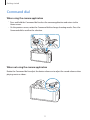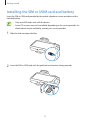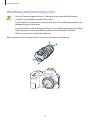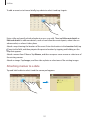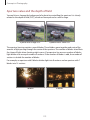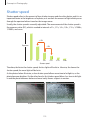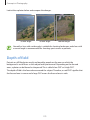
1
EK-GN120
User Manual
www.samsung.com
About this manual
This device provides high quality mobile communication and entertainment using Samsung’s
high standards and technological expertise. This user manual is specially designed to detail
the device’s functions and features.
• Please read this manual before using the device to ensure safe and proper use.
• Descriptions are based on the device’s default settings.
• Images and screenshots may differ in appearance from the actual product.
• Content may differ from the final product, or from software provided by service providers
or carriers, and is subject to change without prior notice. For the latest version of the
manual, refer to the Samsung website, www.samsung.com.
• Content (high quality content) that requires high CPU and RAM usage will affect the
overall performance of the device. Applications related to the content may not work
properly depending on the device’s specifications and the environment that it is used in.
• Available features and additional services may vary by device, software, or service
provider.
• Applications and their functions may vary by country, region, or hardware specifications.
Samsung is not liable for performance issues caused by applications from any provider
other than Samsung.
• Samsung is not liable for performance issues or incompatibilities caused by edited
registry settings or modified operating system software. Attempting to customise the
operating system may cause the device or applications to work improperly.
• Software, sound sources, wallpapers, images, and other media provided with this device
are licensed for limited use. Extracting and using these materials for commercial or other
purposes is an infringement of copyright laws. Users are entirely responsible for illegal
use of media.
• You may incur additional charges for data services, such as messaging, uploading and
downloading, auto-syncing, or using location services. To avoid additional charges, select
an appropriate data tariff plan. For details, contact your service provider.
2
About this manual
• Default applications that come with the device are subject to updates and may no longer
be supported without prior notice. If you have questions about an application provided
with the device, contact a Samsung Service Centre. For user-installed applications,
contact service providers.
• Modifying the device’s operating system or installing softwares from unofficial sources
may result in device malfunctions and data corruption or loss. These actions are violations
of your Samsung licence agreement and will void your warranty.
Instructional icons
Warning: situations that could cause injury to yourself or others
Caution: situations that could cause damage to your device or other equipment
Note: notes, usage tips, or additional information
Copyright
Copyright © 2013 Samsung Electronics
This guide is protected under international copyright laws.
No part of this guide may be reproduced, distributed, translated, or transmitted in any form or
by any means, electronic or mechanical, including photocopying, recording, or storing in any
information storage and retrieval system, without the prior written permission of Samsung
Electronics.
3
About this manual
Trademarks
• SAMSUNG and the SAMSUNG logo are registered trademarks of Samsung Electronics.
• The Android logo, Google™, Google Maps™, Google Mail™, YouTube™, Google Play™
Store, and Google Talk™ are trademarks of Google, Inc.
• Adobe, the Adobe logo, Photoshop and Lightroom are either registered trademarks or
trademarks of Adobe Systems Incorporated in the United States and/or other countries.
• Bluetooth® is a registered trademark of Bluetooth SIG, Inc. worldwide.
• HDMI, the HDMI logo and the term “High Definition
Multimedia Interface” are trademarks or registered
trademarks of HDMI Licensing LLC.
• Wi-Fi®, Wi-Fi Protected Setup™, Wi-Fi Direct™, Wi-Fi CERTIFIED™, and the Wi-Fi logo are
registered trademarks of the Wi-Fi Alliance.
• All other trademarks and copyrights are the property of their respective owners.
4
Table of Contents
Getting started
34 Home screen
36 Using applications
37 Applications screen
38Help
39 Entering text
41 Connecting to a Wi-Fi network
42 Setting up accounts
43 Transferring files
44 Securing the device
45 Upgrading the device
8 Device layout
10Buttons
10 Dioptre adjustment dial
11 Command dial
12 Lens layout
13 Package contents
15 Installing the SIM or USIM card and
battery
18 Charging the battery
20 Inserting a memory card
22 Attaching a strap
23 Attaching and removing a lens
25 Turning the device on and off
26 Adjusting the volume
26 Switching to silent mode
Camera: Basic functions
47
49
49
50
51
51
Basics
27 Indicator icons
28 Using the touch screen
30 Control motions
32 Palm motions
33Notifications
33 Quick setting panel
51
52
53
53
5
Launching Camera
Selecting the operation type
Taking photos
Taking videos
Viewing photos and videos
Taking photos or videos with voice
commands
Taking photos or videos with filter
effects
Changing shooting options quickly
Reducing camera shake
Tips for taking clearer photos
Table of Contents
Camera: Shooting modes
93 OIS (anti-shake)
94 Bracket set
94 ISO customisation
95DMF
95 Noise reduction
95 Distortions correct
95 Colour space
96 Dynamic range
96 Overexposure guide
97 Video recording options
97 Sharing options
98 Camera settings
57Auto
58Expert
63Smart
77 My mode
77 3D mode
Camera: Shooting options
and settings
79 Customising shooting options
79 EV (brightness)
80 ISO (sensitivity)
81 WB (light source)
83Metering
84Drive
85Display
86 Save as User mode
86Flash
88 AF mode
89 AF Area
90 AF size
90 Photo size
91Quality
91 Adjust image
92Timer
92 MF assist
92 Focus peaking
93 Link AE to AF Point
93 Framing mode
Media
100Gallery
105Video
106Music
107YouTube
109 Photo Suggest
Communication
110Contacts
113Messaging
115Email
117 Google Mail
118Talk
118Google+
119Messenger
119ChatON
6
Table of Contents
Web & network
Travel & local
120Internet
121Chrome
122Bluetooth
123 Screen Mirroring
123 Group Play
141Maps
142Local
143Navigation
Settings
144 About Settings
144Connections
147 My device
155Accounts
155More
159 Google Settings
Application & media stores
125
126
126
127
127
127
Play Store
Samsung Apps
Play Books
Play Movies
Play Music
Play Magazines
Optional applications
Utilities
Troubleshooting
128 S Memo
130 S Planner
133Dropbox
133Cloud
134Clock
136Calculator
136 S Translator
137 S Voice
138Google
139 Voice Search
139 My Files
140Downloads
140TripAdvisor
Cleaning the device
Concepts in Photography
7
Getting started
Device layout
Flash
Microphone
Power button
Microphone
Video recording
button
Flash release
button
Shutter button
Lens contacts
AF-assist light
Lens release
button
Lens mount index
Speaker
Lens mount
Image sensor
Hot-shoe
Dioptre
adjustment dial
Command dial
GPS antenna
Eyelet for strap
Eyelet for strap
Viewfinder
Proximity/Light
sensor
Main antenna
Notification light
Touch screen
8
Getting started
Headset jack
Latch
Multipurpose jack
Flap
HDMI port
Tripod mount
You can attach Samsung-approved, optional accessories to the hot-shoe, such as an external
flash.
Do not use the device if it is cracked or broken. Broken glass or acrylic could cause
injury to your hands and face. Take the device to a Samsung Service Centre to have it
repaired.
• Do not cover the antenna area with your hands or other objects, except when you
are taking photos or videos. This may cause connectivity problems or drain the
battery.
• Do not use a screen protector. This causes sensor malfunctions.
• Do not allow water to contact the touch screen. The touch screen may malfunction
in humid conditions or when exposed to water.
9
Getting started
Buttons
Button
Function
• Press and hold to turn the device on or off.
Power
• Press and hold for 6-8 seconds to reset the device if it has
fatal errors or hang-ups, or freezes.
• Press to lock or unlock the device. The device goes into lock
mode when the touch screen turns off.
• On the Home screen, press to turn the camera on.
Shutter
Video
recording
Flash release
• In the camera application, half-press to focus on the subject.
When the subject is in focus, the focus frame turns green.
• In the camera application, press to take the photo.
• On the Home screen, press to turn the camera on.
• In the camera application, press to start or stop taking a
video.
• Press to pop the flash up.
Dioptre adjustment dial
If the image is not shown clearly through the viewfinder, rotate the Dioptre adjustment dial
to improve the view.
10
Getting started
Command dial
When using the camera application
• Press and hold the Command dial to close the camera application and return to the
Home screen.
• On the preview screen, rotate the Command dial to change shooting modes. Press the
Command dial to confirm the selection.
2
1
When not using the camera application
Rotate the Command dial to adjust the device volume or to adjust the sound volume when
playing music or videos.
11
Getting started
Lens layout
Lens mount index
Lens contacts
Focus ring
Lens hood mount
index
i-Function button
AF/MF switch
Lens
Zoom ring
• When purchasing optional lenses, check with a Samsung Service Centre to ensure
compatibility.
• Refer to the corresponding lens instructions for more details.
• This manual uses a SAMSUNG 18-55 mm F3.5-5.6 OIS III lens as an example.
12
Getting started
Package contents
Check the product box for the following items:
Device
(including the body cap and
hot-shoe cover)
Battery
USB cable
USB power adaptor
Shoulder strap
Adobe Photoshop Lightroom
DVD-ROM
Quick start guide / Handbook
13
Getting started
• The illustrations may differ from the actual items.
• The items supplied with the device and any available accessories may vary
depending on the region or service provider.
• The supplied items are designed only for this device and may not be compatible
with other devices.
• Appearances and specifications are subject to change without prior notice.
• You can purchase additional accessories from your local Samsung retailer. Make
sure they are compatible with the device before purchase.
• Other accessories may not be compatible with your device.
• Use only Samsung-approved accessories. Malfunctions caused by using
unapproved accessories are not covered by the warranty service.
• Availability of all accessories is subject to change depending entirely on
manufacturing companies. For more information about available accessories, refer
to the Samsung website.
• Some TVs may not be compatible with the device due to differing HDMI
specifications.
14
Getting started
Installing the SIM or USIM card and battery
Insert the SIM or USIM card provided by the mobile telephone service provider, and the
included battery.
• Only microSIM cards work with the device.
• Some LTE services may not be available depending on the service provider. For
details about service availability, contact your service provider.
1 Slide the latch and open the flap.
2 Insert the SIM or USIM card with the gold-coloured contacts facing upwards.
15
Getting started
3 Push the SIM or USIM card into the slot until it locks in place.
• Do not insert a memory card into the SIM card slot. If a memory card happens to
be lodged in the SIM card slot, take the device to a Samsung Service Centre to
remove the memory card.
• Use caution not to lose or let others use the SIM or USIM card. Samsung is not
responsible for any damages or inconveniences caused by lost or stolen cards.
4 Insert the battery.
Make sure to properly align the battery’s gold-coloured contacts when inserting the
battery.
5 Replace the flap and slide the latch.
16
Getting started
Removing the SIM or USIM card
Push the SIM or USIM card until it disengages from the device, and then pull it out.
Removing the battery
Slide the battery lock to release the battery, and then pull it out.
1
2
17
Getting started
Charging the battery
Use the charger to charge the battery before using it for the first time. A computer can be also
used to charge the device by connecting them via the USB cable.
Use only Samsung-approved chargers, batteries, and cables. Unapproved chargers or
cables can cause the battery to explode or damage the device.
• When the battery power is low, the device emits a warning tone and displays a low
battery power message.
• If the battery is completely discharged, the device cannot be turned on
immediately when the charger is connected. Allow a depleted battery to charge for
a few minutes before turning on the device.
Charging with the charger
Connect the USB cable to the USB power adaptor and then plug the end of the USB cable into
the multipurpose jack.
Connecting the charger improperly may cause serious damage to the device. Any
damage caused by misuse is not covered by the warranty.
18
Getting started
• The device can be used while it is charging, but it may take longer to fully charge
the battery.
• If the device receives an unstable power supply while charging, the touch screen
may not function. If this happens, unplug the charger from the device.
• While charging, the device may heat up. This is normal and should not affect the
device’s lifespan or performance. If the battery gets hotter than usual, the charger
may stop charging.
• If the device is not charging properly, take the device and the charger to a
Samsung Service Centre.
After fully charging, disconnect the device from the charger. First unplug the charger from the
device, and then unplug it from the electric socket.
Do not remove the battery before removing the charger. This may damage the
device.
To save energy, unplug the charger when not in use. The charger does not have a
power switch, so you must unplug the charger from the electric socket when not in
use to avoid wasting power. The device should remain close to the electric socket
while charging.
Checking the battery charge status
When you charge the battery while the device is off, the following icons will show the current
battery charge status:
Charging
Fully charged
19
Getting started
Reducing the battery consumption
Your device provides options that help you save battery power. By customising these options
and deactivating features in the background, you can use the device longer between charges:
• When you are not using the device, switch to sleep mode by pressing the Power button.
• Close unnecessary applications with the task manager.
• Deactivate the Bluetooth feature.
• Deactivate the Wi-Fi feature.
• Deactivate auto-syncing of applications.
• Decrease the backlight time.
• Decrease the brightness of the display.
• Deactivate the fast power-on feature.
• Activate the automatic power-off feature.
• Activate the smart network feature.
Inserting a memory card
Your device accepts memory cards with maximum capacities of 64 GB. Depending on the
memory card manufacturer and type, some memory cards may not be compatible with your
device.
• Some memory cards may not be fully compatible with the device. Using an
incompatible card may damage the device or the memory card, or corrupt the data
stored in it.
• Use caution to insert the memory card right-side up.
• The device supports the FAT and the exFAT file systems for memory cards. When
inserting a card formatted in a different file system, the device asks to reformat the
memory card.
• Frequent writing and erasing of data shortens the lifespan of memory cards.
• When inserting a memory card into the device, the memory card’s file directory
appears in the SD memory card folder under the internal memory.
20
Getting started
1 Slide the latch and open the flap.
2 Insert a memory card with the gold-coloured contacts facing downwards.
3 Push the memory card into the slot until it locks in place.
4 Replace the flap and slide the latch.
Removing the memory card
Before removing the memory card, first unmount it for safe removal. On the Home screen, tap
Apps → Settings → More → Storage → Unmount SD card.
1 Slide the latch and open the flap.
2 Push the memory card until it disengages from the device, and then pull it out.
3 Replace the flap and slide the latch.
Do not remove the memory card while the device is transferring or accessing
information. Doing so can cause data to be lost or corrupted or damage to the
memory card or device. Samsung is not responsible for losses that result from the
misuse of damaged memory cards, including the loss of data.
21
Getting started
Formatting the memory card
A memory card formatted on a computer, memory card reader, or other device may not be
compatible with this device. Format the memory card on this device.
On the Home screen, tap Apps → Settings → More → Storage → Format SD card →
Format SD card → Erase everything.
Before formatting the memory card, remember to make backup copies of all
important data stored on the device. The manufacturer’s warranty does not cover loss
of data resulting from user actions.
Attaching a strap
Attach the strap to the eyelets on both sides of the device.
2
4
1
5
3
Do not swing your device by the strap. This may cause injury to yourself or others or
damage to your device.
22
Getting started
Attaching and removing a lens
• Use only Samsung-approved lenses. Samsung is not responsible for damage
caused by using another manufacturer’s lenses.
• Do not attach or remove lenses in dusty, dirty areas. Dust and foreign particles can
damage the lens or the device.
• Do not touch the inside of the device mount. Dust and foreign particles may affect
shooting results or cause a malfunction if they enter the device or the lens.
• When not using a lens, attach the body cap.
Before attaching a lens, remove the lens cap, lens mount cover, and body cap.
3
4
1
2
1
5
6
23
Getting started
Attaching the lens
To attach the lens, align the red mark on the lens with the red mark on the device. Then,
rotate the lens as shown in the illustration until it locks into place.
1
2
• If you attach a lens with the zoom lock switch, unlock it by rotating the zoom ring
anticlockwise. When the lens is locked, you cannot take photos or videos.
• To lock the lens, pull and hold the zoom lock switch away from the device and
rotate the zoom ring as shown in the illustration.
24
Getting started
Removing the lens
To remove the lens, turn off the device, press and hold the lens release button, and then
rotate the lens as shown in the illustration.
2
1
3
After removing the lens from the device, attach the lens cap and lens mount cover to
protect the lens surface and electrical contacts from scratches.
Turning the device on and off
When turning on the device for the first time, follow the on-screen instructions to set up your
device.
Press and hold the Power button for a few seconds to turn on the device.
25
Getting started
• Follow all posted warnings and directions from authorised personnel in areas
where the use of wireless devices is restricted, such as aeroplanes and hospitals.
• Press and hold the Power button and tap Flight mode to disable the wireless
features.
To turn off the device, press and hold the Power button, and then tap Power off.
Adjusting the volume
Rotate the Command dial to adjust the device volume or to adjust the sound volume when
playing music or videos.
Switching to silent mode
Use one of the following methods:
• Press and hold the Power button, and then tap Mute or Vibrate.
• Open the notifications panel at the top of the screen, and then tap Sound or Vibrate.
26
Basics
Indicator icons
The icons displayed at the top of the screen provide information about the status of the
device. The icons listed in the table below are most common.
Icon
Meaning
No signal
Signal strength
Roaming (outside of normal service area)
UMTS network connected
HSDPA network connected
HSPA+ network connected
LTE network connected
Wi-Fi connected
Bluetooth feature activated
GPS activated
Synced with the web
Connected to computer
No SIM or USIM card
New text or multimedia message
Alarm activated
Silent mode activated
Vibration mode activated
Flight mode activated
Error occurred or caution required
Battery power level
27
Basics
Using the touch screen
Use only fingers to use the touch screen.
• Do not allow the touch screen to come into contact with other electrical devices.
Electrostatic discharges can cause the touch screen to malfunction.
• To avoid damaging the touch screen, do not tap it with anything sharp or apply
excessive pressure to it with your fingertips.
• The device may not recognise touch inputs close to the edges of the screen, which
are outside of the touch input area.
• Leaving the touch screen idle for extended periods may result in afterimages
(screen burn-in) or ghosting. Turn off the touch screen when you do not use the
device.
Finger gestures
Tapping
To open an application, to select a menu item, to press an on-screen button, or to enter a
character using the on-screen keyboard, tap it with a finger.
28
Basics
Dragging
To move an icon, thumbnail, or preview to a new location, tap and hold it and drag it to the
target position.
Double-tapping
Double-tap on a webpage, map, or image to zoom in a part. Double-tap again to return.
Flicking
Flick left or right on the Home screen or the Applications screen to see another panel. Flick up
or down to scroll through a webpage or a list, such as contacts.
29
Basics
Pinching
Spread two fingers apart on a webpage, map, or image to zoom in a part. Pinch to zoom out.
Control motions
Simple motions allow easy control of the device.
Before using motions, make sure the motion feature is activated. On the Home screen, tap
Apps → Settings → My device → Motions and gestures → Motion, and then drag the
Motion switch to the right.
Excessive shaking or impact to the device may result in unintended inputs. Control
motions properly.
Rotating the screen
Many applications allow display in either portrait or landscape orientation. Rotating the
device causes the display to automatically adjust to fit the new screen orientation.
30
Basics
To prevent the display from rotating automatically, open the notifications panel and deselect
Screen rotation.
• Some applications do not allow screen rotation.
• Some applications display a different screen depending on the orientation. The
calculator turns into a scientific calculator when rotated to landscape.
Panning to move
Tap and hold an item, and then move the device to the left or right to move the item to
another panel on the Home screen or the Applications screen.
Panning to browse
When an image is zoomed in, tap and hold a point on the screen, and then move the device
in any direction to browse the image.
31
Basics
Tilting
Tap and hold two points on the screen, and then tilt the device back and forth to zoom in or
out.
Palm motions
Use palm motions to control the device by touching the screen.
Before using motions, make sure the palm motion feature is activated. On the Home screen,
tap Apps → Settings → My device → Motions and gestures → Palm motion, and then
drag the Palm motion switch to the right.
Sweeping
Sweep your hand across the screen to capture a screenshot. The image is saved in Gallery →
Screenshots. It is not possible to capture a screenshot while using some applications.
32
Basics
Covering
Cover the screen with a palm to pause media playback.
Notifications
Notification icons appear on the status bar at the top of the screen to report new messages,
calendar events, device status, and more. Drag down from the status bar to open the
notifications panel. Scroll the list to see additional alerts. To close the notifications panel, drag
up the bar that is at the bottom of the screen.
Quick setting panel
From the quick setting panel, you can view your device’s current settings. Drag down from
the status bar, tap to open the quick setting panel, and then use the following options:
• Wi-Fi: Activate or deactivate the Wi-Fi feature.
• GPS: Activate or deactivate the GPS feature.
• Sound: Activate or deactivate silent mode. You can vibrate or mute your device in silent
mode.
• Screen rotation: Allow or prevent the interface from rotating when you rotate the device.
• Bluetooth: Activate or deactivate the Bluetooth feature.
33
Basics
• Mobile data: Activate or deactivate the data connection.
• Blocking mode: Activate or deactivate blocking mode. In blocking mode, the device
will block notifications. To select which notifications will be blocked, tap Settings → My
device → Blocking mode.
• Screen Mirroring: Activate or deactivate the screen mirroring feature.
• Wi-Fi hotspot: Activate or deactivate the Wi-Fi tethering feature.
• Driving mode: Activate or deactivate driving mode.
• Sync: Activate or deactivate auto-syncing of applications.
• Flight mode: Activate or deactivate flight mode.
• Smart Network: Activate or deactivate the smart network feature.
The available options may vary depending on the region or service provider.
To rearrange the options on the quick setting panel, open the quick setting panel, tap
then tap and drag an item to another location.
, and
Home screen
The Home screen is the starting point to access all of the device’s features. It displays indicator
icons, widgets, shortcuts to applications, and others.
The Home screen can have multiple panels. To view other panels, scroll left or right.
Rearranging items
Adding an application icon
On the Home screen, tap Apps, tap and hold an application icon, and then drag it into a panel
preview.
34
Basics
Adding an item
Customise the Home screen by adding widgets or folders.
Tap and hold the empty area on the Home screen, and then select one of the following
categories:
• Apps and widgets: Add widgets or applications to the Home screen.
• Folder: Create a new folder.
Moving an item
Tap and hold an item and drag it to a new location. To move it to another panel, drag it to the
side of the screen.
Removing an item
Tap and hold an item, and drag it to the rubbish bin that appears at the top of the Home
screen. When the rubbish bin turns red, release the item.
Rearranging panels
Adding a new panel
Tap
→ Edit page →
.
Moving a panel
Tap
→ Edit page, tap and hold a panel preview, and then drag it to a new location.
Removing a panel
Tap → Edit page, tap and hold a panel preview, and then drag it to the rubbish bin at the
top of the screen.
35
Basics
Setting wallpaper
Set an image or photo stored in the device as wallpaper for the Home screen.
On the Home screen, tap
following:
→ Set wallpaper → Home screen, and then select one of the
• Gallery: See photos taken by the device’s camera or images downloaded from the
Internet.
• Live wallpapers: See animated images.
• Wallpapers: See wallpaper images.
Then, select an image and tap Set wallpaper. Or, select an image, resize it by dragging the
frame, and then tap Done.
Using widgets
Widgets are small applications that provide convenient functions and information on your
Home screen. To use them, add widgets from the widgets panel to the Home screen.
• Some widgets connect to web services. Using a web-based widget may result in
additional charges.
• The widgets available may vary depending on the region or service provider.
On the Home screen, tap Apps → Widgets. Scroll left or right on the widgets panel, and then
tap and hold a widget to add it to the Home screen.
Using applications
This device can run many different types of applications, ranging from media to Internet
applications.
Opening an application
On the Home screen or the Applications screen, select an application icon to open it.
36
Basics
Opening from recently-used applications
Tap and hold
to open the list of recently-used applications.
Select an application icon to open.
Closing an application
Close applications not in use to save battery power and maintain device performance.
Tap and hold , tap Task manager, and then tap End next to an application to close it. To
close all running applications, tap End all. Alternatively, tap and hold , and then tap Close
all.
Applications screen
The Applications screen displays icons for all applications, including any new applications
installed.
On the Home screen, tap Apps to open the Applications screen.
To view other panels, scroll left or right.
Rearranging applications
Tap → Edit, tap and hold an application, and then drag it to a new location. To move it to
another panel, drag it to the side of the screen.
Organising with folders
Put related applications together in a folder for convenience.
Tap → Edit, tap and hold an application, and then drag it to Create folder. Enter a folder
name and then tap OK. Put applications into the new folder by dragging, and then tap Save
to save the arrangement.
37
Basics
Rearranging panels
Pinch on the screen, tap and hold a panel preview, and then drag it to a new location.
Installing applications
Use application stores, such as Samsung Apps, to download and install applications.
Uninstalling applications
Tap
→ Uninstall, and then select an application to uninstall it.
Default applications that come with the device cannot be uninstalled.
Sharing applications
Share downloaded applications with other users via email, Bluetooth, or other methods.
Tap → Share app, select applications, tap Done, and then select a sharing method. The
next steps vary depending on the method selected.
Help
Access help information to learn how to use the device and applications or configure
important settings.
Tap Help on the Applications screen. Tap
and select a category to view help information.
38
Basics
Entering text
Use the Samsung keyboard or the voice input feature to enter text.
Text entry is not supported in some languages. To enter text, you must change the
input language to one of the supported languages.
Changing the keyboard type
Tap any text field, open the notifications panel, tap Choose input method, and then select
the type of keyboard to use.
Using the Samsung keyboard
Changing the keyboard layout
Tap → Alphabets or Numbers and symbols, and then tap Qwerty keyboard or 3x4
keyboard.
On the 3x4 keyboard, a key has three or four characters. To enter a character, tap
repeatedly the key corresponding to the character.
Set options for the
Samsung keyboard.
Delete a preceding
character.
Enter uppercase.
Break to the next line.
Enter numerals and
punctuation marks.
Enter a space.
Entering uppercase
Tap
before entering a character. For all caps, tap it twice.
Changing language keyboards
Add languages to the keyboard, and then slide the space key left or right to change language
keyboards.
39
Basics
Handwriting
Tap and hold , tap , and then write a word with a finger. Suggested words appear as
characters are entered. Select a suggested word.
Use handwriting gestures to perform actions, such as editing or deleting characters
and inserting spaces. To view the gesture guides, tap and hold , and then tap →
Handwriting → Gesture guide.
Entering text by voice
Activate the voice input feature and then speak into the microphone. The device displays
what you speak.
To change the language or add languages for the voice recognition, tap the current language.
Copying and pasting
Tap and hold over text, drag or to select more or less text, and then tap Copy to copy or
Cut to cut. The selected text is copied to the clipboard.
To paste it into a text entry field, tap and hold at the point where it should be inserted, and
then tap Paste.
40
Basics
Connecting to a Wi-Fi network
Connect the device to a Wi-Fi network to use the Internet or share media files with other
devices. (p. 144)
Turning Wi-Fi on and off
Open the notifications panel, and then tap Wi-Fi to turn it on or off.
• Your device uses a non-harmonised frequency and is intended for use in all
European countries. The WLAN can be operated in the EU without restriction
indoors, but cannot be operated outdoors.
• Turn off Wi-Fi to save the battery when not in use.
Joining Wi-Fi networks
On the Applications screen, tap Settings → Connections → Wi-Fi, and then drag the Wi-Fi
switch to the right.
Select a network from the list of detected Wi-Fi networks, enter a password if necessary, and
then tap Connect. Networks that require a password appear with a lock icon. After the device
connects to a Wi-Fi network, the device will automatically connect to it any time it is available.
Adding Wi-Fi networks
If the desired network does not appear in the networks list, tap Add Wi-Fi network at the
bottom of the networks list. Enter the network name in Network SSID, select the security
type and enter the password if it is not an open network, and then tap Connect.
Forgetting Wi-Fi networks
Any network that has ever been used, including the current network, can be forgotten so the
device will not automatically connect to it. Select the network in the networks list, and then
tap Forget.
41
Basics
Setting up accounts
Google applications, such as Play Store, require a Google account, and Samsung Apps
requires a Samsung account. Create Google and Samsung accounts to have the best
experience with the device.
Adding accounts
Follow the instructions that appear when opening a Google application without signing in to
set up a Google account.
To sign in with or sign up for a Google account, on the Applications screen, tap Settings →
Accounts → Add account → Google. After that, tap New to sign up, or tap Existing, and
then follow on-screen instructions to complete the account setup. More than one Google
account can be used on the device.
Set up a Samsung account as well.
Removing accounts
On the Applications screen, tap Settings → Accounts, select an account name under My
accounts, select the account to remove, and then tap Remove account.
42
Basics
Transferring files
Move audio, video, image, or other types of files from the device to the computer, or vice
versa.
The following file formats are supported by some applications. Some file formats are
not supported depending on the version of the device’s software or the computer
operating system.
• Music: mp3, m4a, 3ga, aac, ogg, oga, wav, wma, and flac
• Image: bmp, gif, jpg, and png
• Video: mp4, m4v, 3gp, 3g2, wmv, asf, avi, flv, webm, and mkv
Connecting with Samsung Kies
Samsung Kies is a computer application that manages media libraries, contacts, and
calendars, and syncs them with Samsung devices. Download the latest Samsung Kies from
the Samsung website.
1 Connect the device to the computer using the USB cable.
Samsung Kies launches on the computer automatically. If Samsung Kies does not launch,
double-click the Samsung Kies icon on the computer.
2 Transfer files between your device and the computer.
Refer to the Samsung Kies help for more information.
Connecting with Windows Media Player
Ensure that Windows Media Player is installed on the computer.
1 Connect the device to the computer using the USB cable.
2 Open Windows Media Player and sync music files.
43
Basics
Connecting as a media device
1 Connect the device to the computer using the USB cable.
2 Open the notifications panel, and then tap Connected as a media device → Media
device (MTP).
Tap Camera (PTP) if your computer does not support Media Transfer Protocol (MTP) or
not have any appropriate driver installed.
3 Transfer files between your device and the computer.
Securing the device
Prevent others from using or accessing personal data and information stored in the device by
using the security features. The device requires an unlock code whenever unlocking it.
Setting a pattern
On the Applications screen, tap Settings → My device → Lock screen → Screen lock →
Pattern.
Draw a pattern by connecting four dots or more, and then draw the pattern again to verify it.
Set a backup unlock PIN to unlock the screen when you forget the pattern.
44
Basics
Setting a PIN
On the Applications screen, tap Settings → My device → Lock screen → Screen lock →
PIN.
Enter at least four numbers, and then enter the password again to verify it.
Setting a password
On the Applications screen, tap Settings → My device → Lock screen → Screen lock →
Password.
Enter at least four characters including numbers and symbols, and then enter the password
again to verify it.
Unlocking the device
Turn on the screen by pressing the Power button and enter the unlock code.
If the unlock code is forgotten, take the device to a Samsung Service Centre to reset it.
Upgrading the device
The device can be upgraded to the latest software.
This feature may not be available depending on the region or service provider.
Upgrading with Samsung Kies
Launch Samsung Kies and connect the device to the computer. Samsung Kies automatically
recognises the device and shows available updates in a dialogue box, if any. Click the Update
button in the dialogue box to start upgrading. Refer to the Samsung Kies help for details on
how to upgrade.
45
Basics
• Do not turn off the computer or disconnect the USB cable while the device is
upgrading.
• While upgrading the device, do not connect other media devices to the computer.
Doing so may interfere with the update process.
Upgrading over the air
The device can be directly upgraded to the latest software by the firmware over-the-air
(FOTA) service.
On the Applications screen, tap Settings → More → About device → Software update →
Update.
46
Camera: Basic functions
Launching Camera
Use this application to take photos or videos.
Tap Camera on the Applications screen. Alternatively, press the Shutter button or the Video
recording button.
Use Gallery to view photos and videos taken with the device. (p. 100)
• The camera automatically shuts off when unused.
• Make sure that the lens is clean. Otherwise, the device may not work properly in
some modes that require high resolutions.
Camera etiquette
• Do not take photos or videos of other people without their permission.
• Do not take photos or videos where legally prohibited.
• Do not take photos or videos in places where you may violate other people’s privacy.
Learning the preview screen
Change shooting options
quickly.
Indicate the current
camera settings.
Change the camera
settings.
Indicate which shooting
mode is in use.
Return to the Home
screen.
Take photos.
Access shortcuts.
Change the shooting
mode.
Focus frame
Start taking a video.
Open Gallery to view
photos and videos.
Select among various
effects that are available.
47
Camera: Basic functions
Learning icons
The icons displayed on the preview screen provide information about current shooting
options and settings. The icons listed in the table below are the most common.
Icon
Meaning
Shutter speed
Aperture value
Exposure value
ISO sensitivity
Timer
Flash
Photo size
White balance
AF mode
Metering
Continuous shooting
Bracket mode
Raw format file
Voice recognition
Geotagging
Share shot
Buddy photo share
ChatON photo share
Remote viewfinder
48
Camera: Basic functions
Closing Camera
On the preview screen, tap
to close the camera application and return to the Home screen.
Selecting the operation type
Select the operation type for either basic or expert use.
Tap
(or →
)→
→ User type.
• Standard: Use for basic camera operations.
• Professional: Use for more advanced camera operations. You can conveniently change
shooting options by using the smart panel, and quickly access expert modes.
• This manual is based on the standard operation type.
• The default settings for the dial control and power-on mode differ by operation
type, as follows:
– – Standard: Option 1 (dial control), Auto mode (power-on mode)
– – Professional: Option 2 (dial control), Last mode (power-on mode)
Taking photos
Half-press the Shutter button to focus on the subject. When the subject is in focus, the focus
frame turns green. Press the Shutter button to take the photo.
Or, tap the image on the preview screen where the camera should focus. When the subject is
in focus, the focus frame turns green. Tap to take the photo.
Except in interval mode, the camera will not take a photo if it cannot focus on a
subject.
49
Camera: Basic functions
Taking videos
Press the Video recording button to take a video. To stop recording, press the Video recording
button again.
Or, tap
to take a video and tap
to stop recording.
While recording, tap where you want to focus to change the focus. To set the camera to focus
automatically, tap .
• You can take videos up to 20 minutes at one time.
• When using a memory card with a slow writing speed, the device may not be able
to save the video properly. It may stop recording, or recorded video frames may
become corrupted.
• Memory cards with slow writing speeds do not support high-resolution video. To
record high-resolution video, use memory cards with faster writing speeds (micro
SDHC Class10 or higher).
• The video frame size may appear smaller depending on video resolution and frame
rate.
• If you set the image stabiliser option, the image stabiliser sound may be recorded.
• If you adjust the lens while taking a video, the zoom sound or other lens sounds
may be recorded.
• Do not remove or replace the lens while taking a video. Doing this will interrupt
the recording.
• When using an optional video lens, the auto focus noise is not recorded.
• If you change the shooting angle of the camera suddenly while taking a video, the
camera may not be able to record images accurately.
• The camera supports the continuous AF, touch AF, manual focus, and face
detection AF functions when taking a video.
• In expert mode, you can change the major shooting options before recording a
video:
– – Program mode: Exposure value
– – Aperture priority mode: Aperture value and exposure value
– – Shutter priority mode: Shutter speed and exposure value
– – Manual mode: Shutter speed, aperture value, and ISO sensitivity (the
maximum ISO sensitivity is 3200)
50
Camera: Basic functions
Viewing photos and videos
To view taken photos or videos, tap the gallery icon. Scroll left or right to view the next or
previous image. (p. 100)
Taking photos or videos with voice commands
Use the voice recognition to take photos or videos with voice commands.
Tap →
. Say a shooting command, such as Smile, Cheese, or Record video.
To check more voice commands for controlling the camera, tap →
.
Taking photos or videos with filter effects
Use the filter effects to take unique photos or videos.
Tap
and select a filter effect. The available options vary by mode.
• No effect: Do not apply an effect.
• Vignette: This effect applies the retro-looking colours, high contrast, and strong vignette
effect of Lomo cameras.
• Greyscale: This effect makes the image black and white.
• Sepia: This effect red-shifts the background scenery.
• Vintage: This effect gives the image a vintage look and feel.
• Faded colours: This effect fades the colour of the image.
• Turquoise: This effect applies a soft turquoise colour effect.
• Tint: This effect applies a colour tint effect.
• Cartoon: This effect applies a cartoon painting effect.
• Moody: This effect applies a mono cartoon painting effect.
51
Camera: Basic functions
• Rugged: This effect applies a rugged effect.
• Oil pastel: This effect applies a pastel painting effect.
• Fisheye: This effect blackens the edges of the frame and distorts objects to imitate the
visual effect of a fisheye lens.
Changing shooting options quickly
Tap to change shooting options quickly. The available options vary by mode.
• : Configure settings for Camera.
• : Activate or deactivate the flash.
• : Use this to set delayed-time shots.
• : Activate or deactivate the photo suggestion feature. (p. 109)
• : Select a folder for saving photos or videos. To create a new folder, tap
• : Activate or deactivate the voice recognition to take photos or videos.
• : Activate or deactivate the sharing options.
52
.
Camera: Basic functions
Reducing camera shake
Use the Optical Image Stabiliser (OIS) option to reduce or eliminate blurriness from camera
shake.
If the lens has an OIS switch, set the switch to ON to use the OIS function.
Tap
(or →
)→
→ OIS (anti-shake), and select an option.
Before correction
After correction
Tips for taking clearer photos
Holding the camera correctly
Make sure not to block the screen, lens, flash, or microphone.
Make sure not to expose the lens to direct sunlight. This may discolour the image
sensor, or cause it to malfunction.
53
Camera: Basic functions
Half-pressing the Shutter button
Press the Shutter button halfway down to adjust the focus. The camera adjusts the focus,
exposure, and white balance automatically, and the focus frame turns green. The focus frame
turns red if not focused.
Reducing camera shake
Set the Optical Image Stabiliser (OIS) option to reduce camera shake optically. (p. 53)
54
Camera: Basic functions
Keeping the subject in focus
Focusing on the subject may be difficult in the following conditions:
• When the contrast between the subject and background is low. For example, the subject
is wearing clothing that is similar in colour to the background.
• The light behind the subject is too bright.
• The subject is shiny or reflective.
• The subject includes horizontal patterns, such as blinds.
• The subject is not positioned in the centre of the frame.
Using the focus lock
Half-press the Shutter button to focus. When the subject is focused, you can change the
composition. When you are ready, press the Shutter button to take the photo.
55
Camera: Basic functions
When taking photos in low-light conditions
• Turn the flash on to take photos in low-light conditions. (p. 86)
• Adjust the ISO sensitivity. (p. 80)
When subjects are moving rapidly
Use the continuous shooting option to take photos of moving subjects. (p. 64, p. 84)
To take several photos continuously, use memory cards with faster writing speeds
(micro SDHC Class10 or higher).
56
Camera: Shooting modes
Auto
Use this to take photos with scene modes selected automatically by the camera. In this
mode, the camera recognises surrounding conditions and automatically adjusts factors that
contribute to exposure, including the shutter speed, aperture value, metering, and white
balance. As the camera controls most of the functions, some shooting options are limited.
This mode is useful for capturing quick snapshots with the least amount of adjustment.
Tap MODE → Auto.
To display an icon for a scene mode at the top right of the preview screen when you half→ Detection display → On.
press the Shutter button, tap → →
• The camera may detect different scenes, even the same subjects, depending on
external factors, such as camera shake, lighting, and distance to the subject.
• If the camera does not recognise an appropriate scene mode, it uses the default
settings for this mode.
• Even if it detects a face, the camera may not select a portrait mode depending on
the subject’s position or lighting.
• In this mode, the camera consumes more battery power due to constant changing
of settings when selecting appropriate modes.
57
Camera: Shooting modes
Expert
Use this to take photos and videos with manual adjustment of various shooting options,
including the shutter speed, aperture value, exposure value, and ISO sensitivity.
When using the standard operation type, tap MODE → Expert, and select a mode.
Rotate to select a shooting
option.
Rotate to change the value
for the shooting option.
Use user mode.
Return to the previous
screen.
Use manual mode.
Use program mode.
Use aperture priority
mode.
Display descriptions of
modes and functions.
Use shutter priority mode.
When using the professional operation type, tap MODE, and select a mode. To adjust various
shooting options, use the smart panel. (p. 62)
Program mode
In this mode, the camera automatically adjusts the shutter speed and aperture value so that
an optimal exposure value can be achieved. This mode is useful when you want to capture
shots of constant exposure while being able to adjust other settings.
58
Camera: Shooting modes
Tap MODE → Expert → P, and set the desired shooting options.
Program shift
The program shift feature lets you adjust the combination of the shutter speed and aperture
value while the camera maintains the same exposure.
Tap the shutter speed or the aperture value at the top of the screen, and then tap or
adjust the value. You can also use the Command dial or the i-Function button. (p. 61)
to
Aperture priority mode
In this mode, the camera automatically calculates shutter speed according to the aperture
value you choose. You can adjust the depth of field (DOF) by changing the aperture value.
This mode is useful for taking portraits and landscape shots.
Tap MODE → Expert → A, and set the desired shooting options.
Large depth of field
Small depth of field
In low-light settings, you may need to increase the ISO sensitivity to prevent blurry
photos.
59
Camera: Shooting modes
Shutter priority mode
In this mode, the camera automatically adjusts the aperture value according to the shutter
speed you choose. This mode is useful for taking photos of fast-moving subjects or for
creating tracer effects in a photo.
Tap MODE → Expert → S, and set the desired shooting options.
Slow shutter speed
Fast shutter speed
To compensate for the reduced amount of light allowed by fast shutter speeds, adjust
the aperture and let in more light. If your photos are still too dark, increase the ISO
sensitivity.
Manual mode
This mode lets you adjust the shutter speed and aperture value manually. In this mode, you
can fully control the exposure of your photos. This mode is useful in controlled shooting
environments, such as a studio, or when it is necessary to fine-tune camera settings. This
mode is also recommended for shooting night scenes or fireworks.
Tap MODE → Expert → M, and set the desired shooting options.
• If you set a high ISO sensitivity or open the shutter for a long time, image noise
may increase.
• Use a tripod and shutter release to prevent your camera from shaking.
• The longer you open the shutter, the longer it takes to save a photo. Do not turn
the camera off while the camera saves a photo.
60
Camera: Shooting modes
Using the bulb feature
Use this feature to shoot night scenes or the night sky. While you are pressing the Shutter
button, the shutter is left open so you can create moving light effects.
In manual mode, set the shutter speed to Bulb.
User mode
Use this to create and save your own shooting mode by adjusting settings.
Tap MODE → Expert → P / A / S / M, and set the desired shooting options. Then, tap
→ Save as User mode to save the current settings.
→
To access user mode, tap MODE → Expert → USER.
Changes you make with the smart panel do not affect other expert modes.
Adjusting major shooting options
In expert mode, you can adjust the shutter speed, aperture value, exposure value, or ISO
sensitivity by either tapping the screen, using the Command dial, or by using the i-Function
button.
Methods may vary depending on the selected operation type and Command dial
control settings.
Tapping the screen
Tap one of the major shooting options displayed at the top of the screen, and then drag left
or right until the desired value is shown. To confirm the adjustment, tap an empty area on the
screen or half-press the Shutter button.
Using the Command dial
Tap → → Dial control (P/A/S/M) → Option 3, and then return to the preview screen.
Press the Command dial repeatedly to select an option, and then rotate it to adjust the value.
To confirm the adjustment, tap an empty area on the screen or half-press the Shutter button.
61
Camera: Shooting modes
Using the i-Function button
Press the i-Function button on the lens repeatedly to select an option, and then rotate the
focus ring on the lens to adjust the value. To confirm the adjustment, tap an empty area on
the screen or half-press the Shutter button.
Using the smart panel
Use the smart panel to quickly change shooting options. The smart panel can only be used
when the professional operation type has been selected.
To enable the smart panel, tap
To open the smart panel, tap
→
→
→ User type → Professional.
.
Tap an option, and drag left or right to adjust the value or select it from the pop-up list.
Alternatively, rotate the Command dial to highlight an option, press it to select the option,
and then rotate it to adjust the value.
To save the current settings as user mode, tap
.
Using the auto exposure lock
When you cannot achieve an appropriate exposure because of a strong colour contrast, lock
the exposure, and then take a photo.
To lock the exposure value, adjust the photo’s exposure, and tap
the lens where you desire, and then press the Shutter button.
to lock the exposure. Aim
Shortcuts
Add or remove shortcuts for easy access to the camera’s various options.
Tap and hold
or another shortcut icon.
Tap and hold an option and drag it to the desired location.
62
cannot be moved.
Camera: Shooting modes
• One Touch AF/MF: Change the focus mode.
• AF Lock: Lock the focus by half-pressing the Shutter button to focus on the subject, and
then tapping the shortcut icon.
• One Touch WB: Manually set white balance by aiming the lens at a white surface, and
then pressing the Shutter button.
• One Touch RAW+: Set the camera to save photos in both jpg and raw file formats.
• Optical Preview: View the optical preview before taking a photo. The camera adjusts the
aperture to predefined settings and displays the result on the screen.
• Display: Change the way that information is displayed on the screen. (p. 85)
Smart
Use this to take photos with predefined settings for various scenes.
Smart mode suggest
Use this to take photos with one of the smart modes that the camera automatically suggests.
Tap MODE → Smart → Smart mode suggest.
Half-press the Shutter button, select a mode from the suggested list, and then press the
Shutter button to take a photo. If you do not select a mode from the suggested list, the
camera will take a photo in auto mode.
To reset the selected mode, tap
.
Beauty face
Use this to take photos with lightened faces for gentler images.
Tap MODE → Smart → Beauty face.
Press the Shutter button to take a photo. Tap a face, and adjust effects. To switch between the
original and the adjusted photo, tap Before & After. Tap Save to save the photo.
To set the camera to automatically adjust effects, tap →
63
→
→ Enhance face → Off.
Camera: Shooting modes
Best photo
Use this to take multiple photos in a short time, and then choose the best photos among
them.
Tap MODE → Smart → Best photo.
Press the Shutter button to take multiple photos. Tap and hold thumbnails of photos to save,
and then tap Save.
Continuous shot
Use this to take a series of photos of moving subjects.
Tap MODE → Smart → Continuous shot.
While holding the camera steady, press and hold the Shutter button to take several photos
continuously.
To take several photos continuously, use memory cards with faster writing speeds
(micro SDHC Class10 or higher).
Golf
Use this to take consecutive photos of a golf-swing to analyse technique.
Tap MODE → Smart → Golf.
Press the Shutter button. When the camera detects a golf-swing, it takes multiple photos at
120 fps.
• This feature is not available in portrait orientation.
• Using a tripod is recommended.
• In low-light conditions, the preview screen and photos may appear darker, due to
the fixed frame rate and shutter speed. For best results, take photos in places with
sufficient light.
• In low-light conditions (below 500 lux), such as indoors, the camera may not be
able to detect a golf-swing.
64
Camera: Shooting modes
Best face
Use this to take multiple group shots at the same time and combine them to create the best
possible image.
Tap MODE → Smart → Best face.
Press the Shutter button to take multiple photos. To get the best shot, hold the camera steady
and remain still while taking photos. Tap the yellow frame on each face, and choose the best
individual face for the subject. After choosing a face for each individual, tap Save to merge
the images into a single photo, and save it.
Colour bracket
Use this to take three photos with different colour effects continuously.
Tap MODE → Smart → Colour bracket.
Kids shot
Use this to play a funny sound to get a kid’s attention when shooting.
Tap MODE → Smart → Kids shot.
Half-press the Shutter button. The camera emits the attention sound. Press the Shutter button
to take five consecutive photos.
To change the attention sound, tap
.
65
Camera: Shooting modes
Vignette+
Use this to highlight the centre of the photo by darkening the edges.
Tap MODE → Smart → Vignette+.
Landscape
Use this to take photos of blue skies and landscapes with richer colours.
Tap MODE → Smart → Landscape.
Dawn
Use this to take photos of the dawn sky in subtle colours.
Tap MODE → Smart → Dawn.
Snow
Use this to take brighter photos of snow scenery.
Tap MODE → Smart → Snow.
66
Camera: Shooting modes
Macro
Use this to take photos of very close subjects.
Tap MODE → Smart → Macro.
Hold the camera steady to prevent blurry photos.
Food
Use this to take photos of food in more colourful tones.
Tap MODE → Smart → Food.
Party/Indoor
Use this to take crisp indoor photos.
Tap MODE → Smart → Party/Indoor.
67
Camera: Shooting modes
Action freeze
Use this to take photos of subjects moving at high speed.
Tap MODE → Smart → Action freeze.
Use in bright daylight is recommended.
Rich tone
Use this to take photos without losing details in bright and dark areas. The camera
automatically takes three photos with various exposure values, and then merges them into
one photo. The photo taken at the original exposure value is saved also.
Tap MODE → Smart → Rich tone.
While holding the camera steady, press the Shutter button to take three photos.
Without effect
With effect
68
Camera: Shooting modes
• This feature may be affected by camera shake, lighting, movement of the subject,
and shooting environment.
• The flash is disabled in this feature.
• When taking a photo of moving subjects, an afterimage may appear.
• Using a tripod is recommended.
Panorama
Use this to take wide panoramic photos.
Tap MODE → Smart → Panorama.
Press the Shutter button to take a photo, and then move the camera in one direction. When
the blue frame aligns with the preview screen, the camera automatically takes another shot
in the panoramic sequence. To stop shooting, press the Shutter button again. Photos are
automatically combined into one panoramic image.
69
Camera: Shooting modes
• Avoid the following for best results:
– – Moving the camera too quickly or too slowly.
– – Moving the camera too little to take the next photo.
– – Moving the camera at irregular speeds.
– – Shaking the camera.
– – Changing the camera direction while taking a photo.
– – Taking photos in low-light conditions.
– – Taking photos of moving subjects.
– – Taking photos where the brightness or colour of the light changes.
– – Taking photos of a subject in front of unrecognisable backgrounds, such as
empty skies or plain walls.
• Shooting is stopped under the following conditions:
– – Changing the distance from the subject while shooting.
– – Moving the camera too quickly.
– – Not moving the camera.
• The camera may stop taking photos due to composition or movement within the
scene.
• The camera may not take the last scene entirely if you stop moving the camera at
the exact position where you want the scene to end. To take the entire scene, move
the camera slightly beyond the position you want the scene to end.
Waterfall
Use this to take photos of waterfalls.
Tap MODE → Smart → Waterfall.
The image may appear blurry due to the slow shutter speed when the camera takes
photos. Make sure to use a tripod.
70
Camera: Shooting modes
Animated photo
Use this to create a photo in which selected objects move by freezing or animating moving
objects automatically detected by the camera.
Tap MODE → Smart → Animated photo.
Press the Shutter button to take a photo. Tap Animate or Freeze, and then rub the screen
to animate or freeze the detected moving objects. Tap Trim to adjust the range to trim, or
Direction to change the direction of the animation. Then, tap Save to save the photo.
Multi exposure
Use this to take multiple shots and create one photo by overlapping them.
Tap MODE → Smart → Multi exposure.
To set the number of shots, tap
.
To set the camera to save all photos or only the final result, tap →
original.
71
→
→ Save
Camera: Shooting modes
Drama
Use this to take a series of photos and combine them to create an image that shows trails of
the movement.
Tap MODE → Smart → Drama.
While holding the camera steady, press the Shutter button to take several photos
continuously. Select shots, and then tap Save to save the photo.
To get the best shot, follow these tips. The camera may not take photos properly in
other shooting conditions.
• Hold the camera steady and remain still while taking photos.
• Take photos of a subject that is moving in one direction.
• Take photos with backgrounds that are free of moving objects.
• Avoid taking photos of a subject and background with similar colours.
• Avoid taking photos of a subject that is too close or too far away to fit within the
screen or that is too long such as a bus or a train.
Eraser
Use this to erase moving objects in the background.
Tap MODE → Smart → Eraser.
Press the Shutter button to take a series of photos. The camera erases moving objects. To
restore the original photo, tap Show moving objects, and then tap the highlighted area. Tap
Save to save the photo.
72
Camera: Shooting modes
• Hold the camera steady and remain still while taking photos.
• When taking photos of an object and background with similar colours, the camera
may not recognise all of the movement.
• When taking photos of a subject that is moving very little or moving a great deal,
the camera may not recognise all of the movements.
• If there are multiple subjects moving in the background, the camera may not
recognise all of the movement.
Sound & shot
Use this to take a photo with sound.
Tap MODE → Smart → Sound & shot.
The camera records a few seconds of audio after taking a photo.
To set the camera to record sound before or after taking a photo, tap
.
While taking photos in this mode, sound is recorded by the internal microphone.
Miniature
Use this to apply a miniature effect by making the centre clear and blurring the top and
bottom of the image.
Tap MODE → Smart → Miniature.
73
Camera: Shooting modes
Creative shot
Use this to apply an appropriate filter to a scene automatically detected by the camera.
Tap MODE → Smart → Creative shot.
Interval
Use this to set the interval and number of shots to take over time.
Tap MODE → Smart → Interval.
Silhouette
Use this to take photos of dark shapes against a light background.
Tap MODE → Smart → Silhouette.
To maximise the silhouette effect, take photos at a location that is bright.
74
Camera: Shooting modes
Sunset
Use this to take photos of the sunset.
Tap MODE → Smart → Sunset.
Night
Use this to take photos in low-light conditions, without using the flash.
Tap MODE → Smart → Night.
While holding the camera steady, press the Shutter button to take three photos. Photos are
automatically merged into a single photo.
The image may appear blurry due to the slow shutter speed when the camera takes
photos. Make sure to use a tripod.
75
Camera: Shooting modes
Fireworks
Use this to take photos of fireworks.
Tap MODE → Smart → Fireworks.
The image may appear blurry due to the slow shutter speed when the camera takes
photos. Make sure to use a tripod.
Light trace
Use this to take photos of the light trailing in low-light conditions.
Tap MODE → Smart → Light trace.
The image may appear blurry due to the slow shutter speed when the camera takes
photos. Make sure to use a tripod.
76
Camera: Shooting modes
My mode
Use this to register your favourite shooting modes and select them conveniently. You can
register up to 10 modes.
Tap MODE → My mode → Edit, and then select your favourite shooting modes. After
completing your selection, tap Done to save it.
3D mode
Use this to take 3D photos or videos with an optional 3D lens.
Before using this feature, attach a SAMSUNG 45 mm F1.8 [T6] 2D/3D lens to the camera.
Set the 2D/3D switch on the lens to 3D, and then take a photo or video 1.5-5 m away from the
subject.
77
Camera: Shooting modes
• Videos recorded in 3D may be dark or playback may be jittery.
• Shooting in low temperatures may result in colour distortion in images and may
consume more battery power.
• You may not be able to shoot properly in conditions below 8.5 LV/900 lux. For best
results, take photos in places with sufficient light.
• When you photograph objects that contain polarising material, such as a display,
sunglasses, or a polarising filter, or use the polarising material with your lens, the
images may appear dark or the 3D effect may not be applied properly.
• Use a tripod to prevent the camera from shaking.
• If you rotate or tilt the camera vertically while shooting, the 3D effect may not be
applied properly. Take photos or videos with the camera in the normal position.
• If you shoot in fluorescent lighting or capture images displayed by projectors or
TVs, the images may appear black due to the flicker effect.
• The camera’s display shows 3D photos and videos only in 2D.
• Photos taken with the 3D feature are saved in the mpo file format.
• To view 3D files, connect your camera to a 3D TV or 3D monitor with an optional
HDMI cable. While viewing, wear proper 3D glasses.
• You cannot use the flash in this mode.
• You cannot take photos or videos in this mode if an HDMI cable is connected to the
camera.
78
Camera: Shooting options and
settings
Customising shooting options
Various shooting options are provided with your camera. With them, you can take more
customised photos and videos.
Tap
to access shooting options. Depending on the mode selected, you may tap →
.
Select an option, and then save it.
• Available options and default settings may differ depending on the shooting
mode, the lens you are using, and the shooting conditions.
• Depending on the option selected, some settings may not be available.
EV (brightness)
The camera automatically sets the exposure by measuring the levels of light from the photo’s
composition and the position of a subject. If the exposure set by the camera is higher or lower
than you expected, you can adjust the exposure value manually.
Tap
→
→ EV (brightness), and select an option.
Darker (-)
Neutral (0)
79
Brighter (+)
Camera: Shooting options and settings
• When taking a photo, if the appropriate exposure value cannot be decided, use the
AE BKT option to take three consecutive photos with different exposure values.
• Taking photos with higher exposure values may result in blurry photos due to the
slower shutter speed.
ISO (sensitivity)
The ISO sensitivity value represents the sensitivity of the camera to light.
The higher the ISO sensitivity, the more sensitive the camera is to light. Consequently, by
selecting a higher ISO sensitivity, you can take photos in dim or dark places at faster shutter
speeds. However, this may increase electronic noise and result in a grainy photo.
Tap
→
→ ISO (sensitivity), and select an option.
Examples
ISO 100
ISO 400
ISO 800
ISO 3200
80
Camera: Shooting options and settings
• Increase the ISO sensitivity in places where flash use is prohibited. You can take a
clear photo by setting a high ISO sensitivity without having to secure more light.
• Use the noise reduction feature to reduce the visual noise that can appear on
photos of a high ISO sensitivity. (p. 95)
WB (light source)
The white balance represents the light source that influences on the colour of a photo.
The colour of a photo depends on the type and quality of the light source. If you want the
colour of your photo to be realistic, select an appropriate lighting condition to calibrate the
white balance, or adjust the colour temperature manually. You can also adjust colour for the
preset light sources so that the colours of the photo match the actual scene under mixed
lighting conditions.
Tap
→
→ WB (light source), and select an option.
• Auto: Use automatic settings depending on the lighting conditions.
• Daylight: Use this for sunny days. This option results in photos closest to the natural
colours of the scene.
• Cloudy: Use this for cloudy days or in shadows. Photos taken on cloudy days tend to be
more bluish than on sunny days. This option offsets that effect.
• Fluorescent W: Use this under a daylight fluorescent lamp, especially for white
fluorescent lighting.
• Fluorescent NW: Use this under a daylight fluorescent lamp, especially for white
fluorescent lighting with very white hues.
• Fluorescent D: Use this under a daylight fluorescent lamp, especially for white
fluorescent lighting with slightly bluish hues.
• Tungsten: Use this under incandescent bulbs or halogen lamps. Incandescent tungsten
bulbs tend to have a reddish hue. This option offsets that effect.
• Flash WB: Use this when using a flash.
• Custom: Use this to set a custom white balance. Tap
surface, and then press the Shutter button.
81
, aim the lens at a piece of white
Camera: Shooting options and settings
• Colour temperature: Use this to manually adjust the colour temperature of the light
source. Colour temperature is a measurement in degrees Kelvin that indicates the specific
type of light source. As the colour temperature increases, the colour distribution becomes
cooler. Alternatively, as the colour temperature decreases, the colour distribution
becomes warmer. Tap , and then drag the slider or tap or to adjust the colour
temperature.
Clear sky
10,000 K
8,000 K
Fluorescent H
Cloudy
Daylight
6,000 K
5,000 K
Fluorescent L
4,000 K
3,000 K
Halogen lamp
Tungsten
2,000 K
Candle light
Examples
Auto WB
Daylight
Fluorescent daylight
Tungsten
82
Camera: Shooting options and settings
When taking a photo, if the appropriate white balance option cannot be decided, use
the WB BKT option to take three consecutive photos with different white balance
settings.
Customising preset white balance options
Adjust the colour for the preset light sources.
Tap next to a white balance option. Tap the arrows or tap an area on the screen to adjust
the value on the coordinates.
• G: Green
• A: Amber
• M: Magenta
• B: Blue
Metering
The metering mode refers to the method the camera measures the quantity of light.
The camera measures the amount of light in a scene, and in many of its modes, uses the
measurement to adjust various settings. For example, if a subject looks darker than its actual
colour, the camera takes an overexposed photo of it. If a subject looks lighter than its actual
colour, the camera takes an underexposed photo of it.
Tap
→
→ Metering, and select an option.
• Multi: The camera calculates the amount of light in multiple areas. When light is sufficient
or insufficient, the camera adjusts the exposure by averaging the overall brightness of the
scene. This mode is suitable for general photos.
• Spot: The camera calculates the amount of light in the centre. When you take a photo
in conditions where there is a strong backlight behind a subject, the camera adjusts the
exposure to shoot a subject correctly.
• Centre-weighted: The camera calculates a broader area than the camera does in spot
mode. It sums up the amount of light in the centre portion of the shot (60–80 %) and that
of the rest of the shot (20–40 %).
83
Camera: Shooting options and settings
Drive
Use this option to set the shooting method. Continuous or burst shots are recommended for
shooting the rapid motion of fast moving subjects, such as racing cars.
Tap
→
→ Drive, and select an option.
• Single shot: Use this to take a single photo.
• Continuous normal: Use this to take five photos per second continuously while you are
pressing the Shutter button.
• Continuous high: Use this to take about eight photos per second continuously while you
are pressing the Shutter button.
• Burst shot (10 fps) / Burst shot (15 fps) / Burst shot (30 fps): Use this to take 30 photos
continuously when you press the Shutter button once.
• AE BKT: Use the auto exposure bracketing option to take three consecutive photos with
different exposure values (one a step lighter, the original, and one a step darker). Use a
tripod to prevent blurry photos. You can adjust the interval range in Bracket set. (p. 94)
• WB BKT: Use the white balance bracketing option to take three consecutive photos with
different white balance settings (the original and two more with different white balance
settings). The original photo is taken when you press the Shutter button. The other two
are automatically adjusted to the white balance you have set. You can adjust the interval
range in Bracket set. (p. 94)
• Saving photos may take longer depending on the memory card’s capacity and
performance when taking photos continuously.
• Using a tripod is recommended when taking photos continuously.
84
Camera: Shooting options and settings
Display
Use this option to add or remove shooting information from the screen.
Tap
→
→ Display, and select an option.
• Normal: The camera displays basic shooting information on the screen.
• Histogram: The camera displays the histogram on the screen. A histogram is a graph that
shows the brightness distribution of a photo. A histogram inclined to the left indicates a
dark photo. A histogram inclined to the right indicates a bright photo. The height of the
graph is related to colour information. The graph gets higher if a specific colour is more
common.
Insufficient exposure
Balanced exposure
Excessive exposure
• Horizontal level: The camera displays the level gauge on the screen. The level gauge
helps you align the camera with the horizontal lines on the screen.
Level
Unlevel
• Distance scale: The camera displays the distance scale on the screen. The distance scale
indicates the distance between a subject and the camera. This function is available only
when you attach a lens that supports the distance scale function.
• Hide: The camera hides icons that indicate the current camera settings except major
shooting options.
85
Camera: Shooting options and settings
Save as User mode
Use this to save the current settings as your own shooting mode.
Tap
→
→ Save as User mode.
Flash
To take a realistic photo of a subject, the amount of light should be constant. When the light
source varies, you can use a flash and supply a constant amount of light.
In auto or smart mode, the flash pops up automatically depending on the flash option when
you half-press the Shutter button or tap the screen in low-light conditions.
→ Flash, and then select an option. In expert mode, press the Flash release
Tap →
button to open the flash manually before setting the option.
• Off: Use this to turn the flash off.
• Smart flash: Use this to automatically adjust the brightness of the flash according to the
amount of light in the surrounding environment.
• Auto flash: Use this to automatically use the flash. The flash fires when the subject or
background is dark.
• Auto + Red-eye: Use this to automatically use the flash and reduce red-eyes.
• Fill in: Use this to always use the flash.
• Fill in + Red-eye: Use this to always use the flash and reduce red-eyes.
• 1st Curtain: Use this to fire the flash immediately after the shutter opens. The camera
takes a photo of a subject earlier in an action sequence clearly.
Ball moving direction
86
Camera: Shooting options and settings
• 2nd Curtain: Use this to fire the flash just before the shutter closes. The camera takes a
photo of a subject later in an action sequence clearly.
Ball moving direction
• Keep the flash retracted when not in use to avoid damage.
• Forcing the flash to open may cause damage to the camera.
• Use only Samsung-approved flashes. Using incompatible flashes may damage your
camera.
• There is an interval between two bursts of the flash. Do not move until the flash
fires a second time.
• If you select Off, the flash does not fire even when an external flash is attached.
• If light from the flash is reflected, or if a substantial amount of dust is in the air, tiny
spots may appear in the photo.
• If you attach an intensity-adjustable external flash to the camera, the intensity
settings of the flash will be applied.
• If the subject is too close when you use the flash, some light may be blocked,
resulting in a dark photo. Ensure that the subject is within the recommended
range, which varies by lenses.
• When a lens hood is attached, the light from the flash can be blocked by the hood.
Remove the hood to use the flash.
Adjusting the flash intensity
When the flash is on, adjust the flash intensity.
Tap
next to an option, and then drag the slider or tap
87
or
to adjust the intensity.
Camera: Shooting options and settings
AF mode
Use this option to select a focus mode appropriate to the subject.
If the lens has an AF/MF switch, you must set the switch to select the focus mode that you
require. Set the switch to AF to select either Single AF or Continuous AF. Set the switch to MF
to select Manual focus.
Tap
→
→ AF mode, and select an option.
• Single AF: Use this to capture a still subject. When you half-press the Shutter button, the
focus fixes in the focus area. The area turns green when the focus is achieved.
• Continuous AF: Use this to capture fast moving subjects. When you half-press the Shutter
button, the camera continues to focus. Once the focus area is fixed on the subject, the
subject is always in focus even when moving.
• Manual focus: Use this to manually focus on a subject by rotating the focus ring on the
lens.
MF assist helps you achieve a focus easily. While you are rotating the focus ring, the
focus area is magnified. (p. 92) When you use Focus peaking, the colour you selected
appears on the focused subject. (p. 92)
88
Camera: Shooting options and settings
AF Area
Use this option to change the positions of the focus area.
Generally, cameras focus on the nearest subject. When there are a lot of subjects, however,
unwanted subjects can be in focus. To prevent unwanted subjects from being in focus,
change the focus area so that a desired subject is in focus. You can get a clearer and sharper
photo by selecting an appropriate focus area.
Tap
→
→ AF Area, and select an option.
• Centre AF: Use this to focus on the centre of the frame.
• Multi AF: Use this to focus on multiple areas. The photo is divided into two or more areas,
and the camera obtains focus points of each area and displays a green rectangle in places
where focus is set correctly. This option is recommended for scenery photos.
• Face Detection: Use this to focus on human faces preferentially. This option is
recommended for shooting a group of people.
This feature may not be effective in the following conditions:
• The subject is too far from the camera.
• The lighting is too bright or too dark.
• The subject is not facing the device.
• The subject is wearing sunglasses or a mask.
• The subject’s facial expression changes drastically.
• The subject is backlit, or the lighting conditions are unstable.
89
Camera: Shooting options and settings
• Tracking AF: Use this to track and automatically focus on your subject, even when the
subject is moving or when you change the shooting composition.
• Tracking a subject may fail in the following conditions:
– – The subject is too small.
– – The subject moves excessively.
– – The subject is backlit or you are shooting in a dark place.
– – Colours or patterns on the subject and the background are the same.
– – The subject includes horizontal patterns, such as blinds.
– – The camera shakes excessively.
• If the camera fails to track the subject, the focus area will be reset.
• If the camera fails to focus, the focus frame will change to red and the focus will be
reset.
• One touch shot: Use this to take a photo with the touch of your finger. As you tap on the
subject, the camera focuses on the subject and takes a photo automatically.
AF size
Use this option to change the size of the auto focus frame.
Tap
→
→ AF size, and tap
or
to adjust the frame size.
Photo size
As you increase the resolution, your photo will include more pixels, so it can be printed on
larger paper or displayed on a larger screen. When you use a high resolution, the file size
will also increase. Select a low resolution for photos that will be displayed in a digital picture
frame or uploaded to the web.
Tap
→
→ Photo size, and select an option.
90
Camera: Shooting options and settings
Quality
Use this option to select a higher photo quality for better photos. Selecting a higher photo
quality also increases the file size.
Tap
→
→ Quality, and select an option.
The camera saves photos in either the jpg or raw file format. Photos in the jpg format are
stored in the memory according to the settings of the camera at the time of shooting.
However, raw format files are not transformed to jpg and are saved in the memory without
any changes.
Raw format files have the srw file extension. To convert raw format files into other file formats
or to calibrate exposures, white balance, tones, contrasts, and colours, use the Adobe
Photoshop Lightroom program found on the supplied DVD-ROM. Ensure you have enough
space in the memory to save photos in the raw file format.
Installing Adobe Photoshop Lightroom
Insert the Adobe Photoshop Lightroom DVD into your computer, select a language, and then
follow the on-screen instructions to complete the installation.
With Adobe Photoshop Lightroom, you can convert or calibrate image files, including jpg, tiff,
and raw file formats. For more information, refer to the program guide.
• In Adobe Photoshop Lightroom, an image’s brightness, colour and other effects
may be displayed differently. This occurs because the original camera settings and
options applied during image capture are removed, ready for it to be processed in
Adobe Photoshop Lightroom.
• If you use PTP mode to connect your device to a Mac OS computer with a USB
cable, you may not be able to preview image thumbnails on the import panel in
Adobe Photoshop Lightroom. In this case, click the import button and preview
them in the Library module.
Adjust image
Use this option to adjust the colour, saturation, sharpness, or contrast of your photos.
Tap
→
→ Adjust image, and drag the slider or tap
91
or
for each value.
Camera: Shooting options and settings
Timer
Use this option for delayed-time shots.
Tap
→
→ Timer, and select an option.
Press the Shutter button to start the timer. The camera takes photos after a specified length of
time. Press the Shutter button to cancel the timer.
MF assist
Use this option to enlarge the scene and easily adjust the focus while rotating the focus ring.
Tap
→
→ MF assist, and select an option.
• Off: Use to turn this option off.
• Enlarge x5: Use this to magnify the focus area by five times when you rotate the focus
ring.
Focus peaking
Use this option to set the colour you selected appears on the focused subject to help you
focus while rotating the focus ring.
Tap
→
→ Focus peaking, and select an option.
• Level: Use this to set a sensitivity level for detecting the focused subject or turn the
option off.
• Colour: Use this to set a colour to appear on the focused subject.
92
Camera: Shooting options and settings
Link AE to AF Point
Use this option to measure the exposure value of the focus area. When this option is on, the
camera automatically sets an optimal exposure by calculating the brightness of the focus
area.
Tap
→
→ Link AE to AF Point, and turn this option on or off.
Framing mode
When you adjust the aperture value or shutter speed, the exposure value changes according
to the settings, so the display may darken. When this option is on, the brightness of the
display is constant regardless of the settings, so you can better frame your shot.
Tap
→
→ Framing mode, and turn this option on or off.
OIS (anti-shake)
Use the Optical Image Stabiliser (OIS) option to reduce or eliminate blurriness from camera
shake.
If your lens has an OIS switch, set the switch to ON to use the OIS feature.
Tap
→
→ OIS (anti-shake), and select an option.
• Off: Use to turn this option off.
• OIS (half shutter): Use this to apply the OIS feature only when you half-press the Shutter
button.
• OIS (always): Use this to continuously apply the OIS feature.
93
Camera: Shooting options and settings
• This feature may not function properly in the following conditions:
– – When you move the camera to follow a moving subject.
– – If the camera is shaking too much.
– – When the shutter speed is slow (for example, when taking photos in low-light
conditions).
– – If the battery power is low.
– – When you take close-up photos.
• Using this feature with a tripod may blur photos because of vibration from the OIS
sensor. Deactivate this feature when using a tripod.
• The display may be blurry if the camera is hit or dropped. When this happens,
restart the device.
Bracket set
Use this option to change the settings for auto exposure bracketing and white balance
bracketing.
Tap
→
→ Bracket set, and select an option.
• AE Bracket set: Use this to adjust the exposure interval range of the three bracketed
photos.
• WB Bracket set: Use this to adjust the white balance interval range of the three bracketed
photos.
ISO customisation
Use this option to change the settings for the ISO sensitivity.
Tap
→
→ ISO customisation, and select an option.
• ISO sensitivity step: Use this to set the size for the ISO sensitivity by either 1/3 or one
step.
• Auto ISO Range: Use this to set the maximum ISO value under which each EV step is
chosen when you set the ISO sensitivity to Auto.
94
Camera: Shooting options and settings
DMF
Use the Direct Manual Focus (DMF) option to adjust the focus manually by rotating the focus
ring after achieving the focus by half-pressing the Shutter button.
Tap
→
→ DMF, and turn this option on or off.
Noise reduction
Use this option to reduce the visual noise in photos.
Tap
→
→ Noise reduction, and select an option.
• High ISO NR: Use this to reduce noise that may occur when you set a high ISO sensitivity.
You can adjust the noise reduction intensity by selecting one from High, Normal, and
Low.
• Long term NR: Use this to reduce noise when you set the camera for a long exposure.
Distortions correct
Use this option to correct distortion that might occur from lenses.
Tap
→
→ Distortions correct, and turn this option on or off.
Colour space
Use this option to select methods for representing colours. Digital imaging devices, such as
digital cameras, monitors, and printers, have their own methods for representing colours,
which are called colour spaces.
Tap
→
→ Colour space, and select an option.
• S RGB: sRGB (Standard RGB) is an international specification to define the colour space
created by IEC (International Electrotechnical Commission). It is widely used for creating
colours on computer monitors and is also the standard colour space for Exif. sRGB is
recommended for regular images and images you intend to publish on the Internet.
95
Camera: Shooting options and settings
• Adobe RGB: Adobe RGB is used for commercial printing and has a larger colour range
than sRGB. Its wider range of colours helps you to easily edit photos on a computer.
Note that individual programs are generally compatible with a limited number of colour
spaces.
The rule for creating file names varies depending on the selected colour space option.
• sRGB files: YYYYMMDD_hhmmss.jpg. For example, for a photo taken on Jan. 02,
2013, at 15:30:45, the file name would be 20130102_153045.jpg. File names for
continuous, burst, or bracketed photos would be YYYYMMDD_hhmmss_x.jpg, for
the previous example, the file name would be 20130102_153045_1.jpg.
• Adobe RGB files: YYYYMMDD_hhmmss_A.jpg. File names for continuous, burst, or
bracketed photos would be YYYYMMDD_hhmmss_Ax.jpg.
Dynamic range
Use this option to correct the loss of bright detail that can occur due to shading differences in
a photo.
Tap
→
→ Dynamic range, and select an option.
• Off: Use to turn this option off.
• Smart Range+: Use this to correct the loss of bright detail.
• HDR (High Dynamic Range): Use this to take three photos with different exposure values
and combine them to create a single image. The photo taken at the original exposure
value is saved also.
Overexposure guide
Use this option to set the camera to indicate the overexposed area on the preview screen.
Tap
→
→ Overexposure guide, and turn this option on or off.
96
Camera: Shooting options and settings
Video recording options
Tap
→
, and configure the settings for video recording.
• Movie size: Select a resolution for videos. Use higher resolution for higher quality. Higher
resolution videos take up more memory.
• Quality: Set the quality level for videos. Higher quality images require more storage
space.
• Multi motion: Set the playback speed of videos.
If you select an option other than x1, sound will not be recorded.
• Voice: Set the camera to record sound with videos.
• Windcut: Remove some surrounding noise in addition to wind noise.
• Video output format: Set the video signal output that is appropriate for your country.
You can take videos at 60, 30, or 24 fps with NTSC and at 50, 25, or 24 fps with PAL.
Sharing options
Share photos as they are taken by setting sharing options. Tap
→
, and select an option.
• Share shot: Send a photo directly to another device via Wi-Fi Direct.
• You cannot use this feature if the signature option is activated.
• If this feature is activated, you cannot set the quality option to RAW or RAW+JPEG.
• Buddy photo share: Set the camera to recognise a person’s face that you have tagged in
a photo and send it to that person.
• ChatON photo share: Send a photo directly to another device via ChatON.
You cannot use this feature if the signature option is activated.
• Remote viewfinder: Set a device to control the camera remotely.
97
Camera: Shooting options and settings
Camera settings
Tap
→
, and configure the settings for Camera.
• User type: Select the operation type for basic or expert use.
• AF sound: Adjust the auto focus sound.
• Beep: Activate or deactivate beep sounds.
• Description: Display mode descriptions.
• Guidelines: Display a guide to help you compose a scene.
• Auto screen off: Set the length of time the device waits before turning off the display’s
backlight.
• Review: Briefly display photos or videos taken.
• Signature: Use this to add a signature to the image.
You cannot use this feature when the Date/time Imprint setting is activated.
• Date/time Imprint: Use this to imprint the time and date on photos.
• You cannot use this feature when the Signature setting is activated.
• The time and date cannot be imprinted on raw format files.
• GPS tag: Attach GPS information (location and time) and weather information to the file.
Activate this feature when taking photos to create albums in Story Album or use the
photo suggestion feature.
• To improve GPS signals, avoid shooting in locations where the signal may be
obstructed, such as between buildings or in low-lying areas, or in poor weather
conditions.
• Your location may appear on your photos when you upload them to the Internet.
To avoid this, deactivate the GPS tag setting.
• Voice control: Activate or deactivate the voice recognition to take photos or videos.
• Contextual filename: Set the camera to add contextual tags, such as location
information, to filenames.
• To use this feature, you must activate the GPS tag setting.
• The contextual information appears in the display language used by the device at
the time the files were created.
98
Camera: Shooting options and settings
• AF lamp: Use this to activate the AF-assist light in low-light conditions.
• Power-on mode: Select the default camera mode that launches when the device is
turned on.
• Dial control (P/A/S/M): Set Command dial functions when you first press or rotate it on
the preview screen of expert mode.
– – Option 1: Access the mode selection screen by rotating or pressing the Command
dial.
– – Option 2: Access the mode selection screen by rotating the Command dial. Move
through the major shooting options by pressing the Command dial repeatedly.
– – Option 3: Move through the major shooting options by pressing the Command dial
repeatedly. Adjust the option by rotating the Command dial.
In auto or smart mode, you can only change modes with the Command dial.
• Storage: Select the memory location for storage.
• Display select: Use this to set the proximity/light sensor to automatically adjust between
the screen and the viewfinder, or to always use the screen.
• Horizontal calibration: Calibrate the level gauge. If the level gauge is not level, position
the camera on the level surface, and then follow the on-screen instructions.
• You cannot calibrate the level gauge in portrait orientation.
• The camera must be level (not tilted up or down) to complete the calibration.
• Sensor cleaning: Use this to remove dust from the image sensor.
• Lens firmware: Update the firmware of the lens.
Before updating the lens firmware, download the firmware file into the root directory
of the internal memory or a memory card, access the Home screen, and then launch
the camera application.
• Reset: Reset the camera settings.
99
Media
Gallery
Use this application to view images and videos.
Tap Gallery on the Applications screen.
• Some file formats are not supported depending on the software installed on the
device.
• Some files may not play properly depending on the encoding method used.
Viewing images
Launching Gallery displays available folders. When another application, such as Email, saves
an image, the Download folder is automatically created to contain the image. Likewise,
capturing a screenshot automatically creates the Screenshots folder. Select a folder to open
it.
In a folder, images are displayed by creation date. Select an image to view it in full screen.
Scroll left or right to view the next or previous image.
Continuous and burst photos appear as a bundle in the thumbnails view. Tap the
thumbnail to view individual photos.
Zooming in and out
Use one of the following methods to zoom in an image:
• Double-tap anywhere to zoom in.
• Spread two fingers apart on any place to zoom in. Pinch to zoom out, or double-tap to
return.
100
Media
Viewing images using the motion feature
When an image is zoomed in, tap and hold a point on the screen, and then move the device
in any direction to browse the image.
On the Applications screen, tap Settings → My device → Motions and gestures → Motion,
drag the Motion switch to the right, and then turn on the switch for Browse an image.
To stop using the motion feature, turn off the switch for the feature.
Playing videos
Video files show the
icon on the preview. Select a video to watch it and tap
.
Editing images
When viewing an image, tap
and use the following functions:
• Edit: Launch the Photo editor application to edit the image.
• Details: View image details.
• Slideshow: Start a slideshow with the images in the current folder.
• Favourite: Add the image to favourites.
• Photo frame: Use this to add a frame and a note to an image. The edited image is saved
in the Photo frame folder.
• Photo note: Use this to write a note on the back of the image. Tap
to edit the note.
• Signature: Add a signature to the image. Signatures are saved in the My Signature folder.
• Copy to clipboard: Copy to clipboard.
• Rotate left: Rotate anticlockwise.
• Rotate right: Rotate clockwise.
• Crop: Resize the blue frame to crop and save the image in it.
• Buddy photo share: Send the image to a person whose face is tagged in the image.
• Print: Print the image via a USB or Wi-Fi connection. The device is only compatible with
some Samsung printers.
101
Media
• Rename: Rename the file.
• Set as: Set the image as wallpaper or a contact image.
• Settings: Change the Gallery settings.
Modifying images
When viewing an image, tap
→ Edit.
Undo and redo the last
action.
Save changes.
Edit the image.
To select an area to edit, tap and hold the screen, and then tap Selection mode.
Rotating images
Tap Rotate, select an option at the bottom of the screen, and then tap
.
Cropping photos
Tap Crop, select an option at the bottom of the screen, rotate or resize the frame by dragging
the dots on the frame, and then tap .
Changing colours
Tap Colour, select a colour effect at the bottom of the screen, drag the slider to left or right if
required, and then tap .
102
Media
Applying filter effects
Tap Effect, select a filter effect at the bottom of the screen, drag the slider to left or right if
required, and then tap .
Adjusting a portrait photo
Tap Portrait, select a portrait effect at the bottom of the screen, drag the slider to left or right
if required, and then tap .
Putting stickers on images
Tap Sticker, select a sticker type at the bottom of the screen, select a sticker, and then tap
Drawing on images
Tap Drawing, draw on the image, and then tap
.
To change the pen settings, tap Pen.
To erase the drawings, tap Eraser. To change the eraser size, tap Eraser again.
Framing images
Tap Frame, select a frame at the bottom of the screen, and then tap
.
Favourite images
When viewing an image, tap
→ Favourite to add the image to the favourites list.
Making image collages
In a folder, tap → Select item, select two to four images by ticking, and then tap
Create collage. Select a style at the bottom of the screen, and then tap Save.
To add images, tap
→ Add picture.
To delete images, tap
.
To change the split type, tap .
103
→
.
Media
Deleting images
Use one of the following methods:
• In a folder, tap
→ Select item, select images by ticking, and then tap
• When viewing an image, tap
.
.
Sharing images
Use one of the following methods:
• In a folder, tap
to others.
→ Select item, select images by ticking, and then tap
• When viewing an image, tap
to send them
to send it to others.
Setting as wallpaper
When viewing an image, tap
contact.
→ Set as to set the image as wallpaper or to assign it to a
Tagging faces
When viewing an image, tap → Settings, and then tick Face tag. A yellow frame appears
around the recognised face on an image. Tap the face, tap Add name, and then select or add
a contact.
When the face tag appears on an image, tap the face tag and use available options, such as
sending messages.
Face recognition may fail depending on the face angle, face size, skin colour, facial
expression, light conditions, or accessories the subject is wearing.
Organising with folders
Create a folder to organise images or videos stored in the device. You can copy or move files
from one folder to another.
To create a new folder, tap . Enter a name for the folder, tap OK, and then tick images or
videos. Tap and hold any selected image or video, drag it to the new folder, and then tap .
Tap Copy to copy or Move to move.
104
Media
Video
Use this application to play video files.
Tap Video on the Applications screen.
• Some file formats are not supported depending on the device's software.
• Some files may not play properly depending on the encoding method used.
Playing videos
Select a video to play.
Adjust the volume.
Scan DLNA-enabled
devices.
Skip to the next video. Tap
and hold to move
forwards quickly.
Move forwards or
backwards by dragging
the bar.
Reduce the size of the
video screen.
Change screen ratio.
Restart the current video
or skip to the previous
video. Tap and hold to
move backwards quickly.
Pause and resume
playback.
Deleting videos
Tap
→ Delete, select videos by ticking, and then tap Delete.
Sharing videos
Tap
→ Share via, select videos by ticking, tap Done, and then select a sharing method.
105
Media
Using Popup Video player
Use this feature to use other applications without closing the video player. While watching
videos, tap to use the pop-up player.
Spread two fingers apart on the screen to enlarge the player or pinch to reduce it. To move
the player, drag the player to another location.
Music
Use this application to listen to music.
Tap Music on the Applications screen.
• Some file formats are not supported depending on the device’s software version.
• Some files may not play properly depending on the encoding method used.
Playing music
Select a music category, and then select a song to play.
Tap the album image at the bottom of the screen to open the music player screen.
Scan DLNA-enabled
devices.
Adjust the volume.
Set the file as your
favourite song.
Turn on shuffle.
Change the repeat mode.
Open the playlist.
Hide the music player
screen.
Skip to the next song. Tap
and hold to move
forwards quickly.
Restart the
currently-playing song or
skip to the previous song.
Tap and hold to move
backwards quickly.
Pause and resume
playback.
106
Media
To listen to songs at equal volume levels, tap
→ Settings → Smart volume.
When Smart volume is activated, the volume may end up louder than the device
volume level. Use caution to avoid long-term exposure to loud sounds to prevent
damage to your hearing.
Creating playlists
Make an own selection of songs.
Tap Playlists, and then tap → Create playlist. Enter a title and tap OK. Tap Add music,
select songs to include, and then tap OK.
To add the currently-playing song to a playlist, tap
→ Add to playlist.
Playing music by mood
Play music grouped by mood. The playlist is automatically created by the device. When a new
song is added, tap Music square → → Library update.
Tap Music square and select a cell of mood. Or select multiple cells by dragging your finger.
YouTube
Use this application to watch videos from the YouTube website.
Tap YouTube on the Applications screen.
This application may not be available depending on the region or service provider.
107
Media
Watching videos
Tap
, and then enter a keyword. Select one of the returned search results to watch a video.
Rotate the device to landscape orientation to display full screen.
Add the video to the
playlist.
Search for videos.
Pause or resume playback.
Send the URL to others.
Move forwards or
backwards by dragging
the bar.
Change display quality.
Sharing videos
Select the video to view, tap
, and then select a sharing method.
Uploading videos
Select your account, tap
UPLOAD.
, select a video, enter information for the video, and then tap
108
Media
Photo Suggest
Use this application to view photos taken by other users of points of interest near your
current location.
Tap Photo Suggest on the Applications screen.
Viewing photos
Based on your current location, the device suggests photos of nearby places on a map. Search
for a place and tap a thumbnail photo to view it in full screen.
While viewing a photo, tap → Add to favourites/places, add the photo or place to the
favourites list, and turn on the notification setting. You will be notified when you visit the
place in the photo.
Using photos as a shooting guide
You can use the suggested photos as guides for shooting the same or similar places.
While viewing a photo, tap . The camera application launches and displays the photo. Use
the shooting angle and composition in the photo as a guide for taking your own shot.
109
Communication
Contacts
Use this application to manage contacts, including phone numbers, email addresses, and
others.
Tap Contacts on the Applications screen.
Managing contacts
Creating a contact
Tap
and enter contact information.
• : Add an image.
• /
: Add or delete a contact field.
Editing a contact
Select a contact to edit, and then tap
.
Deleting a contact
Tap
→ Delete.
110
Communication
Searching for contacts
Use one of the following search methods:
• Scroll up or down the contacts list.
• Use the index at the right side of the contacts list for quick scrolling, by dragging a finger
along it.
• Tap the search field at the top of the contacts list and enter search criteria.
Once a contact is selected, take one of the following actions:
• : Add to favourite contacts.
• : Compose a message.
• : Compose an email.
Displaying contacts
By default, the device shows all saved contacts on the device, the SIM or USIM card, or
another account.
Tap
→ Contacts to display, and then select a location where contacts are saved.
Moving contacts
Moving contacts to Google
Tap
→ Merge accounts → Merge with Google.
Contacts moved to Google Contacts appear with
in the contacts list.
Moving contacts to Samsung
Tap
→ Merge accounts → Merge with Samsung.
Contacts moved to Samsung Contacts appear with
111
in the contacts list.
Communication
Importing and exporting contacts
Importing contacts
Tap → Import/Export → Import from SIM card, Import from SD card, or Import from
USB storage.
Exporting contacts
Tap → Import/Export → Export to SIM card, Export to SD card, or Export to USB
storage.
Sharing contacts
Tap
→ Share namecard via, select contacts, tap Done, and then select a sharing method.
Favourite contacts
Tap
, and then take one of the following actions:
• Search: Search for contacts.
• Add to favourites: Add contacts to favourites.
• Remove from favourites: Remove contacts from favourites.
• Grid view / List view: View contacts in grid or list form.
Contact groups
Adding contacts to a group
Select a group, and then tap
. Select contacts to add, and then tap Done.
112
Communication
Managing groups
Tap
, and then take one of the following actions:
• Create: Make a new group.
• Search: Search for contacts.
• Change order: Tap and hold
position, and then tap Done.
next to the group name, drag it up or down to another
• Delete groups: Select user-added groups, and then tap Delete. Default groups cannot be
deleted.
Sending a message or email to a group’s members
Select a group, tap
→ Send message or Send email, select members, and then tap Done.
Business card
Create a business card and send it to others.
Tap Set up my profile, enter details, such as phone number, email address, and postal
address, and then tap Save. If user information has been saved when you set up the device,
select the business card in ME, and then tap to edit.
Tap
→ Share namecard via, and then select a sharing method.
Messaging
Use this application to send text messages (SMS) or multimedia messages (MMS).
Tap Messaging on the Applications screen.
You may incur additional charges for sending or receiving messages while you are
outside your home service area. For details, contact your service provider.
113
Communication
Sending messages
Tap Compose, add recipients, enter a message, and then tap
.
Use the following methods to add recipients:
• Enter a phone number.
• Tap
, select contacts, and then tap Done.
Use the following methods to make a multimedia message:
• Tap
• Tap
, and attach images, videos, contacts, memos, events, and others.
→ Add subject to enter a subject.
Sending scheduled messages
While composing a message, tap → Scheduling. Set a time and date, and then tap OK.
The device will send the message at the specified time and date.
• If the device is turned off at the scheduled time, is not connected to the network,
or the network is unstable, the message will not be sent.
• This feature is based on the time and date set on the device. The time and date
may be incorrect if you move across time zones and the network does not update
the information.
Translating and sending messages
To use the translating feature while composing a message, tap → Translate, drag the
Translate switch to the right, set a language pair, and then tap OK.
Tap to translate the message, and then tap Done. The translated message will replace the
message of the source language.
114
Communication
Viewing incoming messages
Incoming messages are grouped into message threads by contact.
Select a contact to view the person’s message.
Email
Use this application to send or view email messages.
Tap Email on the Applications screen.
Setting up email accounts
Set up an email account when opening Email for the first time.
Enter the email address and password. Tap Next for a private email account, such as Google
Mail, or tap Manual setup for a company email account. After that, follow on-screen
instructions to complete the setup.
To set up another email account, tap
→ Settings → Add account.
Sending messages
Tap the email account to use, and then tap
subject, and message, and then tap .
at the top of the screen. Enter recipients,
Tap
to add a recipient from the contacts list.
Tap
to attach images, videos, contacts, memos, events, and others.
Tap
to insert images, events, contacts, location information, and others into the message.
115
Communication
Sending scheduled messages
While composing a message, tap → Schedule sending. Tick Schedule sending, set a time
and date, and then tap Done. The device will send the message at the specified time and
date.
• If the device is turned off at the scheduled time, is not connected to the network,
or the network is unstable, the message will not be sent.
• This feature is based on the time and date set on the device. The time and date
may be incorrect if you move across time zones and the network does not update
the information.
Reading messages
Select an email account to use, and new messages are retrieved. To manually retrieve new
messages, tap .
Tap a message to read.
Reply to all recipients.
Forward the message.
Reply to the message.
Delete the message.
Go to the previous or next
message.
Add this email address to
the contacts list.
Mark the message as a
reminder.
Open attachments.
Tap the attachment tab to open attachments, and then tap Save to save it.
116
Communication
Google Mail
Use this application to quickly and directly access the Google Mail service.
Tap Google Mail on the Applications screen.
• This application may not be available depending on the region or service provider.
• This application may be labelled differently depending on the region or service
provider.
Sending messages
In any mailbox, tap
, enter recipients, a subject, and a message, and then tap SEND.
Tap
→ Attach picture to attach images.
Tap
→ Attach video to attach videos.
Tap
→ Add Cc/Bcc to add more recipients.
Tap
→ Save draft to save the message for later delivery.
Tap
→ Discard to start over.
Reading messages
Delete this message.
Add a label to this
message.
Keep this message for
long-term storage.
Mark the message as
unread.
Forward this message to
others.
Add this email address to
the contacts list.
Reply to all recipients.
Preview attachment.
Reply to this message.
Mark the message as a
reminder.
117
Communication
Labels
Google Mail does not use actual folders, but uses labels instead. When Google Mail is
launched, it displays messages labelled Inbox.
Tap
to view messages in other labels.
To add a label to a message, select the message, tap
, and then select the label to assign.
Talk
Use this application to chat with others.
Tap Talk on the Applications screen.
This application may not be available depending on the region or service provider.
Select a friend from the friends list or enter data to search and select a friend from the results
to start chatting.
Google+
Use this application to stay connected with people via Google’s social network service.
Tap Google+ on the Applications screen.
This application may not be available depending on the region or service provider.
Tap All Circles to change the category, and then scroll up or down to view posts from your
circles.
Tap
to use other social network features.
118
Communication
Messenger
Use this application to chat with others via Google+ instant messaging service.
Tap Messenger on the Applications screen.
This application may not be available depending on the region or service provider.
Select a friend from the friends list, enter a message in the field at the bottom of the screen,
and then tap .
ChatON
Use this application to chat with any device.
Tap ChatON on the Applications screen.
This application may not be available depending on the region or service provider.
Create a buddies list by entering phone numbers or Samsung account email addresses, or by
selecting buddies from the list of suggestions. Alternatively, tap Contact sync to manually
sync contacts from the device.
Tap Chats → Start chat and select a buddy to start chatting.
The video chatting feature is enabled for up to 15 minutes at a time. After 15 minutes,
the device will turn off the video chatting feature for optimal performance.
119
Web & network
Internet
Use this application to browse the Internet.
Tap Internet on the Applications screen.
Viewing webpages
Tap the address field, enter the web address, and then tap Go.
Tap
to share, save, or print the current webpage while viewing a webpage.
To change the search engine, tap the address field, and then tap the search engine icon next
to the web address.
Opening a new page
Tap
→ New window.
To go to another webpage, tap
, scroll up or down, and tap the page to select it.
Bookmarks
To bookmark the current webpage, tap
→ Add bookmark.
To open a bookmarked webpage, tap , and then select one.
History
Tap → History to open a webpage from the list of recently-visited webpages. To clear the
history, tap → Clear history.
Links
Tap and hold a link on the webpage to open it in a new page, save, or copy.
To view saved links, use Downloads. (p. 140)
120
Web & network
Sharing webpages
To share a webpage address with others, tap
→ Share via.
To share a part of a webpage, tap and hold the desired text, and then tap Share.
Chrome
Use this application to search for information and browse webpages.
Tap Chrome on the Applications screen.
This application may not be available depending on the region or service provider.
Viewing webpages
Tap the address field, and then enter a web address or search criteria.
Opening a new page
Tap
→ New tab.
To go to another webpage, tap
→ a webpage.
Searching the web by voice
Tap the address field, tap , speak a keyword, and then select one of the suggested keywords
that appear.
Syncing with other devices
Sync open tabs and bookmarks to use with Chrome on another device, when you are logged
in with the same Google account.
To view open tabs on other devices, tap
To view bookmarks, tap
→ Other devices. Select a webpage to open.
.
121
Web & network
Bluetooth
Bluetooth creates a direct wireless connection between two devices over short distances. Use
Bluetooth to exchange data or media files with other devices.
• Samsung is not responsible for the loss, interception, or misuse of data sent or
received via the Bluetooth feature.
• Always ensure that you share and receive data with devices that are trusted
and properly secured. If there are obstacles between the devices, the operating
distance may be reduced.
• Some devices, especially those that are not tested or approved by the Bluetooth
SIG, may be incompatible with your device.
• Do not use the Bluetooth feature for illegal purposes (for example, pirating copies
of files or illegally tapping communications for commercial purposes).
Samsung is not responsible for the repercussion of illegal use of the Bluetooth
feature.
To activate Bluetooth, on the Applications screen, tap Settings → Connections →
Bluetooth, and then drag the Bluetooth switch to the right.
Pairing with other Bluetooth devices
On the Applications screen, tap Settings → Connections → Bluetooth → Scan, and
detected devices are listed. Select the device you want to pair with, and then accept the autogenerated passkey on both devices to confirm.
Sending and receiving data
Many applications support data transfer via Bluetooth. An example is Gallery. Open Gallery,
select an image, tap → Bluetooth, and then select one of the Bluetooth devices. After
that, accept the Bluetooth authorisation request on the other device to receive the image.
The transferred file is saved in the Bluetooth folder. If a contact is received, it is added to the
contacts list automatically.
122
Web & network
Screen Mirroring
Use this feature to connect your device to a large screen with an AllShare Cast dongle or
HomeSync and then share your contents. You can also use this feature with other devices that
support the Wi-Fi Miracast feature.
• This feature may not be available depending on the region or service provider.
• Miracast-enabled devices that do not support High-bandwidth Digital Content
Protection (HDCP) may not be compatible with this feature.
• Some files may be buffered during playback, depending on the network
connection.
• To save energy, deactivate this feature when not in use.
• If you specify a Wi-Fi frequency, AllShare Cast dongles or HomeSync may not be
discovered or connected.
• If you play videos or games on a TV, select an appropriate TV mode to get the best
experience.
On the Applications screen, tap Settings → Connections → Screen Mirroring. Select a
device, open or play a file, and then control the display with the keys on your device.
Group Play
Use this application to share screens with multiple devices. Create or join a Group Play
session, and then share images, documents, or music.
Tap Group Play on the Applications screen.
• This application may not be available depending on the region or service provider.
• While using this application, you cannot use the Internet.
123
Web & network
Creating a group for Group Play
Tap Create group, set a password, and then use the following features:
• Share music: Select music files to share. You can connect two or more devices and use
them to achieve a surround sound effect.
• Share pictures: Select images to share.
• Share documents: Select documents to share.
Tap and write a note or draw on the screen. All participants can see what you create.
Tap
to view all shared images in mosaic layout.
Tap
or
Tap
to view the group participants.
to select more images or documents.
Joining Group Play
Tap Join group, select a Group Play session to join, and then enter the password for the
group. Select a media category and the content that is currently being shared will appear on
the device.
124
Application & media stores
Play Store
Use this application to purchase and download applications and games that are able to run
on the device.
Tap Play Store on the Applications screen.
This application may not be available depending on the region or service provider.
Installing applications
Browse applications by category, or tap
to search with a keyword.
Select an application to view information. To download it, tap Install. If there is a charge for
the application, tap the price, and follow on-screen instructions to complete the purchase
process.
• When a new version is available for any installed application, an update icon
appears at the top of the screen to alert you to the update. Open the notifications
panel and tap the icon to update the application.
• To install applications that you downloaded from other sources, on the
Applications screen, tap Settings → More → Security → Unknown sources.
Uninstalling applications
Uninstall the applications purchased from Play Store.
Tap → My apps, select an application to delete in the list of installed applications, and
then tap Uninstall.
125
Application & media stores
Samsung Apps
Use this application to purchase and download dedicated Samsung applications. For more
information, visit www.samsungapps.com.
Tap Samsung Apps on the Applications screen.
This application may not be available depending on the region or service provider.
Installing applications
Browse applications by category.
To search for an application, tap
search field.
at the top of the screen, and then enter a keyword in the
Select an application to view information. To download it, tap Free. If there is a charge for
the application, tap the price, and follow on-screen instructions to complete the purchase
process.
When a new version is available for any installed application, an update icon appears
at the top of the screen to alert you to the update. Open the notifications panel and
tap the icon to update the application.
Play Books
Use this application to read and download book files.
Tap Play Books on the Applications screen.
This application may not be available depending on the region or service provider.
126
Application & media stores
Play Movies
Use this application to watch, download, and rent movies or TV shows.
Tap Play Movies on the Applications screen.
This application may not be available depending on the region or service provider.
Play Music
Use this application to listen to music from the device or stream music from the Google cloud
service.
Tap Play Music on the Applications screen.
This application may not be available depending on the region or service provider.
Play Magazines
Use this application to read and download magazines.
Tap Play Magazines on the Applications screen.
This application may not be available depending on the region or service provider.
127
Utilities
S Memo
Use this application to create a memo using images and voice recordings.
Tap S Memo on the Applications screen.
Composing memos
Create memos with enriched content by drawing sketches with your finger or adding images
or voice memos.
Tap
to write or draw on the screen, or tap
Erase the handwritten
memo.
to enter text with the keyboard.
Undo and redo the last
action.
Jot down or draw a memo.
Enter a memo.
Switch to view mode.
Append another page to
the current memo.
Insert a multimedia file.
Make a voice recording to
insert.
128
Utilities
When jotting down a memo, tap
colour.
once more to change the pen type, line thickness, or pen
When erasing the handwritten memo, tap
memo.
once more to change the eraser size or clear the
Change the pen type.
Save the current setting as
a pen profile.
Change the line thickness.
Expand the pen settings
panel to change the pen
colour.
→ Change background.
To change the sheet background, tap
To add tags, tap
→ Add tag.
Browsing memos
Browse memo thumbnails by scrolling up or down.
To search for a memo, tap
To delete memos, tap
→ Search.
→ Delete.
→ Sort by.
To sort memos by date, title, tag, or others, tap
To change the view mode, tap
→ List view.
→ Import.
To create a memo by importing a file, tap
To export memos as another file format, tap
To create a folder, tap
→ Create folder.
To change the order of memos, tap
To move memos to another folder, tap
To copy memos, tap
→ Export.
→ Change order.
→ Move.
→ Copy.
To change the S Memo settings, tap
→ Settings.
To back up or restore memos to or from a storage location, tap
129
→ Backup and restore.
Utilities
Viewing a memo
Tap the memo thumbnail to open it.
→ Delete.
To delete the memo, tap
→ Share via.
To send the memo to others, tap
To save the memo as an image file or a PDF file, tap
To add the memo as your favourites list, tap
To save the memo as an event, tap
→ Export.
→ Add to Favourites.
→ Create event.
To set the memo as wallpaper or to assign it to a contact, tap
To print the memo via a USB or Wi-Fi connection, tap
compatible with some Samsung printers.
To edit the memo, tap
→ Set as.
→ Print. The device is only
.
To play the voice recording, tap
.
S Planner
Use this application to manage events and tasks.
Tap S Planner on the Applications screen.
Creating events or tasks
Tap New and then use one of the following methods:
• Add event: Enter an event with an optional repeat setting.
• Add task: Enter a task with an optional priority setting.
• Add memo: Create a handwritten memo to attach to the date.
130
Utilities
To add an event or task more briefly, tap a date to select it and tap it again.
Enter a title and specify which calendar to use or sync with. Then tap Edit event details or
Edit task details to add more details, such as how often the event repeats, when it has an
advance alert, or where it takes place.
Attach a map showing the location of the event. Enter the location in the Location field, tap
next to the field, and then pinpoint the precise location by tapping and holding on the
map that appears.
Attach a memo from S Memo. Tap Memos, and then compose a new memo or select one of
the existing memos.
Attach an image. Tap Images, and then take a photo or select one of the existing images.
Attaching memos to a date
Tap and hold a date to select it and the memo pad appears.
131
Utilities
Syncing with Google Calendar
On the Applications screen, tap Settings → Accounts → Google under My accounts → a
Google account → Sync Calendar. To manually sync for updating, on the Applications screen,
tap S Planner → → Sync.
To display synced event or tasks, tap
and then tap Done.
→ Calendars → Display, tick the Google account,
Changing calendar type
Select one from among different types of calendars including year, month, week, and others
at the right side of the screen. A pinch gesture can be used to change calendar type. For
example, pinch to change from the monthly calendar to the yearly calendar, and spread apart
to change yearly calendar back to monthly calendar.
Searching for events
Tap
→ Search, and then enter a keyword to search for.
To view today’s events, tap Today at the top of the screen.
Deleting events
Select a date or event, and then tap
→ Delete.
Sharing events
Select an event, tap
→ Share via, and then select a sharing method.
132
Utilities
Dropbox
Use this application to save and share files with others via the Dropbox cloud storage. When
you save files to Dropbox, your device automatically syncs with the web server and any other
computers that have Dropbox installed.
Tap Dropbox on the Applications screen.
This application may not be available depending on the region or service provider.
When running Dropbox for the first time, tap Start to activate it. Follow the on-screen
instructions to complete the setup.
Once Dropbox is activated, photos and videos taken with the device’s camera are uploaded to
Dropbox automatically. To view the uploaded photos or videos, tap . To share or delete files
or create albums, tap , and then select files.
To upload files to Dropbox, tap →
To open files in Dropbox, select a file.
While viewing images or videos, tap
favourites list, tap .
→ Upload here → Photos or videos or Other files.
to add it to the favourites list. To open files in the
Cloud
Use this feature to sync files or back up application data with your Samsung account or
Dropbox.
On the Applications screen, tap Settings → Accounts → Cloud.
This feature may not be available depending on the region or service provider.
133
Utilities
Syncing with the Samsung account
Tap your Samsung account or Sync settings to sync files.
Backing up or restoring data
Tap Backup or Restore to back up or restore data with your Samsung account.
Syncing with Dropbox
Tap Link Dropbox account, and then enter the Dropbox account. Follow the on-screen
instructions to complete the setup.
Once you sign in, tap Allow and the device automatically syncs files with Dropbox whenever
you make some changes.
Clock
Use this application to set alarms, check the time in any location in the world, measure the
duration of an event, or set a timer.
Tap Clock on the Applications screen.
Turn this alarm on or off.
134
Utilities
Alarm
Setting alarms
Tap Create alarm, set a time for the alarm to go off, select days for the alarm to repeat, and
then tap Save.
• Location alarm: Set a location. The alarm goes off only when you are in the location.
• Snooze: Set an interval and the number of times for the alarm to repeat after the preset
time.
• Smart alarm: Set a time for the alarm to go off before the preset time.
Stopping alarms
Drag outside the large circle to stop an alarm. Drag
the alarm after a specified length of time.
outside the large circle to repeat
Deleting alarms
Tap and hold the alarm, and then tap Delete.
World clock
Creating clocks
Tap Add city, and then enter a city name or select a city from the cities list.
To apply summer time, tap and hold a clock, and then tap DST settings.
Deleting clocks
Tap and hold the clock, and then tap Delete.
135
Utilities
Stopwatch
Tap Start to time an event. Tap Lap to record lap times.
Tap Reset to clear lap time records.
Timer
Set the duration, and then tap Start.
Drag
outside the large circle when the timer goes off.
Calculator
Use this application for simple or complex calculations.
Tap Calculator on the Applications screen.
To see the calculation history, tap
To clear the history, tap
to hide the keypad.
→ Clear history.
To change the character size for the history, tap
→ Text size.
S Translator
Use this application to translate text into other languages.
Tap S Translator on the Applications screen.
Using S Translator
Set the source and target languages, enter text in the input field, and then tap
To add a language pair to your favourites list, tap Add to favourites.
To send a language pair to others, tap Share via.
136
.
Utilities
Starting a conversation with the translator
Tap the buttons at the bottom of the screen to communicate with another person via spoken
translation.
Tap Speak for your language, and then speak into the microphone. The device will translate
in the target language field to let the device read the translation out
what you say. Tap
loud.
Then, tap Speak for the language of the person you are talking with and let the person reply
in the source language field
in their language. The device will translate what they say. Tap
to let the device read it back to you.
S Voice
Use this application to command the device by voice to send a message, write a memo, set an
alarm, and more.
Tap S Voice on the Applications screen. Alternatively, tap
twice.
This application may not be available depending on the region or service provider.
Here are several examples of spoken commands:
• Open music
• Launch calculator
• Check schedule
Tips for better voice recognition
• Speak clearly.
• Speak in quiet places.
• Do not use offensive or slang words.
• Avoid speaking in dialectal accents.
The device may not recognise your commands or may perform unwanted commands
depending on your surroundings or how you speak.
137
Utilities
Google
Use this application to search not only the Internet, but also applications and their contents
on the device as well.
Tap Google on the Applications screen.
This application may not be available depending on the region or service provider.
Searching the device
Tap the search field, and then enter a keyword. Alternatively, tap , and then speak a
keyword.
Searching with images
To search with an image, tap
then tap .
→ Search with camera. Aim the camera at an image, and
This feature is available only for English.
Search scope
To select what applications to search, tap
items to search for.
→ Settings → Phone search, and then tick the
Google Now
Launch Google search to view Google Now cards that show the current weather, public
transit info, your next appointment, and more when you are most likely to need it.
Join Google Now when opening Google search for the first time. To change Google Now
settings, tap → Settings → Google Now.
138
Utilities
Voice Search
Use this application to search webpages by speaking.
Tap Voice Search on the Applications screen.
This application may not be available depending on the region or service provider.
Speak a keyword or phrase when Speak now appears on the screen.
My Files
Use this application to access all kinds of files stored in the device, including images, videos,
songs, and sound clips.
Tap My Files on the Applications screen.
Select a folder to open it. To go back to the parent folder, tap Up. To return to the root
directory, tap Home.
In a folder, tap
, and then use one of the following options:
• Select all: Select all files or folders to apply the same option to them at once.
• Create folder: Create a folder.
• Search: Search for files or folders.
• View by: Change the view mode.
• Sort by: Sort files or folders.
• Settings: Change the file manager settings.
139
Utilities
Downloads
Use this application to see what files are downloaded through the applications.
Tap Downloads on the Applications screen.
This application may not be available depending on the region or service provider.
Select a file to open it with an appropriate application.
To sort the files by size, tap Sort by size.
To sort the files by date, tap Sort by date.
TripAdvisor
Use this application to get travel information such as destination or hotel. You can also book
for a room and share your reviews with others.
Tap TripAdvisor on the Applications screen.
140
Travel & local
Maps
Use this application to pinpoint the location of the device, search for places, or get directions.
Tap Maps on the Applications screen.
This application may not be available depending on the region or service provider.
Searching for locations
Tap , enter an address, and then tap . Select a location to view the detailed location
information. To search for nearby locations, tap .
Once the location is found, tap
and use one of the following functions:
• Clear Map: Clear the map.
• Make available offline: Save the map of a specified area to view it offline.
• Layers: Overlay multiple layers including satellite images, traffic information, and more.
• Settings: Change the map settings.
• Help: View information about using the map.
To view current location, tap .
141
Travel & local
Getting directions for a destination
1 Tap
2 Tap
.
, and then select a method to enter starting and ending locations:
• My current location: Use current location for starting location.
• Contacts: Select from the contacts list.
• Point on map: Pinpoint by tapping on the map.
• My Places: Select from the list of offline maps, starred places, recent places, and more.
3 Select a travel method, such as driving, public transit, or walking, and then tap GET
DIRECTIONS.
4 Select one of the routes that appear, and then tap MAP VIEW to view details.
Local
Use this application to search for nearby restaurants, banks, bus stops, and more.
Tap Local on the Applications screen.
This application may not be available depending on the region or service provider.
Select a place category, and then select a place from the list of search results.
• Map: Pinpoint the place on the map.
• Directions: Search for a route to the place.
To add a place category, tap → Add a search on the category list, and then enter a
keyword to search into the text field.
142
Travel & local
Navigation
Use this application to search for a route to a destination.
Tap Navigation on the Applications screen.
• Navigation maps, your current location, and other navigational data may differ
from actual location information. You should always pay attention to road
conditions, traffic, and any other factors that may affect your driving. Follow all
safety warnings and regulations while driving.
• This application may not be available depending on the region or service provider.
Specify the destination by using various methods, such as speaking or entering the
destination address. Once a route is found, follow the on-screen instructions to navigate to
the destination.
143
Settings
About Settings
Use this application to configure the device, set application options, and add accounts.
Tap Settings on the Applications screen.
Connections
Wi-Fi
Activate the Wi-Fi feature to connect to a Wi-Fi network and access the Internet or other
network devices.
To use options, tap
.
• Advanced: Customise Wi-Fi settings.
• WPS push button: Connect to a secured Wi-Fi network with a WPS button.
• WPS PIN entry: Connect to a secured Wi-Fi network with a WPS PIN.
Setting Wi-Fi sleep policy
On the Settings screen, tap Connections → Wi-Fi →
during sleep.
→ Advanced → Keep Wi-Fi on
When the screen is turned off, the device automatically turns off Wi-Fi connections.
When this happens, the device automatically accesses data networks if it is set to use
them. This may incur data transfer fees. To avoid data-usage bills, set this option to
Always.
144
Settings
Setting Network notification
The device can detect open Wi-Fi networks and display an icon on the status bar to notify
when available.
On the Settings screen, tap Connections → Wi-Fi →
notification to activate this feature.
→ Advanced and tick Network
Wi-Fi Direct
Wi-Fi Direct connects two devices directly via a Wi-Fi network without requiring an access
point.
On the Settings screen, tap Connections → Wi-Fi → Wi-Fi Direct.
Bluetooth
Activate the Bluetooth feature to exchange information over short distances.
To use more options, tap
.
• Visibility timeout: Set duration that the device is visible.
• Received files: View received files via the Bluetooth feature.
Data usage
Keep track of your data usage amount, and customise the settings for the limitation.
• Mobile data: Set the device to use data connections on any mobile network.
• Set mobile data limit: Set a limit for the mobile data usage.
• Data usage cycle: Enter monthly reset date to monitor your data usage.
To use more options, tap .
• Data roaming: Set the device to use data connections when you are roaming.
• Restrict background data: Set the device to disable sync in the background while using
a mobile network.
• Auto sync data: Activate or deactivate auto-syncing of applications. You can select what
information to sync for each account in Settings → Accounts.
145
Settings
• Show Wi-Fi usage: Set the device to show your data usage via Wi-Fi.
• Mobile hotspots: Select Wi-Fi hotspots to prevent applications that are running in the
background from using them.
More networks
Customise settings to control networks.
Flight mode
This disables all wireless functions on your device. You can use only non-network services.
Smart network
This disables all data network functions on your device when the screen is turned off, and
disconnects applications, such as SNS applications or Email. When the screen is turned on, all
new notifications that were not received while the screen was off are retrieved.
You can save battery power by turning on this feature.
Mobile networks
• Mobile data: Use to allow packet switching data networks for network services.
• Data roaming: Use the device to connect to another network when you are roaming or
your home network is not available.
• Access Point Names: Set up access point names (APNs).
• Network mode: Select a network type.
• Network operators: Search for available networks and select a network for roaming.
Tethering and portable hotspot
• Portable Wi-Fi hotspot: Use the portable Wi-Fi hotspot to share the device’s mobile
network connection with computers or other devices through the Wi-Fi network.
• USB tethering: Use USB tethering to share the device’s mobile network connection with
a computer via USB. When connected to a computer, the device is used as a wireless
modem for the computer.
146
Settings
• Bluetooth tethering: Use Bluetooth tethering to share the device’s mobile network
connection with computers or other devices via Bluetooth.
• Help: Learn more about USB, Wi-Fi, and Bluetooth tethering.
VPN
Set up and connect to virtual private networks (VPNs).
Nearby devices
• File sharing: Activate media sharing to allow other DLNA-enabled devices to access
media files on your device.
• Shared contents: Set the device to share your content with other devices.
• Allowed devices list: View the list of devices that can access your device.
• Not-allowed devices list: View the list of devices that are blocked from accessing your
device.
• Download to: Select a memory location for saving media files.
• Upload from other devices: Set the device to accept uploads from other devices.
Screen Mirroring
Activate the screen mirroring feature and share your display with others.
Kies via Wi-Fi
Connect the device to Samsung Kies via a Wi-Fi network.
My device
Lock screen
Change settings for the locked screen.
147
Settings
Display
Change the settings for the display.
• Wallpaper:
– – Home screen: Select a background image for the Home screen.
– – Lock screen: Select a background image for the locked screen.
– – Home and lock screens: Select a background image for the Home screen and the
locked screen.
• Notification panel: Customise the items that appear on the notifications panel.
• Screen mode:
– – Adapt display: Use this mode for optimising the display according to the display
settings.
– – Dynamic: Use this mode to make the display tone more vivid.
– – Standard: Use this mode for normal surroundings.
– – Movie: Use this mode for dim surroundings, such as in a dark room.
• Brightness: Set the brightness of the display.
• Auto-rotate screen: Set the content to rotate automatically when the device is turned.
• Screen timeout: Set the length of time the device waits before turning off the display’s
backlight.
• Daydream: Set the device to launch a screensaver when your device is connected to a
desktop dock or charging.
• Font style: Change the font type for display text.
• Font size: Change the font size.
• Display battery percentage: Set the device to display the remaining battery life.
• Edit after screen capture: Set the device to edit the screenshot after capturing it.
148
Settings
Sound
Change settings for various sounds on the device.
• Volume: Adjust the volume level for music and videos, system sounds, and notifications.
• Vibration intensity: Adjust the force of the vibration notification.
• Default notification sound: Select a ringtone for events, such as incoming messages.
• Touch sounds: Set the device to sound when selecting an application or option on the
touch screen.
• Screen lock sound: Set the device to sound when locking or unlocking the touch screen.
• Vibration feedback: Set the device to vibrate when touching keys.
Blocking mode
Select which notifications will be blocked and how long to block them.
Driving mode
Activate driving mode to set the device to read contents aloud and specify applications to
use in driving mode.
Accessory
• Audio output: Select a sound output format to use when connecting your device to
HDMI devices. Some devices may not support the surround sound setting.
149
Settings
Accessibility
Accessibility services are special features for those with certain physical disabilities. Access
and alert the following settings to improve accessibility to the device.
• Auto-rotate screen: Set the interface to rotate automatically when you rotate the device.
• Screen timeout: Set the length of time the device waits before turning off the display’s
backlight.
• Speak passwords: Set the device to read aloud passwords you enter with Talkback.
• Show shortcut: Add a shortcut to Accessibility on the quick menu that appears when
you press and hold the Power button.
• Manage accessibility: Export or import the accessibility settings to share them with
other devices.
• TalkBack: Activate Talkback, which provides voice feedback.
• Font size: Change the font size.
• Magnification gestures: Set the device to zoom in and out with finger gestures.
• Negative colours: Reverse the display colours to improve visibility.
• Colour adjustment: Adjust the colour scheme for the screen when the device determines
that you are colour blind or having difficulty reading content.
• Accessibility shortcut: Set the device to activate Talkback when you press and hold the
Power button, and then tap and hold the screen with two fingers.
• Text-to-speech options:
– – Preferred TTS engine: Select a speech synthesis engine. To change the settings for
speech synthesis engines, tap .
– – Speech rate: Select a speed for the text-to-speech feature.
– – Listen to an example: Listen to the spoken text for an example.
• Enhance web accessibility: Set applications to install web scripts to make their web
content more accessible.
• Sound balance: Adjust the sound balance when using a dual headset.
• Mono audio: Enable mono sound when listening to audio with one earbud.
• Turn off all sounds: Mute all device sounds.
150
Settings
• Assistant menu: Set the device to show the assistive shortcut icon that helps you access
functions supported by external buttons or features on the notifications panel. You can
also edit the menu on the shortcut icon.
• Tap and hold delay: Set the recognition time for tapping and holding the screen.
• Interaction control: Set an area of the screen to be excluded from touch inputs.
Language and input
Change the settings for text input. Some options may not be available depending on the
selected language.
Language
Select a display language for all menus and applications.
Default
Select a default keyboard type for text input.
Google voice typing
To change the voice input settings, tap
.
• Choose input languages: Select input languages for text input.
• Block offensive words: Set the device to prevent the device from recognising offensive
words in voice inputs.
• Download offline speech recognition: Download and install language data for offline
voice input.
Samsung keyboard
To change the Samsung keyboard settings, tap
.
The available options may vary depending on the region or service provider.
• Alphabets: Change the keyboard layout.
• Numbers and symbols: Change the keyboard layout.
• Input languages: Select languages for text input.
151
Settings
• Predictive text: Activate predictive text mode to predict words based on your input and
show word suggestions. You can also customise the word prediction settings.
• Continuous input: Set the device to enter text by sweeping on the Qwerty keyboard.
• Cursor control: Enable or disable the smart keyboard navigation feature to move the
cursor by scrolling the keyboard.
• Key-tap vibration: Set the device to vibrate when a key is touched.
• Key-tap sound: Set the device to sound when a key is touched.
• Handwriting: Customise settings for handwriting mode, such as recognition time, pen
thickness, or pen colour.
• Advanced:
– – Auto capitalisation: Set the device to automatically capitalise the first character after
a final punctuation mark, such as a full stop, question mark, or exclamation mark.
– – Auto spacing: Set the device to automatically insert a space between words.
– – Auto-punctuate: Set the device to insert a full stop when you double-tap the space
bar.
– – Character preview: Set the device to display a large image of each character tapped.
• Tutorial: Learn how to enter text with the Samsung keyboard.
• Reset settings: Reset Samsung keyboard settings.
Voice recogniser
Select a voice recognition engine.
This feature appears once you use a voice recognition application.
Voice search
For Samsung voice recognition, use the following options:
• Language: Select a language for the voice recognition.
• Open via the home key: Set the device to launch S Voice by tapping the Home button
twice.
• Use location data: Set the device to use location information for voice search results.
152
Settings
• Hide offensive words: Hide offensive words from voice search results.
• Help: Access help information for S Voice.
• About: View version information.
• Voice control: Control applications by voice commands.
• Show body of message: Set the device to view the text of a new message received while
in driving mode.
• Wake up command: Set the device to start voice recognition by saying a wake up
command while using S Voice.
• Wake up in lock screen: Set the device to recognise your wake up command when the
screen is locked.
• Set wake-up command: Set a wake up command to launch S Voice or perform a
specified function.
• Check missed events: Set the device to check missed events when S Voice is launched
by pressing the headset button.
• Home address: Enter your home address to use location information with the voice
command feature.
• Log in to Facebook: Enter your Facebook account information to use Facebook with S
Voice.
• Log in to Twitter: Enter your Twitter account information to use Twitter with S Voice.
For Google voice recognition, use the following options:
• Language: Select a language for the voice recognition.
• Speech output: Set the device to provide voice feedback to alert you to the current
action.
• Block offensive words: Hide offensive words from voice search results.
• Download offline speech recognition: Download and install language data for offline
voice input.
• Bluetooth headset: Set the device to allow a voice search with a Bluetooth headset,
when it is connected to the device.
153
Settings
Text-to-speech options
• Preferred TTS engine: Select a speech synthesis engine. To change the settings for
speech synthesis engines, tap .
• Speech rate: Select a speed for the text-to-speech feature.
• Listen to an example: Listen to the spoken text for an example.
Pointer speed
Adjust the pointer speed for the mouse or trackpad connected to your device.
Motions and gestures
Activate the motion recognition feature and change the settings that control motion
recognition on your device.
• Motion:
– – Zoom: Set the device to zoom in or out while viewing images in Gallery, when you
tap and hold two points with your fingers and then tilt the device back and forth.
– – Move an icon: Set the device to move an item to another page when tapping and
holding the item and then panning the device to the left or right.
– – Browse an image: Set the device to scroll through an image by moving the device in
any direction when the image is zoomed in.
• Palm motion:
– – Capture screen: Set the device to capture an image of the screen when you sweep
your hand to the left or right across the screen.
– – Mute/Pause: Set the device to pause media playback when you touch the screen with
your palm.
• Gyroscope calibration: Calibrate the gyroscope so your device can correctly recognise
rotation.
• Place the device on a stable surface during calibration. The calibration process may
fail if the device vibrates or moves.
• Calibrate the gyroscope when you experience drifting or unintended movements
when using tilting or panning motions or motion-enabled games.
154
Settings
Voice control
Change settings to control options by voice commands.
Accounts
Add account
Add email or SNS accounts.
Cloud
Change settings for syncing data or files with your Samsung account or Dropbox cloud
storage.
Backup and reset
Change the settings for managing settings and data.
• Back up my data: Set the device to back up settings and application data to the Google
server.
• Backup account: Set up or edit your Google backup account.
• Automatic restore: Set the device to restore settings and application data when the
applications are reinstalled on the device.
• Factory data reset: Reset settings to the factory default values and delete all data.
More
Customise settings for location services, security, and other options.
155
Settings
Location services
Change settings for location information permissions.
• Access to my location: Set the device to allow applications to use your current location
information.
• Use GPS satellites: Set the device to use the GPS satellite for finding the current location.
• Use wireless networks: Set the device to allow location data collection or to determine
the location of your lost or stolen device via Wi-Fi or mobile network.
• My places: Set up profiles that will be used for specific locations when you use GPS, Wi-Fi,
or Bluetooth features to find your current location.
Security
Change settings for securing the device and the SIM or USIM card.
• Encrypt device: Set a password to encrypt data saved on the device. You must enter the
password each time you turn on the device.
Charge the battery before enabling this setting because it may take more than an
hour to encrypt your data.
• Encrypt external SD card: Set the device to encrypt files on a memory card.
If you reset your device to the factory defaults with this setting enabled, the device
will not be able to read your encrypted files. Disable this setting before resetting the
device.
• Remote controls: Set the device to allow control of your lost or stolen device remotely
via the Internet. To use this feature, you must sign in to your Samsung account.
– – Account registration: Add or view your Samsung account.
– – Use wireless networks: Set the device to allow location data collection or to
determine the location of your lost or stolen device via Wi-Fi or mobile network.
• SIM Change Alert: Activate or deactivate the Find my mobile feature which helps locate
the device when lost or stolen.
156
Settings
• Go to the find my mobile webpage: Access the Find my mobile website
(findmymobile.samsung.com). You can track and control your lost or stolen device on the
Find my mobile website.
• Set up SIM card lock:
– – Lock SIM card: Activate or deactivate the PIN lock feature to require the PIN before
using the device.
– – Change SIM PIN: Change the PIN used to access SIM or USIM data.
• Make passwords visible: Set the device to display passwords as they are entered.
• Device administrators: View device administrators installed on the device. You can allow
device administrators to apply new policies to the device.
• Unknown sources: Choose to install applications from any source. If not chosen,
download applications only from Play Store.
• Verify apps: Set this to allow Google to check the application for harmful behaviour
before installing it.
• Trusted credentials: Use certificates and credentials to ensure secure use of various
applications.
• Install from device storage: Install encrypted certificates stored on the USB storage.
• Clear credentials: Erase the credential contents from the device and reset the password.
Application manager
View and manage the applications on your device.
Battery
View the amount of battery power consumed by your device.
157
Settings
Power
Activate power-saving mode and change the settings for power-saving mode.
• Auto power off: Set the length of time the device waits before turning off.
• The device automatically turns off if the screen is not touched, or the buttons are
not pressed for a preset length of time. For extended use, select a longer time
period.
• This feature is disabled when playing videos or listening to music.
• You can save battery power by turning on this feature.
• Power saving mode:
– – CPU power saving: Set the device to limit some system resource usage.
– – Screen power saving: Set the device to decrease the brightness of the display.
– – Turn off haptic feedback: Set the device to turn off the vibration when touching keys.
– – Learn about Power saving mode: Discover how to reduce battery consumption.
• Fast power-on: Activating this causes the device to start quickly for the next 24 hours.
Storage
View memory information for your device and memory card, or format a memory card.
Formatting a memory card permanently deletes all data from it.
The actual available capacity of the internal memory is less than the specified
capacity because the operating system and default applications occupy part of the
memory. The available capacity may change when you upgrade the device.
158
Settings
Date and time
Access and alter the following settings to control how the device displays the time and date.
If the battery remains fully discharged or removed from the device, the time and date
is reset.
• Automatic date and time: Automatically update the time and date when moving across
time zones.
• Set date: Set the current date manually.
• Set time: Set the current time manually.
• Automatic time zone: Set the device to receive time zone information from the network
when you move across time zones.
• Select time zone: Set the home time zone.
• Use 24-hour format: Display time in 24-hour format.
• Select date format: Select a date format.
About device
Access device information and update device software.
Google Settings
Use this application to configure settings for some features provided by Google.
Tap Google Settings on the Applications screen.
159
Optional applications
The following applications must be downloaded before you can use them.
• Paper Artist
• Samsung Link
• Sphere
• Story Album
• Video editor
On the Home screen or the Applications screen, tap an application icon and follow on-screen
instructions to download it.
Some of the listed applications may be preloaded depending on the region or service
provider.
160
Troubleshooting
Before contacting a Samsung Service Centre, please attempt the following solutions. Some
situations may not apply to your device.
The subject’s eyes appear red
Red eyes occur when the subject’s eyes reflect light from the camera flash.
• Set the flash option to Auto + Red-eye or Fill in + Red-eye.
• If the photo has already been taken, tap
→ Edit → Portrait → Red-eye fix in Gallery.
Photos have dust spots
If dust particles are present in the air, you may capture them in photos when you use the
flash.
• Turn the flash off or avoid taking photos in a dusty place.
• Adjust the ISO sensitivity. (p. 80)
Photos are blurred
Blurring can occur if you take photos in low light conditions or hold the device incorrectly.
• Half-press the Shutter button to ensure the subject is focused.
• Set the image stabiliser option.
• Use a tripod to prevent your device from shaking.
161
Troubleshooting
Photos are blurred when shooting at night
As the device tries to let in more light, the shutter speed slows. This can make it difficult to
hold the device steady long enough to take a clear picture and may result in device shake.
• Set Night in smart mode.
• Turn the flash on.
• Adjust the ISO sensitivity. (p. 80)
• Use a tripod to prevent your device from shaking.
Subjects come out too dark because of backlighting
When the light source is behind the subject or when there is a high contrast between light
and dark areas, the subject may appear too dark.
• Avoid shooting toward the sun.
• Set the flash option to Fill in.
• Adjust the exposure value.
• Set the metering option to Spot if a subject is in the centre of the frame.
When you cannot turn on the device
• Ensure that the battery is inserted. (p. 15)
• Charge the battery.
When you cannot take photos or videos
• Your storage may be full. Delete unnecessary files, or insert a new memory card.
• Format the memory card.
• The memory card may be defective. Purchase a new card.
• Ensure that the device is turned on.
• Charge the battery.
• Ensure that the battery is inserted. (p. 15)
162
Troubleshooting
When the flash is not functional
• Press the Flash release button to pop the flash up.
• The flash option may be set to Off. (p. 86)
• In some modes, the flash is disabled.
When the flash fires unexpectedly
The flash may fire unexpectedly due to static electricity. The device is not malfunctioning.
When the colours in the photo do not match the actual scene
Select an appropriate white balance option to suit the light source. (p. 81)
When the photo is too bright
• Turn the flash off. (p. 86)
• Adjust the ISO sensitivity. (p. 80)
• Adjust the exposure value. (p. 79)
When the photo is too dark
• Turn the flash on. (p. 86)
• Adjust the ISO sensitivity. (p. 80)
• Adjust the exposure value. (p. 79)
163
Troubleshooting
When you turn on your device or while you are using the device, it
prompts you to enter one of the following codes:
• Password: When the device lock feature is enabled, you must enter the password you set
for the device.
• PIN: When using the device for the first time or when the PIN requirement is enabled, you
must enter the PIN supplied with the SIM or USIM card. You can disable this feature by
using the Lock SIM card menu.
• PUK: Your SIM or USIM card is blocked, usually as a result of entering your PIN incorrectly
several times. You must enter the PUK supplied by your service provider.
• PIN2: When you access a menu requiring the PIN2, you must enter the PIN2 supplied with
the SIM or USIM card. For details, contact your service provider.
Your device displays network or service error messages
• When you are in areas with weak signals or poor reception, you may lose reception. Move
to another area and try again. While moving, error messages may appear repeatedly.
• You cannot access some options without a subscription. Contact your service provider for
more details.
Your device does not turn on
• When the battery is completely discharged, your device will not turn on. Charge the
battery completely before turning on the device.
• The battery may not be inserted properly. Insert the battery again.
• Wipe both gold-coloured contacts and insert the battery again.
164
Troubleshooting
The touch screen responds slowly or improperly
• If you attach a protective cover or optional accessories to the touch screen, the touch
screen may not function properly.
• If you are wearing gloves, if your hands are not clean while touching the touch screen,
or if you tap the screen with sharp objects or your fingertips, the touch screen may
malfunction.
• The touch screen may malfunction in humid conditions or when exposed to water.
• Restart your device to clear any temporary software bugs.
• Ensure that your device software is upgraded to the latest version.
• If the touch screen is scratched or damaged, visit a Samsung Service Centre.
Your device freezes or has fatal errors
If your device freezes or hangs, you may need to close applications or reinsert the battery and
turn on the device to regain functionality. If your device is frozen and unresponsive, press and
hold the Power button for more than 7 seconds to reboot.
If this does not solve the problem, perform a factory data reset. On the Applications screen,
tap Settings → Accounts → Backup and reset → Factory data reset → Reset device →
Erase everything. Before performing the factory data reset, remember to make back-up
copies of all important data stored on the device.
If the problem is still not resolved, contact a Samsung Service Centre.
The battery icon is empty
Your battery is low. Recharge or replace the battery.
165
Troubleshooting
The battery does not charge properly (For Samsung-approved
chargers)
• Ensure that the charger is connected properly.
• If the battery terminals are dirty, the battery may not charge properly or the device may
turn off. Wipe both gold-coloured contacts and try charging the battery again.
• The batteries in some devices are not user-replaceable. To have the battery replaced, visit
a Samsung Service Centre.
The battery depletes faster than when first purchased
• When you expose the battery to very cold or very hot temperatures, the useful charge
may be reduced.
• Battery consumption increases when you use messaging features or some applications,
such as games or the Internet.
• The battery is consumable and the useful charge will get shorter over time.
Your device is hot to the touch
When you use applications that require more power or use applications on your device for an
extended period of time, your device may feel hot to the touch. This is normal and should not
affect your device’s lifespan or performance.
Error messages appear when launching the camera
Your device must have sufficient available memory and battery power to operate the camera
application. If you receive error messages when launching the camera, try the following:
• Charge the battery or replace it with a battery that is fully charged.
• Free some memory by transferring files to a computer or deleting files from your device.
• Restart the device. If you are still having trouble with the camera application after trying
these tips, contact a Samsung Service Centre.
166
Troubleshooting
Photo quality is poorer than the preview
• The quality of your photos may vary, depending on the surroundings and the
photography techniques you use.
• If you take photos in dark areas, at night, or indoors, image noise may occur or images
may be out of focus.
Error messages appear when opening multimedia files
If you receive error messages or files do not play, when opening multimedia files on your
device, try the following:
• Free some memory by transferring files to a computer or deleting files from your device.
• Ensure that the music file is not Digital Rights Management (DRM)-protected. If the file is
DRM-protected, ensure that you have the appropriate licence or key to play the file.
• Ensure that your device supports the file type.
• Your device supports photos and videos captured with the device. Photos and videos
captured by other devices may not work properly.
• Your device supports multimedia files that are authorised by your network service
provider or providers of additional services. Some content circulated on the Internet,
such as ringtones, videos, or wallpapers, may not work properly.
Another Bluetooth device is not located
• Ensure that the Bluetooth wireless feature is activated on your device.
• Ensure that the Bluetooth wireless feature is activated on the device you wish to connect
to.
• Ensure that your device and the other Bluetooth device are within the maximum
Bluetooth range (10 m).
If the tips above do not solve the problem, contact a Samsung Service Centre.
167
Troubleshooting
A connection is not established when you connect the device to a
computer
• Ensure that the USB cable you are using is compatible with your device.
• Ensure that you have the proper driver installed and updated on your computer.
• If you are a Windows XP user, ensure that you have Windows XP Service Pack 3 or higher
installed on your computer.
• Ensure that you have Samsung Kies 2.0 or Windows Media Player 10 or higher installed
on your computer.
Your device cannot find your current location
GPS signals may be obstructed in some locations, such as indoors. Set the device to use Wi-Fi
or a mobile network to find your current location in these situations.
Data stored on the device has been lost
Always make backup copies of all important data stored on the device. Otherwise, you
cannot restore data if it is corrupted or lost. Samsung is not responsible for the loss of data
stored on the device.
A small gap appears around the outside of the device case
• This gap is a necessary manufacturing feature and some minor rocking or vibration of
parts may occur.
• Over time, friction between parts may cause this gap to expand slightly.
168
Cleaning the device
Camera lens and display
Use a blower brush to remove dust, and then wipe the lens gently with a soft cloth. If any dust
remains, apply lens cleaning liquid to a lens cleaning paper, and wipe gently.
Image sensor
Depending on different shooting conditions, dust may appear in photos because the image
sensor is exposed to the external environment. This problem is normal, and the exposure to
dust occurs in everyday use of the camera. You can remove dust from the sensor by operating
the sensor cleaning function. (p. 99) If dust remains after cleaning the sensor, contact a
service centre. Do not insert the blower into the mounting opening of the lens.
Camera body
Wipe gently with a soft, dry cloth.
Never use benzene, thinners, or alcohol to clean the device. These solutions can
damage the device or cause it to malfunction.
169
Concepts in Photography
Shooting postures
A correct posture for stabilising the camera is necessary for taking a good photo. Even if you
hold a camera correctly, the wrong posture can cause the camera to shake. Stand up straight
and remain still to maintain a steady base for your camera. When shooting with a slow shutter
speed, hold your breath to minimise body movement.
Holding the camera
Hold the camera with your right hand and place you right index finger on the Shutter button.
Place your left hand under the lens for support.
170
Concepts in Photography
Standing photography
Compose your shot, stand up straight with your feet shoulder-length apart, and keep your
elbows pointed down.
Crouching photography
Compose your shot, crouch with one knee touching the ground, and keep a straight posture.
171
Concepts in Photography
Aperture
The aperture, a hole that controls the amount of light that enters the camera, is one of the
three factors that determine the exposure. The aperture housing contains thin and metal
plates that open and close to let light through the aperture and into the camera. The size
of the aperture is closely related to the brightness of a photo: the larger the aperture, the
brighter the photo; the smaller the aperture, the darker the photo.
Darker photo
(aperture opened slightly)
Brighter photo
(aperture opened wide)
The size of the aperture is represented by a value known as an F-number. The f-number
represents the focal length divided by the diameter of the lens. For example, if a lens with a
50 mm focal length has an f-number of F2, the diameter of the aperture is 25 mm. (50 mm/25
mm=F2) The smaller the f-number, the greater the size of the aperture.
The opening in the aperture is described as the exposure value (EV). Increasing the exposure
value (+1 EV) means the amount of light doubles. Decreasing the exposure value (-1 EV)
means the amount of light halves. You can also use the exposure compensation feature to
fine-tune the amount of light by subdividing exposure values into 1/2, 1/3 EV, and so on.
+1 EV
F1.4
-1 EV
F2
F2.8
F4
F5.6
Exposure value steps
172
F8
Concepts in Photography
Aperture value and the depth of field
You can blur or sharpen the background of a photo by controlling the aperture. It is closely
related to the depth of field (DOF), which can be expressed as small or large.
A photo with a large DOF
A photo with a small DOF
The aperture housing contains several blades. These blades move together and control the
amount of light passing through the centre of the aperture. The number of blades also affects
the shape of light when shooting night scenes. If an aperture has an even number of blades,
light divides into an equal number of sections. If the number of blades is odd, the number of
sections is double the number of blades.
For example, an aperture with 8 blades divides light into 8 sections and an aperture with 7
blades into 14 sections.
7 blades
8 blades
173
Concepts in Photography
Shutter speed
Shutter speed refers to the amount of time it takes to open and close the shutter, and it is an
important factor in the brightness of a photo, as it controls the amount of light which passes
through the aperture before it reaches the image sensor.
Usually, the shutter speed is manually adjustable. The measurement of the shutter speed is
the exposure value (EV), which is marked in intervals of 1 s, 1/2 s, 1/4 s, 1/8 s, 1/15 s, 1/1000 s,
1/2000 s, and so on.
+1 EV
Exposure
-1 EV
1s
1/2 s
1/4 s
1/8 s
1/15 s
1/30 s
Shutter speed
Therefore, the faster the shutter speed, the less light will be let in. Likewise, the slower the
shutter speed, the more light will be let in.
As the photos below illustrate, a slow shutter speed allows more time to let light in, so the
photo becomes brighter. On the other hand, a fast shutter speed allows less time to let light
in and the photo becomes darker and more easily freezes subjects in motion.
0.8 s
0.004 s
174
Concepts in Photography
ISO sensitivity
The exposure of an image is determined by the sensitivity of the camera. This sensitivity
is based on international film standards, known as ISO standards. On digital cameras, this
sensitivity rating is used to represent the sensitivity of the digital mechanism that captures
the image.
ISO sensitivity doubles as the number doubles. For example, an ISO 200 setting is capable
of taking photos at twice the speed of an ISO 100 setting. However, higher ISO settings can
result in noise. As a general rule, it is best to use a low ISO setting to prevent noise in your
photos, unless you are shooting in darkened environments or at night.
Changes in the quality and brightness according to ISO sensitivity
Because a low ISO sensitivity means the camera will be less sensitive to light, you need more
light to have an optimal exposure. When using a low ISO sensitivity, open the aperture more
or reduce the shutter speed to allow more light to enter the camera. For example, on a sunny
day when light is abundant, a low ISO sensitivity does not require a slow shutter speed.
However, in a dark place or at night, a low ISO sensitivity and a slow shutter speed will result
in a blurry photo.
A photo taken with a tripod and
high ISO sensitivity
A blurred photo with a low ISO
sensitivity
175
Concepts in Photography
How the aperture setting, shutter speed, and
ISO sensitivity control exposure
The aperture setting, shutter speed, and ISO sensitivity are closely interconnected in
photography. The aperture setting controls the opening that regulates the light that enters
the camera, while the shutter speed determines the length of time that light is allowed to
enter. ISO sensitivity determines the speed at which the film reacts to light. Together, these
three aspects are described as the triangle of exposure.
A change in shutter speed, aperture value, or ISO sensitivity can be offset by adjustments to
the others to maintain the amount of light. The results, however, change according to the
settings. For example, shutter speed is useful in expressing movement, the aperture can
control the depth of field, and the ISO sensitivity can control the graininess of a photo.
Aperture value
Setting
Result
Wide aperture = more light
Narrow aperture = less light
Wide = small depth of field
Narrow = large depth of field
176
Concepts in Photography
Shutter speed
Setting
Result
Fast speed = less light
Slow speed = more light
Fast = still
Slow = blurry
ISO sensitivity
Setting
Result
High sensitivity = more
sensitive to light
Low sensitivity = less
sensitive to light
High = more grainy
Low = less grainy
177
Concepts in Photography
Correlation between focal length, angle, and
perspective
Focal length, which is measured in millimetres, is the distance between the middle of the
lens to its focal point. It affects the angle and perspective of taken photos. A short focal
length translates into a wide angle, which allows you to take wide shots. A long focal length
translates into a narrow angle, which allows you to take telephoto shots.
Short focal length
Long focal length
178
Concepts in Photography
Look at these photos below and compare the changes.
20 mm angle
50 mm angle
200 mm angle
Normally, a lens with a wide angle is suitable for shooting landscapes and a lens with
a narrow angle is recommended for shooting sports events or portraits.
Depth of field
Portraits or still-life photos mostly acclaimed by people are the ones on which the
background is out of focus so the subject looks pronounced. Depending on the focused
areas, a photo can be blurred or sharpened. This is called ‘a low DOF’ or ‘a high DOF’.
The depth of field is the focused area around the subject. Therefore, a small DOF signifies that
the focused area is narrow and a large DOF means the focused area is wide.
179
Concepts in Photography
A photo with a small DOF, which stresses the subject and makes the rest of it blurred, can be
obtained by using a telescope lens or selecting a low aperture value. Conversely, a photo with
a large DOF which shows all the elements on the photo sharply focused can be achieved by
using a wide angle lens or selecting a high aperture value.
Small depth of field
Large depth of field
What controls out-of-focus effects?
DOF depends on aperture value
The wider the aperture is (namely the lower the aperture value), the lower the DOF becomes.
Under the condition where the other values including the shutter speed and ISO sensitivity
are equal, a low aperture value leads to a photo with a low DOF.
50 mm F5.7
50 mm F22
180
Concepts in Photography
DOF depends on focal length
The longer the focal length is, the lower the DOF gets. A telescope lens with a longer focal
length than a wide-angle lens with a short focal length is better to take a photo of a low DOF.
A photo taken with a
A photo taken with a
20 mm wide-angle lens 100 mm telescope lens
DOF depends on the distance between the subject and the camera
The shorter the distance between the subject and the camera is, the lower the DOF gets.
Therefore, taking a photo close to a subject can result in a photo of low DOF.
A photo taken with a 100 mm
telescope lens
A photo taken close to the
subject
181
Concepts in Photography
Composition
It is fun to take a photo of the beauty of world with a camera. No matter how the world is
beautiful, however, a poor composition cannot capture the beauty of it.
When it comes to composition, it is very important to prioritise subjects.
Composition in photography means arranging objects in a photo. Usually, abiding by the rule
of thirds leads to a good composition.
Rule of thirds
To use the rule of thirds, divide the image into a 3x3 pattern of equal rectangles.
To compose photos that best emphasise the subject, make sure the subject is located at one
of the corners of the centre rectangle.
182
Concepts in Photography
Using the rule of thirds will create photos with stable and compelling compositions. Below
are a few examples.
Photos with two subjects
If your subject is in one corner of the photo, it creates an unbalanced composition. You can
stabilise the photo by capturing a second subject in the opposite corner to balance the
weight of the photo.
Subject 2
Subject 2
Subject 1
Subject 1
Unstable
Stable
183
Concepts in Photography
When taking landscape photos, centring the horizon will create an unbalanced effect. Give
more weight to the photo by moving the horizon up or down.
Subject 1
Subject 1
Subject 2
Subject 2
Unstable
Stable
Flash
Light is one of the most important components in photography. It’s not easy, however, to
have an enough amount of light anytime and anywhere. Making use of a flash allows you to
optimise light settings and create a variety of effects.
Flash, also known as strobe or speed light, helps to create adequate exposure in low-light
conditions. It is also useful in light-abundant situations. For example, flash can be used in
compensating the exposure of a subject’s shadow or capturing clearly both the subject and
the background in backlit conditions.
Before correction
After correction
184
Concepts in Photography
Flash guide number
The model number of a flash refers to the flash’s power, and the maximum amount of light
created is represented by a value known as a guide number. The bigger the guide number,
the more light is emitted from the flash. The guide number is achieved by multiplying the
distance from the flash to the subject and the aperture value when the ISO sensitivity is set to
100.
Guide number = Flash to Subject Distance X Aperture value
Aperture value = Guide number / Flash to Subject Distance
Flash to Subject Distance = Guide number / Aperture value
Therefore, if you know the guide number of a flash, you can estimate an optimum flash to
subject distance when setting the flash manually. For example, if a flash has a guide number
of GN 20 and is 4 metres away from the subject, the optimal aperture value is F5.0.
Bounce photography
Bounce photography refers to the method of bouncing light off of the ceiling or walls so
that the light spreads evenly over the subject. Normally, photos taken with flash may appear
unnatural and cast shadows. Subjects in photos taken with bounce photography cast no
shadows and look smooth due to evenly spread light.
185
Some content may differ from your device depending on the region, service provider, or
software version, and is subject to change without prior notice.
www.samsung.com
English (EU). 07/2013. Rev. 1.0