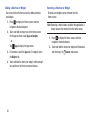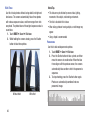
1
S M A R T
C A M E R A
User Manual
Please read this manual before operating your
camera, and keep it for future reference.
Intellectual Property
All Intellectual Property, as defined below, owned by or which is otherwise the property of Samsung or its respective suppliers
relating to the SAMSUNG Galaxy Tab, including but not limited to, accessories, parts, or software relating there to (the “Galaxy Tab
System”), is proprietary to Samsung and protected under federal laws, state laws, and international treaty provisions. Intellectual
Property includes, but is not limited to, inventions (patentable or unpatentable), patents, trade secrets, copyrights, software,
computer programs, and related documentation and other works of authorship. You may not infringe or otherwise violate the
rights secured by the Intellectual Property. Moreover, you agree that you will not (and will not attempt to) modify, prepare
derivative works of, reverse engineer, decompile, disassemble, or otherwise attempt to create source code from the software. No
title to or ownership in the Intellectual Property is transferred to you. All applicable rights of the Intellectual Property shall remain
with SAMSUNG and its suppliers.
Open Source Software
Some software components of this product incorporate source code covered under GNU General Public License (GPL), GNU Lesser
General Public License (LGPL), OpenSSL License, BSD License and other open source licenses. To obtain the source code covered
under the open source licenses, please visit:
http://opensource.samsung.com.
Samsung Electronics America (SEA), Inc
Address:
85 Challenger Road
Ridgefield Park,
New Jersey
07660
EK-GN120NX_UM_English_MI4_TN_103113_F1
Toll Free
Telephone:
1-800-SAMSUNG
Internet
Address:
http://www.samsung.com
©2013 Samsung Telecommunications America, LLC. Samsung is a registered trademark of Samsung Electronics Co., Ltd.
Do you have questions about your Samsung Mobile Device?
For 24 hour information and assistance, we offer a new FAQ/ARS System (Automated Response System) at:
www.samsung.com/us/support
Nuance®, VSuite™, T9® Text Input, and the Nuance logo are trademarks or registered trademarks of Nuance Communications,
Inc., or its affiliates in the United States and/or other countries.
ACCESS® and NetFront™ are trademarks or registered trademarks of ACCESS Co., Ltd. in Japan and other countries.
The Bluetooth® word mark, figure mark (stylized “B Design”), and combination mark (Bluetooth word mark and “B Design”) are
registered trademarks and are wholly owned by the Bluetooth SIG.
microSD™ and the microSD logo are Trademarks of the SD Card Association.
Openwave® is a registered Trademark of Openwave, Inc.
Google, the Google logo, Android, the Android logo, Google Play, Gmail, Google Mail, Google Maps, Google Music, Google Talk,
Picasa, YouTube and other marks are trademarks of Google Inc.
Wi-Fi is a registered trademark of the Wireless Fidelity Alliance, Inc.
Swype and the Swype logos are trademarks of Swype, Inc. © 2010 Swype, Inc. All rights reserved.
, DivX®, DivX Certified® and associated logos are trademarks of Rovi Corporation or its subsidiaries and are used under
license.
DivX Certified® to play DivX® video up to HD 720p, including premium content.
ABOUT DIVX VIDEO: DivX® is a digital video format created by DivX, LLC, a subsidiary of Rovi Corporation. This is an official DivX
Certified® device that plays DivX video. Visit www.divx.com for more information and software tools to convert your files into DivX
videos.
Table of Contents
Section 1: Getting Started .............................4
Understanding This User Manual . . . . . . . . . . . . .4
Setting Up Your Camera . . . . . . . . . . . . . . . . . . . .5
Charging a Battery . . . . . . . . . . . . . . . . . . . . . . . .8
Turning the Camera On or Off . . . . . . . . . . . . . . .9
Locking and Unlocking the Touch Screen . . . . . .10
Configuring Your Camera . . . . . . . . . . . . . . . . . .10
Shooting Modes . . . . . . . . . . . . . . . . . . . . . . . . 34
3D Mode . . . . . . . . . . . . . . . . . . . . . . . . . . . . . 52
Shooting Options and Settings . . . . . . . . . . . . . 53
Section 4: Entering Text ..............................72
Text Input Methods . . . . . . . . . . . . . . . . . . . . . 72
Entering Text Using the Samsung Keyboard . . . 72
Using the Google Voice Typing Feature . . . . . . 75
Section 2: Understanding Your Camera .....12
Section 5: Accounts and Contacts ..............76
Features of Your Camera . . . . . . . . . . . . . . . . . .12
Your Camera at a Glance . . . . . . . . . . . . . . . . . .13
Back View of Your Camera . . . . . . . . . . . . . . . . .14
Bottom View of Your Camera . . . . . . . . . . . . . . .15
Cleaning the Device . . . . . . . . . . . . . . . . . . . . . .15
Home Screen . . . . . . . . . . . . . . . . . . . . . . . . . . .16
Customizing Your Home Screen . . . . . . . . . . . . .19
Notification Panel . . . . . . . . . . . . . . . . . . . . . . . .22
Using the Touch Screen . . . . . . . . . . . . . . . . . . .23
Accounts . . . . . . . . . . . . . . . . . . . . . . . . . . . . . 76
Contacts . . . . . . . . . . . . . . . . . . . . . . . . . . . . . 77
Section 6: Multimedia .................................86
Gallery . . . . . . . . . . . . . . . . . . . . . . . . . . . . . . .
Video Editor . . . . . . . . . . . . . . . . . . . . . . . . . . .
Video Player . . . . . . . . . . . . . . . . . . . . . . . . . . .
Music Player . . . . . . . . . . . . . . . . . . . . . . . . . .
Google Play Music . . . . . . . . . . . . . . . . . . . . . .
Play Movies & TV . . . . . . . . . . . . . . . . . . . . . . .
86
91
91
92
95
95
Section 3: Camera Operation ......................25
Section 7: Messaging ..................................96
Taking Photos . . . . . . . . . . . . . . . . . . . . . . . . . .25
Tips for Taking Clearer Photos . . . . . . . . . . . . . .31
Types of Messages . . . . . . . . . . . . . . . . . . . . . 96
Creating and Sending Messages . . . . . . . . . . . 97
1
Managing Messages . . . . . . . . . . . . . . . . . . . . . 99
Messaging Settings . . . . . . . . . . . . . . . . . . . . . 101
Gmail . . . . . . . . . . . . . . . . . . . . . . . . . . . . . . . 102
Email . . . . . . . . . . . . . . . . . . . . . . . . . . . . . . . 103
Hangouts . . . . . . . . . . . . . . . . . . . . . . . . . . . . 106
Google+ . . . . . . . . . . . . . . . . . . . . . . . . . . . . . 106
ChatON . . . . . . . . . . . . . . . . . . . . . . . . . . . . . . 106
Section 8: Applications ............................. 107
Calculator . . . . . . . . . . . . . . . . . . . . . . . . . . . . 107
Calendar . . . . . . . . . . . . . . . . . . . . . . . . . . . . . 107
Camera . . . . . . . . . . . . . . . . . . . . . . . . . . . . . . 109
ChatON . . . . . . . . . . . . . . . . . . . . . . . . . . . . . . 109
Chrome . . . . . . . . . . . . . . . . . . . . . . . . . . . . . . 109
Clock . . . . . . . . . . . . . . . . . . . . . . . . . . . . . . . 109
Contacts . . . . . . . . . . . . . . . . . . . . . . . . . . . . . 112
Downloads . . . . . . . . . . . . . . . . . . . . . . . . . . . 112
Dropbox . . . . . . . . . . . . . . . . . . . . . . . . . . . . . 113
Email . . . . . . . . . . . . . . . . . . . . . . . . . . . . . . . 113
Gallery . . . . . . . . . . . . . . . . . . . . . . . . . . . . . . 114
Gmail . . . . . . . . . . . . . . . . . . . . . . . . . . . . . . . 114
Google . . . . . . . . . . . . . . . . . . . . . . . . . . . . . . 114
Google Settings . . . . . . . . . . . . . . . . . . . . . . . . 114
2
Google+ . . . . . . . . . . . . . . . . . . . . . . . . . . . . . 114
Group Play . . . . . . . . . . . . . . . . . . . . . . . . . . . 115
Hangouts . . . . . . . . . . . . . . . . . . . . . . . . . . . . 115
Help . . . . . . . . . . . . . . . . . . . . . . . . . . . . . . . . 115
Internet . . . . . . . . . . . . . . . . . . . . . . . . . . . . . . 116
Local . . . . . . . . . . . . . . . . . . . . . . . . . . . . . . . . 116
Maps . . . . . . . . . . . . . . . . . . . . . . . . . . . . . . . 116
Music Player . . . . . . . . . . . . . . . . . . . . . . . . . . 116
My Files . . . . . . . . . . . . . . . . . . . . . . . . . . . . . 117
Navigation . . . . . . . . . . . . . . . . . . . . . . . . . . . . 118
Paper Artist . . . . . . . . . . . . . . . . . . . . . . . . . . . 118
Photo Suggest . . . . . . . . . . . . . . . . . . . . . . . . . 118
Play Books . . . . . . . . . . . . . . . . . . . . . . . . . . . 118
Play Magazines . . . . . . . . . . . . . . . . . . . . . . . . 118
Play Movies & TV . . . . . . . . . . . . . . . . . . . . . . 119
Play Music . . . . . . . . . . . . . . . . . . . . . . . . . . . 119
Play Store . . . . . . . . . . . . . . . . . . . . . . . . . . . . 119
S Memo . . . . . . . . . . . . . . . . . . . . . . . . . . . . . 120
S Translator . . . . . . . . . . . . . . . . . . . . . . . . . . 121
S Voice . . . . . . . . . . . . . . . . . . . . . . . . . . . . . . 121
Samsung Apps . . . . . . . . . . . . . . . . . . . . . . . . 122
Samsung Link . . . . . . . . . . . . . . . . . . . . . . . . . 122
Settings . . . . . . . . . . . . . . . . . . . . . . . . . . . . . .122
Sphere . . . . . . . . . . . . . . . . . . . . . . . . . . . . . . .122
Story Album . . . . . . . . . . . . . . . . . . . . . . . . . . .123
TripAdvisor . . . . . . . . . . . . . . . . . . . . . . . . . . .123
Video Player . . . . . . . . . . . . . . . . . . . . . . . . . . .123
Video Editor . . . . . . . . . . . . . . . . . . . . . . . . . . .123
Voice Search . . . . . . . . . . . . . . . . . . . . . . . . . .123
YouTube . . . . . . . . . . . . . . . . . . . . . . . . . . . . .123
Section 9: Connections .............................124
Internet . . . . . . . . . . . . . . . . . . . . . . . . . . . . . .124
Wi-Fi . . . . . . . . . . . . . . . . . . . . . . . . . . . . . . . .131
Bluetooth . . . . . . . . . . . . . . . . . . . . . . . . . . . . .135
PC Connections . . . . . . . . . . . . . . . . . . . . . . . .139
Section 10: Changing Your Settings .........141
Accessing Settings . . . . . . . . . . . . . . . . . . . . .141
Connections Settings . . . . . . . . . . . . . . . . . . . .141
My Device Settings . . . . . . . . . . . . . . . . . . . . .146
Accounts Settings . . . . . . . . . . . . . . . . . . . . . .157
More Settings . . . . . . . . . . . . . . . . . . . . . . . . .159
Section 11: Troubleshooting .....................165
Section 12: Health and Safety Information 172
Specific Absorption Rate (SAR) Certification
Information . . . . . . . . . . . . . . . . . . . . . . . . . 177
FCC Part 15 Information to User . . . . . . . . . . . 179
Smart Practices While Driving . . . . . . . . . . . . 179
Battery Use and Safety . . . . . . . . . . . . . . . . . . 180
Samsung Mobile Products and Recycling . . . . 181
UL Certified Travel Charger . . . . . . . . . . . . . . 182
Display / Touch-Screen . . . . . . . . . . . . . . . . . 182
GPS . . . . . . . . . . . . . . . . . . . . . . . . . . . . . . . . 183
Care and Maintenance . . . . . . . . . . . . . . . . . . 184
Responsible Listening . . . . . . . . . . . . . . . . . . 185
Operating Environment . . . . . . . . . . . . . . . . . 187
Restricting Children's Access to Your Mobile Device
189
FCC Notice and Cautions . . . . . . . . . . . . . . . . 189
Other Important Safety Information . . . . . . . . 189
Section 13: Warranty Information ............191
Standard Limited Warranty . . . . . . . . . . . . . . 191
End User License Agreement for Software . . . 196
Index .........................................................204
Exposure to Radio Frequency (RF) Signals . . . .172
3
Section 1: Getting Started
This section helps you to quickly start using your device.
Understanding This User Manual
The sections of this manual generally follow the features of
your device. A robust index for features begins on page 204.
Also included is important safety information, beginning on
page 172, that you should know before using your device.
This manual gives navigation instructions according to the
default display settings. If you select other settings,
navigation steps may be different.
Unless otherwise specified, all instructions in this manual
assume that you are starting from a Home screen. To get to a
Home screen, you may need to unlock the device. For more
information, refer to “Locking and Unlocking the
Touch Screen” on page 10.
Note: Instructions in this manual are based on default settings
and may vary from your device depending on the
software version on your device and any changes to the
device’s settings.
4
Note: All screen images in this manual are simulated. Actual
displays may vary depending on the software version of
your device and any changes to the device’s settings.
Special Text
In this manual, some text is set apart from the rest. This
special text is intended to point out important information,
share quick methods for activating features, define terms,
and more. The definitions for these methods are as follows:
• Notes: Presents alternative options for the current feature, menu,
or sub-menu.
• Tips: Provides quick or innovative methods or useful shortcuts.
• Important: Points out important information about the current
feature that could affect performance.
• Warning: Brings important information to your attention that
can help to prevent loss of data or functionality or damage to
your device.
Setting Up Your Camera
Text Conventions
This manual provides condensed information about how to
use your device. To make this possible, the following text
conventions are used to represent often-used steps:
➔
Arrows are used to represent the sequence of selecting
successive options in longer, or repetitive, procedures.
For example:
From a Home screen, touch
➔ Connections tab ➔ Wi-Fi.
Apps ➔
Prior to use, it is necessary to install both the battery,
SIM card, and optional memory card (not included) into their
corresponding internal compartments.
Opening the Battery Compartment
1. From the bottom of the camera, open the battery
compartment by sliding the cover lock to the left.
Settings
This button turns a feature or setting ON and OFF.
•
•
indicates that the feature is ON.
indicates that the feature is OFF.
For example:
Touch
to turn Bluetooth ON.
2. Swing the compartment cover open.
Getting Started
5
Installing the Battery
1. Insert the battery into the opening on the back of the
camera, making sure the connectors align.
Installing the SIM Card
Insert the SIM card provided by your mobile service provider.
Push the SIM card into the LEFT SLOT until it clicks.
2. Gently press in to secure the battery.
Important! Make sure the SIM card’s gold contact pins face
upward toward the camera screen and the card is
securely inserted.
6
Installing the Memory Card
You can use an optional microSD or microSDHC memory card
(not included) to expand available memory space.
Closing the Battery Compartment
1. Close the battery compartment door.
2. Slide the cover lock to the Right as shown below.
Push the microSD card into the RIGHT SLOT until
it clicks.
Important! Make sure the microSD’s gold contact pins face
downward toward the camera lens and the card is
securely inserted.
Note: Make sure the battery is properly installed and the cover
is securely closed before switching on the camera.
Getting Started
7
Charging a Battery
Your device is powered by a rechargeable Li-ion battery. The
Travel Charger that is used to charge the battery is included
with your device. Use only Samsung-approved batteries and
chargers.
Note: You must fully charge the battery before using your
camera for the first time. A discharged battery
recharges fully in approximately 4 hours.
Note: Long backlight settings, searching for service, vibrate
mode, web browser use, and other variables may
reduce the battery’s charge.
Although you can use the camera while the battery is
charging, doing so will require additional charging time.
8
Using the Travel Charger
Important! Verify that the camera battery is installed prior to
connection. If the battery is not properly installed
and the wall charger is connected, the camera
may power off and on continuously, preventing
proper operation.
1. Remove the plastic cover, then plug the flat end of
the Travel Charger into the Power/Accessory Interface
Connector and the other end into a standard
AC wall outlet.
2. When charging is finished, remove the flat end from
the interface connector jack on the camera.
Caution! Failure to unplug the wall charger before you remove
the battery can cause damage to the camera.
Turning the Camera On or Off
1. Press and hold
until the camera turns on.
Low Battery Indicator
When the battery is weak, the battery icon ( ) blinks and
the device sounds a warning tone at regular intervals. In this
condition, your camera conserves its remaining battery
power, not by turning off the backlight, but by entering the
dimming mode. For a quick check of your battery level,
glance at the battery charge indicator located in the upperright corner of your device’s display. Solid color ( ) indicates
a full charge.
When the battery level becomes too low, the camera
automatically turns off.
2. Swipe your finger across the screen to unlock
the camera.
3. To turn off the camera, press and hold
Device options screen displays.
until the
4. Touch Power off to turn off the camera.
Getting Started
9
Locking and Unlocking the
Touch Screen
1. Press
to lock the touch screen.
2. Press
again to display the Lock screen, then swipe
your finger across the screen to unlock.
For more information about the Lock screen, see “Lock
Screen Settings” on page 146.
Warning! Please note that a touch screen responds best to a
light touch from the pad of your finger. Using
excessive force or a metallic object when pressing
on the touch screen may damage the tempered
glass surface and void the warranty. For more
information, refer to “Standard Limited Warranty”
on page 191.
Configuring Your Camera
When you first turn on your camera, you will need to set up a
few things.
Tip: If you are visually impaired or hard of hearing, touch
Accessibility to configure accessibility settings.
1. Select a language and touch Next.
2. Date and time: Set the date and time settings.
3. User type: Touch Standard or Professional to set the
camera for either basic or expert use.
The main Camera screen is displayed.
Touch
to continue.
to enable Wi-Fi, then touch an
4. Wi-Fi: Touch
available network to connect.
5. End User License Agreement for Software: Read the
terms and conditions, and then touch I understand and
agree to the terms and conditions above. Touch Yes or
No thanks to allow error logging.
6. Samsung account:Touch Sign in, Create new account, or
touch Skip.
10
7. Got Google?: Touch Yes to log into your existing
account, or No to continue.
8. Make It Google: Touch Get an account or Not now.
9. Entertainment: Touch Set up a credit card and enter
credit card information for your Google Play account, or
touch Not now.
• This screen displays if you have signed in to your
Google Account.
10. Backup and Restore: Read the information and touch
each option to enable it.
• This screen only displays if you have signed in to your
Google Account.
11. Google & Location: Select the Google location services
you prefer.
12. This device belongs to...: Enter your First and
Last name.
13. Dropbox: Touch Create account, Sign in, or Skip.
14. Learn about key features: Touch
each feature.
to enable
15. Enter a name for your device.
Congratulations! Your device is set up and ready to use.
Getting Started
11
Section 2: Understanding Your Camera
This section outlines some key features of your camera and
describes the screen and the icons that appear when the
camera is in use. It also shows how to navigate the camera
and provides information on using a memory card.
Features of Your Camera
The Samsung Galaxy Camera is the optimum device for the
new era in communication where consumers want to share
their moments visually instead verbally. Instead of sending
text messages, emails, instant messages or text social
networking posts, consumers want to share images of their
daily moments in unique ways.
The following list outlines a few of the features included in
your camera.
• 20 Megapixel BIS CMOS Sensor with Optical Image Stabilization
• 18x Zoom with 55mm wide angle lens
• 4G network with 1.6 gigahertz quad-core processor
• Android v 4.2.2, Jelly Bean Platform
• Brilliant 4.8” HD Super Clear Touch screen display
• Photo Wizard and Movie Wizard applications
• Ready access to the Internet
12
• Built-in Bluetooth and advanced Wi-Fi® technology
• HSPA+ 42 Mbps high speed download capability
• Up to 64 GB expandable memory slot
• 16 GB memory and 2 GB RAM
• Corporate and Personal Email
• Sync and update social network applications
• Over 450,000 Apps available to download via
Google Play Store™
• Full Integration of Google Mobile™ Services (Gmail, YouTube,
Google Maps, Google Voice Search)
Your Camera at a Glance
3. Video Record Button: Starts/stops video recording.
1
8
2
9
3
10
4. Shutter Button: Take a picture.
5. AF Assist light: Assists in taking pictures in low-light
conditions.
6. Lens Mount Index: Marking used for matching the EF
lens mount to the lens mount.
7. Lens Mount: Holds removable lens.
8. Flash: Adds light when there is not adequate lighting
for taking pictures.
4
11
5
12
9. Microphone: Performs noise cancellation and
stereo recording.
10. Flash Release: Raise the flash.
11. Lens Contacts: Connectors for additional lenses.
12. Speaker: Plays notifications and music.
6
13
7
14
1. Microphone: Performs noise cancellation and
stereo recording.
13. Power/Accessory Interface Connector: allows you to
connect a Travel Charger or other optional accessories
such as a USB/data cable.
14. Image Sensor: Creates digital images.
2. Power/Lock Key: Turns your camera on and off. It also
locks or unlocks the touch screen.
Understanding Your Camera
13
Back View of Your Camera
6
1
7
8
2
9
3
4. Proximity/Light Sensor: Uses the ambient light level
to adjust display brightness and other features.
5. Touch Screen: Displays the Home screen, apps,
photos and videos, settings, etc.
6. Hot-Shoe: Connects optional accessories, such as an
external flash.
7. Command Dial: Changes shooting mode when using
the camera, and adjusts the volume when playing
music or videos.
8. GPS Antenna: Provides location information.
9. Eyelet for Strap: Attaches a camera strap.
4
10
10. Main Antenna: Connects to network services.
11. Notification light: Provides camera feedback.
11
5
1. Dioptre Adjustment Dial: Adjusts the viewfinder focus
to suit an individual’s eyes.
2. Eyelet for Strap: Attaches a camera strap.
3. Viewfinder: Displays the composition of the picture
or video.
14
Important! Do not cover the antenna area with your hands or
other objects, except when you are taking photos
or videos. This may cause connectivity problems or
drain the battery.
Bottom View of Your Camera
Cleaning the Device
Camera Lens and Display
1
4
2
Use a blower brush to remove dust, and then wipe the lens
gently with a soft cloth. If any dust remains, apply lens
cleaning liquid to a lens cleaning paper, and wipe gently.
5
3
6
1. 3.5 Headset Jack: Connects earphones (not included)
or other accessories.
2. Power/Accessory Interface Connector: Connects a
Travel Charger or other optional accessories such as a
USB/data cable.
3. HDMI Port: Connects your camera to HDMI devices.
4. Battery Cover Release: Locks the battery compartment.
5. Battery Compartment: Houses the battery, SIM card,
and Memory card.
6. Tripod mount: Attaches your camera to a tripod
(not included).
Understanding Your Camera
15
Image Sensor
Home Screen
Depending on different shooting conditions, dust may appear
in photos because the image sensor is exposed to the
external environment. This problem is normal, and the
exposure to dust occurs in everyday use of the camera. You
can remove dust from the sensor by operating the sensor
cleaning function.
The Home screen is the starting point for using your camera.
It provides a wealth of information about the camera’s status
and options, as well as providing access to applications.
If dust remains after cleaning the sensor, contact a service
centre. Do not insert the blower into the mounting opening of
the lens.
4
1
2
3
Camera Body
5
Wipe gently with a soft, dry cloth.
Warning! Never use benzene, thinners, or alcohol to clean the
device. These solutions can damage the device or
cause it to malfunction.
6
7
8
9
7
1. Status Bar: Displays system information, such as
signal strength, battery level, time, etc.
2. Widgets: Small apps which run on the Home screen.
The Weather widget appears on the main Home screen
by default.
16
3. Notifications: Displays notifications such as unread
emails, updates available, etc.
4. Back Key: Step backwards when navigating a menu or
web page.
5. Home Key: Return to the Home screen from any
screen or menu. Press and hold to display the
Task Manager.
Extended Home Screen
The Home screen consists of the main Home panel plus
additional panels that extend beyond the display width to
provide more space for adding shortcuts and widgets.
Slide your finger horizontally across the screen to scroll to
the left or right side panels.
6. Menu Key: Access sub-menus with additional options
for the current app or feature.
7. Application Icons: Shortcuts to your favorite
applications placed on the Home screen. The Camera
and Apps icons appear on all Home pages and are
referred to as Primary Shortcuts and cannot be
removed from the Home screen.
8. Google Quick Search Bar: Shortcut to Google Search
that allows you to search for items on the internet.
9. Home Screen Indicator: Shows which Home screen is
currently displayed.
Understanding Your Camera
17
Indicator Icons
This list identifies the symbols you’ll see on your camera’s
Status bar.
Indicates that the Airplane Mode is active. You
cannot send or receive any messages or access
online information.
Displays when your camera is in Blocking mode.
Displays when there is a system error or alert.
Displays your battery charge level. Icon shown is
fully charged.
Displays when your battery is charging. Also
displays battery charge level.
Device Power Very Low – Shows your current
battery only has between 5 and 15 percent power
remaining.
Device Power Critical – Shows your current battery
only has less than 5 percent power remaining and
will immediately shutdown.
Displays when your camera is downloading or has
downloaded a file. It will blink green when it is
installing.
18
Displays when the an outbound file transfer is in
progress.
Displays when a Play Store download has
completed.
Displays when updates are available for download.
Displays when the camera is connected to a
computer via a supported USB cable connection.
Displays when Email is received.
Displays when the time and date for a Calendar Event
has arrived. For more information, refer to
“Calendar” on page 107.
Displays when you set an alarm to ring at a specified
time. For more information, refer to “Alarm” on page
109.
Displays when the Sound profile is set to Mute.
Displays when the Sound profile is set to Vibrate.
Displays when Bluetooth is activated.
Displays when a Bluetooth device has been paired
with the camera.
Displays when Wi-Fi is connected, active, and
communicating with a Wireless Access Point
(WAP).
Displays when Wi-Fi is active but there is a
communication issue with the target Wireless
Access Point (WAP).
Displays when Wi-Fi Direct is active and your
camera is connected to another device.
Displays when your camera is connected to a Digital
Living Network Alliance (DLNA) certified device
using the AllShare Play application.
Displays when GPS is active and acquiring a signal.
Displays when data synchronization and
application sync is active and synchronization is in
progress for Gmail, Calendar, and Contacts.
Customizing Your Home Screen
You can customize your Home screen by doing the following:
• Creating Shortcuts
• Adding and Removing Widgets on the Home Screen
• Creating Folders
• Changing the Wallpaper
• Adding and Deleting Home Screens
Shortcuts and Widgets
You can add, reposition, or remove shortcuts and widgets
from the Home screen.
• Shortcuts: Icons on the Home screen which launch applications.
• Widgets: Self-contained applications. They appear as on-screen
applications.
Displays when a Software update is available for
download.
Displays when your device is connected being used
to control streaming media and is connected to a
Digital Living Network Alliance (DLNA) certified
device using the AllShare Play application.
Displays when the keypad is active.
Understanding Your Camera
19
Adding a Shortcut or Widget
You can customize the Home screen by adding shortcuts
and widgets.
1. Press
to display the Home screen, and then
navigate to the desired panel.
2. Touch and hold an empty area of the Home screen.
On the pop-up menu, touch Apps and widgets.
– or –
Tap
Apps to display the Apps menu.
3. For shortcuts, touch the Apps tab. For widgets, touch
the Widgets tab.
4. Touch and hold the shortcut or widget, and then drag it
to a position on the Home screen and release.
20
Removing a Shortcut or Widget
Shortcuts and widgets can be removed from the
Home screen.
Note: Removing a shortcut does not delete the application, it
simply removes the shortcut from the Home screen.
1. Press
to display the Home screen, and then
navigate to the desired panel.
2. Touch and hold the shortcut or widget until it detaches,
and then drag it to Remove and release.
Folders
You can add folders to your Home screen to help organize
your application shortcuts.
Adding a Folder
1. Press
to display the Home screen, and then
navigate to the desired panel.
2. Touch and hold an empty area of the Home screen.
On the pop-up menu, touch Folder.
3. Enter a name for the folder, and then touch OK. A folder
is created on the Home screen.
Using Folders
To add shortcuts to the folder, touch and hold the
shortcut, and then drag it to the folder and release.
Touch the folder to open it and access the shortcuts
inside.
To delete a folder, touch and hold the folder until it
detaches, and then drag it to Remove and release.
Wallpaper
You can change the Wallpaper (background image) of your
Home screen and Lock screen.
1. From any Home screen, press
and touch
Set wallpaper.
2. Touch Home screen, Lock screen, or Home and
lock screens.
3. Touch to select a source location:
• Gallery: Select a picture from Gallery. Follow the prompts to
crop the picture and save it as wallpaper.
• Live wallpapers: Select a moving scene for the background
(Home screen only).
• Travel wallpaper: Choose options to display images from the
city of your choice (Lock screen only).
• Wallpapers: Choose an image from the Wallpapers gallery.
4. Select a wallpaper and touch Set wallpaper, Done,
or Cancel.
Note: All shortcuts contained in the folder will also be deleted.
Understanding Your Camera
21
Notification Panel
Access settings
The Notification Panel displays information about
connections, alerts, new messages, and more. It also has
Quick settings—buttons which allow you to quickly access
and change common system settings.
Access additional options
Access the Notifications Panel
1. Touch and slide downward from the top of the screen
to display the Notification Panel. Slide the Notification
Panel upward to close it.
Screen brightness
2. Touch an ongoing event or a notification to view it or to
launch its related app or feature.
Quick settings
Ongoing events
Notifications
Drag bar down to
show panel
22
Using the Touch Screen
Your camera’s touch screen lets you control actions through
a variety of touch gestures. Use only your fingers when
touching the screen.
Dragging
Touch and hold an item until it “releases,” then drag it to a
new position and release. Use dragging when:
• Moving an thumbnail or preview to a new location.
• Rearranging app shortcuts
Caution! To avoid damaging the touch screen, do not tap it
with anything sharp or apply excessive pressure to it
with your fingertips.
Double-Tapping
Touch
Pinching and Stretching
Lightly touch items to select or launch them. For example:
• Touch the on-screen keyboard to enter characters or text.
• Touch a menu item to select it.
• Touch an application’s icon to launch the application.
Touch and Hold
Double-tap lightly on the screen. Use double-tapping when:
• Zooming in or out on a web page, map, or image.
Bring two fingers together on the screen (pinching), or
spread two fingers apart on the screen (stretching).
Use pinching and stretching when:
• Zooming in (stretch) and zooming out (pinch) on a web page,
map, or image.
Activate on-screen items by a touch and hold gesture.
For example:
• Touch and hold a widget on the home screen to move it.
• Touch and hold on a field to display a pop-up menu of options.
Understanding Your Camera
23
Rotating the Screen
Many applications allow display in either portrait or
landscape orientation. Rotating the device causes the display
to automatically adjust to fit the new screen orientation.
To prevent the display from rotating automatically, open the
Notification panel and deselect Screen rotation.
Note: Some applications do not allow screen rotation, and
some applications display a different screen depending
on the orientation.
Motions and Gestures
Simple motions and gestures allow easy control of the
device. For more information, refer to “Motions and
Gestures” on page 155.
24
Section 3: Camera Operation
This section describes how to use your Camera to take
pictures or shoot videos.
Launching the Camera
Touch Camera
on the Home screen. Alternatively,
press the Shutter button or the Video recording button.
Notes/Tips
• The camera automatically shuts off when unused.
• Make sure that the lens is clean. Otherwise, the device may not
work properly in some modes that require high resolutions.
Taking Photos
Quick settings
Camera settings
Return to the
Home screen
Access shortcuts
Current camera
settings
Current
shooting mode
Take photos
Change
shooting mode
Focus frame
Record video
Important! Do not take photos of people without
their permission.
Do not take photos in places where cameras
are not allowed.
Do not take photos in places where you may
interfere with another person’s privacy.
Open Gallery
Effects
Taking pictures with your device’s built-in camera is as
simple as choosing a subject, pointing the camera, then
pressing the camera key.
1. From any Home screen, touch Camera
to activate
the camera mode.
2. Using the preview screen, adjust the image by aiming
the camera at the subject.
Camera Operation
25
3. Before you take a picture, use the Zoom button to zoom
in or out. You can magnify the picture up to x21
(2100 percent).
4. If desired, before taking the photo, you can touch
on-screen icons to access various camera options
and settings.
5. You can also touch the screen to move the focus to the
area you touch.
Camera Settings Icons
The icons displayed on the preview screen provide
information about current shooting options and settings. The
icons listed in the table below are the most common.
Shutter speed
Aperture value
Exposure value
6. Press the Shutter button ( ) until the shutter sounds.
(You can also press the on-screen Camera icon). The
picture is automatically stored within your designated
storage location. For more information, refer to
“Camera Settings” on page 70.
ISO sensitivity
7. Touch Gallery to view your picture.
White balance
Timer
Flash
Photo size
AF mode
Metering
Continuous shooting
Bracket mode
Raw format file
26
Voice recognition
Geotagging
Share shot
Buddy photo share
ChatON photo share
Remote viewfinder
Selecting the Operation Type
Select the operation type for either basic or expert use.
Touch
(or ➔ ) ➔
➔ User type.
• Standard: Use for basic camera operations.
• Professional: Use for more advanced camera operations. You
can conveniently change shooting options by using the smart
panel, and quickly access expert modes.
Taking Photos
Half-press the Shutter button to focus on the subject.
When the subject is in focus, the focus frame turns
green. Press the Shutter button to take the photo.
– or –
Touch the image on the preview screen where the
camera should focus. When the subject is in focus, the
focus frame turns green. Touch
to take the photo.
Notes/Tips
• Except in interval mode, the camera will not take a photo if it
cannot focus on a subject.
Notes/Tips
• This manual is based on the standard operation type.
• The default settings for the dial control and power-on mode differ
by operation type, as follows:
– Standard: Option 1 (dial control), Auto mode (power-on mode)
– Professional: Option 2 (dial control), Last mode
(power-on mode)
Camera Operation
27
Taking Videos
1. Press the Video recording button to take a video. To
stop recording, press the Video recording button again.
– or –
Touch
to take a video and touch
recording.
to stop
2. While recording, touch where you want to focus to
change the focus. To set the camera to focus
automatically, touch
.
Notes/Tips
• You can take videos up to 20 minutes at one time.
• When using a memory card with a slow writing speed, the
device may not be able to save the video properly. It may stop
recording, or recorded video frames may become corrupted.
• Memory cards with slow writing speeds do not support highresolution video. To record high-resolution video, use memory
cards with faster writing speeds (micro SDHC Class10 or
higher).
• The video frame size may appear smaller depending on video
resolution and frame rate.
• If you set the image stabilizer option, the image stabilizer sound
may be recorded.
28
• If you adjust the lens while taking a video, the zoom sound or
other lens sounds may be recorded.
• Do not remove or replace the lens while taking a video. Doing
this will interrupt the recording.
• When using an optional video lens, the auto focus noise is not
recorded.
• If you change the shooting angle of the camera suddenly while
taking a video, the camera may not be able to record images
accurately.
• The camera supports the continuous AF, touch AF, manual
focus, and face detection AF functions when taking a video.
• In expert mode, you can change the major shooting options
before recording a video:
– Program mode: Exposure value
– Aperture priority mode: Aperture value and exposure value
– Shutter priority mode: Shutter speed and exposure value
– Manual mode: Shutter speed, aperture value, and ISO
sensitivity (the maximum ISO sensitivity is 3200)
Taking Photos or Videos with Voice Commands
• Tint: This effect applies a color tint effect.
Use the voice recognition to take photos or videos with voice
commands.
1. Touch ➔
.
• Cartoon: This effect applies a cartoon painting effect.
2. Say a shooting command, such as “Smile”, “Cheese”,
or “Record video.”
• Oil pastel: This effect applies a pastel painting effect.
3. To check more voice commands for controlling the
camera, touch ➔
.
Taking Photos or Videos with Filter Effects
Use the filter effects to take unique photos or videos.
• Moody: This effect applies a mono cartoon painting effect.
• Rugged: This effect applies a rugged effect.
• Fisheye: This effect blackens the edges of the frame and
distorts objects to imitate the visual effect of a fisheye lens.
Viewing Photos and Videos
1. To view taken photos or videos, tap the Gallery icon.
2. Scroll left or right to view the next or previous image.
Touch
and select a filter effect. The available
options vary by mode.
• No effect: Do not apply an effect.
• Vignette: This effect applies the retro-looking colors, high
contrast, and strong vignette effect of Lomo cameras.
• Greyscale: This effect makes the image black and white.
• Sepia: This effect red-shifts the background scenery.
• Vintage: This effect gives the image a vintage look and feel.
• Faded colors: This effect fades the color of the image.
• Turquoise: This effect applies a soft turquoise color effect.
Camera Operation
29
Changing Shooting Options Quickly
Touch to change shooting options quickly. The
available options vary by mode.
•
Configure settings for Camera.
•
Activate or deactivate the flash.
•
Use this to set delayed-time shots.
•
Activate or deactivate the photo suggestion feature. For
more information, refer to “Photo Suggest” on page 118.
•
Select a folder for saving photos or videos. To create a
new folder, touch .
•
Activate or deactivate the voice recognition to take photos
or videos.
•
30
Activate or deactivate the sharing options.
Reducing Camera Shake
Use the Optical Image Stabilizer (OIS) option to reduce or
eliminate blurriness from camera shake.
1. If the lens has an OIS switch, set the switch to ON to
use the OIS function.
(or ➔
2. Touch
and select an option.
Before correction
)➔
➔ OIS (anti-shake),
After correction
Closing the Camera Application
On the preview screen, touch
to close the camera
application and return to the Home screen.
Tips for Taking Clearer Photos
Holding the Camera Correctly
Make sure not to block the screen, lens, flash, or
microphone.
Warning! Make sure not to expose the lens to direct sunlight.
This may discolor the image sensor, or cause it to
malfunction.
Camera Operation
31
Half-Pressing the Shutter Button
Press the Shutter button halfway down to adjust the focus.
The camera adjusts the focus, exposure, and white balance
automatically, and the focus frame turns green. The focus
frame turns red if not focused.
32
Reducing Camera Shake
Set the Optical Image Stabilizer (OIS) option to reduce
camera shake optically.
Keeping the Subject in Focus
Focusing on the subject may be difficult in the following
conditions:
• When the contrast between the subject and background is low.
For example, the subject is wearing clothing that is similar in color
to the background.
Using the Focus Lock
1. Half-press the Shutter button to focus. When the
subject is focused, you can change the composition.
2. When you are ready, press the Shutter button to take
the photo.
• The light behind the subject is too bright.
• The subject is shiny or reflective.
• The subject includes horizontal patterns, such as blinds.
• The subject is not positioned in the centre of the frame.
When Taking Photos in Low-Light Conditions
Turn the flash on to take photos in low-light conditions.
Adjust the ISO sensitivity.
Camera Operation
33
When Subjects Are Moving Rapidly
Use the continuous shooting option to take photos of
moving subjects.
To take several photos continuously, use memory
cards with faster writing speeds (micro SDHC Class10
or higher).
34
Shooting Modes
Auto Mode
Use this to take photos with scene modes selected
automatically by the camera. In this mode, the camera
recognizes surrounding conditions and automatically adjusts
factors that contribute to exposure, including the shutter
speed, aperture value, metering, and white balance.
As the camera controls most of the functions, some shooting
options are limited. This mode is useful for capturing quick
snapshots with the least amount of adjustment.
1. Touch MODE ➔ Auto.
2. To display an icon for a scene mode at the top right of
the preview screen when you half-press the Shutter
button, touch ➔
➔
➔ Detection display
➔ On.
Notes/Tips
• The camera may detect different scenes, even the same subjects,
depending on external factors, such as camera shake, lighting,
and distance to the subject.
• If the camera does not recognise an appropriate scene mode, it
uses the default settings for this mode.
Expert Mode
Use this to take photos and videos with manual adjustment
of various shooting options, including the shutter speed,
aperture value, exposure value, and ISO sensitivity.
When using the standard operation type, touch MODE
➔ Expert, and select a mode.
• Even if it detects a face, the camera may not select a portrait
Rotate to change the value for
the shooting option
mode depending on the subject’s position or lighting.
• In this mode, the camera consumes more battery power due to
constant changing of settings when selecting appropriate modes.
Return to the
previous screen
Rotate to select a
shooting option
User mode
Manual mode
Program mode
Aperture priority mode
Display descriptions of modes
and functions
Shutter priority mode
When using the professional operation type, touch MODE,
and select a mode. To adjust various shooting options, use
the smart panel.
Camera Operation
35
Program Mode
In this mode, the camera automatically adjusts the shutter
speed and aperture value so that an optimal exposure value
can be achieved. This mode is useful when you want to
capture shots of constant exposure while being able to adjust
other settings.
36
Touch MODE ➔ Expert ➔ P, and set the desired
shooting options.
Program Shift
The program shift feature lets you adjust the combination of
the shutter speed and aperture value while the camera
maintains the same exposure.
Touch the shutter speed or the aperture value at the
top of the screen, and then touch
or
to adjust
the value. You can also use the Command dial or the
i-Function button.
Aperture Priority Mode
Shutter Priority Mode
In this mode, the camera automatically calculates shutter
speed according to the aperture value you choose. You can
adjust the depth of field (DOF) by changing the aperture
value. This mode is useful for taking portraits and
landscape shots.
Touch MODE ➔ Expert ➔ A, and set the desired
shooting options.
In this mode, the camera automatically adjusts the aperture
value according to the shutter speed you choose. This mode
is useful for taking photos of fast-moving subjects or for
creating tracer effects in a photo.
Touch MODE ➔ Expert ➔ S, and set the desired
shooting options.
Slow shutter speed
Large depth of field
Small depth of field
Fast shutter speed
Notes/Tips
• To compensate for the reduced amount of light allowed by fast
shutter speeds, adjust the aperture and let in more light. If your
photos are still too dark, increase the ISO sensitivity.
Camera Operation
37
Manual Mode
This mode lets you adjust the shutter speed and aperture
value manually. In this mode, you can fully control the
exposure of your photos. This mode is useful in controlled
shooting environments, such as a studio, or when it is
necessary to fine-tune camera settings. This mode is also
recommended for shooting night scenes or fireworks.
Touch MODE ➔ Expert ➔ M, and set the desired
shooting options.
Notes/Tips
• If you set a high ISO sensitivity or open the shutter for a long time,
image noise may increase.
• Use a tripod and shutter release to prevent your camera
from shaking.
• The longer you open the shutter, the longer it takes to save
a photo. Do not turn the camera off while the camera saves
a photo.
Using the Bulb Feature
Use this feature to shoot night scenes or the night sky. While
you are pressing the Shutter button, the shutter is left open
so you can create moving light effects.
38
In Manual mode, set the shutter speed to Bulb.
User Mode
Use this to create and save your own shooting mode by
adjusting settings.
Touch MODE ➔ Expert ➔ P / A / S / M, and set the
desired shooting options. Then touch
➔
Save as User mode to save the current settings.
To access user mode, touch MODE ➔ Expert ➔ USER.
Notes/Tips
• Changes you make with the smart panel do not affect other
expert modes.
Adjusting Major Shooting Options
In expert mode, you can adjust the shutter speed, aperture
value, exposure value, or ISO sensitivity by either touching
the screen, using the Command dial, or by using the iFunction button.
Notes/Tips
• Methods may vary depending on the selected operation type and
Command dial control settings.
Touching the Screen
Touch one of the major shooting options displayed at
the top of the screen, and then drag left or right until
the desired value is shown. To confirm the adjustment,
touch an empty area on the screen or half-press the
Shutter button.
Using the Command Dial
Touch
➔
➔ Dial control (P/A/S/M) ➔ Option 3,
and then return to the preview screen. Press the
Command dial repeatedly to select an option, and then
rotate it to adjust the value. To confirm the adjustment,
touch an empty area on the screen or half-press the
Shutter button.
Using the i-Function Button
Press the i-Function button on the lens repeatedly to
select an option, and then rotate the focus ring on the
lens to adjust the value. To confirm the adjustment,
touch an empty area on the screen or half-press the
Shutter button.
Using the Smart Panel
Use the smart panel to quickly change shooting options. The
smart panel can only be used when the professional
operation type has been selected.
1. To enable the smart panel, touch
➔
➔
User type ➔ Professional.
2. To open the smart panel, touch
➔
.
3. Touch an option, and drag left or right to adjust the
value or select it from the pop-up list. Alternatively,
rotate the Command dial to highlight an option, press it
to select the option, and then rotate it to adjust the
value.
4. To save the current settings as a User mode,
touch
.
Camera Operation
39
Using the Auto Exposure Lock
When you cannot achieve an appropriate exposure because
of a strong color contrast, lock the exposure, and then take a
photo.
To lock the exposure value, adjust the photo’s
exposure, and touch
to lock the exposure. Aim
the lens where you desire, and then press the
Shutter button.
Shortcuts
Add or remove shortcuts for easy access to the camera’s
various options.
1. Touch and hold
or another shortcut icon.
2. Touch and hold an option and drag it to the desired
location.
cannot be moved.
40
• One Touch AF/MF: Change the focus mode.
• AF Lock: Lock the focus by half-pressing the Shutter button to
focus on the subject, and then touching the shortcut icon.
• One Touch WB: Manually set white balance by aiming the lens
at a white surface, and then pressing the Shutter button.
• One Touch RAW+: Set the camera to save photos in both jpg
and raw file formats.
• Optical Preview: View the optical preview before taking a
photo. The camera adjusts the aperture to predefined settings
and displays the result on the screen.
• Display: Change the way that information is displayed on the
screen.
Smart Mode
Beauty Face
Use this to take photos with predefined settings for various
scenes.
Smart Mode Suggest
Use this to take photos with one of the smart modes that the
camera automatically suggests.
1. Touch MODE ➔ Smart ➔ Smart mode suggest.
2. Half-press the Shutter button, select a mode from the
suggested list, and then press the Shutter button to
take a photo. If you do not select a mode from the
suggested list, the camera will take a photo in
auto mode.
3. To reset the selected mode, touch
.
Use this to take photos with lightened faces for gentler
images.
1. Touch MODE ➔ Smart ➔ Beauty face.
2. Press the Shutter button to take a photo. Touch a face,
and adjust effects. To switch between the original and
the adjusted photo, touch Before & After. Touch Save to
save the photo.
3. To set the camera to automatically adjust effects, touch
➔
➔
➔ Enhance face ➔ Off.
Best Photo
Use this to take multiple photos in a short time, and then
choose the best photos among them.
1. Touch MODE ➔ Smart ➔ Best photo.
2. Press the Shutter button to take multiple photos.
Touch and hold thumbnails of photos to save, and then
touch Save.
Camera Operation
41
Continuous Shot
Use this to take a series of photos of moving subjects.
1. Touch MODE ➔ Smart ➔ Continuous shot.
2. While holding the camera steady, press and hold the
Shutter button to take several photos continuously.
Golf
Use this to take consecutive photos of a golf-swing to
analyze technique.
1. Touch MODE ➔ Smart ➔ Golf.
2. Press the Shutter button. When the camera detects a
golf-swing, it takes multiple photos at 120 fps.
Notes/Tips
• This feature is not available in portrait orientation.
• Using a tripod is recommended.
• In low-light conditions, the preview screen and photos may
Notes/Tips
• To take several photos continuously, use memory cards with
faster writing speeds (micro SDHC Class10 or higher).
appear darker, due to the fixed frame rate and shutter speed. For
best results, take photos in places with sufficient light.
• In low-light conditions (below 500 lux), such as indoors, the
camera may not be able to detect a golf-swing.
42
Best Face
Use this to take multiple group shots at the same time and
combine them to create the best possible image.
1. Touch MODE ➔ Smart ➔ Best face.
2. Press the Shutter button to take multiple photos. To get
the best shot, hold the camera steady and remain still
while taking photos. Touch the yellow frame on each
face, and choose the best individual face for the
subject.
3. After choosing a face for each individual, touch Save to
merge the images into a single photo, and save it.
Color Bracket
Use this to take three photos with different color effects
continuously.
Touch MODE ➔ Smart ➔ Color bracket.
Kids Shot
Use this to play a funny sound to get a kid’s attention when
shooting.
1. Touch MODE ➔ Smart ➔ Kids shot.
2. Half-press the Shutter button. The camera emits the
attention sound. Press the Shutter button to take five
consecutive photos.
3. To change the attention sound, touch
.
Camera Operation
43
Vignette+
Use this to highlight the centre of the photo by darkening
the edges.
Touch MODE ➔ Smart ➔ Vignette+.
Landscape
Use this to take photos of blue skies and landscapes with
richer colors.
Touch MODE ➔ Smart ➔ Landscape.
Dawn
Use this to take photos of the dawn sky in subtle colors.
Touch MODE ➔ Smart ➔ Dawn.
Snow
Use this to take brighter photos of snow scenery.
44
Touch MODE ➔ Smart ➔ Snow.
Macro
Action Freeze
Use this to take photos of very close subjects.
Touch MODE ➔ Smart ➔ Macro.
Use this to take photos of subjects moving at high speed.
Touch MODE ➔ Smart ➔ Action freeze.
Notes/Tips
Notes/Tips
• Use in bright daylight is recommended.
• Hold the camera steady to prevent blurry photos.
Food
Use this to take photos of food in more colorful tones.
Touch MODE ➔ Smart ➔ Food.
Party/Indoor
Use this to take crisp indoor photos.
Touch MODE ➔ Smart ➔ Party/Indoor.
Camera Operation
45
Rich Tone
Notes/Tips
Use this to take photos without losing details in bright and
dark areas. The camera automatically takes three photos
with various exposure values, and then merges them into
one photo. The photo taken at the original exposure value is
saved also.
1. Touch MODE ➔ Smart ➔ Rich tone.
2. While holding the camera steady, press the Shutter
button to take three photos.
Without effect
46
With effect
• This feature may be affected by camera shake, lighting,
movement of the subject, and shooting environment.
• The flash is disabled in this feature.
• When taking a photo of moving subjects, an afterimage may
appear.
• Using a tripod is recommended.
Panorama
Use this to take wide panoramic photos.
1. Touch MODE ➔ Smart ➔ Rich tone.
2. Press the Shutter button to take a photo, and then
move the camera in one direction. When the blue
frame aligns with the preview screen, the camera
automatically takes another shot in the panoramic
sequence.
3. To stop shooting, press the Shutter button again.
Photos are automatically combined into one
panoramic image.
Notes/Tips
• Avoid the following for best results:
– Moving the camera too quickly or too slowly.
– Moving the camera too little to take the next photo.
– Moving the camera at irregular speeds.
– Shaking the camera.
– Changing the camera direction while taking a photo.
– Taking photos in low-light conditions.
– Taking photos of moving subjects.
– Taking photos where the brightness or color of the
light changes.
– Taking photos of a subject in front of unrecognizable
backgrounds, such as empty skies or plain walls.
• Shooting is stopped under the following conditions:
– Changing the distance from the subject while
shooting.
– Moving the camera too quickly.
– Not moving the camera.
• The camera may stop taking photos due to
Waterfall
Use this to take photos of waterfalls.
Touch MODE ➔ Smart ➔ Waterfall.
Notes/Tips
• The image may appear blurry due to the slow shutter speed when
the camera takes photos. Make sure to use a tripod.
Animated Photo
Use this to create a photo in which selected objects move by
freezing or animating moving objects automatically detected
by the camera.
1. Touch MODE ➔ Smart ➔ Animated photo.
2. Press the Shutter button to take a photo. Touch
Animate or Freeze, and then rub the screen to animate
or freeze the detected moving objects.
3. Touch Trim to adjust the range to trim, or Direction to
change the direction of the animation.
4. Touch Save to save the photo.
composition or movement within the scene.
• The camera may not take the last scene entirely if you stop
moving the camera at the exact position where you want the
scene to end. To take the entire scene, move the camera slightly
beyond the position you want the scene to end.
Camera Operation
47
Multi Exposure
Use this to take multiple shots and create one photo by
overlapping them.
1. Touch MODE ➔ Smart ➔ Multi exposure.
2. To set the number of shots, touch
.
3. To set the camera to save all photos or only the final
result, touch ➔
➔
➔ Save original.
Drama
Use this to take a series of photos and combine them to
create an image that shows trails of the movement.
1. Touch MODE ➔ Smart ➔ Drama.
2. While holding the camera steady, press the Shutter
button to take several photos continuously. Select
shots, and then touch Save to save the photo.
Notes/Tips
To get the best shot, follow these tips. The camera may not
take photos properly in other shooting conditions.
• Hold the camera steady and remain still while taking photos.
• Take photos of a subject that is moving in one
direction.
48
• Take photos with backgrounds that are free of moving
objects.
• Avoid taking photos of a subject and background with
similar colors.
• Avoid taking photos of a subject that is too close or
too far away to fit within the screen or that is too long
such as a bus or a train.
Eraser
Use this to erase moving objects in the background.
1. Touch MODE ➔ Smart ➔ Eraser.
2. Press the Shutter button to take a series of photos. The
camera erases moving objects. To restore the original
photo, touch Show moving objects, and then touch
the highlighted area.
Sound & Shot
Use this to take a photo with sound.
1. Touch MODE ➔ Smart ➔ Sound & shot.
2. The camera records a few seconds of audio after
taking a photo.
3. To set the camera to record sound before or after
taking a photo, touch
.
Notes/Tips
• While taking photos in this mode, sound is recorded by the
internal microphone.
3. Touch Save to save the photo.
Camera Operation
49
Miniature
Use this to apply a miniature effect by making the center
clear and blurring the top and bottom of the image.
1. Touch MODE ➔ Smart ➔ Miniature.
Creative Shot
Use this to apply an appropriate filter to a scene
automatically detected by the camera.
Touch MODE ➔ Smart ➔ Creative shot.
Interval
Use this to set the interval and number of shots to take over
time.
50
Touch MODE ➔ Smart ➔ Interval.
Silhouette
Use this to take photos of dark shapes against a light
background.
Touch MODE ➔ Smart ➔ Silhouette.
Notes/Tips
• To maximise the silhouette effect, take photos at a location that is
bright.
Sunset
Use this to take photos of the sunset.
1. Touch MODE ➔ Smart ➔ Sunset.
Night
Use this to take photos in low-light conditions, without using
the flash.
1. Touch MODE ➔ Smart ➔ Night.
2. While holding the camera steady, press the Shutter
button to take three photos. Photos are automatically
merged into a single photo.
Fireworks
Use this to take photos of fireworks.
Touch MODE ➔ Smart ➔ Fireworks.
Notes/Tips
• The image may appear blurry due to the slow shutter speed when
Notes/Tips
the camera takes photos. Make sure to use a tripod.
• The image may appear blurry due to the slow shutter speed when
the camera takes photos. Make sure to use a tripod.
Camera Operation
51
Light Trace
Use this to take photos of the light trailing in low-light
conditions.
Touch MODE ➔ Smart ➔ Light Trace.
3D Mode
Use this to take 3D photos or videos with an optional 3D lens.
Before using this feature, attach a SAMSUNG 45 mm
F1.8 [T6] 2D/3D lens to the camera.
Notes/Tips
• The image may appear blurry due to the slow shutter speed when
the camera takes photos. Make sure to use a tripod.
My Mode
Use this to register your favorite shooting modes and select
them conveniently. You can register up to 10 modes.
52
Touch MODE ➔ My mode ➔ Edit, and then select your
favorite shooting modes. After completing your
selection, touch Done to save it.
Set the 2D/3D switch on the lens to 3D, and then take
a photo or video 1.5-5 m away from the subject.
Notes/Tips
• Videos recorded in 3D may be dark or playback may be jittery.
• Shooting in low temperatures may result in color distortion in
images and may consume more battery power.
• You may not be able to shoot properly in conditions below 8.5 LV/
Shooting Options and Settings
900 lux. For best results, take photos in places with sufficient
light.
• When you photograph objects that contain polarizing material,
such as a display, sunglasses, or a polarizing filter, or use the
polarizing material with your lens, the images may appear dark or
the 3D effect may not be applied properly.
• Use a tripod to prevent the camera from shaking.
• If you rotate or tilt the camera vertically while shooting, the 3D
effect may not be applied properly. Take photos or videos with the
camera in the normal position.
• If you shoot in fluorescent lighting or capture images displayed by
projectors or TVs, the images may appear black due to the flicker
effect.
• The camera’s display shows 3D photos and videos only in 2D.
• Photos taken with the 3D feature are saved in the mpo file format.
• To view 3D files, connect your camera to a 3D TV or 3D monitor
with an optional HDMI cable. While viewing, wear proper 3D
glasses.
• You cannot use the flash in this mode.
• You cannot take photos or videos in this mode if an HDMI cable is
connected to the camera.
Customizing Shooting Options
Various shooting options are provided with your camera. With
them, you can take more customized photos and videos.
1. Touch
to access shooting options. Depending on
the mode selected, you may touch ➔
.
2. Select an option, and then save it.
Note/Tips
• Available options and default settings may differ depending on the
shooting mode, the lens you are using, and the shooting
conditions.
• Depending on the option selected, some settings may not be
available.
Camera Operation
53
EV (Brightness)
ISO (Sensitivity)
The camera automatically sets the exposure by measuring
the levels of light from the photo’s composition and the
position of a subject. If the exposure set by the camera is
higher or lower than you expected, you can adjust the
exposure value manually.
Touch
➔
an option.
➔ EV (brightness), and select
The ISO sensitivity value represents the sensitivity of the
camera to light.
The higher the ISO sensitivity, the more sensitive the camera
is to light. Consequently, by selecting a higher ISO sensitivity,
you can take photos in dim or dark places at faster shutter
speeds. However, this may increase electronic noise and
result in a grainy photo.
Touch
➔
an option.
➔ ISO (sensitivity), and select
Examples
Darker (-)
Neutral (0)
Brighter (+)
Notes/Tips
• When taking a photo, if the appropriate exposure value cannot be
decided, use the AE BKT option to take three consecutive photos
with different exposure values.
• Taking photos with higher exposure values may result in blurry
photos due to the slower shutter speed.
54
ISO 100
ISO 400
ISO 800
ISO 3200
Notes/Tips
• Increase the ISO sensitivity in places where flash use is
prohibited. You can take a clear photo by setting a high ISO
sensitivity without having to secure more light.
• Use the noise reduction feature to reduce the visual noise that
can appear on photos of a high ISO sensitivity. (p. 95)
WB (Light Source)
The white balance represents the light source that influences
on the color of a photo.
The color of a photo depends on the type and quality of the
light source. If you want the color of your photo to be
realistic, select an appropriate lighting condition to calibrate
the white balance, or adjust the color temperature manually.
You can also adjust color for the preset light sources so that
the colors of the photo match the actual scene under mixed
lighting conditions.
Touch
➔
➔ WB (light source), and select
an option.
• Auto: Use automatic settings depending on the lighting
conditions.
• Daylight: Use this for sunny days. This option results in photos
closest to the natural colors of the scene.
• Cloudy: Use this for cloudy days or in shadows. Photos taken
on cloudy days tend to be more bluish than on sunny days. This
option offsets that effect.
• Fluorescent W: Use this under a daylight fluorescent lamp,
especially for white fluorescent lighting.
• Fluorescent NW: Use this under a daylight fluorescent lamp,
especially for white fluorescent lighting with very white hues.
• Fluorescent D: Use this under a daylight fluorescent lamp,
especially for white fluorescent lighting with slightly bluish hues.
• Tungsten: Use this under incandescent bulbs or halogen
lamps. Incandescent tungsten bulbs tend to have a reddish
hue. This option offsets that effect.
• Flash WB: Use this when using a flash.
• Custom: Use this to set a custom white balance. Touch ,
aim the lens at a piece of white surface, and then press the
Shutter button.
Camera Operation
55
• Color temperature: Use this to manually adjust the color
temperature of the light source. Color temperature is a
measurement in degrees Kelvin that indicates the specific type
of light source. As the color temperature increases, the color
distribution becomes cooler. Alternatively, as the color
temperature decreases, the color distribution becomes
warmer. Touch , and then drag the slider or touch
or
to adjust the color temperature.
10,000 K
8,000 K
6,000 K
5,000 K
4,000 K
56
Examples
Auto WB
Daylight
Fluorescent daylight
Tungsten
Clear sky
Fluorescent H
Cloudy
Daylight
Fluorescent L
3,000 K
Halogen lamp
Tungsten
2,000 K
Candle light
Notes/Tips
• When taking a photo, if the appropriate white balance option
cannot be decided, use the WB BKT option to take three
consecutive photos with different white balance settings.
Customizing Preset White Balance Options
Adjust the color for the preset light sources.
• Touch
next to a white balance option. Touch the arrows or
touch an area on the screen to adjust the value on the
coordinates.
– G: Green
– A: Amber
– M: Magenta
– B: Blue
• Spot: The camera calculates the amount of light in the centre.
When you take a photo in conditions where there is a strong
backlight behind a subject, the camera adjusts the exposure to
shoot a subject correctly.
• Centre-weighted: The camera calculates a broader area than
the camera does in spot mode. It sums up the amount of light
in the centre portion of the shot (60–80 %) and that of the rest
of the shot (20–40 %).
Metering
The metering mode refers to the method the camera
measures the quantity of light. The camera measures the
amount of light in a scene, and in many of its modes, uses
the measurement to adjust various settings. For example, if a
subject looks darker than its actual color, the camera takes
an overexposed photo of it. If a subject looks lighter than its
actual color, the camera takes an underexposed photo of it.
Touch
➔
➔ Metering, and select an option.
• Multi: The camera calculates the amount of light in multiple
areas. When light is sufficient or insufficient, the camera
adjusts the exposure by averaging the overall brightness of the
scene. This mode is suitable for general photos.
Camera Operation
57
Drive
Use this option to set the shooting method. Continuous or
burst shots are recommended for shooting the rapid motion
of fast moving subjects, such as racing cars.
Touch
➔
➔ Drive, and select an option.
• Single shot: Use this to take a single photo.
• Continuous normal: Use this to take five photos per second
continuously while you are pressing the Shutter button.
• Continuous high: Use this to take about eight photos per
second continuously while you are pressing the Shutter button.
• Burst shot (10 fps) / Burst shot (15 fps) / Burst shot (30
fps): Use this to take 30 photos continuously when you press
the Shutter button once.
• AE BKT: Use the auto exposure bracketing option to take three
consecutive photos with different exposure values (one a step
lighter, the original, and one a step darker). Use a tripod to
prevent blurry photos. You can adjust the interval range in
Bracket set.
58
• WB BKT: Use the white balance bracketing option to take three
consecutive photos with different white balance settings (the
original and two more with different white balance settings).
The original photo is taken when you press the Shutter button.
The other two are automatically adjusted to the white balance
you have set. You can adjust the interval range in Bracket set.
Notes/Tips
• Saving photos may take longer depending on the memory card’s
capacity and performance when taking photos continuously.
• Using a tripod is recommended when taking photos continuously.
Display
• Distance scale: The camera displays the distance scale on the
screen. The distance scale indicates the distance between a
subject and the camera. This function is available only when
you attach a lens that supports the distance scale function.
Use this option to add or remove shooting information from
the screen.
Touch
➔
➔ Display, and select an option.
• Normal: The camera displays basic shooting information on
the screen.
• Histogram: The camera displays the histogram on the screen.
A histogram is a graph that shows the brightness distribution of
a photo. A histogram inclined to the left indicates a dark photo.
A histogram inclined to the right indicates a bright photo. The
height of the graph is related to color information. The graph
gets higher if a specific color is more common.
Insufficient exposure
Balanced exposure
• Hide: The camera hides icons that indicate the current camera
settings except major shooting options.
Save as User mode
Use this to save the current settings as your own shooting
mode.
Touch
➔
➔ Save as User mode.
Excessive exposure
• Horizontal level: The camera displays the level gauge on the
screen. The level gauge helps you align the camera with the
horizontal lines on the screen.
Level
Unlevel
Camera Operation
59
Flash
To take a realistic photo of a subject, the amount of light
should be constant. When the light source varies, you can
use a flash and supply a constant amount of light.
In auto or smart mode, the flash pops up automatically
depending on the flash option when you half-press the
Shutter button or touch the screen in low-light conditions.
Touch
➔
➔ Flash, and then select an option.
In expert mode, press the Flash release button to open
the flash manually before setting the option.
• Off: Use this to turn the flash off.
• Smart flash: Use this to automatically adjust the brightness of
the flash according to the amount of light in the surrounding
environment.
• Auto flash: Use this to automatically use the flash. The flash
fires when the subject or background is dark.
• Auto + Red-eye: Use this to automatically use the flash and
reduce red-eyes.
60
• 1st Curtain: Use this to fire the flash immediately after the
shutter opens. The camera takes a photo of a subject earlier in
an action sequence clearly.
Ball moving direction
• 2nd Curtain: Use this to fire the flash just before the shutter
closes. The camera takes a photo of a subject later in an action
sequence clearly.
Ball moving direction
Warning! Keep the flash retracted when not in use to avoid
damage.
• Fill in: Use this to always use the flash.
Forcing the flash to open may cause damage to
the camera.
• Fill in + Red-eye: Use this to always use the flash and reduce
red-eyes.
Use only Samsung-approved flashes. Using
incompatible flashes may damage your camera.
Notes/Tips
• There is an interval between two bursts of the flash. Do not move
until the flash fires a second time.
• If you select Off, the flash does not fire even when an external
flash is attached.
• If light from the flash is reflected, or if a substantial amount of
dust is in the air, tiny spots may appear in the photo.
• If you attach an intensity-adjustable external flash to the camera,
the intensity settings of the flash will be applied.
• If the subject is too close when you use the flash, some light may
be blocked, resulting in a dark photo. Ensure that the subject is
within the recommended range, which varies by lenses.
• When a lens hood is attached, the light from the flash can be
blocked by the hood. Remove the hood to use the flash.
Adjusting the Flash Intensity
When the flash is on, adjust the flash intensity.
Touch
touch
next to an option, and then drag the slider or
or
to adjust the intensity.
AF Mode
Use this option to select a focus mode appropriate to the
subject.
If the lens has an AF/MF switch, you must set the switch to
select the focus mode that you require. Set the switch to AF
to select either Single AF or Continuous AF. Set the switch to
MF to select Manual focus.
Touch
➔
➔ AF and select an option.
• Single AF: Use this to capture a still subject. When you halfpress the Shutter button, the focus fixes in the focus area. The
area turns green when the focus is achieved.
• Continuous AF: Use this to capture fast moving subjects.
When you half-press the Shutter button, the camera continues
to focus. Once the focus area is fixed on the subject, the
subject is always in focus even when moving.
• Manual focus: Use this to manually focus on a subject by
rotating the focus ring on the lens. MF assist helps you achieve
a focus easily. While you are rotating the focus ring, the focus
area is magnified. When you use Focus peaking, the color you
selected appears on the focused subject.
Camera Operation
61
AF Area
Use this option to change the positions of the focus area.
Generally, cameras focus on the nearest subject. When there
are a lot of subjects, however, unwanted subjects can be in
focus. To prevent unwanted subjects from being in focus,
change the focus area so that a desired subject is in focus.
You can get a clearer and sharper photo by selecting an
appropriate focus area.
Touch
➔
➔ AF Area and select an option.
• Centre AF: Use this to focus on the centre of the frame.
• Multi AF: Use this to focus on multiple areas. The photo is
divided into two or more areas, and the camera obtains focus
points of each area and displays a green rectangle in places
where focus is set correctly. This option is recommended for
scenery photos.
• Face Detection: Use this to focus on human faces
preferentially. This option is recommended for shooting a group
of people. This feature may not be effective in the following
conditions:
– The subject is too far from the camera.
– The lighting is too bright or too dark.
– The subject is not facing the device.
62
– The subject is wearing sunglasses or a mask.
– The subject’s facial expression changes drastically.
– The subject is backlit, or the lighting conditions are unstable.
• Tracking AF: Use this to track and automatically focus on your
subject, even when the subject is moving or when you change
the shooting composition. Tracking a subject may fail in the
following conditions:
– The subject is too small.
– The subject moves excessively.
– The subject is backlit or you are shooting in a dark place.
– Colors or patterns on the subject and the background are
the same.
– The subject includes horizontal patterns, such as blinds.
– The camera shakes excessively.
– If the camera fails to track the subject, the focus area will
be reset.
– If the camera fails to focus, the focus frame will change to red
and the focus will be reset.
• One touch shot: Use this to take a photo with the touch of your
finger. As you touch on the subject, the camera focuses on the
subject and takes a photo automatically.
AF Size
Quality
Use this option to change the size of the auto focus frame.
Touch
➔
➔ AF size, and touch
adjust the frame size.
or
to
Photo Size
As you increase the resolution, your photo will include more
pixels, so it can be printed on larger paper or displayed on a
larger screen. When you use a high resolution, the file size
will also increase. Select a low resolution for photos that will
be displayed in a digital picture frame or uploaded to the
web.
Touch
Use this option to select a higher photo quality for better
photos. Selecting a higher photo quality also increases the
file size.
➔
➔ Photo size, and select an option.
Touch
➔
➔ Quality, and select an option.
The camera saves photos in either the jpg or raw file format.
Photos in the jpg format are stored in the memory according
to the settings of the camera at the time of shooting.
However, raw format files are not transformed to jpg and are
saved in the memory without any changes.
Raw format files have the srw file extension. To convert raw
format files into other file formats or to calibrate exposures,
white balance, tones, contrasts, and colors, use the Adobe
Photoshop Lightroom program found on the supplied DVDROM. Ensure you have enough space in the memory to save
photos in the raw file format.
Camera Operation
63
Installing Adobe Photoshop Lightroom
Insert the Adobe Photoshop Lightroom DVD into your
computer, select a language, and then follow the onscreen instructions to complete the installation.
With Adobe Photoshop Lightroom, you can convert or
calibrate image files, including jpg, tiff, and raw file formats.
For more information, refer to the program guide.
Notes/Tips
• In Adobe Photoshop Lightroom, an image’s brightness, color and
other effects may be displayed differently. This occurs because
the original camera settings and options applied during image
capture are removed, ready for it to be processed in Adobe
Photoshop Lightroom.
• If you use PTP mode to connect your device to a Mac OS
computer with a USB cable, you may not be able to preview
image thumbnails on the import panel in Adobe Photoshop
Lightroom. In this case, click the import button and preview them
in the Library module.
Adjust Image
Use this option to adjust the color, saturation, sharpness, or
contrast of your photos.
Touch
➔
or touch
or
➔ Adjust image, and drag the slider
for each value.
Timer
Use this option for delayed-time shots.
1. Touch
➔
➔ Timer, and select an option.
2. Press the Shutter button to start the timer. The camera
takes photos after a specified length of time.
3. Press the Shutter button to cancel the timer.
MF Assist
Use this option to enlarge the scene and easily adjust the
focus while rotating the focus ring.
Touch
➔
➔ MF assist, and select an option.
– Off: Use to turn this option off.
– Enlarge x5: Use this to magnify the focus area by five times
when you rotate the focus ring.
64
Focus Peaking
Framing Mode
Use this option to set the color you selected appears on
the focused subject to help you focus while rotating the
focus ring.
Touch
➔
➔ Focus peaking, and select an
option.
• Level: Use this to set a sensitivity level for detecting the focused
subject or turn the option off.
• Color: Use this to set a color to appear on the focused subject.
Link AE to AF Point
Use this option to measure the exposure value of the focus
area. When this option is on, the camera automatically sets
an optimal exposure by calculating the brightness of the
focus area.
Touch
➔
option on or off.
➔ Link AE to AF Point, and turn this
When you adjust the aperture value or shutter speed, the
exposure value changes according to the settings, so the
display may darken. When this option is on, the brightness of
the display is constant regardless of the settings, so you can
better frame your shot.
Touch
➔
option on or off.
➔ Framing mode, and turn this
OIS (Anti-Shake)
Use the Optical Image Stabilizer (OIS) option to reduce or
eliminate blurriness from camera shake.
If your lens has an OIS switch, set the switch to ON to use the
OIS feature.
Touch
➔
➔ OIS (anti-shake), and select an
option.
• Off: Use to turn this option off.
• OIS (half shutter): Use this to apply the OIS feature only when
you half-press the Shutter button.
• OIS (always): Use this to continuously apply the OIS feature.
Camera Operation
65
Notes/Tips
• This feature may not function properly in the following conditions:
– When you move the camera to follow a moving subject.
– If the camera is shaking too much.
– When the shutter speed is slow (for example, when taking
photos in low-light conditions).
– If the battery power is low.
– When you take close-up photos.
• Using this feature with a tripod may blur photos because of
vibration from the OIS sensor. Deactivate this feature when using
a tripod.
• The display may be blurry if the camera is hit or dropped. When
this happens, restart the device.
Bracket Set
Use this option to change the settings for auto exposure
bracketing and white balance bracketing.
Touch
➔
➔ Bracket set, and select an option.
• AE Bracket set: Use this to adjust the exposure interval range
of the three bracketed photos.
• WB Bracket set: Use this to adjust the white balance interval
range of the three bracketed photos.
66
ISO Customization
Use this option to change the settings for the ISO sensitivity.
Touch
➔
➔ ISO customization, and select an
option.
• ISO sensitivity step: Use this to set the size for the ISO
sensitivity by either 1/3 or one step.
• Auto ISO Range: Use this to set the maximum ISO value under
which each EV step is chosen when you set the ISO sensitivity
to Auto.
DMF
Use the Direct Manual Focus (DMF) option to adjust the focus
manually by rotating the focus ring after achieving the focus
by half-pressing the Shutter button.
Touch
or off.
➔
➔ DMF, and turn this option on
Noise Reduction
Color Space
Use this option to reduce the visual noise in photos.
Touch
➔
➔ Noise reduction, and select an
option.
• High ISO NR: Use this to reduce noise that may occur when
you set a high ISO sensitivity. You can adjust the noise
reduction intensity by selecting one from High, Normal,
and Low.
• Long term NR: Use this to reduce noise when you set the
camera for a long exposure.
Distortions Correct
Use this option to correct distortion that might occur from
lenses.
Touch
➔
option on or off.
➔ Distortions correct, and turn this
Use this option to select methods for representing colors.
Digital imaging devices, such as digital cameras, monitors,
and printers, have their own methods for representing colors,
which are called color spaces.
Touch
➔
➔ Color space, and select an option.
• S RGB: sRGB (Standard RGB) is an international specification to
define the color space created by IEC (International
Electrotechnical Commission). It is widely used for creating
colors on computer monitors and is also the standard color
space for Exif. sRGB is recommended for regular images and
images you intend to publish on the Internet.
• Adobe RGB: Adobe RGB is used for commercial printing and
has a larger color range than sRGB. Its wider range of colors
helps you to easily edit photos on a computer. Note that
individual programs are generally compatible with a limited
number of color spaces.
Camera Operation
67
Notes/Tips
The rule for creating file names varies depending on the
selected color space option.
• sRGB files: YYYYMMDD_hhmmss.jpg. For example, for a photo
taken on Jan. 02, 2013, at 15:30:45, the file name would be
20130102_153045.jpg. File names for continuous, burst, or
bracketed photos would be YYYYMMDD_hhmmss_x.jpg, for the
previous example, the file name would be
20130102_153045_1.jpg.
Dynamic Range
Use this option to correct the loss of bright detail that can
occur due to shading differences in a photo.
• Smart Range+: Use this to correct the loss of bright detail.
• HDR (High Dynamic Range): Use this to take three photos
with different exposure values and combine them to create a
single image. The photo taken at the original exposure value is
saved also.
• Adobe RGB files: YYYYMMDD_hhmmss_A.jpg. File names for
continuous, burst, or bracketed photos would be
YYYYMMDD_hhmmss_Ax.jpg.
Touch
➔
➔ Dynamic range, and select an
option.
• Off: Use to turn this option off.
Overexposure Guide
Use this option to set the camera to indicate the overexposed
area on the preview screen.
68
Touch
➔
➔ Overexposure guide, and turn this
option on or off.
Video Recording Options
Touch
➔
, and configure the settings for
video recording.
• Movie size: Select a resolution for videos. Use higher resolution
for higher quality. Higher resolution videos take up more
memory.
• Quality: Set the quality level for videos. Higher quality images
require more storage space.
• Multi motion: Set the playback speed of videos.
– If you select an option other than x1, sound will not be recorded.
• Voice: Set the camera to record sound with videos.
• Windcut: Remove some surrounding noise in addition to wind
noise.
• Video output format: Set the video signal output that is
appropriate for your country. You can take videos at 60, 30, or
24 fps with NTSC and at 50, 25, or 24 fps with PAL.
Sharing Options
Share photos as they are taken by setting sharing options.
Touch
➔ , and select an option.
• Share shot: Send a photo directly to another device via
Wi-Fi Direct.
– You cannot use this feature if the signature option is activated.
– If this feature is activated, you cannot set the quality option to
RAW or RAW+JPEG.
• Buddy photo share: Set the camera to recognise a person’s
face that you have tagged in a photo and send it to that person.
• ChatON photo share: Send a photo directly to another device
via ChatON.
– You cannot use this feature if the signature option is activated.
• Remote viewfinder: Set a device to control the camera
remotely.
Camera Operation
69
Camera Settings
Touch
➔
, and configure the settings for
Camera.
• User type: Select the operation type for basic or expert use.
• Dial control: Set Command dial functions when you first press
or rotate it on the preview screen of expert mode.
– Option 1: Access the mode selection screen by rotating or
pressing the Command dial.
– Option 2: Access the mode selection screen by rotating the
Command dial. Move through the major shooting options by
pressing the Command dial repeatedly.
– You cannot use this feature when the Date/time Imprint setting
is activated.
• GPS tag: Attach GPS information (location and time) and
weather information to the file. Activate this feature when
taking photos to create albums in Story Album or use the photo
suggestion feature.
– To improve GPS signals, avoid shooting in locations where the
signal may be obstructed, such as between buildings or in lowlying areas, or in poor weather conditions.
– Your location may appear on your photos when you upload them
– Option 3: Move through the major shooting options by pressing
to the Internet. To avoid this, deactivate the GPS tag setting.
the Command dial repeatedly. Adjust the option by rotating the
Command dial.
• Date/time Imprint: Use this to imprint the time and date on
photos.
– In auto or smart mode, you can only change modes with the
Command dial.
• Display select: Use this to set the proximity/light sensor to
automatically adjust between the screen and the viewfinder, or
to always use the screen.
• Power-on mode: Select the default camera mode that
launches when the device is turned on.
70
• Signature: Use this to add a signature to the image.
– You cannot use this feature when the Signature setting is
activated.
– The time and date cannot be imprinted on raw format files.
• Voice control: Activate or deactivate the voice recognition to
take photos or videos.
• Guidelines: Display a guide to help you compose a scene.
• Description: Display mode descriptions.
• Storage: Select the memory location for storage.
• Contextual filename: Set the camera to add contextual tags,
such as location information, to filenames.
– To use this feature, you must activate the GPS tag setting.
– The contextual information appears in the display language used
by the device at the time the files were created.
• Review: Briefly display photos or videos taken.
• Auto screen off: Set the length of time the device waits before
turning off the display’s backlight.
• Beep: Activate or deactivate beep sounds.
• AF sound: Adjust the auto focus sound.
• AF lamp: Use this to activate the AF-assist light in low-light
conditions.
• Horizontal calibration: Calibrate the level gauge. If the level
gauge is not level, position the camera on the level surface, and
then follow the on-screen instructions.
– You cannot calibrate the level gauge in portrait orientation.
– The camera must be level (not tilted up or down) to complete the
calibration.
• Lens firmware: Update the firmware of the lens.
– Before updating the lens firmware, download the firmware file
into the root directory of the internal memory or a memory card,
access the Home screen, and then launch the camera
application.
• Reset: Reset the camera settings.
• Sensor cleaning: Use this to remove dust from the image
sensor.
Camera Operation
71
Section 4: Entering Text
This section describes how to select the desired text input
method when entering characters. This section also
describes the predictive text entry system that reduces the
amount of key strokes associated with entering text.
Your camera comes equipped with an orientation detector
that can tell if the camera is being held in an upright (Portrait)
or sideways (Landscape) orientation. This is useful when
entering text.
Entering Text Using the
Samsung Keyboard
From a screen where you can enter text, touch a text field.
The on-screen QWERTY keypad will display.
Text Input Methods
There are two text input methods available:
• Samsung keyboard (default): Samsung’s on-screen
QWERTY keypad that can be used in both portrait and
landscape orientation.
• Google Voice typing: Enter text by speaking.
To change the input method, see “Default Input Method” on
page 152.
72
Shift
Key
Keyboard Settings
Mode
Delete
Key
Space Bar
New
paragraph
Changing the Keyboard Layout
There are two main keyboard layout keys that will change
the on-screen keys within the QWERTY keypad.
The available Text Input modes are: Sym and Abc.
123
Sym
ABC
Using ABC Mode
Note: The keyboard display will differ slightly depending on
the application used to enter text.
Symbol/Numeric Mode: activates the number,
symbol, and emoticon keys.
ABC Mode: activates the default alphabet keys.
Can also be set to Abc or abc by using the shift
(
) key.
Note: When in Abc mode, the Sym button will appear. When in
Sym mode, the Abc/ABC/abc button will appear.
1. At the keyboard display, tap the desired alphabetic
characters.
2. The screen initially opens in ABC mode. After typing the
first letter, the shift key (
) will change to
and following letters will be lowercase.
3. Tap
to input another upper-case letter or tap
twice to switch to ABC mode. The shift key will
change to
in ABC mode. All following letters will
be uppercase until you tap the shift key again.
Entering Text
73
Using Symbol/Numeric Mode
Use Symbol/Numeric Mode to add numbers, symbols, or
emoticons.
1. Rotate your camera counterclockwise to a Landscape
orientation.
2. Tap 123
Sym at the bottom of the screen. The following
screen displays:
Predictive Text
By using the Predictive Text option, you can have next-letter
prediction and regional error correction, which compensates
for pressing the wrong keys on the QWERTY keyboard.
Predictive text is turned on by default.
1. At the keyboard, touch and hold
, then tap
on
the pop-up menu.
2. Touch
to turn Predictive text ON (
).
3. In the text portion of the message screen, begin typing
a word. A list of word options is displayed. Tap one of
the words to replace the word that has already been
typed or scroll the line of words to the left for more
word choices.
3. Tap the desired number, symbol, or emoticon
characters.
button to access additional symbols.
4. Tap the
1/3
5. Tap
to return to Abc mode.
74
ABC
4. Continue typing your message. Send the message or
for more options. For more information, refer
press
to “Creating and Sending Messages” on page 97.
Samsung Keyboard Settings
For information on how you can configure your Samsung
keyboard settings, see “Samsung Keyboard” on page 153.
Using the Google Voice Typing Feature
You can use your voice to enter text using the Google Voice
typing feature.
1. At the keyboard, tap
. The Google voice typing
screen is displayed
Entering Text Using Continuous Input
You can enter text simply by using your finger to handwrite
letters on your screen. The following example shows how to
enter the word “This”. Put your finger down on the “T”, and
without lifting, glide it to the “h”, then to the “i” then over to
the “s”.
2. At the Speak now prompt, speak clearly and distinctly
into the microphone. The text is displayed in the
message as you are speaking.
3. If the red microphone turns gray, then the feature has
timed out and you should tap the microphone icon to
start again.
Note: The feature works best when you break your message
down into smaller segments.
Entering Text
75
Section 5: Accounts and Contacts
Accounts
Managing Accounts
Your device provides the ability to synchronize information,
from a variety of accounts, including Email, Facebook,
Google, and your Samsung account. Depending on the
account, you can choose to synchronize your calendar,
contacts, and other types of content.
Note: Account settings and options may vary due to account
type and service provider. Not all settings are available
for all accounts. See your account service provider for
more information.
Contacts from your accounts appear in your device’s
Contacts.
Apps ➔
1. From the Home screen, touch
Settings ➔ Accounts tab ➔ (account type).
With synchronization, you can ensure that information on
your device is updated with any information that changes in
your accounts.
2. Touch Sync all to synchronize all accounts listed. Touch
Cancel sync to stop the synchronization.
Setting Up Your Accounts
3. Touch Settings to configure general options for this
account type.
Set up and manage your accounts.
Adding an Account
1. From the Home screen, touch
Settings ➔ Accounts tab ➔
4. Touch an individual account for options:
• Touch Sync now to synchronize all data for the selected
account.
Apps ➔
Add account.
2. Select an account provider, then follow the prompts to
enter your credentials and sign in.
3. The device communicates with the provider’s server to
set up your account on the device.
76
– or –
Touch the account data to synchronize, such as, Calendar,
Contacts, and so on.
• Touch Remove account to remove the account and delete all
of its messages, contacts, and other data.
5. For Google accounts, touch one of the items listed
under Privacy to view various settings for that item.
– or –
For Samsung accounts, touch Account settings to
manage Samsung account settings or Device backup to
set Samsung account back up and restore options.
– or –
For Email accounts, touch Settings to manage various
settings for that account.
Contacts
Use Contacts to store information for your friends, family and
colleagues, making contacting them easy.
Access Contacts
From the Home screen, touch
Apps ➔
Contacts.
Contact Tips
• Swipe right-to-left across a contact to create a message
addressed to the contact.
• To quickly move to a specific section in your contact list, touch a
letter on the right side of the list to go directly to that letter in the
alphabetical list.
Creating Contacts
1. From the Home screen, touch
Apps ➔
Contacts
➔
Contacts tab ➔
Create contact.
Contacts
2. Touch Device to store the contact on your camera, or
touch an account to store the contact.
3. Touch each field to enter information. To add an
additional entry, touch
. To delete an entry,
touch .
• Touch the Photo icon and assign a picture to the Contact:
– Image: Choose a picture from Gallery.
– Pictures by people: Choose pictures by tags.
– Take picture: Take a new picture.
– S Memo: Choose an image from S Memo.
• Touch the Name field and use the on-screen keyboard to enter
the full name. Touch
next to the Name field to display
additional name fields.
• Touch the Phone field, and then enter a phone number. Touch
and then choose a label for the number.
• Touch the Email field, and then enter an email address. Touch
and then choose a label for the number.
• Touch Groups to assign the contact to a group.
Accounts and Contacts
77
• Touch Message alert to choose a ringtone to play for new
messages from the contact.
• Touch Add another field to add additional fields for the
contact.
4. Touch Save to save the new contact.
Apps ➔
Contacts
Contacts
2. Touch
Menu ➔ Delete.
4. Touch Delete.
Contacts
Contacts
2. Touch a contact to view its information, then touch
Edit.
– or –
Touch and hold a contact, then select Edit from
the menu.
3. Update contact information.
1. From the Home screen, touch
➔
Contacts tab.
3. Touch contacts to mark them for deletion, or touch
Select all.
Updating Contacts
Make changes to update an existing contact.
Apps ➔
1. From the Home screen, touch
➔
Contacts tab.
Delete Contacts
Managing Contacts
Choosing Contacts to Display
1. From the Home screen, touch
➔
Contacts tab.
Apps ➔
Contacts
Contacts
Menu ➔ Contacts to display:
2. Touch
• All contacts to show all contacts.
• Device: Display only contacts stored on your device.
• SIM: Display only contacts saved to the SIM card.
• [Account]: Display contacts from selected accounts.
• Customized list: Select contacts to display.
78
Contacts Options
1. From the Home screen, touch
➔
Contacts tab.
• Settings: Access settings for Contacts.
Apps ➔
Contacts
Contacts
Menu ➔ Settings for options:
2. Touch
• Delete: Delete contacts.
– Only contacts with phones: Only display contacts that have
phone numbers.
– List by: Sort contacts by first or last name.
– Display contacts by: List contacts by first name first or last
• Import/Export: Import or export the selected contact
information from/to a specified location.
– Contacts sharing settings: Choose whether to send all
• Share namecard via: Share contact(s) with others using
Bluetooth, ChatON, Email, Gmail, Messaging, or Wi-Fi Direct.
– Online search: Searches your synced accounts even if they are
• Merge accounts: Combine contacts with a Google or
Samsung Account.
name first.
namecards at once or individually.
not currently being displayed.
• Accounts: Display accounts set up on your camera.
• Send message/email: Create a new text message or email to
selected contacts.
• Contacts to display: Choose contacts to display from your
device, accounts set up on your device, or other sources.
Accounts and Contacts
79
Individual Contact Options
1. From the Home screen, touch
➔
Contacts tab.
My Local Profile
Apps ➔
Contacts
Contacts
Menu:
2. Touch a contact to display it, then touch
• History: View calls and messages to and from this contact.
• Edit: Modify contact information.
• Delete: Erase the contact record.
• Link contact/Separate contact: Manage multiple contacts as
one. For information, see “Linking Contacts” on page 81.
• Mark as default: Set a default phone number or other field
(such as IM or email address). Defaults are the contact method
used when creating a message or calling a contact. You can
also set a default by touching and holding on a contact field.
• Share namecard via: Send the namecard. For information,
see “Sharing Contact Information” on page 81.
• Print contact info: Print the Contact’s information to a
Samsung printer.
• Add shortcut to home: Places this contact as a shortcut on
the Home screen.
80
My local profile is your own contact record, listed under ME
at the beginning of the Contacts list.
Creating My Local Profile
1. From the Home screen, touch
Apps ➔
Contacts
➔
Contacts tab.
Contacts
2. Touch Set up profile, then enter your information in the
contact fields.
Sending My Local Profile
You can your contact record as a vCard via Bluetooth, as an
attachment via ChatON, Email, Gmail, or Messaging, or via
Wi-Fi Direct.
1. From the Home screen, touch
Apps ➔
Contacts
➔
Contacts tab.
Contacts
2. Touch your profile to display your contact information.
3. Touch
Menu, then touch Share namecard via.
4. Choose a sending method, then follow the prompts to
send the namecard.
Linking Contacts
Sharing Contact Information
When you have contacts from various sources (Gmail,
Facebook, etc.), you may have multiple similar entries for a
single contact. Your Contacts app lets you link multiple
entries into a single contact.
You can send a contact namecard as a vCard via Bluetooth,
as an attachment via ChatON, Email, Gmail, or Messaging, or
via Wi-Fi Direct.
Linking also helps you keep your contacts updated, because
any changes to information in the respective accounts is
automatically updated the next time you synchronize with
the account.
Linking Contacts
1. From the Home screen, touch
Apps ➔
Contacts
➔
Contacts tab.
Important! Not all Bluetooth devices will accept contacts, and
not all devices support transfers of multiple
contacts. Check the target device’s documentation.
1. From the Home screen, touch
➔
Contacts tab.
Apps ➔
Contacts
Contacts
2. Touch
Menu ➔ Share namecard via.
Contacts
2. Touch and hold on a contact, then select Link contact.
3. Touch another contact to link to the displayed contact.
Separating Contacts
1. From the Home screen, touch
➔
Contacts tab.
Apps ➔
Contacts
3. Touch contacts to mark them for sending, or touch
Select all.
4. Touch Done. At the prompt, choose a sending method,
then follow the prompts to send the namecard.
Contacts
2. Touch
under the Connection heading, and then
touch
next to a contact to unlink it from the
displayed contact.
Accounts and Contacts
81
Favorites
Mark contacts with a
star to identify them as Favorites.
Favorites display on the Favorites tab.
Access Favorites
From the Home screen, touch
Favorites tab.
Apps ➔
Contacts
➔
Add a Contact to Favorites
1. From the Home screen, touch
Contacts.
Contacts ➔
Contacts
2. Touch and hold on a contact, then select Add to
favorites from the pop-up menu.
– or –
Touch a contact to display it, then touch
of the screen.
82
at the top
Remove a Contact from Favorites
1. From the Home screen, touch
Apps ➔
➔
Favorites tab.
Contacts
2. Touch and hold on a contact, then select Remove from
favorites from the pop-up menu.
– or –
Touch a contact to display it, then touch
of the screen.
at the top
Groups
Assign contacts to Groups to make searching for contacts
faster, or to quickly send messages to group members. Your
device comes with pre-loaded groups, and you can create
new groups.
Accessing Groups
From the Home screen, touch
Groups tab.
Apps ➔
Contacts
➔
Create a New Group
1. From the Home screen, touch
➔
Groups tab.
Add Contacts to a Group
1. From the Home screen, touch
➔
Groups tab.
Apps ➔
Contacts
2. Touch a Group to display it, then touch
Add member.
+
3. Touch contacts to mark them for addition to the group,
or touch Select all.
4. Touch Done to add the selected contacts.
Apps ➔
Contacts
Menu ➔ Create, then enter information:
2. Touch
• Touch Group name to enter a Group Name.
Remove Contacts from a Group
1. From the Home screen, touch
➔
Groups tab.
Apps ➔
Contacts
2. Touch a Group to display it.
3. Touch
Menu, then touch Remove member.
• Touch Message alert to choose a ringtone to play as a
message alert from group members.
4. Touch contacts to mark them for removal to the group,
or touch Select all.
• Touch Add member to select members from Contacts.
5. Touch Done to remove the selected contacts.
3. Touch Save to save the new group.
Accounts and Contacts
83
Send an Email or Message to Group Members
Create a new text or email message, addressed to the
group’s members.
1. From the Home screen, touch
Apps ➔
Contacts
➔
Groups tab.
2. Touch a Group to display it.
Menu, then touch Send message or
3. Touch
Send email.
4. Touch contacts to mark them as recipients for the new
message or email, or touch Select all.
5. Touch Done. The new message opens, with the marked
contacts as recipients. Continue creating the message.
Edit a Group
1. From the Home screen, touch
➔
Groups tab.
Apps ➔
Contacts
2. Touch a Group to display it.
Menu ➔ Edit, then update information for
3. Touch
the group.
Delete a Group
1. From the Home screen, touch
➔
Groups tab.
2. Touch
Apps ➔
Contacts
Menu, then touch Delete groups.
3. Touch groups to tag them for deletion, or touch
Select all. (You cannot delete pre-loaded groups.)
4. Touch Delete, then choose Group only or Group and
group members.
84
Importing and Exporting Contacts
You can import/export your contacts from/to USB storage
(your device’s memory) or an installed memory card.
Contacts are imported/exported as vCards.
1. From the Home screen, touch
Apps ➔
Contacts
➔
Contacts tab.
Contacts
2. Touch
Menu, then touch Import/Export.
3. Select an option, then follow the prompts to complete
the operation:
• Import from USB storage: Copy contacts that are saved in
device memory.
• Export to USB storage: Copy contacts to device memory.
• Import from SD card: Imports contacts from the SD card.
• Export to SD card: Exports contacts to the SD card.
Accounts and Contacts
85
Section 6: Multimedia
This section explains how to use the multimedia features of
your camera.
Gallery
The Gallery is where you view photos and play back videos.
For photos, you can also perform basic editing tasks, view a
slideshow, set photos as wallpaper or contact image, and
share as a picture message.
1. From the Home screen, touch Gallery .
All of the Albums that hold your pictures and videos will
be displayed with folder name and number of files.
2. Touch an Album and thumbnails of the contents will be
displayed.
86
Viewing Pictures
1. From the main gallery, touch
➔ Slideshow to see a
slideshow of all of the pictures in the current folder.
2. Touch a thumbnail to view a single picture.
Note: If no control icons are displayed on the screen in
addition to the picture, touch anywhere on the screen to
display them.
3. The following options are available while
viewing photos.
•
Select device: Select a different AllShare/Samsung Link
device from your available list.
•
Details: View details about the picture, such as the title,
the time it was taken, file size, etc.
•
Share via: allows you to share the picture via Bluetooth,
Wi-Fi Direct, and various accounts such as email, Gmail,
etc.
•
Delete: Permanently delete the picture.
•
Options: Display additional options (available options
may vary with different file types and storage locations):
– Edit: Edit the current image.
– Favorite: Tag the current item as a favorite.
– Download: Download photos from online accounts (such as
Picasa) to your camera.
– Slideshow: View your photos in a slideshow.
– Photo frame: Create a surrounding photo frame that can be
edited with edited text or drawn object.
– Photo note: Write notes on your current image.
– Signature: Sign an autograph on the photo.
– Copy to clipboard: Copy one or more pictures to the clipboard.
– Print: Print the current image on a compatible Samsung printer.
– Rename: Rename the current file.
– Buddy photo share: Share the current image with active
Viewing Videos
Note: If no control icons are displayed on the screen in
addition to the picture, touch anywhere on the screen to
display them.
1. From the Home screen, touch Gallery
The following options are available while viewing
video previews.
•
Select device: Select a different AllShare/Samsung Link
device from your available list.
•
Details: View details about the picture, such as the title,
the time it was taken, file size, etc.
•
Share via: allows you to share the picture via Bluetooth,
Wi-Fi Direct, and various accounts such as email, Gmail,
etc.
•
Delete: Permanently delete the picture.
ChatON buddies.
– Set as: Assign the current image as a Contact photo, or as
.
2. Select a folder location and touch a video preview.
wallpaper for the Home screen and Lock screen.
– Settings: Configure your synced accounts, such as Gmail.
Choose to sync your accounts only via Wi-Fi, and configure
options for Tag buddy and Face tag.
Multimedia
87
•
Options: Display additional options:
– Trim: Edit the length of the video.
– Slideshow: View your video as a slideshow.
– Favorite: Tag the video as a favorite.
– Rename: Rename the video.
– Settings: Configure your synced accounts, such as Gmail.
Choose to sync your accounts only via Wi-Fi, and configure
options for Tag buddy and Face tag.
3. Touch
to play the video. The following options are
available while playing videos:
Original size view. The video will be played
in its original size.
Full-screen in ratio view. The video is
enlarged as much as possible without
becoming distorted.
Start the video after being paused.
Full-screen view. The entire screen is
used, which may cause some minor
distortion.
Press and hold to rewind the video. Tap to
go to previous video.
Streams the video to another device via
Samsung Link.
Pause the video.
Press and hold to fast-forward the video.
Tap to go to next video.
Volume control.
88
PIP (Picture In Picture) view. The video will
be played in a small window so you can
use your phone for other purposes while
watching the video. Double-tap screen to
return to previous size.
Manage Your Video Files
You can perform actions such as renaming, moving, etc. on
your video files.
1. From the Home screen, touch Gallery .
Note: Only photos which are stored on your camera can be
edited. To edit photos which are stored online (such as
with Picasa), touch
➔ Download (this places a copy
of the file in the Gallery on your camera).
2. Select a folder location to view thumbnails of videos.
3. Touch and hold a video thumbnail to select it, or press
and touch Select all.
1. From the Home screen, touch Gallery
for options:
4. Touch
– Slideshow: View your files in a slideshow.
3. With the image displayed, press
– Copy: Create a duplicate of the selected file.
– Move: Move a selected file to a new location.
– Hide items: Hide selected items.
– Show hidden items: Show items that were previously hidden.
– Rename: Rename the selected video.
– Details: View file information.
Editing a Photo
The Gallery’s photo editing tools provides basic editing
functions for pictures and videos. Along with basic image
adjustments such as brightness, contrast, and color, a wide
variety of effects are available.
.
2. Select a folder location and touch a file to open it.
➔ Edit.
• Edit: allows you to edit the current image. Launches the Photo
Editor application.
4. Select an image area by touching and holding the
image, and then select an option:
• Selection mode: Provides several on-screen selection options
such as: Select area, Inverse selection, Selection size, and
Selection mode (Select area, Inverse selection, Selection size,
and Selection mode).
• Select all: Select the entire area of the current image.
• Clipboard: Copy the currently selected area to your device’s
clipboard.
Multimedia
89
5. Use the following controls to edit your picture:
Undo: Undo the last operation.
Sticker: Place various stickers, icons, and other
fun graphics on your image.
Redo: Redo the previous operation.
Drawing: Draw directly on your picture using
either a brush, pen, or eraser.
Cancel/Delete: Exit the current photo editing
session.
Save: Save the edited photo.
Rotate: Rotate a photo in all 4 directions, as well
as flipping the image horizontally/vertically.
Crop: Crop an area of a photo.
Color: Adjust the color of the image. Options
include Auto adjust color, Brightness, Contrast,
Saturation, Adjust RGB, Temperature, Exposure,
and Hue.
Effects: Add various effects to your photo.
Portrait: Apply various face touch-up effects.
Options include Red-eye fix, Airbrush face, Face
brightness, Out-of-focus, Beauty face, Face
reshaping, and Spot healing.
90
Frame: Place a border around your image.
6. Press
for options:
• Save as: Rename the image and save it to the Gallery.
• Select image: Select a new image for editing.
• Take picture: Activate the camera and take a new image for
editing.
• Share via: Share your photo via Add to Dropbox, Bluetooth,
ChatON, Email, Gmail, Google+, Group Play, Hangouts,
Messages, Picasa, S Note, Wi-Fi Direct.
• Set as: Assign the image as a Contact photo, or as wallpaper
for the Home screen and Lock screen.
Video Editor
With the Video Editor, you can edit videos you take with your
camera. You can add themes and also add additional media
to your videos such music and photos.
1. From the Home screen, touch
Apps ➔
Video Editor.
2. Follow the on-screen instructions for using the
Video Editor.
Video Player
The Video Player application plays video files stored on your
microSD card.
1. Touch
Apps ➔
Video Player.
2. All videos that you have on your camera and memory
card will be displayed. Touch the video that you want
to play.
3. The video will begin to play.
4. The following video controls are available:
Pause the video.
Press and hold to rewind the video. Touch
to go to previous video.
Press and hold to fast-forward the video.
Touch to go to next video.
Volume control.
Capture Icon
PIP (Picture In Picture) view. The video will
be played in a small window so you can use
your camera for other purposes while
watching the video. Double-touch screen to
return to previous size.
Original size view. The video will be played in
its original size.
Full-screen in ratio view. The video is
enlarged as much as possible without
becoming distorted.
Full-screen view. The entire screen is used,
which may cause some minor distortion.
Start the video after being paused.
Multimedia
91
Note: The screen view icons are a three-way toggle. The icon
that is displayed, is the mode that will appear after the
icon is touched.
Music Player
The Music Player is an application that can play music files.
The Music Player supports files with extensions AAC, AAC+,
eAAC+, MP3, WMA, 3GP, MP4, and M4A. Launching the
Music Player allows you to navigate through your music
library, play songs, and create playlists (music files bigger
than 300 KB are displayed).
Playing Music
1. From the Home screen, touch
4. The following Music Player controls are available:
Pause the song.
Start the song after being paused.
Press and hold to rewind the song. Touch to go to
previous song.
Press and hold to fast-forward the song. Touch to
go to next song.
Volume control.
Repeat one: repeats the currently playing song.
Apps ➔
Music.
2. Touch a library category at the top of the screen (All,
Playlists, Albums, Artists, Music square, Folders, or
Nearby devices) to view the available music files.
3. Scroll through the list of songs and touch an entry to
begin playback.
Repeat all: replays the current list when the list
ends.
Play All: plays the current song list once.
Shuffle On: the current list of songs are randomly
shuffled for playback.
Shuffle Off: songs play in order and are not
shuffled.
92
Provides access to the Music square.
Lists the current playlist songs.
Adding Music to a Playlist
1. From the Home screen, touch
Apps ➔
Music.
2. Touch the Playlists tab.
3. Touch the playlist name in which to add music.
Displays the current song in the player window.
Provides access to the SoundAlive feature.
Using Playlists
Playlists are used to assign songs to a list of preferred media
which can then be grouped into a list for later playback.
These Playlists can be created via either the handset’s Music
Player options menu or from within a 3rd party music
application (such as Windows Media Player) and then
downloaded to the handset.
Creating a Playlist
1. From the Home screen, touch
Apps ➔
Music.
2. Touch the Playlists tab.
3. Press
4. Touch
Add music.
5. Touch a music file, or touch Select all to add all the
music tracks to this playlist then touch Done.
Removing Music from a Playlist
1. From the Home screen, touch
Apps ➔
Music.
2. Touch the Playlists tab.
3. Touch the playlist name in which to delete music.
4. Press
➔ Delete.
5. Touch the checkbox to the left of each track you want
to remove from this playlist, or touch Select all to
remove all the music tracks from this playlist, then
touch Delete.
➔ Create playlist.
4. Type a name for this playlist in the field and touch OK.
Multimedia
93
Editing a Playlist
Besides adding and removing music files in a playlist, you
can also rename the playlist.
1. From the Home screen, touch
Apps ➔
Music.
2. Touch Playlists.
3. Press
➔ Edit title.
4. Touch a playlist name to edit.
5. Enter a new name for the playlist then touch OK.
Music Player Options
To access additional options, follow these steps:
1. From the Home screen, touch
Apps ➔
2. Press
Music.
.
3. The follow options are available:
• Add to play list: Add the current music file to the Play list.
• Via Bluetooth: Scan for devices and pair with a Bluetooth
device.
• Via Bluetooth: Share your music using Bluetooth.
• Delete: Delete the selected song.
• Search: Search for a specific song.
• Scan for nearby devices: Scan for devices nearby to
connect to and share the song.
• Settings: Access Music Player settings. For more information,
refer to “Music Player Settings” on page 95.
• End: End the Music Player app.
94
Music Player Settings
The Music Player Settings menu allows you to set
preferences for the Music Player such as whether you want
the music to play in the background, sound effects, and how
the music menu displays.
1. From the Home screen, touch
Apps ➔
Music.
2. Press
➔ Settings.
3. Select one of the following settings:
• SoundAlive: Set the type of equalization that you desire.
• Play speed: Set the play speed anywhere between 0.5X and
2.0X using the slider.
• Music menu: Select which categories you want to display.
Choices are: Albums, Artists, Genres, Music square, Folders,
Composers, Years, Most played, Recently played, or Recently
added.
• Lyrics: Display lyrics, if available.
Google Play Music
With Google Play Music, you can play music that you have
added to your music file as well as any music you copied
from your PC. While offline, you can listen to music you have
copied from your PC.
1. From the Home screen, touch
Apps ➔
Play Music.
2. Follow the on-screen instructions to use the
Play Music app.
Play Movies & TV
With Google Play Movies & TV, you can rent thousands of
different movies and television shows. You can watch
instantly, or download your movie or show for offline viewing
at a later time.
1. From the Home screen, touch
Apps ➔
Play Movies & TV.
• Smart volume: Automatically adjust each track’s volume to an
equal level.
2. Log on to your Google account if you have not already
done so.
• Voice control: Use voice commands to control Music Player.
3. Following the on-screen instructions for renting and
viewing movies and TV shows.
Multimedia
95
Section 7: Messaging
This section describes how to send and receive messages
and other features associated with messaging.
Types of Messages
Your device supports these types of messages:
• Text Messages
• Multimedia (Picture, Video, and Audio) Messages
• Email
• Gmail
• Hangouts
• Google+
• ChatON
The Short Message Service (SMS) lets you send and receive
text messages to and from other mobile phones or email
addresses. To use this feature, you may need to subscribe to
your service provider’s message service.
The Multimedia Messaging Service (MMS) lets you send and
receive multimedia messages (such as picture, video, and
audio messages) to and from other mobile phones or email
addresses. To use this feature, you may need to subscribe to
your service provider’s multimedia message service.
96
Important! When creating a message, adding an image, a
sound file, or a video clip to a text message
changes the message from a text message to a
multimedia message.
New Messages Notification
Depending on your notification settings, the phone will play a
ringtone, vibrate, or display the message briefly in the Status
bar when you receive a new message. To change the
notification for new messages, see “Messaging Settings” on
page 101 for details.
A new message icon
appears in the notifications area of
the Status bar, and the Messaging application icon
also
displays the number of new messages.
To open the message, touch and hold the Status bar, and
then slide the Status Bar down to open the Notifications
panel. Touch the new message to open and read it. For
information on reading and replying to messages see
“Managing Messages” on page 99.
Creating and Sending Messages
Quickly compose and sent text and multimedia messages on
your phone.
Apps ➔
Messaging
1. From a Home screen, touch
➔
Compose.
2. Touch
Enter recipient, and then enter a contact
name, a mobile phone number, or an email address. As
you type, possible matches from your accounts and
contacts display on the screen. Touch a match to add it
to the message.
• Audio: Choose a sound from Music.
• Record audio: Launch Voice Recorder to record a new sound.
• S Memo: Launch S Memo to choose or create a memo.
• Calendar: Add an event from your calendar.
• Location: Attach a map showing your location.
• Contacts: Add a contact entry (namecard) to the message.
5. When finished, touch
to send the message.
Note: If you exit a message before you send it, it will be
automatically saved as a draft.
Note: Enter additional recipients by separating each entry with
a semicolon (;).
3. Touch the Enter message field and type your message.
4. To add an attachment, touch
and select a file:
• Image: Choose a picture from Gallery.
• Take a picture: Launch the Camera to take a photo, and then
add it to your message by touching Save.
• Video: Choose a video from Gallery.
• Record video: Launch the Camera to record a video, and then
add it to your message by touching Save.
Messaging
97
Options While Composing a Message
1. While composing a message, press
additional messaging options.
• Discard: Delete the message.
to reveal
• Insert smiley: Add emoticons, such as a happy face, to your
message.
• Add text: Insert text or data from S Memo, Contacts, a
Location, Calendar, or from Text templates.
• Add to contacts: Add the recipient to your Contacts. This
option only appears if the recipient is not already in
your Contacts.
• View contact: View Contact information on the recipient. This
option only appears if the recipient is in your Contacts.
• Add slide: Add a new page to a message.
• Add recipients: Add additional recipients.
• Scheduling: Assign the current message for scheduled
delivery at a designated time.
• Add to spam numbers: Tag a number as spam so that these
messages can be directly delivered to your spam folder.
98
• Remove from spam numbers: Unregister a number from the
spam number list. This option only appears if the number was
previously registered as spam.
• Discard: allows you to delete the current message.
• Translate: launches a Translate popup menu. Here you can
both assign the sender’s original language and assign a target
language for the recipient (they will receive your message in the
designated language).
Managing Messages
Messages that are sent to and received from a contact (or a
number) are grouped into conversations or “threads” in the
All messages screen. Threads let you see all exchanged
messages with a contact.
View a Message
1. From a Home screen, touch
Messaging.
Note: File attachments on a MMS message can be saved to an
optional memory card (not included). Touch and hold on
the attachment, and then touch Save attachment. Select
the attachment and touch Save.
Reply to a Message
Apps ➔
2. From the message list, touch a message to display it.
• To view the details of a particular message, in the message
thread, touch and hold the message to open the options menu,
and then touch View message details.
• If a message contains a link to a Web page, touch the message
and then touch the link to open it in the Web browser.
3. While viewing a MMS message, touch the play icon (on
a video or audio file) to play back the file or touch an
image to view a picture.
1. From a Home screen, touch
Messaging.
Apps ➔
2. From the message list, touch a message to display it.
3. Touch the Enter message field and then type your reply
message.
4. When finished, touch
Send.
Delete a Message
1. From a Home screen, touch
Messaging.
Apps ➔
2. From the message list, touch and hold the message or
thread that you want to delete.
3. From the pop-up menu, touch Delete message or
Delete thread.
Messaging
99
Tip: To delete several message threads at once, touch
➔
Delete threads. Select the threads you want to delete and
touch Delete.
Protect a Message from Deletion
You can lock a message so that it will not be deleted even if
you delete the other messages in the thread.
1. From a Home screen, touch
Apps ➔
Messaging.
Message Options
1. From a Home screen, touch
Messaging.
Apps ➔
2. Before composing a message, press
to reveal
additional messaging options:
• Search: Search through all messages for a certain word or
phrase. Enter a search string in the Search field and touch
.
2. From the message list, touch a message thread.
• Delete threads: Delete message threads. Touch each
message thread you want to delete, or touch Select all. Touch
Delete.
3. Touch and hold the message that you want to lock.
• Draft messages: Display messages saved as drafts.
4. Touch Lock message on the pop-up menu. A lock icon
displays at the lower right hand side of the message.
• Locked messages: Display locked messages.
• Scheduled messages: Display scheduled messages.
• Spam messages: Display messages tagged as spam.
• Settings: Access messaging settings.
100
Messaging Settings
To configure the settings for text messages and multimedia
messages.
Apps ➔
Messaging
1. From a Home screen, touch
➔
➔ Settings.
2. The following settings are available:
• Delete old messages: Automatically delete the oldest messages
when the maximum number of messages is reached. Set the
maximum number of messages with the Text message limit and
Multimedia message limit settings below.
• Text message limit: Set the maximum number of text messages
per conversation.
• Multimedia message limit: Set the maximum number of
multimedia messages per conversation.
• Auto retrieve: Control whether message attachment(s) are
automatically downloaded when you display a multimedia
message. If you disable this option, only the message header
displays in the message list, and you'll be prompted to download
the attachment(s).
• Roaming auto retrieve: Automatically retrieve messages while
roaming.
• Creation mode: Use multimedia message creation mode.
• MMS alert: Set the device to alert you when you make a change
to a message that will convert the message to a multimedia
message (MMS).
• Bubble style: Control how messages appear on the screen.
Bubbles are the boxes that surround each message.
• Background style: Set the background of the message screen.
• Delivery reports (TXT): Request a delivery report for each
message you send.
• Use the volume key: Enable changing the text size while reading
a message by pressing the Volume Key up or down.
• Input mode: Uses text message input mode.
• Push messages: Receive push messages from network.
• Delivery reports (MMS): Request a delivery report for each
message you send.
• Service loading: Set prompts for service loading.
• Notifications: Control whether notifications for new messages
display in the Status bar.
Messaging
101
• Select ringtone: Set the ringtone for your message notifications.
• Vibrate: Set whether vibration plays along with the ringtone for
new message notifications.
• Message alert repetition: Set how often your device notifies you
of new message(s).
• Preview message: Control whether a preview of a new message
appears in the Status bar with the message notification.
• Add signature: Add a text signature to all messages you send.
• Signature text: Create your text signature.
• Spam settings: Filter incoming messages for spam messages.
• Add to spam numbers: Add telephone numbers which will be
automatically flagged as spam, when Spam settings is enabled.
• Add to spam phrases: Add text phrases which will be
auto