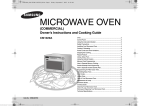
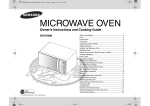
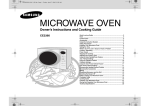
1
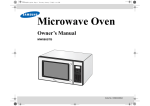
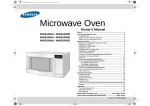
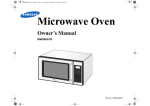
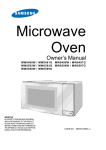
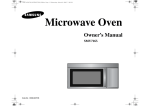
t~][W~ht~]\W~hTUGGwGXGGm SGhGXYSGYWWYGGYa[ZGwt Microwave Oven Owner’s Manual MW640WA MW640BA MW650WA MW650BA INSTANT COO KING One Minute + Popcorn Defrost Pizza Beverage 1 2 3 4 5 6 7 8 Power Level 0 Pause Cancel 9 Clock Start Code No. : DE68-01931A-01 t~][W~ht~]\W~hTUGGwGYGGm SGhGXYSGYWWYGGYa[ZGwt Safety on your own – there is dangerous voltage inside. If the oven needs to be repaired, call 1-800-SAMSUNG for the name of an authorized service center near you. PRECAUTIONS TO AVOID POSSIBLE EXPOSURE TO IMPORTANT SAFETY EXCESSIVE INSTRUCTIONS MICROWAVE When using any electrical appliance, basic safety precautions should be NERGY: E followed, including the following: (a) Do not attempt to operate this oven with the door open since open-door operation can result in harmful exposure to microwave energy. It is important not to defeat or tamper with the safety interlocks. (b) Do not place any object between the front face of the oven and the door or allow soil or cleaner residue to accumulate on sealing surfaces. (c) Do not operate the oven if it is damaged. It is particularly important that the oven door close properly and that there is no damage to the 1) Door (bent or dented), 2) Hinges and latches (broken or loosened), 3) Door seals and sealing surfaces. (d) The oven should not be adjusted or repaired by anyone except properly qualified service personnel. WARNING Always observe Safety Precautions when using your oven. Never try to repair the oven WARNING To reduce risk of burns, electric shock, fire, personal injury or exposure to excessive microwave energy: • Read all safety instructions before using the appliance. • Read and follow the specific “Precautions to Avoid Possible Exposure to Excessive Microwave Energy” on this page. • This appliance must be grounded. Connect only to properly grounded outlets. See “Important Grounding Instructions” on page 4 of this manual. • Install or place this appliance only in accordance with the installation instructions provided. • Some items, like whole eggs and food in sealed containers, may explode if heated in this oven. • Use this appliance only for its intended use as described in the manual. Do not use corrosive chemicals or vapors in this appliance. This type of oven is specifically designed to heat, cook, or dry food. It is not designed for industrial or laboratory use. SAVE THESE INSTRUCTIONS 2 t~][W~ht~]\W~hTUGGwGZGGm SGhGXYSGYWWYGGYa[ZGwt Safety Important Safety Instructions, continued • As with any appliance, close supervision is necessary when used by children. • Do not operate this appliance if it has a damaged cord or plug, if it is not working properly, or if it has been damaged. • This appliance should be serviced only by qualified service personnel. Contact the nearest authorized service facility for examination, repair, or adjustment. • Do not cover or block any of the openings on this appliance. • Do not store this appliance outdoors. Do not use near water – for example, near a kitchen sink, in a wet basement, or near a swimming pool, etc. • Keep the inside of the oven clean. Food particles or spattered oils stuck to the oven walls or floor can cause paint damage and reduce the efficiency of the oven. • Do not immerse cord or plug in water. • Keep cord away from heated surfaces. • Do not let cord hang over edge of table or counter. • When cleaning door and oven surfaces, use only mild, nonabrasive soaps or detergents applied with a sponge or soft cloth. • To reduce the risk of fire in the oven: a. Do not overcook food. Watch appliance carefully if paper, plastic, or other combustible materials are inside. b. Remove wire twist-ties from plastic cooking bags before placing bags in oven. c. If materials inside the oven ignite, keep the oven door closed, turn the oven off, disconnect the power cord, or shut off the power at the fuse or circuit breaker panel. • • • • • • • • • • • d. Do not use the oven compartment for storage purposes. Do not leave paper products, cooking utensils, or food in the oven when not in use. Do not try to preheat oven or operate while empty. Do not cook without the glass tray in place on the oven floor. Food will not cook properly without the tray. Do not defrost frozen beverages in narrownecked bottles. The containers can break. Dishes and containers can become hot. Handle with care. Carefully remove container coverings, directing steam away from hands and face. Remove lids from baby food before reheating. After heating baby food, stir well and test temperature by tasting before serving. A short power-supply cord is provided to reduce the risk of becoming entangled in or tripping over a longer cord. Longer cord sets or extension cords are available and may be used with caution. Do not operate any other heating or cooking appliance beneath this appliance. Do not mount unit over or near any portion of a heating or cooking appliance. Do not mount over a sink. Do not store anything directly on top of the appliance when it is in operation. SAVE THESE INSTRUCTIONS 3 t~][W~ht~]\W~hTUGGwG[GGm SGhGXYSGYWWYGGYa[ZGwt Safety IMPORTANT GROUNDING INSTRUCTIONS Use of Extension Cords A short power-supply cord is provided to reduce the risk of becoming entangled in This appliance must be grounded. In the or tripping over a longer cord. Longer cord sets or extension cords are event of an electrical short circuit, available and may be used if care is grounding reduces the risk of electric exercised in their use. If a long cord or shock by providing an escape wire for extension cord is used: the electrical current. This appliance is equipped with a cord that includes a 1. The marked electrical rating of the grounding wire and a grounding plug. cord set or extension cord should be The plug must be plugged into an outlet at least as great as the electrical that is properly installed and grounded. rating of the appliance. Plug the three-prong power cord into a 2. The extension cord must be a properly grounded outlet of standard grounding-type 3-wire cord and it 115-120 voltage, 60 Hz. Your oven must be plugged into a 3-slot outlet. should be the only appliance on this 3. The longer cord should be arranged circuit. so that it will not drape over the counter top or tabletop where it can be pulled on by children or tripped over accidentally. If you use an extension cord, the interior light may Improper use of the grounding flicker and the blower may vary when plug can result in a risk of electric the microwave oven is on. Cooking shock. Consult a qualified times may be longer, too. electrician or servicer if you do not understand the grounding instructions or if you are not sure if the appliance is properly grounded. Do not cut or remove the third (ground) prong from the power cord under any circumstances. WARNING WARNING SAVE THESE INSTRUCTIONS 4 t~][W~ht~]\W~hTUGGwG\GGm SGhGXYSGYWWYGGYa[ZGwt Contents Safety .................................................................................................................... 2 Your New Microwave oven ................................................................................. Checking Parts ................................................................................................... Warranty and Service Information ...................................................................... Setting Up Your Microwave Oven....................................................................... Control Panel Buttons(MW640WA/MW640BA) .................................................. Control Panel Buttons(MW650WA/MW650BA) .................................................. 6 6 6 6 7 8 Operation .............................................................................................................. 9 Setting the Clock................................................................................................. 9 Using the Pause/Cancel Button.......................................................................... 9 Using the Instant Cook Buttons .......................................................................... 9 Instant Cook Chart............................................................................................ 10 Using the One Minute+ Button.......................................................................... 11 Defrosting ......................................................................................................... 11 Setting Cooking Times & Power Levels............................................................ 11 Cooking Instructions ......................................................................................... Cooking Utensils............................................................................................... Testing Utensils ................................................................................................ Cooking Techniques ......................................................................................... General Tips ..................................................................................................... Cooking Guide .................................................................................................. Defrosting Guide............................................................................................... Recipes............................................................................................................. 12 12 12 13 13 14 16 17 Appendix ............................................................................................................ Troubleshooting Guide ..................................................................................... Care and Cleaning............................................................................................ Specifications.................................................................................................... 19 19 20 21 Warranty ............................................................................................................. 22 Guía Rápida ..............................................................................Inside Back Cover Quick Reference ................................................................................ Back Cover 5 t~][W~ht~]\W~hTUGGwG]GGm SGhGXYSGYWWYGGYa[ZGwt Your New Microwave oven Checking Parts Warranty service can only be performed by a Samsung Authorized Service Center. If you should require warranty service, provide the above information with a copy of your sales receipt to the Samsung Authorized Service Center. Unpack your microwave oven and check to make sure that you have all the parts shown here. If any part is missing or broken, call your dealer. For service assistance and the location of the nearest service center, please call 1-800SAMSUNG (800-726-7864), or go on-line to WWW.SAMSUNGSUPPORT.COM microwave oven instruction manual Setting Up Your Microwave Oven 1 glass tray roller guide ring registration card Place the oven on a flat, sturdy surface and plug the cord into a grounded outlet. Once plugged in, the display on your oven will show: Warranty and Service Information Make sure there is adequate ventilation for your oven by leaving at least four inches of space behind, above, and to the sides of the oven. To help us better serve you, please complete the enclosed registration card and promptly return it by mail. If the registration card is missing, you can call Samsung Electronics America, Inc., at 1-800-SAMSUNG (800-7267864), or register on-line at WWW.SAMSUNGUSA.COM When contacting Samsung, please provide the specific model and serial number information which is usually located on the back or bottom of the product. Please record these numbers below, along with the other requested information. Keep this information in a safe place as a permanent record of your purchase to aid in identification in case of theft or loss, and a copy of your sales receipt as a proof of purchase if warranty service is needed. MODEL NUMBER _________________ SERIAL NUMBER _________________ 2 3 4 5 DATE PURCHASED _________________ PURCHASED FROM_________________ 6 Open the oven door by pressing the button below the control panel. Wipe the inside of the oven with a damp cloth. Place the pre-assembled ring in the indentation in the center of the oven. Place the glass tray on top of the ring so that the three glass tabs in the center of the tray fit securely into the tabs on the floor of the oven. t~][W~ht~]\W~hTUGGwG^GGm SGhGXYSGYWWYGGYa[ZGwt Your New Microwave oven Control Panel Buttons (MW640WA/MW640BA) 1. Instant Cook Buttons p.9 Instant settings to cook popular foods. 2. One Minute+ p.11 Press once for every minute of cooking at High power. 3. Defrost Press to set the defrosting time of the food to be defrosted. 1 INSTANT COOKING 2 One Minute + Popcorn Pizza Defrost Beverage 1 2 3 4 5 6 3 4 p.11 4. Number buttons Set cooking times. 5. Power Level p.11 Sets power to level other than high. 6. Clock p.9 Sets current time. 7. Pause/Cancel p.9 Press to pause oven or correct a mistake. 5 6 7 8 7 8 9 Power Level 0 Clock Pause Cancel 8. Start Press to start cooking. Start 7 t~][W~ht~]\W~hTUGGwG_GGm SGhGXYSGYWWYGGYa[ZGwt Your New Microwave oven Control Panel Buttons (MW650WA/MW650BA) 1. Instant Cook Buttons p.9 Instant settings to cook popular foods. 2. One Minute+ p.11 Press once for every minute of cooking at High power. 3. Defrost Press to set the defrosting time of the food to be defrosted. 1 2 3 One Minute + Defrost p.11 I NS T ANT C O O KI NG 4. Number buttons Popcorn Pizza Beverage Frozen Dinner Set cooking times. 5. Power Level p.11 Sets power to level other than high. 4 5 6 7 8 1 2 3 6. Clock 4 5 6 7. Pause/Cancel 7 8 9 Power Level 0 Clock Pause Cancel p.9 Sets current time. p.9 Press to pause oven or correct a mistake. 8. Start Press to start cooking. Start 8 t~][W~ht~]\W~hTUGGwG`GGm SGhGXYSGYWWYGGYa[ZGwt Operation Setting the Clock 1 2 3 Using the Instant Cook Buttons Press the Clock button. The display will show: 1 Use the Number buttons to enter the current time. You must press at least three numbers to set the clock. If the current time is 5:00 enter, 5,0,0. 2 Press the Instant Cook button corresponding to the food you are cooking (Popcorn, for example). The display shows the first serving size: Press the button repeatedly to select the serving size you want. The display will cycle through all available serving sizes. Once you select the correct serving size, the microwave will begin cooking automatically. Press Clock again. A colon will appear, indicating that the time is set. If there is a power interruption, you will need to reset the clock. • See next page for Instant Cook Guide. You can check the current time while cooking is in progress by pressing the Clock button. Using the Pause/Cancel Button The Pause/Cancel button allows you to clear instructions you have entered. It also allows you to pause the oven’s cooking cycle, so that you can check the food. • To pause the oven during cooking: press Pause/Cancel once. To restart, press Start. • To stop cooking, erase instructions, and return the oven display to the time of day: press Pause/Cancel twice. • To correct a mistake you have just entered: press Pause/Cancel once, then re-enter the instructions. 9 t~][W~ht~]\W~hTUGGwGXWGGm SGhGXYSGYWWYGGYa[ZGwt Operation Instant Cook Chart Item Weight Remarks Popcorn 3.5 oz 3.0-3.5 oz • Use one microwave-only bag of popcorn. • Use caution when removing and opening hot bag from oven • To help prevent the popcorn bag from getting stuck in the oven, fold each end of the bag up one inch ( ) before placing the bag in the center of the oven. • If it still gets stuck, open the door and reposition the bag, close the door and press start. Frozen Dinner (MW650WA/ MW650BA only) 7-10 oz 10-12 oz • Remove package from outerwrapping and follow package instructions for covering and standing. After cooking, let stand 1-3 min. Pizza 1 Slice 2 Slices • Put the pizza on a microwave-safe plate with wide end of slice towards the outside edge of the plate. • Do not let slices overlap. Do not cover. • Before serving, let stand 1-2 min. Beverage ½ cup 1 cup 2 cups • Use measuring cup or mug; do not cover. • Place the beverage in the oven. • After heating, stir well. Note The cooking time of 3.0 oz. microwave-popcorn depends on the brand. Cooking time is adjustable for desired taste by using the number pads and following the package instructions. 10 t~][W~ht~]\W~hTUGGwGXXGGm SGhGXYSGYWWYGGYa[ZGwt Operation Using the One Minute+ Button Setting Cooking Times & Power Levels This button offers a convenient way to heat food in one-minute increments at the High power level. 1 Press the One Minute+ button once for each minute you wish to cook the food. For example, press it twice for two minutes. The time will display, and the oven starts automatically. The power level lets you control the heating intensity from Warm to High with the Power Level button. 1 Add minutes to a program in progress by pressing the One Minute+ button for each minute you want to add. Defrosting Pad Touch Display Output Power Level Once Twice 3 Times 4 Times 5 Times 7 Times 6 Times 8 Times 9 Times 10 Times PL:Hi PL:90 PL:80 PL:70 PL:60 PL:50 PL:40 PL:30 PL:20 PL:10 650W 585W 520W 455W 390W 325W 260W 195W 130W 65W The defrost setting is designed for speedy thawing of frozen food and is one great advantage of the microwave oven. (Power level of 30% is automatically set for defrosting) 1 Press the Defrost button. The display shows “ PL:30”. 2 2 3 3 Press the Number buttons to enter the desired defrosting time. Press the Start button to begin defrosting. Press the Power Level button. The power level is automatically set to high. If you want to set the power level to something other than High, press the Power Level button repeatedly. Press the Number buttons sequentially to enter the desired cooking time. Press the Start button to begin cooking. If you want to change the power level, press Pause/Cancel before you press Start, and re-enter all of the instructions. You can check the Power Level while cooking is in progress by pressing the Power Level button. • See page 16 for the Defrosting Guide. 11 t~][W~ht~]\W~hTUGGwGXYGGm SGhGXYSGYWWYGGYa[ZGwt Cooking Instructions Cooking Utensils Recommended Use • Glass and glass-ceramic bowls and dishes — Use for heating or cooking. • Microwave browning dish — Use to brown the exterior of small items such as steaks, chops, or pancakes. Follow the directions provided with your browning dish. • Microwavable plastic wrap — Use to retain steam. Leave a small opening for some steam to escape and avoid placing it directly on the food. • Wax paper — Use as a cover to prevent spattering. • Paper towels and napkins — Use for short-term heating and covering; they absorb excess moisture and prevent spattering. Do not use recycled paper towels, which may contain metal and can catch fire. • Paper plates and cups — Use for shortterm heating at low temperatures. Do not use recycled paper, which may contain metal and can catch fire. • Thermometers — Use only those labeled “Microwave Safe” and follow all directions. Check the food in several places. Conventional thermometers may be used once the food has been removed from the oven. Not Recommended • Glass jars and bottles — Regular glass is too thin to be used in a microwave, and can shatter. • Paper bags — These are a fire hazard, except for popcorn bags that are designed for microwave use. • Styrofoam plates and cups — These can melt and leave an unhealthy residue on food. • Plastic storage and food containers — Containers such as margarine tubs can melt in the microwave. • Metal utensils — These can damage your oven. Remove all metal before cooking. Testing Utensils If you are not sure whether a dish is microwave-safe or not, you can perform this test: 1 Fill a 1 cup glass measuring cup with water and put it inside your oven, next to the dish you want to test. Limited Use • Aluminum foil — Use narrow strips of foil to prevent overcooking of exposed areas. Using too much foil can damage your oven, so be careful. • Ceramic, porcelain, and stoneware — Use these if they are labeled “Microwave Safe.” If they are not labeled, test them to make sure they can be used safely. Never use dishes with metallic trim. • Plastic — Use only if labeled “Microwave Safe.” Other plastics can melt. • Straw, wicker, and wood — Use only for short-term heating, as they can be flammable. 2 Press the One Minute+ button once to heat them for one minute at High power. The water should be warm and the dish you are testing should be cool. If the dish is warm, then it is absorbing microwave energy and is not acceptable for use in the microwave. 12 t~][W~ht~]\W~hTUGGwGXZGGm SGhGXYSGYWWYGGYa[ZGwt Cooking Instructions Cooking Techniques Stirring Stir foods such as casseroles and vegetables while cooking to distribute heat evenly. Food at the outside of the dish absorbs more energy and heats more quickly, so stir from the outside to the center. The oven will turn off when you open the door to stir your food. Arrangement Arrange unevenly shaped foods, such as chicken pieces or chops, with the thicker, meatier parts toward the outside of the turntable where they receive more microwave energy. To prevent overcooking, place thin or delicate parts toward the center of the turntable. Shielding Shield food with narrow strips of aluminum foil to prevent overcooking. Areas that need shielding include poultry wing-tips, the ends of poultry legs, and corners of square baking dishes. Use only small amounts of aluminum foil. Larger amounts can damage your oven. Turning Turn foods over midway through cooking to expose all parts to microwave energy. This is especially important with large items such as roasts. Standing Foods cooked in the microwave build up internal heat and continue to cook for a few minutes after the oven stops. Let foods stand to complete cooking, especially foods such as roasts and whole vegetables. Roasts need this time to complete cooking in the center without overcooking the outer areas. All liquids, such as soup or hot chocolate, should be shaken or stirred when cooking is complete. Let liquids stand a moment before serving. When heating baby food, stir well and test the temperature before serving. Adding Moisture Microwave energy is attracted to water molecules. Food that is uneven in moisture content should be covered or allowed to stand so that the heat disperses evenly. Add a small amount of water to dry food to help it cook. General Tips • Dense foods, such as potatoes, take longer to heat than lighter foods. Foods with a delicate texture should be heated at a low power level to avoid becoming tough. • Altitude and the type of cookware you are using can affect cooking time. When using a new recipe, use the minimum cooking time and check the food occasionally to prevent overcooking. • Foods with a non-porous skin or shell, such as potatoes, eggs, or hot dogs, should be pierced to prevent bursting. • Frying with heating oil or fat is not recommended. Fat and oil can suddenly boil over and cause severe burns. • Some ingredients heat faster than others. For example, the jelly inside a jelly doughnut will be hotter than the dough. Keep this in mind to avoid burns. • Home canning in the microwave oven is not recommended because all harmful bacteria may not be destroyed by the microwave heating process. • Although microwaves do not heat the cookware, the heat is often transferred to the cookware. Always use pot holders when removing food from the microwave and instruct children to do the same. 13 t~][W~ht~]\W~hTUGGwGX[GGm SGhGXYSGYWWYGGYa[ZGwt Cooking Instructions Cooking Guide Guide for Cooking Meat in Your Microwave • Place meat on a microwave-safe roasting rack in a microwave-safe dish. • Start meat fat-side down. Use narrow strips of aluminum foil to shield any bone tips or thin meat areas. • Check the temperature in several places before letting the meat stand the recommended time. • The following temperatures are removal temperatures. The temperature of the food will rise during the standing time. Food Cook Time/Power Level Roast Beef Boneless Up to 3 lbs. Cooking Time: 7-10 min. / lb. for 115° F - Rare 8-11 min. / lb. for 120° F - Medium 9-14 min. / lb. for 145° F - Well Done Directions Place roast fat-side down on roasting rack. Cover with wax paper. Turn over when cooking time is half up. Let stand 10 min. Power Level: High(Hi) for first 5 min., then Medium(50). Pork Boneless or bone-in Up to 3 lbs. Bacon 2-6 slices Cooking Time: 18-20 min. / lb. for 160° F Well Done Power Level: High(Hi) for first 5 min., then Medium(50). Cooking Time: 2 slices: 1½- 3 min. 4 slices: 3-5 min. 6 slices: 4-6 min. Power Level: High(Hi). Place roast fat-side down on roasting rack. Cover with vented plastic wrap. Turn over when cooking time is half up. Let stand 10 min. Arrange slices on roasting rack or a dish lined with paper-towel. Cover with paper towel. Microwave until crisp. Guide for Cooking Poultry in Your Microwave • • • • Place poultry on a microwave-safe roasting rack in a microwave-safe dish. Cover poultry with wax paper to prevent spattering. Use aluminum foil to shield bone tips, thin meat areas, or areas that start to overcook. Check the temperature in several places before letting the poultry stand the recommended time. Food Cook Time/Power Level Directions Whole Cooking Time: Chicken 7-10 min. / lb. 170° -180°F Up to 3 lbs. Place chicken breast-side down on roasting rack. Cover with wax paper. Turn over when cooking time is half up. Cook until juices run clear and Power Level: Medium High(70). meat near the bone is no longer pink. Let stand 510 min. Chicken Cooking Time: Pieces 8-12 min. / lb. 180°F dark meat 170°F light meat Up to 1.5 lbs. Power Level: Medium High(70). Place chicken bone-side down on dish, with the thickest portions towards the outside of the dish. Cover with wax paper. Turn over when cooking time is half up. Cook until juices run clear and meat near the bone is no longer pink. Let stand 510 min. 14 t~][W~ht~]\W~hTUGGwGX\GGm SGhGXYSGYWWYGGYa[ZGwt Cooking Instructions Guide for Cooking Seafood in Your Microwave • Cook fish until it flakes easily with a fork. • Place fish on a microwave-safe roasting rack in a microwave-safe dish. • Use a tight cover to steam fish. A lighter cover of wax paper or paper towel provides less steaming. • Do not overcook fish; check it at minimum cooking time. Food Steaks Up to 1.5 lbs. Fillets Up to 1.5 lbs. Cook Time/Power Level Directions Cooking Time: 6-9 min. / lb. Arrange steaks on roasting rack with meaty portions towards the outside of rack. Cover with wax paper. Turn over and rearrange when cooking Power Level: Medium-High(70). time is half up. Cook until fish flakes easily with a fork. Let stand 3-5 min. Cooking Time: 5-7 min. / lb Power Level: High(Hi). Shrimp Cooking Time: 4-6 min. / lb. Up to 1.5 lbs. Power Level: High(Hi). Arrange fillets in a baking dish, turning any thin pieces under. Cover with wax paper. If over 1/2 inch thick, turn over and rearrange when cooking time is half up. Cook until fish flakes easily with a fork. Let stand 2-3 min. Arrange shrimp in a baking dish without overlapping or layering. Cover with wax paper. Cook until firm and opaque, stirring 2 or 3 times. Let stand 5 min. Guide for Cooking Eggs in Your Microwave • Never cook eggs in the shell, and never warm hard-cooked eggs in the shell; they can explode. • Always pierce whole eggs to keep them from bursting. • Cook eggs just until set; they become tough if overcooked. Guide for Cooking Vegetables in Your Microwave • Vegetables should be washed just before cooking. Often, no extra water is needed. If dense vegetables such as potatoes, carrots and green beans are being cooked, add about ¼ cup water. • Small vegetables (sliced carrots, peas, lima beans, etc.) will cook faster than larger ones. • Whole vegetables, such as potatoes, acorn squash or corn on the cob, should be arranged in a circle on the turntable before cooking. They will cook more evenly if turned over after half the cooking time. • Always place vegetables like asparagus and broccoli with the stem ends pointing towards the edge of the dish and the tips toward the center. • When cooking cut vegetables, always cover the dish with a lid or vented microwavable plastic wrap. • Whole, unpeeled vegetables such as potatoes, squash, eggplant, etc., should have their skin pricked in several spots before cooking to prevent them from bursting. • For more even cooking, stir or rearrange whole vegetables halfway through the cooking time. • Generally, the denser the food, the longer the standing time. (Standing time refers to the time necessary for dense, large foods and vegetables to finish cooking after they come out of the oven.) A baked potato can stand on the counter for five minutes before cooking is completed, while a dish of peas can be served immediately. 15 t~][W~ht~]\W~hTUGGwGX]GGm SGhGXYSGYWWYGGYa[ZGwt Cooking Instructions Defrosting Guide • Unwrap food. Place food on a microwave-safe rack, plate or shallow dish. • After first half of defrosting time: remove any remaining wrap, break food apart or separate pieces if possible, remove any thawed food, if possible, shield tips, thin meat or warm areas of food with foil. • When defrosted, food should be cool, but softened in all areas. If still slightly icy, return to microwave oven very briefly, or let stand a few minutes. • Poultry and fish may be placed under running cool water until defrosted. Food Microwave Time at Defrost Level Procedure Beef Chuck Roast Microwave Time: 7-9 min / lb Let Stand: 5-10 min. up to 3 lbs Place on plate or rack. Microwave until a wooden pick can be easily inserted in center. Turn over twice. Microwave Time: 6-9 min / lb Place on plate or rack. Microwave until Steaks Let Stand: 5-10 min pliable, then separate steaks and rearrange. up to 3 lbs Turn over twice. Ground Beef Microwave Time: 8-10 min / lb Place on plate or rack. Microwave until Let Stand: 5-10 min. pliable, then break apart and remove up to 3 lbs defrosted portions at halftime. Turn over twice. Pork Spareribs up to 3 lbs Microwave Time: 6-8 min / lb Let Stand: 5-10 min. Pork Chops up to 3 lbs Microwave Time: 6-8 min / lb Let Stand: 5-10 min. Poultry Whole Chicken up to 5 lbs Microwave Time: 7-9 min / lb Let Stand: 5-10 min. Pieces up to 2 lbs Place on plate or rack. Microwave until pliable, then separate and rearrange. Turn over twice. Place on plate or rack. Microwave until pliable, then separate and rearrange. Turn over twice. Place on plate or rack. Microwave until pliable, then break apart and rearrange portions at half time. Rinse cavity with cool water. Remove giblets. Microwave Time: 9-11 min / lb Place on plate or rack. Microwave until pliable, then break apart and rearrange Let Stand: 5-10 min. portions at half time. Seafood Steaks up to 3 lbs Microwave Time: 6-9 min / lb Let Stand: 5-10 min. Fillets up to 3 lbs Microwave Time: 4-7 min / lb Let Stand: 5-10 min. Shrimp up to 3 lbs Microwave Time: 4-7 min / lb Let Stand: 5-10 min. Place on plate or rack. MIcrowave until a wooden pick can be easily inserted in center, break apart and rearrange at half time. Place on plate or rack. Microwave until a wooden pick can be easily inserted in center, break apart and rearrange at half time. Place on plate or rack. Microwave until pliable, then separate and rearrange at half time. 16 t~][W~ht~]\W~hTUGGwGX^GGm SGhGXYSGYWWYGGYa[ZGwt Cooking Instructions Recipes Beef and Barley Stew 1½ lbs. beef stew cubes, cut into ½-inch pieces ½ cup chopped onion 2 Tbs. all-purpose flour 1 Tbs Worcestershire sauce 1 can (13.75-14.5 oz.) beef broth 2 medium carrots, cut into ½-inch slices (about 1 cup) ½ cup barley 1 bay leaf ¼ tsp. pepper 1 pkg. (9-10 oz.) frozen peas, thawed 1. In a 2-quart casserole, combine beef, onion, flour, and Worcestershire; mix well. Cover with lid. Cook at High for 6 to 8 minutes until beef is no longer pink, stirring once. 2. Stir in beef broth, carrots, barley, bay leaf, and pepper. Cover with lid. Cook at Medium for 45 to 50 minutes until carrots and beef are tender, stirring 2 to 3 times. 3. Stir in peas. Cover with lid. Cook at Medium for 10 minutes. Let stand for 10 minutes. Remove bay leaf before serving. Makes 6 servings. Broccoli and Cheese Casserole ¼ cup butter or margarine ¼ cup chopped onion 1½ Tbs. flour ½ tsp. salt ¼ tsp. dry mustard 1 /8 tsp. pepper 1½ cups milk ¼ cup chopped red pepper 8 oz. (2 cups) cheddar cheese, shredded 1 pkg. (9-10 oz.) frozen chopped broccoli, thawed 4 cups cooked spiral shaped pasta (8 oz. dry) 1. In a 2-quart casserole, cook butter and onion at High for 2 to 3 minutes until onion is soft, stirring once. 2. Add flour, salt, mustard, and pepper; mix well. Cook at High for 60 to 90 seconds until mixture boils. Stir in milk until smooth. 3. Stir in red pepper. Cook at High for 2 to 3 minutes until mixture boils and thickens slightly, stirring twice. Stir in cheese until melted. 4. Add broccoli and pasta, mix well. Cover with lid. Cook at High for 4 to 6 minutes until heated through, stirring once. Stir before serving. Makes 6 servings. 17 t~][W~ht~]\W~hTUGGwGX_GGm SGhGXYSGYWWYGGYa[ZGwt Cooking Instructions Warm Potato Salad Black Bean Soup 2 lbs. small red potatoes, cut into ½-inch pieces 4 slices bacon (uncooked), cut into ½-inch pieces ¼ cup chopped onion 2 tsp. sugar 1 tsp. salt 1 tsp. flour ½ tsp. celery seed 1/8 tsp. pepper 2½ Tbs. apple cider vinegar 1 cup chopped onion 1 clove garlic, minced 2 cans (15 oz. each) black beans, drained 1 can (14-16 oz.) stewed tomatoes, chopped 1 can (13.75-14.5 oz.) chicken broth 1 can (7-8.5 oz.) corn 1 can (4 oz.) chopped green chilies 1-2 tsp. ground cumin, or to taste 1. In a 2-quart casserole, combine potatoes and ¼ cup water. Cover with lid. Cook at High until potatoes are tender (10-12 min.); stir twice. Drain and set aside to cool slightly. 2. In a medium bowl, cook bacon at High until crisp (3-5 min.); stir once. Place bacon on a paper towel. Reserve 1 Tbs. drippings. 3. Combine drippings and onion. Cover with plastic wrap; turn back a corner to vent steam. Cook at High until tender (3-4 min.); stir once. 4. Stir in sugar, salt, flour, celery seed, and pepper. Cook at High until mixture boils (30-40 sec.). Stir in vinegar and ½ cup water. Cook at High until liquid boils and thickens slightly (1-2 min.); stir once. Add bacon to dressing. Pour dressing over potatoes. Stir well. Makes 6 servings. 1. Place onion and garlic in a 3-quart casserole. Cover with lid. Cook at High for 3 to 5 minutes until tender. 2. Add one can of beans, mash beans with a fork. Add remaining ingredients; mix well. 3. Cook uncovered, at High for 10 minutes; stir. Reduce power to Medium and cook for 5 minutes. Stir before serving. Makes about 2 quarts. 18 t~][W~ht~]\W~hTUGGwGX`GGm SGhGXYSGYWWYGGYa[ZGwt Appendix Troubleshooting Guide You see sparks or arcing. Before you call a repair person for your oven, check this list of possible problems and solutions. • Remove any metallic utensils, cookware, or metal ties. If using foil, use only narrow strips and allow at least one inch between the foil and interior oven walls. Neither the oven’s display nor the oven operate. • Properly insert the plug into a grounded outlet. • If the outlet is controlled by a wall switch, make sure the wall switch is turned on. • Remove the plug from the outlet, wait ten seconds, then plug it in again. • Reset the circuit breaker or replace any blown fuse. • Plug another appliance into the outlet; if the other appliance doesn’t work, have a qualified electrician repair the outlet. • Plug the oven into a different outlet. The turntable makes noises or sticks. • Clean the turntable, roller ring and oven floor. • Make sure the turntable and roller ring are positioned correctly. Using your microwave causes TV or radio interference. • This is similar to the interference caused by other small appliances, such as hair dryers. Move your microwave further away from other appliances, like your TV or radio. The oven’s display works, but the power won’t come on. • Make sure the door is closed securely. • Check to see if packing material or other material is stuck to the door seal. • Check for door damage. • Press Cancel twice and re-enter all cooking instructions. The power goes off before the set time has elapsed. • If there has not been a power outage, remove the plug from the outlet, wait ten seconds, then plug it in again. If there was a power outage, the time indicator will display “88:88” Reset the clock and any cooking instructions. • Reset the circuit breaker or replace any blown fuse. The food is cooking too slowly. • Make sure the oven is on its own 15 amp circuit line. Operating another appliance on the same circuit can cause a voltage drop. If necessary, move the oven to its own circuit. 19 t~][W~ht~]\W~hTUGGwGYWGGm SGhGXYSGYWWYGGYa[ZGwt Appendix Care and Cleaning Follow these instructions to clean and care for your oven. • Keep the inside of the oven clean. Food particles and spilled liquids can stick to the oven walls, causing the oven to work less efficiently. • Wipe up spills immediately. Use a damp cloth and mild soap. Do not use harsh detergents or abrasives. • To help loosen baked on food particles or liquids, heat two cups of water (add the juice of one lemon if you desire to keep the oven fresh) in a four-cup measuring glass at High power for five minutes or until boiling. Let stand in the oven for one or two minutes. • Remove the glass tray from the oven when cleaning the oven or tray. To prevent the tray from breaking, handle it carefully and do not put it in water immediately after cooking. Wash the tray carefully in warm sudsy water or in the dishwasher. • Clean the outside surface of the oven with soap and a damp cloth. Dry with a soft cloth. To prevent damage to the operating parts of the oven, don’t let water seep into the openings. • Wash the door window with very mild soap and water. Be sure to use a soft cloth to avoid scratching. • If steam accumulates inside or outside the oven door, wipe with a soft cloth. Steam can accumulate when operating the oven in high humidity and in no way indicates microwave leakage. • Never operate the oven without food in it; this can damage the magnetron tube or glass tray. You may wish to leave a cup of water in the oven when it is not in use to prevent damage if the oven is accidentally turned on. If you have a problem you cannot solve, please call our service line: 1-800-SAMSUNG 20 t~][W~ht~]\W~hTUGGwGYXGGm SGhGXYSGYWWYGGYa[ZGwt Appendix Specifications Model Number MW640WA/MW640BA/MW650WA/MW650BA Oven Cavity 0.6cuft Controls 10 power levels, including defrost Timer 99 minutes, 99 seconds Power Source 120 VAC, 60 Hz Power Output 650 Watts Outside Dimensions 189/64”(W) X 923/32”(H) X 1227/32”(D) Oven Cavity Dimensions 1113/32”(W) X 73/64”(H) X 127/16”(D) Net/Gross Weight 22.2/24.4 lbs 21 t~][W~ht~]\W~hTUGGwGYYGGm SGhGXYSGYWWYGGYa[ZGwt Warranty SAMSUNG MICROWAVE OVEN LIMITED LIMITED WARRANTY WARRANTY TO TO ORIGINAL ORIGINAL PURCHASER PURCHASER This SAMSUNG brand product, as supplied and distributed by SAMSUNG ELECTRONICS AMERICA, INC. (SAMSUNG) and delivered new, in the original carton to the original consumer purchaser, is warranted by SAMSUNG against manufacturing defects in materials and workmanship for a limited warranty period of: One (1) Year Parts and Labor, Eight (8) Years Parts Warranty for Magnetron This limited warranty begins on the original date of purchase, and is valid only on products purchased and used in the United States. To receive warranty service, the purchaser must contact SAMSUNG for problem determination and service procedures. Warranty service can only be performed by a SAMSUNG authorized service center. The original dated bill of sale must be presented upon request as proof of purchase to SAMSUNG or SAMSUNG’s authorized service center. Transportation of the product to and from the service center is the responsibility of the purchaser. SAMSUNG will repair or replace this product, at our option and at no charge as stipulated herein, with new or reconditioned parts or products if found to be defective during the limited warranty period specified above. All replaced parts and products become the property of SAMSUNG and must be returned to SAMSUNG. Replacement parts and products assume the remaining original warranty, or ninety (90) days, whichever is longer This limited warranty covers manufacturing defects in materials and workmanship encountered in normal, non-commercial use of this product and shall not apply to the following, including, but not limited to: damage which occurs in shipment; delivery and installation; applications and uses for which this product was not intended; altered product or serial numbers; cosmetic damage or exterior finish; accidents, abuse, neglect, fire, water, lightning or other acts of nature; use of products, equipment, systems, utilities, services, parts, supplies, accessories, applications, installations, repairs, external wiring or connectors not supplied or authorized by SAMSUNG which damage this product or result in service problems; incorrect electrical line voltage, fluctuations and surges; customer adjustments and failure to follow operating instructions, cleaning, maintenance and environmental instructions that are covered and prescribed in the instruction book; product removal and reinstallation; problems caused by pest infestations, and overheating or overcooking by user; glass tray or turntable; reduced magnetron power output related to normal aging. SAMSUNG does not warrant uninterrupted or error-free operation of the product. 22 t~][W~ht~]\W~hTUGGwGYZGGm SGhGXYSGYWWYGGYa[ZGwt Warranty THERE ARE NO EXPRESS WARRANTIES OTHER THAN THOSE LISTED AND DESCRIBED ABOVE, AND NO WARRANTIES WHETHER EXPRESS OR IMPLIED, INCLUDING, BUT NOT LIMITED TO, ANY IMPLIED WARRANTIES OF MERCHANTABILITY OR FITNESS FOR A PARTICULAR PURPOSE, SHALL APPLY AFTER THE EXPRESS WARRANTY PERIODS STATED ABOVE, AND NO OTHER EXPRESS WARRANTY OR GUARANTY GIVEN BY ANY PERSON, FIRM OR CORPORATION WITH RESPECT TO THIS PRODUCT SHALL BE BINDING ON SAMSUNG. SAMSUNG SHALL NOT BE LIABLE FOR LOSS OF REVENUE OR PROFITS, FAILURE TO REALIZE SAVINGS OR OTHER BENEFITS, OR ANY OTHER SPECIAL, INCIDENTAL OR CONSEQUENTIAL DAMAGES CAUSED BY THE USE, MISUSE OR INABILITY TO USE THIS PRODUCT, REGARDLESS OF THE LEGAL THEORY ON WHICH THE CLAIM IS BASED, AND EVEN IF SAMSUNG HAS BEEN ADVISED OF THE POSSIBILITY OF SUCH DAMAGES. NOR SHALL RECOVERY OF ANY KIND AGAINST SAMSUNG BE GREATER IN AMOUNT THAN THE PURCHASE PRICE OF THE PRODUCT SOLD BY SAMSUNG AND CAUSING THE ALLEGED DAMAGE. WITHOUT LIMITING THE FOREGOING, PURCHASER ASSUMES ALL RISK AND LIABILITY FOR LOSS, DAMAGE OR INJURY TO PURCHASER AND PURCHASER’S PROPERTY AND TO OTHERS AND THEIR PROPERTY ARISING OUT OF THE USE, MISUSE OR INABILITY TO USE THIS PRODUCT SOLD BY SAMSUNG NOT CAUSED DIRECTLY BY THE NEGLIGENCE OF SAMSUNG. THIS LIMITED WARRANTY SHALL NOT EXTEND TO ANYONE OTHER THAN THE ORIGINAL PURCHASER OF THIS PRODUCT, IS NONTRANSFERABLE AND STATES YOUR EXCLUSIVE REMEDY. Some states do not allow limitations on how long an implied warranty lasts, or the exclusion or limitation of incidental or consequential damages, so the above limitations or exclusions may not apply to you. This warranty gives you specific legal rights, and you may also have other rights which vary from state to state. To obtain warranty service, please contact: SAMSUNG ELECTRONICS AMERICA, INC. WWW.SAMSUNGUSA.COM SAMSUNG CUSTOMER SERVICE 400 VALLEY RD., SUITE 201, MT. ARLINGTON, NJ 07856 Tel: 973-601-6000, Fax: 973-601-6001 1-800-SAMSUNG (1-800-726-7864) WWW.SAMSUNGSUPPORT.COM 23 t~][W~ht~]\W~hTUGGwGY[GGm SGhGXYSGYWWYGGYa[ZGwt Warranty SAMSUNG ELECTRONICS NOR TH AMERICAN LIMITED WARRANTY ADDENDUM NORTH AMERICAN LIMITED WARRANTY ADDENDUM Subject to the requirements, conditions, exclusions and limitations of the Original Limited Warranty supplied with Samsung Electronics (SAMSUNG) products, and the requirements, conditions, exclusions and limitations contained herein, SAMSUNG will additionally provide Warranty Repair Service in the United States on SAMSUNG products purchased in Canada, and in Canada on SAMSUNG products purchased in the United States, for the warranty period originally specified, and to the Original Purchaser only. The above described warranty repairs must be performed by a SAMSUNG Authorized Service Center. Along with this Statement, the Original Limited Warranty Statement and a dated Bill of Sale as Proof of Purchase must be presented to the Service Center. Transportation to and from the Service Center is the responsibility of the purchaser. Conditions covered are limited only to manufacturing defects in material or workmanship, and only those encountered in normal use of the product. Excluded, but not limited to, are any original specified provisions for, in-home or on-site services, minimum or maximum repair times, exchanges or replacements, accessories, options, upgrades, or consumables. For the locations of a SAMSUNG Authorized Service Center in the United States and Canada, please contact SAMSUNG at: 1-800-SAMSUNG (1-800-726-7864) Or on-line at: WWW.SAMSUNGUSA.COM and WWW.SAMSUNGCANADA.COM 24 t~][W~ht~]\W~hTUGGwGY\GGm SGhGXYSGYWWYGGYa[ZGwt Note 25 t~][W~ht~]\W~hTUGGwGY]GGm SGhGXYSGYWWYGGYa[ZGwt Note 26 t~][W~ht~]\W~hTUGGwGY^GGm SGhGXYSGYWWYGGYa[ZGwt Guía Rápida Feature Operation Programar el Reloj 1. Presione CLOCK. 2. Use los botones numéricos para ingresar la hora del día. 3. Presione nuevamente CLOCK. Cocinando con Un Minuto Más 1. Presione el botón ONE MINUTE + una vez por cada minuto de cocción. 2. Se mostrará el tiempo en la pantalla y el horno comenzará. Botones Cocción Instantánea 1. Presione el botón que corresponda al alimento que va a cocinar. (Por ejemplo POPCORN). 2. Presione repetidamente el botón para seleccionar la porción. Descongelar 1. Presione DEFROST. 2. Presione en secuencia los botones numéricos (del 0 al 9) para ingresar el tiempo deseado de descongelado. 3. Presione START. Para programar el 1. Presione el botón POWER LEVEL. Si usted desea programar Tiempo de Cocción y un nivel de potencia diferente a ALTO, entonces presione los Niveles de Potencia repetidamente el botón POWER LEVEL. 2. Use los botones numéricos para programar el tiempo de cocción. 3. Presione START para comenzar a cocinar. 27 t~][W~ht~]\W~hTUGGwGY_GGm SGhGXYSGYWWYGGYa[ZGwt Quick Reference Feature Operation Set Clock 1. Press CLOCK. 2. Use the Number buttons to enter the current time. 3. Press CLOCK again. One Minute+ Cooking 1. Press the ONE MINUTE + button once for each minute of cooking. 2. The time will display and the oven will start. Instant Cook Buttons 1. Press button that corresponds to the food you are cooking (for example, POPCORN). 2. Press the button repeatedly to select serving size. Defrost 1. Press DEFROST. 2. Press the buttons(0-9) sequentially to enter the desired defrosting time. 3. Press START. Set Cooking Time and Power Levels 1. Press the POWER LEVEL button. If you want to set the power level to something other than High, press the POWER LEVEL button repeatedly. 2. Use NUMBER buttons to set cooking time. 3. Press START to begin cooking. ELECTRONICS SAMSUNG ELECTRONICS AMERICA, INC. HEADQUARTERS 105 CHALLENGER ROAD RIDGEFIELD PARK, NEW JERSEY 07660-0511 Samsung Electronics Co., Ltd. April. 2002 Printed in Malaysia