1
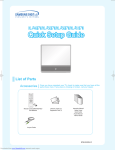
BP68-00426A-00_QG_0831
9/3/04
3:11 PM
Page 1
Quick Guide
Connections
Connecting VHF and UHF Antennas
Connecting a Camcorder
Connecting a DVD Player
If you do not have a cable system, you will need to connect an antenna to your TV.
The side panel jacks on your TV make it easy to connect a camcorder to your TV. You can use your camcorder to view tapes without using a VCR.
The rear panel jacks on your TV make it easy to connect a DVD player to your TV.
Antennas with 300-ohm Flat Twin Leads
If your antenna looks like this:
it has 300-ohm flat
twin leads.
If your antenna looks like this:
Locate the A/V output jacks on the camcorder. They are usually found on the side or back of the camcorder.
Camcorder
Antennas with 75-ohm Round Leads
it is an antenna with
75-ohm round leads.
TV Side Panel
Camcorder
Output Jacks
Connect a set of audio cables between the AUDIO IN jacks on the TV and the AUDIO OUT jacks on the
camcorder. If you have mono camcorder, connect L(mono) to camcorder audio out using only one audio
cable.
Connect a video cable between the VIDEO IN (or S-VIDEO IN) jack on the TV and the VIDEO OUT jack on
the camcorder. The audio-video cables shown here are usually included with a Camcorder. (If not, check
your local electronics store.) If your camcorder is stereo, you need to connect a set of two cables.
Connecting to Y, PB, PR
Connecting to audio and video jacks
Connect a set of audio cables between the COMPONENT (1 or 2)
audio (L, R) in jacks on the TV and the AUDIO OUT jacks on the DVD
player.
To enable Component video viewing, connect a set of video cables
between the COMPONENT (1 or 2) VIDEO (Y, PB, PR) in jacks on the
TV and VIDEO (Y, PB, PR (or Y, CB, CR) OUT jacks on the DVD player.
Connect a set of audio cables between the Audio in (1 or 2) jacks on
the TV and the AUDIO OUT jacks on the DVD player.
Connect a video cable between the VIDEO IN (1 or 2) jack on the TV
and the VIDEO OUT jack on the DVD player.
TV Rear Panel
Place the wires from the twin leads under the screws on the 300-75 ohm
adaptor (not supplied). Use a screwdriver to tighten the screws.
Plug the adapter into the “ANT 1 IN” terminal on the rear panel.
TV Rear Panel
Plug the antenna lead into the “ANT 1 IN” terminal on the rear panel.
Connecting a DTV Set-Top Box
Separate VHF and UHF Antennas
If you have two separate antennas for your TV (one VHF and one UHF), you must combine the two antenna signals before connecting the antennas to the
TV. This procedure requires an optional combiner-adaptor (available at most electronics shops).
Connecting to Y, PB, PR
Connecting to DVI (Digital Visual Interface)
Connect a set of audio cables between the COMPONENT (1 or 2) audio
(L, R) in jacks on the TV and the AUDIO OUT jacks on the Set-Top Box.
Connect a set of video cables between the COMPONENT (1 or 2) VIDEO
(Y, PB, PR) in jacks on the TV and VIDEO (Y/PB/PR or Y/CB/CR) OUT jacks
on the Set-Top Box.
Connect a set of audio cables between the DVI audio (L, R) in jacks on the
TV and the AUDIO OUT jacks on the Set-Top Box.
Connect a video cable between the DVI IN jack on the TV and the DVI
OUT jack on the Set-Top Box.
Connect both antenna leads to the combiner.
Plug the combiner into the “ANT 1 IN” terminal on the rear panel.
Incoming Cable
or Antenna
Incoming Cable
or Antenna
TV Rear Panel
DVD Player
DVD Player
NOTE : For an explanation of Component video, see your DVD
player's owner's manual.
Incoming Cable
or Antenna
Connecting Cable TV and VCR
You can connect different cable systems to your TV, including cable without a cable box, and cable with a cable box that descrambles some or all channels.
TV Rear Panel
From Cable
This connection allows you to watch cable and premium channels. You should keep your TV selected
to “ANT 1 IN” so that you can use the TV features. When viewing premium channels, select “ANT 2
IN” and tune the TV to channel 3 or 4 (whichever channel is vacant in your area), then use the
converter box to change channels. You will need two coaxial cables.
NOTES
• When you use a converter box with your TV, there may be features that you can not program
using the remote control, such as programming your favorite channels and blocking channels.
• The output from “ANT 1 OUT” is available when select “Ant.2” in the “Antenna“ channel
menu.
TV Rear Panel
From
Cable
Connecting a Cable Converter Box and a VCR
PC Display
Incoming Cable
or Antenna
Connecting a Cable Converter Box
TV Rear Panel
DTV Set-Top Box
DTV Set-Top Box
NOTE : For an explanation of Component video, see your Set Top Box
owner's manual.
How to Connect Your PC to the TV
Connecting to R,G,B
Connecting to HDMI (High Definition Multimedia Interface)
Connect a set of audio cables between the PC audio (L, R) in jacks on the
TV and the AUDIO OUT jacks on the Set-Top Box.
Connect a video cable between the PC IN jack on the TV and the R.G.B
OUT jack on the Set-Top Box.
Connect a HDMI cable between the HDMI IN jack on the TV and the HDMI
OUT jack on the Set-Top Box.
TV Rear Panel
Using Your TV as a Computer (PC) Display
This figure shows the Standard Connector-jack panel. The actual configuration on your TV may be different, depending on the model.
TV Rear Panel
TV Rear Panel
This connection allows you to watch and record basic and premium cable channels,
as well as watch videotapes. You should keep your TV selected to “ANT 1 IN” so
that you can use the TV’s features. When viewing premium channels or recording
with the VCR, select “ANT 2 IN” (whichever channel is vacant in your area), then
use the converter box to change channels.
15Pin(D-Sub)
Cable
Audio Cable
Caution: If you want to record one channel while watching another channel, a splitter (not included) must be added between the cable and “ANT 1 IN”. One output of
the splitter goes to “ANT 1 OUT” and the second output is connected to IN on the
cable converter box.
If you have a mono VCR, connect L/Mono to VCR Audio OUT using only one audio
cable.
If you have a S-VHS VCR, use the S-video connections and remove the video cable.
Do not connect the video cable and the S-video cable to video1 simultaneously.
VCR
When you use a converter box with your TV there may be features that you can not
program using the remote control, such as programming your favorite channels and
blocking channels.
Incoming Cable
or Antenna
Incoming Cable
or Antenna
DTV Set-Top Box
PC
DTV Set-Top Box
NOTE : Please check if the power of HDMI source is on, in case that you fail
to select HDMI from the “Source List” even after you connected the
cable of HDMI source (DTV Set-Top Box, DVD, etc.) to TV.
NOTE : The “Anynet” jack is for repairs and software upgrades.
BP68-00426A-00_QG_0831
9/3/04
3:11 PM
Page 2
Quick Guide
Operation
Front Panel LED Indicators
Selecting the Video Signal Source
Storing Channels in Memory (Automatic Method)
Before your TV can begin memorizing the available channels,
you must specify the type of signal source that is connected to the TV
(i.e., an antenna or a cable system).
First, select the correct signal source (“Air”, “STD”, “HRC” or “IRC”)
as described before.
Press the MENU button.
Press the … or † button to select
“Channel”, then press the ENTER
button.
Channel
Input
Picture
Sound
Channel
Press the … or † button to select
“Air/CATV”, then press the ENTER
button.
Setup
Move
Enter
√
√
√
√
√
√
√
Return
Channel
Input
If you are connected to an antenna,
press the … or † button to select “Air”.
If you connected cable, press the … or
† button to select the type of cable
system: “STD”, “HRC” or “IRC”.
Antenna
: Ant.1
Air/CATV
: Air
Auto Program
Add/Delete
Favorite Channels
Name
Fine Tune
▼ More
Picture
Sound
Channel
Setup
Antenna
: Air
Ant.1
Air/CATV
: STD
Air
Auto Program
HRC
Add/Delete
IRC
Favorite Channels
Name
Fine Tune
▼ More
Move
Enter
Return
Press the MENU button.
Press the … or † button to select
“Channel”, then press the ENTER
button.
Remote Control
The three lights on the front panel indicate the status of your TV.
You can use the remote control up to about 23 feet from the TV. When using the remote control, always point it directly at the TV. You can also
use your remote control to operate your Set-Top Box, VCR, Cable box or DVD player.
Channel
Input
Picture
Sound
Channel
Press the … or † button to select “Auto
Program”, then press the ENTER button.
Your New Wide TV
Setup
Press the ENTER button to start the auto
program.
The TV begins memorizing all of the
available stations.
Press the ENTER button at any time to
interrupt the memorization process.
Press the EXIT button to exit.
Move
1. POWER
Turns the TV on and off.
√
√
√
√
√
√
√
Antenna
: Ant.1
Air/CATV
: Air
Auto Program
Add/Delete
Favorite Channels
Name
Fine Tune
▼ More
2. S.MODE
Adjust the TV sound by selecting one of
the preset factory settings. (or select your
personal, customized sound settings.)
Return
Enter
Auto Program
3. P.MODE
Adjust the TV picture by selecting one of
the preset factory settings. (or select your
personal, customized picture settings.)
Start
Enter
Return
Auto Program
Air 11
4. +100
Press to select cable channels over 100
on TV.
Stop
Enter
Return
Press the EXIT button to exit.
5. VOL +, VOL Press to increase or decrease the volume.
6. MUTE
Press to mute the TV sound.
7. Anynet
Runs the Anynet view functions and sets
up the Anynet devices.
Special Features
8. MENU
Displays the main on-screen menu.
Customizing Your Remote Control
Your TV comes equipped with a universal remote control. In addition to controlling the TV, the universal remote control
can also operate a VCR, Cable box, DVD and Set-Top Box made by Samsung (even if your VCR, Cable box and DVD
are made by manufacturers other than Samsung).
NOTE : The remote control might not be compatible with all VCRs, DVD players and Cable boxes.
9. STILL
Press to stop the action during a
particular scene. Press again to resume
normal video.
Indicator Light Key
: Light is On
: Light is Blinking
: Light is Off
10. P.SIZE
Press to change the picture size.
Setting Up Your Remote Control to Operate Your VCR (Cable box or DVD player)
Turn off your VCR (Cable box or DVD player).
Press the MODE button to switch the remote control to the VCR (CABLE or DVD) mode.
The remote control has five modes: TV, STB, VCR, CABLE and DVD.
On your Samsung remote control, press the SET button.
Enter 3 digits of the VCR (Cable box or DVD player) code listed on next page for your brand of VCR (Cable box or
DVD player).
Make sure you enter 3 digits of the code, even if the first digit is a “0”. (If more than one code listed, try the first one.)
Press the POWER button. Your VCR (Cable box or DVD player) should turn on. If your VCR (Cable box or DVD player)
turns on, your remote control is now set correctly.
If your VCR (Cable box or DVD player) does not turn on, repeat steps 2, 3, and 4, but try one of the other codes listed
for the brand of your particular VCR (Cable box or DVD player).
Once your remote control is set up, press the MODE button any time you want to use the remote to operate your VCR
(Cable box or DVD player).
NOTES
• When your remote is in the TV mode, the VCR (or DVD player) control buttons (REW, STOP, PLAY/PAUSE and FF)
will still operate your VCR (or DVD player).
• When your remote control is in the STB, VCR, CABLE or DVD mode, the volume buttons still control your TV’s
volume.
TIMER LAMP
STAND BY/TEMP
11. MODE
Selects a target device to be controlled
by the Samsung remote control (i.e., TV,
STB, VCR, CABLE, or DVD).
Indication
Standby state.
12. PRE-CH
Tunes to the previous channel.
The picture will automatically appear in about 15 seconds.
Auto Timer ON/OFF has been set and the set will automatically be turned on in about 25 seconds.
Lamp cover on rear of the set is not properly shut.
13. SOURCE
Press to display all of the available video
sources (i.e., TV, Set-Top Box, VCR, DVD,
DTV, PC).
Check if the ventilation hole on the rear of the set is blocked, because if the inner temperature is too
high, the power will shut off.
14. CH
, CH
Press to change channels.
A cooling fan inside the set is not operating normally.
15. INFO
Press to display information on the TV
screen.
Lamp may be defective. Please contact a certified technician.
• It takes about 30 seconds for the TV to warm up, so normal brightness may not appear immediately.
16. EXIT
Press to exit the menu.
• The TV has a fan to keep the inside lamp from overheating. You’ll occasionally hear it working.
17. …, †, œ, √, ENTER
Press to select highlight up, down, left, or
right. While using the on-screen menus,
press the ENTER to activate (or change) a
particular item.
BP68-00426A-00
18. MTS (MULTICHANNEL TELEVISION
STEREO)
Press to choose Stereo, Mono or SAP
(Secondary Audio Program).
19. SRS
Activates TruSurround.
20. ADD/DEL
Press to add or erase channels in the TV’s
memory.
Use the ADD/DEL button to memorize
and erase the fine tuning after fine tuning
channels.
21. SLEEP
Press to select a preset time interval for
automatic shutoff.
22. PIP (Picture In Picture)
Activates PIP.
23. Fav.CH (Favorite Channel)
Press to switch between your favorite
channels.
24. SET
Used during set up of this remote control,
so that it will work compatibly with other
devices (Set-Top Box, VCR, Cable box,
DVD, etc.).
25. DNIe (Digital Natural Image
engine)
Activates DNIe.
26. PIP Controls
SWAP; Press to exchange the video
signal that is currently displayed on the
main screen with the signal in the PIP
window.
CH
/
; Press to display the
available channels in sequence.
(These buttons change channels in the
PIP window only.)
27. VCR/DVD Controls
Controls VCR or DVD functions: Rewind,
Stop, Play/Pause, Fast Forward.
28. RESET
If your remote control is not functioning
properly, take out the batteries and press
the reset button for about 2~3 seconds.
Re-insert the batteries and try using the
remote control again.