1
Control panel Gas460
English
Package RE 22
18/01/06
Technical
instructions
Contents
Introduction . . . . . . . . . . . . . . . . . . . . . . . . . . . . . . . . . . . . . . . . . . . . . . . . . . . . . . . . . . . . . . . . . . . . . . . . . . . . . . . . .3
1 Presentation . . . . . . . . . . . . . . . . . . . . . . . . . . . . . . . . . . . . . . . . . . . . . . . . . . . . . . . . . . . . . . . . . . . . . . . . . . . . . . . . . . . . . . . . . . . . . .3
Description . . . . . . . . . . . . . . . . . . . . . . . . . . . . . . . . . . . . . . . . . . . . . . . . . . . . . . . . . . . . . . . . . . . . . . . . . . . . . . . . . .4
Operating principle . . . . . . . . . . . . . . . . . . . . . . . . . . . . . . . . . . . . . . . . . . . . . . . . . . . . . . . . . . . . . . . . . . . . . . . . . . .5
Electrical connections. . . . . . . . . . . . . . . . . . . . . . . . . . . . . . . . . . . . . . . . . . . . . . . . . . . . . . . . . . . . . . . . . . . . . . . . .5
1 Terminal block . . . . . . . . . . . . . . . . . . . . . . . . . . . . . . . . . . . . . . . . . . . . . . . . . . . . . . . . . . . . . . . . . . . . . . . . . . . . . . . . . . . . . . . . . . . .5
1.1
Electrical connections . . . . . . . . . . . . . . . . . . . . . . . . . . . . . . . . . . . . . . . . . . . . . . . . . . . . . . . . . . . . . . . . . . . . . . . . . . . . . .6
2 Installation with optional Rematic control unit . . . . . . . . . . . . . . . . . . . . . . . . . . . . . . . . . . . . . . . . . . . . . . . . . . . . . . . . . . . . . . . . . . . .7
2.1
Fitting the Rematic control unit. . . . . . . . . . . . . . . . . . . . . . . . . . . . . . . . . . . . . . . . . . . . . . . . . . . . . . . . . . . . . . . . . . . . . . . .7
2.2
Connections optional REMATIC . . . . . . . . . . . . . . . . . . . . . . . . . . . . . . . . . . . . . . . . . . . . . . . . . . . . . . . . . . . . . . . . . . . . . .9
2.3
Mouting of the control unit . . . . . . . . . . . . . . . . . . . . . . . . . . . . . . . . . . . . . . . . . . . . . . . . . . . . . . . . . . . . . . . . . . . . . . . . . .10
3 Connecting a third party control unit. . . . . . . . . . . . . . . . . . . . . . . . . . . . . . . . . . . . . . . . . . . . . . . . . . . . . . . . . . . . . . . . . . . . . . . . . . .11
4 Connecting the harness . . . . . . . . . . . . . . . . . . . . . . . . . . . . . . . . . . . . . . . . . . . . . . . . . . . . . . . . . . . . . . . . . . . . . . . . . . . . . . . . . . . .11
5 Connecting the low-water pressure switch alarm indicator (Only NL) . . . . . . . . . . . . . . . . . . . . . . . . . . . . . . . . . . . . . . . . . . . . . . . . .12
6 Connecting the safety thermostat alarm indicator . . . . . . . . . . . . . . . . . . . . . . . . . . . . . . . . . . . . . . . . . . . . . . . . . . . . . . . . . . . . . . . .12
7 Connecting one or two hour run meters (Package BG 40) . . . . . . . . . . . . . . . . . . . . . . . . . . . . . . . . . . . . . . . . . . . . . . . . . . . . . . . . .13
8 Connecting the flue gas thermometer (Package BP 28) . . . . . . . . . . . . . . . . . . . . . . . . . . . . . . . . . . . . . . . . . . . . . . . . . . . . . . . . . . .14
9 Connecting the burner . . . . . . . . . . . . . . . . . . . . . . . . . . . . . . . . . . . . . . . . . . . . . . . . . . . . . . . . . . . . . . . . . . . . . . . . . . . . . . . . . . . . .15
Skeleton Diagrams. . . . . . . . . . . . . . . . . . . . . . . . . . . . . . . . . . . . . . . . . . . . . . . . . . . . . . . . . . . . . . . . . . . . . . . . . . .16
Starting up and operation . . . . . . . . . . . . . . . . . . . . . . . . . . . . . . . . . . . . . . . . . . . . . . . . . . . . . . . . . . . . . . . . . . . . .17
1 Control panel without Rematic control unit. . . . . . . . . . . . . . . . . . . . . . . . . . . . . . . . . . . . . . . . . . . . . . . . . . . . . . . . . . . . . . . . . . . . . .17
2 Control panel with optional Rematic control unit . . . . . . . . . . . . . . . . . . . . . . . . . . . . . . . . . . . . . . . . . . . . . . . . . . . . . . . . . . . . . . . . .18
Control panel RE 22
18/01/06 - 300005257-001-A
Introduction
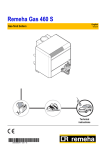
The control panel is fitted to Remeha boilers in the GAS 460 ranges.
Warning
This product will be marketed in the following European Union
member states :
The boiler shall be assembled and installed by a qualified
professional only.
Version L: BE, ES
For a proper operating of the boiler, follow carefully the instructions.
Version S: GB, HU, ES
Directive 97/23/EC
Gas and oil boilers with a maximum operating temperature of 110°C
and hot water tanks with a maximum operating pressure of 10 bar
pertain to article 3.3 of the directive, and therefore, cannot be CEmarked to certify compliance with the directive 97/23 ECThe boilers
and hot water tanks are designed and manufactured in accordance
with the sound engineering practice, as requested in article 3.3 of the
directive 97/23/EC; it is certified by compliance with the directives 90/
396/EC, 92/42/EC, 73/23 EC and 89/336/EC.
1 Presentation
The control panel is used to control boilers with 1 or 2-stage burners.
It may be fitted along with several optional features:
- Rematic control unit for 2-stage burners regulating the burner and
2 mixing valve, for heating only or for heating and domestic hot
water.
- Hour run meter/s (Package BG 40)
- Flue gas thermometer (Package BP 28)
Symbols used
Caution danger
Risk of injury and damage to equipment. Attention must be paid to the warnings on
safety of persons and equipment
Specific information
Information must be kept in mind to maintain comfort
Z
Reference
Refer to another manual or other pages in this instruction manual
18/01/06 - 300005257-001-A
Control panel RE 22
3
Description
1
3-position switch Auto / Manual ! / TEST STB
- The switch may be left on either position manual ! or automatic AUTO.
- STB TEST: Temporary action to test the safety thermostat.
- Press the TEST STB switch and set pump shut-off switch (2) 9 to the “Summer” position %.
2
Switch Burner / Heating pump:
This button is used to control the burner and the heating pump.
Both buttons are in “Winter” . position: Heating and hot water production systems operate (if a hot water tank is included).
Both buttons are in “Summer” % position: The burner and the heating pump don't operate.
If the boiler is fitted with a control unit, both buttons must be left on the Winter . position.
3
Main ON/OFF switch
4
Location for hour run meter for the first and second stage (optional)
5
Boiler thermostat (30 to 90 °C):
A factory-set stop limits the maximum temperature to 75 °C. The stop may be moved if necessary.
6
Stage one or stage two indicators:
These only go on if the relevant thermostat or control unit require heating and if the safety contact is closed.
7
Boiler thermometer
8
Location for flue gas thermometer (optional)
9
Safety thermostat with manual reset (set to 110 °C).
10 10 A Circuit-breaker: with delayed action and manual reset.
11 Location for optional features or a RC4/RC5 control unit
13 Switch for selecting the number of burner stages
14 Burner alarm indicator + Reset button
4
Control panelRE 22
18/01/06 - 300005257-001-A
Operating principle
•
Boiler regulation
The boiler may be regulated:
- either by the boiler thermostats,
- or by the Rematic control unit, if any (optional terminal strip present
in control panel)
- or by the Rematic control unit of the cascaded installation.
- or by a third party control unit with volt-free contacts for high-low
and on-off operation, if any (connection kit necessary).
If the boiler is fitted with a Rematic control unit, the boiler
temperature is modulated by the regulator, which controls the burner
and the motorised mixing valves depending upon the outside
temperature. With a third party control connected, the boiler
thermostats are set to the maximum position. Operating security is
provided by the safety thermostat with manual reset.
Electrical connections
the electrical wiring has been carefuly checked in the
Asfactory,
the internal connections on the control panel must
not be changed in any way.
Electrical connections must match the electrical diagrams delivered
with the equipment and comply with the instructions in the manual.
The electrical connections shall comply with standards in force. The
equipment must have a power supply equipped with a omnipolar
switch with an opening distance above 3 mm.
The earth connections shall comply with local standards.
1 Terminal block
All connections are made with the terminal boxes designed for that
purpose on the back of the boiler's command board.
18/01/06 - 300005257-001-A
Control panel RE 22
5
1.1
Electrical connections
1
5
3
4
6
8
7
3
9
5
4
6
8
7
3
9
3
3
83
58
N
02
4
2
B
Proceed as follows to open the control panel:
Pull out the connection board cover.
Remove the upper casing of the boiler.
Open the side of the panel. Remove the 4 screws . Turn the
panel.
Remove the front casing.
These cables will be fixed on to the control panel with cable clips
(supplied in a separate bag).
Remove the top front panel.
6
Make the connections, respecting the live (L), neutral (N) and
earth terminals.
Control panelRE 22
18/01/06 - 300005257-001-A
2 Installation with optional Rematic control unit
2.1
Fitting the Rematic control unit
The Rematic control unit is fitted on the left-hand side of the front of
the panel.
1.
18/01/06 - 300005257-001-A
2.
Control panel RE 22
7
3. Installing the supplementary wiring
- Remove the "External Regulation" harness
- Fit the harnesses delivered with the REMATIC RC4/5 option
8
Control panelRE 22
18/01/06 - 300005257-001-A
2.2
Connections optional REMATIC
Connection block for Rematic sensors and controls.
See the instructions supplied with the control unit and any remote
control unit used.
the extra low voltage sensor wires from 230 V
Separate
power wires in order to prevent electromagnetic
interference.
Inside the boiler:
- Boilers with one cable channel: Place the 230 V main supply
cables on one side of the cable channel and the sensor cables on
the other. The cables shall be held in place on either side using
plastic ties.
- Boilers with two cable channels: Place the 230 V main supply
cables in one cable channel and the sensor cables in the other.
The cables shall be held in place on either side using plastic ties.
Outside the boiler:
use 2 pipes or cable guides at least 10 cm apart.
to comply with these instructions could lead to
Failure
interference and control unit malfunctioning or even
damage to the electronic circuitry.
18/01/06 - 300005257-001-A
Control panel RE 22
9
2.3
Mouting of the control unit
1
2
1/4
1/4
Bring the blue connectors out through the opening in the control
panel.
Plug the connectors onto the back of the control unit.
10
4
Push the control unit into the front of the control panel and fix it
with the 2 plastic screws supplied (push and 1/4 turn, clockwise) on
the front of the control unit.
Close the control panel.
Control panelRE 22
18/01/06 - 300005257-001-A
3x
3 Connecting a third party control unit
Control of the first stage of the burner by volt-free contacts
Control of the second stage of the burner by volt-free contacts
4 Connecting the harness
Remove the bridge connector from the control panel wiring
"CA"
Connect the "External Regulation" harness to the control
panel harness.
18/01/06 - 300005257-001-A
Control panel RE 22
11
5 Connecting the low-water pressure switch alarm indicator (Only NL)
1
2x 0,75 mm2 mini.
AL
L N
Low-water pressure switch alarm indicator
6 Connecting the safety thermostat alarm indicator
Safety thermostat alarm indicator
12
Control panelRE 22
18/01/06 - 300005257-001-A
7 Connecting one or two hour run meters (Package BG 40)
One or two optional hour run meters (stage 1 and 2) may be fitted on the front of the control panel.
To do so:
- Cut the cover off with a cutter along the edges of the coloured rectangle.
- Pull out the *1 wires standing by in the control panel
- Connect the wires to the hour run meter (the wires are interchangeable):
- Brown and blue wires for stage 1
- Violet and blue wires for stage 2
- Clip the hour run meter into the control panel.
If the burner is a 1-stage burner, the counter displays the burner operating time.
If the burner has 2 stages, the first stage hour run meters displays the total burner operating time and the second hour run meter displays the
operating time of stage 2.
18/01/06 - 300005257-001-A
Control panel RE 22
13
8 Connecting the flue gas thermometer (Package BP 28)
An optional flue gas thermometer may be fitted on the front of the control panel.
To do so:
- Cut the cover off with a cutter along the edges of the coloured rectangle.
- Clip the thermometer into the opening.
- Bring the sensor to the back of the boiler via the cable channel and insert it in the flue gas pipe.
14
Control panelRE 22
18/01/06 - 300005257-001-A
9 Connecting the burner
1
Ignition circuit
2
Gas pressostat
3
Gas valve circuit
4
Leak proofing system (Options RE 30)
18/01/06 - 300005257-001-A
Control panel RE 22
15
16
Control panelRE 22
UMWAELZPUMPE
BA
A
BA
2b
7
8
2
DRUCKDICHTHEITSKONTROLER
ABGASKLAPPE
DJ4A
THERMOSTAT DE CHAUDIERE 1ere ALLURE
TRANSFORMATEUR D'ISOLEMENT
VOYANT
VOYANT ALARME THERMOSTAT DE SECURITE
VOYANT MARCHE 1ere ALLURE
VOYANT MARCHE 2eme ALLURE
TCH1
TI
V
VA-TS
VB1
VB2
PHASE
NULLEITER
PSG
GASDRUCKWAECHTER
STEUERRELAIS
REGELUNG
PRESSOSTAT GAZ
RELAIS
REGULATION
R
RG
KESSELKREISPUMPE
PHASE
NEUTRE
POMPE DE RECYCLAGE CHAUDIERE
N
INTERRUPTEUR BRULEUR
INTERRUPTEUR ETE-HIVER
INTERRUPTEUR GENERAL
INTERRUPTEUR TEST
ZB
ZEH
ZG
ZT
VANNE PRINCIPALE
THERMOSTAT DE CHAUDIERE 2eme ALLURE
TCH2
13
THERMOSTAT ANTIREFOULEUR
2
CCE**
BA
1b
12
SONDE D'IONISATION
VANNE GAZ
WARMWASSER
1a
BA
2
4
ECS
VA - TS
?
COFFRET DE SECURITE
1a
SI
9
12
CA
1b
1
1
CCE
1
SCS
4
3
TAF
TI
TI
VG
2
1
VP
7
2
FUNKENENSTÖRUNGSFILTER
LEISTUNGSSCHALTER
SICHERHEITSKONTAKT
1
ZEH
2a
ENTSTÖRUNGSDRUCKTASTE
2
1
8
5
KASKADENSCHALTUNG
P2
L
DISJONCTEUR
EAU CHAUDE SANITAIRE
FILTRE ANTIPARASITE
DJ4A
ECS
FA
CONTROLEUR CYCLIQUE D'ETANCHEITE
CLAPET OBTURATEUR
CONTACT DE SECURITE
CCE
CO
CS
BARRETTE
BOUTON POUSSOIR REARMEMENT BRULEUR
CASCADE
BA
BPR
CA
ELEKTROZÜNDER
ANSCHLUSSLEISTE
5
3
BRENNER
2
1
4
4
8
3
RG
11
CA
6
ACCELERATEUR
BA
P2
BA
CA
9
6
ECS
ALLUMEUR ELECTRIQUE
2
1
BRULEUR
ZG
ZG
AE
2a
1a
B
2
BA
BA
1
2
CO
BA
BA
3
1
7
11
CS
10
2
θ
2
1
1b
TCH 1
2
1
2
1
6
PSG
TESTSCHALTER
HAUPTSCHALTER
SOMMER-WINTERSCHALTER
BRENNER SCHALTER
HAUPTGASVENTIL
GASVENTIL
BETRIEBSLEUCHTE 2.STUFE
BETRIEBSLEUCHTE 1.STUFE
1
4
5
2
3
CCE
P
3
SICHERHEITSTEMPERATURBEGRENZER ALARMLEUCHTE
LEUCHTE
TRENNTRAFO
KESSEL TEMPERATURREGLER 1.STUFE
KESSEL TEMPERATURREGLER 2.STUFE
ABGASÜBERWACHUNGSTHERMOSTAT
IONISATIONSELEKTRODE
GASFEUERRUNGSAUTOMAT
5
TS
CA
1a
ZEH
1
9
7
RG
2
θ
1
2
RG
R
PSG
P2
N
L
FA
ECS
DJ4A
CS
CO
CCE
CA
BPR
BA
B
AE
A
1
7
6
2
1
BA
VG
BA
REGULATOR
RELAY
GAS PRESSOSTAT
SHUNT PUMP
NEUTRAL
PHASE
EMI SUPPRESSOR
DOMESTIC HOT WATER
CIRCUIT BREAKER
SAFETY CONTACT
FLUE DAMPER
LEAK PROOFING SYSTEM
CASCADE CONNECTION
RESET PUSH BUTTON
CONNECTING BOARD
BURNER
ELECTRIC IGNITOR
HEATING PUMP
CCE
TAF
15
14
1
2
1
1
V
X1
2
2
3
4
5
3
4
4
5
7
2
VG
5
1a
REGELING
RELAIS
GASPRESSIOSTAAT
RECYCLAGE POMP
NULLEIDER
FASE
ONSTORINGS-FILTER
SANITAIR WARM WATER
THERMISCHE BEVEILIGING
VEILIGHEIDSCONTACT
AFSLUITKLEP
CYCLISCH DICHTINGSCONTROLE CONTROLEUR
TRAPSGEWIJS
HERBEWAPENINGSKNOP BRANDER
AANSLUITINGSKLEMMEN
BRANDER
ELEKTRISCHE ONTSTEKING
VERWARMINGSPOMP
1
7
BPR-VA
1
6
SCS
SI
ZT
ZG
ZEH
ZB
VP
VG
VB2
VB1
VA-TS
V
TI
TCH1
TCH2
TAF
9
8
8
2
5
CCE
VA
X2
1a
1b
9
5
2
(B)
CA
6
10
1
4
7
SI
2
IONISATION PROBE
2b
2a
TEST SWITCH
MAIN SWITCH
SUMMER-WINTER SWITCH
BURNER SWITCH
MAIN GAS VALVE
GAS VALVE
ON/OFF INDICATOR 2nd STAGE
ON/OFF INDICATOR 1st STAGE
ZT
ZB
1b
2
1
1
6
15
14
4
3
VB1
IONISATIE SONDE
2
CH1
1
2
1
h
TA
TEST SCHAKELAAR
ALGEMENE SCHAKELAAR
ZOMMER-WINTER SCHAKELAAR
BRANDER SCHAKELAAR
HOOFDGASKLEP
GASKLEP ONTSTEKING
LAMPJE WERKING 2de TRAP
LAMPJE WERKING 1st TRAP
VEILIG HEIDS THERMOSTAAT ALARM LAMPJE
LAMPJE
SCHEIDINGSTRAFO
KETELTHERMOSTAAT 1st TRAP
KETELTHERMOSTAAT 2de TRAP
ANTITERUGSLAG THERMOSTAAT
1
8
ECS
TCH2
2
FA
VEILIGHEIDSKOFFERTJE
h
13
CA
f
RG
1
PL 300005300-001-A
CH2
1a
1
1a
2
SAFETY THERMOSTAT ALARM INDICATOR
INDICATOR
ISOLATING TRANSFORMER
BOILER THERMOSTAT 1st STAGE
BOILER THERMOSTAT 2nd STAGE
BLOCKED VENT SHUTOFF SYSTEM
VB2
X3
DGAI 73
SCS
VA-SCS
SAFETY CONTROL BOX
VP
1
7
17
SCHEMA DE PRINCIPE - STROMLAUFPLAN - PRINCIPLE DIAGRAM - PRINCIPESCHEMA - GAS 460
A
N
L
Skeleton Diagrams
18/01/06 - 300005257-001-A
Starting up and operation
1 Control panel without Rematic control unit
first start-up is to be performed by your installation
The
engineer.
Moving the thermostat stop:
Before starting the boiler, check if the installation is filled with water.
Start the boiler in the following order:
• Boiler temperature regulation by means of the thermostats
Place the boiler thermostat 5 in the required position. If the burner
has 2 stages, the stage 2 thermostat must always be set to value
which is approximately 5°C less than that of the stage 1 thermostat.
If required, move the maximum temperature stop as instructed
below.
there is no control unit, we advise you never to set the
Ifboiler
thermostat below mark 4 (approx. 40°C) in order to
avoid the risk of combustion products condensing on the
walls of the boiler.
•
•
•
18/01/06 - 300005257-001-A
5
7
6
8
Set switch 1 to the manual ! position.
Control unit in boiler room electrical cabinet
See the instructions supplied with the control unit and any
remote control unit used.
Check that safety thermostat 9 is properly set. To do so,
unscrew the hexagonal cap and press the reset button with a
screwdriver.
Set the burner and heating pump buttons 2 to the Winter .
position.
Set main On/Off switch 3 to 8.
9
•
•
M000154
A factory-set stop limits the maximum temperature to 75 °C. To move
the stop, proceed as follows:
- Pull the thermostat button out carefully (use pliers and a cloth).
- Remove the stop with the pliers.
- Put the stop in the hole of the desired higher temperature
(maximum 90°C).
Control panel RE 22
17
2 Control panel with optional Rematic control unit
first start-up is to be performed by your installation
The
engineer.
Before starting the boiler, check if the installation is filled with water.
Start the boiler in the following order:
•
Set the boiler thermostats 5 on maximum position.
If required, move the maximum temperature stop as instructed
on the preceding page.
Set the Rematic control unit 12. To do so, operate
according to the control instructions supplied with the
unit.
•
•
•
•
18
Set switch 1 to the AUTO position.
Check that safety thermostat 9 is properly set. To do so,
unscrew the hexagonal cap and press the reset button with a
screwdriver.
Set the burner and heating pump buttons 2 to the Winter .
position.
Set main On/Off switch 3 to 8.
Control panelRE 22
18/01/06 - 300005257-001-A
Control panel RE 22
18/01/06 - 300005257-001-A
NL
Remeha B.V.
Postbus 32
7300 AA APELDOORN
Tel: +31 55 5496969
Fax: +31 55 5496496
Internet: nl.remeha.com
E-mail: [email protected]
GB
Broag Ltd.
Remeha House
Molly Millars Lane
RG41 2QP WOKINGHAM, Berks.
Tel: +44 118 9783434
Fax: +44 118 9786977
Internet: uk.remeha.com
E-mail: [email protected]
B
J.L. Mampaey BVBA
Uitbreidingstraat 54
2600 ANTWERPEN
Tel: +32 3 2307106
Fax: +32 3 2301153
Internet: www.mampaey.be
E-mail: [email protected]
B
Thema S.A.
6, Avenue de l'expansion
4460 GRACE-HOLLOGNE
Tel: +32 4 2469575
Fax: +32 4 2469576
Internet: www.thema-sa.be
E-mail: [email protected]
H
Marketbau - Remeha Kft.
Gyár u. 2.
Ipari Park
2040 BUDAÖRS
Tel: +36 23 503 980
Fax: +36 23 503 981
Internet: www.remeha.hu
E-mail: [email protected]
E
Termibarna S.A.
C. Zamora 55-59
08005 BARCELONA
Tel: +34 3 3000204
Fax: +34 3 3009558
E
Cuatrocesa S.A.
c) Sor Angela de La Cruz, 10
- 1º Oficina C
28020 MADRID
Tel: +34 91 658 18 88
Fax: +34 91 658 30 77
E
D.A.C. S.A.
Tomás A. Edison 29
Poligono Cogullada
50014 ZARAGOZA
Tel: +34 76 464076
Fax: +34 76 471311
Internet: www.dac.es
E-mail: [email protected]
E
Norte Comercial Organización S.A.
Bereteage Bidea, 19
48180 LOIU (Vizcaya)
Tel: +34 94 471 03 33
Fax: +34 94 471 11 52
E-mail: [email protected]
IRL
Euro Gas Ltd.
Unit 38, Southern Cross Business Park
Boghall Road, Bray, Co
WICKLOW
Tel: +353 12868244
Fax: +353 12861729
Internet: www.eurogas.ie
E-mail: [email protected]
© Copyright
All technical and technological information contained in these technical instructions, as well as any
drawings and technical descriptions supplied, remain our property and shall not be multiplied without
our prior consent in writing..
Ours is a policy of continuous development. We reserve the right to alter specifications without prior
notification
.
Subject to alterations