1
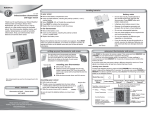
12-1655
AM/FM clock radio
Thank you for purchasing your AM/FM Clock Radio from
RadioShack.
AM/FM Clock Radio
User’s Guide
NOTE: Actual product may vary from the images found in this document.
Please read this user’s guide before installing,
setting up and using your new product
www.radioshack.com
The Basics
contents
features
4
safety certification
5
important safety instructions
6
before you begin
9
connect power ......................................................... 9
install a back-up battery .......................................... 9
operating your clock radio
10
setting the time ........................................................ 10
playing the radio ...................................................... 11
using the alarm ........................................................ 12
setting alarm time .................................................... 12
silencing the alarm .................................................. 13
using sleep
14
resetting your clock
15
caring for your clock radio ...................................... 15
specifications ........................................................... 15
3
The Basics
The Basics
features
safety certification
2 ¼” Speaker
Provides great sound!
This unit was made and tested to meet exacting safety
standards. It meets ETL and FCC requirements and complies
with safety performance standards of the U.S. Department of
Health and Human Services.
CAUTION—THIS UNIT SHOULD NOT BE ADJUSTED OR
REPAIRED BY ANYONE EXCEPT PROPERLY QUALIFIED
SERVICE PERSONNEL.
The Caution Marking is located on the bottom enclosure of
the product.
CAUTION
RISK OF ELECTRIC SHOCK
DO NOT OPEN
!
WARNING: To reduce the
risk of fire or shock hazard,
do not expose this product
to rain or moisture
CAUTION: TO REDUCE THE RISK OF ELECTRIC SHOCK, DO NOT REMOVE
THE COVER OR BACK. NO USER-SERVICEABLE PARTS INSIDE. REFER
SERVICING TO QUALIFIED PERSONNEL.
Large Digital Display
Makes the clock easy to read
AM/FM Radio
Listen to your favorite station!
The lightning symbol is intended to alert you to the
presence of uninsulated, dangerous voltage within
this product’s enclosure that might be of sufficient
magnitude to constitute a risk of electric shock. Do
not open the product’s case.
!
4
The exclamation symbol is intended to inform
you that important operating and maintenance
instructions are included in the literature
accompanying this product.
5
The Basics
The Basics
important safety
instructions
Read all the included safety and operating instructions before
using your clock radio. Follow them closely, and retain them
for future reference.
Heed Warnings—Follow all warnings on the product and in
the operating instructions.
Cleaning—Unplug this product from the wall outlet before
cleaning. Use only a damp cloth for cleaning. Do not use
liquid or aerosol cleaners.
Attachments—Do not use attachments/accessories not
recommended by the product manufacturer, as they might
create a hazard.
Water and Moisture—Do not use this product near water (for
example, near a bathtub, washbowl, kitchen sink, or laundry
tub; in a wet basement; or near a swimming pool).
Accessories—Do not place this product on an unstable cart,
stand, tripod, bracket, or table. The product may fall, causing
serious injury to a child or adult, and serious damage to the
product. Use only with a cart, stand, tripod, bracket, or table
recommended by the manufacturer or sold with the product.
Follow the manufacturer’s instructions for mounting, and use
a recommended mounting accessory.
Ventilation—Slots and openings in the cabinet provide
ventilation, ensure reliable operation, and protect from
overheating. Do not block or cover these openings, and do
not place the product on a bed, sofa, rug, or other similar
surface. Do not place the product in a built-in installation,
such as a bookcase or rack, unless it provides proper
ventilation as specified by the manufacturer.
Power Sources—Operate this product using only the power
source indicated on its marking label. If you are not sure of
your home’s power type, consult your product dealer or local
power company.
6
Polarization—This product is equipped with a polarized AC
line plug (a plug having one blade wider than the other). This
plug will fit in the power outlet only one way. This is a safety
feature. If you cannot insert the plug fully into the outlet, try
reversing the plug. If the plug still doesn’t fit, contact your
electrician to replace your obsolete outlet. Do not defeat
the safety purpose of the polarized plug. If you need an
extension, use a polarized cord.
CAUTION: To prevent electric shock, match the wide blade of
the plug to the wide slot and fully insert.
Power Cord Protection—Route power cords so they are
not likely to be walked on or pinched by items placed on
or against them. Pay particular attention to cords at plugs,
convenience receptacles, and the point where they exit from
the product.
Lightning—For added protection for this product during a
lightning storm, or when it will be left unattended or unused
for long periods of time, unplug it from the wall outlet. This
will prevent damage to the product due to lightning and
power surges.
Overloading—Do not overload wall outlets, extension cords,
or integral convenience receptacles, as this can result in a
risk of fire or electric shock.
Object and Liquids—Never push objects of any kind into this
product through openings, as they may touch dangerous
voltage points or short out parts that could result in a fire or
electric shock. Never spill liquid of any kind on the product.
Servicing—Do not attempt to service this product yourself,
as opening or removing covers may expose you to
dangerous voltage or other hazards. Refer all servicing to
qualified service personnel.
Damage Requiring Service—Unplug this product from the
wall outlet and refer servicing to qualified service personnel
under the following conditions:
• When the power cord or plug is damaged.
• If liquid has been spilled on, or objects have fallen into
the product.
7
The Basics
The Basics
•
•
If the product has been exposed to rain or water.
If the product does not operate normally by following
the operating instructions, adjust only those controls
that are covered by the operating instructions.
Improper adjustment of other controls may result in
damage and will often require extensive work by a
qualified technician to restore the product to normal
operation.
• If the product has been dropped or damaged in
any way.
• When the product exhibits a distinct change in
performance.
Replacement parts—When replacement parts are required,
be sure the service technician uses replacement parts
specified by the manufacturer or has the same characteristics
as the original part. Unauthorized substitutions may result in
fire, electric shock, or other hazards.
Safety Check—Upon completion of service or repairs to
this product, ask the service technician to perform safety
checks to determine that the product is in proper operating
condition.
Wall or Ceiling Mount—The product should be mounted to a
wall or ceiling only as recommended by the manufacturer.
Heat—The product should be situated away from heat
sources such as radiators, heat registers, stoves, or other
products (including amplifiers) that produce heat.
Power Lines—Locate an outdoor antenna away from power
lines.
Non-use Periods—Unplug the product’s power cord when you will
not use it for extended periods.
before you begin
connect power
Plug the power cord into a standard AC outlet. All display
segments briefly appear.
CAUTION: The power cord is equipped with a polarized plug
to prevent electric shock. One blade on the plug is wider than
the other and the plug only fits one way in the outlet. If you
cannot insert the plug easily, turn it over and try again. Do
not force it.
install a back-up battery
Your clock radio requires a 9V battery for back-up power (not
supplied, available at RadioShack or online at
www.radioshack.com).
1. Remove the battery
compartment cover.
2. Snap the battery onto
the connector.
3. Place the battery in
the compartment and
replace the cover.
NOTE
• Dispose of old batteries promptly and properly. Do not
bury or burn them.
• Use only fresh batteries of the required size and
recommended type.
• Always remove an old or weak battery. Batteries can
leak chemicals that can damage electronic parts.
8
9
The Basics
The Basics
operating your clock radio
playing the radio
set the time
Hold down TIME SET.
Then, press HOUR or
MINUTE.
1. Set RADIO ON/OFF
to ON.
2. Set AM/FM to the
desired band.
Each time you press HOUR or
MINUTE, the hour and minute
digits advance by one. Or, scroll
through the numbers by holding
HOUR or MINUTE down.
3. Rotate TUNING to
the desired station.
4. Adjust VOLUME.
The PM indicator appears on
the top left side of the display if
you set the clock to a PM hour.
NOTE
• The clock radio has a built-in AM antenna. For the
best AM reception, rotate your radio.
• Your radio’s power cord acts as the FM antenna.
For the best FM reception, fully extend the power
cord.
10
11
The Basics
The Basics
silencing the alarm
using the alarm
NOTE
setting alarm time
Hold down ALARM SET.
Then, press HOUR or
MINUTE.
At the preset alarm time, the alarm sounds. After 1
hour and 59 minutes, the alarm will stop.
To turn off the alarm immediately,
press ALARM STOP. It will sound
again after 24 hours.
Each time you press HOUR or
MINUTE, the hour and minute
digits advance by one. To scroll
through the numbers, press
and hold HOUR or MINUTE.
To temporarily silence the alarm
buzzer or radio, press SNOOZE.
This silences the alarm for about
9 minutes. You can repeat this
cycle as many times as you like.
The PM indicator appears on
the top left side of the display if
you set the clock to a PM hour.
To wake to the alarm buzzer or the
radio, set ALARM BUZZ/RADIO/OFF
to BUZZ or RADIO. The ALM indictor
lights.
To turn off the alarm
completely, set ALARM
BUZZ/RADIO/OFF to OFF.
12
13
Beyond the Basics
Beyond the Basics
using sleep
resetting the clock
You can set the radio to automatically turn off after up to one
hour and 59 minutes.
On rare occasions, your clock might not work properly or it
might lock up. If that happens, disconnect the AC power cord
and remove the back-up battery. Then, reinstall the battery
and plug the clock back in. If you still encounter difficulties,
take it to your local RadioShack store for assistance.
To play the radio for less than 1 hour
1. Make sure the radio is
off by setting RADIO
ON/OFF to OFF.
2. While you hold SLEEP,
press MINUTE. The
minutes decrease by
1 each time you press
minute.
To play the radio for more than 1 hour but
less than 2 hours.
1. Hold down SLEEP, then press HOUR once. The time
increases to 1 hour, 59 minutes.
2. While you hold SLEEP, press MINUTE. The minutes
decrease by 1 each time you press MINUTE.
3. Release SLEEP.
NOTE
caring for your clock radio
Keep your clock radio dry. If it gets wet, wipe it dry
immediately. Use and store your clock radio only in room
temperature environments. Handle your clock radio carefully.
Do not drop it. Keep it away from dust and dirt, and wipe it
with a damp cloth occasionally to keep it looking new.
specifications
Bands ..................................................................... AM 530-1710 kHz
FM 88-108 MHz
Power Output...................................................... 350mW (maximum)
Speaker ........................................................................... 2 1/4 Inches
Power Requirement .......................................120 V AC, 60 Hz, 37mA
DC 9V (Backup Battery)
Dimensions (LWD) .....................................5 1/16 x 6 7/8 x 1 13/16 inches
Specifications are typical; individual units might vary. Specifications are
subject to change and improvement without notice.
To turn off the radio before it automatically turns
off, press SNOOZE.
14
15
This equipment has been tested and found to comply with the limits for a Class
B digital device, pursuant to Part 15 of the FCC Rules. These limits are designed
to provide reasonable protection against harmful interference in a residential
installation. This equipment generates, uses, and can radiate radio frequency
energy and, if not installed and used in accordance with the instructions, may
cause harmful interference to radio communications. However, there is no
guarantee that interference will not occur in a particular installation. If this
equipment does cause harmful interference to radio or television reception,
which can be determined by turning the equipment off and on, the user is
encouraged to try to correct the interference by one or more of the following
measures:
• Reorient or relocate the receiving antenna.
• Increase the separation between the equipment and receiver.
• Connect the equipment into an outlet on a circuit different from that to which
the receiver is connected.
Consult your local RadioShack store or an experienced radio/TV technician for
help.
If you cannot eliminate the interference, the FCC requires that you stop using
this product.
WARNING: Changes or modifications not expressly approved by RadioShack
may cause interference and void the user’s authority to operate the equipment.
This device complies with Part 15 of the FCC Rules. Operation is subject to the
following two conditions: (1) This device may not cause harmful interference,
and (2) This device must accept any interference received, including
interference that may cause undesired operation.
This product is warranted by RadioShack against manufacturing defects in material and workmanship
under normal use for ninety (90) days from the date of purchase from RadioShack company-owned
stores and authorized RadioShack franchisees and dealers. For complete warranty details and
exclusions, check with your local RadioShack store.
RadioShack Customer Relations
200 Taylor Street, 6th Floor, Fort Worth, TX 76102
04/04
Printed in China
12-1655
02A05
©2004. RadioShack Corporation.
All rights reserved. RadioShack and RadioShack.com are
trademarks used by RadioShack Corporation.