1
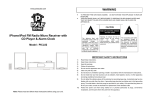
www.pyleaudio.com WARNING TO PREVENT FIRE OR SHOCK HAZARD. DO NOT EXPOSE THIS APPLIANCE TO RAIN OR MOISTURE. THIS APPLIANCE SHALL NOT BE EXPOSED TO DRIPPING OR SPLASHING WATER AND THAT NO OBJECT FILLED WITH LIQUIDS SUCH AS VASES SHALL BE PLACED ON APPARATUS. CAUTION iPod iPhone Clock Radio W/ FM Receiver And Dual Alarm Clock RISK OF ELECTRIC SHOCK DO NOT OPEN Model : PICL34 The lightning flash with arrowhead symbol, within an equilateral triangle, is intended to alert the user to the presence of uninsulated “dangerous voltage” within the products enclosure that may be of sufficient magnitude to constitute a risk of electric shock to persons. Warning: To reduce the rise of electric shock, do not remove cover (or back) no user-serviceable parts inside. Refer servicing to qualified service personnel. The exclamation point within an equilateral triangle is intended to alert the user to the presence of important operating and maintenance (servicing) instructions in the literature accompanying the appliance. IMPORTANT SAFETY INSTRUCTIONS 1) Read these instructions. 2) Keep these instructions. 3) Heed all warnings. 4) Follow all instructions. 5) Do not use this apparatus near water. 6) Clean only with dry cloth. 7) Do not block any ventilation openings. Install in accordance with the manufacturer’s instructions. 8) Do not install near any heat sources such as radiators, heat registers, stoves, or other apparatus (including amplifiers) that produce heat. 9) Do not defeat the safety purpose of the polarized or grounding-type plug. A polarized plug has two blades with one wider than the other. A grounding type plug has two blades and a third grounding prong. The wide blade or the third prong are provided for your safety. If the provided plug does not fit into your outlet, consult an electrician for replacement of the obsolete outlet. Note: Please read and follow these instructions before using your unit. 10) Protect the power cord from being walked on or pinched particularly at plugs, convenience receptacles, and the point where they exit from the apparatus. -1- 11) Only use attachments/accessories specified by the manufacturer. 12) Use only with the cart, stand, tripod, bracket, or table specified by the manufacturer, or sold with the apparatus. When a cart is used, use caution when moving the cart/apparatus combination to avoid injury from tip-over. FCC NOTICE This equipment has been tested and found to comply with the limits for a Class B digital device, pursuant to Part 15 of the FCC Rules. These limits are designed to provide reasonable protection against harmful interference in a residential installation. This equipment generates, uses and can radiate radio frequency energy and, if not installed and used in accordance with the instructions, may cause harmful interference to radio communications. However, there is no guarantee that interference will not occur in a particular installation. If this equipment does cause harmful interference to radio or television reception, which can be determined by turning the equipment off and on, the user is encouraged to try to correct the interference by one or more of the following measures: 13) Unplug this apparatus during lightning storms or when unused for long periods of time. 14) Refer all servicing to qualified service personnel. Servicing is required when the apparatus has been damaged in any way, such as power-supply cord or plug is damaged, liquid has been spilled or objects have fallen into the apparatus, the apparatus has been exposed to rain or moisture, does not operate normally, or has been dropped. 15) Grounding or Polarization – This product may be equipped with a polarized alternating-current line plug (a plug having one blade wider than the other). This plug will fit into the power outlet only one way. This is a safety feature. If you are unable to insert the – Reorient or relocate the receiving antenna. – Increase the separation between the equipment and receiver. – Connect the equipment into an outlet on a circuit different from that to which the receiver is needed. – Consult the dealer or an experienced radio/TV technician for help. WARNING: Changes or modifications to this unit not expressly approved by the party responsible for compliance could void the user's authority to operate the equipment. plug fully into the outlet, try reversing the plug. If the plug should still fail to fit, contact your electrician to replace your obsolete outlet. Do not defeat the safety purpose of the polarized plug. Alternate Warnings - This product is equipped with a three-wire grounding-type plug, a plug having a third (grounding) pin. This plug will only fit into a grounding-type power outlet. This is a safety feature. If you are unable to insert the plug into the outlet, contact your electrician to replace your obsolete outlet. Do not defeat the safety purpose of the grounding-type plug. 17) Ventilation – Slots and openings in the cabinet are provided for ventilation and to ensure reliable operation of the product and to protect it from overheating, and these openings must not be blocked or covered. The openings should never be blocked by placing the product on a bed, sofa, rug, or other similar surface. This product should not be placed in a built-in installation such as a bookcase or rack unless proper ventilation is provided or the manufacturer’s instructions have been adhered to. 17) The MAINS plug or an appliance coupler is used as the disconnect device, the disconnect device shall remain readily operable. 18) 回: CLASS II apparatus with double insulation, and no protective earth provided. -2- -3- LOCATION OF CONTROLS CONNECTING THE UNIT TO POWER Plug one end of the AC/DC adaptor into the DC-In jack, and then plug the other end into AC wall outlet. Before switching on the unit, make sure that the voltage of your electricity supply is the same as that indicated on the rating plate. Back-up Battery Open the battery door located at the bottom of the unit, insert 2 pcs. ‘AA’ size (UM-3) batteries with battery polarities same as shown inside the battery compartment. In case of AC power outage or interrupted AC power, the current time, alarm time settings and the stored radio stations are preserved in the memory of the unit. Important: When the unit is not use for 3 days or more and also the unit is not connect to AC power during that time, please remove the battery to avoid damage to the set from leakage of battery. SETTING THE TIME Before starting to set the time, make sure that the unit is in POWER OFF Mode. If you have IPhone or iPod (Except iPod Shuffle) 1. Dock in the iPhone/iPod on the 30 pins Connector 2. Press the SNOOZE/SLEEP button for a few seconds until the display shows SYN, and the unit is automatically synchronized the time same as the iPod/iPhone. If you do not have any iPhone/iPod units 1. Press and hold the FUNC/CL ADJ button for a few seconds, the hour digit in the display will start flashing. 2. Press the SKIP UP/TUNE+ or SKIP DOWN/TUNE- button to adjust the hour. 3. When the correct hour is selected, press the FUNC/CL.ADJ. button again to enter the minute mode with minute digit flashing. 4. Press the SKIP UP/TUNE+ or SKIP-/TUNE- button to adjust the minute. 5. When the correct time is selected, press the FUNC/CL ADJ. button to store the time in the memory. 1 2 3 4 5 6 7 8 9 10 IPod/iPhone Connector Display Speaker Skip Down [ ] / Tun- Button Alarm 1 Button Function/Clock Adjust Button Power/Alarm Off Button Skip Up [ ] / Tune+ Button Alarm2 Button Color Button 11 12 13 14 15 16 17 PLAY/PAUSE [/ ] / MEM Button Volume+ Button Snooze / Sleep Button Volume- Button Battery Compartment FM Antenna DC In Jack SETTING THE ALARM TIME Before starting to set the alarm time, make sure that the unit is in POWER OFF mode. 1. Press the AL1 or AL2 button once and the AL1 or AL2 icon will appear in the display. 2. Press the FUNC/CL. ADJ. button to select the alarm wake up source. You can choose buzzer, iPod/iPhone, or Radio. 3. Press and hold the AL1 or AL2 button for a few seconds, the alarm hour digit will begin flashing. 4. Press the /TUNE+ or /TUNE- button to adjust the alarm hour. 5. When the desired alarm hour is selected, press the AL1 or AL2 button again, the alarm minute digit will begin flashing. 6. Press the /TUNE+ or /TUNE- button to adjust the alarm minute. 7. When the desired alarm time is selected, press the AL1 or /AL2 button again to confirm. Note : If you choose iPod/iPhone as the alarm wake up source, please make sure that you have the iPod/iPhone in place. TURN OFF THE ALARM When the alarm activate, press the POWER/AL.OFF button to turn off the alarm. -4- -5- SNOOZE FUNCTION 1. Whenever the alarm activates, it can be temporarily suspended for a short period of 10 minutes by pressing the SNOOZE/SLEEP button. 2. The alarm will then automatically activate again after the 10 minutes SNOOZE period has ended. 3. This procedure can be repeated for up to approximately one hour. RADIO OPERATION 1. Press the POWER/AL OFF button to turn on the unit. 2. Press the FUNC/CL.ADJ. button to select the FM Radio mode. 3. Press and hold the /TUNE+ or /TUNE- for approx. 1 second, it will start to search the next radio station in the direction of the search. The search operation simply finds stations with strong signals. Stations with weak signal can only be tuned in manually. 4. Press VOLUME+ or VOLUME- button to adjust the volume to the desired listening level. SAVING RADIO STATIONS IN THE MEMORY Note : If you use this unit in the first time, or after plug off the AC/DC adaptor from a wall outlet, the unit memory number will be starting from P01. 1. Tune to the desired stations. 2. Press and hold the PLAY/PAUSE/MEMORY button, the display will show the next memory station number and flashing. 3. Press the /TUNE+ or /TUNE- button to select memory number, then press PLAY/PAUSE/MEMORY button again to store the station into the memory. 4. Repeat step 1 to 3 to store more radio stations in the memory. 5. Up to maximum 20 radio stations can be stored in the memory. TO SELECT A STORED RADIO STATION IN THE MEMORY In RADIO mode, use the AL1 or AL2 button to select the stored radio station. Press the AL1 button will go to the next stored radio station. Press the AL2 button will go to the last stored radio station. LISTEN TO iPOD/iPHONE WITH DOCKING CONNECTOR Warning : Turn off your iPhone/iPod before docking on the unit 1. Press the POWER/AL OFF button to turn on the unit. 2. Press the FUNC/CL.ADJ. button to select the iPhone/iPod mode. 3. Connect the iPhone or iPod to the docking connector, the iPhone or iPod will start playing. 4. Press the VOLUME+ or VOLUME- button to your desired listening level. 5. During playing or in pause mode, press the /TUNE+ button to go to the next track. 6. During playing, press the /TUNE- button once to go back to the beginning of the track. Press the /TUNE- button twice to go back to the previous track. 7. In pause mode, press the /TUNE- button once to go back to the previous track. 8. During playing, press the PLAY/PAUSE/MEMORY button to temporarily pause playing. To resume, press the PLAY/PAUSE/MEMORY button again. Charging your iPod While your iPhone or iPod is docked in the unit and the unit is connected to AC power, your iPhone or iPod will recharge until your iPhone or iPod is fully charged. AUX-IN CONNECTION 1. Press the POWER/AL OFF button to turn on the unit. 2. Press the FUNC/CL.ADJ. button to select the Aux mode. 3. Insert one side of the audio cable into the Line-Out or Phone Jack on your MP3 Player or audio device and the other side into the AUX-IN jack of the unit. 4. Turn on your MP3 player or audio device and follow its playback instructions. SLEEP TO MUSIC FUNCTION 1. This function allows you to listen to the radio, iPhone/iPod or any audio device that connected to the aux-in jack of the unit while you fall asleep. 2. Press the SNOOZE/SLEEP button, the display will show the default sleep time of 90 minutes. Press the SNOOZE/SLEEP button again to select the sleep time with decrement of 10 minutes. 3. When the correct sleep time is selected, stop pressing the SNOOZE/SLEEP button, the unit will go to the sleep mode in about 5 seconds with the SLEEP icon appear in the display. 4. Now you can enjoy listening to the selected music for the pre-set period of sleep time. 5. After this pre-set time has elapsed, the unit will switch off automatically. Note : If you choose Aux-in for the Sleep Function, when the pre-set time has elapsed, only the unit will turn off, the audio device that connected to the aux-in jack is still in working. CHANGING DISPLAY COLOR Press the COLOR button to turn on the color display changing. The display color will change from one color to another color every few seconds. Press the COLOR button again set the display to only one color. SPECIFICATIONS Frequency Range: Power Supply: FM 88 – 108 MHz AC 100V to 240V ~ 50/60Hz DC Adaptor : 7.5V – 1.8A Specifications are subject to change without further notice. Warning : Please make sure that your iPhone or iPod is properly docked into the unit. Failure to do so may damage your iPhone/iPod. -6- -7-