1
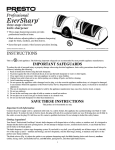
Professional EverSharp Electric Knife Sharpener Three-stage sharpening system for professional results at home. No guess sharpening. Blade guides automatically hold knife at the perfect sharpening angle. Interchangeable guides for heavy, medium, and fine knife blades. Visit us on the web at www.GoPresto.com Instructions This is a manufacturers. 2007 by National Presto Industries, Inc. Listed appliance. The following important safeguards are recommended by most portable appliance IMPORTANT SAFEGUARDS To reduce the risk of personal injury or property damage when using electrical appliances, basic safety precautions should always be followed, including the following: 1. Read all instructions before using the knife sharpener. 2. To protect against the risk of electrical shock, do not put knife sharpener in water or other liquids. 3. Close supervision is necessary when any appliance is used by or near children. 4. Unplug from outlet when not in use, before putting on or taking off parts, and before cleaning. 5. Do not operate knife sharpener without blade guide in place. 6. Avoid contacting moving parts. 7. Do not operate any appliance with a damaged cord or plug, or in the event the appliance malfunctions, or is dropped or damaged in any manner. Return the appliance to the Presto Factory Service Department for examination, repair, or electrical or mechanical adjustment. 8. The use of attachments not recommended or sold by the appliance manufacturer may cause fire, electric shock, or injury. 9. Do not use outdoors. 10. Do not let cord hang over edge of table or counter or touch hot surfaces. 11. Do not place on or near a hot gas or electric burner or in a heated oven. 12. Do not use the knife sharpener for other than intended use. SAVE THESE INSTRUCTIONS This product is for household use only. Important Cord Information Connect the power supply cord to a polarized outlet only. As a safety feature, this appliance has a polarized plug (one blade is wider than the other). To reduce the risk of electric shock, this plug will only fit in a polarized outlet one way. If the plug does not fit fully in the outlet, reverse the plug. If it still does not fit, contact a qualified electrician. Do not attempt to defeat this safety feature. 1 Getting Acquainted Your Presto EverSharp electric knife sharpener will sharpen knives of alloy, carbon, or stainless steel. It is designed to sharpen kitchen knives and most sporting knives. Do not attempt to sharpen scissors, serrated electric knives, or any blade that does not fit freely in the blade guides. The knife sharpener features three interchangeable blade guides. Each guide is labeled at the Top View of Interchangeable Blade Guide back (Heavy, Medium, or Fine) and has an illustration of the type of blade (Fig. A) the guide Medium should be used for. There is a guide for each of the following blade types: 3 2 1 Heavy blades – for sharpening hunting knives and cleavers. Medium blades – for sharpening regular kitchen and chef’s knives. Fine blades – for sharpening fillet, paring knives and other light blades. Each guide has three pairs of sharpening slots (Fig. B) each corresponding to a sharpening Stage 1 Stage 2 Stage 3 stage—Coarse Grinding (Stage 1), Medium Grinding (Stage 2), and Honing (Stage 3). The Coarse Medium Honing stages are identified with a number (1, 2, or 3) behind each pair of slots (Fig. A). Grinding Grinding Fig. A If your knife is very dull, you will probably use all three stages, if a bit dull, two of the stages (2 and 3 – medium and honing), and most frequently, only the third Stage 1 Fig. B stage, honing, to maintain your knives at the optimum razor sharp condition. The interchangeable blade guides take the guesswork out of sharpening by insuring that the optimum sharpening angle is used for each type of blade you sharpen. When not in use, the blade guides nest on the sharpener base for compact storage. Interchanging the Blade Guides Caution: Always be sure the unit is unplugged before changing the blade guides. To attach a blade guide to the knife sharpener base, position the guide so that the stage number and blade description (Heavy, Medium, or Fine) are right side up and you are looking down at them. Next rotate the guide away from you so that you can insert the two hooks on the back of the guide in the two pockets on the back of the base (Fig. C). Rotate the guide forward so the two sets of tabs on the front of the guide fit into the two pockets on the front of the base. Press down until guide snaps into place (Fig. D). Remove the guide, by grasping it with both hands, placing your thumbs above the lip (Fig. D) and your fingers on the back of the guide where the blade descriptions (Heavy, Medium, or Fine) are printed. Push down on the front of the guide with your thumbs and use your fingers to lift and rotate the back of the guide towards you. That will release the two back hooks. Continue lifting to free the two front tabs. Left and right slots Fig. C 2.Select the appropriate blade guide for the type of knife being sharpened (see “Getting Acquainted” above) and attach the blade guide as described above. Plug cord into outlet. Stage 3 Left and right slots Interchangeable blade guide Hook How To Use 1.For best results, moisten the bottom of the suction feet on the knife sharpener base and place the unit on a stable surface. Stage 2 Left and right slots Back pockets Knife sharpener base Fig. D 3.Turn the unit On by pressing the symbol “ l ” on the on/off switch (Fig. E). 4.Evaluate the condition of your blade to determine which sharpening stage to start with: If the blade is very dull or if you are sharpening the knife for the first time, begin with STAGE l – Coarse GRINDING. This is the stage located on the left, nearest the on/off switch. This stage begins sharpening and creates a precision Fig. E angled edge. Follow the sharpening procedure as described on page 3, beginning with Stage 1 and followed by Stages 2 and 3. Front pockets Tabs Lip (Note: Do not use Stage 1 when sharpening serrated blades.) If your knife is a bit dull, begin with STAGE 2 – Medium Grinding. This is the stage located in the middle; it continues the grinding by giving the blade a precision edge. Follow the sharpening procedure as described on page 3, beginning with Stage 2 and followed by Stage 3. 2 On/Off switch Suction feet If your knife just needs a little touch-up sharpening, begin with STAGE 3 – HONING. This is the stage located on the right. This will be the stage most frequently used. It completes the knife sharpening process by honing and polishing the knife to an exact razor sharp edge. Follow the sharpening procedure as described below, using only the slots in Stage 3. Then complete the honing process with one quick pass (approximately one second) through both slots of Stage 3. 5.Begin sharpening. The sharpening procedure is the same for each stage. Sharpening Procedure Begin by placing the knife in the left slot of the stage in use, so the side of the blade rests against the outside face (Fig. F) and the cutting edge makes contact with the bottom of the sharpening slot (Fig. E). The outside face of each sharpening slot acts as a guide to insure that the knife is positioned at the perfect sharpening angle. For best results, do not stand directly in front of Stage 2 during sharpening; instead, if you are right handed, stand slightly off to the Outside face left of Stage 2 and if you are left handed, stand slightly off to the right of Stage 2. This Fig. F of left slot Inside face will make it easier to draw the knife through the guide slots. of left slot Slowly draw the knife towards you through both the left and right slots three times, alternating passes between the two slots. When sharpening the tip of the blade, lift up on the knife handle slightly as the curved portion of the blade is drawn through the slots. Note: The greater the curve on the blade the more you will need to lift up on the handle; the less the curve, the less you will need to lift up on the handle. Certain blades may not have a curve and therefore it will not be necessary to lift up on the handle as you draw the tip through the slots. When drawing the knife through the slots, allow approximately one second for each two inches of blade. For example, if sharpening a knife with a 6-inch blade, you should take approximately three seconds for each pass. 6.Before using the knife to slice food, always wipe the knife blade with a damp cloth to remove metal filings that may have deposited during sharpening. 7. If knife does not slice food with ease, repeat Stages 2 and 3. 8.When sharpening is completed, turn the unit off by pressing the symbol “ O” on the on/off switch. Note: With normal use, you may notice small cuts appearing at the front base of the knife slots. These are normal and should not affect the knife sharpening procedure. CAUTION: Do not run fingers along edge of knife to check sharpness. To avoid injury, handle knives with extreme care. Never insert the tip of the knife into the blade guide first and push through. This could damage the knife sharpener and your knife. Before using the knife to slice food, always wipe the knife blade with a damp cloth to remove any metal filings that may remain from the sharpening process. Questions And Answers How often should I sharpen my knives? Hone (Stage 3) the knife prior to each use if you want to maintain a razor sharp edge. After extensive use, if you have honed the knife and it no longer slices food with ease, run the knife through Stages 2 and 3. How do I get an even edge on my knife? To get an even edge when sharpening, be sure to place the knife in the slot so the side of the blade rests against the outside face (Fig. F) and the cutting edge makes contact with the bottom of the sharpening slot (Fig. E). The outside face of each sharpening slot acts as a guide to insure that the knife is positioned at the perfect sharpening angle. For best results, do not stand directly in front of Stage 2 during sharpening; instead, if you are right handed, stand slightly off to the left of Stage 2 and if you are left handed, stand slightly off to the right of Stage 2. This will make it easier to draw the knife through the guide slots. Allow adequate time for sharpening. When drawing the knife through the slots, allow approximately one second for each two inches of blade. For example, if sharpening a knife with a 6-inch blade, you should take approximately three seconds for each pass. Pulling the knife through too quickly may result in an uneven edge. When sharpening the tip of the blade, lift up on the knife handle slightly as the curved portion of the blade is drawn through the blade guides. Note: The greater the curve on the blade the more you will need to lift up on the handle; the less the curve, the less 3 you will need to lift up on the handle. Certain blades may not have a curve and therefore it will not be necessary to lift up on the handle as you draw the tip through the slots. How can I tell if my knife is sharp? Use it to slice food. If the knife does not slice the food with ease, it needs additional sharpening. Repeat Stages 2 and 3. If the knife is extremely dull, repeat stages 1, 2, and 3. My knife is not sharp and I’ve gone through the whole knife sharpening procedure twice. What am I doing wrong? Although unusual, there are times when you will have to repeat Stages 1, 2, and 3 more than once. This may occur during the first sharpening of a knife that has been improperly sharpened by another process previously. It may also occur when sharpening knives of tempered steel which have extremely hard blades, such as some hunting knives. To sharpen these types of knives with the Presto knife sharpener, simply continue to repeat Stages 1, 2, and 3 until the knife cuts food easily. Depending on the condition of the blade, you may have to repeat the process several times. (In extreme cases, this could be 10 times or more.) This extended process will only be necessary the first time you use the knife sharpener for this type of knife. Thereafter, you will be able to sharpen your knife following the normal sharpening procedure. Can I sharpen serrated knives with my Presto electric knife sharpener? Yes, with the exception of electric serrated knives or knives serrated on both sides. To sharpen non-electric serrated knives, use only the slots in Stages 2 and 3 and only sharpen the smooth side of the knife blade (the side without the grooves). Note: Each time the knife is sharpened, a portion of the serration is being removed. Over a long period of time, the serration on the knife may be completely removed and you may have a knife blade similar to a utility knife. Occasionally I see sparks when sharpening my knives. What causes this? Knives with high carbon content (usually higher quality knives) sometimes will spark when they come in contact with the sharpening wheels. This is normal. Care and Cleaning Always unplug the knife sharpener before cleaning and before removing the interchangeable blade guides. The outside surface of the knife sharpener may be cleaned with a damp cloth. Do not use abrasives. Never immerse the knife sharpener in water or any other liquid. Do not use any type of lubrication with the EverSharp knife sharpener. Metal filings from your knives will collect inside the knife sharpener base. Occasionally remove the interchangeable blade guide by grasping it with both hands, placing your thumbs above the lip (Fig. D) and your fingers on the back of the guide where the blade descriptions (Heavy, Medium, or Fine) are printed. Push down on the front of the guide with your thumbs and use your fingers to lift and rotate the back of the guide towards you. That will release the two back hooks. Continue lifting to free the two front tabs. Then, invert the knife sharpener base, and shake out the metal filings that have collected inside. Any maintenance, other than the items listed here, should be performed by the Presto Factory Service Department. Stack the interchangeable blade guides on the knife sharpener base for compact storage. Stack them so the heavy guide is at the bottom, followed by the medium guide, and then the fine guide. Wrap the cord around them so they stay in place. 4 Service Information If you have any questions regarding the operation of your Presto appliance or need parts for your appliance, contact us by any of these methods: •Call 1-800-877-0441 weekdays 8:00 AM to 4:30 PM (Central Time) •Email us at our website www.GoPresto.com •Write: National Presto Industries, Inc. Consumer Service Department 3925 N. Hastings Way, Eau Claire, WI 54703-3703 When contacting the Consumer Service Department, please indicate the model number for the knife sharpener and the 4 digit date code. These numbers can be found on the bottom of the knife sharpener. Please record this information: Model Number ____________________ Date Code __________ Date Purchased ______________ Inquiries will be answered promptly by telephone, letter, or email. When writing, please include a phone number and a time when you can be reached during weekdays if possible. Any maintenance required for this product, other than normal household care and cleaning should be performed by our Factory Service Department. Be sure to indicate date of purchase and a description of defect when sending an appliance for repair. Send appliances for repair to: Canton Sales and Storage Company Presto Factory Service Department 555 Matthews Drive, Canton, MS 39046-0529 The Presto Factory Service Department is equipped to service all PRESTO appliances and supply genuine PRESTO parts. Genuine PRESTO replacement parts are manufactured to the same exacting quality standards as PRESTO appliances and are engineered specifically to function properly with its appliances. Presto can only guarantee the quality and performance of genuine Presto parts. “Look-alikes” might not be of the same quality or function in the same manner. To ensure that you are buying genuine PRESTO replacement parts, look for the PRESTO trademark. PRESTO Limited Warranty This quality PRESTO appliance is designed and built to provide many years of satisfactory performance under normal household use. Presto pledges to the original owner that should there be any defects in material or workmanship during the first year after purchase, we will repair or replace it at our option. Our pledge does not apply to damage caused by shipping. To obtain service under the warranty, return this PRESTO appliance, shipping prepaid, to the Factory Service Department. When returning a product, please include a description of the defect and indicate the date the appliance was purchased. We want you to obtain maximum enjoyment from using this PRESTO appliance and ask that you read and follow the instructions enclosed. Failure to follow instructions, damage caused by improper replacement parts, abuse or misuse will void this pledge. This warranty gives you specific legal rights, and you may also have other rights which vary from state to state. This is Presto’s personal pledge to you and is being made in place of all other express warranties. NATIONAL PRESTO INDUSTRIES, INC. Eau Claire, WI 54703-3703 Form 72-739C 5