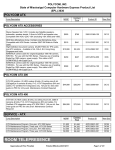
1
Administrator’s Guide
for the Polycom® QSXTM 2.0
February, 2006 Edition
3725-22370-001/B
Version 2.0
Trademark Information
Copyright © 2006 Polycom, Inc. All rights reserved. Polycom, the Polycom logo design, and SoundStation are registered
trademarks and QSX, SoundStation VTX 1000, VoiceStation, and the industrial design of SoundStation are trademarks of
Polycom, Inc. in the U.S. and various countries.
All other brand and product names are trademarks or registered trademarks of their respective companies.
Patent Information
The accompanying product is protected by one or more U.S. and foreign patents and/or pending patent applications held
by Polycom, Inc.
© 2006 Polycom, Inc. All rights reserved.
Polycom Inc.
4750 Willow Road
Pleasanton, CA 94588-2708 USA
No part of this document may be reproduced or transmitted in any form or by any means, electronic or mechanical, for
any purpose, without the express written permission of Polycom, Inc. Under the law, reproducing includes translating into
another language or format.
As between the parties, Polycom, Inc. retains title to, and ownership of, all proprietary rights with respect to the software
contained within its products. The software is protected by United States copyright laws and international treaty provision.
Therefore, you must treat the software like any other copyrighted material (e.g. a book or sound recording).
Every effort has been made to ensure that the information in this manual is accurate. Polycom, Inc. is not responsible for
printing or clerical errors. Information in this document is subject to change without notice.
About this Guide
This Administrator’s Guide for the QSX System is for administrators of QSX systems
who need to:
❑ Configure the system for use in the network environment.
❑ Understand different usage scenarios and how the QSX works in them.
❑ Troubleshoot any issues that occur.
Other documents available for QSX systems include:
❑ The QSX Quick Start Guide, which describes how to install the hardware.
❑ Release Notes for the QSX System, which describes the latest features, feature
limitations, and system requirements.
For support or service, please contact your Polycom distributor or go to Polycom Support
at www.polycom.com/support.
Polycom recommends that you record the serial number of your QSX system here for
future reference. The serial number for the system is printed on the unit.
System Serial Number: ____________________________________________
3
Table of Contents
Chapter 1- Introducing the QSX System........................................................................ 6
Usage Overview.............................................................................................................. 6
Chapter 2- QSX Overview ............................................................................................... 9
QSX Equipment Overview ............................................................................................. 9
QSX 400 Components .................................................................................................... 9
QSX 300 Components .................................................................................................. 10
QSX System Back Panel............................................................................................... 11
Content Controller ........................................................................................................ 11
SoundStation VTX1000 Conference Phone Controls................................................... 12
Manual IP Dialing..................................................................................................... 12
QSX Info Screen ........................................................................................................... 13
Info Screen Alerts ..................................................................................................... 15
Chapter 3- Typical QSX Usage Scenarios & How QSX Works ................................. 16
QSX in Stand Alone Mode ........................................................................................... 16
QSX Connecting to Other QSX Systems...................................................................... 18
QSX Connected to Polycom Video Systems ................................................................ 19
QSX Usage with Polycom MGC .................................................................................. 21
Chapter 4- Setting Up the QSX System ........................................................................ 22
Connect the QSX System.............................................................................................. 22
Set an IP Address .......................................................................................................... 23
Accessing the QSX Web Admin Page...................................................................... 23
Setting a Static IP Address via the QSX Web Admin Page ..................................... 23
Set a Static IP Address Using HyperTerminal.......................................................... 24
Changing QSX to Dynamic IP Mode ....................................................................... 25
Chapter 5- Accessing the QSX Administrative Web Page.......................................... 26
QSX Administrative Web Options ............................................................................... 26
Logging On to the QSX Administrative Web Page...................................................... 27
Chapter 6- Configuring Administrative Settings......................................................... 28
Info / System Info ......................................................................................................... 28
Home / Table of Contents ............................................................................................. 28
Admin Settings.......................................................................................................... 29
General Settings .................................................................................................... 29
System Settings................................................................................................. 29
Security ............................................................................................................. 29
Password ........................................................................................................... 30
Location ............................................................................................................ 31
Serial Port.......................................................................................................... 32
Bandwidth ......................................................................................................... 33
Video Network/IP Network .................................................................................. 35
H.323 Settings................................................................................................... 35
Firewall ............................................................................................................. 36
Global Services ..................................................................................................... 37
Management Servers......................................................................................... 37
My Information................................................................................................. 37
LAN Properties ..................................................................................................... 38
4
Graphics Display................................................................................................... 39
Other Scaling Considerations ............................................................................... 39
Diagnostics................................................................................................................ 40
Restart System ...................................................................................................... 40
Call Summary ....................................................................................................... 40
Call Statistics ........................................................................................................ 40
Network Statistics ................................................................................................. 41
Advanced Network Statistics................................................................................ 41
Chapter 7- Diagnostics and Troubleshooting............................................................... 41
Viewing QSX System Information............................................................................... 41
Keeping Your Software Current ................................................................................... 42
Resetting a Forgotten Administrative Password........................................................... 42
Viewing Call Details..................................................................................................... 42
Restarting the System ................................................................................................... 43
Status Alerts .................................................................................................................. 44
General Troubleshooting .............................................................................................. 46
How to Contact Technical Support............................................................................... 46
By Telephone ............................................................................................................ 47
By Internet ................................................................................................................ 47
Limited Warranty, Disclaimers, Limit of Liability ..................................................... 47
Safety and Legal Notices ................................................................................................ 48
Appendix A – Bandwidth Considerations in QSX....................................................... 52
Overview....................................................................................................................... 52
Additional Information ................................................................................................. 53
Maximum Bandwidth Utilization in Low Bandwidth Environments....................... 53
Bandwidth Sharing versus Time Sharing ................................................................. 53
Time Sharing......................................................................................................... 53
Bandwidth Sharing................................................................................................ 54
Load Balancing ......................................................................................................... 55
Appendix B – Additional Web Viewer Information.................................................... 56
Web Viewer Cascading................................................................................................. 56
Web Viewing in a Video Environment......................................................................... 57
Web Viewer Load Balancing........................................................................................ 58
External Web Viewers and IP Addresses (NAT) ......................................................... 58
Additional Web Viewer Notes...................................................................................... 59
Appendix C – Technical Specifications......................................................................... 60
Content Transmission ................................................................................................... 60
Multipoint Capabilities ................................................................................................. 61
System Security ............................................................................................................ 61
Resolution ..................................................................................................................... 62
Physical Dimensions and Interfaces on QSX Base Unit .............................................. 62
User Interface................................................................................................................ 62
Web Viewer Requirements ........................................................................................... 63
Web Administrator Requirements ................................................................................ 63
Appendix D—Additional Resolution & Graphics Display Information.................... 64
5
Chapter 1- Introducing the QSX System
The Polycom QSX™ system allows users to instantly share anything on their computer
screens with remote locations via the Web or with other QSX or VSX locations. Users
don’t need to learn new applications, upload documents, pay monthly service fees, or preschedule meetings. It’s an easy and secure way to share content with remote sites. QSX
systems have the following features and benefits:
Easy one-time setup – Simply plug in your IP connection, power and VGA cables. Easy
Web interface for additional optional configuration.
Easy to use – Instant content sharing without wasting time on downloading applications,
uploading documents, advance scheduling or user training.
Open architecture – Works with any content, any phone systems and any type of
computer or VGA input source- even those belonging to presenters who can’t get access
to the network.
Multi-point capability – Each QSX session shares content directly with up to ten sites
per QSX via a standard web browser. Scale to even more sites by connecting directly
with up to four other QSX units or leverage a Polycom MGC conference bridge for large
scale meetings.
Cost effective – The QSX provides unlimited content sharing. It pays for itself quickly
because there are no monthly charges or per-minute fees.
Content security – Keep complete control over your document. AES (Advanced
Encryption Standard) media encryption on QSX to QSX calls, secure login for Web
browser access, and the ability to share information without releasing control of it ensure
your content is protected.
Simply connect your computer to the QSX VGA cable and share content, including
business applications, proprietary software, the Internet, images, and software demos –
all at the touch of a button. The QSX user interface provides convenient information
screen (Info Screen) overlays that show presenter/viewer locations and connection
information, as well as the Web address and login information for remote participants.
Usage Overview
QSX systems allow content sharing with other QSX systems and with remote sites via the
Web. Alternately, QSX systems allow content sharing with Polycom videoconferencing
equipment including the VSX 8000, VSX 7000e or the VSX 7000s with Visual Concert.
Finally, the QSX is interoperable with the Polycom MGC bridge, allowing you to scale
the number of web, QSX and video participants in a meeting based on the number of
ports and bandwidth available on the MGC itself.
6
The following illustrations show several types of meetings you could have with a QSX
system. Additional configuration details are available in Chapter 3.
Figure 1- Stand Alone Mode. This is for web viewers only. No conference phone is required.
Figure 2- QSX to QSX with Web participants. This is a mixed environment that offers increased flexibility.
7
Computer
(sending meeting content)
ec
tor
Vortex
(optional)
Co
nte
nt
v
iew
ed
thr
ou
gh
pro
j
Content
Controller
Standard VGA Cable
VGA In
VGA In
VGA Out
VGA Out
VSX 8000
VSX 7000e
VSX 7000s
(with Visual Content)
QSX
eb
W
e
ew
Vi
rC
n
io
ct
ne
on
Remote Participant
(connecting through internet)
Figure 3- QSX with a designated Polycom video system allows remote users without video capability to share content.
Figure 4- Larger Scale Meetings with MGC. This allows you to scale based on MGC ports and bandwidth.
8
Chapter 2- QSX Overview
QSX Equipment Overview
There are two basic versions of the QSX. The QSX 400 is designed to work in
environments without a conference phone or with Polycom’s analog SoundStation,
SoundStation2, SoundStation Premier or SoundStation2W conference phones. The QSX
300 is specifically designed to work with the Polycom VTX 1000 conference phone. The
QSX 300 does not require a content controller because that functionality has been
designed into the VTX 1000 phone and can be accessed through the menus on the phone
itself.
QSX 400 Components
When sharing content between two QSX units, you will need one Polycom conference
phone connected to each QSX for the session. If only sharing content with web viewers,
it is not required to connect a phone to the QSX.
Name
Component
Description
QSX system base
Adds content sharing to phone
calls. The base can be mounted
on a rack, under a table, or on a
wall, or it can be placed on a
tabletop.
Content controller with 25-foot
(~8.5 meters) VGA Cable
Allows the presenter to send
content with the push of a button.
3 foot VGA Extension
Connects the QSX system to a
computer or other VGA source.
LAN Cable
Connects the QSX system to the
IP network.
Power Supply and Power Cable
Connects power to the QSX
system base.
8-wire cable for phone console
Connects the QSX system’s 8wire connector to the conference
phone.
Serial Cable (straight through)
Connects to the serial port on the
QSX. Used for setting static IP if
required and HyperTerminal is
not available.
Mounting Brackets
Includes screws and four brackets
for mounting the QSX system
base under a table or on a wall.
9
QSX 300 Components
The QSX 300 system is designed specifically for use with the Polycom SoundStation
VTX 1000 conference phone.
Name
Component
Description
QSX system base
Adds content sharing to phone
calls. The base can be mounted
on a rack, under a table, or on a
wall, or it can be placed on a
tabletop.
VGA Cable
Connects the QSX system to a
computer or other VGA source.
LAN Cable
Connects the QSX system to the
IP network.
Power Supply and Power Cable
Connects power to the QSX
system base.
8-wire cable for phone console
Connects the QSX system’s 8wire connector to the conference
phone.
Conference Link Cable (for use
with VTX 1000 only)
Connects the QSX system’s
conference link connector to a
SoundStation VTX 1000
conference phone.
Serial Cable (straight through)
Connects to the serial port on the
QSX. Used for setting static IP if
required and HyperTerminal is
not available.
Mounting Brackets
Includes screws and four brackets
for mounting the QSX system
base under a table or on a wall.
10
QSX System Back Panel
Content Controller
If you have a Content Controller, you can use the Idle, Preview and Send functions as
illustrated in the graphic below.
Idle:
No one sees your content.
Preview:
Content Button:
Info Button:
You see your content locally, but
can choose whether to
automatically send content to
others or not.
Press to display the Info Screen on
your local VGA display.
Send:
Press to start and stop sending.
All sites see your content.
Note: If you hold the Info button
down for more than 4 seconds, the QSX
will generate a new web viewer password (if Generate Random Password
option is selected in the Web Admin page).
Note: You may see the lights automatically change on your Content Controller when a
web viewer connects or disconnects from a meeting.
11
SoundStation VTX1000 Conference Phone Controls
If you have a QSX connected to a VTX1000 conference phone, you can use the phones
controls as shown below:
Note: If your QSX system is connected to both a content controller and a SoundStation
VTX 1000 phone, you can use either device to control meeting content and access the
Info screen.
Note: Unless you have configured the QSX for a specific password, a new password will
be generated each time the VTX 1000 phone is placed on-hook (i.e.- hung up).
Manual IP Dialing
You can manually dial the IP address of a remote QSX or Polycom MGC bridge using
the keypad on your VTX 1000.
Note: In this scenario, the VTX 1000 is serving as a dial pad for one QSX dialing another
one.
In order to do so, follow these steps:
1. Make a voice call by dialing the phone number using the VTX 1000 dial pad.
2. To dial a device with an IP Address and Password, dial the following sequence:
Dial sequence:
Example:
#*<IP>#[password]#
#*172*43*16*213#1234#
12
3. To dial a device with an extension and password when both are registered to the
same gatekeeper, dial the following sequence:
Dial sequence:
Example:
#*<Extension>#[password]#
#*2483#1234#
4. To dial a device with a Gatekeeper IP Address, an Extension and a Password, dial
the following sequence:
Dial sequence:
Example:
#*<IP>**<Extension>#[password]#
#*172*43*16*213**2483#1234#
Note: If you misdial a sequence, you can press #* to reset the dialing sequence and
start over at any time.
Note: If no password is required, you can end the dialing sequence by pressing ##
(e.g.- #*172*43*16*213##).
QSX Info Screen
The Info screen displays status information for the meeting and your QSX system, as
shown below:
This information includes the following:
•
•
•
•
Meeting Web Address. The address of the Master Control Unit (MCU)
Internal IP Address. This is the IP address of the QSX system. It will be the same
as the Meeting Web Address if this QSX is the MCU.
External IP Address. The External IP Address, if configured, is the address that
allows access to meeting content from outside the LAN. For information about
configuring an external IP address, refer to page 36 and/or 58.
Meeting Password. Six digit password that Web participants will use to log into
QSX meeting. For more information about passwords and password security,
refer to Page 30.
13
•
•
•
Content Status. Will show whether content is being sent to participants.
System Name. Will show the name of that QSX (default is its serial number)
Meeting Participants. There are two types of participants shown here:
• QSX participants. People who are connected via QSX. Up to 5 QSX
participants, including the presenting unit will be shown here.
• Web viewers. Those people who have logged into the meeting via the
web. Up to 10 web viewers will be shown here.
Note: The pie chart icon indicates which QSX is presenting content to other participants
in the meeting.
To access the Info screen on the local VGA display:
•
•
On the Content Controller, press the Info button
On a SoundStation VTX 1000 conference phone, press an arrow button
scroll, and then press the Info soft key on the phone.
14
to
Info Screen Alerts
There are a number of alerts that may appear locally on the Info screen of the QSX. They
include:
QSX Local Display Messages
Message
Description
Corrective Action
Initializing
When the QSX is connected to a
SoundStation or VTX phone and
the call is connected, the message
will appear. It will stay visible for
two minutes unless a meeting
participant joins.
No corrective action required.
Meeting is full
The maximum number of
QSX systems are already in the
meeting.
You can participate in the audio call and wait for another
QSX system to disconnect or join the meeting as a web
viewer.
Network disconnected
You have lost the connection to the
LAN.
Make sure Ethernet cable is firmly connected into QSX.
No content detected
The QSX system VGA input is not
receiving a signal.
Make sure that the VGA cable or content controller cable is
firmly connected to the QSX system and your computer.
If necessary, press function keys on your computer to send
video out to the QSX system.
Participant Joined
When a participant joins the
meeting, the name of the remote
party and the “Joined” message will
appear.
No corrective action required.
PC resolution or
refresh rate not
supported
The display settings on your
computer are not compatible with
the QSX system.
Change your computer display settings to one of the
compatible values listed on Page 39.
Preview
Indicates that the QSX is in
Preview mode. PC or laptop is
connected to the QSX, has content
loaded and is ready to send it.
No corrective action required. When the presenter is ready
to share content, he should press the Share button on the
Content Controller.
By default, the QSX is configured
to automatically send content when
the first web viewer joins.
Receiving
Content from another QSX unit is
being received.
No corrective action required.
Sending
Content is being sent to a
participant that is connecting via
web or another QSX unit.
No corrective action required.
Idle
Meeting has stopped. Indicator light
on Content Controller should be
red, indicating that you have
returned to Idle mode.
Make sure content is loaded and cables are firmly
connected. Make sure participants have connected to QSX
unit. Press Share button on Content Controller until
indicator light moves to yellow if the “preview content”
feature is enabled or green if the feature is not enabled.
15
The following are messages that web viewers may see when they try to log on to a QSX
content-sharing session.
Web Viewer Messages
Message
Description
Corrective Action
Java plug in must be
enabled in order to run
this application.
Web viewer is not Java enabled
and cannot see content.
Enable Java plug in by going to control panel on your
Windows PC or download Plug in from
www.java.sun.com/products/plugin/downloads/index.html
Maximum connections
reached
Message shown in web viewer
when the meeting is full.
You can participate in the audio call and wait for another
web viewer participant to disconnect.
Please retry
Log on has failed.
Close browser and try again.
Chapter 3- Typical QSX Usage Scenarios & How QSX
Works
QSX in Stand Alone Mode
One of the main advantages of the QSX is the ability for people to log into a meeting via
the web from a remote location.
In order to set up and initiate a call with a web viewer, the QSX user should follow these
steps:
1. Make sure the QSX system is properly connected. You can check your settings
by referring to the QSX Quick Start Guide that came with the product.
2. Connect your computer to the QSX and make sure that the QSX is in Preview
state. If you’re using a Content Controller, the light should be yellow. If your
16
QSX is connected through a VTX 1000, you should see “Preview” displayed in
the telephone’s display window.
3. Set up the presentation on your computer and initiate a call with the web viewing
party. Note that even though the QSX is not required to be connected to a
SoundStation phone in the Stand Alone Mode, it is assumed that you will still
have an audio connection with other meeting participants.
4. Press the Info button on the Content Controller
or VTX 1000 keypad
to
obtain the IP Address and Meeting Password for the meeting. Both of these will
be displayed on the Info Screen as shown below.
5. Direct the web viewer to connect to the internet, launch a web browser and enter
the IP Address in the browser window.
6. The web viewer will receive a pop-up asking him for his user name and password.
He should enter his name in the User Name field and the Meeting Password that
you gave him in the Password field.
7. He will get a message that content is being loaded. You will see the QSX
automatically move from Preview to Send. After a short delay, the web viewer
will be able to see the content you’re displaying on the computer in your location.
*- Note that if you are going to share content with web viewers outside your organization,
you will need both an internal IP address and an external IP address. You should obtain
one from your network administrator. When you communicate an IP address to
participants outside your organization, you will give them the external IP address which
can be obtained by hitting the Info button on either the Content Controller of the QSX
400 or the soft key option on the VTX 1000 if you are using a QSX 300 with VTX 1000
conference phone.
Note: The web browser must be Java-enabled in order to receive content from a QSX.
Note: By default, a new Meeting Password will be generated after a meeting has ended
and there have been 60 minutes of inactivity. Alternately, you can reset the password by
holding the Info button for at least 4 seconds as long as the QSX is in Idle or Preview
17
mode (i.e.- not sending content to web viewers). There are other password options that
you can access from the QSX’s Web Administrator page. These are described on Page
30.
Note: Web viewer sites do not necessarily need to participate in a phone call with the
presenter in order to see content.
Disconnecting Web Viewers
When the QSX ends a presentation, you can disconnect the web viewers by ensuring the
QSX is in Idle or Preview mode, then holding the Info button down for at least 4 seconds.
If the QSX user re-initiates the presentation but hasn’t changed the password, the web
viewers will need to refresh their browser and log in again.
Note: A maximum of 10 web viewers can connect to each QSX during a meeting.
Note: If the QSX has a SoundStation or VTX 1000 phone attached, this configuration
will override the stand alone operation. Placing the SoundStation or VTX 1000 on-hook
(i.e. - disconnecting the call) will drop all web viewer connections as well as H.323 calls
and web viewer connections.
QSX Connecting to Other QSX Systems
In calls between QSX systems, the systems automatically identify each other over the
phone line using standards-based Low Profile Signaling Protocol (LPSP). The signal is
embedded in the standard audio frequency band. When an audio call is placed, the QSX
units connect to each phone and begin to communicate. After the QSX systems identify
each other, typically within 15-30 seconds, they automatically establish a H.323 content
sharing channel over the LAN. One QSX system becomes the initial meeting controller
and its IP address becomes the Meeting Web Address. At this point, web viewers can
also join the meeting and receive content from the presenting QSX.
18
Note: A maximum of 5 QSX units can connect directly to one another for a meeting.
For higher scaling, refer to Interoperability with Polycom MGC below.
Note: In a QSX-to-QSX meeting, web viewers are still able to login and view content.
Note: There are several advantages to a QSX-to-QSX meeting. First, the direct
connection eliminates the need to communicate IP addresses and passwords to other
meeting participants. Second, all content between QSX units is encoded in 128-bit AES
encryption. Third, a QSX-to-QSX connection provides higher frame-per-second
transmission of content. Fourth, the H.323 connection between QSX units minimizes
delays in content transmission. Finally, in a meeting with multiple QSXs, it is possible to
change which room is sending content. If a different QSX system starts sending content
during the meeting, content from the new presenting unit is automatically directed to web
viewers through the QSX they originally connected to. Web viewer sites can continue to
view meeting content until the QSX system hangs up or stops sending content.
QSX Connected to Polycom Video Systems
In videoconferencing environments, you can enhance the capabilities of People+Content
by adding a QSX. There are two ways to add a QSX to a video environment.
First, you directly connect the QSX to a VSX 8000, a VSX 7000e or a VSX 7000s
(through Visual Concert) using VGA cables. In doing so, you can share content with
people participating in the meeting who do not have video capability (e.g.- salesperson
calling into the audio bridge from a remote location such as a hotel room). An example of
this type of scenario is shown below.
Computer
(sending meeting content)
Local Display
VTX 1000
(optional)
Content
Controller
VGA Out
Standard VGA Cable VGA In
VGA In
VGA Out
Fa
r-E
nd
W
eb
ion
ct
n
tio
ec
nn
Co
e
nn
Co
er
ew
Vi
o
de
Vi
VSX 8000
VSX 7000e
VSX 7000s
(with Visual Content)
QSX
Remote Participant
(connecting through video system)
Remote Participant
(connecting through internet)
19
In order to utilize the QSX as a web-conferencing device and allow people without video
capability to share content in a video-enabled meeting, follow these steps:
1. Ensure the video system is properly connected and configured. For more
information about Polycom’s video systems, refer to the Administrator’s Guide
for the respective product.
2. Connect the power and LAN connections of the QSX as described in Chapter 3 of
this guide.
3. Connect the Content Controller to the VGA-In port of the QSX as described in
Chapter 3 of this guide.
4. Connect a standard VGA cable from the VGA-Out port of the QSX to the VGAIn port of the Visual Content (for VSX 7000s) unit or directly to the VGA-In port
of the VSX 7000e or VSX 8000 unit.
5. Connect your laptop or computer to the Content Controller. By default, the
Content Controller will be in auto-preview mode, so content will be sent to the
Visual Concert or VSX unit.
6. To send content to far-end participants via the Visual Concert unit, press the send
button on the unit itself. To send content to far-end participants via a VSX 7000e
or VSX 8000, press the Graphics button on the unit’s remote control.
7. To enable web viewers to access the content, press the Info button on the Content
Controller. Provide the web viewers with the IP address and password of the
QSX unit. They can then open a browser, log into the IP address and enter their
name and the password to view the content.
Note: In this mode, People+Content operations will work as normal.
The second way to connect a QSX in a video environment is to use the video system’s
remote control to dial the IP address of the QSX. You will be prompted for the QSX
unit’s password. Once you’ve successfully entered the password, the video system will
be connected via a H.323 connection. Content can be sent from the QSX to the video
unit and from the video unit to the participants who have logged onto the QSX via the
Web.
20
QSX Usage with Polycom MGC
The QSX system can be connected to an MGC bridge to increase the scalability of
content sharing beyond 5 QSX units. It does so by leveraging the capabilities of the
MGC.
To use a QSX with an MGC bridge, follow these steps:
1. Ensure the MGC is properly connected and configured. For more information
about Polycom’s MGC systems, refer to the Administrator’s Guide for the
respective product.
2. Connect the power and LAN connections of the QSX as described in Chapter 3 of
this guide.
3. Enable MGC Dial Out by going to the Web Admin Page, Admin Settings
>Video/IP Network > H.323 Settings > Enable MGC Dial Out Conference
Calls.
4. For MGC configuration, consult the Administrator’s Guide for that product.
This capability enables the QSX to answer a call from an MGC in one of two scenarios.
MGC Dial-Out. There are two ways that the MGC can connect to the QSX. First, it can
dial out to the QSX directly by dialing its IP address. Second, if both the MGC and QSX
are registered to a gatekeeper, the MGC can dial the E164 extension of the QSX. In
either situation, once the MGC has made the connection, the QSX can send and receive
content. The link to the QSX has to be disconnected by the MGC. There is no way to
disconnect from the QSX side.
Dial-in with a SoundStation VTX 1000. A user can utilize a SoundStation VTX 1000
phone attached to the QSX can dial into the MGC using the Manual IP Dialing method
described on Page 12.
21
After the MGC call has connected to the QSX, the QSX unit will not connect to any other
QSX or video units. Other non-QSX units must access the content via the MGC bridge.
If the QSX is already in a call with another unit (i.e. – QSX or video unit) and the MGC
calls it, it will reject the MGC call.
Note: It is strongly recommended that you only use the MGC’s dial-out mode for
connecting to the QSX. Doing so avoids establishing a QSX-to-QSX connection before a
connection between the QSX and MGC is established. If this happens, the MGC dial
attempt will be rejected.
Note: When participating in an MGC-hosted meeting with a VTX 1000 conference
phone, you will only see two parties on the QSX unit’s Info Screen—you and the MGC.
If you see more meeting participants, you should hang up the call and use the VTX 1000
to manually dial into the MGC unit again.
Chapter 4- Setting Up the QSX System
Connect the QSX System
Connect the QSX System, by following these steps (for more information and a graphical
depiction of these steps, consult your QSX Quick Start Guide.
1. Connect the following cables:
• LAN Cable. Connect the LAN cable from the back of the QSX unit to an
active LAN port in the area where the QSX will reside.
•
Power Cable. Connect the Power Cable from the back of the QSX unit to
an available power outlet.
•
VGA Cables.
For the QSX 400, connect the Content Controller to the VGA-In port
on the back of the QSX unit, and then connect the VGA cable to
the Content Controller itself.
For the QSX 300, connect the VGA Cable directly into VGA-In port
on the back of the QSX unit.
If you plan to display content on a projector or second computer monitor in the
area where the QSX will reside, you will need an additional VGA cable that
connects from the VGA-Out port
on the back of the QSX unit to the
display equipment. Note that this VGA Cable is not included with the QSX
system.
Note: The only way to display the Info screen is to use a second display (e.g.second monitor, projector, etc.)
22
2. Step 1 is all that is required to set up your QSX system. If you plan to use it with
a Polycom conference phone, please connect the following cables as well:
•
•
8-wire cable for phone console. Connect the 8-wire cable from the back
of the QSX unit to the Polycom conference phone.
Conference Link Cable. For use with a Polycom VTX 1000 conference
phone only. Connect the cable from the phone to the back of the QSX
unit.
Note: You will also need a POTS module cable that connects to the SoundStation
console. This cable ships with the SoundStation phones.
Set an IP Address
By default, the QSX system obtains its IP address automatically. You need the IP
address of the QSX system in order to access its Admin Web interface.
If your QSX system obtains its IP address automatically, it is displayed as My IP on the
Info screen when you press the Info button on the content controller, or the INFO soft
key on the SoundStation VTX 1000 conference phone.
If your location does not allow dynamic IP address assignment, contact your IP network
service provider or system administrator to obtain an IP address and system name. You
must manually assign the static IP address to the QSX system before you use it.
Note: The default mode for IP Address is dynamic. This means that the QSX system
will automatically request an IP address from a DHCP server if there is one on your
network.
Accessing the QSX Web Admin Page
To see if your QSX system obtained its IP address automatically, follow these steps:
1. Once QSX is connected, hit the Info button on Content Controller.
2. If screen shows an IP address in the “My IP” field, go to the next step. You may
need to wait a few minutes for the DHCP server to assign an IP address to the
QSX unit. Otherwise, proceed to the following sections for setting a Static IP
Address.
3. Open your internet browser and type in the IP address, followed by “/admin.htm”
(e.g. https//140.242.16.45/admin.htm) as shown in the picture below.
Setting a Static IP Address via the QSX Web Admin Page
1. After accessing the Web Admin page, go to Admin Settings > LAN Properties.
Select “Enter IP Address Manually.” After typing IP Address, Subnet Mask
Gateway and DNS information, click the update button.
23
Set a Static IP Address Using HyperTerminal
If you need to assign a static IP address to the QSX system, follow these steps before you
try to set up and use the QSX system:
1.
2.
3.
4.
5.
Connect a straight-through serial cable from the QSX system to a computer.
Power on the QSX base with only the power cable and serial cable connected.
Start the HyperTerminal application on the computer.
Open a connection to the COM port being used for the serial cable.
Set the bits per second to 115200. Other settings can remain at their defaults (data
bits=8, Parity=none, stop bits=1, and Flow control=Hardware).
6. When a connection is established, type ip.
7. Follow the instructions to set a static IP address. Enter the appropriate IP address,
default gateway, subnet mask, and DNS servers. See picture below for more
details.
8. When finished, select Yes to accept the changes. The QSX system restarts.
24
Note: If you hold the Content button during boot up of the QSX unit, it will force the unit
into DHCP mode. That will cause the QSX unit to seek an IP address from the DHCP
server on your network.
Changing QSX to Dynamic IP Mode
By default, the QSX is configured to obtain an IP address from a DHCP server in your
network. If you have configured it with a Static IP address and want to change it back to
that default mode, you should follow these steps:
1. Disconnect the power cord.
2. Reconnect the power cord.
3. As the QSX is booting up, hold down the Share button. By holding down this
button, you will force the QSX into DHCP mode. The QSX will automatically
request an IP address from a DHCP server if there is one on your network.
25
Chapter 5- Accessing the QSX Administrative Web Page
QSX Administrative Web Options
The QSX Administrative Web page (Admin Web Page) gives you significant control and
flexibility in the configuration and deployment of your QSX system. The following
diagram is an overview of the various options you have for configuring your QSX.
Admin Settings
General Settings
Video/IP Network
Global Services
System Settings
H.323 Settings
Management Servers
Security
Firewall
My Information
Call Summary
Call Statistics
LAN Properties
Graphics Display
Password
Location
Serial Port
Bandwidth
Diagnostic
Restart System
26
Network Statistics
Advanced Net Stats
Logging On to the QSX Administrative Web Page
After the QSX system is set up, you can log on to the system’s Admin Web Page by
following these steps:
1. On a computer, open Windows Internet Explorer version 6.0 or later.
2. In the browser address line, enter the IP address of the QSX system followed by
/admin.htm, for example xxx.xx.xx.xx/admin.htm where xxx.xx.xx.xx is the My
IP shown on the Info screen (e.g.- http://172.43.156.34/admin.htm).
3. Enter the administrator’s user name and password.
4. The default administrator’s user name is admin. The password is blank until you
establish one.
27
Chapter 6- Configuring Administrative Settings
Info / System Info
Administrators can view detailed system information on the System Information screen
of the QSX Admin Web. The System Information screen displays information such as the
system’s serial number and software version.
To view the System Information screen:
1. Log on to the QSX Admin Web as described on Page 23.
2. Click the Home icon at the top of the window.
3. You will be re-directed to a screen that looks like the one below.
Home / Table of Contents
The different configurations options in this section are broken into Admin and
Diagnostics Settings. Under each area, there are multiple configuration changes
available. Refer to the diagram at the beginning of Chapter 4 for an overview or review
the following sections for more details.
28
Admin Settings
Admin Settings are divided into five groups—General Settings, Video Network/IP
Network, Global Services, LAN Properties and Graphics Display.
General Settings
System Settings
System Settings allow you to give a name to your QSX (e.g.- You may want to name it
“Pebble Beach Conference Room” if that’s where the unit will be located). You can also
set Low Profile Signaling Protocols (LPSP) based on your expected usage of the QSX
system. For more details on each of these settings, consult the table below.
To configure system settings:
1. Log on to the QSX Admin Web as described on Page 23.
2. Go to Admin Settings > General Settings > System Settings.
3. Configure these settings:
Setting
Description
System Name
Specifies the system name in this field. This name is displayed to other
meeting participants.
(default: serial number)
LPSP Gain
(default: 200)
Specifies the gain for the Low Profile Signaling Protocol (LPSP). Increase
the gain to 300 or 400 if you expect the QSX system to handle international
calls.
If the QSX is to be used in a Stand Alone Mode, configure the LPSP Gain
to zero.
LPSP Delay
(default: 15)
Specifies the delay in seconds for LPSP activation. Increase the delay if
conference bridges that require pass codes are being used. Extra delay
might be necessary to prevent the QSX system from disrupting DTMF
transmission of the audio conference pass codes.
Note: Low Profile Signaling Protocol (LPSP) is the method that the QSX systems use to
establish a connection with one another. In doing so, they transmit and decode site
identification. The QSX units use a small fraction of the standard 3.5 Hz bandwidth
allocation of a typical POTS call for the LPSP communication.
Security
The QSX system allows you to share content with other meeting participants in a secure
manner. By not transferring files, you ensure that they won’t be accessed by
unauthorized viewers or used in unintended ways. AES (Advanced Encryption Standard)
media encryption in calls between QSX systems ensures that the content is secure
traveling via the Internet or an IP network. Finally, secure login and encrypted password
exchange for web access allows you to restrict who is able to join meetings.
29
To configure security settings:
1. Log on to the QSX Admin Web as described on Page 23.
2. Go to Admin Settings > General Settings > Security.
3. Configure these settings:
Settings
Description
Enable Remote Access
Specifies whether to allow remote access to the
system by:
• FTP
• Telnet
You may select either of these, or both. You might
need remote access to reset a forgotten
administrator password or set a static IP address.
(default: FTP enabled, Telnet enabled)
Note: The system restarts if you change the remote
access settings.
AES Encryption
(default: disabled)
Specifies whether to enable AES encryption. The
Advanced Encryption Standard (AES) is an
encryption algorithm used by the US government
and others to protect sensitive information.
AES encryption is a standard security feature on the
QSX system. When it is enabled, the system
automatically encrypts content with other AEScapable systems.
Web Access Port
(default: 80)
Specifies the port to use when accessing the system
using the web interface. This is a user assigned
port.
Password
To configure Password settings:
1. Log on to the QSX Admin Web as described on Page 23.
2. Go to Admin Settings > General Settings > Password.
3. Configure these settings:
Settings
Description
Admin Password
Specifies a password for accessing the Web Admin
Page. You will need to enter it any time you wish to
access the Web Admin Page for configuration
changes, etc. Maximum of 8 characters.
(default: blank (i.e.- no password))
Use Random Password
(default: disabled)
Meeting Password
(default: blank (no meeting password))
Enables or disables the generation of random
meeting passwords for web viewers. If it is enabled,
a new password will be generated each time the Info
button on the Content Controller is held for more
than 4 seconds or, if connected, when the phone
goes on/off-hook.
Allows you to set a permanent password for QSX
meetings. Overrides the generation of random
passwords.
30
Note: If the QSX is in Idle or Preview mode and there is no H.323 connection (i.e.- only
web viewers are accessing content), you can reset the password and clear all web viewer
connections by holding the Info button down on the QSX 400 for more than 4 seconds.
Note: The password will change on the QSX 300 when the VTX 1000 is taken on/offhook. The password will change on the QSX 400 if it is connected to any SoundStation
phone and that phone is taken on/off-hook.
Note: After all the connections are disconnected, a timer on the QSX will be set for 60
minutes. After 60 minutes, the password will automatically change. This ensures that no
unauthorized parties can access a meeting. If you wish to disable this feature, however,
you can set a permanent password by following the steps above.
Location
Location settings allow you configure the QSX based on where it is geographically
located and the language that is spoken there. Accurately setting these configurations
ensures that the proper country codes associated with the local telephony system are
associated with your QSX as well as displaying local VGA and web content
To configure location settings:
1. Log on to the QSX Admin Web as described on Page 23.
2. Go to Admin Settings > General Settings > Location.
3. Configure these settings:
Settings
Description
Country
Specifies the country where the system is located.
Changing the country automatically adjusts the
country code associated with your system number.
(default: United States)
Language
(default: American English)
Sets the language for the local VGA display and web
viewer interface. The QSX Admin Web interface
automatically uses the same language as the
computer operating system.
31
4. Click Next and configure these settings:
Settings
Description
Date Format
Specifies your format preference for the date display
and lets you enter your local date.
(default: MM-dd-yyyy)
Time Format
Specifies your format preference for the time display
and lets you enter your local time.
(default: 12 Hour)
Daylight Saving Time
(default: enabled)
Time Difference from GMT
Specifies daylight savings time setting. When you
enable this option, the system clock moves ahead
one hour. When you disable this option, the system
clock moves back one hour.
Specifies the time difference between GMT
(Greenwich Mean Time) and your location.
(default: -06:00)
Display Time in Call
Specifies the time display in a call:
(default: Elapsed Time)
• Elapsed Time – Displays the amount of time in the
call.
• Local Time – Displays the local time on the screen
during a call.
• Off – Time is not displayed.
Time Server
Specifies connection to a time server for automatic
system time settings.
(default: Auto)
Time Server Address
Lets you specify the IP address of the server when
Time Server is set to Manual.
Serial Port
The QSX system provides an RS-232 serial port for configuring a static IP address. The
QSX system is configured as DCE (Data Communications Equipment).
To configure serial port settings:
1. Log on to the QSX Admin Web as described on Page 23.
2. Go to Admin Settings > General Settings > Serial Ports.
3. Configure these settings, and make sure that they match the configuration of your
computer serial port.
32
Settings
Description
Baud Rate
Fixed at 115200.
RS-232 Mode
Control or Debug
(default: Debug)
RS-232 Flow Control
Fixed at None.
Bandwidth
One of the primary variables that can affect the quality of a QSX-based content sharing
session is bandwidth. Different participants may be connected at different speeds.
Alternately, the total available bandwidth may not be sufficient for all participants to use
the maximum transmit and receive rates. As a result, QSX 2.0 provides a number of
enhancements for how bandwidth can be used.
To configure the Bandwidth settings described below, follow these steps:
1. Log on to the QSX Admin Web as described on Page 23.
2. Go to Admin Settings > Table of Contents > General Settings > Bandwidth
3. Configure the settings.
4. Click on the Update button.
Settings
Description
Web Viewer Bandwidth Usage
Specifies how you want to allocate bandwidth for web
viewers. There are two options:
(default: Bandwidth Sharing )
Bandwidth Sharing - For use in normal corporate LAN
environments.
Time Sharing - For use in which web viewers are
accessing the QSX session from a low-bandwidth
connection.
For more details on bandwidth, please see Appendix A.
Maximum Average Transmit Bandwidth
(default:1920 Kbps)
Maximum Average Receive Bandwidth
(default:1920 Kbps)
Specifies the maximum amount of bandwidth that you
wish to use when transmitting content from the QSX to
other meeting participants.
Specifies the maximum amount of bandwidth that you
wish to use when receiving content from another QSX
unit.
33
Additional Bandwidth Settings include:
Settings
Description
Input Scaling for QSX to QSX Connections
Specifies whether you want to scale the input resolution
for a QSX to QSX connection. Generally, you would
choose input scaling for QSX to QSX connections when
you wish to obtain a faster frame rate, but are not as
concerned with resolution. The Far End display will try
to scale up to the native resolution of the projector.
(default: No)
(Actual resolution is 1024 x 768)
There are three options:
• No – You do not wish to scale the input.
• 800x600 (SVGA) – You want to scale to an 800x600
image.
• 640x480 (VGA) – You want to scale to a 640x480
image.
Refer to Graphics Display on Page 39 for more
information.
Input Scaling for Web Viewer Content
(default: 800x600 SVGA)
Specifies whether you want to scale the input resolution
for Web Viewer Content. Generally, you would choose
this in order to reduce bandwidth usage and ensure that
web viewers can see an entire image in their browser
without having to scroll vertically or horizontally to do
so. There are three options:
• No – You do not wish to scale the input.
• 800x600 (SVGA) – You want to scale to an 800x600
image.
• 640x480 (VGA) – You want to scale to a 640x480
image.
Enable Load Balancing for Web Viewer
(default: disabled)
Enable Web Viewer Cascading
(default: disabled)
This feature accommodates situations where there is a
limit on available bandwidth. The most common
scenario is when a QSX is both the MCU and the
presenter to additional QSX units as well as web
viewers. In this situation, it may allocate all bandwidth
to the QSX units, leaving none for the web viewers.
Enabling load balancing automatically redirects a web
viewer from the MCU/presenting unit to another QSX
that has available bandwidth.
This feature accommodates a situation where you have
more than 10 web viewers attempting to join a meeting
where there are also multiple QSX units. By enabling
web viewer cascading, you can have web viewers log
into a QSX other than the presenting or main (MCU)
QSX unit. This requires them to enter the IP address of
the second unit. You can use Web Viewer Cascading to
enable up to 10 web viewers per QSX.
Note: If you make bandwidth configuration changes while the QSX is in a Preview or
Send state (yellow or green light, respectively, on the Content Controller), the changes
will not immediately take effect. The QSX will need to be cycled through the Idle state,
then back to Preview. It is recommended that you make bandwidth changes while the
QSX is in Idle.
34
Video Network/IP Network
H.323 Settings
H.323 is a protocol standard that defines how audiovisual conferencing content is
transmitted over IP and LAN networks. It handles call control and management for pointto-point and multipoint conferences, as well as gateway administration of media traffic,
bandwidth, and user participation.
If your network uses a gatekeeper, the system can automatically register its H.323 name
and extension. If your network uses a gatekeeper, get the gatekeeper information from
your IP network service provider or system administrator.
To configure H.323 settings:
1. Log on to the QSX Admin Web as described on Page 23.
2. Go to Admin Settings > Video Network > IP Network > H.323 Settings.
3. Configure these settings:
Settings
Description
Enable H.239
Specifies standards-based data collaboration.
H.239 is the international standard that defines
multiple channels for delivering audio, video, and
content in conferences.
(default: enabled)
Use Gatekeeper
(default: Off)
Specifies whether to use a gatekeeper. A
gatekeeper manages H.323 endpoints within a
network. Gatekeepers are optional but must be used
if present. H.323 gateways work with gatekeepers to
allow communication with endpoints in other types of
networks.
• Off — Calls do not use a gatekeeper.
• Auto — System automatically finds an available
gatekeeper.
• Specify — Calls use the specified gatekeeper.
Enter the gatekeeper’s IP address or name (for
example, gatekeeper.companyname.usa.com, or
255.255.255.255).
H.323 Name
Specifies the name that gatekeepers and gateways
use to identify this system.
(default: product serial number)
The H.323 Name is the same as the System Name,
unless you change it. Your organization’s dial plan
may define the names you can use.
H.323 Extension (E.164)
Lets users place point-to-point calls using the
extension if both systems are registered with a
gatekeeper, and specifies the extension that
gatekeepers and gateways use to identify this
system.
The default H.323 Extension is based on the system
serial number, but it can be changed. Your
organization’s dial plan may define the extensions
you can use.
35
Additional H.323 settings include:
Enable MGC Dial Out Conference Calls
Enables QSX to answer a call from an MGC bridge.
For more information on using the QSX with a
Polycom MGC Bridge, refer to the section on “QSX
Usage with MGC” on Page 22.
Firewall
To make meeting content accessible to web viewer participants outside of your LAN,
your QSX system must have an external IP addressed assigned to it by a network
administrator.
The Meeting Web Address (External IP) displayed on the Info screen is the Meeting Web
Address that web viewer participants must use if they are outside the firewall. If your
QSX system displays an external IP address, you can share content with other sites that
are inside and outside your firewall.
Note: This feature only enables web viewer access from outside the firewall. A QSX
System cannot communicate with other QSX systems across a firewall unless external IP
addresses have been configured for the units behind the firewalls.
To assign an external IP address to the QSX system:
1. Ask your network administrator to assign both a static IP address and
corresponding external IP address to it, and to allow only traffic on the userassigned port (e.g.- port 80).
2. Log on to the QSX Admin Web as described on Page 23.
3. Go to Admin Settings > LAN Properties and select Enter IP address
manually.
4. Enter the static IP address as Use the Following IP Address.
5. Go to Admin Settings > Video Network > IP Network > Firewall and set NAT
Configuration to Manual.
6. Click Update.
7. Enter the external IP address as the NAT Public (WAN) Address.
8. Click Update.
After the QSX system restarts, both internal and external IP addresses appear on the Info
screen.
36
To configure firewall settings:
1. Log on to the QSX Admin Web as described on Page 23.
2. Go to Admin Settings > Video Network > IP Network > Firewall.
3. Configure these settings:
Settings
NAT Configuration
(default: Off)
Description
Lets you specify whether the system should
determine the NAT Public WAN Address
automatically.
• If the system is not behind a NAT or is connected
to the IP network through a Virtual Private Network
(VPN), select Off.
• If the system is behind a NAT that does not allow
HTTP traffic, select Manual. Select Manual to
assign an external IP address to the QSX system.
Click Update to access the NAT Public (WAN)
option.
NAT Public (WAN) Address
Lets you enter external IP address for web viewer
access outside of your LAN when NAT
Configuration is set to Manual. This is only for
display on the Info screen. It does not set the
external IP address.
Description
Global Services
If your organization uses the Polycom Global Management System, you can configure,
manage, and monitor the QSX system using the Global Management System (GMS)
server. For more information about GMS, go to www.polycom.com.
On networks managed by the Global Management System, several Global Servers may
be configured to manage this system remotely. You can view information about these
servers.
Management Servers
To view the management servers list:
1. Log on to the QSX Admin Web as described on Page 23.
2. Go to Admin Settings > Global Services > Management Servers to view the
server information.
My Information
If your system is managed by GMS, you can configure the QSX system so that users can
request help from the GMS administrator.
To configure Global Management contact information:
1. Log on to the QSX Admin Web as described on Page 23.
2. Go to Admin Settings > Global Services > My Information.
Enter your contact information for the GMS administrator for technical support
37
LAN Properties
To configure LAN properties:
1. Log on to the QSX Admin Web as described on Page 23.
2. Go to Admin Settings > LAN Properties.
3. Configure these settings:
Setting
Description
Host Name
Indicates the system’s DNS name. If you change the
Host Name, the system restarts.
(default: serial number)
IP Address
(default: Obtain IP address automatically)
Your IP Address is
or
Specifies how the system obtains an IP address.
• Obtain IP address automatically — Select if the
system gets an IP address from the DHCP server on
the LAN.
• Enter IP address manually — Select if the IP
address will not be assigned automatically.
Displays the IP address currently assigned to the
system if the system obtains its IP address
automatically.
Use the Following IP Address
Allows you to enter the IP address for the system if
Enter IP address manually is selected.
DNS Servers
Displays the DNS servers currently assigned to the
system. If the system does not automatically obtain
a DNS server address, enter up to four DNS servers
here.
Default Gateway
Displays the gateway currently assigned to the
system. If the system does not automatically obtain
a gateway IP address, enter one here.
Subnet Mask
Displays the subnet mask currently assigned to the
system. If the system does not automatically obtain
a subnet mask, enter one here.
WINS Server
Displays the WINS server currently assigned to the
system. If the system does not automatically obtain
a WINS server IP address, enter one here.
Sends a request to the WINS server for WINS name
resolution.
WINS Resolution
(default: disabled)
LAN Speed
(default: Auto)
Duplex Mode
(default: Auto)
Specifies the LAN speed to use. Note that the speed
you choose must be supported by the switch.
Choose Auto to have the network switch negotiate
the speed automatically. If you choose 10 Mbps or
100 Mbps, you must also select a duplex mode.
Choose Auto to have the network switch negotiate
the Duplex mode automatically, or specify the
Duplex mode to use. Note that the Duplex mode you
choose must be supported by the switch.
38
Graphics Display
The QSX system supports various resolutions and refresh rates for VGA input and
output.
QSX Output Scaling option allows the user to scale down the content that the QSX sends
to other devices. This content can be scaled to a specified resolution in order to optimize
transmission. Input resolution options include:
•
•
•
•
SXGA (1280 x 1024)
XGA (1024 x 768)
SVGA (800 x 600)
VGA (640 x 480)
To configure Graphics Display settings:
1. Log on to the QSX Admin Web as described on Page 23.
2. Go to Admin Settings > Graphics Display.
3. Configure these settings:
Settings
Preview with VGA Display
(default: enabled)
Default Output VGA Resolution
(default: 60Hz, 800x600)
Description
Specifies whether to preview content locally when in
a call with another QSX system. If this option is
enabled, your content is previewed until you send it.
If this option is disabled, preview mode is not
available and content is sent to all meeting
participants as soon as the call starts or you connect
the computer.
Specifies the VGA resolution for your monitor.
Select the maximum VGA resolution that your
monitor or projector can support, if your monitor is
not specified through DDC information. Consult the
user manual provided with the VGA monitor or
projector for performance information.
Other Scaling Considerations
You have the capability to independently scale WebViewer (http) content or H.323
content stream. To configure this setting, you would:
1. Log on to the QSX Admin Web as described on Page 23.
2. Go to Admin Settings > Bandwidth.
3. Choose the scaling option you want in the pull down menu by “Input
Scaling for Web Viewer Content”.
Downsizing the image may have different effects for web viewer connections and QSX
to QSX connections.
39
QSX to Web Viewer Connections
When a web viewer displays the image, it will be displayed at its current resolution. An
800x600 or 640x480 image will display at the center of browser.
Scaling for web viewers will reduce the image size for JPEG compression. This will
immediately affect the loading speed of web viewers and hence the delays of displaying
each image. The higher the resolution, the greater the delay for loading the slide will be.
QSX to QSX Connections
When the QSX displays the remote image, it will always scale the decompressed image
to its own local display resolution.
QSX to QSX connections uses a H263 encoder. Reducing the image size will cause the
H263 to work faster, and hence perform a better compression job and a faster frame rate.
Diagnostics
Restart System
Note: Do not restart the QSX system while it is in the process of a software update.
To restart the system:
1. Log on to the QSX Admin Web as described on Page 23.
2. Click Diagnostics > Restart System.
3. Click the Restart System button.
You can also restart the system by unplugging power from QSX system and plugging it
back in.
Call Summary
Call Summary gives you a summary of the calls that have been placed on a particular
QSX unit. You will be able to see the amount of time you were in the last call, how
many calls the QSX has participated in, which ones were IP calls and how many of those
there were.
To view Call Summary:
1. Log on to the QSX Admin Web as described on Page 23.
2. Click Diagnostics, then select Call Summary.
Note: Call Summary features are not enabled in QSX 2.0 at this time.
Call Statistics
QSX system meeting participants can view information about the current call on the Info
screen. Administrators can view statistics and call information on the Diagnostics screen
of the QSX Admin Web.
40
To view Call Details:
1. Log on to the QSX Admin Web as described on Page 23.
2. Click Diagnostics, then select Call Statistics.
Note: Call Statistics features are not enabled in QSX 2.0 at this time.
Network Statistics
QSX system administrators can view statistics and network information on the
Diagnostics screen of the QSX Admin Web. This may help in understanding types of
connections, connection speeds and protocols being used.
To view Network Statistics:
1. Log on to the QSX Admin Web as described on Page 23.
2. Click Diagnostics, then select Network Statistics.
Advanced Network Statistics
Advanced network statistics let QSX Administrators view even more information about
QSX meetings. This additional information includes Audio & Video rates with regard to
speed, frames, packets lost and jitter. The information can assist in understanding the
health of the network, the QSX system as well as serving as an important troubleshooting
tool.
To view Advanced Network Statistics:
3. Log on to the QSX Admin Web as described on Page 23.
4. Click Diagnostics, then select Network Statistics.
Note: Call Statistics features are not enabled in QSX 2.0 at this time.
Chapter 7- Diagnostics and Troubleshooting
Viewing QSX System Information
Administrators can view detailed system information on the System Information screen
of the QSX Admin Web. The System Information screen displays information such as the
system’s serial number and software version.
To view the System Information screen:
4. Log on to the QSX Admin Web as described on Page 23.
5. Click the Info icon at the top of the window.
41
Keeping Your Software Current
You can download the web-based SoftUpdate application to update the QSX system
software. It is available on Polycom’s support website, which is accessible at
www.polycom.com.
To upgrade your software via the Internet:
1. From your computer, go to www.polycom.com.
2. Log in to the Polycom Product Resource Center, navigate to the QSX systems
product page, and download the QSX system software upgrade file in .zip format.
3. Double-click the software .zip file to extract the file.
4. Double-click Softupdate.exe.
5. Click Softupdate, and then enter the IP address of the system you want to
upgrade. Enter the administrator password, if required, and click OK to begin the
upgrade.
6. You can disable the Save my current system settings option to return all admin
settings to their default values when upgrading the QSX system software.
7. Click Continue to upgrade the QSX system software.
Resetting a Forgotten Administrative Password
If you forget the administrator password and cannot gain access to the QSX Admin
Web, follow these steps:
1. Put the QSX system in Boot UI mode:
• If you have a Content Controller, hold down the Info button while you
disconnect and reconnect power to the QSX system base.
• If you do not have a Content Controller, connect a serial cable from a
computer to the QSX system base. Enter the command swus.
2. FTP into the QSX system using the IP address shown on the Boot UI screen.
3. Log in as admin.
4. Press <Enter> when prompted for a password.
5. Enter the following command to delete the current, unknown password:
del sw.dat
6. Enter the following command to restart the QSX system without a password:
quote boot
Now you can log in to the QSX Admin Web with a blank password and set a new
password.
Viewing Call Details
QSX system meeting participants can view some information about the current call on
the Info screen. Administrators can view statistics and call information on the
Diagnostics screen of the QSX Admin Web.
42
To view call details and statistics:
1. Log on to the QSX Admin Web as described on Page 23.
2. Click Diagnostics, then select Call Statistics, Network Statistics, or Advanced Net
Stats.
Restarting the System
To restart the system:
1. Log on to the QSX Admin Web as described on Page 23.
2. Click Diagnostics > Restart System.
3. Click the Restart System button.
You can also restart the system by unplugging power from QSX system and plugging it
back in.
43
Status Alerts
The following table describes the status alerts that appear on the local VGA display or
web viewer, gives suggested steps to correct the problem.
QSX Local Display Messages
Message
Description
Corrective Action
Initializing
When the QSX is connected to a
SoundStation or VTX phone and
the call is connected, the message
will appear. It will stay visible for
two minutes unless a meeting
participant joins.
No corrective action required.
Meeting is full
The maximum number of
QSX systems are already in the
meeting.
You can participate in the audio call and wait for another
QSX system to disconnect or join the meeting as a web
viewer.
Network disconnected
You have lost the connection to the
LAN.
Make sure Ethernet cable is firmly connected into QSX.
No content detected
The QSX system VGA input is not
receiving a signal.
Make sure that the VGA cable or content controller cable is
firmly connected to the QSX system and your computer.
If necessary, press function keys on your computer to send
video out to the QSX system.
Participant Joined
When a participant joins the
meeting, the name of the remote
party and the “Joined” message will
appear.
No corrective action required.
PC resolution or
refresh rate not
supported
The display settings on your
computer are not compatible with
the QSX system.
Change your computer display settings to one of the
compatible values listed on Page 39.
Preview
Indicates that the QSX is in
Preview mode. PC or laptop is
connected to the QSX, has content
loaded and is ready to send it.
No corrective action required. When the presenter is ready
to share content, he should press the Share button on the
Content Controller.
By default, the QSX is configured
to automatically send content when
the first web viewer joins.
Receiving
Content from another QSX unit is
being received.
No corrective action required.
Sending
Content is being sent to a
participant that is connecting via
web or another QSX unit.
No corrective action required.
Idle
Meeting has stopped. Indicator light
on Content Controller should be
red, indicating that you have
returned to Idle mode.
Make sure content is loaded and cables are firmly
connected. Make sure participants have connected to QSX
unit. Press Share button on Content Controller until
indicator light moves to yellow if the “preview content”
feature is enabled or green if the feature is not enabled.
44
There are Status Alerts for Web Viewers as well. These include:
Web Viewer Messages
Message
Description
Corrective Action
Java plug in must be
enabled in order to run
this application.
Web viewer location is not Java
enabled and cannot see content.
Enable Java plug in by going to control panel on your
Windows PC or download Plug in from
www.java.sun.com/products/plugin/downloads/index.html
Maximum connections
reached
Message shown in web viewer
when the meeting is full.
You can participate in the audio call and wait for another
web viewer participant to disconnect.
Please retry
Log on has failed.
Close browser and try again.
45
General Troubleshooting
System
Problem
Corrective Action
The system is not sending
content.
The system is not connected
correctly.
Ensure that all cables are
connected as shown in Setting up
the QSX System. If you are using
a VTX 1000 conference phone,
make sure that both the 8-wire
cable and conference link cable
are used to connect the QSX
system to the phone.
The system does not respond at
all.
The system is not connected to
power.
Ensure that the power supply is
connected to the system and to a
power source, that the power
cables are firmly seated, and that
the phone’s interface module is
connected to power.
A computer is connected to the
system but content does not
appear on the local VGA display.
The system is idle or the QSX
system base is not receiving a
VGA signal from the computer.
Press the Content button on the
content controller, or the
PREVIEW soft key on the VTX
1000 conference phone, until you
see a preview on the local VGA
display.
Press the appropriate function
keys, such as <F5>, on the
computer to send a VGA signal
out.
The conference phone does not
have a dial tone.
The system is not connected
correctly.
Ensure that all cables are
connected as shown in Setting up
the QSX System. The conference
phone’s floor/wall module must
be connected to a POTS (analog
phone) outlet.
The SoundStation VTX 1000
conference phone does not
display the correct QSX soft keys.
The SoundStation VTX 1000
conference phone has software
earlier than version 1.6.
Update the SoundStation VTX
1000 conference phone to use
software version 1.6 or later.
The indicators on the front of the
QSX base are flashing red and
green.
The system is in Boot UI mode.
Start SoftUpdate to update the
QSX system software, or
disconnect the power cord and
reconnect it to restart the system.
How to Contact Technical Support
If you are not able to make test calls successfully and you have verified that the
equipment is installed and set up correctly, contact Polycom Technical Support by
telephone or Internet as described below.
46
By Telephone
Before calling Polycom Technical Support, please have the following information ready:
•
•
Description of the issue – What is happening or not happening, and any related
events you may be able to notice.
The 14-digit serial number on the bottom of the system.
Contact Polycom Technical Support at 1-800-POLYCOM.
By Internet
To contact Polycom Technical Support, go to www.polycom.com/support.
Enter the following information, then ask a question or describe the problem. This
information helps us to respond faster to your issue:
•
•
•
•
The 14-digit serial number on the bottom of the system.
The software version from the System Information screen in the QSX Admin
Web.
Information about your network.
Troubleshooting steps you have already tried.
Limited Warranty, Disclaimers, Limit of Liability
LIMITED WARRANTY. Polycom warrants to the end user (“Customer”) that (a) the hardware product(s) will be free from
defects in workmanship and materials, under normal use and service, for one year from the date of purchase from
Polycom or its authorized reseller, and (b) the software product(s) will perform substantially in accordance with the
accompanying documentation for a period of ninety (90) days from the date of receipt by Customer. Polycom does not
warrant that use of the product(s) will be uninterrupted or error free, or that all defects in the product(s) will be corrected.
You assume full responsibility for the selection of the product(s) to achieve your intended results and for the installation,
use and results obtained from the product(s). Polycom’s sole obligation under this express warranty shall be, at Polycom’s
option and expense, to repair the defective product or part, deliver to Customer an equivalent product or part to replace
the defective item, or if neither of the two foregoing options is reasonably available, Polycom may, in its sole discretion,
refund to Customer the purchase price paid for the defective product. All products that are replaced will become the
property of Polycom. Replacement products or parts may be new or reconditioned. Polycom warrants any replaced or
repaired product or part for ninety (90) days from shipment, or the remainder of the initial warranty period, whichever is
longer. Products returned to Polycom must be sent prepaid and packaged appropriately for safe shipment, and it is
recommended that they be insured or sent by a method that provides for tracking of the package. Responsibility for loss
or damage does not transfer to Polycom until the returned item is received by Polycom. The repaired or replaced item will
be shipped to Customer, at Polycom's expense, not later than thirty (30) days after Polycom receives the defective
product, and Polycom will retain risk of loss or damage until the item is delivered to Customer.
EXCLUSIONS. POLYCOM SHALL NOT BE LIABLE UNDER THIS LIMITED WARRANTY IF ITS TESTING AND
EXAMINATION DISCLOSE THAT THE ALLEGED DEFECT OR MALFUNCTION IN THE PRODUCT DOES NOT
EXIST OR RESULTS FROM:
• FAILURE TO FOLLOW POLYCOM’S INSTALLATION, TESTING, OPERATION, OR MAINTENANCE
INSTRUCTIONS;
• UNAUTHORIZED PRODUCT MODIFICATION, ALTERATION OR ANY OTHER CAUSE BEYOND THE
RANGE OF THE INTENDED USE;
• UNAUTHORIZED USE OF COMMON CARRIER COMMUNICATION SERVICES ACCESSED THROUGH
THE
PRODUCT;
• ABUSE, MISUSE, NEGLIGENT ACTS OR OMISSIONS OF CUSTOMER OR PERSONS UNDER
CUSTOMER’S CONTROL; OR
• ACCIDENT, FIRE, LIGHTNING, POWER SURGES, CUTS OR OUTAGES, OTHER HAZARDS, THIRD
PARTY ACTS OR ACTS OF GOD.
47
WARRANTY EXCLUSIVE. IF A POLYCOM PRODUCT DOES NOT OPERATE AS WARRANTED ABOVE,
CUSTOMER'S SOLE REMEDY FOR BREACH OF THAT WARRANTY SHALL BE REPAIR, REPLACEMENT, OR
REFUND OF THE PURCHASE PRICE PAID, AT POLYCOM'S SOLE OPTION. TO THE FULL EXTENT ALLOWED BY
LAW, THE FOREGOING WARRANTIES AND REMEDIES ARE EXCLUSIVE AND ARE IN LIEU OF ALL OTHER
WARRANTIES, TERMS, OR CONDITIONS, EXPRESS OR IMPLIED, EITHER IN FACT OR BY OPERATION OF LAW,
STATUTORY OR OTHERWISE, INCLUDING WARRANTIES, TERMS, OR CONDITIONS OF MERCHANTABILITY,
FITNESS FOR A PARTICULAR PURPOSE, SATISFACTORY QUALITY, CORRESPONDENCE WITH DESCRIPTION,
AND NON-INFRINGEMENT, ALL OF WHICH ARE EXPRESSLY DISCLAIMED. POLYCOM NEITHER ASSUMES NOR
AUTHORIZES ANY OTHER PERSON TO ASSUME FOR IT ANY OTHER LIABILITY IN CONNECTION WITH THE
SALE, INSTALLATION, MAINTENANCE OR USE OF ITS PRODUCTS. NO ADVICE OR INFORMATION, WHETHER
ORAL OR WRITTEN, OBTAINED BY YOU FROM POLYCOM OR THROUGH OR FROM THE PRODUCT SHALL
CREATE ANY WARRANTY NOT EXPRESSLY STATED HEREIN.
SUPPORT & SERVICE AGREEMENTS. If you purchased your product from a Polycom Authorized Reseller, contact the
Authorized Reseller for information about support and service agreements applicable to your product.
For information on Polycom service, go to the Polycom web site www.polycom.com, products and services menu, or call
1-800-765-9266, outside the US call 1-408-526-9000, or your local Polycom Office, as listed on the Polycom Web site.
Limitation of Liability. TO THE FULL EXTENT ALLOWED BY LAW, POLYCOM EXCLUDES FOR ITSELF AND ITS
SUPPLIERS ANY LIABILITY, WHETHER BASED IN CONTRACT OR TORT (INCLUDING NEGLIGENCE), FOR
INCIDENTAL, CONSEQUENTIAL, INDIRECT, SPECIAL, OR PUNITIVE DAMAGES OF ANY KIND, OR FOR LOSS OF
REVENUE OR PROFITS, LOSS OF BUSINESS, LOSS OF INFORMATION OR DATA, OR OTHER FINANCIAL LOSS
ARISING OUT OF OR IN CONNECTION WITH THE SALE, INSTALLATION, MAINTENANCE, USE, PERFORMANCE,
FAILURE, OR INTERRUPTION OF ITS PRODUCTS, EVEN IF POLYCOM OR ITS AUTHORIZED RESELLER HAS
BEEN ADVISED OF THE POSSIBILITY OF SUCH DAMAGES, AND LIMITS ITS LIABILITY TO REPAIR,
REPLACEMENT, OR REFUND OF THE PURCHASE PRICE PAID OR U.S. $5.00, WHICHEVER IS GREATER, AT
POLYCOM'S OPTION. THIS DISCLAIMER OF LIABILITY FOR DAMAGES WILL NOT BE AFFECTED IF ANY REMEDY
PROVIDED HEREIN SHALL FAIL OF ITS ESSENTIAL PURPOSE.
DISCLAIMER. Some countries, states, or provinces do not allow the exclusion or limitation of implied warranties or the
limitation of incidental or consequential damages for certain products supplied to consumers, or the limitation of liability for
personal injury, so the above limitations and exclusions may be limited in their application to you. When the implied
warranties are not allowed to be excluded in their entirety due to local law, they will be limited to the duration of the
applicable written warranty.
GOVERNING LAW. This Limited Warranty and Limitation of Liability shall be governed by the laws of the State of
California, U.S.A., and by the laws of the United States, excluding their conflicts of laws principles. The United
Nations Convention on Contracts for the International Sale of Goods is hereby excluded in its entirety from application to
this Limited Warranty and Limitation of Liability.
Safety and Legal Notices
Important Safeguards
Read and understand the following instructions before using the system:
• Close supervision is necessary when the system is used by or near children. Do
not leave unattended while in use.
• Only use electrical extension cords with a current rating at least equal to that of
the system.
• Always disconnect the system from power before cleaning and servicing and
when not in use.
• Do not spray liquids directly onto the system when cleaning. Always apply the
liquid first to a static free cloth.
• Do not immerse the system in any liquid or place any liquids on it.
• Do not disassemble this system. To reduce the risk of shock and to maintain the
warranty on the system, a qualified technician must perform service or repair
work.
• Connect this appliance to a grounded outlet.
• Only connect the system to surge protected power outlets.
48
•
•
Keep ventilation openings free of any obstructions.
SAVE THESE INSTRUCTIONS.
License Restrictions
THE SOFTWARE PROGRAMS CONTAINED OR DESCRIBED HEREIN ARE
CONFIDENTIAL INFORMATION AND PROPRIETARY PRODUCTS OF
POLYCOM, INC. OR ITS LICENSORS.
Buyer shall not sublicense or otherwise distribute any of the Subject Programs except to
and Users and/or resellers who have entered into a Sublicense Agreement. For purposes
of this Agreement a “Sublicense Agreement” shall mean a written license agreement
between the Buyer and its purchaser, or, in the case of any sale by Buyer to a reseller,
between such reseller and the End User, that is either 1) signed by the End User or 2)
included with the Documentation, in such a manner that the End User reasonably
indicates its acceptance of the Sublicense Agreement by turning on and using the
Computer Equipment. Polycom, Inc. shall include so-called “break the seal software
licenses” with the Documentation, and Buyer shall not remove or alter any such
Sublicense Agreements or any notifications or warning stickers relating thereto. Buyer
shall not waive, amend, or otherwise modify any Sublicense Agreement without
Polycom’s prior consent.
Title to all Subject Programs shall at all times remain and vest solely with Polycom, Inc.
and its licensors. Buyer acknowledges Polycom’s claim that the Subject Programs are its
trade secret and confidential property, and shall treat them as such. Buyer will not attempt
to disassemble, decompile, reverse-engineer or otherwise endeavor to discover or
disclose the methods and concepts embodied in the Subject Programs. Except as
expressly allowed under this Agreement, the Buyer shall not copy, modify, transcribe,
store, translate, sell, lease, or otherwise transfer or distribute any of the Subject Programs
in whole or in part, without prior authorization, in writing, from Polycom, Inc. Buyer
shall not remove or destroy any copyright, patent, trademark or other proprietary mark or
notice on Computer Equipment, and shall reproduce any such marks on any copies of
Subject Programs that it makes hereunder.
You shall not, and shall not allow, any third party to 1) decompile, disassemble, or
otherwise reverse-engineer or attempt to reconstruct or discover any source code or
underlying ideas or algorithms of the software by any means whatsoever or 2) remove
any product.
Limitation of Remedies and Damages
Polycom, Inc., its agents, employees, suppliers, dealers and other authorized
representatives shall not be responsible or liable with respect to the product or any other
subject matter related thereto under any contract, negligence, strict liability or other
theory for any indirect, incidental, or consequential damages, including, but not limited to
loss of information, business, or profits.
The law of certain states or nations does not permit limitation or exclusion of implied
warranties and consequential damages, so the above limitations, disclaimers, or exclusion
49
may not apply to you. This warranty gives you special legal rights. You may also have
other rights that vary by state and nation.
Warning
This is a Class A product. In a domestic environment, this product may cause radio
interference in which case the user may be required to take adequate measures.
USA and Canadian Regulatory Notices
FCC Notice
Class A Digital Device or Peripheral
This equipment has been tested and found to comply with the limits for a Class A digital
device, pursuant to Part 15 of the FCC Rules. These limits are designed to provide
reasonable protection against harmful interference when the equipment is operated in a
commercial environment. This equipment generates, uses, and can radiate radio
frequency energy and, if not installed and used in accordance with the instruction manual,
may cause harmful interference to radio communications. Operation of this equipment in
a residential area is likely to cause harmful interference in which case the user will be
required to correct the interference at his own expense.
In accordance with Part 15 of the FCC rules, the user is cautioned that any changes or
modifications not expressly approved by Polycom Inc. could void the user's authority to
operate this equipment.
The socket outlet to which this apparatus is connected must be installed near the
equipment and must always be readily accessible.
Part 15 FCC Rules
This device complies with part 15 of the FCC rules. Operation is subject to the following
two conditions:
1) This device may not cause harmful interference, and
2) this device must accept any interference received, including interference that may
cause undesired operation.
EEA Regulatory Notices
CE Mark LVD and EMC Directive
This system has been marked with the CE mark. This mark indicates compliance with
EEC Directives 89/336/EEC and 73/23/EEC. A full copy of the Declaration of
Conformity can be obtained from Polycom Ltd., 270 Bath Road, Slough UK SL1 4DX,
UK.
Mains Powered POTS Voice Telephony Without Emergency 000 Dialing
Warning: This equipment will be inoperable when mains power fails.
50
Underwriters Laboratories Statement
The system is intended to be powered only by the supplied power supply unit.
Special Safety Instructions
Follow existing safety instructions and observe all safeguards as directed.
Installation Instructions
Installation must be performed in accordance with all relevant national wiring rules.
Plug Acts as Disconnect Device
The socket outlet to which this apparatus is connected must be installed near the
equipment and must always be readily accessible.
51
Appendix A – Bandwidth Considerations in QSX
Overview
The QSX 2.0 offers a number of bandwidth options that allow you to optimize its use for
your particular environment. The flowchart below is designed to serve as a guide for
making the proper bandwidth configurations.
This flowchart assumes that you are starting with an idea of how you want to use the
QSX (e.g.- in a Stand Alone mode to share content with web viewers only or in a mixed
environment with other QSX units and web viewers). It also assumes you have a general
idea of the bandwidth that you have available. Based on that information, you can use
this chart to determine the performance with various numbers of participants and what
settings you need to configure on the Web Admin page of the QSX.
Usage
Bandwidth
QSX Settings
Performance
(Web Admin Page)
Bandwidth Sharing Mode:
High Bandwidth
1920 Kbps
QSX to webviewers only
Med Bandwidth
512 Kbps
Low Bandwidth
384 Kbps
How are you
going to use
the QSX?
# of web viewers
Transition Time (sec) 1-3
# of web viewers
10
3-5
6-8
5
10
7
# of web viewers
5
1
Transition Time (sec) 3-7
1
Transition Time (sec) 1-3
# of QSX units
QSX to QSX
& webviewers
1
5
Transition Time (sec) 3-5
# of web viewers
High Bandwidth
1920 Kbps
1
Transition Time (s)
# of web viewers
10
7-16
7-22
5
10
2-6
6-8
1
2
4
0.25
0.25
0.25
1
5
Transition Time (sec) 3-5
6-15
Low Bandwidth
512 Kbps
# of QSX units
12
1
Transition Time (s) 0.25
>5 web
viewers not
recommended
at this
bandwidth
2
4
0.25
0.25
Bandwidth
Max Average Tx:
1024
Max Average Rx:
1024
Bandwidth Sharing Mode:
Bandwidth
Max Average Tx:
512
Max Average Rx:
512
Bandwidth Sharing Mode:
Time Sharing
Max Average Tx:
384
Max Average Rx:
1024
Bandwidth Sharing Mode:
Bandwidth
Max Average Tx:
1920
Max Average Rx:
1920
Bandwidth Sharing Mode:
Bandwidth
Max Average Tx:
512
Max Average Rx:
512
Note: In the above diagram, “Transition Speed” is the average number of seconds it takes
for a new image to refresh on a meeting participant’s screen. These times are all
approximate. Actual times are based on actual bandwidth and amount of network traffic.
This chart was based on a PC input resolution to the QSX of 1024x768. The QSX was
configured for no scaling (1024x768) for H.323 connections and 800x600 for web
viewers.
52
Additional Information
Maximum Bandwidth Utilization in Low Bandwidth Environments
Most low bandwidth connections (e.g.- DSL) are asymmetrical—transmission speeds are
usually slower than reception speeds. The Transmit and Receive configurations of the
QSX 2.0 use this fact to fully utilize available bandwidth. Look at the following
example, where to QSX units are connected at different rates:
QSX1
QSX2
Transmit Speed Receive Speed
384Kbps
1024Kbps
128Kbps
1024Kbps
In this case, even though the QSX2 has a slower connection, the QSX1 can still transmit
data at 384Kbps and the QSX2 can receive it at that speed. The extra bandwidth
available allows you to share content with people, minimizing delays in delivering that
content to them.
Bandwidth Sharing versus Time Sharing
The QSX allows you to choose between two different modes of bandwidth sharing for
Web Viewers. Depending on the type and speed of connection that participants have to
the meeting, you can use one of these modes to optimize the quality of information
exchange.
Time Sharing
The Time Sharing mode was developed to accommodate web viewers in a low bandwidth
environment.
In the Time Sharing mode, current images will be uploaded to participating web viewers
on a rotating basis. For example, if 32Kbps is available for web viewing and there are
three (3) web viewers connected to the QSX, they will, in turn, use the full 32kbps to
upload images.
No matter how many web viewers are connected, the bandwidth used by each web
viewer will not exceed the maximum allowed value. Moreover, each web viewer still
works under normal bandwidth conditions.
The advantage of Time Sharing is that a web viewer will have the full amount of
bandwidth for a period of time to upload shared content. The disadvantage is that one
slow connection could affect the performance of the rest of the web viewers. If, for
example, the bandwidth allowed is 128Kpbs, but one of three web viewers has a 56Kbps
connection, then the real bandwidth usage will be:
53
User 1: 128Kbps
User 2: 128Kbps
User 3: 56Kbps
As a result, the Time Sharing Mode is recommended for an environment with
connections of 128kbps-384kbps. In order to configure the Time Sharing option, follow
these steps:
1.
2.
3.
4.
Log on to the QSX Admin Web as described on Page 23.
Go to Table of Contents.
Go to Admin Settings > Table of Contents > General Settings > Bandwidth.
From the pull down menu for the Web Viewer Bandwidth Option, choose “Time
Sharing”.
5. Click the Update button.
Bandwidth Sharing
In the Bandwidth Sharing mode, the total bandwidth allowed for the web viewers is
divided by the total number of participating web viewers. If, for example, there is a total
bandwidth of 1024Kbps and three web viewers, then the maximum amount of bandwidth
that each user will be allocated is:
1024Kbps / 3 web viewers = 340Kbps per web viewer
In the Bandwidth Sharing mode, each web viewer will be allocated a minimum of
32Kbps.
The advantage of the Bandwidth Sharing mode is that each web viewer can work
independently, based on its own bandwidth allocation without being affected by a web
viewer that has a slow connection. The disadvantage is that the sum of the allowed
bandwidth of all web viewers may exceed the configured bandwidth setting, possibly
causing some congestion. The Bandwidth Sharing mode is recommended in corporate
LAN environments where there is little risk of exceeding configured bandwidth.
In order to configure the Bandwidth Sharing option, follow these steps:
1.
2.
3.
4.
Log on to the QSX Admin Web as described on Page 23.
Go to Table of Contents.
Go to Admin Settings > Table of Contents > General Settings > Bandwidth.
From the pull down menu for the Web Viewer Bandwidth Option, choose
“Bandwidth Sharing”.
5. Click the Update button.
54
Load Balancing
In standard usage scenarios, web viewers log in to the presenting QSX to receive higher
quality images and content. In certain situations, the maximum transmission bandwidth
that has been configured will be exceeded because H.323 will use a pre-determined
bandwidth. In these cases, the web viewers are re-directed to a receiving QSX to reduce
the bandwidth usage by the presenting QSX.
The QSX will search all remote parties to determine if there is another QSX unit
participating in the session. For external web viewers participating in the session, the
QSX will also determine if the second QSX unit has NAT enabled.
In this situation, if load balancing is enabled in Time Sharing mode and the QSX has no
more than 64Kbps of bandwidth left from the H.323 connection, it will redirect a web
viewer to the other QSX.
To configure the Bandwidth settings described below, follow these steps:
1. Log on to the QSX Admin Web as described on Page 23.
2. Go to Admin Settings > Table of Contents > General Settings > Bandwidth
3. Choose to either enable or disable Load Balancing for Web Viewers.
4. Click on the Update button.
55
Appendix B – Additional Web Viewer Information
Web Viewer Cascading
Web Viewer Cascading allows a web viewer to access content from any QSX
participating in a meeting. If the Web Viewer Cascading option is selected, web viewers
can directly login to a QSX which is receiving content rather than being required to login
directly to the presenting QSX or MCU. This allows you to connect up to 10 web
viewers to each QSX participating in a meeting. For example, in the diagram below you
can have up to 10 web participants connecting to the QSX with IP address 156.16.0.180
and 10 more participants connecting to the QSX with IP address 156.16.0.152.
eb
W
ew
Vi
C
er
n
io
ct
ne
on
To configure the Web Viewer Cascading settings described below, follow these steps:
1. Log on to the QSX Admin Web as described on Page 23.
2. Go to Admin Settings > Table of Contents > General Settings > Bandwidth
3. Check the box for Enable Web Viewer Cascading.
4. Click on the Update button.
56
Web Viewing in a Video Environment
If the QSX is connected to a Polycom VSX8000, VSX7000s or a VSX7000e with Visual
Concert, web viewers without video capability can still receive content in a video
environment. In order to do so, they can login directly to the QSX and receive content.
An example of this type of scenario is shown below.
Computer
(sending meeting content)
Local Display
r ou
gh
pro
jec
t or
Vortex
(optional)
Co
nte
n
t vie
we
d th
Content
Controller
Standard VGA Cable
VGA In
VGA Out
VGA In
VGA Out
nd
r-E
Fa
eb
W
de
Vi
ion
ct
ne
n
tio
ec
on
rC
nn
Co
e
ew
Vi
o
VSX 8000
VSX 7000e
VSX 7000s
(with Visual Content)
QSX
Remote Participant
(connecting through video system)
Remote Participant
(connecting through internet)
When using the QSX in this scenario, you should ensure that it is configured to autopreview content. This means that it will automatically forward content to the local
display, which, in this case, is the VSX unit.
For use of the overall solution, user behavior will not change. When the user wishes to
display content locally or to the far-end video participants, he will simply press the
“Graphics” key on the video system’s remote control. For more information on Polycom
videoconferencing products, please refer to www.polycom.com.
Note: The Polycom Vortex unit shown here is an optional configuration. Polycom
Vortex optimizes audio quality in large conference rooms and other large-room
environments. For more information about the Polycom Vortex system, refer to
www.polycom.com.
57
Web Viewer Load Balancing
If the presenting QSX has the Load Balance feature enabled, web viewers will be
redirected to a QSX receiving content when bandwidth limitations are reached.
The most common scenario where this happens is when a QSX is both the MCU and the
presenter to additional QSX units as well as web viewers. In this situation, it may
allocate all bandwidth to the QSX units, leaving none for the web viewers. Enabling load
balancing automatically redirects a web viewer from the MCU/presenting unit to another
QSX that has available bandwidth.
External Web Viewers and IP Addresses (NAT)
There may be situations where you want to share content with people outside your
organization’s network. In order to do so, you will need to use Network Address
Translation to link an External IP address to the Internal IP address of your QSX.
Network Address Translation (NAT) is most frequently used to protect IP addresses
inside a company’s network. A NAT-enabled address is linked to an internal, or nonNAT, IP address so that an outside party can still access that piece of equipment or
location in the network. This allows people to safely cross corporate firewalls without
exposing the network to the outside world.
When a QSX with a NAT-provided IP address is connected to a QSX with an IP address
that has not been translated via NAT, an external web viewer can login to the NATenabled QSX to receive content from the non-NAT QSX. In the example below, the web
participants outside the corporate firewall are accessing the QSX via its External IP
address.
58
Note: If you are trying to share content between two QSX units that are on either side of
a firewall (or two firewalls if one QSX is inside of one corporation’s firewall and the
other is inside another corporation’s firewall), you will need to use manual IP dialing as
described on Page 12.
Note: If you are using the QSX in a Stand Alone Mode, you will need an External IP
address for web viewers to access. If you are using the QSX from a home office, you
may need to place the unit in the firewall’s DMZ. To determine if you need to place the
QSX in a DMZ, you should contact your Internet Service Provider to a) find out if it is
possible to do so and; b) understand the steps required to configure the system.
Additional Web Viewer Notes
Note: By default, the QSX is configured for Auto Send. In this mode, if the QSX is in
the Preview state (yellow light on the Content Controller or “Preview” in the window of
the VTX1000) content will automatically be send to the first web viewer that logs into
the QSX.
Note: When the QSX is in the Preview state and subsequent web viewers log on, they
will see the QSX splash screen and a message that says “Please Wait for Presentation to
Start”. They will remain in this mode until the presenter presses the Send button on
either the Content Controller or VTX1000 conference phone.
Note: When the last web viewer disconnects from a QSX session, the QSX will
automatically return to the Preview state.
59
Appendix C – Technical Specifications
Content Transmission
Bandwidth Configuration Options (set via Admin Web page)
• Default Average Transmit & Receive Bandwidth: 1,920 kbps
• Maximum Average Transmit Bandwidth Setting Range: 128 kbps - 1,920 kbps*
• Maximum Average Receive Bandwidth Setting Range: 128 kbps - 1,920 kbps
*Performance and scalability may vary depending on Bandwidth option selected. Refer
to Page 33 or Appendix A for more detail.
Maximum Bandwidth Requested in Unlimited Bandwidth Environment
• H.323 link to other QSX appliances or Polycom video systems: Up to 1 Mbps
• HTTP link to each Web viewer up to 1 Mbps
Other Bandwidth Configuration Options (set via Admin Web page)
• Bandwidth Sharing Mode for simultaneous transmission to each remote connection
• Time Sharing Mode for sequential transmission to each remote connection
• Load Balancing to distribute Web Viewers among multiple QSX’s in a Session.
Video & Graphics Standards
• H.263
• H.239
• JPEG for Web Viewer
IP Protocols
• TCP/IP
• ITU H.323
• http
Frame Rates
• Intelligently selects frame rate for best performance
• 3-8 fps to other QSX or VSX endpoints over H.323 connection
• Up to 1fps to Web Viewers over http connection
Network Interfaces Supported
• IP (LAN, DSL, cable modem via Ethernet)*
• Single 10/100 Ethernet port (10 Mbps/100Mbps/Auto)
*DSL and Cable Modem require DMZ configuration
Network Features
• Error Concealment
• TCP/IP, DNS, WINS, DHCP, ICMP, ARP, HTTP, FTP, Telnet
60
Multipoint Capabilities
Internal Multipoint Features
• Up to 10 Web viewers using embedded web server
• Up to four additional connections to other QSX or VSX units with embedded H.323
MCU.
Automatic Connect Feature for QSX to QSX meetings
• Requires wired analog Polycom conference phone connected to QSX
• Embedded low bit rate (100bps) inaudible modem over phone line automatically
exchanges QSX IP addresses and initiate H.323 content sharing channel between
QSX rooms on phone call
• Works to connect up to five QSX systems in single meeting. Compatible with any
audio conferencing service or bridge.
Interoperability with Polycom Videoconferencing
• VSX dial in support to share content between QSX and video system(s) over H.323
call.
Interoperability with Polycom MGC
• Use H.323 dial out capabilities of MGC to enable larger multipoint QSX to QSX
meetings*
• Compatible with scheduled dial out conferences for MGC 7.5.0.52 release and
beyond
*Scalability governed by MGC port and bandwidth availability
System Security
Security
• Secure password authentication for each session
• Password for Web viewer access
• Administrator password to control access to Admin Web page
• Ability to disable remote interfaces (FTP, Telnet, HTTP)
Password Security
• Random password generation by holding Info button on Content Controller for 4
seconds
• Alternative when conference phone connected: random password generation when
conference phone goes off/on hook
• Auto password reset after 60 minutes elapsed time without any active QSX use.
• Admin option to set fixed session password
Media Encryption
• Advanced Encryption Standard (AES) for H.323 content stream
• 128-bit key length
61
Resolution
Content Resolution
• Input: SXGA (1280 x 1024), XGA (1024 x 768), SVGA (800 x 600), VGA (640 x
480)
• Output: SXGA (1280 x 1024), XGA (1024 x 768), SVGA (800 x 600)
• User configuration to scale transmitted content down across range of resolutions to
optimize performance. XGA (1024 x 768), SVGA (800 x 600), VGA (640X480)
• Capability to independently scale WebViewer (http) content or H.323 content stream.
Physical Dimensions and Interfaces on QSX Base Unit
Dimensions
• Maximum dimensions: 8.6” (L) x 7.6” (W) x 1.8” (H) / 19.3cm x 21.8cm x 4.6cm
• Weight: 2.85 lbs. / 1.3 kg
Required I/O
• Graphics Input: 1 VGA connector
• Graphics Output:1 VGA Connector
• Ethernet Port:1 RJ 45 connector
• Power:1 AC Power connector
Optional I/O - (for use if conference phone connected or for local management)
• Compatible with all analog wired Polycom conference phones
• 1 x 8 wire RJ45 connector to conference phone wall module
• 1x 8 wire DIN connector to conference phone console
• 1x Conference Link connector for SoundStation VTX 1000®
• 1 Serial port RS-232 DB-9 Connector
User Interface
Content Controller
• Tabletop meeting control pod with integrated 20 ft. VGA cable.
• LED indicators for meeting status (idle, preview, send)
• Share button
• Info button
• Integrated VGA cable to Base unit
• 3 ft. VGA in cable to connect presenting computer to controller (cable included)
SoundStation VTX 1000 Softkeys (optional - for QSX 300)
• Share button and Info button appear on phone LCD
• No need for Content Controller.
• QSX 300 ships with standard VGA cable to connect computer to QSX.
62
Soft Interface shown on local display in QSX location
• Info alerts for new participants and connection status
• Info screen: IP address for Web Viewer login, Password, Content Status, Meeting
Participants
Configuration and System Management
• Integrated Web Admin page for easy remote configuration and management
• Diagnostics and software upgrades via PC, LAN
• Support for Polycom Global Management System™ & Polycom PathNavigator™
Quality of Service and Experience
• IP Precedence (ToS) - default
• Dynamic Bandwidth Allocation
• Proactive Network Monitoring
• Packet and jitter control
• TCP/UDP fixed-port firewall support
Web Viewer Requirements
Browsers
• Internet Explorer 6.0 and higher - Windows® 2000 and XP
• Netscape® 7.1 and higher - Windows 2000 and XP
• Safari 1.2.4 and higher - Mac® OS 10
Web Viewer Login
• Login interface for user name & password
Web Viewer network requirements
• 56k and higher
Web Administrator Requirements
Browsers
• Internet Explorer 6.0 and higher - Windows 2000 and XP
QSX 400 – For general use as stand-alone system or connected to any wired, analog
Polycom conference phone except for the SoundStation VTX 1000*. Ships with Content
Controller UI.
QSX 300 – for use with Polycom SoundStation VTX 1000 software release 1.6 or higher.
Uses SoundStation VTX1000 softkeys as UI and standard VGA cable. Does not ship
with Content Controller.
The QSX400 can be adapted for use with the SoundStation VTX1000 with an additional
Conference Link Cable.
63
Appendix D—Additional Resolution & Graphics Display
Information
To understand how an image is scaled from the QSX unit’s VGA output to another
device, refer to the following table:
Transmission Scaling
QSX Output Resolution
640 x 480
800 x 600
1024 x 768
1280 x 1024
No Scaling
640 x 480
Scale to 800x 600
640 x 480
Scale to 640 x 480
640 x 480
800 x 600
800 x 600
640 x 480
1024 x 768
800 x 600
640 x 480
1024 x 768
800 x 600
640 x 480
In this table, if you wish to scale VGA output of the QSX from, for example, 1024x768
to 800x600, the resulting scale will be 800x600.
Note: If the resolution of the VGA Output is configured at 1280x1024, the images will
automatically be scaled to 1024x768 for transmission.
Note: The QSX supports local display output resolutions of 1280x1024, 1024x768 and
800x600, but not 640x480. If the output device supports DDC, the highest resolution
will be first selected. If output device does not support DDC, a 1024x768 resolution will
be used.
Note: The QSX output scaling option takes effect after the next presentation starts. If the
option is changed when the QSX is in presentation, it is required to stop presentation and
start again.
When the QSX displays a remote image, it will always scale the decompressed image to
its own local display resolution. The resolution can be one of the following three
resolutions:
•
•
•
SXGA (1280 x 1024)
XGA (1024 x 768)
SVGA (800 x 600)
64