1
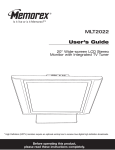
LCD Flat Panel
LCD-1700 & LCD-2000
Operation Manual
LCD-1700
20050316
LCD-20002005
WELCOME TO THE BRIGHT AND VIVID WORLD OF POLAROID COLOR TV
Dear customer,
Thank you for purchasing this Polaroid Color LCD TV. We hope you enjoy many years of viewing pleasure.
The goal of this manual is to guide you through setting up and operating your Polaroid LCD TV as quickly and easily
as possible.
Please read all the safety and operating instructions carefully before you begin.
SAFETY CLASS
This is an IEC safety class
product and must be grounded for safety.
CONTENTS
Brief operating instructions . . . . . . . . . . . . . . . . . . . . . . . . . . . . . . . . . . . . . . . . . . . . . . . . . . . . . . . . . . . . . . . . . . . . . . . . . . . . . . . . . . . . . . . .
Important safeguards . . . . . . . . . . . . . . . . . . . . . . . . . . . . . . . . . . . . . . . . . . . . . . . . . . . . . . . . . . . . . . . . . . . . . . . . . . . . . . . . . . . . . . . . . . . . . .
Learning about your new TV . . . . . . . . . . . . . . . . . . . . . . . . . . . . . . . . . . . . . . . . . . . . . . . . . . . . . . . . . . . . . . . . . . . . . . . . . . . . . . . . . . . . . . .
Selecting a location for the TV. . . . . . . . . . . . . . . . . . . . . . . . . . . . . . . . . . . . . . . . . . . . . . . . . . . . . . . . . . . . . . . . . . . . . . . . . . . . . . . . . . . . . .
Connecting your TV. . . . . . . . . . . . . . . . . . . . . . . . . . . . . . . . . . . . . . . . . . . . . . . . . . . . . . . . . . . . . . . . . . . . . . . . . . . . . . . . . . . . . . . . . . . . . . . .
Connecting the audio/visual equipment . . . . . . . . . . . . . . . . . . . . . . . . . . . . . . . . . . . . . . . . . . . . . . . . . . . . . . . . . . . . . . . . . . . . . . .
Connecting the PC or NB . . . . . . . . . . . . . . . . . . . . . . . . . . . . . . . . . . . . . . . . . . . . . . . . . . . . . . . . . . . . . . . . . . . . . . . . . . . . . . . . . . . . . .
Connecting the aerial . . . . . . . . . . . . . . . . . . . . . . . . . . . . . . . . . . . . . . . . . . . . . . . . . . . . . . . . . . . . . . . . . . . . . . . . . . . . . . . . . . . . . . . . . .
Connecting a cable converter box . . . . . . . . . . . . . . . . . . . . . . . . . . . . . . . . . . . . . . . . . . . . . . . . . . . . . . . . . . . . . . . . . . . . . . . . . . . . .
Using the remote control . . . . . . . . . . . . . . . . . . . . . . . . . . . . . . . . . . . . . . . . . . . . . . . . . . . . . . . . . . . . . . . . . . . . . . . . . . . . . . . . . . . . . . . . . . .
Preparing the remote control for use . . . . . . . . . . . . . . . . . . . . . . . . . . . . . . . . . . . . . . . . . . . . . . . . . . . . . . . . . . . . . . . . . . . . . . . . . . .
Shortcut keys operation . . . . . . . . . . . . . . . . . . . . . . . . . . . . . . . . . . . . . . . . . . . . . . . . . . . . . . . . . . . . . . . . . . . . . . . . . . . . . . . . . . . . . . . . . . .
Menu operation . . . . . . . . . . . . . . . . . . . . . . . . . . . . . . . . . . . . . . . . . . . . . . . . . . . . . . . . . . . . . . . . . . . . . . . . . . . . . . . . . . . . . . . . . . . . . . . . . . . .
Using the PICTURE menu . . . . . . . . . . . . . . . . . . . . . . . . . . . . . . . . . . . . . . . . . . . . . . . . . . . . . . . . . . . . . . . . . . . . . . . . . . . . . . . . . . . .
Using the AUDIO menu . . . . . . . . . . . . . . . . . . . . . . . . . . . . . . . . . . . . . . . . . . . . . . . . . . . . . . . . . . . . . . . . . . . . . . . . . . . . . . . . . . . . . . .
Using the PRESET menu . . . . . . . . . . . . . . . . . . . . . . . . . . . . . . . . . . . . . . . . . . . . . . . . . . . . . . . . . . . . . . . . . . . . . . . . . . . . . . . . . . . . . .
Using the OPTION1 menu . . . . . . . . . . . . . . . . . . . . . . . . . . . . . . . . . . . . . . . . . . . . . . . . . . . . . . . . . . . . . . . . . . . . . . . . . . . . . . . . . . . . .
Using the OPTION2 menu . . . . . . . . . . . . . . . . . . . . . . . . . . . . . . . . . . . . . . . . . . . . . . . . . . . . . . . . . . . . . . . . . . . . . . . . . . . . . . . . . . . . .
Appendix . . . . . . . . . . . . . . . . . . . . . . . . . . . . . . . . . . . . . . . . . . . . . . . . . . . . . . . . . . . . . . . . . . . . . . . . . . . . . . . . . . . . . . . . . . . . . . . . . . . . . . . . . .
Cleaning and care . . . . . . . . . . . . . . . . . . . . . . . . . . . . . . . . . . . . . . . . . . . . . . . . . . . . . . . . . . . . . . . . . . . . . . . . . . . . . . . . . . . . . . . . . . . . .
Trouble shooting . . . . . . . . . . . . . . . . . . . . . . . . . . . . . . . . . . . . . . . . . . . . . . . . . . . . . . . . . . . . . . . . . . . . . . . . . . . . . . . . . . . . . . . . . . . . . .
Specifications . . . . . . . . . . . . . . . . . . . . . . . . . . . . . . . . . . . . . . . . . . . . . . . . . . . . . . . . . . . . . . . . . . . . . . . . . . . . . . . . . . . . . . . . . . . . . . . . .
1
3
5
6
6
6
7
7
8
9
9
10
13
13
13
13
14
16
19
19
20
21
Brief Operating Instructions
1.Connection
Connect the antenna lead or CATV cable or external equipments(such as Antenna, Cable TV ,VCD,DVD,
VTR,Set top box,etc.)to the corresponding terminals or interface on the TV rear(please refer to the owner s
manual of the equipment to be connected as well)and confirm that the signal source is available and works
normally.
ANT.IN
ANT.IN
L
R S-VHS VIDEO Y PB/CB PR/CR
VGA
L
R
AUDIO IN
S-VHS VIDEO
Y
PB/CB PR/CR
VGA
POWER
AUDIO IN
2.The remote control
Open the back battery cover on the remote control and install two AAA size batteries and then close
the battery cover.
SOURCE SCAN
CCD
PARENT
LOCK
M
TE
E
U
N
M
U
SAP
/ : Cursor up/down
/ : Select or adjust from a particular menu
OK: Confirm selected function or return to the previous menu
E
S.MODE
RE
OD
CA
M
P.
LL
OK
VOL
SCAN: Scan available channels
POWER: Power on/off
SOURCE: Select one of five input signal source
PARENT: Parental lock function
LOCK: Set child lock
CCD: Closed caption function
SAP: SAP/stereo/mono selection
MUTE: Mute the sound
MENU: Call up the main menu
CH
RECALL: Return to previous channel
S.MODE: Select the sound mode
P.MODE: Select the picture mode
VOL+/-:Volume up/down
CH+/-: Channel up/down
1
2
3
4
5
6
8
9
CHANNEL NUMBER: Direct Channel selection
SLEEP: Set the sleep timer
7
DISPLAY: Display current Status information
0
SLEEP
DISPLAY
-1-
POWER
3.Switching on/off
1)Connect the TV to power outlet, the power indicator will display red. Press the power switch or the POWER
button on the remote control to turn on the TV.
2)Press the power switch or the POWER button on the remote control to turn off the TV.
4.Signal source selection
Press the number [1-9] button or CH+ or CH- button to select TV input; press the SOURCE button to select TV,
Component Video, Analog RGB, Composite Video or S-Video.
5.Air/Cable selection
powerd by
You can select the signal receiving method according to the following steps:
1) Press the MENU button to enter the main menu.
2) Press the [ or ] button to select the item PRESET, and press the
[
] button to enter PRESET menu.
3) Press the [ or ] button to select the item tv source.
4) Press the [ ] button to change the item among air, catv s, catv h and
cath i.
POLAROID
preset
tv source
brightness
auto search
contrast
fine tune
skip
position
air
50
49
4
4
off
4
down for preset settings
6.Channel search
powerd by
1) Press the MENU button to enter the main menu.
2) Press the [ or ] button to select the item preset, and press the
[
] button to enter preset menu.
3) Press the [ or ] button to select the item auto search.
4) Press the [ ] button to start auto search channels.
POLAROID
preset
tv source
brightness
auto search
contrast
fine tune
skip
position
air
50
49
4
4
off
4
down for preset settings
7.Picture adjustment
powerd by
POLAROID
1) Press the MENU button to enter the main menu.
2) Press the [ or ] button to select the item picture, and press the
[
] button to enter picture menu.
3) Press the [ or ] button to select the item you want to adjust.
4) Press the [ or ] button to adjust the level.
picture
brightness
brightness
contrast
contrast
color
sharpness
tint
color temp
50
50
50
49
49
49
44
7300K
down for picture settings
8.Audio adjustment
1) Press the MENU button to enter the main menu.
2) Press the [ or ] button to select the item audio, and press the
[
] button to enter audio menu.
3) Press the [ or ] button to select the item you want to adjust.
4) Press the [ or ] button to adjust the level.
powerd by
POLAROID
audio
volume
brightness
treble
contrast
bass
balance
btsc
mute
50
78
49
60
60
50
off
mono
on
down for audio settings
Note1: All keys mentioned above are on the remote control unless indicated otherwise.
Note2: For more detailed information, please refer to the user's manual.
-2-
The lightning flash with arrowhead symbol, within an
equilateral triangle is intended to alert the user to the
presence of uninsulated dangerous voltage within the
product ' s enclosure that may be of sufficient magnitude
to constitute a risk of electric shock.
CAUTION
CAUTION: TO REDUCE THE RISK OF ELECTRIC SHOCK, DO NOT REMOVE
COVER(OR BACK).NO USERSERVICEABLE PARTS INSIDE.
REFER SERVICING TO QUALIFIED
SERVICE PERSONNEL.
The exclamation point within an equilateral triangle is
intended to alert the user to the presence of important
operating and maintenance(servicing) instructions in
the literature accompanying the TV.
CAUTION: Changes or modifications not expressly approved by the party responsible for compliance with
the FCC Rules could void the users authority to operate this equipment.
WARNING: TO PREVENT FIRE OR SHOCK HAZARD, DO NOT EXPOSE THIS APPLIANCE TO RAIN OR MOISTURE.
Important safeguards
1. Read instructions
All the safety and operating instructions should be read before the TV is operated.
2. Retain instructions
The safety and operating instructions should be retained for future reference.
3. Heed warnings
All warnings on the TV and in the operating instructions should be adhered to.
4. Follow instructions
All operating and use instructions should be followed.
5. Cleaning
Unplug the TV from the wall outlet before cleaning. Do not use liquid cleaners or aerosol cleaners. Use a damp cloth
for cleaning.
6. Attachments
The manufacturer of this unit does not make any recommendations for attachments, as they may cause hazards.
7. Water and moisture
Do not use this TV near water. For example, near a bathtub, washbowl, kitchen sink,
or laundry tub, in a wet basement, or near a swimming pool, and the like.
8. Accessories
Do not place this TV on an unstable cart, stand, tripod, bracket ,or table.
The TV may fall, causing serious injury to someone, and serious damage
to the appliance. An TV and cart combination should be moved with
care. Quick stops, excessive force, and uneven surfaces may cause the
TV and cart combination to overturn.
9. Ventilation
Slots and openings in the cabinet back or bottom are provided for
ventilation, to ensure reliable operation of the TV and to protect
it from overheating. These openings must not be blocked or covered.
The openings should never be blocked by placing the TV on a bed,
S3126A
sofa, rug, or other similar surface. This TV should never be placed
near or over a radiator or heat resource. This TV should not be placed
in a built-in installation such as a bookcase or rack unless proper ventilation
is provided or the manufacturer's instructions have been adhered to.
10 . Fragility
The LCD panel used in this product is made of glass. Therefore, it can be broken when the product is dropped or applied
with impact. Be careful not to be injured by broken glass pieces in case the LCD panel breaks.
-3-
Important safeguards
11. Power source
This TV should be operated only from the type of power source indicated on the marking label. If you are not sure of the type of
power supply to your home, consult your appliance dealer or local power company. For TVs intended to operate from battery
power, or other sources, refer to the operating instructions.
12. Power cord protection
Power-supply cords should be routed so that they are not likely to be walked on or pinched by items placed upon or against
them, paying particular attention to cords at plugs, convenience receptacles, and the point where they exit from the appliance.
13. Outdoor antenna Grounding
If an outside antenna or cable system is connected to the TV,
be sure the antenna or cable system is grounded to provide
some protection against voltage surges and built-up static
charges. Section 810 of the National Electrical Code,
ANSI/NFPA NO.70, provides information with respect to proper
grounding of the mast and supporting structure, grounding of
the lead-in wire to an antenna discharge unit, size of
grounding conductors, location of antenna discharge
unit, connection to grounding electrodes, and requirements
for the grounding electrode.
14. Lightning
For added Protection for this TV receiver during a lightning
storm, or when it is left unattended and unused for long
period of time, unplug it from the wall outlet and disconnect
the antenna or cable system. This will prevent damage to
the TV due to lighting and power line surges.
15. Power lines
An outside antenna system should not be located in the vicinity of overhead power lines, or other electric light or power circuits,
or where it can fall into such power lines. When installing an outside antenna system, extreme care should be taken to keep
from touching such power lines or circuits as contact with them might be fatal.
16. Overloading
Do not overload wall outlets and extension cords as this can result in a risk of fire or electric shock.
17. Object and liquid entry
Never push objects of any kind into this TV through openings as they may touch dangerous voltage points or short out parts that
could result in fire or electric shock. Never spill liquid of any kind into the TV.
18. Servicing
do not attempt to service this TV yourself as opening or removing covers may expose you to dangerous voltage or other hazards.
Refer all servicing to qualified service personnel.
19. Damage requiring service
Unplug this TV from the wall outlet and refer servicing to qualified service personnel under the following conditions:
a. When the power supply cord or plug is damaged or frayed.
b. If liquid has been spilled, or objects have fallen into the TV.
c. If the TV ha been exposed to rain or water.
d. If the TV does not operate normally be following the operating instructions. Adjust only those controls that are coved by the
operating instructions, as an improper adjustment of other controls may result in damage and will often require extensive
work by a qualified technician to restore the TV to its normal operation.
e. If the TV has been dropped or damaged in any way.
f. When the TV exhibits a distinct change in performance, this indicates a need for service.
20. Replacement parts
When replacement parts are required, be sure the service technician uses replacement parts specified by us that have the
same characteristics as the original part. Unauthorized substitutions may result in fire, electric shock, injury to persons or other
hazards.
21. Safety check
Upon completion of any service or repairs to this TV, ask the service technician to perform routine safety checks to determine
that the TV is in proper operating condition.
22. Heat
This TV product should be situated away from heat sources such as radiation, stoves, or other products (including amplifiers)
that produce heat.
23. Non-active pixels
The LCD panel is a very high technology product with 921,600 thin film transistors, giving you fine picture details. Occasionally,
a few non-active pixels may appear on the screen as a fixed point of blue , green or red. Please note that this does not affect the
the performance of your product.
-4-
Learning about your new TV
You can operate your TV by using the buttons on the front panel or the remote control. The terminals on the
front and the back panel provide all the connections you will need to connect other equipment to your TV.
Front Controls
CH
VOL
MENU
TV/AV
Back Connections
9
ANT.IN
L
R S-VHS VIDEO Y PB/CB PR/CR
VGA
POWER
AUDIO IN
8
ANT.IN
L
R
AUDIO IN
S-VHS VIDEO
Y
PB/CB PR/CR
VGA
POWER
Note: The above figures are for reference only, please refer to the actual units to determine their appearance.
-5-
Learning about your new TV
POWER button (standby)
POWER indicator
Remote Sensing Window
MENU button
TV / AV / PC input select
Volume up / cursor right
Volume down / cursor left
Channel up / cursor up
Channel down / cursor down
CATV antenna input
AV audio input L
AV audio input R
S-Video input
AV Video input
YPBPR/YCBCR input
PC VGA input
POWER PLUG
Headphone jack
9 Wall mounting locating hole
Selecting a location for the TV
1)Place the TV on the floor or on a sturdy platform in a location where light does not directly hit the screen.
2)Place the TV far enough from the walls to allow proper ventilation. Inadequate ventilation may cause
overheating, which may damage the TV.
NOTE: Please contact local dealer for wall mounting.
Connecting your TV
Caution: Do not plug the TV in until you have finished connecting all of your equipment.
Connecting audio/visual equipment
Follow the instructions below to hookup a VCR, DVD, STB, satellite receiver, camcorder, audio amplifier, etc.
Use your remote control to select signal sources.
HDTV STB
ADAPTER
VCD, DVD
-6-
Connecting your TV
NOTE: 1) Headphones are not included in the supplied
accessories.
2) No sound will be heard from the main unit speaks
when a headphone mini-plug is connected into
the headphone jack.
ANT.IN
L
R S-VHS VIDEO Y PB/CB PR/CR
VGA
POWER
AUDIO IN
Headphone
Connecting the PC or NB
You can use your TV as a monitor for your PC or NB by connecting through its 15pin standard RGB interface . Connect
the devices as shown below.
PC/NB
To VGA
RGB line
Connecting the aerial
To enjoy the terrestrial signal transmitted by your local TV station, you need an indoor or outdoor aerial (not supplied).
Perfect picture quality requires a good signal and generally means that an outdoor aerial must be implemented. The
exact type and location of the aerial will depend on your particular area. Consult your local dealer or service
personnel for best advice. If you are a subscriber of your local CATV net, the outdoor or indoor aerial is not needed.
Connect the equipments as the following figure.
Plug(not supplied)
REAR VIEW
COAXIAL CABLE(75
)
OR
AERIAL SOCKET
Adaptor (not supplied)
TWIN-LEAD FEEDER(300
)
The signal comes from:
! An outdoor aerial
! An indoor aerial
ANT.IN
Loosen the screw
ANT.IN
L
R S-VHS VIDEO Y PB/CB PR/CR
VGA
POWER
AUDIO IN
-7-
Insert the feeder in
Tighten the screw
Connecting your TV
Connecting a cable converter box
This television has an extended tuning range and can tune most cable channels without using a cable
company supplied converter box. Some cable companies offer premium pay channels in which signal is
scrambled. Descrambling these signals for normal viewing requires the use of a descrambler device which
is generally provided by the cable company.
For subscribers to Basic Cable TV Service
For basic cable service not requiring a Converter/Descrambler box, connect the CATV 75 ohm Coaxial
Cable directly to the Antenna Jack on the back of the television.
For subscribers to Scrambled Cable TV Service
If you subscribe to a cable service which requires the use of a Converter/Descrambler box, connect the
incoming cable to the Converter/Descrambler box and connect the output of the box to the Antenna Jack
on the back of the television. Follow the connections shown below. Set the television to the output of the
Converter/Descrambler box(usually channel 3 or 4)and use the Converter/Descrambler box to select
channels.
For Subscribers to Unscrambled Basic Cable with Scrambled Premium Channels
If you subscribe to a cable service in which basic cable channels are unscrambled and premium channels
require the use of a Converter/Descrambled box, you may wish to use a two-set signal splitter(sometimes
called[two set coupler) and an A/B Switch box from the cable installer or an electronics supply store.
Follow the connections shown below. With the switch in the B position, you can directly tune any
nonscrambled channels on your TV. With the switch in the A position, tune your TV to the output of the
Converter/Descrambler box(usually channel 3 or 4) and use the box to tune scrambled channels.
Note:
When you use a converter box with your TV, there may be features that you cannot
program using the remote control.
ANT.IN
L
R
AUDIO IN
S-VHS VIDEO
Y
PB/CB PR/CR
VGA
POWER
Converter/Descrambler
Converter/Descrambler
Splitter
-8-
A/B Switch
Using the remote control
Preparing the remote control for use
+
+
Installing the remote control batteries
1. Open the battery cover on the back of the remote control.
+
+
2. Install two AAA size(1.5V) batteries. Match the + and - signs on the batteries to the signs on the battery
compartment.
3. Close the battery cove.
30
6m
30
Note:
1.Dispose of your batteries in a designated disposal area. Do not throw your batteries into fire.
2.Do not mix battery types or combine used batteries with new ones.
3.Remove dead batteries immediately to prevent battery acid from leaking into the battery compartment.
4.If you do not intend to use the remote control for a long time, remove the batteries.
5.The effective range of remote control is suggested in the figure.
30
30
6m
-9-
Shortcut keys operation
Connecting POWER
ANT.IN
L
R S-VHS VIDEO Y PB/CB PR/CR
VGA
POWER
AUDIO IN
Notes: 1. Use a commercially available AC plug adapter, if necessary, depending on the design of the wall outlet.
2. Always unplug the AC adapter from the product and power outlet when not using for a long period of time.
ON/OFF Standby
Press POWER on the remote control to turn off the LCD TV, the POWER indicator will turn red.
Press POWER again to turn the LCD TV back on, the POWER indicator will turn blue.
Selecting the signal source
1. Turn on the power of the connected video equipment.
2. Press SOURCE select the applicable input source. The screen displays TV, Component
Video, Analog RGB, Composite Video or S-Video mode each time SOURCE is pressed.
DISPLAY
TV
TV
Component Video
Analog RGB
Composite Video
S-Video
-10-
INPUT TERMINAL
Antenna
Component Video
YCBCR/YPBPR
Analog RGB
D-Sub15
Composite Video
Composite Video
S-Video
S-Video
Shortcut keys operation
Adjusting sound volume
Press VOL+ or VOL- on the remote control or VOL
segment of the indicator will increase or decrease.
on the TV to increase or decrease the sound volume. The
Muting the sound
Press the MUTE on the remote control to temporarily turn off the sound .To restore the sound, press MUTE
again.The mute function is automatically turned off when any of the following buttons are pressed: POWER,
VOL+/-, or SAP .
Changing channels
To change the channel, you can
1.Press CH + or CH- on the remote control or CH
on the TV.
2.Press the channel number buttons(0-9).
1) To select a one-digit channel : Press the 1-9 button to select channel directly.
2) To select a two-digit channel : Press a button from 1-9 to select the first number, then press a button
from 0-9 again to select the second number. For example, to select channel 28, press the 2 button first ,
--2 will appear on the screen, and then press the 8 button, -28 will appear on the screen for one second.
3) To select a three-digit channel: Press the 1 button to select the first number, then press buttons from 0-9
successively to select the other two numbers. For example, to select channel 120, press the button 1 ,
--1 will appear on the screen, then press the button 2 and the button 0 successively.
Displaying the current channel number on screen
Press the DISPLAY button on the remote control, the current channel number and TV source mode will display on the
top-right corner of the screen. Whenever you want to cancel it, press the DISPLAY button again.
Switching between two channels
Press the RECALL button on the remote control to return to the previous channel that you have just viewed.
Press the RECALL button repeatedly, the screen will alternate between the present and previous channels.
Setting the child lock
Press the LOCK button to lock or unlock the TV.
When the TV is locked, the screen will turn to black background, and nothing can be viewed unless you press
LOCK again to unlock it.
Setting the sleep timer
Press SLEEP on the remote control to display SLEEP TIMER screen. Press SLEEP continuously to progressively set
the sleep timer for longer periods of time starting with 10 minutes, 20 minutes, 30 minutes, 60 minutes, 90 minutes,
120 minutes,180 minutes, 240 minutes and then back to 0 minute. Selecting 0 minute turns the sleep timer off.
-11-
Shortcut keys operation
Selecting the picture mode
You can select the picture quality instantly from among three preset
modes and one user-set mode. Press the P.MODE button on the remote
control repeatedly to select the desired picture quality.
P.MODE
Standard
Soft
User
Dynamic
Selecting the sound mode
You can select the sound effect instantly from among three preset
modes and one user-set mode. Press the S.MODE button on the
remote control repeatedly to select the desired sound effect.
S.MODE
Standard
News
User
Music
Selecting BTSC/SAP broadcasts
You can enjoy watching TV while you listen to high-fidelity stereo sound with the BTSC feature. BTSC can
also transmit a second audio program(SAP) containing a second language or other audio information.
Press the SAP button on the remote control to switch among Mono, Stereo and SAP
NOTE: In the main menu, you can acquire the same effects by adjusting the sound menu.
Scanning all available channels
You can scan all available channels by press the SCAN button on the remote control .
Using CCD
You can set CCD function by press the CCD button on the remote control . See page 16 for more details .
Using Parental Function
You can set Parental function by pressing the PARENT button on the remote control .See page 16 for more details .
-12-
Menu operation
Using the PICTURE menu
Adjust picture settings
1) Press the MENU button to enter the main menu.
2) Press the [ or ] button to select the item PICTURE,
] button to enter PICTURE menu.
and press the [
3) Press the [ or ] button to select the item you want to adjust.
4) Press the [ or ] button to adjust the level.
5) The adjusted data is stored automatically in the user mode.
NOTE: 1) The disabled items will disappear. For example, tint will
disappear unless the valid input signal is NTSC mode.
2) There are some differences among different input mode .
For example, phase and frequency will disappear
unless the input signal is from PC.
3) The item color temp is for reference only.
powerd by
POLAROID
picture
brightness
brightness
contrast
contrast
color
sharpness
tint
color temp
50
50
50
49
49
49
44
7300K
down for picture settings
Using the AUDIO menu
Adjust audio settings
1) Press the MENU button to enter the main menu.
2) Press the [ or ] button to select the item AUDIO, and press
] button to enter AUDIO menu.
the [
3) Press the [ or ] button to select the item you want to adjust.
4) Press the [ or ] button to adjust the level.
5) The adjusted data is stored automatically in the user mode.
Using the PRESET menu
powerd by
POLAROID
audio
volume
brightness
treble
contrast
bass
balance
btsc
mute
50
78
49
60
60
50
off
mono
on
down for audio settings
TV SOURCE
You can set tv source for different valid input RF signals.
1) Press the MENU button to enter the main menu.
2) Press the [ or ] button to select the item PRESET, and press
] button to enter PRESET menu.
the [
3) Press the [ or ] button to select tv source.
4) Press the [ or ] button to switch among air, catv s, catv h and catv i.
powerd by
POLAROID
preset
tv source
brightness
auto search
contrast
fine tune
skip
position
air
off
4
down for preset settings
AUTO SEARCH
1) Press the MENU button to enter the main menu.
2) Press the [ or ] button to select the item PRESET, and press the [
3) Press the [ or ] button to select auto search.
4) Press the [ or ] button to start auto search.
] button to enter PRESET menu.
50
49
4
4
Menu operation
FINE TUNE
1) Press the MENU button to enter the main menu.
2) Press the [ or ] button to select the item PRESET, and press the [
3) Press the [ or ] button to select fine tune.
4) Press the [ or ] button to fine tune the present channel.
] button to enter PRESET menu.
SKIP
1) Press the MENU button to enter the main menu.
] button to enter PRESET menu.
2) Press the [ or ] button to select the item PRESET, and press the [
3) Press the [ or ] button to select skip.
4) Press the [ or ] button to skip or unskip the present channel.
NOTE: The 'skipped' channels cannot be accessed by CH+ or CH- , but you can access them by digit button.
POSITION
1) Press the MENU button to enter the main menu.
2) Press the [ or ] button to select the item PRESET, and press the [
3) Press the [ or ] button to select position.
4) Press the [ or ] button to select the present channel.
] button to enter PRESET menu.
Using the OPTION1 menu
MENU BACKGROUND
1) Press the MENU button to enter the main menu.
2) Press the [ or ] button to select the item OPTION1, and press
] button to enter OPTION1 menu.
the [
3) Press the [ or ] button to select menu background.
4) Press the [ or ] button to switch menu background between
translucent and opaque.
powerd by
POLAROID
option1
menu background
opaque
language
english
osd timeout
30sec
black screen
on
timer
window adjust
4
4
down for option settings
LANGUAGE
1) Press the MENU button to enter the main menu.
] button to enter OPTION1 menu.
2) Press the [ or ] button to select the item OPTION1, and press the [
[
or
]
3) Press the
button to select language.
[
or
]
4) Press the
button to select OSD language among English, French and Spanish.
OSD TIMEOUT
1) Press the MENU button to enter the main menu.
] button to enter OPTION1 menu.
2) Press the [ or ] button to select the item OPTION1, and press the [
3) Press the [ or ] button to select osd timeout.
4) Press the [ or ] button to select OSD disappear time among 5 seconds, 10seconds, 15 seconds, 20 seconds,
25seconds, 30seconds, 40seconds, 50seconds, 60seconds and never.
-14-
Menu operation
BLACK SCREEN
1) Press the MENU button to enter the main menu.
2) Press the [ or ] button to select the item OPTION1, and press the [
3) Press the [ or ] button to select black screen.
4) Press the [ or ] button to switch between on and off.
] button to enter OPTION1 menu.
NOTE: When you enable the black screen, the screen will turn into black screen saver mode in case of no valid input
signal. The screen will turn into auto screen saver mode several seconds later, and into stand-by mode 15
minutes later.
TIMER
1) Press the MENU button to enter the main menu.
2) Press the [ or ] button to select the item OPTION1, and press the [
3) Press the [ or ] button to select timer.
4) Press the [ or ] button to enter timer menu.
Press the [ or ] button to select the item you want to adjust.
Press the [ or ] button to change the value.
Clock: The item allows you to set the local time on the TV.
Off timer: The item allows the TV automatically to switch
to standby mode when the preset time comes.
On timer: The item allows the TV automatically turns on
to a preset channel when preset time comes.
] button to enter OPTION1 menu.
clock , timer , power pos setting
clock
10 : 10 am
off timer
off
10 : 10 am
on timer
off
10 : 10 am
power pos
4
right/left to adjust value , up/down to adjust item
WINDOW ADJUST
1) Press the MENU button to enter the main menu.
2) Press the [ or ] button to select the item OPTION1, and press the [
3) Press the [ or ] button to select window adjust.
4) Press the [ or ] button to enter window adjust menu.
Press the [ or ] button to select the item you want to adjust.
Press the [ or ] button to change the value.
] button to enter OPTION1 menu.
window settings
zoom
h clipping
fill all
38
h position
30
Zoom: The item allows you to switch the size of TV image between
v position
65
fill all, 4:3 and user.
H clipping: The item allows you to extend or shorten the TV image
right/left to change image size.
in the horizontal direction.
H position: The item allows you to move the TV image in the
horizontal direction.
V position: The item allows you to move the TV image in the
vertical direction.
NOTE: 1) The item zoom allows you to select the size of TV image among fill all, fill aspect and 1:1 in
Analog RGB mode.
2) LCD-2000 has not 4:3 mode in zoom item.
-15-
Menu operation
Using the OPTION2 menu
powerd by
CCD setup
You have two options with the closed caption feature:
captions or text. A caption is a printed version of the dialogue,
narration and/or sound effects of a TV program. Text is
information not related to what is appearing on the TV screen.
POLAROID
option2
brightness
close caption mode
contrast
c.caption background
off 50
49
transparent
4
4
parental setup
source enable
down for option settings
CLOSE CAPTION MODE
1) Press the MENU button to enter the main menu.
] button to enter OPTION2 menu.
2) Press the [ or ] button to select the item OPTION2, and press the [
3) Press the [ or ] button to select close caption mode.
4) Press the [ or ] button to select your desired mode.
Note: By pressing the CCD button on the remote control, you can acquire the same effects.
C.CAPTION BACKGROUND
1) Press the MENU button to enter the main menu.
] button to enter OPTION2 menu.
2) Press the [ or ] button to select the item OPTION2, and press the [
3) Press the [ or ] button to select c.caption background.
4) Press the [ or ] button to change CCD background between transparent and opaque.
Parental setup
Parental enables parents to prevent their children from viewing certain programs or channels.
PARENTAL
1) Press the MENU button to enter the main menu.
2) Press the [ or ] button to select the item OPTION2, and
] button to enter OPTION2 menu.
press the [
3) Press the [ or ] button to select parental setup.
4) Press the [ or ] button to enter parental setup menu.
Note: By pressing the PARENT button on the remote control,
you can acquire the same effects.
1
4
7
-
2
5
8
0
3
6
9
+
powerd by
POLAROID
password
enter
AA
down to enter password
ENTER PASSWORD
1
4
7
-
Password is a six-digit number. The preset password is 000000.
You must enter password to access the next three operations.
-16-
or
3
6
9
+
powerd by
POLAROID
password
AA
1) Press the [ or ] button to select enter, and press the
[ ] button to enter enter .
2) Press the [ or ] button to select position, and press [
button to input the digit.
2
5
8
0
]
enter
000000
ok
up/down change digit , right/left select digit
Menu operation
3) After entering the password, press [
the password.
] button to select OK , then press OK button on the remote control to confirm
CHANGE PASSWORD
1) Press the [ or ] button to select change , and press the [
2) Repeat steps 2) to 3) of ENTER PASSWORD.
] to enter change .
1
4
7
-
2
5
8
0
3
6
9
+
powerd by
POLAROID
CLEAR PASSWORD DISPLAY
password
or ] button to select clear .
] button to clear the password display .
1) Press the [
2) Press the [
AA
enter
AA
change
000000
ok
clear
TV RATING/MPAA RATING
right to enter the password
1) Press MENU button to return to parental setup.
] button to enter it.
2) Press the [ or ] button to select tv rating or mpaa rating, and press [
3) Press the [ or ] [ or ] button to select the rating, and press OK button to block or unblock the selected rating.
4) Press MENU button to return.
1
4
7
-
2
5
8
0
3
6
9
+
2
5
8
0
1
4
7
-
powerd by
POLAROID
3
6
9
+
mpaa rating
tv rating
G
Y
Y7
PG
FV
PG
13
G
PG
14
MA
powerd by
POLAROID
D
D
L
S
R
V
L
S
V
L
S
V
NC
17
X
<ok> to set tv block level , <menu> to return
<ok> to set mpaa block level , <menu> to return
Note:
As you block ratings, all ratings higher than the ones you select are blocked as well. For example, if you
choose to block the MPAA rating R, the higher ratings, NC-17 and X, are automatically blocked too.
About TV Ratings
The TV ratings are divided into two groups: age-based and content-based.
Age
Defined as
Contents
Defined as
TV-Y
All children
FV
Fantasy Violence
TV-Y7
Directed to older children
D
Suggestive dialogue
TV-G
General audience
L
Strong language
TV-PG
Parental Guidance suggested
TV-14
Parents Strongly cautioned
S
Sexual situations
TV-MA
Mature Audience only
V
Violence
-17-
Menu operation
About MPAA Ratings
The Motion Picture Association of America(MPAA) uses a rating system to qualify motion picture content.
Television broadcasters employ a rating system to qualify the content of televison programs as well.
The MPAA and TV ratings work with the parental feature and allow you to block out programming above
the rating limits you determine.
Rating
Defined as
G
General audience
PG
Parental Guidance suggested
PG-13
Parents strongly cautioned
R
Restricted
NC-17
No one 17 and under admitted
X
Adult audience only
SOURCE ENABLE/DISABLE
1) Press the MENU button to enter the main menu.
2) Press the [ or ] button to select the item OPTION2, and
] button to enter OPTION2 menu.
press the [
3) Press the [ or ] button to select source enable .
4) Press the [ or ] button to enter source enable menu.
]
5) Press the [ or ] button to select source, press [
[
]
button to toggle enable, press
button to enable all .
-18-
source enable / disable
Analog RGB
Composite video
S-Video
TV
Component video
right to toggle enable , left to enable all
Appendix
Cleaning and care
WARNING: TV sets use high voltage. Do not try to remove the cabinet back. Refer servicing to qualified
service technicians.
To clean the TV screen:
1) Unplug the TV to avoid possible shock hazard.
2) Use a damp cloth or clean cellulose sponge to clean the TV screen and trim. Do not allow water to spill
into the cabinet or damage may occur.
3) Wipe off any excess moisture with a clean dry cloth.
4)Polish the cabinet with a quality furniture polish to maintain the finish and appearance of the cabinet.
Caution: Never use strong solvents such as thinner, benzene, or other chemicals on or near the cabinet.
These chemicals can damage the finish of the cabinet.
Customer important notice
1. When the TV can not be operated in some special situation, please unplug the power and restart.
2. Displaying a still picture for a long time will cause image sticking when the input signal is interlace. The
image sticking will disappear when you turn off the TV for a moment.
We suggest do not display the still picture on the screen for a long time when the input signal is interlace.
-19-
Appendix
Troubleshooting
Before calling a service technician, please check the following table for a possible cause of the problem and
some solutions.
Problem
Solution
TV will not turn on
Make sure the power cord is plugged in, then press POWER.
The remote control batteries may be dead. Replace the batteries.
No picture, no sound
Check the antenna/cable connections.
No sound, picture OK
The sound may be muted. Press VOL+.
The station may have broadcast difficulties. Try another channel.
Poor sound, picture OK
The station may have broadcast difficulties. Try another channel
Poor picture, sound OK
Check the antenna connections.
The station may have broadcast difficulties. Try another channel.
Adjust the picture from the menu.
Poor reception of broadcast channels
The station may have broadcast difficulties. Try another channel.
Check the antenna connections.
If you are using a VCR, make sure the TV/AV button is set correctly.
Unable to select a certain channel
The channel may be deleted with the Add/Del feature.
Multiple images
The station may have broadcast difficulties. Try another channel.
Use a highly directional outdoor antenna.
Poor color or no color
The remote control does not operate
The station may have broadcast difficulties. Try another channel.
Adjust the TINT and COLOR in the menu.
If you change the direction of the TV while it is turned on, the
picture could suffer from color shading. If so, turn off the TV and
allow it to cool down for several hours before turning it on again.
Check to see if the TV/AV mode is properly set.
There may be an obstruction between the remote control and the
remote control sensor.
The remote control batteries may be dead. Replace the batteries.
-20-
Appendix
Specifications
LCD-1700
LCD panel
17.1 INCHES TFT LCD
Television system
NTSC standard
Channel coverage
VHF: 2~13
UHF: 14-69
Cable TV: 2~13,A~W, W+1~W+84,
A-5~A-1, 4A
Resolution
1280X768
Contrast
400:1
Brightness
450cd/m
Viewing angles
176 (H)/176 (V)
OSD language
English/French/Spanish
Power source
DC 12V , AC 100 - 240V ,47-63Hz
Power consumption
55W
Audio power
1.5W+1.5W
Lamp life
50,000 hours
Video/Audio
terminals
Cable/ antenna RF 1
VIDEO 1
S-VIDEO 1
YPBPR/YCBCR 1
GRAPHIC input: Analog RGB 15pin 1
AUDIO input: AV audio 1
AUDIO output: MINI-JACK FOR STEREO (3.5
2
o
o
RF input:
VIDEO input:
Dimensions
Width: 22-4/5inches
Height: 15-7/10inches
Depth: 10inches
Weight
22lbs
Supplied accessories
Remote control , Batteries , AC adapter , AC cord
Design and specifications are subject to change without notice.
-21-
)
1
Appendix
Specifications
LCD-2000
LCD panel
20.1 INCHES TFT LCD
Television system
NTSC standard
Channel coverage
VHF: 2~13
UHF: 14-69
Cable TV: 2~13,A~W, W+1~W+84,
A-5~A-1, 4A
Resolution
640X480
Contrast
350:1
Brightness
450cd/m
Viewing angles
176 (H)/176 (V)
OSD language
English/French/Spanish
Power source
DC 12V , AC 100 - 240V ,47-63Hz
Power consumption
62W
Audio power
1.5W+1.5W
Lamp life
50,000 hours
Video/Audio
terminals
Cable/ antenna RF 1
VIDEO 1
S-VIDEO 1
YPBPR/YCBCR 1
GRAPHIC input: Analog RGB 15pin 1
AUDIO input: AV audio 1
AUDIO output: MINI-JACK FOR STEREO (3.5
2
o
o
RF input:
VIDEO input:
Dimensions
Width: 24-2/5inches
Height: 18-3/5inches
Depth: 10inches
Weight
26lbs
Supplied accessories
Remote control , Batteries , AC adapter , AC cord
Design and specifications are subject to change without notice.
-22-
)
1