1
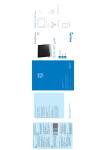
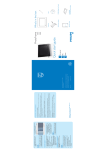
PhotoFrame
SPF2007
SPF2107
SPF2207
Quick start guide
1
2
3
Get started
Use your PhotoFrame
Setup
ENG
What’s in the box
PhotoFrame
(For SPF2107 and SPF2207)
Two extra baby frames
PhotoFrame
Quick start guide
1
2
3
Get started
Play
Setup
Eng
Stand
CD-ROM
• Digital User Manual
• PC software for Windows
USB cable
AC-DC power adaptor
Quick Start Guide
1
A
Get Started
Install the stand
C
Connect the power
Control buttons
Button
Function
Turn on/off the PhotoFrame
Play slideshow/music/video
Change mode for slideshow
(For photo/video) Zoom in
/ / /
OK
a
Select the previous/next/
right/left item
(For music/video) Pause or
resume play
Confirm a selection
Enter the main menu
(For photo/video) Zoom out
B
b
1 Connect the power cord to the DC
socket of the PhotoFrame.
2 Connect the power cord to a power
supply socket.
D
Connect a storage device
Install the stand
1 Insert the stand into the PhotoFrame.
2 Screw the stand into the stand hole
firmly.
Insert a storage device firmly.
• Compact Flash type I
• Secure Digital (SD)
• Secure Digital (SDHC)
• Multimedia Card
• Multimedia + Card
• xD card
• Memory Stick
• Memory Stick Pro (with adaptor)
• USB memory drive
2
Use your PhotoFrame
Turn on the PhotoFrame
• In Slideshow mode, press / to display
the next/previous photo.
1 Press and hold
for more than 1 second. • In Slideshow mode, press to toggle between
slideshow, browse, calendar, and Kiddy Clock
» Help message for control keys is
(for SPF2107 and SPF2207) mode.
displayed.
A
C
Play video
D Note
• To access the main menu directly, press
B
.
Display photos
D Note
You can play only JPEG photos on the
PhotoFrame.
1 In the main menu, select [Photos] and
then press OK to confirm.
» Available photo sources are
displayed.
2 Select a photo source, and then press
OK to confirm.
3 Select an album, and then press OK to
confirm.
» Photos in the album are displayed in
thumbnail mode.
4 Press
to start slideshow play.
• You can play only M-JPEG video files (in
*.avi format) on the PhotoFrame.
• For best compatibility, you can use
bundled PC software (for Windows) to
transfer video files to your PhotoFrame
and play.
1 In the main menu, select [Video] and
then press OK to confirm.
2 Select a source, and then press OK to
confirm.
3 Select an album/folder, and then press
OK to confirm.
• To select files in a sub-folder, repeat
step 3.
4 Select a file to play.
• To select all files, press and hold OK.
5 Press to start play.
During play,
• To stop, press and hold .
• To pause, press OK.
• To resume, press OK again.
• To play in full screen, press .
• To stop play in full screen, press
• To adjust volume, press / .
.
• To select the next/previous file, press / . • To adjust volume, press / .
• To mute play, press and hold until the • To mute play, press and hold until the
icon is displayed.
icon is displayed.
• To change repeat mode, press repeatedly. • To change repeat mode, press
repeatedly.
D
Play music
E
D Note
You can play only MP3 (MPEG Audio Layer
III) music files on the PhotoFrame.
1 In the main menu, select [Music] and
then press OK to confirm.
2 Select a source, and then press OK to
confirm.
3 Select an album/folder, and then press
OK to confirm.
• To select files in a sub-folder, repeat
step 3.
4 Select a file to play.
• To select all files, press and hold OK.
5 Press to start play.
During play,
• To pause, press OK.
• To resume, press OK again.
• To stop, press .
• To select the next/previous file, press
/ .
Play background music
D Note
You can only play MP3 (MPEG audio layer
III) music files on the PhotoFrame.
1 In the main menu, select [Music] and
then press OK to confirm.
2 Select a source, and then press OK to
confirm.
3 Select an album/folder, and then press
OK to confirm.
• To select files in a sub-folder, repeat
step 3.
4 Select a file, and then press OK to
confirm.
• To select all files, press and hold OK.
5 Press
to access the menu list.
6 Select [Play at background], and then
press OK to confirm.
7 Select [Yes], and then press OK to
start play.
F
Display collage photos
1 In the main menu, select [Slideshow]
and then press OK to confirm.
2 Select [Collage], and then press OK
to confirm.
3 Select [Multi], and then press OK to
confirm.
4 Select a layout.
5 Press 1 (Right) to select [Photo 1].
6 Press 1 (Right) again to access the
photo source options.
7 Select a photo from a photo source.
8 Repeat steps 5 to 7 until all photos are
selected for the format.
3
A
9 Press to start collage display.
• To stop collage display, select
[Slideshow] > [Collage] > [Single]
and then press OK to confirm.
E Tip
• If you select a collage layout, the
PhotoFrame displays a static collage
If you select [Random] format, the
PhotoFrame automatically does the
random collage base on the optimal
layout of photos and displays the
collages in slideshow mode.
Setup
Select photo background
1 In the main menu, select [Slideshow]
and then press OK to confirm.
2 Select [Background Color], and then
press OK to confirm.
3 Select a background color / [Auto fit]
/ [RadiantColor], and then press OK
to confirm.
» If you select a background color, the
PhotoFrame displays a photo with a
background color or black bar.
» If you select [Auto fit], the
PhotoFrame extends a photo to fill
the screen with picture distortion.
» If you select [RadiantColor], the
PhotoFrame extends the color on
the edges of a photo that is smaller
than the full screen to fill the screen
without black bars or aspect ratio
distortion.
B
Select on-screen language
D
Zoom and crop pictures
1 In the main menu, select [Setup] and
1 In the main menu, select [Photos] and
then press OK to confirm.
then press OK to confirm.
2 Select [Language], and then press OK
to confirm.
3 Select [Language Setting], and then
press OK to confirm.
4 Select a language, and then press OK to
confirm.
C
Set display auto on/off by
time
D Note
Ensure that you set the current time and
date of the PhotoFrame before you set
the auto on/off function.
1 In the main menu, select [Setup] and
then press OK to confirm.
2 Select [Smart power], and then press
OK to confirm.
3 Select [Set time], and then press OK
to confirm.
4 Select [Weekday] / [Weekend], and
then press OK to confirm.
5 Select [Auto on] / [Auto off], and
then press OK to confirm.
• To cancel [Auto on] / [Auto off],
select [Set On/Off] > [Off].
6 Press 3 / 4 / 1 / 2 and OK to set the
time for auto-on/auto-off function, and
then press OK to confirm.
2 Select a photo source, and then press
OK to confirm.
3 Select an album, and then press OK to
confirm.
» Photos in the album are displayed in
thumbnail mode.
4 Press 3 / 4 / 1 / 2 to select a photo,
and then press OK to confirm.
• To select all photos displayed on the
screen, press and hold OK for more
than 1 second.
5 Press
to access [Photo Menu] and
manage photos.
6 In [Photo Menu], select [Zoom and
Crop] and then press OK to confirm.
7 Press to zoom in a photo.
• Press
to zoom out a photo.
8 Press / / / to crop the photo, and
then press OK to confirm.
9 Select [Yes], and then press OK to
confirm.
3
E
Setup
Set time and date
1 In the main menu, select [Setup] and
then press OK to confirm.
2 Select [Time and Date], and then
press OK to confirm.
3 Select [Set time] / [Set date], and
then press OK to confirm.
4 Press 3 / 4 / 1 / 2 and OK to enter
the current time/date, and then press
OK to confirm.
F
Create an event reminder
1 In the main menu, select [Setup] and
then press OK to confirm.
2 Select [Event reminder], and then
press OK to confirm.
3 Select [New reminder], and then
press OK to confirm.
» A keypad is displayed.
4 To enter the new name (up to 24
characters), select an alphabet/number
and then press OK to confirm.
• To switch between uppercase and
lowercase, select [abc] on the
displayed keypad and then press OK
to confirm.
5 When the name is complete, select
[Enter] and then press OK to confirm.
G
Set event time and date
D Note
Ensure that you set the current time and
date of the PhotoFrame before you set
time and date for an event reminder.
1 In the main menu, select [Setup] and
then press OK to confirm.
2 Select [Event reminder], and then
press OK to confirm.
3 Select a reminder, and then press OK
to confirm.
4 Select [Set time] / [Set date], and
then press OK to confirm.
5 Press 3 / 4 / 1 / 2 and OK to set
the time/date, and then press OK to
confirm.
H
Set on/off a reminder
1 In the main menu, select [Setup] and
then press OK to confirm.
2 Select [Event reminder], and then
press OK to confirm.
3 Select a reminder, and then press OK
to confirm.
4 Select [Set], and then press OK to
confirm.
5 Select [On] to set the reminder on,
and then press OK to confirm.
• To set the reminder off, select [Off]
and then press OK to confirm.
Frequently asked questions
Is the LCD screen touch-enabled?
The LCD screen is not touch-enabled. Use the buttons on the back
to control the PhotoFrame.
What can I do if a video format is not in the *.avi format?
You can use Philips PhotoFrame Manager to convert the format.
For more details, refer to the user manual of Philips PhotoFrame
Manager in the supplied CD-ROM.
Can I use the PhotoFrame during its display auto-off periods?
Yes. You can press to wake up the PhotoFrame.
Why does not the PhotoFrame go into autooff status after I set it?
Ensure that you set the current time, auto-off time, and auto-on time
correctly. The PhotoFrame automatically turns off its display exactly
at the auto-off time. If the time has already passed for the day, it
starts to enter auto-off status at the specified time from the next day.
The PhotoFrame is ON but the PhotoFrame does not respond
anymore. What can I do?
Ensure that the PhotoFrame is turned on. Then, use a pin to trigger
the RESET button located on the back to restore the system.
Register your product and get support at
www.philips.com/welcome
© Royal Philips Electronics N.V. 2009
All rights reserved.
Specifications are subject to change without notice.
Trademarks are the property of Koninklijke Philips
Electronics N.V. or their respective owners.
Printed in China
QSG_V1.7