1
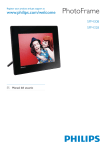
PhotoFrame
SPF1017
SPF1027
Quick start guide
1
2
3
Get started
Play
Setup
EN
What’s in the box
AC-DC power adaptor
Stand
Philips Digital PhotoFrame
PhotoFrame
Quick start guide
1
2
3
Get started
Play
Setup
Eng
CD-ROM,
• Digital User Manual
• Auto Run software
Quick Start Guide
What you also need
AC
AC power socket
Memory card/USB
Computer
1 Get started
Install the stand
Control buttons
To place the PhotoFrame on a flat surface,
attach the supplied stand to the back of the
PhotoFrame.
a
•
Turn on/off the PhotoFrame
•
Toggle between slideshow mode,
thumbnail mode, and main menu
1
Insert the stand into the PhotoFrame.
2
Screw the stand into the stand hole
firmly.
b
c
/ / /
• Select the previous/next/right/
left option
d
•
•
•
Play photos in slideshow mode,
browse mode, or clock mode
Pause slideshow
Confirm a selection
•
Enter/Exit photo menu
e
Connect power
Note
• When you position the PhotoFrame, ensure that
the power plug and outlet are easily accessible.
1
Connect the power cord to the DC
socket of the PhotoFrame.
b
a
2
Connect the power cord to a power
supply socket.
Turn on the PhotoFrame
1
Note
For xD/SD/MMC/MS/MS Pro card, insert
it into the slot until you hear a “CLICK”.
• For USB memory drive, insert it into
the slot firmly.
• You can only turn off the PhotoFrame after all
copy and save actions are complete.
1
Press and hold for more than 1 second.
» Photos are displayed in slideshow
mode.
•
To turn off the PhotoFrame, press
and hold .
Connect a storage device
•
Caution
• Do not remove a storage device from the
PhotoFrame when files are transferring from or
to the storage device.
Photos in the storage device are
displayed in slideshow mode.
To remove a storage device:
• For xD/SD/MMC/MS/MS Pro card, push
the card inward and then pull it out.
You can play JPEG photos in one of the
following storage device which is connected to
the PhotoFrame:
• Secure Digital (SD)
• Secure Digital (SDHC)
• Multimedia Card (MMC)
• xD card (xD)
• Memory Stick (MS)
• Memory Stick Pro (with adaptor)
• USB memory drive
However, we do not guarantee the
operations for all types of memory card
media.
a
b
•
For USB memory drive, pull it out from
the PhotoFrame.
2 Play
Display collage photos
Play photos
1
In the main menu, select [Setup] and then
press
to confirm.
2
Select [Collage], and then press
3
Select [Random], and then press
confirm.
1
2
3
In the main menu, select [Photo] and
then press
to confirm.
to confirm.
Select a photo source, and then press
to confirm.
Select a photo, and then press
confirm.
to
to
•
To disable collage function, select
[Off] and then press
to confirm.
3 Setup
Select a photo background
Select an on-screen language
1
2
3
1
In the main menu, select [Setup] and then
press
to confirm.
2
Select [Background], and then press
to confirm.
3
Select an option, and then press to confirm.
» If you select a background color, the
PhotoFrame displays a photo with a
background color.
In the main menu, select [Setup] and then
press
to confirm.
Select [Language], and then press
confirm.
Select a language, and then press
confirm.
to
to
» If you select [Auto Fit], the
PhotoFrame extends a photo to fill the
screen with picture distortion.
» If you select [RadiantColor], the
PhotoFrame extends the color on the
edges of a photo that is smaller than
the full screen to fill the screen without
black bars or aspect ratio distortion.
2
Select [Auto Dim], and then press
confirm.
3
Select [Auto Dim - End] / [Auto Dim Start], and then press
to confirm.
4
Press / / / to set time for auto-on/
auto-off, and then press
to confirm.
5
Select [Auto Dim Timer], and then press
to confirm.
to
Set display auto on/off
You can configure the time for the PhotoFrame
to turn on or off the display automatically.
Note
• Ensure that you set the current time and date
of the PhotoFrame before you set the auto on/
off function.
1
In the main menu, select [Setup] and then
press
to confirm.
6
Select [On], and then press
to confirm.
• To set off auto-on/auto-off function,
select [Off] and then press
to
confirm.
3
Select [Time] / [Date], and then press
to confirm.
4
Press / / / to set time/date, and then
press
to confirm.
Set time and date
1
In the main menu, select [Clock] and then
press
to confirm.
Show clock in slideshow
1
2
Select [Time and Date], and then press
to confirm.
•
Select [12/24 hr] > [12HR] / [24HR],
and then press
to confirm.
In the [Time and Date] menu, select
[Slideshow Clock] and then press
to
confirm.
2
3
Select [Time], and then press
confirm.
4
Press / / / to set time for an alarm
clock, and then press
to confirm.
In the main menu, select [Clock] and then
press
to confirm.
5
Select [Day] for an alarm clock, and then
press
to confirm.
Select [Alarm Clock], and then press
to confirm.
6
Selection an option, and then press
confirm.
Select [Yes], and then press
confirm.
to
» You can have clock shown in slideshow.
to
Set alarm clock
Note
• Ensure that you set time and date of you
PhotoFrame correctly.
1
2
» The [Alarm Clock] menu is displayed.
to
7
Select [On/Off], and then press
confirm.
8
Select [On], and then press
to confirm.
• To set off an alarm clock, select [Off]
and then press
to confirm.
to
Frequently asked questions
Is the LCD screen touch-enabled?
The LCD screen is not touch-enabled. Use the buttons on the back to control the PhotoFrame.
Will the LCD be damaged, if I keep showing the same photo for a long time?
No. The PhotoFrame can display the same photo continuously for 72 hours without any
damage to the LCD screen.
Why does my PhotoFrame not show some of my photos?
The PhotoFrame supports only JPEG photos. Ensure that these JPEG photos are not damaged.
Why does the PhotoFrame not go into auto-off status after I set it?
Ensure that you set the current time, auto-off time, and auto-on time correctly. The
PhotoFrame automatically turns off its display exactly at the auto-off time. If the time has
already passed for the day, it starts to enter auto-off status at the specified time from the next
day.
Can I use the PhotoFrame during its display auto-off periods?
Yes. You can press to wake up the PhotoFrame.
Welcome to Philips!
Register your product and get support at
www.philips.com/welcome
© Royal Philips Electronics N.V. 2009
All rights reserved.
Specifications are subject to change without notice.
Trademarks are the property of Koninklijke Philips
Electronics N.V. or their respective owners.
QSG_V1.0
3ULQWHGLQ&KLQD