1
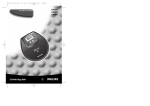
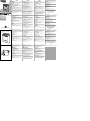
ENGLISH
POWER SUPPLY
1
2
3
4
Battery (not included)
• Open battery door and insert two alkaline batteries, type R03,UM4 or
AAA as indicated.
• Remove the batteries from the set if they are exhausted or not to be used
for a long time.
– When the batteries are running low,
flashes in the display. If the
radio is on, it will automatically switch off.
– It may be necessary to reprogramme your preset stations.
5
SETTING THE CLOCK
MHz
kHz
When the radio is off, the time is displayed using the 24-hour clock or the 12
clock system with AM and PM indication.
1. Check the radio is switched off.
2. Press TIMESET on the back panel.
3. To set the hours/minutes, press TUNING 3 or 4 (HR or MIN) while the
display is still flashing.
– With your finger held down on 3/4, the hour/minute increases continuously. Release 3/4 when you reach the correct hour/minute setting.
– Press 3/4 briefly and repeatedly if you need to adjust the hours/ minutes slowly.
DYNA
M IC B
ASS B
OOST
AE67
75 A
M /F M
STER
EO R
E C E IV
To adjust the 9/10 kHz AM tuning step and clock display
ER
In North and South America the frequency step between adjacent AM band
channels is 10kHz. In the rest of the world e.g. Europe, this step is 9 kHz.
Usually the frequency step has been preset in the factory for your area.
1. Open the battery door. With a ballpoint pen tip adjust the 9K/10K tuning
step switch to select your tuning step.
2. With a ballpoint pen tip press the RESET hole.
– The display will either show:
0:00 for 9kHz and a 24-hour clock display.
12:00 for 10kHz and a 12-hour clock display.
– All previous preset stations and the time will need to be re-entered.
AE 6775 - Portable Radio
English
RADIO RECEPTION
1. Connect headphones to the p socket.
2. Press I POWER/ BAND to switch on the radio.
3. Press I POWER/ BAND once or more to select AM or FM waveband.
– The display shows the radio station details throughout the radio mode.
– STEREO appears when you are receiving a FM stereo transmission.
4. Select your station by using a preset number (1-5), or TUNING 3 or 4
(+ or –).
To improve reception:
FM: The headphone cord functions as the FM-aerial. Extend it fully to the
yellow mark and position the cord.
AM: Uses a built-in aerial. Turn the set to find the best position.
5. Adjust the sound with VOLUME and DBB ON•OFF.
6. To switch off the radio, press I POWER/ BAND, once or more until
OFF appears briefly.
Français
Español
∑
TUNING
Manual tuning
• Press TUNING 3 or 4 (+ or –) briefly, once or more until the right frequency is found.
Automatic tuning
1. Press and hold down TUNING 3 or 4 (+ or –) until the display frequency
starts to run.
2. When a station of sufficient strength has been found tuning stops, or you
can stop automatic tuning by pressing TUNING 3 or 4 again.
Meet PHILIPS at the internet http://www.philips.com
inted in Hong Kong
FRANÇAIS
ALIMENTATION
Piles (non comprises à la livraison)
• Ouvrez le compartiment des piles pour y introduire deux piles alcalines
de type R03, UM4 ou AAA de la manière indiquée.
• Enlevez les piles dès qu’elles sont usées ou qu’elles n’ont pas été utilisées pendant une période prolongée.
– Si les piles ont une faible capacité,
clignote sur l’écran. Si la radio
est en service, la mise hors service
se fera automatiquement.
– Il sera parfois nécessaire de reprogrammer les stations mémorisées.
REGLAGE DE L’HORLOGE
Lorsque la radio est mise hors service, l’heure est affichée sur 24 heures ou sur
12 heures avec indication AM (matin) et PM (après-midi).
1. Contrôlez si la radio est hors service.
2. Appuyez sur TIMESET sur le panneau arrière.
3. Pour régler les heures et les minutes, appuyez sur TUNING 3 ou 4
(HR ou MIN) lorsque l’affichage clignote.
– Appuyez et maintenez le doigt sur 3 ou 4, pour faire défiler les
heures/minutes. Relâchez la touche 3/4 lorsque le réglage des heures
ou des minutes est correct.
– Appuyez brièvement et de manière répétée sur 3 ou 4 pour régler lentement les heures ou les minutes.
Pour régler l’intervalle de fréquence AM 9/10 kHz /l’affichage de l’heure
En Amérique du nord et du sud, l’intervalle de fréquence entre les canaux
adjacents en bande AM est de 10 kHz. Dans le reste du monde, dont
l’Europe, cet intervalle est de 9 kHz. En règle générale, l’intervalle de
fréquence a été réglée en usine pour votre région.
1. Ouvrez le compartiment des piles. Avec l’aide d’une pointe de stylo,
réglez le sélecteur d’intervalle d’accord 9K/10K sur la valeur voulue.
2. Enfoncez une pointe de stylo à bille dans le trou RESET.
– L’écran indiquer alors:
Soit 0:00 pour 9kHz et l’affichage de l’heure sur 24 heures.
Soit12:00 pour 10kHz et l’affichage de l’heure sur 12 heures.
– Toutes les stations préréglées au préalable et l’heure devront être reprogrammées.
RECEPTION RADIO
1. Branchez les écouteurs dans la prise p.
2. Appuyez sur I POWER/ BAND pour mettre la radio en marche.
3. Appuyez une seule ou plusieurs fois sur I POWER/ BAND pour sélectionner la bande AM ou FM.
– L’écran affiche les données de la station radio tant que l’appareil est
en mode radio.
– STEREO s’affiche lorsque vous recevez une émission FM stéréo.
4. Sélectionnez la station voulue à l’aide de l’un des numéros de présélection (1 à 5), ou en appuyant sur TUNING 3 ou 4 (+ ou –).
Pour améliorer la réception:
FM: Le cordon des écouteurs fait office d’antenne FM. Déroulez-le entièrement jusqu’au repère jaune et positionnez-le.
AM: Utilisez l’antenne intégrée. Orientez l’appareil pour obtenir la meilleure
réception.
5. Réglez le son à l’aide du bouton VOLUME et DBB ON•OFF.
6. Pour mettre la radio hors service, appuyez une seule ou plusieurs fois sur
I POWER/ BAND, jusqu’à ce qu’OFF apparaisse un bref instant.
RECHERCHE DES FREQUENCES
Recherche manuelle
• Appuyez une seule ou plusieurs fois brièvement sur TUNING 3 ou 4
(+ ou –) pour rechercher la fréquence voulue.
Recherche automatique
1. Appuyez sans relâcher le doigt sur TUNING 3 ou 4 (+ ou –) jusqu’à ce
que l’affichage de la fréquence commence à défiler.
2. Lorsqu’une station de puissance suffisante a été détectée, la recherche
s’arrête. Vous pouvez aussi arrêter la recherche automatique en appuyant
de nouveau sur TUNING 3 ou 4.
ESPAÑOL
FUENTE DE ALIMENTACIÓN
Pilas (no incluidas)
• Abra el compartimento de las pilas e introduzca 2 pilas alcalinas, tipo
R03, UM4 o AAA como se indica.
• Si las pilas están desgastadas o no va a utilizar el aparato durante un
largo período, extráigalas del aparato.
– Cuando las pilas están desgastadas,
parpadea en el visor. Si la
radio está encendida, se apagará
automáticamente.
– Probablemente necesitará volver a programar las emisoras presintonizadas.
AJUSTE DEL RELOJ
Con la radio apagada, el visor muestra el sistema de horario del reloj de 24horas o del de 12 horas: indicaciones AM (mañana) y PM (tarde).
1. Asegúrese de que la radio está apagada.
2. Pulse TIMESET en la parte posterior del panel.
3. Para ajustar las horas/minutos, pulse TUNING 3 o 4 (HR o MIN) mientras la pantalla parpadea.
– Mantenga presionado 3/4 con el dedo para que la hora/minutos
aumenten continuamente. Suelte 3/4 cuando haya llegado al ajuste
correcto.
– Pulse 3/4 breve y repetidamente si necesita ajustar despacio la
hora/minutos.
TROUBLESHOOTING
If a fault occurs, first check the points listed below before taking the set for
repair. If you are unable to remedy a problem by following these hints, consult your dealer or service centre.
WARNING: Under no circumstances should you try to repair
the set yourself, as this will invalidate your guarantee.
Poor sound/ no sound:
–
•
–
•
RECEPCIÓN DE RADIO
1. Conecte los auriculares a la toma p.
2. Pulse I POWER/ BAND para apagar la radio.
3. Pulse I POWER/ BAND una o más veces para seleccionar la banda
AM o FM.
– En el modo de radio, el visor muestra los detalles de la emisora.
– Aparece STEREO cuando se recibe una transmisión estéreo de FM.
4. Seleccione la emisora con un número de preselección del (1 al 5), o
TUNING 3 ó 4 (+ ó –).
Para mejorar la recepción:
FM: El cable de los auriculares funciona como antena FM. Extiéndalo hasta
la marca amarilla y colóquelo.
AM: Utiliza una antena incorporada. Gire el aparato hasta encontrar la
mejor posición.
5. Ajuste el volumen con VOLUME y DBB ON•OFF.
6. Para apagar la radio, pulse I POWER/ BAND, una o más veces hasta
que aparezca brevemente OFF.
SINTONIZACIÓN
Sintonización manual
• Pulse TUNING 3 ó 4 (+ o –) brevemente, una o más veces hasta que
encuentre la frecuencia correcta.
Sintonización automática
1. Mantenga pulsado TUNING 3 ó 4 (+ o –) hasta que la frecuencia del
visor comience a desplazarse.
2. Cuando encuentre una emisora con suficiente fuerza, la sintonización
automática se detiene, o se detiene también pulsando de nuevo TUNING 3 ó 4.
Headphone plug not fully inserted
Insert plug fully for personal listening
Wrong battery polarity
Insert batteries correctly
Severe radio hum/distortion:
–
•
–
•
–
•
FM aerial (headphone cord) not fully extended
Extend FM aerial fully
Set too close to TV, computer, etc.
Move set away from other electrical equipment
Batteries weak
Insert fresh batteries
Digital controls/ display does not function properly
– Electrostatic discharge
• Use the tip of a ball-point pen to press the RESET hole and then reprogramme settings
The model number is found at the back panel and
the production number in the battery compartment.
Para ajustar el paso de sintonización 9/10 kHz AM y el visor del reloj.
En Norteamérica y Sudamérica el paso de sintonización entre canales de ondas
adyacentes AM es de 10kHz. En el resto del mundo, por ej. en Europa es de 9
kHz. Normalmente el paso de sintonización viene ya preseleccionado de fábrica.
1. Abra el compartimento de las pilas. Con la punta de un bolígrafo, seleccione el interruptor de paso de sintonización de 9K ó 10K.
2. Con la punta de un bolígrafo pulse en la ranura de RESET.
– El visor mostrará una de las indicaciones siguientes:
0:00 para 9kHz y la visualización del reloj de 24 horas.
12:00 para 10kHz y la visualización del reloj de 12 horas.
– Necesitará reprogramar todas las emisoras presintonizadas con anterioridad, así como la hora.
English
This product complies with the radio interference
requirements of the European Union.
RECHERCHE DE PANNES
Français
Dans le cas d’une panne, vérifiez les points ci-dessous avant d’envoyer l’appareil en réparation. Si vous ne réussissez pas à résoudre le problème, contactez votre revendeur ou votre service après-vente.
AVERTISSEMENT
: vous ne devez en aucun cas essayer
de réparer cet appareil vous-même car vous perdriez toute possibilité de recours en garantie.
Volume faible/ pas de son
–
•
–
•
La fiche écouteurs n’est pas bien introduite
Introduisez correctement la fiche pour écoute personnelle
Polarité incorrecte des piles
Introduisez correctement les piles
Graves bourdonnements/distorsion de la radio:
–
•
–
•
–
•
Antenne FM (câble écouteurs) non entièrement étirée
Etirez entièrement l’antenne FM
Equipement trop près du téléviseur, de l’ordinateur, etc.
Eloignez l’équipement des autres appareils électriques
Piles faibles
Introduisez de nouvelles piles
Commandes panneau avant/
l’afficheur ne fonctionne pas d’une manière optimale
– Décharge électrostatique
• Utilisez la pointe de la fiche écouteurs/ stylo à billes pour appuyer sur
RESET et reprogrammez les réglages
La plaquette signalétique se trouve sur le panneau arrière et le
numéro de production dans le compartiment des piles.
Cet appareil est conforme aux prescriptions de la
Communauté Européenne relatives à la limitation des
perturbations radio-électriques.
TC text/RB/9852
SELECTING & STORING FREQUENCIES: PRESETS
POWER/BAND PRESET 1-5 TUNING 3 4
DISPLAY
1
2
3
4
5
MHz
kHz
DYNA
M
IC BA
AE67
75 A
M /F M
GENERAL FEATURES
Reset
Should you receive external interference which affects the display and electronic functions of your set, RESET allows you to clear all data from your set
and to start up again.
You can also use the RESET to erase all your radio preset stations.
• With a ballpoint pen tip press the RESET hole.
– The display will show 12:00 or 0:00. All previous preset stations are
erased and the clock time will now need to be re-entered.
Memory protection
When you change batteries, the memory protection acts as a backup whereby
the time setting, presets and the last FM/AM station listened to are retained
for at least 30 minutes.
Note:
The clock time freezes during memory protection, so you may have to adjust
the time after changing batteries.
SS BO
STER
OST
EO R
E C E IV
You can store the frequencies of up to 10 radio stations in the memory, 5 on
each wave band. A stored frequency can be erased from the memory by
storing another frequency in its pIace.
1. Select your wave band and tune to your desired station (See TUNING).
2. Press one of the preset numbers (1-5) for 2 seconds or more to store your
station.
– PRESET appears in the display.
3. To listen to a preset station:
• select your waveband;
• press the preset number of your desired station.
– PRESET appears in the display.
ER
SELECTION ET MEMORISATION DES FREQUENCES: PRESELECTIONS
SELECCIÓN Y ALMACENAMIENTO DE FRECUENCIAS: PRESINTONÍAS
Vous pouvez mémoriser les fréquences de dix stations radio maximum, cinq
par bande. Une fréquence mémorisée est effacée lorsqu’on en mémorise
une nouvelle à sa place.
1. Sélectionnez la bande et recherchez la station voulue
(Voir RECHERCHE DES FREQUENCES).
2. Appuyez sur l’un des numéros de présélection (1 à 5) pendant au moins
deux secondes pour mémoriser la station.
– PRESET s’affiche sur l’écran.
3. Pour écouter une station programmée:
• Sélectionnez la bande voulue;
• Appuyez sur le numéro de présélection correspondant à la station voulue.
– PRESET s’affiche sur l’écran.
Se pueden almacenar en la memoria las frecuencias de un total de 10
emisoras, 5 en cada una de las bandas. Si almacena una frecuencia nueva
en una posición determinada, la frecuencia anterior se borra.
1. Seleccione la banda y sintonice la emisora deseada
(Vea SINTONIZACIÓN).
2. Pulse uno de los números preseleccionados (1-5) durante 2 ó más segundos para memorizar la emisora.
– Aparece en el visor PRESET.
3. Para escuchar una emisora preseleccionada (presintonía):
• seleccione la banda;
• pulse el número de preselección de su emisora favorita.
– Aparece en el visor PRESET.
FONCTIONS GENERALES
CARACTERÍSTICAS GENERALES
Réinitialisation
Si des interférences externes perturbent l’affichage et les fonctions électroniques
de votre appareil, la fonction de réinitialisation (RESET) vous permet de remettre
toutes les données à l’état initial. Vous pouvez également utiliser cette fonction
pour effacer toutes les stations présélectionnées.
• Enfoncez la pointe d’un stylo dans le trou RESET.
– L’écran indique 12:00 ou 0:00. Toutes les stations précédemment
mémorisées sont effacées et l’heure devra être reprogrammée.
Protection par la mémoire
Lors du remplacement des piles, la mémoire fait office de sauvegarde et
conserve pendant au moins 30 minutes l’heure, les présélections et la
dernière station FM/AM écoutée.
Reinicialización
Si las funciones electrónicas y de visualización del aparato se ven afectadas
por interferencias externas, el botón RESET le permite borrar todos los
datos del aparato y volverlo a programar de nuevo.
Se puede utilizar la función RESET para borrar todas las presintonías.
• Con la punta de un bolígrafo pulse en la ranura RESET.
– El visor mostrará 12:00 ó 0:00. Todas las emisoras presintonizadas
se borrarán y el reloj deberá programarse otra vez.
Protección de la memoria
Cuando reemplace las pilas, el protector de la memoria se activa para retener, durante como mínimo 30 minutos, las presintonías y la última emisora
FM/AM que ha estado escuchando.
Remarque: L’heure se fige en mode protection par la mémoire et il vous
faudra donc l’ajuster après avoir remplacé les piles.
Advertencia: Durante el período de protección de la memoria, el reloj se queda
parado por lo que deberá reprogramarlo una vez que haya cambiado las pilas.
SOLUCIÓN DE PROBLEMAS
Español
Si se produce un problema, verifique los puntos que se relacionan a continuación
antes de llevar a reparar el equipo. Si no puede solucionar el problema por sí mismo
siguiendo estas sugerencias, consulte con su distribuidor o centro de servicio.
ADVERTENCIA: En ningún caso trate de reparar el aparato Vd. mismo ya que perderá todos los derechos de la garantía.
Mala calidad de sonido/no hay sonido:
•
•
La clavija de los auriculares no se ha introducido completamente
Insértela completamente para uso personal
La polaridad de las pilas no coincide
Insértelas correctamente
Zumbido/distorsión acusada:
– La antena FM (cable de los auriculares) no está completamente extendida
• Extiéndala completamente
– El aparato está demasiado cerca del TV, ordenador, etc.
• Reposicione el aparato lejos de equipos eléctricos
– La carga de las pilas está baja
• Ponga pilas nuevas
Controles del panel frontal/el visor no funciona correctamente
– Descarga electrostática
• Utilice la punta de la clavija de los auriculares o un bolígrafo para presionar RESET y reprogramar los ajustes
El número del modelo se encuentra en la parte posterior del panel y
el número de producción en el compartimento de las pilas.
Este apparato satisface las normas relativas a la interferencia radioléctrica de la Comunidad Europea.
Locking
Locking prevents any other control from being accidentally pressed.
1. Press LOCK on the back panel.
appears when LOCK is activated.
2. To deactivate the LOCK function, press LOCK again.
disappears from the display.
GENERAL INFORMATION
Accessories (included)
1 x AY 3656 stereo headphone with winder
• To use: pull and extend headphone cord gently.
• To rewind: push the WIND d switch.
- TUNING +
MIN
HR
TIME SET
LOCK
battery
compartment
POWER
BAND
RESET
pp
RESET
LOCK TIMESET
VOL
9/10K
VOLUME
MAINTENANCE
DBB
ON•
OFF•
AAA/R03/UM4
1.5V x 2
TAKE CARE WHEN USING HEADPHONES
Hearing Safety: Listen at a moderate volume. Use at high volume can
impair your hearing!
Traffic Safety: Do not use headphones while driving or cycling as you may
cause an accident!
DBB
• Use a soft damp cloth to wipe off dust and dirt. Don't use benzene or corrosives to clean the set.
• Don't expose the set to rain, moisture, sand or to excessive heat e.g. cars
parked in direct sunlight.
ENVIRONMENTAL NOTE
• The packaging has been minimized so that it is easy to separate into two
materials: cardboard and plastic. Please observe the local regulations
regarding the disposal of these packaging materials.
• Please inquire about local regulations on how to hand in your old set for
recycling.
• Batteries contain chemical substances, so they should be disposed of properly.
Verrouillage
Le verrouillage empêche toute manipulation intempestive.
1. Appuyez sur LOCK sur le panneau arrière.
s’affiche lorsque le verrouillage est enclenché.
2. Pour supprimer le verrouillage, appuyez de nouveau sur LOCK.
disparaît de l’écran.
INFORMATIONS GENERALES
Accessoires (compris à la livraison)
1 x écouteurs stéréo AY 3656 avec enrouleur
• Avant utilisation: tirez et déroulez le cordon avec précautions.
• Pour rebobiner le cordon: appuyez sur le bouton WIND d.
Bloqueo
El dispositivo de bloqueo impide que se presione accidentalmente cualquier
otro control.
1. Pulse LOCK (bloquear) en la parte posterior del panel.
Cuando se activa LOCK aparece
.
2. Para desactivar la función LOCK, pulse de nuevo LOCK.
desaparece del visor.
INFORMACIÓN GENERAL
Accesorios (incluidos)
1 x Auriculares estéreo con rebobinador AY 3656
• Para utilizarlo: tire y extienda con cuidado el cable de auriculares.
• Para rebobinar: pulse el interruptor WIND d.
PRECAUTIONS A PRENDRE LORS DE L’UTILISATION DES ECOUTEURS
Sécurité de l’ouïe: Ecoutez à volume modéré. Une écoute à forte puissance peut être nuisible pour l’ouïe!
Sécurité sur la route: N’utilisez pas les écouteurs à bicyclette ou au
volant, car vous risquez de causer un accident!
ENTRETIEN
• Utilisez un chiffon doux légèrement humidifié pour enlever la poussière
et la saleté. N’utilisez pas de benzène ou des produits détergents pouvant avoir un effet abrasif pour nettoyer l’équipement.
• Ne pas exposer l’équipement à l’humidité, à la pluie, au sable ni à la
chaleur excessive causée par exemple par des véhicules en stationnement exposés en plein soleil.
INFORMATIONS SUR L’ENVIRONNEMENT
• Tous les matériaux d’emballage inutiles n’ont pas été utilisés et ce pour faciliter
la séparation plus tard en deux matériaux: le carton et le plastique. Veuillez
observer les régulations locales quant au rebut de ces matériaux d’emballage.
• Veuillez vous renseigner sur les régulations locales concernant le recyclage de votre ancien appareil.
• Les piles contiennent des substances chimiques, donc elles
doivent être jetées selon les normes de l’environnement.
TENGA CUIDADO AL UTILIZAR LOS AURICULARES
Seguridad de audición: Escuche a un nivel de sonido moderado. ¡Si los
utiliza a un nivel alto, puede dañar su capacidad auditiva!
Seguridad durante la conducción: ¡No utilice los auriculares durante la
conducción o cuando monte en bicicleta ya que podría causar un accidente!
MANTENIMIENTO
• Utilice un paño suave humedecido para quitar el polvo y la suciedad. No
utilice productos de limpieza corrosivos o benceno.
• No exponga el receptor a la humedad, lluvia, arena o calor excesivo
(automóviles expuestos directamente al sol).
CONSEJO MEDIOAMBIENTAL
• El embalaje se ha simplificado para que pueda dividirse fácilmente en
dos materiales: cartón y plástico. Por favor, cumpla con la normativa
local referente a la eliminación de éstos materiales de embalaje.
• Para reciclar el aparato desechable, infórmese sobre la normativa local.
• Las pilas contienen sustancias químicas peligrosas, cuando las
vaya a tirar, hágalo conforme a la normativa local.
NOTES
CINESE
POWER SUPPLY
1
2
3
4
Battery (not included)
• Open battery door and insert two alkaline batteries, type R03,UM4 or
AAA as indicated.
• Remove the batteries from the set if they are exhausted or not to be used
for a long time.
– When the batteries are running low,
flashes in the display. If the
radio is on, it will automatically switch off.
– It may be necessary to reprogramme your preset stations.
5
SETTING THE CLOCK
MHz
kHz
When the radio is off, the time is displayed using the 24-hour clock or the 12
clock system with AM and PM indication.
1. Check the radio is switched off.
2. Press TIMESET on the back panel.
3. To set the hours/minutes, press TUNING 3 or 4 (HR or MIN) while the
display is still flashing.
– With your finger held down on 3/4, the hour/minute increases continuously. Release 3/4 when you reach the correct hour/minute setting.
– Press 3/4 briefly and repeatedly if you need to adjust the hours/ minutes slowly.
DYNA
M IC B
ASS B
OOST
AE67
75 A
M /F M
STER
EO R
E C E IV
To adjust the 9/10 kHz AM tuning step and clock display
ER
In North and South America the frequency step between adjacent AM band
channels is 10kHz. In the rest of the world e.g. Europe, this step is 9 kHz.
Usually the frequency step has been preset in the factory for your area.
1. Open the battery door. With a ballpoint pen tip adjust the 9K/10K tuning
step switch to select your tuning step.
2. With a ballpoint pen tip press the RESET hole.
– The display will either show:
0:00 for 9kHz and a 24-hour clock display.
12:00 for 10kHz and a 12-hour clock display.
– All previous preset stations and the time will need to be re-entered.
AE 6775 - Portable Radio
English
RADIO RECEPTION
1. Connect headphones to the p socket.
2. Press I POWER/ BAND to switch on the radio.
3. Press I POWER/ BAND once or more to select AM or FM waveband.
– The display shows the radio station details throughout the radio mode.
– STEREO appears when you are receiving a FM stereo transmission.
4. Select your station by using a preset number (1-5), or TUNING 3 or 4
(+ or –).
To improve reception:
FM: The headphone cord functions as the FM-aerial. Extend it fully to the
yellow mark and position the cord.
AM: Uses a built-in aerial. Turn the set to find the best position.
5. Adjust the sound with VOLUME and DBB ON•OFF.
6. To switch off the radio, press I POWER/ BAND, once or more until
OFF appears briefly.
Français
Español
∑
TUNING
Manual tuning
• Press TUNING 3 or 4 (+ or –) briefly, once or more until the right frequency is found.
Automatic tuning
1. Press and hold down TUNING 3 or 4 (+ or –) until the display frequency
starts to run.
2. When a station of sufficient strength has been found tuning stops, or you
can stop automatic tuning by pressing TUNING 3 or 4 again.
Meet PHILIPS at the internet http://www.philips.com
inted in Hong Kong
TC text/RB/9852
SELECTING & STORING FREQUENCIES: PRESETS
POWER/BAND PRESET 1-5 TUNING 3 4
DISPLAY
1
2
3
4
You can store the frequencies of up to 10 radio stations in the memory, 5 on
each wave band. A stored frequency can be erased from the memory by
storing another frequency in its pIace.
1. Select your wave band and tune to your desired station (See TUNING).
2. Press one of the preset numbers (1-5) for 2 seconds or more to store your
station.
– PRESET appears in the display.
3. To listen to a preset station:
• select your waveband;
• press the preset number of your desired station.
– PRESET appears in the display.
5
MHz
kHz
DYNA
M
IC BA
SS BO
OST
GENERAL FEATURES
A E6 77
5 AM
/F M
ST ER
EO R
EC
EI V ER
- TUNING +
MIN
HR
TIME SET
LOCK
battery
compartment
POWER
BAND
RESET
pp
RESET
LOCK TIMESET
VOL
9/10K
VOLUME
Reset
Should you receive external interference which affects the display and electronic functions of your set, RESET allows you to clear all data from your set
and to start up again.
You can also use the RESET to erase all your radio preset stations.
• With a ballpoint pen tip press the RESET hole.
– The display will show 12:00 or 0:00. All previous preset stations are
erased and the clock time will now need to be re-entered.
Memory protection
When you change batteries, the memory protection acts as a backup whereby
the time setting, presets and the last FM/AM station listened to are retained
for at least 30 minutes.
Note:
The clock time freezes during memory protection, so you may have to adjust
the time after changing batteries.
DBB
ON•
OFF•
English
If a fault occurs, first check the points listed below before taking the set for
repair. If you are unable to remedy a problem by following these hints, consult your dealer or service centre.
WARNING: Under no circumstances should you try to repair
the set yourself, as this will invalidate your guarantee.
–
•
–
•
ESTA POLIZA ES GRATUITA
Headphone plug not fully inserted
Insert plug fully for personal listening
Wrong battery polarity
Insert batteries correctly
Este aparato ha sido cuidadosamente diseñado y se ha fabricado con los mejores materiales bajo un estricto
control de calidad, garantizando su buen funcionamiento por los periodos establecidos según el aparato (ver
lista en la parte inferior) a partir de la entrega del aparato al consumidor. Esta póliza incluye la
reparación o reposición gratuita de cualquier parte o componente que eventualmente fallase y la
mano de obra necesaria para su reparación, misma que se hará efectiva en cualquiera de nuestros
centros de servicio autorizados en el país.
Severe radio hum/distortion:
–
•
–
•
–
•
FM aerial (headphone cord) not fully extended
Extend FM aerial fully
Set too close to TV, computer, etc.
Move set away from other electrical equipment
Batteries weak
Insert fresh batteries
Digital controls/ display does not function properly
– Electrostatic discharge
• Use the tip of a ball-point pen to press the RESET hole and then reprogramme settings
The model number is found at the back panel and
the production number in the battery compartment.
AUSTRALIA
Philips product warranty for Australia
n
Es necesario que lea cuidadosamente su instructivo de manejo.
PRECAUCIÓN - ADVERTENCIA
No abrir, riesgo de choque eléctrico
ATENCIÓN
Verifique que el voltaje de alimentación
sea el requerido para su aparato
Para evitar el riesgo de choque eléctrico, no quite la tapa.
En caso de requerir servicio, dirijase al personal calificado.
Descripción (Description):
Estereofónico
Modelo (Model):
Alimentación (Mains):
Consumo (Consumption):
mportador (Importer):
Domicilio (Street):
Vallejo
ocalidad y Telefono (City and Phone):
28 42 00
xportador (Exporter):
aís de Origen (Origin):
Reproductor de Cassette
AE 6780/01
n/a
n/a
Philips Mexicana, S.A. de C.V.
Norte 45, # 669, Col. Industrial
C.P. 02300 México D.F., Tel.
Philips Hongkong, Ltd.
China
___________________________
LEA CUIDADOSAMENTE ESTE INSTRUCTIVO
ANTES DE USAR SU APARATO.
GENERAL INFORMATION
Accessories (included)
1 x AY 3656 stereo headphone with winder
• To use: pull and extend headphone cord gently.
• To rewind: push the WIND d switch.
TAKE CARE WHEN USING HEADPHONES
Hearing Safety: Listen at a moderate volume. Use at high volume can
impair your hearing!
Traffic Safety: Do not use headphones while driving or cycling as you may
cause an accident!
MAINTENANCE
• Use a soft damp cloth to wipe off dust and dirt. Don't use benzene or corrosives to clean the set.
• Don't expose the set to rain, moisture, sand or to excessive heat e.g. cars
parked in direct sunlight.
ENVIRONMENTAL NOTE
• The packaging has been minimized so that it is easy to separate into two
materials: cardboard and plastic. Please observe the local regulations
regarding the disposal of these packaging materials.
• Please inquire about local regulations on how to hand in your old set for
recycling.
• Batteries contain chemical substances, so they should be disposed of properly.
PHILIPS MEXICANA S.A. de C.V. a través de sus centros de servicio autorizados reparará y devolverá a usted
su aparato en un plazo no mayor a 20 días hábiles, contados a partir de la fecha de ingreso, impresa en la
orden de servicio de cualquiera de nuestros centros de servicio autorizados.
La garantía de esta póliza cubre cualquier desperfecto o daño eventualmente ocasionado por los
trabajos de reparación y/o traslado del aparato en el interior de nuestros centros de servicio
autorizados.
ESTA POLIZA NO SE HARÁ EFECTIVA EN LOS SIGUIENTES CASOS:
Warranty conditions valid for Colour Television, Video Cassette Recorders,
Audio Systems, and Portable Audio.
The benefits given to the purchaser by this warranty are in addition to all
other rights and remedies which the purchaser has in respect of the product
under the Trade Practices Act or other Commonwealth or State Law.
Philips Sound and Vision warrants it’s products to the purchaser as follows
and subject to the stated conditions.
12 months free service
Any defect in materials or workmanship in the product occurring within 12
months from the original date of purchase will be rectified free of charge by
Philips Service or one of our authorised service centers.
Conditions of warranty
1. All claims for warranty service should be made to your nearest Philips
Service Branch or to a Philips authorised service dealer. Reasonable evidence of date of purchase must be provided.
2. This warranty extends only to defects occurring under normal use of the
product when operated in accordance with the instructions.
3. Home service within the normal service area of Philips Service or one of our
authorised service centres will be provided for television receivers with
screen size 59cm and above. All other products are to be brought or sent to
your nearest Philips Service Branch or to an authorised service centre.
4. This warranty does not cover:
a) Mileage or traveling time, pickup or delivery, cost of insurance.
b) Service costs arising from failure to correctly adjust the controls of the
product or to observe the instructions, or inspections that reveal that the
product is in normal working order.
c) Product failures caused by misuse, neglect, normal wear and tear, accidental breakage, transit damage, inexpert repairs or modification by unauthorised persons, lightning strikes, vermin intestation or liquid spillage.
d) Cleaning of video or audio heads.
e) Inadequate receiving antennae.
f) Replacement of worn or used batteries, styli or other consumables.
The conditions contained in this warranty replace and override the provisions
of the World-Wide Guarantee for Products sold in Australia.
Philips Service Branches
To contact your nearest Philips Service Branch call 1300 36 3392 from anywhere in Australia.
Sydney
Technology Park
Australia Centre
3 Figtree Drive
Homebush NSW 2140
Newcastle & Central Coast
984 Hunter Street
Newcastle West NSW 2302
Perth
1 Fredrick Street
Belmont WA 6104
Melbourne
Cnr Wellington &
Springvale Roads
Mulgrave VIC 3170
Brisbane
10 Graystone Street
Tingalpa QLD 4173
Also Service Centres:
Adelaide
348 Torrens Road
Croydon Park SA 5008
Hobart
2A Pierce Street
Moonah TAS 700
Wollongong
1/216 Corrimal Street
Wollongong NSW 2500
Canberra
Unit F,
66–70 Maryborough Street
Fyshwick ACT 2609
Service is also provided through 1,200 accredited service dealers throughout
Australia. To find out about your nearest centre, call 1300 36 3392.
Call us direct on the
Philips Customer Helpline
• Cuando el aparato sea utilizado en condiciones anormales y los daños o desperfectos que manifieste sean
causados por mal trato, descuido o mal uso.
• Cuando el aparato no haya sido operado de acuerdo a su instructivo de uso, en donde se señalan las
condiciones normales de operación, los valores nominales y las tolerancias de las tensiones (voltaje),
frecuencia (ciclaje) de alimentación eléctrica y las características que deben reunir las instalaciones auxiliares.
• Cuando la causa de la falla o mal funcionamiento sea consecuencia de una reparación inadecuada o
alteración producida por personas no autorizadas por PHILIPS MEXICANA S.A. de C.V.
• Cuando los datos de esta póliza hayan sido alterados o modificados.
• Por fenómenos naturales no imputables a la empresa tales como: temblores, inundaciones, incendios,
descargas eléctricas, rayos, etc.
PERIODOS DE GARANTÍA
12 MESES. – Televisores, videocaseteras, proyectores, cámaras de video, decodificadores de señal (IRD), T.V.
hotel, sistemas de observación, televisores de proyección, teléfonos celulares, pagers, equipos
modulares, sintoamplificadores.
6 MESES. – Radio grabadoras con y sin compact disc, mini reproductores de cassette, reproductor de CD
portátil, radio relojes, radios A.M.F.M., auto estéreos, teléfonos inalámbricos.
3 MESES. – Accesorios, controles remotos y bocinas.
Philips Mexicana, S.A. de C.V.
Producto importado por:
Philips Mexicana, S.A. de C.V.
Norte 45 No. 669 Col. Ind. Vallejo
Del. Azcapotzalco C.P. 02300
Tels. 728 42 00 y 729 48 00
Centro de Información al Consumidor:
Norte 45 No. 669 Col. Ind. Vallejo
Del. Azcapotzalco C.P. 02300
Tels. 368 77 88 Lada 01 800 504 62 00
Centro de Servicio Vallejo:
Norte 45 No. 669 Col. Ind. Vallejo
Del. Azcapotzalco C.P. 02300
Tel. 368 20 33
En caso que en su producto se produzca alguna falla, acuda al centro de servicio más cercano a su domicilio (según listado de talleres), de tener
alguna duda, por favor llame a nuestra CENTRAL DE SERVICIO, en donde con gusto le atenderemos.
Asimismo cuando requiera refacciones y partes originales para su producto, acuda a los mismos centros de servicio. Para hacer efectiva la garantía
de su producto, es necesario que presente usted esta póliza debidamente requisitada o de lo contrario presentar su factura de compra.
Philips customer care lasts as long as you keep the product. Whenever you
need any information on the care or operation of your product, remember it’s
always best to go straight to the source. Phone Philips Helpline direct on
Modelo ______________
1300 36 3391
7 days a week
Nº de Serie_______________
La presente garantía contará a partir de: ______
dia
______
mes
______
año
– your call is always welcome.
Please record the following information for your records and keep in a safe
place.
Model No:....................................................
Serial No:....................................................
Version 2, 08/97, FPCP–030
México
Si su aparato llegase a requerir de nuestro servicio de garantía, acuda al centro de servicio más cercno a su
domicilio, de tener alguna duda por favor llame a nuestra central de servicio al tel.: 728 42 52, y en el interior
del país LADA sin costo al 01 800 506 92 00 en donde con gusto le indicaremos el cetro de servicio autorizado
más cercano a su domicilio.
Esta póliza sólo tendrá validez, si está debidamente requisitada, sellada y firmada por la casa
vendedora, en caso de extravío de esta póliza, podrá hacer efectiva su garantía con la presentación de su
factura de compra.
Philips Electronics Australia Limited
ACN 008 445 743, 3 Figtree Drive
Homebush NSW 2140
Locking
Locking prevents any other control from being accidentally pressed.
1. Press LOCK on the back panel.
appears when LOCK is activated.
2. To deactivate the LOCK function, press LOCK again.
disappears from the display.
POLIZA DE GARANTÍA
Poor sound/ no sound:
Please retain your purchase receipt which is required
to claim service under warranty.
DBB
AAA/R03/UM4
1.5V x 2
Nº de Serie (Serial number):
TROUBLESHOOTING
NEW ZEALAND
Guarantee and Service for New Zealand
Thank-you for purchasing this quality Philips product.
Philips New Zealand Ltd guarantees this product against defective components and faulty workmanship for a period of 12 months. Any defect in materials or workmanship occurring within 12 months from the date of purchase
subject to the following conditions will be rectified free of charge by the
retailer from whom this product was purchased.
Conditions
1. The product must have been purchased in New Zealand. As proof of purchase, retain the original sales docket indicating the date of purchase.
2. The guarantee applies only to faults caused by defective components, or
faulty workmanship on the part of the manufacturer.
3. The guarantee does not cover failures caused by misuse, neglect, normal
wear and tear, accidental breakage, use on the incorrect voltage, use contrary to operating instructions, or unauthorised modification to the product
or repair by an unauthorised technician.
4. Reasonable evidence (in the form of a sales docket) must be supplied to
indicate that the product was purchased no more than 12 months prior to
the date of your claim.
5. In the event of a failure, Philips shall be under no liability for any injury, or
any loss or damage caused to property or products other than the product
under guarantee.
This guarantee does not prejudice your rights under common law and statute,
and is in addition to the normal responsibilities of the retailer and Philips.
How to claim
Should your Philips product fail within the guarantee period, please return it
to the retailer from whom it was purchased. In most cases the retailer will be
able to satisfactorily repair or replace the product.
However, should the retailer not be able to conclude the matter satisfactorily,
or if you have other diffi-culties claiming under this guarantee, please contact
The Guarantee Controller
Philips New Zealand Ltd.
4 P.O. Box 41.021
Auckland
3 (09) 84 94 160
fax 3 (09) 84 97 858
Ciudad
EDO
Calle y Nº
Colonia
C. P.
Nombre Comercial
Lada
Telefono
Fax
Acapulco
GRO
Av. Revolucion Nº 28
M. Aleman
39300
Servicio Electronico
Professional
74
83 32 96
–
Cd. Juarez
CHIH.
Rancho el Becerro 3011
Pradera Dora
39300
Teleservicio Dominguez
16
18 21 28
18 21 28
Cd. Reynosa
TAMPS
Rosalinda Guerrero Esq. 5
de Febrero
Prol. Longoria
88699
Centro de Servicio Lugo
892
492 43
–
Chihuahua
CHIH.
Trasviña y Retes Nº 3503-A
San Felipe
31240
Zener Electronica
14
14 01 16
26 50 41
Colima
COL
Francisco I. Madero Nº 426
Centro
28000
TV Antenas de Colim
331
403 01
403 01
Culiacan
SIN.
Venustiano Carranza
Nº 140-A Nte.
Centro
80090
Estereo Voz
67
16 15 10
–
615 72 62
Guadalajara
JAL
Av. Vallarta Nº 2250
Ladron de Guevara
44600
Leecom S.A. de C.V.
3
616 18 88
616 01 26
Leon
GTO
Hernandez Alvarez Nº 726
Ssan Juan de Dios
37480
Tecnicos Especializados
47
47 70 26-99
15 58 64
23 39 97
Merida
YUC
Calle 70 Nº 443 X 49 Depto. 8
Centro
97000
Servicentro
99
28 54 28
Mexicali
B.C.N.
Calz. Cuauhtemoc Nº 866-2
Cuauhtemoc Nte.
21200
Baja Electronic’s
619
67 49 16
67 49 16
Mexico
D.F.
Norte 45 Nº 669
Industrial Vallejo
2300
Philips Mexicana S.A. de C.V.
5
368 20 33
728 42 72
Mexico
D.F.
Calz. Vallejo Nº 904 Loc. 5
Industrial Vallejo
2300
Tecnologia y Servicio
S.A. de C. V.
5
587 57 99
587 57 99
Mexico
D.F.
Pilares Nº 519 Local C-3
Del Valle
03100
Cocesionario Pilares
5
605 42 15
605 42 67
605 43 46
Monterrey
N.L.
Juan Mendez Nº 825 Nte.
Centro
64000
Monterrey Centro
Electronico S.A.
8
375 16 17
374 85 42
Morelia
MICH.
Lago de Patzcuaro Nº500-A
Ventura Puente
58020
Multiserv. Prof. de Zamora
43
12 03 17
–
Oaxaca
OAX
Huzares Nº 207
Centro
68000
El Francistor S. de R.L. de C.V.
951
647 37
–
Pachuca
HGO
Pza. de las Americas Lote 28
Nucleo D
Valle de Sn Javier
42086
Frazare Electronica
77
14 15 81
–
Puebla
PUE
Av. 10 Poniente Nº 2902-B
San Alejandro
72090 Concesionario Philips de Puebla
22
30 34 39
–
Queretaro
QRO
Bolivia 32
Lomas de Queretaro
76190
Electronica Zener
421
610 09
–
San Luis Potosi
S.L.P.
Fuente De La Glorieta Nº 147
Balcones del Vale
78320
Servicios Electronicos
481
534 07
–
Tampico
TAMPS
Laredo Nº 105
Mainero
89060
Concesionario Philiips Tampico
12
12 36 04
–
Tijuana
B.C.N.
Calle 1a. Nº 1540-3
Centro
22000
Sistemas Inalambricos de
Comunicacion
66
85 95 58
85 95 58
Toluca
EDO MEX
alle Toluca Nº 505
Sanchez
50040
Concesionario Philips Toluca
72
14 83 09
17 03 21
Torreon
COAH
Mariano Lopez Ortiz
Nº 1126 Nte.
Centro
27000
Electronica Jomar
17
22 00 05
–
Tuxtla Gutierrez
CHIS
10 Nte. Ote 153-A
Centro
29000
KC-Video
96
18 19 08
–
Veracruz
VER
Av. Costa Verde Nº 1116
Fracc. Costa Verde
94294
Servicios Esp. en Electronica
29
21 07 02
21 07 02
Villahermosa
TAB
Sanchez Marmol Nº 206
Centro
86000
Tecnicentro
93
14 31 36
–