1
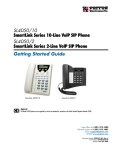
SL4050/B12/E
SmartLink Series 12-Line VoIP SIP Phone
SL4050/B2/E
SmartLink Series 2-Line VoIP SIP Phone
Quick Start Guide
Important
This is a Class B device and is intended for use in a light industrial or residential environment. It is not
intended nor approved for use in an industrial environment.
The Model SL4050 phones are not approved for, and are not intended for, direct connection to the Public
Switched Telephone Network (PSTN).
Part Number: 07MSL4050B-QS, Rev. A
Revised: September 11, 2008
Sales Office: +1 (301) 975-1000
Technical Support: +1 (301) 975-1007
E-mail: [email protected]
WWW: www.patton.com
WARNING
•
This device contains no user serviceable parts. The equipment
shall be returned to Patton Electronics for repairs, or repaired
by qualified service personnel.
•
The external power adapter shall be a listed Limited Power
Source. Ensure that the power cable used meets all applicable
standards for the country in which it is to be installed, and
that it is connected to a wall outlet which has earth ground.
The mains outlet that is utilized to power the devise shall be
within 10 feet (3 meters) of the device, shall be easily accessible, and protected by a circuit breaker.
•
Do not work on the system or connect or disconnect cables
during periods of lightning activity.
In accordance with the requirements of council directive 2002/96/EC on
Waste of Electrical and Electronic Equipment (WEEE), ensure that at endof-life you separate this product from other waste and scrap and deliver
to the WEEE collection system in your country for recycling.
2
SmartLink 4050 Series Quick Start Guide
1.0 Before you begin
The VoIP SIP phone can be set up using the keypad and a web browser, such as Internet Explorer. If you purchased this product to make a VoIP call, you must have either an Ethernet-based Cable or a DSL modem with an
active connection to the Internet.
1.1 Check your package contents
The following items are included in the SmartLink 4050/B12 and SmartLink 4050/B2 packaging. Contact your
supplier immediately if an item is missing.
SmartLink 4050/B12 VoIP SIP Phone
SmartLink 4050/B2 VoIP SIP Phone
Ethernet cable, 5-foot (1.5-meter), Qty: 1
SmartLink documentation CD-ROM
\
Power Adaptor
SmartLink 4050 Series Quick Start Guide
Wall/Desk mounting plate
3
1.2 Overview of the SL4050/B12/E key functions
2x16 Characters LED Display
LED Indicator
M1
M2
Up
3-Way Conference
M3
Voice Message
Down
Cancel/Left
Phone Book
M4
Cancel
OK
Phone Book
OK/Right
M5
Menu
M6
Menu
M7
Local Multi-Line
M8
1
4
2
ABC
5
3
Mute/Func
DEF
6
GHI
JKL
MNO
7
8
Item
2 x 16 LCD Display
LED Indicator
Up
3-Way Conference
OK/Right
Menu
Mute/Function
Transfer
Redial/Call History
Hold
Speaker Phone
Voice Message
Down
Cancel/Left
Phone Book
Numeric Keypad
Local Multiline
4
Transfer
Transfer
M11
Numeric Keypad
TUV
9
Redial
PQRS
WXYZ
*.
0
#
Hold
@
Mute/Function
M9
M10
Redial/Call History
M12
SPEAKER
Hold
Speaker Phone
Description
Displays menu, time, clock, name, phone number, call status
Indicates that phone is currently in use or ringing
Cycle through the phone menu, adjust volume
Enable 3-way conference
Confirm setting change, exit menu, dial, save changes
Access the phone menu
Disable user's microphone so that the person on the other line can not hear anything,
access the language selection, access the time format
Transfer the person you are currently having a conversation to another line
Redial last dialed number, access redial menu
Place the person on the other line on hold, answer call waiting
Enable user to use the phone without using the handset
Check voice message
Cycle through the phone menu, adjust volume
Deny changes, cancel phone calls, ignore phone calls, backspace
Access the phonebook
Input IP/phone number/alphabet characters
Switch to different lines
SmartLink 4050 Series Quick Start Guide
1.3 Overview of the SL4050/B2/E key functions
2x16 Characters LED Display
LED Indicator
Up
3-Way Conference
Voice Message
Down
Cancel/Left
Phone Book
Cancel
1
4
GHI
OK/Right
OK
Phone Book
Menu
Menu
2
ABC
3
Mute/Func
6
Transfer
DEF
5
JKL
MNO
Mute/Function
Transfer
Numeric Keypad
7
TUV
9
Redial
PQRS
WXYZ
*.
0
#
Hold
8
@
Description
Item
Transfer
Redial/Call History
Hold
Speaker Phone
Voice Message
Down
Cancel/Left
Phone Book
Hold
Speaker Phone
Speaker
2 x 16 LCD Display
LED Indicator
Up
3-Way Conference
OK/Right
Menu
Mute/Function
Redial/Call History
Displays menu, time, clock, name, phone number, call status
Indicates that phone is currently in use or ringing
Cycle through the phone menu, adjust volume
Enable 3-way conference
Confirm setting change, exit menu, dial, save changes
Access the phone menu
Disable user's microphone so that the person on the other line can not hear anything,
access the language selection, access the time format
Transfer the person you are currently having a conversation to another line
Redial last dialed number, access redial menu
Place the person on the other line on hold, answer call waiting
Enable user to use the phone without using the handset
Check voice message
Cycle through the phone menu, adjust volume
Deny changes, cancel phone calls, ignore phone calls, backspace
Access the phonebook
SmartLink 4050 Series Quick Start Guide
5
1.4 Numeric Keypad Definitions
You can use alphanumeric characters to enter details into the Phone Book, to create text and e-mail messages.
The table below shows the characters that you can enter in the different text modes.
Key
Text Mode
Normal (ABC)
1
1
Text Mode
Normal (ABC)
Numeric (0-9)
7
pqrsPQRS
7
8
tuvTUV
8
9
wxyzWXYZ
9
PQRS
2
abcABC
2
3
defDEF
3
4
ghiGHI
4
0
@ . _ * # ()
%&+/$,
0
5
jklJKL
5
*.
.
*
6
mnoMNO
6
#
ABC
DEF
GHI
JKL
MNO
6
Numeric (0-9)
Key
TUV
WXYZ
@
#
SmartLink 4050 Series Quick Start Guide
2.0 Installing the VoIP SIP phone
The interconnecting cables shall be acceptable for external use and shall be rated for
the proper application with respect to voltage, current, anticipated temperature, flammability, and mechanical serviceability.
CAUTION
1
Plug one end of the Ethernet cable included with the VoIP SIP phone into the WAN port on the SIP phone
(see figure 1 for SL4050/B12/E or figure 2 on page 8 for SL4050/B2/E). Plug the other end of the
cable into the xDSL modem or cable modem (or into an optional router or hub).
Do not work on the system or connect or disconnect cables during periods
of lightning activity.
WARNING
DC IN 5V
WAN
LAN
SmartLink 4050/10 VoIP SIP Phone
3
Power adapter
1
Ethernet Cable (included with
SL 4050/10 phone)
2
Ethernet Cable (optional)
Router/Hub
(optional)
Internet or
optional WAN
TX
RX
le
er
Pow
Cab
LAN
Cable/xDSL
modem
PC (optional)
Figure 1. Connecting the SL4050/B12/E SIP Phone
SmartLink 4050 Series Quick Start Guide
7
2
If you will not be connecting a PC to the phone, go to step 3. Otherwise, connect an Ethernet cable into
the LAN port of the SIP phone (see figure 1 on page 7 for SL4050/B12/E or figure 2 for SL4050/B2/
E). Plug the other end of the cable into the Ethernet port on the PC.
SmartLink 4050/B2 VoIP SIP Phone
LAN
DC IN 5V
WAN
Power adapter
2
Ethernet Cable (optional)
1
3
Ethernet Cable (included with
SL 4050/2 phone)
Router/Hub
(optional)
Internet or
optional WAN
TX
RX
Pow
PC (optional)
er
Cab
le
LAN
Cable/xDSL
modem
Figure 2. Connecting the SL4050/B2/E SIP Phone
3
8
Plug the power adapter barrel connector into the power connector on th SIP phone (see figure 1 on
page 7 for SL4050/B12/E or figure 2 for SL4050/B2/E). Plug the other end of the power adapter into
an AC electrical outlet.
SmartLink 4050 Series Quick Start Guide
3.0 Setting up the VoIP SIP phone
Press the MENU key
Display Name:
Your name
ADSL DIALUP:
ENABLE/DISABLE
Enable
ADSL DIALUP:
ENABLE
Disable
ADSL DIALUP:
DISABLE
ADSL ID:
My_ADSL_ID
ADSL Password:
********
DHCP:
ENABLE/DISABLE
Enable
Disable
IP Address:
AUTO
IP Address:
010.000.000.100
Subnet Mask:
AUTO
Subnet Mask:
255.255.255.000
Router IP:
AUTO
Router IP:
010.000.000.254
DNS Server IP:
010.000.000.001
SNTP Server IP:
220.130.158.52
ENABLE/DISABLE – select
enable or disable
AUTO – IP address given by
the router or ISP
SNTP Server IP – IP or URL
Figure 3. Menu summary, page 1 of 2
SmartLink 4050 Series Quick Start Guide
9
SNTP Cycle:
01
Do Not Disturb:
ENABLE/DISABLE
CF Unconditional:
ENABLE/DISABLE
CF User Busy:
ENABLE/DISABLE
CF No Answer:
ENABLE/DISABLE
Anonymous Call:
ENABLE/DISABLE
Anony Call Rej:
ENABLE/DISABLE
Ringing Type:
Ringing 1~4/5~8/9
Ringing 1~9
1~4: Tone
5~8: Melody
9: MP3
WAN MAC Address:
00D0E9123456
M2 ~ M12
Type: Line/Park
One Touch Dial/
Extension
M2 Setting:
Line
SL4050/B12
Model Only
LAN MAC Address:
00D0E9123457
Version:
V: 01.31
Press the MENU key
UPDATE CHANGES?
<OK> OR <CANCEL>
Figure 4. Menu summary, page 2 of 2
10
SmartLink 4050 Series Quick Start Guide
4.0 Logging in to the web interface
The configuration menu can be accessed using a web browser.
1. Open a web browser (Internet Explorer, Netscape Navigator, or equivalent).
2. Type in the IP address of the phone followed by: 9999 (for example http://192.168.1.1:9999).
Note The IP address is provided by your Internet service provider (ISP). If your ISP supports DHCP, you can
obtain the IP address from your phone.
Press
Mute/Func
+
9
4
to get the IP address. You can also login from the LAN port with http://
WXYZ
GHI
192.168.15.1:9999.
The login window displays (see figure 5).
Figure 5. Login window
3. Enter a User Name and Password. Leave the user name and password blank if you are installing the
phone for the first time.
4. Click OK. The following screen displays after logging in:
Figure 6. Main window
SmartLink 4050 Series Quick Start Guide
11
4.1 Network Settings - DHCP
Click on Dynamic host configuration protocol (DHCP) for IP address information that is obtained automatically
from your ISP. The DNS Server information is obtained from your ISP.
Figure 7. DHCP configuration window
4.2 Network Settings - PPPoE
Select PPPoE if your ISP uses PPPoE. Most DSL users use PPPoE.
Figure 8. PPPoE configuration window
• PPPoE ID: PPPoE ID/username provided by your ISP
• PPPoE Password: Password for the PPPoE ID
• DNS Server 1-2: DNS address provided by your ISP
12
SmartLink 4050 Series Quick Start Guide
4.3 Network Settings - Static IP
Select Static IP if all Wide Area Network IP information is provided to you by your ISP.
Figure 9. Static IP configuration window
• IP Address: IP address assigned to you by your ISP
• Router IP: Router IP address
• Subnet Mask: Subnet mask
• DNS Server 1-2: DNS server address provided by your ISP
Note RESTART the system for new settings to take effect after you modify the IP address.
SmartLink 4050 Series Quick Start Guide
13
4.4 SIP Settings
Click on SIP Settings to display the configuration window (see figure 10). Session initiation protocol (SIP) is
the most popular VoIP standard. It enables two or more people to make phone calls, share multimedia, and
make multimedia conference over the Internet.
Note You should have an administrator set up these settings for you or obtain the information directly from
your SIP service provider.
Figure 10. SIP Settings window
• SIP Phone Port Number: SIP phone listening port
• Registrar Server Domain Name/IP Address: Registrar server domain name or IP address.
• Registrar Server Port Number: Registrar server listening port
• Authentication Expire Time: The time that the SIP registration expires. The phone must send SIP REGIS-
TER to keep the registration at half of the setting time.
• Outbound Proxy Domain Name/IP Address: Outbound proxy domain name or IP address.
• Outbound Proxy Port Number: Outbound proxy listening port
• Send messages via Outbound Proxy: Select Enable to send all SIP requests through Outbound Proxy
14
SmartLink 4050 Series Quick Start Guide
4.5 SIP Account Settings
Click on SIP Account Settings to display the configuration window (see figure 11). You can have up to four
accounts—that is, the SIP phone can receive calls from up to four different phone numbers.
Figure 11. SIP Account Settings window
• Default Account: When you dial a number, the default account is used to dial. User Name of default account
is displayed on the receiver's IP phone.
• Account Active: Enable or disable this account.
• Display Name: Name displayed on the LCD of called party.
• SIP User Name: The number in the URI displayed on the LCD for the caller.
• Authentication User Name: User name to log into the SIP server.
• Authentication Password: Password to log into the SIP server.
• Ringer Type: Eight types of tone and melody can be selected for the specified account
• Register Status: Displays if the current phone is registered or unregistered with SIP server.
SmartLink 4050 Series Quick Start Guide
15
5.0 Making a phone call
5.1 Dialing an IP address
1. Lift the handset
or press the SPEAKER
SPEAKER
button.
2. Dial an IP address. For example, to dial 192.168.0.1 press:
9
1
3. Press
WXYZ
OK
2
ABC
*.
1
6
MNO
8
TUV
*.
0
@
*.
1
or wait until the timer expires to dial.
5.2 Dialing a SIP number
Note You must register with a SIP server before using a SIP number.
1. Lift the handset
or press the SPEAKER
SPEAKER
button.
2. Dial a SIP number. For example, to dial 1866 press
1
3. Press
16
8
TUV
OK
6
MNO
6
MNO
or wait until the timer expires to dial.
SmartLink 4050 Series Quick Start Guide
6.0 Operating the Internet Radio
1. Press
2. Press
to turn on the Internet radio.
Phone Book
3. Press
and
to choose a preferred station.
to turn off the Internet radio.
Cancel
6.1 Key Definitions for Internet Radio
Key
Definition
Key
Turn on the Internet Radio
OK
Cancel
Numeral
Keys
Definition
Increase / decrease the volume
Pause / Play
Menu
Turn off the Internet Radio
Phone Book
Display the name of the current station
Tune the Internet Radio to the preferred
station
The ten numeral keys 0, 1~9 are the quick access keys to the first ten preferred stations on web configuration “Music Station”.
6.2 About Internet Radio
• All the keys related to the Internet Radio are described in the table above. Those key functions will only be
available when the phone is hung up. If the phone is hung on, those key functions will back to the original
designed which has stated in Page.7.
• When the phone is receiving the incoming call, the Internet Radio function will be turned off automatically.
• When the user picks up the handset or presses “SPEAKER” to make a phone call, the Internet Radio will be
also turned off automatically.
• Please turn off the Internet Radio before you do the next steps as below:
• Use pre-dialing to make a phone call
• Enter MENU to configure
• Access Phone Book
• Adjust the Ringer Volume
• When the user is listening to the Internet Radio, the phone will have the current song and singer's name
showing on the screen.
SmartLink 4050 Series Quick Start Guide
17
7.0 Additional Information
The complete SmartLink 4050 Getting Started Guide is located on the CD-ROM that came with your SIP phone. It
can also be downloaded for viewing from www.patton.com.
A.0 Compliance Information
A.1 Compliance
EMC:
• FCC Part 15, Class B
• EN55022, Class B
• EN55024
Safety:
• EN60950-1
PSTN Regulatory Compliance:
• FCC Part 68
• CS-03
• AS/ACIF S004
• AS/ACIF S040
A.2 Radio and TV Interference (FCC Part 15)
This equipment generates and uses radio frequency energy, and if not installed and used properly-that is, in
strict accordance with the manufacturer's instructions-may cause interference to radio and television reception.
This equipment has been tested and found to comply with the limits for a Class A computing device in accordance
with the specifications in Subpart B of Part 15 of FCC rules, which are designed to provide reasonable protection
from such interference in a commercial installation. However, there is no guarantee that interference will not
occur in a particular installation. If the equipment causes interference to radio or television reception, which can
be determined by disconnecting the cables, try to correct the interference by one or more of the following measures: moving the computing equipment away from the receiver, re-orienting the receiving antenna, and/or
plugging the receiving equipment into a different AC outlet (such that the computing equipment and receiver are
on different branches).
A.3 CE Declaration of Conformity
We certify that the apparatus identified in this document conforms to the requirements of Council Directive
1999/5/EC on the approximation of the laws of the member states relating to Radio and Telecommunication
Terminal Equipment and the mutual recognition of their conformity.
18
SmartLink 4050 Series Quick Start Guide
The safety advice in the documentation accompanying this product shall be obeyed. The conformity to the above
directive is indicated by the CE sign on the device.
A.4 Authorized European Representative
D R M Green, European Compliance Services Limited.
Oakdene House, Oak Road , Watchfield, Swindon, Wilts SN6 8TD, UK
A.5 FCC Part 68 (ACTA) Statement
This equipment complies with Part 68 of FCC rules and the requirements adopted by ACTA. On the bottom side of
this equipment is a label that contains-among other information-a product identifier in the format US:
AAAEQ##TXXXX. If requested, this number must be provided to the telephone company.
The method used to connect this equipment to the premises wiring and telephone network must comply with the
applicable FCC Part 68 rules and requirements adopted by the ACTA.
If this equipment causes harm to the telephone network, the telephone company will notify you in advance that
temporary discontinuance of service may be required. But if advance notice isn't practical, the telephone company will notify the customer as soon as possible. Also, you will be advised of your right to file a complaint with
the FCC if you believe it is necessary.
The telephone company may make changes in its facilities, equipment, operations or procedures that could
affect the operation of the equipment. If this happens the telephone company will provide advance notice in
order for you to make necessary modifications to maintain uninterrupted service.
If trouble is experienced with this equipment, for repair or warranty information, please contact our company. If
the equipment is causing harm to the telephone network, the telephone company may request that you disconnect the equipment until the problem is resolved.
Connection to party line service is subject to state tariffs. Contact the state public utility commission, public service commission or corporation commission for information.
A.6 Industry Canada Notice
This equipment meets the applicable Industry Canada Terminal Equipment Technical Specifications. This is confirmed by the registration number. The abbreviation, IC, before the registration number signifies that registration was performed based on a Declaration of Conformity indicating that Industry Canada technical specifications
were met. It does not imply that Industry Canada approved the equipment.
This Declaration of Conformity means that the equipment meets certain telecommunications network protective,
operational and safety requirements. The Department does not guarantee the equipment will operate to the
user's satisfaction. Before installing this equipment, users should ensure that it is permissible to be connected to
the facilities of the local telecommunications company. The equipment must also be installed using an acceptable
method of connection. In some cases, the company's inside wiring associated with a single line individual service
may be extended by means of a certified connector assembly (telephone extension cord). The customer should
be aware that compliance with the above condition may not prevent degradation of service in some situations.
Repairs to some certified equipment should be made by an authorized maintenance facility designated by the
supplier. Any repairs or alterations made by the user to this equipment, or equipment malfunctions, may give
the telecommunications company cause to request the user to disconnect the equipment. Users should ensure for
their own protection that the ground connections of the power utility, telephone lines and internal metallic water
pipe system, are connected together. This protection may be particularly important in rural areas.
SmartLink 4050 Series Quick Start Guide
19
Copyright statement
Copyright © 2008, Patton Electronics Company. All rights reserved.
The information in this document is subject to change without notice. Patton Electronics assumes no
liability for errors that may appear in this document.
Trademarks statement
The term SmartLink is a trademark of Patton Electronics Company. All other trademarks presented in this document are the property of their respective owners.
Patton support headquarters in the USA
• Online support: Available at www.patton.com
• E-mail support: E-mail sent to [email protected] will be answered within 1 business day
• Telephone support: Standard telephone support is available five days a week—from 8:00 am to
5:00 pm EST (1300 to 2200 UTC/GMT)—by calling +1 (301) 975-1007
• Support via VoIP: Contact Patton free of charge by using a VoIP ISP phone to call sip:[email protected]
• Fax: +1 (253) 663-5693
Alternate Patton support for Europe, Middle East, and Africa (EMEA)
• Telephone support: Standard telephone support is available five days a week—from 8:00 am to
5:00 pm CET (0900 to 1800 UTC/GMT)—by calling +41 (0)31 985 25 55
• Fax: +41 (0)31 985 25 26
Note For additional service and support information, refer to the “Contacting Patton for assistance” chapter
of the SmartLink 4050 Series Getting Started Guide located on the CD-ROM that came with your SIP
phone or available online at www.patton.com.
For additional warranty, trademark, compliance, and technical support information, refer to the SmartLink 4050
Series Getting Started Guide located on the CD-ROM that came with your SIP phone or available online
at www.patton.com.
20
SmartLink 4050 Series Quick Start Guide