1
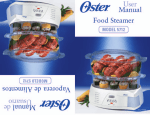
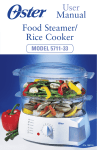
User Manual
Manual de Instrucciones
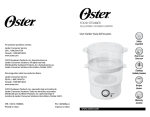
Food Steamer
Vaporera de Alimentos
MODELS/MODELOS
5709, 5711, 5713
Visit us at www.oster.com
P.N. 111858 (Rev.A)
IMPORTANT SAFEGUARDS
When using electrical appliances, basic safety precautions should always be followed,
including the following:
• READ ALL INSTRUCTIONS.
• Do not touch hot surfaces. Use potholders when removing cover or handling
hot containers to avoid steam burns.
• To protect against electrical shock, do not immerse cord, plug or base unit in
water or other liquids.
• Close supervision is necessary when any appliance is used by or near children.
• Unplug from outlet when not in use. Unplug before putting on or taking off
parts, and allow to cool before cleaning.
• Do not operate any appliance with a damaged cord or plug, or after the
appliance malfunctions or has been damaged in any manner. Return appliance
®
to an authorized Oster Service Center for examination, repair or adjustment.
• Do not use outdoors.
• Do not let cord hang over edge of table or counter, or touch hot surfaces.
• Do not operate appliance while empty or without water in the reservoir.
• Do not place on or near a hot gas or electric burner, or in a heated oven.
• Extreme caution must be used when moving an appliance containing hot food
or water or other hot liquids.
• Do not use appliance for other than intended use.
• Lift and open cover carefully to avoid scalding and allow water to drip into steamer.
• The use of accessory attachments not recommended by this appliance
manufacturer may cause hazards.
SPECIAL INSTRUCTIONS
• This appliance is intended for household use only.
• Make sure the voltage in your outlet is the same as the voltage indicated on the
appliance’s rating label.
• The length of the cord used on this appliance was selected to reduce the hazards
of becoming tangled in, or tripping over a long cord.
• For safety it is not recommended to use an electrical extension cord with
this appliance.
• Do not immerse base unit in water or other liquids.
• Use with wall receptacle only.
FOR 120-V AND 127-V MARKETS ONLY
To reduce the risk of electrical shock, this appliance has a polarized plug (one
blade is wider than the other). This plug fits a polarized outlet only one way.
This is a safety feature intended to help reduce the risk of electrical shock. If
the plug does not fit fully into the outlet, reverse the plug. If it still does not fit,
contact a qualified electrician. Do not attempt to defeat this safety feature.
THIS UNIT IS FOR HOUSEHOLD USE ONLY
SAVE THESE INSTRUCTIONS
WELCOME
Congratulations on your purchase of an OSTER® Food Steamer!
To learn more about OSTER® products, please visit us at www.oster.com.
FOOD STEAMER FEATURES
1. Lid
1
2. Rice Bowl
2
3. Upper Steaming Bowl
4. Lower Steaming Bowl
Can Be Used As Egg Tray
(Not available on Model 5709)
3
5. Drip Tray
6. Removable Heating
Element Sleeve
4
7. Heating Element
5
8. Base Unit
9. Water Inlet
6
10. Timer
8
7
11. Light
10
9
BEFORE
THE
FIRST USE
• Remove any labels or stickers from appliance.
• Thoroughly wash lid, rice bowl, upper steaming bowl, lower steaming bowl,
drip tray and heating element sleeve in warm, soapy water before first use,
then rinse and dry carefully. The heating element sleeve must be installed
around the heating element for proper operation.
• Wipe the inside of the water reservoir with a damp cloth.
INSTANT STEAM FUNCTION
Included is a removable heating element sleeve.
Before cooking, when this sleeve is placed
around the heating element, the steam function
will automatically produce steam in 35
seconds. Do not operate the steamer
without the heating element sleeve.
PLEASE NOTE : The heating element sleeve
may be removed to allow cleaning of the
heating element. On the heating element sleeve,
there is a small indentation (cut) which
should face downward when replaced on the
heating element.
REMOVABLE HEATING
ELEMENT SLEEVE
STEP 1A
USING YOUR STEAMER
Place unit on a flat, sturdy surface with
adequate clearance (i.e., do not place under
wall cabinets). The steamer unit and
components are not for use in ovens
(microwave, convection or conventional)
or on stovetop.
FILLING WATER RESERVOIR
STEP 1B
(Step 1A) Fill water reservoir with clean water
only. Do not put any other liquids or add
any salt, pepper, etc., in the water reservoir.
Make sure the water does not exceed the HI fill
level or go lower than the LO fill level as
indicated inside the water reservoir. Then place
the drip tray on the base. (Step 1B)
DRIP TRAY
Or you can fill the water reservoir from the
water inlet. There are MAX and MIN lines on
the water box to indicate the water level. Even
while food is still cooking, if the water box
shows that the water level is low, you can add
water accordingly to the water inlet without
moving any of the steaming bowls. (Step 2)
NOTE: WATER SHOULD
NEVER GO LOWER THAN
LO (MIN) LINE.
STEP 2
WATER INLET
TO USE UPPER OR LOWER STEAMING BOWL
(Step 3) Place vegetable, seafood or other
foods without sauce or liquid into the steaming
bowl. Arrange food in center of bowl.
Try not to block steam vents. You can
use lower steaming bowl as an egg tray
by directly placing a total of 8 eggs on it.
(Egg holding steaming tray not available
on Model 5709).
FOR DOUBLE TIER OR
THREE TIER STEAMER
STEP 3
UPPER OR LOWER STEAMING BOWLS
Place the largest piece of food with longest
cooking time in the lower steaming bowl. Place
lower bowl on top of drip tray and base. Place
the upper steaming bowl on top of the base
unit, or you can place upper steaming bowl
directly on top of the lower steaming bowl.
(Upper steaming tray not available on Model 5709).
Cooking times are estimates and depend on the
quantity, size, required degree of cooking and
temperature of food. Consider all the cooking
time given in the following guide as suggested
times for double tier steamer.
When handling and removing hot components,
use POTHOLDERS to avoid burns from
hot steam.
MULTI-TIERED STEAMING
USING
THE
RICE BOWL
Place rice or other foods with sauce or liquid in
rice bowl. Place rice bowl in the lower steaming
bowl and cover with the lid. Plug into wall outlet
and set timer. When food is well cooked, unplug
unit.
TIMER SETTING (Maximum 75 Minutes)
Set the timer to the recommended cooking time
(steaming times can be adjusted as per your
experiment). The light turns on and steam
comes in 35 seconds. The light will turn off
when cooking is completed and the timer will
give a signal bell.
CARE
AND
RICE BOWL
CLEANING
• Unplug cord from outlet. Before cleaning, allow Steamer to cool.
• Never immerse the Base, Cord or Plug in water.
• Empty the drip tray and the water reservoir. If there is a small amount of water
remaining inside the water box, you can just turn the unit upside down and
water will come out from the water inlet.
• Wash lid, steaming bowl, rice bowl and drip tray in hot, soapy water.
Rinse and dry all parts, or wash on top rack of dishwasher.
• Clean reservoir with soapy water then wipe with damp cloth.
• Do not use abrasive cleaners
• The lower steaming bowl and the rice bowl can be stored inside the upper
steaming bowl with the lid on top.
• In hard water areas, the scale may build up on the heating element. If scale
is allowed to accumulate, the steam could turn off before the food is cooked.
So, after 7-10 uses, pour 3 cups clear vinegar into the water reservoir then
fill with water up to the HI level. Do not place lid, steaming bowl, rice bowl
and drip tray in this procedure.
• Plug in and set timer to 20 minutes. When the timer rings, unplug cord from
outlet. Allow the unit to cool completely before emptying the water reservoir.
Use cold water to rinse the water reservoir several times.
REHEATING: BREADS
AND
LEFTOVERS
1. Do not wrap or cover when reheating breads.
2. For leftovers, reheating times are based on foods at refrigerator temperatures.
3. When reheating leftovers in the rice bowl, always spread leftovers evenly in
RICE BOWL and use aluminum foil to cover.
4. Experiment with your own leftovers.
Grains
ny types of rice. Follow specific directions for variety used.
easure rice and water then combine in rice bowl. Pour specified
ater in water reservoir. Cover and steam.
e, increase by 1 – 2 tablespoons the water mixed with rice by the
unt of water on the chart. For firmer rice decrease water mixed
he same amount.
ess and consistency of rice at minimum time specified for each
rice at the same time.
ng/stirring rice, be careful not to drip the condensate into the rice
would reduce the quality and flavor of the steamed rice.
n water in water reservoir.
seasoned with salt, pepper or butter after steaming.
RICE
C OMBINED I N R ICE B OWL
R ICE A MOUNT
WATER
A PPROX . T IME
(Minutes)
1/2 cup
1 cup
42 – 45
1 cup
1-1/2 cups
45 – 50
pkg.)
Mix
1-1/2 cups
50 – 55
g (6-1/2 oz. pkg.)
Mix
1-3/4 cups
18 – 20
1 cup
1-1/2 cups
15 – 18
1 cup
1-1/2 cups
45 – 50
1 cup
1-2/3 cups
50 – 55
Wild Rice Mix
Vegetables
1. Clean the vegetables thoroughly. Cut off stems; trim, peel or chop if necessary.
Smaller pieces steam faster than larger ones.
2. Quantity, quality, freshness, size/uniformity and temperature of frozen food
may affect steam timing. Adjust water amounts and cooking time as desired.
3. Frozen vegetables should not be thawed before steaming.
4. Some frozen vegetables should be placed in the rice bowl and covered with a
piece of aluminum foil during steaming. The frozen foods should be separated
or stirred after 10-12 minutes. Use a long-handled fork or spoon to separate
or stir foods.
WEIGHT OR
APPROX. TIME
VARIETY
NUMBER OF PIECES
(MINUTES)
Artichokes, Whole
4 whole, tops trimmed
30 – 32
Asparagus, Spears
1 pound
10 – 14
Beans,
Green/Wax
1/2 pound
10 – 14
Cut or Whole
1 pound
12 – 16
Beets
1 pound, cut
25 – 28
Broccoli, Spears
1 pound
10 – 14
Brussels Sprouts
1 pound
15 – 18
Cabbage
1 pound, sliced
16 – 18
Celery
1/2 pound, thinly sliced
14 – 16
Carrots
1 pound, thinly sliced
10 – 14
Cauliflower, Whole
1 pound
10 – 14
Corn on the Cob
3 – 5 ears
25 – 30
Eggplant
1 pound
16 – 18
Mushrooms, Whole
1 pound
25 – 30
Okra
1 pound
18 – 20
Onions
1/2 pound, thinly sliced
12 – 14
Parsnips
1/2 pound
10 – 14
Peas
1 pound shelled
12 – 13
Peppers, Whole
Up to 4 medium (not stuffed) 12 – 13
Potatoes, Whole – Red
1 pound, about 6 small
35 – 45
Rutabaga
1 medium, diced
28 – 30
Spinach
1/2 pound
14 – 16
Squash
Summer Yellow and Zucchini 1 pound, sliced
12 – 14
Winter Acorn and Butternut
1 pound
22 – 24
Turnips
1 pound, sliced
20 – 22
All Frozen Vegetables
10 ounces
28 – 50
Fish and Seafood
1. The steaming times listed in the chart are for fresh, frozen or fully thawed
seafood and fish. Before steaming, clean and prepare fresh seafood and fish.
2. Most fish and seafood cook very quickly. Steam in small portions
or in amounts as specified.
3. Clams, oysters and mussels may open at different times. Check the shells to
avoid overcooking.
4. You may steam fish fillets in the RICE BOWL. Serve steamed seafood and fish
plain or use seasoned butter or margarine, lemon or favorite sauces.
5. Adjust steaming times accordingly.
VARIETY
WEIGHT OR
NUMBER OF PIECES
APPROX. TIME
(MINUTES)
Clams in Shell
Littlenecks/Cherrystones
1 pound
12 – 14
King Crab, legs/claws
1/2 pound
20 – 22
Soft Shell
8 – 12 pieces
10 – 12
Tails
2–4
16 – 18
Split
1 to 1-1/4 pounds
18 – 20
Whole, Live
1 to 1-1/4 pounds
18 – 20
1 pound
14 – 16
3 pounds
18 – 20
Bay (shucked)
1 pound
14 – 16
Sea (shucked)
1 pound
18 – 20
Medium in shell
1 pound
12 – 14
Large/Jumbo in shell
1 pound
16 – 18
Whole
1/2 to 3/4 pound
18 – 25
Dressed
1/2 to 3/4 pound
18 – 25
Fillets
1 pound
18 – 25
Steaks
1 pound, 1-inch thick
20 – 25
Crab
Lobster
Mussels
(fresh in shell)
Oysters
(fresh in shell)
Scallops(fresh)
Shrimp
Fish
One-Year Limited Warranty
Sunbeam Products Inc., d/b/a Jarden Consumer Solutions, or if in Canada, Sunbeam Corporation
(Canada) Limited d/b/a Jarden Consumer Solutions, (collectively “Sunbeam”) warrants that for a
period of one year from the date of purchase, this product will be free from defects in material and
workmanship. Sunbeam, at its option, will repair or replace this product or any component of the
product found to be defective during the warranty period. Replacement will be made with a new or
remanufactured product or component. If the product is no longer available, replacement may be
made with a similar product of equal or greater value. This is your exclusive warranty.
This warranty is valid for the original retail purchaser from the date of initial retail purchase and
is not transferable. Keep the original sales receipt. Proof of purchase is required to obtain warranty
performance. Sunbeam dealers, service centers, or retail stores selling Sunbeam products do not have
the right to alter, modify or any way change the terms and conditions of this warranty.
This warranty does not cover normal wear of parts or damage resulting from any of the following:
negligent use or misuse of the product, use on improper voltage or current, use contrary to the
operating instructions, disassembly, repair or alteration by anyone other than Sunbeam or an authorized
Sunbeam service center. Further, the warranty does not cover: Acts of God, such as fire, flood,
hurricanes and tornadoes.
What Are the Limits on Sunbeam’s Liability?
Sunbeam shall not be liable for any incidental or consequential damages caused by the breach of any
express, implied or statutory warranty or condition.
Except to the extent prohibited by applicable law, any implied warranty or condition of merchantability
or fitness for a particular purpose is limited in duration to the duration of the above warranty.
Sunbeam disclaims all other warranties, conditions or representations, express, implied, statutory or otherwise.
Sunbeam shall not be liable for any damages of any kind resulting from the purchase, use or misuse of, or
inability to use the product including incidental, special, consequential or similar damages or loss of profits,
or for any breach of contract, fundamental or otherwise, or for any claim brought against purchaser by any
other party.
Some provinces, states or jurisdictions do not allow the exclusion or limitation of incidental
or consequential damages or limitations on how long an implied warranty lasts, so the above
limitations or exclusion may not apply to you.
This warranty gives you specific legal rights, and you may also have other rights that vary from
province to province, state to state or jurisdiction to jurisdiction.
How to Obtain Warranty Service
In the U.S.A. –
If you have any question regarding this warranty or would like to obtain warranty service,
please call 1.800.334.0759 and a convenient service center address will be provided to you.
In Canada –
If you have any question regarding this warranty or would like to obtain warranty service,
please call 1.800.667.8623 and a convenient service center address will be provided to you.
In the U.S.A., this warranty is offered by Sunbeam Products, Inc., located in Boca Raton,
Florida 33431. In Canada, this warranty is offered by Sunbeam Corporation (Canada) Limited,
located at 5975 Falbourne Street, Mississauga, Ontario L5R 3V8.
PLEASE DO NOT RETURN THIS PRODUCT TO ANY OF
THESE ADDRESSES OR TO THE PLACE OF PURCHASE.
PRECAUCIONES IMPORTANTES
Cuando use algún aparato eléctrico siempre deben seguirse precauciones
básicas de seguridad incluyendo las siguientes:
• LEA TODAS LAS INSTRUCCIONES.
• No toque las superficies calientes. Cuando quite la tapa o maneje contenedores
calientes, use protectores resistentes al calor para evitar quemaduras ocasionadas
por el vapor.
• Para protegerse contra una descarga eléctrica, no sumerja el cordón, el enchufe o
la base de la unidad en agua o en otros líquidos.
• Es necesaria la supervisión cercana de un adulto cuando el aparato es usado por
o cerca de niños.
• Desconecte de la toma de corriente cuando no esté en uso. Desconecte antes de
colocar o quitar partes y permita que se enfríe antes de limpiar el electrodoméstico.
• No opere ningún aparato con un cordón o con un enchufe dañado o después de
que el aparato ha funcionado inadecuadamente o ha sido dañado en cualquier
manera. Regrese el aparato a un Centro de Servicio OSTER® autorizado
para su revisión, reparación o ajuste.
• No debe usarse en exteriores.
• No permita que el cordón cuelgue de la orilla de la mesa o del mostrador o toque
superficies calientes.
• No opere el aparato mientras esté vacío o sin agua en el tanque.
• No coloque este aparato sobre o cerca de quemadores calientes eléctricos
o de estufas de gas o dentro de un horno caliente.
• Tenga extremo cuidado cuando mueva un aparato que contenga agua o alimentos
calientes o cualquier otro líquido que esté caliente.
• No use este aparato más que para el fin para lo que ha sido diseñado.
• Levante y abra la tapa cuidadosamente y permita que el agua escurra dentro de la
vaporera para evitar quemaduras.
• El uso de accesorios o aditamentos que no sean los recomendados por
el fabricante de este aparato pueden causar lesiones o daños.
INSTRUCCIONES ESPECIALES
• Este aparato es para uso doméstico únicamente.
• Asegúrese de que el voltaje del toma de corriente sea el mismo que el voltaje indicado en la
placa del aparato
• La longitud del cable de alimentación de este aparato se estipuló para reducir el riesgo de
que alguien pueda enredarse o tropezar.
• Por seguridad, no se recomienda el uso de extensiones eléctricas con este electrodoméstico.
• No sumerja la base de la unidad en agua o en ningún otro líquido.
• Conecte en un toma de corriente de pared únicamente
PARA MERCADOS DE 120-V Y 127-V ÚNICAMENTE
Para reducir el riesgo de descargas eléctricas, este aparato cuenta con un enchufe polarizado
(una clavija es más ancha que la otra). Este enchufe entra en un toma de corriente de una
sola manera. Esta es una medida de seguridad, para reducir el riesgo de choque eléctrico. Si
el enchufe no encaja en el toma de corriente simplemente colóquelo al revés. Si aún así no
encaja llame a un electricista calificado. De ninguna manera intente modificar esta medida
de seguridad.
ESTE APARATO ES SÓLO
PARA
USO DOMÉSTICO
GUARDE ESTAS INSTRUCCIONES
BIENVENIDOS
¡Felicitaciones en su compra de un Vaporera de Alimentos OSTER.® Para aprender
más sobre productos OSTER ®, por favor visítenos en www.oster.com!
DESCRIPCIÓN
DE LAS
1
PARTES
1. Tapa
2. Tazón para Cocinar Arroz
2
3. Tazón Superior para
Cocinar al Vapor
4. Tazón Inferior para
Cocinar al Vapor, Puede
Usarse como una Bandeja
para Cocinar Huevos
3
(No está Desponible en
el Modelo 5709)
5. Bandeja de Goteo
4
6. Cubierta del Elemento
Calefactor
5
7. Elemento Calefactor
6
8. Base de la Unidad
9. Entrada de Agua
7
8
10
11
9
10. Reloj
11. Luz
ANTES
DEL
PRIMER USO
• Quite cualquier etiqueta del aparato.
• Antes del primer uso, lave muy bien con agua tibia y jabonosa la tapa,
el tazón para cocinar arroz, el tazón superior para cocinar al vapor, el tazón
inferior para cocinar al vapor, la bandeja de goteo y la cubierta removible
del elemento calefactor. Después enjuague y seque cuidadosamente.
La cubierta del elemento calefactor debe ser instalada alrededor
del elemento calefactor para que funcione en forma correcta.
• Limpie con un paño húmedo el interior del tanque para agua.
FUNCIÓN DE VAPOR INSTANTÁNEO
Se incluye la cubierta removible del elemento
calefactor. Antes de comenzar a cocinar, coloque
la cubierta sobre el elemento calefactor
y la función de vaporización producirá
vapor automáticamente en sólo 35 segundos.
No opere la vaporera sin la cubierta del elemento
calefactor.
NOTE LO SIGUIENTE: Se puede quitar la cubierta
del elemento calefactor para permitir la limpieza del
elemento calefactor. Hay una pequeña marca
(corte) en la cubierta del elemento calefactor, ésta
debe estar colocada hacia abajo cuando coloque
la cubierta sobre el elemento calefactor.
CUBIERTA REMOVIBLE DEL
ELEMENTO CALEFACTOR
MEDIDA 1A
CÓMO USAR SU VAPORERA
Coloque la unidad sobre una superficie plana y
resistente, que cuente con el espacio libre
suficiente (por ejemplo, no la coloque debajo de
los gabinetes de la cocina). No debe usar la
vaporera ni sus componentes dentro de hornos
(microondas o convencionales) tampoco sobre la
estufa.
LLENE EL TANQUE
MEDIDA 1B
(Medida 1A) Llene el tanque con agua limpia
solamente. No coloque ningún otro líquido en el
tanque para agua ni añada sal, pimienta, etc.
Asegúrese de que el agua no exceda el nivel
máximo de llenado HI, o que se encuentre más
abajo del nivel inferior LO, tal como se indica en
el interior del tanque para agua. Después coloque
la bandeja para goteo en la base del aparato.
(Medida 1B)
Usted también puede llenar el tanque para agua
BANDEJA
DE
GOTEO
desde la entrada externa. En la caja para agua
hay líneas indicadas con el nivel máximo MAX y
mínimo MIN. Aun cuando los alimentos están
cocinándose, si usted considera que el nivel de
agua está bajo, puede revisarlo claramente desde
la caja de agua y añadir el agua desde la entrada
externa sin mover ningún tazón para cocinar al
vapor. (Medida 2)
NOTA: NO DEJE QUE EL NIVEL DEL
AGUA BAJE MÁS ALLÁ DEL NIVEL
(MÍNIMO) “LO”.
MEDIDA 2
NIVEL
PARA USAR LOS TAZONES SUPERIOR
O INFERIOR Y COCINAR AL VAPOR
(Medida 3) Coloque las verduras, los
mariscos u otros alimentos sin salsas o
líquidos dentro del tazón para cocinar al
vapor. Acomode los alimentos en el centro
del tazón. Trate de no bloquear las ventilas
para salida de vapor. Usted puede utilizar el
tazón inferior para cocinar al vapor como
una bandeja para cocinar huevos, colocando
en ella directamente un total de hasta 8
huevos. (La bandeja para cocinar huevos al
vapor no está disponible en el Modelo 5709)
PARA VAPORERAS
DE
DOS
O
DE
AGUA
MEDIDA 3
TAZONES SUPERIOR O INFERIOR
PARA COCINAR AL VAPOR
TRES NIVELES
Coloque en el tazón inferior la pieza más grande de alimento que requiera el
mayor tiempo de cocción a vapor. Coloque el tazón superior para cocinar al
vapor sobre la base de la unidad, o bien; usted puede colocar el tazón superior
para cocinar al vapor, directamente sobre el tazón inferior para cocinar al vapor.
(La bandeja superior para cocinar al vapor no está disponible en el Modelo 5709).
Los tiempos de cocción son estimados y
dependen de la cantidad, tamaño, grado
requerido de cocción y temperatura de los
alimentos. Considere todos los tiempos de
cocción que se ofrecen en la siguiente guía,
como tiempos sugeridos para vaporeras
de dos niveles.
Cuando maneje y saque los componentes,
utilice PROTECTORES RESISTENTES
AL CALOR para evitar quemaduras
ocasionadas por vapor caliente.
VAPORERAS DE DOS O TRES NIVELES
CÓMO USAR
EL TAZÓN PARA C OCINAR A RROZ
Coloque el arroz u otros alimentos con salsa
o líquidos en el tazón para cocinar arroz.
Coloque el tazón para cocinar arroz dentro
del tazón inferior para cocinar al vapor
y cubra con la tapa. Enchufe en la toma
de corriente y ajuste el tiempo del reloj.
Cuando los alimentos estén bien cocidos,
desconecte la unidad.
CÓMO AJUSTAR EL TIEMP EN EL RELOJ
TAZÓN PARA COCINAR ARROZ
(Máximo de 75 Minutos)
Ajuste el tiempo en el reloj de acuerdo a los tiempos de cocción recomendados
(los tiempos para cocinar al vapor pueden ajustarse de acuerdo a lo que vaya
experimentando una vez que ya ha usado su vaporera varias veces). La luz se
enciende y sale vapor en 35 segundos. La luz se apagará cuando la cocción haya
terminado y el reloj emitirá una señal sonora.
CUIDADO
Y
LIMPIEZA
• Desconecte el cable de la toma de corriente. Antes de limpiar, permita que
la vaporera se enfríe.
• Nunca sumerja la base, el cable o el enchufe en agua.
• Vacíe la bandeja de goteo y el tanque para agua. Si hay una pequeña cantidad
de agua sobrante en el interior de la caja para agua, usted puede voltear
la unidad hacia abajo y el agua saldrá del aparato.
• Lave con agua caliente y jabonosa la tapa, el tazón para cocinar al vapor,
el tazón para cocinar arroz, y la bandeja de goteo. Enjuague y seque todas
las partes, o lávelas en la canasta superior de la lavadora de platos.
• Lave el tanque para agua con agua jabonosa y después limpie con un paño seco.
• No use limpiadores abrasivos.
• El tazón inferior para cocinar al vapor y el tazón para cocinar arroz pueden
almacenarse en el interior del tazón superior con la tapa encima.
• En lugares donde el agua sea dura, pueden acumularse residuos minerales en
el elemento calefactor. Si estos residuos se acumulan, el vapor podría apagarse
antes de que los alimentos estén cocidos. Así que después de 7 a 10 usos, vierta
3 tazas de vinagre blanco dentro del tanque para agua y llene con agua hasta el
nivel máximo HI. Durante este proceso, no coloque la tapa, el tazón para
cocinar al vapor, el tazón para cocinar arroz, ni la bandeja para goteo.
• Enchufe y ajuste 20 minutos en el reloj. Cuando suene la alarma, desconecte
el enchufe del cable de la toma de corriente. Permite que la unidad se enfríe
completamente antes de vaciar el agua del tanque. Use agua fría para enjuagar
varias veces el tanque.
RECALENTANDO: PANES Y SOBRANTES DE COMIDA
1. Cuando caliente panes, no los envuelva o tape.
2. Para recalentar los sobrantes de comida, los tiempos están basados
en alimentos que están a temperaturas del refrigerador.
3. Cuando recaliente sobrantes usando el tazón para cocinar arroz,
siempre acomode los sobrantes de manera uniforme en el TAZÓN
PARA COCINAR ARROZ y utilice papel aluminio para taparlos.
4. Experimente con sus propios sobrantes.
Arroz y Granos
1. Hay muchos tipos de arroz. Siga las direcciones específicas para el tipo
de arroz que va a usar.
2. Mida exactamente el arroz y el agua y combínelos en el tazón para arroz.
Vierta la cantidad específica de agua en el tanque. Tape y comience a cocinar
al vapor.
3. Para un arroz mas suave, aumente de 1 a 2 cucharadas de agua mezclándolas
con el arroz, de acuerdo a la cantidad de agua especificada en el cuadro. Para
un arroz mas firme, disminuya la misma cantidad de agua mezclada con el
arroz.
4. Una vez que haya transcurrido el mínimo de tiempo especificado para
cada tipo de arroz, revise la consistencia para ver si ya está listo,
al mismo tiempo que lo revuelve.
5. Cuando revise y revuelva el arroz, tenga cuidado de no escurrir el vapor
condensado dentro del tazón para arroz, esto podría reducir la calidad
y el sabor del arroz cocido al vapor.
6. Solamente use agua limpia en el tanque para agua.
7. Una vez cocido, puede sazonar el arroz con sal, pimienta o mantequilla.
C OMBINADO
TIPO DE ARROZ
EN EL
TAZÓN
CANTIDAD DE ARROZ
PARA
DE
A RROZ
AGUA
TIEMPO
APROXIMADO
(MINUTOS)
Dorado
Regular
1/2 taza
1 taza
42 – 45
1 taza
1-1/2 tazas
45 – 50
Regular (paquete de 6 onzas)
Mix
1-1/2 tazas
50 – 55
Cocción Rápida (paquete de 6-1/2 onzas)
Mix
1-3/4 tazas
18 – 20
1 taza
1-1/2 tazas
15 – 18
Regular
1 taza
1-1/2 tazas
45 – 50
Grano Largo
1 taza
1-2/3 tazas
50 – 55
Cocido en Agua
Grano Largo y Mezcla de Arroz Silvestre
Instantáneo
Blanco
Verduras
1. Limpie muy bien las verduras. Corte los tallos, pélelas o píquelas si
es necesario. Las piezas de tamaño más pequeño se cocinan al vapor
más rápidamente.
2. Los tiempos de cocción al vapor pueden verse afectados por la cantidad,
calidad, frescura y tamaño/uniformidad y temperatura de alimentos
congelados. Ajuste a su gusto la cantidad de agua y los tiempos de cocción.
3. Las verduras congeladas no deben ser desheladas antes de cocer al vapor.
4. Algunas verduras congeladas deben colocarse en el tazón para cocinar arroz y
cubrirse con un trozo de papel aluminio durante su cocción. Los alimentos
congelados deben separarse o revolverse a los 10 ó 12 minutos de la cocción.
Utilice un trinche o cuchara de mango largo para separar o revolver los
alimentos.
VARIEDAD
Alcachofas, Enteras
Espárragos, Varas
Frijoles,
Verdes
Cortados o Enteros
Remolacha
Bróculi, Ramitas
Col de Bruselas
Col
Apio
Zanahorias
Coliflor, Entera
Mazorcas de Maíz
Berenjena
Champiñones, Enteros
Quimbombó
Cebollas
Chirivía
Chícharos o Guisantes
Pimientos, Enteros
Papas, Enteros – Rojas
Colinabo o Nabo Sueco
Espinacas
Calabazas
Amarillas y Calabacines
Tipo Winter Acorn y Butternut
Nabos
Todas las Verduras Congeladas
PESO O
TIEMPO APROX.
NÚMERO DE PIEZAS
(MINUTOS)
4 entero, recorte las partes superiores 30 – 32
1 libra
10 – 14
1/2 libra
1 libra
1 libra, cortada
1 libra
1 libra
1 libra, cortada
1/2 libra, cortada muy fino
1 libra, cortada muy fino
1 libra
3–5
1 libra
1 libra
1 libra
1/2 libra, rebanadas delgadas
1/2 libra
1 libra, pelada
4 Médio (no empanada)
1 libra, 6 pequeñas
1 medium, cortada en cubitos
1/2 libra
10
12
25
10
15
16
14
10
10
25
16
25
18
12
10
12
12
35
28
14
–
–
–
–
–
–
–
–
–
–
–
–
–
–
–
–
–
–
–
–
14
16
28
14
18
18
16
14
14
30
18
30
20
14
14
13
13
45
30
16
1 libra, cortada
1 libra
1 libra, rebanados
10 oncas
12
22
20
28
–
–
–
–
14
24
22
50
Pescados y Mariscos
1. Los tiempos de cocción al vapor que se muestran en el cuadro, son para
pescados y mariscos frescos, congelados o completamente descongelados.
Antes de cocinar, limpie y prepare los pescados y mariscos frescos.
2. La mayoría de pescados y mariscos se cocinan en muy poco tiempo. Cocine
al vapor porciones pequeñas o en las cantidades especificadas.
3. Las ostras, almejas y mejillones pueden abrirse a diferentes tiempos. Revise
las conchas para evitar cocinarlos demasiado.
4. Usted puede cocinar filetes de pescado al vapor en el TAZÓN PARA
ARROZ. Sirva los pescados y mariscos al natural o bien sazónelos con
mantequilla, margarina, limón o sus salsas favoritas.
5. Haga los ajustes correspondientes de los tiempos de cocción.
VARIEDAD
Almejas en su concha
Tipo Littlenecks/Cherrystones
Cangrejo
Tipo King Crab, patas/tenazas
Tipo de caparazón suave
Langosta
Colas de langosta
Abierta
Entera, viva
Mejillones
(frescos en su concha)
Ostras
(frescas en su concha)
Escalopes (frescos)
De bahía (sin concha)
De mar (sin concha)
Camarón o gambas
Mediano sin pelar
Grande/Jumbo sin pelar
Pescado
Entero
Aderezado
Filetes
Trozos
PESO O
NÚMERO DE PIEZAS
TIEMPO APROX.
(MINUTOS)
1 libra
12 – 14
1/2 libra
8 – 12 piezas
20 – 22
10 – 12
2–4
1, 1-1/4 libras
1, 1-1/4 libras
16 – 18
18 – 20
18 – 20
1 libra
14 – 16
3 libras
18 – 20
1 libra
1 libra
14 – 16
18 – 20
1 libra
1 libra
12 – 14
16 – 18
1/2 a 3/4 libra
1/2 ta 3/4 libra
1 libra
1 libra en piezas de 2.5 cm
18
18
18
20
–
–
–
–
25
25
25
25
Carne
VARIEDAD
Res
Paletilla o Espaldilla
Hamburguesas
Albóndigas
Pollos
Piezas
Cordero
Trozos
Cerdo
Trozos
Hot Dogs o Salchichas
Salchichón Precocido
PESO O
NÚMERO DE PIEZAS
TIEMPO APROX.
(MINUTOS)
1 libra
1 libra
1 libra
28 – 30
18 – 22
22 – 24
1 libra (2 – 4 piezas)
26 – 30
1 libra
26 – 28
1 libra
1 libra
1 libra
26 – 28
10 – 16
10 – 16
Huevos
VARIEDAD
PESO O
TIEMPO APROX.
NÚMERO DE PIEZAS (MINUTOS)
En el Cascarón
Tibios
1 – 12
12 – 15
Duros
1 – 12
15 – 18
Tibios
1–4
1 – 12
Duros
1–4
12 – 14
“Huevos en Base”
Rompa el cascarón en la base para cocinarlo,
sazone con sal, pimienta y mantequilla
si así lo desea.
Escalfados o Poché
7–8
Paso uno: Vierta 2 tazas de agua en el tazón
para arroz. Comience a vaporizar para calentar el agua.
Paso dos: Rompa el huevo en un tazón pequeño,
deslícelo en el agua caliente del tazón para arroz.
Cocine al vapor hasta que queden escalfados o estilo poché.
Huevos revueltos
En el tazón para arroz, bata 6 huevos
con 2 cucharadas de leche.
Sazone con sal y pimienta.
Revuelva los huevos a la mitad del ciclo de cocción.
7–8
20 – 22
Garantía Limitada de 1 Año
Sunbeam Products, Inc., d/b/a Jarden Comsumer Solutions, o si en Canadá, Sunbeam Corporation
(Canadá) Limited (colectivamente “Sunbeam”) d/b/a Jarden Comsumer Solutions, garantiza que
este producto estará libre de defectos en material o mano de obra por un período de un año a
partir de la fecha de la compra. Sunbeam, a su elección, reparará o reemplazará este producto o
cualquier componente del producto que se encuentre defectuoso durante el período de garantía.
El reemplazo será efectuado por un producto o componente nuevo o remanufacturado.
Si el producto ya no está disponible, el reemplazo podrá efectuarlo por un producto similar de
igual o mayor valor. Esta es su garantía exclusiva.
Esta garantía es válida para el comprador original al detalle desde la fecha de compra original
al detalle y no es transferible. Guarde el recibo de venta original. Se requiere prueba de compra
para obtener la garantía. Los concesionarios Sunbeam, centros de servicio, o almacenes de ventas al
detalle de productos Sunbeam no tienen el derecho de alterar, modificar o cambiar, de manera
alguna, los términos y condiciones de esta garantía.
Esta garantía no cubre el desgaste normal de las piezas o daños resultantes de cualquiera de los
siguientes: uso negligente o mal uso del producto, uso en voltaje o corriente inapropiada, uso contrario
a las instrucciones de operación, desarme, reparación o alteración por cualquier persona que no sea
Sunbeam o de un centro de servicio autorizado Sunbeam. Además, esta garantía no cubre: Actos de la
naturaleza, tales como incendios, inundaciones, huracanes o tornados.
¿Cuáles Son los Límites de Responsabilidad de Sunbeam?
Sunbeam no será responsable por ningún daño incidental o consecuente causados
por el incumplimiento de la garantía o condición expresa, implícita o reglamentaria.
Excepto hasta donde lo prohíben las leyes aplicables, cualquier garantía implícita o condición de
comerciabilidad o aptitud para un propósito particular, está limitada en duración a la duración de
la garantía descrita arriba.
Sunbeam niega cualquier otra garantía, condición o representación, expresa, implícita,
reglamentaria o de otra manera.
Sunbeam no será responsable por ningún tipo de daño que resulte de la compra, uso o mal uso, o
inhabilidad de usar el producto incluyendo daños incidentales, especiales, consecuentes o similares
o pérdida de lucro, o por cualquier incumplimiento de contrato, fundamental o de otra manera, o
por cualquier reclamo contra el comprador iniciado por cualquier otra tercera persona.
Algunas provincias, estados o jurisdicciones no permiten la exclusión o la limitación de daños
incidentales o consecuentes, o limitaciones sobre cuánto dura una garantía implícita, de modo que
las limitaciones o exclusiones mencionadas arriba pueda que no le aplique a usted.
Esta garantía le otorga derechos legales específicos, y pueda que usted tenga otros derechos,
los cuales varían de provincia a provincia, de estado a estado o de jurisdicción a jurisdicción.
Cómo Obtener Servicio de Garantía
En los Estados Unidos –
Si usted tiene alguna pregunta relacionada con esta garantía o quisiera obtener servicio de garantía,
por favor llame al teléfono 1.800.334.0759 y le proporcionaremos la dirección del centro de servicio
más conveniente para usted.
En Canadá –
Si usted tiene alguna pregunta relacionada con esta garantía o quisiera obtener servicio
de garantía, por favor llame al teléfono 1.800.667.8623 y le proporcionaremos la dirección
del centro de servicio más conveniente para usted.
En los Estados Unidos, esta garantía es ofrecida por Sunbeam Products, Inc., situada en Boca Ratón,
Florida 33431. En Canadá, esta garantía es ofrecida por Sunbeam Corporation (Canadá) Limited,
situada en el 5975 Falbourne Street, Mississauga, Ontario L5R 3V8.
POR FAVOR, NO RETORNE ESTE PRODUCTO A NINGUNA
DE ESTAS DIRECCIONES NI AL LUGAR DONDE LO COMPRÓ.
For product questions contact:
Sunbeam Consumer Service
USA : 1.800.334.0759
Canada : 1.800.667.8623
www.oster.com
©2005 Sunbeam Products Inc., d/b/a Jarden Consumer Solutions. All Rights Reserved.
Distributed by Sunbeam Products Inc., d/b/a Jarden Consumer Solutions,
Boca Raton, Florida 33431.
AMB:8222005
Para preguntas sobre los productos llame:
Sunbeam Consumer Service
EE.UU. : 1.800.334.0759
Canadá : 1.800.667.8623
www.oster.com
©2005 Sunbeam Products, Inc., d/b/a Jarden Consumer Solutions.
Todos los derechos reservados.
Distribuido por Sunbeam Products, Inc., d/b/a Jarden Consumer Solutions,
Boca Raton, Florida 33431.
Printed in China
Impreso en China