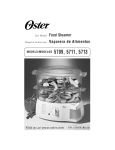
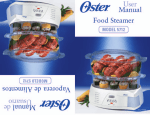
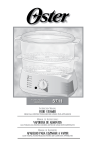
1
Sunbeam Products, Inc., or if in Canada, Sunbeam Corporation (Canada) Limited (collectively “Sunbeam”)
INSTRUCCIONES ESPECIALES
ANTES
BIENVENIDOS
Cuando use algún aparato eléctrico siempre deben seguirse precauciones básicas
de seguridad incluyendo las siguientes:
Este aparato es para uso doméstico únicamente.
•
Asegúrese de que el voltaje del toma de corriente sea el mismo que el voltaje
indicado en la placa del aparato
•
La longitud del cable de alimentación de este aparato se estipuló para reducir
el riesgo de que alguien pueda enredarse o tropezar.
•
Por seguridad, no se recomienda el uso de extensiones eléctricas con este
electrodoméstico.
• LEA TODAS LAS INSTRUCCIONES.
This warranty is valid for the original retail purchaser from the date of initial retail purchase and
is not transferable. Keep the original sales receipt. Proof of purchase is required to obtain warranty
performance. Sunbeam dealers, service centers, or retail stores selling Sunbeam products do not have
the right to alter, modify or any way change the terms and conditions of this warranty.
• No toque las superficies calientes. Cuando quite la tapa o maneje contenedores
calientes, use protectores resistentes al calor para evitar quemaduras ocasionadas
por el vapor.
This warranty does not cover normal wear of parts or damage resulting from any of the following:
negligent use or misuse of the product, use on improper voltage or current, use contrary to the
operating instructions, disassembly, repair or alteration by anyone other than Sunbeam or an
authorized Sunbeam service center. Further, the warranty does not cover: Acts of God, such as fire,
flood, hurricanes and tornadoes.
• Para protegerse contra una descarga eléctrica, no sumerja el cordón, el enchufe
o la base de la unidad en agua o en otros líquidos.
•
•
• Es necesaria la supervisión cercana de un adulto cuando el aparato es usado
por o cerca de niños.
¡Felicitaciones en su compra de un Vaporera de Alimentos OSTER. Para aprender
más sobre productos OSTER ®, por favor visítenos en www.oster.com!
•
DESCRIPCIÓN
DE LAS
1
PARTES
1. Tapa
2. Tazón para Cocinar Arroz
FUNCIÓN
3. Tazón Superior para
Cocinar al Vapor
Conecte en un toma de corriente de pared únicamente
What Are the Limits on Sunbeam’s Liability?
• Desconecte de la toma de corriente cuando no esté en uso. Desconecte antes de
colocar o quitar partes y permita que se enfríe antes de limpiar el electrodoméstico.
Sunbeam shall not be liable for any incidental or consequential damages caused by the breach of any
express, implied or statutory warranty or condition.
Except to the extent prohibited by applicable law, any implied warranty or condition of merchantability
or fitness for a particular purpose is limited in duration to the duration of the above warranty.
Sunbeam disclaims all other warranties, conditions or representations, express, implied, statutory or otherwise.
Sunbeam shall not be liable for any damages of any kind resulting from the purchase, use or misuse of, or
inability to use the product including incidental, special, consequential or similar damages or loss of profits,
or for any breach of contract, fundamental or otherwise, or for any claim brought against purchaser by any
other party.
• No permita que el cordón cuelgue de la orilla de la mesa o del mostrador
o toque superficies calientes.
Some provinces, states or jurisdictions do not allow the exclusion or limitation of incidental
or consequential damages or limitations on how long an implied warranty lasts, so the above
limitations or exclusion may not apply to you.
How to Obtain Warranty Service
In the U.S.A. –
If you have any question regarding this warranty or would like to obtain warranty service,
please call 1.800.334.0759 and a convenient service center address will be provided to you.
• Tenga extremo cuidado cuando mueva un aparato que contenga agua
o alimentos calientes o cualquier otro líquido que esté caliente.
In Canada –
If you have any question regarding this warranty or would like to obtain warranty service,
please call 1.800.667.8623 and a convenient service center address will be provided to you.
• No use este aparato más que para el fin para lo que ha sido diseñado.
ESTE APARATO ES SÓLO
PARA
USO DOMÉSTICO
6
PLEASE DO NOT RETURN THIS PRODUCT TO ANY OF
THESE ADDRESSES OR TO THE PLACE OF PURCHASE.
GUARDE ESTAS INSTRUCCIONES
10
11
English-7
Español-1
(Medida 1A) Llene el tanque con agua limpia
solamente. No coloque ningún otro líquido
en el tanque para agua ni añada sal, pimienta,
etc. Asegúrese de que el agua no exceda el nivel
máximo de llenado HI, o que se encuentre más
abajo del nivel inferior LO, tal como se indica
en el interior del tanque para agua. Después
coloque la bandeja para goteo en la base del
aparato. (Medida 1B)
9. Entrada de Agua
7
8
• El uso de accesorios o aditamentos que no sean los recomendados por
el fabricante de este aparato pueden causar lesiones o daños.
8. Base de la Unidad
Español-2
9
10. Reloj
11. Luz
Español-3
– – – FOLD – – –
MEDIDA 2
User Manual
Manual de Instrucciones
NIVEL
DE
AGUA
(Medida 3) Coloque las verduras, los mariscos
u otros alimentos sin salsas o líquidos dentro
del tazón para cocinar al vapor. Acomode los
alimentos en el centro del tazón. Trate de
no bloquear las ventilas para salida de vapor.
Usted puede utilizar el tazón inferior para
cocinar al vapor como una bandeja para
cocinar huevos, colocando en ella
directamente un total de hasta 8 huevos.
(La bandeja para cocinar huevos al vapor
no está disponible en el Modelo 5709)
CUBIERTA REMOVIBLE DEL
ELEMENTO CALEFACTOR
MEDIDA 1A
O
MODELS/MODELOS
MODÈLES
5709, 5711, 5713
TAZONES SUPERIOR O INFERIOR
PARA COCINAR AL VAPOR
TRES NIVELES
Los tiempos de cocción son estimados y
dependen de la cantidad, tamaño, grado
requerido de cocción y temperatura de los
alimentos. Considere todos los tiempos de
cocción que se ofrecen en la siguiente guía,
como tiempos sugeridos para vaporeras
de dos niveles.
MEDIDA 1B
DE
DOS
Food Steamer
Vaporera de Alimentos
Cuiseur
Coloque en el tazón inferior la pieza más grande de alimento que requiera el
mayor tiempo de cocción a vapor. Coloque el tazón superior para cocinar al
vapor sobre la base de la unidad, o bien; usted puede colocar el tazón superior
para cocinar al vapor, directamente sobre el tazón inferior para cocinar al vapor.
(La bandeja superior para cocinar al vapor no está disponible en el Modelo 5709).
LLENE EL TANQUE
BANDEJA
DE
Manuel d’Instructions
MEDIDA 3
PARA USAR LOS TAZONES SUPERIOR
O INFERIOR Y COCINAR AL VAPOR
PARA VAPORERAS
Coloque la unidad sobre una superficie plana
y resistente, que cuente con el espacio libre
suficiente (por ejemplo, no la coloque debajo
de los gabinetes de la cocina). No debe usar la
vaporera ni sus componentes dentro de hornos
(microondas o convencionales) tampoco sobre
la estufa.
7. Elemento Calefactor
• Levante y abra la tapa cuidadosamente y permita que el agua escurra
dentro de la vaporera para evitar quemaduras.
In the U.S.A., this warranty is offered by Sunbeam Products, Inc., located in Boca Raton,
Florida 33431. In Canada, this warranty is offered by Sunbeam Corporation (Canada) Limited,
located at 5975 Falbourne Street, Mississauga, Ontario L5R 3V8.
6. Cubierta del Elemento
Calefactor
5
• No coloque este aparato sobre o cerca de quemadores calientes eléctricos
o de estufas de gas o dentro de un horno caliente.
VAPOR INSTANTÁNEO
CÓMO USAR SU VAPORERA
• No opere el aparato mientras esté vacío o sin agua en el tanque.
This warranty gives you specific legal rights, and you may also have other rights that vary from
province to province, state to state or jurisdiction to jurisdiction.
5. Bandeja de Goteo
4
DE
NOTE LO SIGUIENTE: Se puede quitar la cubierta
del elemento calefactor para permitir la limpieza
del elemento calefactor. Hay una pequeña
marca (corte) en la cubierta del elemento
calefactor, ésta debe estar colocada hacia
abajo cuando coloque la cubierta sobre
el elemento calefactor.
(No está Desponible en
el Modelo 5709)
Para reducir el riesgo de descargas eléctricas, este aparato cuenta con
un enchufe polarizado (una clavija es más ancha que la otra). Este enchufe
entra en un toma de corriente de una sola manera. Esta es una medida de
seguridad, para reducir el riesgo de choque eléctrico. Si el enchufe no encaja
en el toma de corriente simplemente colóquelo al revés. Si aún así no encaja
llame a un electricista calificado. De ninguna manera intente modificar esta
medida de seguridad.
• No debe usarse en exteriores.
4. Tazón Inferior para
Cocinar al Vapor, Puede
Usarse como una Bandeja
para Cocinar Huevos
3
PARA MERCADOS DE 120-V Y 127-V ÚNICAMENTE
• No opere ningún aparato con un cordón o con un enchufe dañado o después
de que el aparato ha funcionado inadecuadamente o ha sido dañado en
®
cualquier manera. Regrese el aparato a un Centro de Servicio OSTER
autorizado para su revisión, reparación o ajuste.
Usted también puede llenar el tanque para agua
desde la entrada externa. En la caja para agua
hay líneas indicadas con el nivel máximo MAX
y mínimo MIN. Aun cuando los alimentos
están cocinándose, si usted considera que
el nivel de agua está bajo, puede revisarlo
claramente desde la caja de agua y añadir el
agua desde la entrada externa sin mover
ningún tazón para cocinar al vapor. (Medida 2)
NOTA: NO DEJE QUE EL NIVEL DEL
AGUA BAJE MÁS ALLÁ DEL NIVEL
(MÍNIMO) “LO”.
PRIMER USO
Se incluye la cubierta removible del elemento
calefactor. Antes de comenzar a cocinar,
coloque la cubierta sobre el elemento
calefactor y la función de vaporización
producirá vapor automáticamente en
sólo 35 segundos. No opere la vaporera
sin la cubierta del elemento calefactor.
2
No sumerja la base de la unidad en agua o en ningún otro líquido.
DEL
• Quite cualquier etiqueta del aparato.
• Antes del primer uso, lave muy bien con agua tibia y jabonosa la tapa,
el tazón para cocinar arroz, el tazón superior para cocinar al vapor, el tazón
inferior para cocinar al vapor, la bandeja de goteo y la cubierta removible
del elemento calefactor. Después enjuague y seque cuidadosamente.
La cubierta del elemento calefactor debe ser instalada alrededor
del elemento calefactor para que funcione en forma correcta.
• Limpie con un paño húmedo el interior del tanque para agua.
®
warrants that for a period of one year from the date of purchase, this product will be free from defects
in material and workmanship. Sunbeam, at its option, will repair or replace this product or any component
of the product found to be defective during the warranty period. Replacement will be made with a new
or remanufactured product or component. If the product is no longer available, replacement may be made
with a similar product of equal or greater value. This is your exclusive warranty.
– – – FOLD – – –
– – – FOLD – – –
– – – FOLD – – –
– – – FOLD – – –
– – – FOLD – – –
PRECAUCIONES IMPORTANTES
One-Year Limited Warranty
Cuando maneje y saque los componentes,
utilice PROTECTORES RESISTENTES
AL CALOR para evitar quemaduras
ocasionadas por vapor caliente.
GOTEO
Español-4
Visit us at www.oster.com
VAPORERAS DE DOS O TRES NIVELES
P.N. 111858
Español-5
– – – F OLD – – –
– – – F OLD – – –
10
HOUSEHOLD USE ONLY
9
8
7
10. Timer
6
FOR 120-V AND 127-V MARKETS ONLY
• This appliance is intended for household use only.
• Make sure the voltage in your outlet is the same as the voltage indicated on
the appliance’s rating label.
• The length of the cord used on this appliance was selected to reduce the
hazards of becoming tangled in, or tripping over a long cord.
• For safety it is not recommended to use an electrical extension cord with
this appliance.
• Do not immerse base unit in water or other liquids.
• Use with wall receptacle only.
9. Water Inlet
8. Base Unit
Place unit on a flat, sturdy surface with
adequate clearance (i.e., do not place under
wall cabinets). The steamer unit and
components are not for use in ovens
(microwave, convection or conventional)
or on stovetop.
5
7. Heating Element
4
6. Removable Heating
Element Sleeve
Cooking times are estimates and depend on the
quantity, size, required degree of cooking and
temperature of food. Consider all the cooking
time given in the following guide as suggested
times for double tier steamer.
STEP 1B
FOR DOUBLE TIER OR
THREE TIER STEAMER
5. Drip Tray
When using electrical appliances, basic safety precautions should always be followed,
including the following:
• READ ALL INSTRUCTIONS.
• Do not touch hot surfaces. Use potholders when removing cover or handling
hot containers to avoid steam burns.
• To protect against electrical shock, do not immerse cord, plug or base unit in
water or other liquids.
• Close supervision is necessary when any appliance is used by or near children.
• Unplug from outlet when not in use. Unplug before putting on or taking off
parts, and allow to cool before cleaning.
• Do not operate any appliance with a damaged cord or plug, or after the
appliance malfunctions or has been damaged in any manner. Return appliance
to an authorized Oster® Service Center for examination, repair or adjustment.
• Do not use outdoors.
• Do not let cord hang over edge of table or counter, or touch hot surfaces.
• Do not operate appliance while empty or without water in the reservoir.
• Do not place on or near a hot gas or electric burner, or in a heated oven.
• Extreme caution must be used when moving an appliance containing hot food
or water or other hot liquids.
• Do not use appliance for other than intended use.
• Lift and open cover carefully to avoid scalding and allow water to drip into steamer.
• The use of accessory attachments not recommended by this appliance
manufacturer may cause hazards.
3
P LEASE N OTE : The heating element sleeve
may be removed to allow cleaning of the
heating element. On the heating element
sleeve, there is a small indentation (cut) which
should face downward when replaced on the
heating element.
(Not available on Model 5709)
4. Lower Steaming Bowl
Can Be Used As Egg Tray
3. Upper Steaming Bowl
2
1
1. Lid
FOOD STEAMER FEATURES
• Wipe the inside of the water reservoir with a damp cloth.
• Remove any labels or stickers from appliance.
WELCOME
BEFORE
– – – FOLD – – –
– – – FOLD – – –
Or you can fill the water reservoir from the
water inlet. There are MAX and MIN lines on
the water box to indicate the water level. Even
while food is still cooking, if the water box
shows that the water level is low, you can add
water accordingly to the water inlet without
moving any of the steaming bowls. (Step 2)
• Thoroughly wash lid, rice bowl, upper steaming bowl, lower steaming bowl,
drip tray and heating element sleeve in warm, soapy water before first use,
then rinse and dry carefully. The heating element sleeve must be installed
around the heating element for proper operation.
Congratulations on your purchase of an OSTER® Food Steamer!
To learn more about OSTER® products, please visit us at www.oster.com.
IMPORTANT SAFEGUARDS
NOTE: WATER SHOULD
NEVER GO LOWER THAN
LO (MIN) LINE.
THE
FIRST USE
5. Adjust steaming times accordingly.
1. Do not wrap or cover when reheating breads.
4. You may steam fish fillets in the RICE BOWL. Serve steamed seafood and
fish plain or use seasoned butter or margarine, lemon or favorite sauces.
REHEATING: BREADS
AND
LEFTOVERS
• Clean reservoir with soapy water then wipe with damp cloth.
WATER INLET
THE
©2003 Sunbeam Products, Inc. Tous droits réservés.
www.oster.com
États-Unis : 1.800.334.0759
Canada : 1.800.667.8623
Pour les questions de produit:
Sunbeam Consumer Service
Distributed by Sunbeam Products, Inc., Boca Raton, FL 33431
OSTER® is a registered trademark of Sunbeam Products, Inc.
©2003 Sunbeam Products, Inc. All rights reserved.
6. Use only clean water in water reservoir
5. When checking/stirring rice, be careful not to drip the condensate into the
rice bowl which would reduce the quality and flavor of the steamed rice.
RICE BOWL
www.oster.com
USA : 1.800.334.0759
Canada : 1.800.667.8623
4. Check doneness and consistency of rice at minimum time specified
for each type, stirring rice at the same time.
3. For softer rice, increase by 1 – 2 tablespoons the water mixed with rice
by the specified amount of water on the chart. For firmer rice decrease
water mixed with rice by the same amount.
Place rice or other foods with sauce or liquid
in rice bowl. Place rice bowl in the lower
steaming bowl and cover with the lid.
Plug into wall outlet and set timer.
When food is well cooked, unplug unit.
USING
OSTER® est une marque déposée de Sunbeam Products, Inc.
7. Rice may be seasoned with salt, pepper or butter after steaming.
CLEANING
TIMER SETTING (Maximum 75 Minutes)
STEP 2
Distribué par Sunbeam Products, Inc., Boca Raton, Florida 33431
VEGETABLES
• Unplug cord from outlet. Before cleaning, allow Steamer to cool.
Set the timer to the recommended cooking
time (steaming times can be adjusted as per
your experiment). The light turns on and
steam comes in 35 seconds. The light will
turn off when cooking is completed and the
timer will give a signal bell.
SEAFOOD
1. Clean the vegetables thoroughly. Cut off stems; trim, peel or chop if necessary.
Smaller pieces steam faster than larger ones.
• Never immerse the Base, Cord or Plug in water.
STEP 3
AND
2. Quantity, quality, freshness and size/uniformity, temperature of frozen food,
may affect steam timing. Adjust water amounts and cooking time as desired.
• Empty the drip tray and the water reservoir. If there is a small amount
of water remaining inside the water box, you can just turn the unit upside
down and water will come out from the water inlet.
AND
Para preguntas sobre los productos llame:
Sunbeam Consumer Service
3. Frozen vegetables should not be thawed before steaming.
• Wash lid, steaming bowl, rice bowl and drip tray in hot, soapy water.
Rinse and dry all parts, or wash on top rack of dishwasher.
CARE
www.oster.com
EE.UU. : 1.800.334.0759
Canadá : 1.800.667.8623
4. Some frozen vegetables should be placed in the rice bowl and covered with a
piece of aluminum foil during steaming. The frozen foods should be separated
or stirred after 10 – 12 minutes. Use a long-handled fork or spoon to separate
or stir foods.
• Do not use abrasive cleaners
UPPER OR LOWER STEAMING BOWLS
OSTER® es una marca registrada de Sunbeam Products, Inc.
1. Before steaming, clean and prepare fresh seafood and fish.
FISH
For product questions contact:
Sunbeam Consumer Service
2. Accurately measure rice and water then combine in rice bowl. Pour specified
amount of water in water reservoir. Cover and steam.
1. There are many types of rice. Follow specific directions for variety used.
RICE
RICE BOWL
AND
Impreso en China
©2003 Sunbeam Products, Inc. Todos los derechos reservados.
2. Most fish and seafood cook very quickly. Steam in small portions
or in amounts as specified.
• The lower steaming bowl and the rice bowl can be stored inside the upper
steaming bowl with the lid on top.
Imprimé en Chine
Distribuido por Sunbeam Products, Inc., Boca Raton, FL 33431
3. Clams, oysters and mussels may open at different times. Check the shells
to avoid overcooking.
• In hard water areas, the scale may build up on the heating element. If scale
is allowed to accumulate, the steam could turn off before the food is cooked.
So, after 7-10 uses, pour 3 cups clear vinegar into the water reservoir then
fill with water up to the HI level. Do not place lid, steaming bowl, rice bowl
and drip tray in this procedure.
TO USE UPPER OR LOWER STEAMING BOWL
INSTANT STEAM FUNCTION
6. You can steam fresh, frozen or fully-thawed seafood and fish in the
RICE BOWL.
• Plug in and set timer to 20 minutes. When the timer rings, unplug cord from
outlet. Allow the unit to cool completely before emptying the water reservoir.
Use cold water to rinse the water reservoir several times.
(Step 3) Place vegetable, seafood or other
foods without sauce or liquid into the steaming
bowl. Arrange food in center of bowl.
Try not to block steam vents. You can
use lower steaming bowl as an egg tray
by directly placing a total of 8 eggs on it.
(Egg holding steaming tray not available
on Model 5709).
Included is a removable heating element
sleeve. Before cooking, when this sleeve
is placed around the heating element,
the steam function will automatically produce
steam in 35 seconds. Do not operate the
steamer without the heating element sleeve.
2. Rice Bowl
MULTI-TIERED STEAMING
STEP 1A
REMOVABLE HEATING
ELEMENT SLEEVE
Printed in China
2. For leftovers, reheating times are based on foods at refrigerator temperatures.
Place the largest piece of food with longest
cooking time in the lower steaming bowl. Place
lower bowl on top of drip tray and base. Place
the upper steaming bowl on top of the base
unit, or you can place upper steaming bowl
directly on top of the lower steaming bowl.
(Upper steaming tray not available on Model 5709).
FILLING WATER RESERVOIR
USING YOUR STEAMER
SPECIAL INSTRUCTIONS
English-6
3. When reheating leftovers in the rice bowl, always spread leftovers evenly in
RICE BOWL and use aluminum foil to cover.
When handling and removing hot components,
use POTHOLDERS to avoid burns from
hot steam.
(Step 1A) Fill water reservoir with clean water
only. Do not put any other liquids or add
any salt, pepper, etc., in the water reservoir.
Make sure the water does not exceed the
HI fill level or go lower than the LO fill level
as indicated inside the water reservoir. Then
place the drip tray on the base. (Step 1B)
11. Light
To reduce the risk of electrical shock, this appliance has a polarized plug (one
blade is wider than the other). This plug fits a polarized outlet only one way.
This is a safety feature intended to help reduce the risk of electrical shock. If
the plug does not fit fully into the outlet, reverse the plug. If it still does not
fit, contact a qualified electrician. Do not attempt to defeat this safety feature.
English-5
4. Experiment with your own leftovers.
– – – FOLD – – –
FOR
English-4
DRIP TRAY
– – – FOLD – – –
THIS UNIT IS
English-3
– – – FOLD – – –
English-2
11
GRAINS
– – – FOLD – – –
English-1
SAVE THESE INSTRUCTIONS
– – – FOLD – – –
– – – FOLD – – –
PRECAUCIONES IMPORTANTES
One-Year Limited Warranty
Sunbeam Products, Inc., or if in Canada, Sunbeam Corporation (Canada) Limited (collectively “Sunbeam”)
warrants that for a period of one year from the date of purchase, this product will be free from defects
in material and workmanship. Sunbeam, at its option, will repair or replace this product or any component
of the product found to be defective during the warranty period. Replacement will be made with a new
or remanufactured product or component. If the product is no longer available, replacement may be made
with a similar product of equal or greater value. This is your exclusive warranty.
INSTRUCCIONES ESPECIALES
Cuando use algún aparato eléctrico siempre deben seguirse precauciones básicas
de seguridad incluyendo las siguientes:
Conecte en un toma de corriente de pared únicamente
•
No sumerja la base de la unidad en agua o en ningún otro líquido.
•
Por seguridad, no se recomienda el uso de extensiones eléctricas con este
electrodoméstico.
•
La longitud del cable de alimentación de este aparato se estipuló para reducir
el riesgo de que alguien pueda enredarse o tropezar.
•
Asegúrese de que el voltaje del toma de corriente sea el mismo que el voltaje
indicado en la placa del aparato
•
Este aparato es para uso doméstico únicamente.
•
• LEA TODAS LAS INSTRUCCIONES.
This warranty is valid for the original retail purchaser from the date of initial retail purchase and
is not transferable. Keep the original sales receipt. Proof of purchase is required to obtain warranty
performance. Sunbeam dealers, service centers, or retail stores selling Sunbeam products do not have
the right to alter, modify or any way change the terms and conditions of this warranty.
• No toque las superficies calientes. Cuando quite la tapa o maneje contenedores
calientes, use protectores resistentes al calor para evitar quemaduras ocasionadas
por el vapor.
This warranty does not cover normal wear of parts or damage resulting from any of the following:
negligent use or misuse of the product, use on improper voltage or current, use contrary to the
operating instructions, disassembly, repair or alteration by anyone other than Sunbeam or an
authorized Sunbeam service center. Further, the warranty does not cover: Acts of God, such as fire,
flood, hurricanes and tornadoes.
– – – FOLD – – –
• Para protegerse contra una descarga eléctrica, no sumerja el cordón, el enchufe
o la base de la unidad en agua o en otros líquidos.
• Es necesaria la supervisión cercana de un adulto cuando el aparato es usado
por o cerca de niños.
– – – FOLD – – –
Sunbeam disclaims all other warranties, conditions or representations, express, implied, statutory or otherwise.
ANTES
BIENVENIDOS
¡Felicitaciones en su compra de un Vaporera de Alimentos OSTER.® Para aprender
más sobre productos OSTER ®, por favor visítenos en www.oster.com!
DESCRIPCIÓN
1
DE LAS
PARTES
1. Tapa
FUNCIÓN
2
3. Tazón Superior para
Cocinar al Vapor
4. Tazón Inferior para
Cocinar al Vapor, Puede
Usarse como una Bandeja
para Cocinar Huevos
3
PARA MERCADOS DE 120-V Y 127-V ÚNICAMENTE
• No debe usarse en exteriores.
(No está Desponible en
el Modelo 5709)
6. Cubierta del Elemento
Calefactor
5
PARA
DE
DEL
PRIMER USO
VAPOR INSTANTÁNEO
NOTE LO SIGUIENTE: Se puede quitar la cubierta
del elemento calefactor para permitir la limpieza
del elemento calefactor. Hay una pequeña
marca (corte) en la cubierta del elemento
calefactor, ésta debe estar colocada hacia
abajo cuando coloque la cubierta sobre
el elemento calefactor.
5. Bandeja de Goteo
4
USO DOMÉSTICO
6
8. Base de la Unidad
• No use este aparato más que para el fin para lo que ha sido diseñado.
9
10
10. Reloj
11. Luz
Español-3
11
Español-2
CUBIERTA REMOVIBLE DEL
ELEMENTO CALEFACTOR
DOS
O
NIVEL
DE
MEDIDA 2
User Manual
Manual de Instrucciones
AGUA
Manuel d’Instructions
Food Steamer
Vaporera de Alimentos
Cuiseur
MODELS/MODELOS
MODÈLES
5709, 5711, 5713
TAZONES SUPERIOR O INFERIOR
PARA COCINAR AL VAPOR
TRES NIVELES
Los tiempos de cocción son estimados y
dependen de la cantidad, tamaño, grado
requerido de cocción y temperatura de los
alimentos. Considere todos los tiempos de
cocción que se ofrecen en la siguiente guía,
como tiempos sugeridos para vaporeras
de dos niveles.
MEDIDA 1B
DE
DE
Coloque en el tazón inferior la pieza más grande de alimento que requiera el
mayor tiempo de cocción a vapor. Coloque el tazón superior para cocinar al
vapor sobre la base de la unidad, o bien; usted puede colocar el tazón superior
para cocinar al vapor, directamente sobre el tazón inferior para cocinar al vapor.
(La bandeja superior para cocinar al vapor no está disponible en el Modelo 5709).
LLENE EL TANQUE
BANDEJA
MEDIDA 3
PARA USAR LOS TAZONES SUPERIOR
O INFERIOR Y COCINAR AL VAPOR
(Medida 3) Coloque las verduras, los mariscos
u otros alimentos sin salsas o líquidos dentro
del tazón para cocinar al vapor. Acomode los
alimentos en el centro del tazón. Trate de
no bloquear las ventilas para salida de vapor.
Usted puede utilizar el tazón inferior para
cocinar al vapor como una bandeja para
cocinar huevos, colocando en ella
directamente un total de hasta 8 huevos.
(La bandeja para cocinar huevos al vapor
no está disponible en el Modelo 5709)
MEDIDA 1A
PARA VAPORERAS
CÓMO USAR SU VAPORERA
• No opere el aparato mientras esté vacío o sin agua en el tanque.
Coloque la unidad sobre una superficie plana
y resistente, que cuente con el espacio libre
suficiente (por ejemplo, no la coloque debajo
de los gabinetes de la cocina). No debe usar la
vaporera ni sus componentes dentro de hornos
(microondas o convencionales) tampoco sobre
la estufa.
7. Elemento Calefactor
ESTE APARATO ES SÓLO
• Tenga extremo cuidado cuando mueva un aparato que contenga agua
o alimentos calientes o cualquier otro líquido que esté caliente.
(Medida 1A) Llene el tanque con agua limpia
solamente. No coloque ningún otro líquido
en el tanque para agua ni añada sal, pimienta,
etc. Asegúrese de que el agua no exceda el nivel
máximo de llenado HI, o que se encuentre más
abajo del nivel inferior LO, tal como se indica
en el interior del tanque para agua. Después
coloque la bandeja para goteo en la base del
aparato. (Medida 1B)
9. Entrada de Agua
7
8
GUARDE ESTAS INSTRUCCIONES
Español-1
Usted también puede llenar el tanque para agua
desde la entrada externa. En la caja para agua
hay líneas indicadas con el nivel máximo MAX
y mínimo MIN. Aun cuando los alimentos
están cocinándose, si usted considera que
el nivel de agua está bajo, puede revisarlo
claramente desde la caja de agua y añadir el
agua desde la entrada externa sin mover
ningún tazón para cocinar al vapor. (Medida 2)
NOTA: NO DEJE QUE EL NIVEL DEL
AGUA BAJE MÁS ALLÁ DEL NIVEL
(MÍNIMO) “LO”.
• Quite cualquier etiqueta del aparato.
• Antes del primer uso, lave muy bien con agua tibia y jabonosa la tapa,
el tazón para cocinar arroz, el tazón superior para cocinar al vapor, el tazón
inferior para cocinar al vapor, la bandeja de goteo y la cubierta removible
del elemento calefactor. Después enjuague y seque cuidadosamente.
La cubierta del elemento calefactor debe ser instalada alrededor
del elemento calefactor para que funcione en forma correcta.
• Limpie con un paño húmedo el interior del tanque para agua.
2. Tazón para Cocinar Arroz
Se incluye la cubierta removible del elemento
calefactor. Antes de comenzar a cocinar,
coloque la cubierta sobre el elemento
calefactor y la función de vaporización
producirá vapor automáticamente en
sólo 35 segundos. No opere la vaporera
sin la cubierta del elemento calefactor.
What Are the Limits on Sunbeam’s Liability?
• Desconecte de la toma de corriente cuando no esté en uso. Desconecte antes de
colocar o quitar partes y permita que se enfríe antes de limpiar el electrodoméstico.
Sunbeam shall not be liable for any incidental or consequential damages caused by the breach of any
express, implied or statutory warranty or condition.
Except to the extent prohibited by applicable law, any implied warranty or condition of merchantability
or fitness for a particular purpose is limited in duration to the duration of the above warranty.
• No opere ningún aparato con un cordón o con un enchufe dañado o después
de que el aparato ha funcionado inadecuadamente o ha sido dañado en
®
cualquier manera. Regrese el aparato a un Centro de Servicio OSTER
autorizado para su revisión, reparación o ajuste.
Sunbeam shall not be liable for any damages of any kind resulting from the purchase, use or misuse of, or
inability to use the product including incidental, special, consequential or similar damages or loss of profits,
or for any breach of contract, fundamental or otherwise, or for any claim brought against purchaser by any
other party.
Para reducir el riesgo de descargas eléctricas, este aparato cuenta con
un enchufe polarizado (una clavija es más ancha que la otra). Este enchufe
entra en un toma de corriente de una sola manera. Esta es una medida de
seguridad, para reducir el riesgo de choque eléctrico. Si el enchufe no encaja
en el toma de corriente simplemente colóquelo al revés. Si aún así no encaja
llame a un electricista calificado. De ninguna manera intente modificar esta
medida de seguridad.
• No permita que el cordón cuelgue de la orilla de la mesa o del mostrador
o toque superficies calientes.
Some provinces, states or jurisdictions do not allow the exclusion or limitation of incidental
or consequential damages or limitations on how long an implied warranty lasts, so the above
limitations or exclusion may not apply to you.
This warranty gives you specific legal rights, and you may also have other rights that vary from
province to province, state to state or jurisdiction to jurisdiction.
• No coloque este aparato sobre o cerca de quemadores calientes eléctricos
o de estufas de gas o dentro de un horno caliente.
How to Obtain Warranty Service
In the U.S.A. –
If you have any question regarding this warranty or would like to obtain warranty service,
please call 1.800.334.0759 and a convenient service center address will be provided to you.
In Canada –
If you have any question regarding this warranty or would like to obtain warranty service,
please call 1.800.667.8623 and a convenient service center address will be provided to you.
• Levante y abra la tapa cuidadosamente y permita que el agua escurra
dentro de la vaporera para evitar quemaduras.
In the U.S.A., this warranty is offered by Sunbeam Products, Inc., located in Boca Raton,
Florida 33431. In Canada, this warranty is offered by Sunbeam Corporation (Canada) Limited,
located at 5975 Falbourne Street, Mississauga, Ontario L5R 3V8.
• El uso de accesorios o aditamentos que no sean los recomendados por
el fabricante de este aparato pueden causar lesiones o daños.
PLEASE DO NOT RETURN THIS PRODUCT TO ANY OF
THESE ADDRESSES OR TO THE PLACE OF PURCHASE.
English-7
– – – FOLD – – –
– – – FOLD – – –
Cuando maneje y saque los componentes,
utilice PROTECTORES RESISTENTES
AL CALOR para evitar quemaduras
ocasionadas por vapor caliente.
GOTEO
Español-4
Visit us at www.oster.com
VAPORERAS DE DOS O TRES NIVELES
P.N. 111858
Español-5
– – – F OLD – – –
– – – F OLD – – –
English-3
English-4
English-5
Printed in China
3. When reheating leftovers in the rice bowl, always spread leftovers evenly in
RICE BOWL and use aluminum foil to cover.
MULTI-TIERED STEAMING
1. Do not wrap or cover when reheating breads.
5. Adjust steaming times accordingly.
2. For leftovers, reheating times are based on foods at refrigerator temperatures.
6. You can steam fresh, frozen or fully-thawed seafood and fish in the
RICE BOWL.
REHEATING: BREADS
AND
LEFTOVERS
3. Clams, oysters and mussels may open at different times. Check the shells
to avoid overcooking.
AND
Imprimé en Chine
Impreso en China
OSTER® es una marca registrada de Sunbeam Products, Inc.
©2003 Sunbeam Products, Inc. Todos los derechos reservados.
• Plug in and set timer to 20 minutes. When the timer rings, unplug cord from
outlet. Allow the unit to cool completely before emptying the water reservoir.
Use cold water to rinse the water reservoir several times.
THE
Distribuido por Sunbeam Products, Inc., Boca Raton, FL 33431
4. You may steam fish fillets in the RICE BOWL. Serve steamed seafood and
fish plain or use seasoned butter or margarine, lemon or favorite sauces.
FISH
www.oster.com
EE.UU. : 1.800.334.0759
Canadá : 1.800.667.8623
2. Most fish and seafood cook very quickly. Steam in small portions
or in amounts as specified.
Para preguntas sobre los productos llame:
Sunbeam Consumer Service
1. Before steaming, clean and prepare fresh seafood and fish.
• Do not use abrasive cleaners
USING
AND
SEAFOOD
Distribué par Sunbeam Products, Inc., Boca Raton, Florida 33431
OSTER® est une marque déposée de Sunbeam Products, Inc.
©2003 Sunbeam Products, Inc. Tous droits réservés.
www.oster.com
3. Frozen vegetables should not be thawed before steaming.
• Wash lid, steaming bowl, rice bowl and drip tray in hot, soapy water.
Rinse and dry all parts, or wash on top rack of dishwasher.
WATER INLET
États-Unis : 1.800.334.0759
Canada : 1.800.667.8623
Pour les questions de produit:
Sunbeam Consumer Service
1. Clean the vegetables thoroughly. Cut off stems; trim, peel or chop if necessary.
Smaller pieces steam faster than larger ones.
VEGETABLES
Distributed by Sunbeam Products, Inc., Boca Raton, FL 33431
OSTER® is a registered trademark of Sunbeam Products, Inc.
7. Rice may be seasoned with salt, pepper or butter after steaming.
CLEANING
©2003 Sunbeam Products, Inc. All rights reserved.
6. Use only clean water in water reservoir
5. When checking/stirring rice, be careful not to drip the condensate into the
rice bowl which would reduce the quality and flavor of the steamed rice.
RICE BOWL
Place rice or other foods with sauce or liquid
in rice bowl. Place rice bowl in the lower
steaming bowl and cover with the lid.
Plug into wall outlet and set timer.
When food is well cooked, unplug unit.
STEP 2
www.oster.com
3. For softer rice, increase by 1 – 2 tablespoons the water mixed with rice
by the specified amount of water on the chart. For firmer rice decrease
water mixed with rice by the same amount.
For product questions contact:
Sunbeam Consumer Service
4. Check doneness and consistency of rice at minimum time specified
for each type, stirring rice at the same time.
USA : 1.800.334.0759
Canada : 1.800.667.8623
2. Accurately measure rice and water then combine in rice bowl. Pour specified
amount of water in water reservoir. Cover and steam.
1. There are many types of rice. Follow specific directions for variety used.
RICE
RICE BOWL
– – – FOLD – – –
– – – FOLD – – –
– – – FOLD – – –
English-6
4. Experiment with your own leftovers.
DRIP TRAY
9
Cooking times are estimates and depend on the
quantity, size, required degree of cooking and
temperature of food. Consider all the cooking
time given in the following guide as suggested
times for double tier steamer.
STEP 1B
FILLING WATER RESERVOIR
• In hard water areas, the scale may build up on the heating element. If scale
is allowed to accumulate, the steam could turn off before the food is cooked.
So, after 7-10 uses, pour 3 cups clear vinegar into the water reservoir then
fill with water up to the HI level. Do not place lid, steaming bowl, rice bowl
and drip tray in this procedure.
• The lower steaming bowl and the rice bowl can be stored inside the upper
steaming bowl with the lid on top.
4. Some frozen vegetables should be placed in the rice bowl and covered with a
piece of aluminum foil during steaming. The frozen foods should be separated
or stirred after 10 – 12 minutes. Use a long-handled fork or spoon to separate
or stir foods.
• Clean reservoir with soapy water then wipe with damp cloth.
UPPER OR LOWER STEAMING BOWLS
STEP 1A
REMOVABLE HEATING
ELEMENT SLEEVE
2. Quantity, quality, freshness and size/uniformity, temperature of frozen food,
may affect steam timing. Adjust water amounts and cooking time as desired.
• Empty the drip tray and the water reservoir. If there is a small amount
of water remaining inside the water box, you can just turn the unit upside
down and water will come out from the water inlet.
• Never immerse the Base, Cord or Plug in water.
• Unplug cord from outlet. Before cleaning, allow Steamer to cool.
CARE
Set the timer to the recommended cooking
time (steaming times can be adjusted as per
your experiment). The light turns on and
steam comes in 35 seconds. The light will
turn off when cooking is completed and the
timer will give a signal bell.
STEP 3
TO USE UPPER OR LOWER STEAMING BOWL
FIRST USE
AND
GRAINS
– – – FOLD – – –
English-2
11
10
HOUSEHOLD USE ONLY
5
Place the largest piece of food with longest
cooking time in the lower steaming bowl. Place
lower bowl on top of drip tray and base. Place
the upper steaming bowl on top of the base
unit, or you can place upper steaming bowl
directly on top of the lower steaming bowl.
(Upper steaming tray not available on Model 5709).
USING YOUR STEAMER
(Not available on Model 5709)
4. Lower Steaming Bowl
Can Be Used As Egg Tray
1. Lid
NOTE: WATER SHOULD
NEVER GO LOWER THAN
LO (MIN) LINE.
• Wipe the inside of the water reservoir with a damp cloth.
THE
– – – FOLD – – –
FOR
10. Timer
9. Water Inlet
(Step 1A) Fill water reservoir with clean water
8. Base Unit
Place unit on a flat, sturdy surface with
adequate clearance (i.e., do not place under
wall cabinets). The steamer unit and
components are not for use in ovens
(microwave, convection or conventional)
or on stovetop.
7. Heating Element
4
6. Removable Heating
Element Sleeve
SPECIAL INSTRUCTIONS
3
P LEASE N OTE : The heating element sleeve
may be removed to allow cleaning of the
heating element. On the heating element
sleeve, there is a small indentation (cut) which
should face downward when replaced on the
heating element.
3. Upper Steaming Bowl
2
(Step 3) Place vegetable, seafood or other
foods without sauce or liquid into the steaming
bowl. Arrange food in center of bowl.
Try not to block steam vents. You can
use lower steaming bowl as an egg tray
by directly placing a total of 8 eggs on it.
(Egg holding steaming tray not available
on Model 5709).
Included is a removable heating element
sleeve. Before cooking, when this sleeve
is placed around the heating element,
the steam function will automatically produce
steam in 35 seconds. Do not operate the
steamer without the heating element sleeve.
2. Rice Bowl
1
INSTANT STEAM FUNCTION
FOOD STEAMER FEATURES
• Remove any labels or stickers from appliance.
BEFORE
TIMER SETTING (Maximum 75 Minutes)
Or you can fill the water reservoir from the
water inlet. There are MAX and MIN lines on
the water box to indicate the water level. Even
while food is still cooking, if the water box
shows that the water level is low, you can add
water accordingly to the water inlet without
moving any of the steaming bowls. (Step 2)
• Thoroughly wash lid, rice bowl, upper steaming bowl, lower steaming bowl,
drip tray and heating element sleeve in warm, soapy water before first use,
then rinse and dry carefully. The heating element sleeve must be installed
around the heating element for proper operation.
Congratulations on your purchase of an OSTER Food Steamer!
To learn more about OSTER® products, please visit us at www.oster.com.
WELCOME
– – – FOLD – – –
English-1
SAVE THESE INSTRUCTIONS
THIS UNIT IS
8
7
6
FOR 120-V AND 127-V MARKETS ONLY
When handling and removing hot components,
use POTHOLDERS to avoid burns from
hot steam.
only. Do not put any other liquids or add
any salt, pepper, etc., in the water reservoir.
Make sure the water does not exceed the
HI fill level or go lower than the LO fill level
as indicated inside the water reservoir. Then
place the drip tray on the base. (Step 1B)
11. Light
To reduce the risk of electrical shock, this appliance has a polarized plug (one
blade is wider than the other). This plug fits a polarized outlet only one way.
This is a safety feature intended to help reduce the risk of electrical shock. If
the plug does not fit fully into the outlet, reverse the plug. If it still does not
fit, contact a qualified electrician. Do not attempt to defeat this safety feature.
• This appliance is intended for household use only.
• Make sure the voltage in your outlet is the same as the voltage indicated on
the appliance’s rating label.
• The length of the cord used on this appliance was selected to reduce the
hazards of becoming tangled in, or tripping over a long cord.
• For safety it is not recommended to use an electrical extension cord with
this appliance.
• Do not immerse base unit in water or other liquids.
• Use with wall receptacle only.
FOR DOUBLE TIER OR
THREE TIER STEAMER
5. Drip Tray
When using electrical appliances, basic safety precautions should always be followed,
including the following:
• READ ALL INSTRUCTIONS.
• Do not touch hot surfaces. Use potholders when removing cover or handling
hot containers to avoid steam burns.
• To protect against electrical shock, do not immerse cord, plug or base unit in
water or other liquids.
• Close supervision is necessary when any appliance is used by or near children.
• Unplug from outlet when not in use. Unplug before putting on or taking off
parts, and allow to cool before cleaning.
• Do not operate any appliance with a damaged cord or plug, or after the
appliance malfunctions or has been damaged in any manner. Return appliance
to an authorized Oster® Service Center for examination, repair or adjustment.
• Do not use outdoors.
• Do not let cord hang over edge of table or counter, or touch hot surfaces.
• Do not operate appliance while empty or without water in the reservoir.
• Do not place on or near a hot gas or electric burner, or in a heated oven.
• Extreme caution must be used when moving an appliance containing hot food
or water or other hot liquids.
• Do not use appliance for other than intended use.
• Lift and open cover carefully to avoid scalding and allow water to drip into steamer.
• The use of accessory attachments not recommended by this appliance
manufacturer may cause hazards.
®
IMPORTANT SAFEGUARDS
– – – FOLD – – –
– – – FOLD – – –
PRECAUCIONES IMPORTANTES
One-Year Limited Warranty
Sunbeam Products, Inc., or if in Canada, Sunbeam Corporation (Canada) Limited (collectively “Sunbeam”)
warrants that for a period of one year from the date of purchase, this product will be free from defects
in material and workmanship. Sunbeam, at its option, will repair or replace this product or any component
of the product found to be defective during the warranty period. Replacement will be made with a new
or remanufactured product or component. If the product is no longer available, replacement may be made
with a similar product of equal or greater value. This is your exclusive warranty.
INSTRUCCIONES ESPECIALES
Cuando use algún aparato eléctrico siempre deben seguirse precauciones básicas
de seguridad incluyendo las siguientes:
Conecte en un toma de corriente de pared únicamente
•
No sumerja la base de la unidad en agua o en ningún otro líquido.
•
Por seguridad, no se recomienda el uso de extensiones eléctricas con este
electrodoméstico.
•
La longitud del cable de alimentación de este aparato se estipuló para reducir
el riesgo de que alguien pueda enredarse o tropezar.
•
Asegúrese de que el voltaje del toma de corriente sea el mismo que el voltaje
indicado en la placa del aparato
•
Este aparato es para uso doméstico únicamente.
•
• LEA TODAS LAS INSTRUCCIONES.
This warranty is valid for the original retail purchaser from the date of initial retail purchase and
is not transferable. Keep the original sales receipt. Proof of purchase is required to obtain warranty
performance. Sunbeam dealers, service centers, or retail stores selling Sunbeam products do not have
the right to alter, modify or any way change the terms and conditions of this warranty.
• No toque las superficies calientes. Cuando quite la tapa o maneje contenedores
calientes, use protectores resistentes al calor para evitar quemaduras ocasionadas
por el vapor.
This warranty does not cover normal wear of parts or damage resulting from any of the following:
negligent use or misuse of the product, use on improper voltage or current, use contrary to the
operating instructions, disassembly, repair or alteration by anyone other than Sunbeam or an
authorized Sunbeam service center. Further, the warranty does not cover: Acts of God, such as fire,
flood, hurricanes and tornadoes.
– – – FOLD – – –
• Para protegerse contra una descarga eléctrica, no sumerja el cordón, el enchufe
o la base de la unidad en agua o en otros líquidos.
• Es necesaria la supervisión cercana de un adulto cuando el aparato es usado
por o cerca de niños.
– – – FOLD – – –
Sunbeam disclaims all other warranties, conditions or representations, express, implied, statutory or otherwise.
ANTES
BIENVENIDOS
¡Felicitaciones en su compra de un Vaporera de Alimentos OSTER.® Para aprender
más sobre productos OSTER ®, por favor visítenos en www.oster.com!
DESCRIPCIÓN
1
DE LAS
PARTES
1. Tapa
FUNCIÓN
2
3. Tazón Superior para
Cocinar al Vapor
4. Tazón Inferior para
Cocinar al Vapor, Puede
Usarse como una Bandeja
para Cocinar Huevos
3
PARA MERCADOS DE 120-V Y 127-V ÚNICAMENTE
• No debe usarse en exteriores.
(No está Desponible en
el Modelo 5709)
6. Cubierta del Elemento
Calefactor
5
PARA
DE
DEL
PRIMER USO
VAPOR INSTANTÁNEO
NOTE LO SIGUIENTE: Se puede quitar la cubierta
del elemento calefactor para permitir la limpieza
del elemento calefactor. Hay una pequeña
marca (corte) en la cubierta del elemento
calefactor, ésta debe estar colocada hacia
abajo cuando coloque la cubierta sobre
el elemento calefactor.
5. Bandeja de Goteo
4
USO DOMÉSTICO
6
8. Base de la Unidad
• No use este aparato más que para el fin para lo que ha sido diseñado.
9
10
10. Reloj
11. Luz
Español-3
11
Español-2
CUBIERTA REMOVIBLE DEL
ELEMENTO CALEFACTOR
DOS
O
NIVEL
DE
MEDIDA 2
User Manual
Manual de Instrucciones
AGUA
Manuel d’Instructions
Food Steamer
Vaporera de Alimentos
Cuiseur
MODELS/MODELOS
MODÈLES
5709, 5711, 5713
TAZONES SUPERIOR O INFERIOR
PARA COCINAR AL VAPOR
TRES NIVELES
Los tiempos de cocción son estimados y
dependen de la cantidad, tamaño, grado
requerido de cocción y temperatura de los
alimentos. Considere todos los tiempos de
cocción que se ofrecen en la siguiente guía,
como tiempos sugeridos para vaporeras
de dos niveles.
MEDIDA 1B
DE
DE
Coloque en el tazón inferior la pieza más grande de alimento que requiera el
mayor tiempo de cocción a vapor. Coloque el tazón superior para cocinar al
vapor sobre la base de la unidad, o bien; usted puede colocar el tazón superior
para cocinar al vapor, directamente sobre el tazón inferior para cocinar al vapor.
(La bandeja superior para cocinar al vapor no está disponible en el Modelo 5709).
LLENE EL TANQUE
BANDEJA
MEDIDA 3
PARA USAR LOS TAZONES SUPERIOR
O INFERIOR Y COCINAR AL VAPOR
(Medida 3) Coloque las verduras, los mariscos
u otros alimentos sin salsas o líquidos dentro
del tazón para cocinar al vapor. Acomode los
alimentos en el centro del tazón. Trate de
no bloquear las ventilas para salida de vapor.
Usted puede utilizar el tazón inferior para
cocinar al vapor como una bandeja para
cocinar huevos, colocando en ella
directamente un total de hasta 8 huevos.
(La bandeja para cocinar huevos al vapor
no está disponible en el Modelo 5709)
MEDIDA 1A
PARA VAPORERAS
CÓMO USAR SU VAPORERA
• No opere el aparato mientras esté vacío o sin agua en el tanque.
Coloque la unidad sobre una superficie plana
y resistente, que cuente con el espacio libre
suficiente (por ejemplo, no la coloque debajo
de los gabinetes de la cocina). No debe usar la
vaporera ni sus componentes dentro de hornos
(microondas o convencionales) tampoco sobre
la estufa.
7. Elemento Calefactor
ESTE APARATO ES SÓLO
• Tenga extremo cuidado cuando mueva un aparato que contenga agua
o alimentos calientes o cualquier otro líquido que esté caliente.
(Medida 1A) Llene el tanque con agua limpia
solamente. No coloque ningún otro líquido
en el tanque para agua ni añada sal, pimienta,
etc. Asegúrese de que el agua no exceda el nivel
máximo de llenado HI, o que se encuentre más
abajo del nivel inferior LO, tal como se indica
en el interior del tanque para agua. Después
coloque la bandeja para goteo en la base del
aparato. (Medida 1B)
9. Entrada de Agua
7
8
GUARDE ESTAS INSTRUCCIONES
Español-1
Usted también puede llenar el tanque para agua
desde la entrada externa. En la caja para agua
hay líneas indicadas con el nivel máximo MAX
y mínimo MIN. Aun cuando los alimentos
están cocinándose, si usted considera que
el nivel de agua está bajo, puede revisarlo
claramente desde la caja de agua y añadir el
agua desde la entrada externa sin mover
ningún tazón para cocinar al vapor. (Medida 2)
NOTA: NO DEJE QUE EL NIVEL DEL
AGUA BAJE MÁS ALLÁ DEL NIVEL
(MÍNIMO) “LO”.
• Quite cualquier etiqueta del aparato.
• Antes del primer uso, lave muy bien con agua tibia y jabonosa la tapa,
el tazón para cocinar arroz, el tazón superior para cocinar al vapor, el tazón
inferior para cocinar al vapor, la bandeja de goteo y la cubierta removible
del elemento calefactor. Después enjuague y seque cuidadosamente.
La cubierta del elemento calefactor debe ser instalada alrededor
del elemento calefactor para que funcione en forma correcta.
• Limpie con un paño húmedo el interior del tanque para agua.
2. Tazón para Cocinar Arroz
Se incluye la cubierta removible del elemento
calefactor. Antes de comenzar a cocinar,
coloque la cubierta sobre el elemento
calefactor y la función de vaporización
producirá vapor automáticamente en
sólo 35 segundos. No opere la vaporera
sin la cubierta del elemento calefactor.
What Are the Limits on Sunbeam’s Liability?
• Desconecte de la toma de corriente cuando no esté en uso. Desconecte antes de
colocar o quitar partes y permita que se enfríe antes de limpiar el electrodoméstico.
Sunbeam shall not be liable for any incidental or consequential damages caused by the breach of any
express, implied or statutory warranty or condition.
Except to the extent prohibited by applicable law, any implied warranty or condition of merchantability
or fitness for a particular purpose is limited in duration to the duration of the above warranty.
• No opere ningún aparato con un cordón o con un enchufe dañado o después
de que el aparato ha funcionado inadecuadamente o ha sido dañado en
®
cualquier manera. Regrese el aparato a un Centro de Servicio OSTER
autorizado para su revisión, reparación o ajuste.
Sunbeam shall not be liable for any damages of any kind resulting from the purchase, use or misuse of, or
inability to use the product including incidental, special, consequential or similar damages or loss of profits,
or for any breach of contract, fundamental or otherwise, or for any claim brought against purchaser by any
other party.
Para reducir el riesgo de descargas eléctricas, este aparato cuenta con
un enchufe polarizado (una clavija es más ancha que la otra). Este enchufe
entra en un toma de corriente de una sola manera. Esta es una medida de
seguridad, para reducir el riesgo de choque eléctrico. Si el enchufe no encaja
en el toma de corriente simplemente colóquelo al revés. Si aún así no encaja
llame a un electricista calificado. De ninguna manera intente modificar esta
medida de seguridad.
• No permita que el cordón cuelgue de la orilla de la mesa o del mostrador
o toque superficies calientes.
Some provinces, states or jurisdictions do not allow the exclusion or limitation of incidental
or consequential damages or limitations on how long an implied warranty lasts, so the above
limitations or exclusion may not apply to you.
This warranty gives you specific legal rights, and you may also have other rights that vary from
province to province, state to state or jurisdiction to jurisdiction.
• No coloque este aparato sobre o cerca de quemadores calientes eléctricos
o de estufas de gas o dentro de un horno caliente.
How to Obtain Warranty Service
In the U.S.A. –
If you have any question regarding this warranty or would like to obtain warranty service,
please call 1.800.334.0759 and a convenient service center address will be provided to you.
In Canada –
If you have any question regarding this warranty or would like to obtain warranty service,
please call 1.800.667.8623 and a convenient service center address will be provided to you.
• Levante y abra la tapa cuidadosamente y permita que el agua escurra
dentro de la vaporera para evitar quemaduras.
In the U.S.A., this warranty is offered by Sunbeam Products, Inc., located in Boca Raton,
Florida 33431. In Canada, this warranty is offered by Sunbeam Corporation (Canada) Limited,
located at 5975 Falbourne Street, Mississauga, Ontario L5R 3V8.
• El uso de accesorios o aditamentos que no sean los recomendados por
el fabricante de este aparato pueden causar lesiones o daños.
PLEASE DO NOT RETURN THIS PRODUCT TO ANY OF
THESE ADDRESSES OR TO THE PLACE OF PURCHASE.
English-7
– – – FOLD – – –
– – – FOLD – – –
Cuando maneje y saque los componentes,
utilice PROTECTORES RESISTENTES
AL CALOR para evitar quemaduras
ocasionadas por vapor caliente.
GOTEO
Español-4
Visit us at www.oster.com
VAPORERAS DE DOS O TRES NIVELES
P.N. 111858
Español-5
– – – F OLD – – –
– – – F OLD – – –
English-3
English-4
English-5
Printed in China
3. When reheating leftovers in the rice bowl, always spread leftovers evenly in
RICE BOWL and use aluminum foil to cover.
MULTI-TIERED STEAMING
1. Do not wrap or cover when reheating breads.
5. Adjust steaming times accordingly.
2. For leftovers, reheating times are based on foods at refrigerator temperatures.
6. You can steam fresh, frozen or fully-thawed seafood and fish in the
RICE BOWL.
REHEATING: BREADS
AND
LEFTOVERS
3. Clams, oysters and mussels may open at different times. Check the shells
to avoid overcooking.
AND
Imprimé en Chine
Impreso en China
OSTER® es una marca registrada de Sunbeam Products, Inc.
©2003 Sunbeam Products, Inc. Todos los derechos reservados.
• Plug in and set timer to 20 minutes. When the timer rings, unplug cord from
outlet. Allow the unit to cool completely before emptying the water reservoir.
Use cold water to rinse the water reservoir several times.
THE
Distribuido por Sunbeam Products, Inc., Boca Raton, FL 33431
4. You may steam fish fillets in the RICE BOWL. Serve steamed seafood and
fish plain or use seasoned butter or margarine, lemon or favorite sauces.
FISH
www.oster.com
EE.UU. : 1.800.334.0759
Canadá : 1.800.667.8623
2. Most fish and seafood cook very quickly. Steam in small portions
or in amounts as specified.
Para preguntas sobre los productos llame:
Sunbeam Consumer Service
1. Before steaming, clean and prepare fresh seafood and fish.
• Do not use abrasive cleaners
USING
AND
SEAFOOD
Distribué par Sunbeam Products, Inc., Boca Raton, Florida 33431
OSTER® est une marque déposée de Sunbeam Products, Inc.
©2003 Sunbeam Products, Inc. Tous droits réservés.
www.oster.com
3. Frozen vegetables should not be thawed before steaming.
• Wash lid, steaming bowl, rice bowl and drip tray in hot, soapy water.
Rinse and dry all parts, or wash on top rack of dishwasher.
WATER INLET
États-Unis : 1.800.334.0759
Canada : 1.800.667.8623
Pour les questions de produit:
Sunbeam Consumer Service
1. Clean the vegetables thoroughly. Cut off stems; trim, peel or chop if necessary.
Smaller pieces steam faster than larger ones.
VEGETABLES
Distributed by Sunbeam Products, Inc., Boca Raton, FL 33431
OSTER® is a registered trademark of Sunbeam Products, Inc.
7. Rice may be seasoned with salt, pepper or butter after steaming.
CLEANING
©2003 Sunbeam Products, Inc. All rights reserved.
6. Use only clean water in water reservoir
5. When checking/stirring rice, be careful not to drip the condensate into the
rice bowl which would reduce the quality and flavor of the steamed rice.
RICE BOWL
Place rice or other foods with sauce or liquid
in rice bowl. Place rice bowl in the lower
steaming bowl and cover with the lid.
Plug into wall outlet and set timer.
When food is well cooked, unplug unit.
STEP 2
www.oster.com
3. For softer rice, increase by 1 – 2 tablespoons the water mixed with rice
by the specified amount of water on the chart. For firmer rice decrease
water mixed with rice by the same amount.
For product questions contact:
Sunbeam Consumer Service
4. Check doneness and consistency of rice at minimum time specified
for each type, stirring rice at the same time.
USA : 1.800.334.0759
Canada : 1.800.667.8623
2. Accurately measure rice and water then combine in rice bowl. Pour specified
amount of water in water reservoir. Cover and steam.
1. There are many types of rice. Follow specific directions for variety used.
RICE
RICE BOWL
– – – FOLD – – –
– – – FOLD – – –
– – – FOLD – – –
English-6
4. Experiment with your own leftovers.
DRIP TRAY
9
Cooking times are estimates and depend on the
quantity, size, required degree of cooking and
temperature of food. Consider all the cooking
time given in the following guide as suggested
times for double tier steamer.
STEP 1B
FILLING WATER RESERVOIR
• In hard water areas, the scale may build up on the heating element. If scale
is allowed to accumulate, the steam could turn off before the food is cooked.
So, after 7-10 uses, pour 3 cups clear vinegar into the water reservoir then
fill with water up to the HI level. Do not place lid, steaming bowl, rice bowl
and drip tray in this procedure.
• The lower steaming bowl and the rice bowl can be stored inside the upper
steaming bowl with the lid on top.
4. Some frozen vegetables should be placed in the rice bowl and covered with a
piece of aluminum foil during steaming. The frozen foods should be separated
or stirred after 10 – 12 minutes. Use a long-handled fork or spoon to separate
or stir foods.
• Clean reservoir with soapy water then wipe with damp cloth.
UPPER OR LOWER STEAMING BOWLS
STEP 1A
REMOVABLE HEATING
ELEMENT SLEEVE
2. Quantity, quality, freshness and size/uniformity, temperature of frozen food,
may affect steam timing. Adjust water amounts and cooking time as desired.
• Empty the drip tray and the water reservoir. If there is a small amount
of water remaining inside the water box, you can just turn the unit upside
down and water will come out from the water inlet.
• Never immerse the Base, Cord or Plug in water.
• Unplug cord from outlet. Before cleaning, allow Steamer to cool.
CARE
Set the timer to the recommended cooking
time (steaming times can be adjusted as per
your experiment). The light turns on and
steam comes in 35 seconds. The light will
turn off when cooking is completed and the
timer will give a signal bell.
STEP 3
TO USE UPPER OR LOWER STEAMING BOWL
FIRST USE
AND
GRAINS
– – – FOLD – – –
English-2
11
10
HOUSEHOLD USE ONLY
5
Place the largest piece of food with longest
cooking time in the lower steaming bowl. Place
lower bowl on top of drip tray and base. Place
the upper steaming bowl on top of the base
unit, or you can place upper steaming bowl
directly on top of the lower steaming bowl.
(Upper steaming tray not available on Model 5709).
USING YOUR STEAMER
(Not available on Model 5709)
4. Lower Steaming Bowl
Can Be Used As Egg Tray
1. Lid
NOTE: WATER SHOULD
NEVER GO LOWER THAN
LO (MIN) LINE.
• Wipe the inside of the water reservoir with a damp cloth.
THE
– – – FOLD – – –
FOR
10. Timer
9. Water Inlet
(Step 1A) Fill water reservoir with clean water
8. Base Unit
Place unit on a flat, sturdy surface with
adequate clearance (i.e., do not place under
wall cabinets). The steamer unit and
components are not for use in ovens
(microwave, convection or conventional)
or on stovetop.
7. Heating Element
4
6. Removable Heating
Element Sleeve
SPECIAL INSTRUCTIONS
3
P LEASE N OTE : The heating element sleeve
may be removed to allow cleaning of the
heating element. On the heating element
sleeve, there is a small indentation (cut) which
should face downward when replaced on the
heating element.
3. Upper Steaming Bowl
2
(Step 3) Place vegetable, seafood or other
foods without sauce or liquid into the steaming
bowl. Arrange food in center of bowl.
Try not to block steam vents. You can
use lower steaming bowl as an egg tray
by directly placing a total of 8 eggs on it.
(Egg holding steaming tray not available
on Model 5709).
Included is a removable heating element
sleeve. Before cooking, when this sleeve
is placed around the heating element,
the steam function will automatically produce
steam in 35 seconds. Do not operate the
steamer without the heating element sleeve.
2. Rice Bowl
1
INSTANT STEAM FUNCTION
FOOD STEAMER FEATURES
• Remove any labels or stickers from appliance.
BEFORE
TIMER SETTING (Maximum 75 Minutes)
Or you can fill the water reservoir from the
water inlet. There are MAX and MIN lines on
the water box to indicate the water level. Even
while food is still cooking, if the water box
shows that the water level is low, you can add
water accordingly to the water inlet without
moving any of the steaming bowls. (Step 2)
• Thoroughly wash lid, rice bowl, upper steaming bowl, lower steaming bowl,
drip tray and heating element sleeve in warm, soapy water before first use,
then rinse and dry carefully. The heating element sleeve must be installed
around the heating element for proper operation.
Congratulations on your purchase of an OSTER Food Steamer!
To learn more about OSTER® products, please visit us at www.oster.com.
WELCOME
– – – FOLD – – –
English-1
SAVE THESE INSTRUCTIONS
THIS UNIT IS
8
7
6
FOR 120-V AND 127-V MARKETS ONLY
When handling and removing hot components,
use POTHOLDERS to avoid burns from
hot steam.
only. Do not put any other liquids or add
any salt, pepper, etc., in the water reservoir.
Make sure the water does not exceed the
HI fill level or go lower than the LO fill level
as indicated inside the water reservoir. Then
place the drip tray on the base. (Step 1B)
11. Light
To reduce the risk of electrical shock, this appliance has a polarized plug (one
blade is wider than the other). This plug fits a polarized outlet only one way.
This is a safety feature intended to help reduce the risk of electrical shock. If
the plug does not fit fully into the outlet, reverse the plug. If it still does not
fit, contact a qualified electrician. Do not attempt to defeat this safety feature.
• This appliance is intended for household use only.
• Make sure the voltage in your outlet is the same as the voltage indicated on
the appliance’s rating label.
• The length of the cord used on this appliance was selected to reduce the
hazards of becoming tangled in, or tripping over a long cord.
• For safety it is not recommended to use an electrical extension cord with
this appliance.
• Do not immerse base unit in water or other liquids.
• Use with wall receptacle only.
FOR DOUBLE TIER OR
THREE TIER STEAMER
5. Drip Tray
When using electrical appliances, basic safety precautions should always be followed,
including the following:
• READ ALL INSTRUCTIONS.
• Do not touch hot surfaces. Use potholders when removing cover or handling
hot containers to avoid steam burns.
• To protect against electrical shock, do not immerse cord, plug or base unit in
water or other liquids.
• Close supervision is necessary when any appliance is used by or near children.
• Unplug from outlet when not in use. Unplug before putting on or taking off
parts, and allow to cool before cleaning.
• Do not operate any appliance with a damaged cord or plug, or after the
appliance malfunctions or has been damaged in any manner. Return appliance
to an authorized Oster® Service Center for examination, repair or adjustment.
• Do not use outdoors.
• Do not let cord hang over edge of table or counter, or touch hot surfaces.
• Do not operate appliance while empty or without water in the reservoir.
• Do not place on or near a hot gas or electric burner, or in a heated oven.
• Extreme caution must be used when moving an appliance containing hot food
or water or other hot liquids.
• Do not use appliance for other than intended use.
• Lift and open cover carefully to avoid scalding and allow water to drip into steamer.
• The use of accessory attachments not recommended by this appliance
manufacturer may cause hazards.
®
IMPORTANT SAFEGUARDS
Sunbeam Products, Inc., or if in Canada, Sunbeam Corporation (Canada) Limited (collectively “Sunbeam”)
INSTRUCCIONES ESPECIALES
ANTES
BIENVENIDOS
Cuando use algún aparato eléctrico siempre deben seguirse precauciones básicas
de seguridad incluyendo las siguientes:
Este aparato es para uso doméstico únicamente.
•
Asegúrese de que el voltaje del toma de corriente sea el mismo que el voltaje
indicado en la placa del aparato
•
La longitud del cable de alimentación de este aparato se estipuló para reducir
el riesgo de que alguien pueda enredarse o tropezar.
•
Por seguridad, no se recomienda el uso de extensiones eléctricas con este
electrodoméstico.
• LEA TODAS LAS INSTRUCCIONES.
This warranty is valid for the original retail purchaser from the date of initial retail purchase and
is not transferable. Keep the original sales receipt. Proof of purchase is required to obtain warranty
performance. Sunbeam dealers, service centers, or retail stores selling Sunbeam products do not have
the right to alter, modify or any way change the terms and conditions of this warranty.
• No toque las superficies calientes. Cuando quite la tapa o maneje contenedores
calientes, use protectores resistentes al calor para evitar quemaduras ocasionadas
por el vapor.
This warranty does not cover normal wear of parts or damage resulting from any of the following:
negligent use or misuse of the product, use on improper voltage or current, use contrary to the
operating instructions, disassembly, repair or alteration by anyone other than Sunbeam or an
authorized Sunbeam service center. Further, the warranty does not cover: Acts of God, such as fire,
flood, hurricanes and tornadoes.
• Para protegerse contra una descarga eléctrica, no sumerja el cordón, el enchufe
o la base de la unidad en agua o en otros líquidos.
•
•
• Es necesaria la supervisión cercana de un adulto cuando el aparato es usado
por o cerca de niños.
¡Felicitaciones en su compra de un Vaporera de Alimentos OSTER. Para aprender
más sobre productos OSTER ®, por favor visítenos en www.oster.com!
•
DESCRIPCIÓN
DE LAS
1
PARTES
1. Tapa
2. Tazón para Cocinar Arroz
FUNCIÓN
3. Tazón Superior para
Cocinar al Vapor
Conecte en un toma de corriente de pared únicamente
What Are the Limits on Sunbeam’s Liability?
• Desconecte de la toma de corriente cuando no esté en uso. Desconecte antes de
colocar o quitar partes y permita que se enfríe antes de limpiar el electrodoméstico.
Sunbeam shall not be liable for any incidental or consequential damages caused by the breach of any
express, implied or statutory warranty or condition.
Except to the extent prohibited by applicable law, any implied warranty or condition of merchantability
or fitness for a particular purpose is limited in duration to the duration of the above warranty.
Sunbeam disclaims all other warranties, conditions or representations, express, implied, statutory or otherwise.
Sunbeam shall not be liable for any damages of any kind resulting from the purchase, use or misuse of, or
inability to use the product including incidental, special, consequential or similar damages or loss of profits,
or for any breach of contract, fundamental or otherwise, or for any claim brought against purchaser by any
other party.
• No permita que el cordón cuelgue de la orilla de la mesa o del mostrador
o toque superficies calientes.
Some provinces, states or jurisdictions do not allow the exclusion or limitation of incidental
or consequential damages or limitations on how long an implied warranty lasts, so the above
limitations or exclusion may not apply to you.
How to Obtain Warranty Service
In the U.S.A. –
If you have any question regarding this warranty or would like to obtain warranty service,
please call 1.800.334.0759 and a convenient service center address will be provided to you.
• Tenga extremo cuidado cuando mueva un aparato que contenga agua
o alimentos calientes o cualquier otro líquido que esté caliente.
In Canada –
If you have any question regarding this warranty or would like to obtain warranty service,
please call 1.800.667.8623 and a convenient service center address will be provided to you.
• No use este aparato más que para el fin para lo que ha sido diseñado.
ESTE APARATO ES SÓLO
PARA
USO DOMÉSTICO
6
PLEASE DO NOT RETURN THIS PRODUCT TO ANY OF
THESE ADDRESSES OR TO THE PLACE OF PURCHASE.
GUARDE ESTAS INSTRUCCIONES
10
11
English-7
Español-1
(Medida 1A) Llene el tanque con agua limpia
solamente. No coloque ningún otro líquido
en el tanque para agua ni añada sal, pimienta,
etc. Asegúrese de que el agua no exceda el nivel
máximo de llenado HI, o que se encuentre más
abajo del nivel inferior LO, tal como se indica
en el interior del tanque para agua. Después
coloque la bandeja para goteo en la base del
aparato. (Medida 1B)
9. Entrada de Agua
7
8
• El uso de accesorios o aditamentos que no sean los recomendados por
el fabricante de este aparato pueden causar lesiones o daños.
8. Base de la Unidad
Español-2
9
10. Reloj
11. Luz
Español-3
– – – FOLD – – –
MEDIDA 2
User Manual
Manual de Instrucciones
NIVEL
DE
AGUA
(Medida 3) Coloque las verduras, los mariscos
u otros alimentos sin salsas o líquidos dentro
del tazón para cocinar al vapor. Acomode los
alimentos en el centro del tazón. Trate de
no bloquear las ventilas para salida de vapor.
Usted puede utilizar el tazón inferior para
cocinar al vapor como una bandeja para
cocinar huevos, colocando en ella
directamente un total de hasta 8 huevos.
(La bandeja para cocinar huevos al vapor
no está disponible en el Modelo 5709)
CUBIERTA REMOVIBLE DEL
ELEMENTO CALEFACTOR
MEDIDA 1A
O
MODELS/MODELOS
MODÈLES
5709, 5711, 5713
TAZONES SUPERIOR O INFERIOR
PARA COCINAR AL VAPOR
TRES NIVELES
Los tiempos de cocción son estimados y
dependen de la cantidad, tamaño, grado
requerido de cocción y temperatura de los
alimentos. Considere todos los tiempos de
cocción que se ofrecen en la siguiente guía,
como tiempos sugeridos para vaporeras
de dos niveles.
MEDIDA 1B
DE
DOS
Food Steamer
Vaporera de Alimentos
Cuiseur
Coloque en el tazón inferior la pieza más grande de alimento que requiera el
mayor tiempo de cocción a vapor. Coloque el tazón superior para cocinar al
vapor sobre la base de la unidad, o bien; usted puede colocar el tazón superior
para cocinar al vapor, directamente sobre el tazón inferior para cocinar al vapor.
(La bandeja superior para cocinar al vapor no está disponible en el Modelo 5709).
LLENE EL TANQUE
BANDEJA
DE
Manuel d’Instructions
MEDIDA 3
PARA USAR LOS TAZONES SUPERIOR
O INFERIOR Y COCINAR AL VAPOR
PARA VAPORERAS
Coloque la unidad sobre una superficie plana
y resistente, que cuente con el espacio libre
suficiente (por ejemplo, no la coloque debajo
de los gabinetes de la cocina). No debe usar la
vaporera ni sus componentes dentro de hornos
(microondas o convencionales) tampoco sobre
la estufa.
7. Elemento Calefactor
• Levante y abra la tapa cuidadosamente y permita que el agua escurra
dentro de la vaporera para evitar quemaduras.
In the U.S.A., this warranty is offered by Sunbeam Products, Inc., located in Boca Raton,
Florida 33431. In Canada, this warranty is offered by Sunbeam Corporation (Canada) Limited,
located at 5975 Falbourne Street, Mississauga, Ontario L5R 3V8.
6. Cubierta del Elemento
Calefactor
5
• No coloque este aparato sobre o cerca de quemadores calientes eléctricos
o de estufas de gas o dentro de un horno caliente.
VAPOR INSTANTÁNEO
CÓMO USAR SU VAPORERA
• No opere el aparato mientras esté vacío o sin agua en el tanque.
This warranty gives you specific legal rights, and you may also have other rights that vary from
province to province, state to state or jurisdiction to jurisdiction.
5. Bandeja de Goteo
4
DE
NOTE LO SIGUIENTE: Se puede quitar la cubierta
del elemento calefactor para permitir la limpieza
del elemento calefactor. Hay una pequeña
marca (corte) en la cubierta del elemento
calefactor, ésta debe estar colocada hacia
abajo cuando coloque la cubierta sobre
el elemento calefactor.
(No está Desponible en
el Modelo 5709)
Para reducir el riesgo de descargas eléctricas, este aparato cuenta con
un enchufe polarizado (una clavija es más ancha que la otra). Este enchufe
entra en un toma de corriente de una sola manera. Esta es una medida de
seguridad, para reducir el riesgo de choque eléctrico. Si el enchufe no encaja
en el toma de corriente simplemente colóquelo al revés. Si aún así no encaja
llame a un electricista calificado. De ninguna manera intente modificar esta
medida de seguridad.
• No debe usarse en exteriores.
4. Tazón Inferior para
Cocinar al Vapor, Puede
Usarse como una Bandeja
para Cocinar Huevos
3
PARA MERCADOS DE 120-V Y 127-V ÚNICAMENTE
• No opere ningún aparato con un cordón o con un enchufe dañado o después
de que el aparato ha funcionado inadecuadamente o ha sido dañado en
®
cualquier manera. Regrese el aparato a un Centro de Servicio OSTER
autorizado para su revisión, reparación o ajuste.
Usted también puede llenar el tanque para agua
desde la entrada externa. En la caja para agua
hay líneas indicadas con el nivel máximo MAX
y mínimo MIN. Aun cuando los alimentos
están cocinándose, si usted considera que
el nivel de agua está bajo, puede revisarlo
claramente desde la caja de agua y añadir el
agua desde la entrada externa sin mover
ningún tazón para cocinar al vapor. (Medida 2)
NOTA: NO DEJE QUE EL NIVEL DEL
AGUA BAJE MÁS ALLÁ DEL NIVEL
(MÍNIMO) “LO”.
PRIMER USO
Se incluye la cubierta removible del elemento
calefactor. Antes de comenzar a cocinar,
coloque la cubierta sobre el elemento
calefactor y la función de vaporización
producirá vapor automáticamente en
sólo 35 segundos. No opere la vaporera
sin la cubierta del elemento calefactor.
2
No sumerja la base de la unidad en agua o en ningún otro líquido.
DEL
• Quite cualquier etiqueta del aparato.
• Antes del primer uso, lave muy bien con agua tibia y jabonosa la tapa,
el tazón para cocinar arroz, el tazón superior para cocinar al vapor, el tazón
inferior para cocinar al vapor, la bandeja de goteo y la cubierta removible
del elemento calefactor. Después enjuague y seque cuidadosamente.
La cubierta del elemento calefactor debe ser instalada alrededor
del elemento calefactor para que funcione en forma correcta.
• Limpie con un paño húmedo el interior del tanque para agua.
®
warrants that for a period of one year from the date of purchase, this product will be free from defects
in material and workmanship. Sunbeam, at its option, will repair or replace this product or any component
of the product found to be defective during the warranty period. Replacement will be made with a new
or remanufactured product or component. If the product is no longer available, replacement may be made
with a similar product of equal or greater value. This is your exclusive warranty.
– – – FOLD – – –
– – – FOLD – – –
– – – FOLD – – –
– – – FOLD – – –
– – – FOLD – – –
PRECAUCIONES IMPORTANTES
One-Year Limited Warranty
Cuando maneje y saque los componentes,
utilice PROTECTORES RESISTENTES
AL CALOR para evitar quemaduras
ocasionadas por vapor caliente.
GOTEO
Español-4
Visit us at www.oster.com
VAPORERAS DE DOS O TRES NIVELES
P.N. 111858
Español-5
– – – F OLD – – –
– – – F OLD – – –
10
HOUSEHOLD USE ONLY
9
8
7
10. Timer
6
FOR 120-V AND 127-V MARKETS ONLY
• This appliance is intended for household use only.
• Make sure the voltage in your outlet is the same as the voltage indicated on
the appliance’s rating label.
• The length of the cord used on this appliance was selected to reduce the
hazards of becoming tangled in, or tripping over a long cord.
• For safety it is not recommended to use an electrical extension cord with
this appliance.
• Do not immerse base unit in water or other liquids.
• Use with wall receptacle only.
9. Water Inlet
8. Base Unit
Place unit on a flat, sturdy surface with
adequate clearance (i.e., do not place under
wall cabinets). The steamer unit and
components are not for use in ovens
(microwave, convection or conventional)
or on stovetop.
5
7. Heating Element
4
6. Removable Heating
Element Sleeve
Cooking times are estimates and depend on the
quantity, size, required degree of cooking and
temperature of food. Consider all the cooking
time given in the following guide as suggested
times for double tier steamer.
STEP 1B
FOR DOUBLE TIER OR
THREE TIER STEAMER
5. Drip Tray
When using electrical appliances, basic safety precautions should always be followed,
including the following:
• READ ALL INSTRUCTIONS.
• Do not touch hot surfaces. Use potholders when removing cover or handling
hot containers to avoid steam burns.
• To protect against electrical shock, do not immerse cord, plug or base unit in
water or other liquids.
• Close supervision is necessary when any appliance is used by or near children.
• Unplug from outlet when not in use. Unplug before putting on or taking off
parts, and allow to cool before cleaning.
• Do not operate any appliance with a damaged cord or plug, or after the
appliance malfunctions or has been damaged in any manner. Return appliance
to an authorized Oster® Service Center for examination, repair or adjustment.
• Do not use outdoors.
• Do not let cord hang over edge of table or counter, or touch hot surfaces.
• Do not operate appliance while empty or without water in the reservoir.
• Do not place on or near a hot gas or electric burner, or in a heated oven.
• Extreme caution must be used when moving an appliance containing hot food
or water or other hot liquids.
• Do not use appliance for other than intended use.
• Lift and open cover carefully to avoid scalding and allow water to drip into steamer.
• The use of accessory attachments not recommended by this appliance
manufacturer may cause hazards.
3
P LEASE N OTE : The heating element sleeve
may be removed to allow cleaning of the
heating element. On the heating element
sleeve, there is a small indentation (cut) which
should face downward when replaced on the
heating element.
(Not available on Model 5709)
4. Lower Steaming Bowl
Can Be Used As Egg Tray
3. Upper Steaming Bowl
2
1
1. Lid
FOOD STEAMER FEATURES
• Wipe the inside of the water reservoir with a damp cloth.
• Remove any labels or stickers from appliance.
WELCOME
BEFORE
– – – FOLD – – –
– – – FOLD – – –
Or you can fill the water reservoir from the
water inlet. There are MAX and MIN lines on
the water box to indicate the water level. Even
while food is still cooking, if the water box
shows that the water level is low, you can add
water accordingly to the water inlet without
moving any of the steaming bowls. (Step 2)
• Thoroughly wash lid, rice bowl, upper steaming bowl, lower steaming bowl,
drip tray and heating element sleeve in warm, soapy water before first use,
then rinse and dry carefully. The heating element sleeve must be installed
around the heating element for proper operation.
Congratulations on your purchase of an OSTER® Food Steamer!
To learn more about OSTER® products, please visit us at www.oster.com.
IMPORTANT SAFEGUARDS
NOTE: WATER SHOULD
NEVER GO LOWER THAN
LO (MIN) LINE.
THE
FIRST USE
5. Adjust steaming times accordingly.
1. Do not wrap or cover when reheating breads.
4. You may steam fish fillets in the RICE BOWL. Serve steamed seafood and
fish plain or use seasoned butter or margarine, lemon or favorite sauces.
REHEATING: BREADS
AND
LEFTOVERS
• Clean reservoir with soapy water then wipe with damp cloth.
WATER INLET
THE
©2003 Sunbeam Products, Inc. Tous droits réservés.
www.oster.com
États-Unis : 1.800.334.0759
Canada : 1.800.667.8623
Pour les questions de produit:
Sunbeam Consumer Service
Distributed by Sunbeam Products, Inc., Boca Raton, FL 33431
OSTER® is a registered trademark of Sunbeam Products, Inc.
©2003 Sunbeam Products, Inc. All rights reserved.
6. Use only clean water in water reservoir
5. When checking/stirring rice, be careful not to drip the condensate into the
rice bowl which would reduce the quality and flavor of the steamed rice.
RICE BOWL
www.oster.com
USA : 1.800.334.0759
Canada : 1.800.667.8623
4. Check doneness and consistency of rice at minimum time specified
for each type, stirring rice at the same time.
3. For softer rice, increase by 1 – 2 tablespoons the water mixed with rice
by the specified amount of water on the chart. For firmer rice decrease
water mixed with rice by the same amount.
Place rice or other foods with sauce or liquid
in rice bowl. Place rice bowl in the lower
steaming bowl and cover with the lid.
Plug into wall outlet and set timer.
When food is well cooked, unplug unit.
USING
OSTER® est une marque déposée de Sunbeam Products, Inc.
7. Rice may be seasoned with salt, pepper or butter after steaming.
CLEANING
TIMER SETTING (Maximum 75 Minutes)
STEP 2
Distribué par Sunbeam Products, Inc., Boca Raton, Florida 33431
VEGETABLES
• Unplug cord from outlet. Before cleaning, allow Steamer to cool.
Set the timer to the recommended cooking
time (steaming times can be adjusted as per
your experiment). The light turns on and
steam comes in 35 seconds. The light will
turn off when cooking is completed and the
timer will give a signal bell.
SEAFOOD
1. Clean the vegetables thoroughly. Cut off stems; trim, peel or chop if necessary.
Smaller pieces steam faster than larger ones.
• Never immerse the Base, Cord or Plug in water.
STEP 3
AND
2. Quantity, quality, freshness and size/uniformity, temperature of frozen food,
may affect steam timing. Adjust water amounts and cooking time as desired.
• Empty the drip tray and the water reservoir. If there is a small amount
of water remaining inside the water box, you can just turn the unit upside
down and water will come out from the water inlet.
AND
Para preguntas sobre los productos llame:
Sunbeam Consumer Service
3. Frozen vegetables should not be thawed before steaming.
• Wash lid, steaming bowl, rice bowl and drip tray in hot, soapy water.
Rinse and dry all parts, or wash on top rack of dishwasher.
CARE
www.oster.com
EE.UU. : 1.800.334.0759
Canadá : 1.800.667.8623
4. Some frozen vegetables should be placed in the rice bowl and covered with a
piece of aluminum foil during steaming. The frozen foods should be separated
or stirred after 10 – 12 minutes. Use a long-handled fork or spoon to separate
or stir foods.
• Do not use abrasive cleaners
UPPER OR LOWER STEAMING BOWLS
OSTER® es una marca registrada de Sunbeam Products, Inc.
1. Before steaming, clean and prepare fresh seafood and fish.
FISH
For product questions contact:
Sunbeam Consumer Service
2. Accurately measure rice and water then combine in rice bowl. Pour specified
amount of water in water reservoir. Cover and steam.
1. There are many types of rice. Follow specific directions for variety used.
RICE
RICE BOWL
AND
Impreso en China
©2003 Sunbeam Products, Inc. Todos los derechos reservados.
2. Most fish and seafood cook very quickly. Steam in small portions
or in amounts as specified.
• The lower steaming bowl and the rice bowl can be stored inside the upper
steaming bowl with the lid on top.
Imprimé en Chine
Distribuido por Sunbeam Products, Inc., Boca Raton, FL 33431
3. Clams, oysters and mussels may open at different times. Check the shells
to avoid overcooking.
• In hard water areas, the scale may build up on the heating element. If scale
is allowed to accumulate, the steam could turn off before the food is cooked.
So, after 7-10 uses, pour 3 cups clear vinegar into the water reservoir then
fill with water up to the HI level. Do not place lid, steaming bowl, rice bowl
and drip tray in this procedure.
TO USE UPPER OR LOWER STEAMING BOWL
INSTANT STEAM FUNCTION
6. You can steam fresh, frozen or fully-thawed seafood and fish in the
RICE BOWL.
• Plug in and set timer to 20 minutes. When the timer rings, unplug cord from
outlet. Allow the unit to cool completely before emptying the water reservoir.
Use cold water to rinse the water reservoir several times.
(Step 3) Place vegetable, seafood or other
foods without sauce or liquid into the steaming
bowl. Arrange food in center of bowl.
Try not to block steam vents. You can
use lower steaming bowl as an egg tray
by directly placing a total of 8 eggs on it.
(Egg holding steaming tray not available
on Model 5709).
Included is a removable heating element
sleeve. Before cooking, when this sleeve
is placed around the heating element,
the steam function will automatically produce
steam in 35 seconds. Do not operate the
steamer without the heating element sleeve.
2. Rice Bowl
MULTI-TIERED STEAMING
STEP 1A
REMOVABLE HEATING
ELEMENT SLEEVE
Printed in China
2. For leftovers, reheating times are based on foods at refrigerator temperatures.
Place the largest piece of food with longest
cooking time in the lower steaming bowl. Place
lower bowl on top of drip tray and base. Place
the upper steaming bowl on top of the base
unit, or you can place upper steaming bowl
directly on top of the lower steaming bowl.
(Upper steaming tray not available on Model 5709).
FILLING WATER RESERVOIR
USING YOUR STEAMER
SPECIAL INSTRUCTIONS
English-6
3. When reheating leftovers in the rice bowl, always spread leftovers evenly in
RICE BOWL and use aluminum foil to cover.
When handling and removing hot components,
use POTHOLDERS to avoid burns from
hot steam.
(Step 1A) Fill water reservoir with clean water
only. Do not put any other liquids or add
any salt, pepper, etc., in the water reservoir.
Make sure the water does not exceed the
HI fill level or go lower than the LO fill level
as indicated inside the water reservoir. Then
place the drip tray on the base. (Step 1B)
11. Light
To reduce the risk of electrical shock, this appliance has a polarized plug (one
blade is wider than the other). This plug fits a polarized outlet only one way.
This is a safety feature intended to help reduce the risk of electrical shock. If
the plug does not fit fully into the outlet, reverse the plug. If it still does not
fit, contact a qualified electrician. Do not attempt to defeat this safety feature.
English-5
4. Experiment with your own leftovers.
– – – FOLD – – –
FOR
English-4
DRIP TRAY
– – – FOLD – – –
THIS UNIT IS
English-3
– – – FOLD – – –
English-2
11
GRAINS
– – – FOLD – – –
English-1
SAVE THESE INSTRUCTIONS
– – – FOLD – – –
– – – FOLD – – –
PRECAUCIONES IMPORTANTES
One-Year Limited Warranty
Sunbeam Products, Inc., or if in Canada, Sunbeam Corporation (Canada) Limited (collectively “Sunbeam”)
warrants that for a period of one year from the date of purchase, this product will be free from defects
in material and workmanship. Sunbeam, at its option, will repair or replace this product or any component
of the product found to be defective during the warranty period. Replacement will be made with a new
or remanufactured product or component. If the product is no longer available, replacement may be made
with a similar product of equal or greater value. This is your exclusive warranty.
INSTRUCCIONES ESPECIALES
Cuando use algún aparato eléctrico siempre deben seguirse precauciones básicas
de seguridad incluyendo las siguientes:
Conecte en un toma de corriente de pared únicamente
•
No sumerja la base de la unidad en agua o en ningún otro líquido.
•
Por seguridad, no se recomienda el uso de extensiones eléctricas con este
electrodoméstico.
•
La longitud del cable de alimentación de este aparato se estipuló para reducir
el riesgo de que alguien pueda enredarse o tropezar.
•
Asegúrese de que el voltaje del toma de corriente sea el mismo que el voltaje
indicado en la placa del aparato
•
Este aparato es para uso doméstico únicamente.
•
• LEA TODAS LAS INSTRUCCIONES.
This warranty is valid for the original retail purchaser from the date of initial retail purchase and
is not transferable. Keep the original sales receipt. Proof of purchase is required to obtain warranty
performance. Sunbeam dealers, service centers, or retail stores selling Sunbeam products do not have
the right to alter, modify or any way change the terms and conditions of this warranty.
• No toque las superficies calientes. Cuando quite la tapa o maneje contenedores
calientes, use protectores resistentes al calor para evitar quemaduras ocasionadas
por el vapor.
This warranty does not cover normal wear of parts or damage resulting from any of the following:
negligent use or misuse of the product, use on improper voltage or current, use contrary to the
operating instructions, disassembly, repair or alteration by anyone other than Sunbeam or an
authorized Sunbeam service center. Further, the warranty does not cover: Acts of God, such as fire,
flood, hurricanes and tornadoes.
– – – FOLD – – –
• Para protegerse contra una descarga eléctrica, no sumerja el cordón, el enchufe
o la base de la unidad en agua o en otros líquidos.
• Es necesaria la supervisión cercana de un adulto cuando el aparato es usado
por o cerca de niños.
– – – FOLD – – –
Sunbeam disclaims all other warranties, conditions or representations, express, implied, statutory or otherwise.
ANTES
BIENVENIDOS
¡Felicitaciones en su compra de un Vaporera de Alimentos OSTER.® Para aprender
más sobre productos OSTER ®, por favor visítenos en www.oster.com!
DESCRIPCIÓN
1
DE LAS
PARTES
1. Tapa
FUNCIÓN
2
3. Tazón Superior para
Cocinar al Vapor
4. Tazón Inferior para
Cocinar al Vapor, Puede
Usarse como una Bandeja
para Cocinar Huevos
3
PARA MERCADOS DE 120-V Y 127-V ÚNICAMENTE
• No debe usarse en exteriores.
(No está Desponible en
el Modelo 5709)
6. Cubierta del Elemento
Calefactor
5
PARA
DE
DEL
PRIMER USO
VAPOR INSTANTÁNEO
NOTE LO SIGUIENTE: Se puede quitar la cubierta
del elemento calefactor para permitir la limpieza
del elemento calefactor. Hay una pequeña
marca (corte) en la cubierta del elemento
calefactor, ésta debe estar colocada hacia
abajo cuando coloque la cubierta sobre
el elemento calefactor.
5. Bandeja de Goteo
4
USO DOMÉSTICO
6
8. Base de la Unidad
• No use este aparato más que para el fin para lo que ha sido diseñado.
9
10
10. Reloj
11. Luz
Español-3
11
Español-2
CUBIERTA REMOVIBLE DEL
ELEMENTO CALEFACTOR
DOS
O
NIVEL
DE
MEDIDA 2
User Manual
Manual de Instrucciones
AGUA
Manuel d’Instructions
Food Steamer
Vaporera de Alimentos
Cuiseur
MODELS/MODELOS
MODÈLES
5709, 5711, 5713
TAZONES SUPERIOR O INFERIOR
PARA COCINAR AL VAPOR
TRES NIVELES
Los tiempos de cocción son estimados y
dependen de la cantidad, tamaño, grado
requerido de cocción y temperatura de los
alimentos. Considere todos los tiempos de
cocción que se ofrecen en la siguiente guía,
como tiempos sugeridos para vaporeras
de dos niveles.
MEDIDA 1B
DE
DE
Coloque en el tazón inferior la pieza más grande de alimento que requiera el
mayor tiempo de cocción a vapor. Coloque el tazón superior para cocinar al
vapor sobre la base de la unidad, o bien; usted puede colocar el tazón superior
para cocinar al vapor, directamente sobre el tazón inferior para cocinar al vapor.
(La bandeja superior para cocinar al vapor no está disponible en el Modelo 5709).
LLENE EL TANQUE
BANDEJA
MEDIDA 3
PARA USAR LOS TAZONES SUPERIOR
O INFERIOR Y COCINAR AL VAPOR
(Medida 3) Coloque las verduras, los mariscos
u otros alimentos sin salsas o líquidos dentro
del tazón para cocinar al vapor. Acomode los
alimentos en el centro del tazón. Trate de
no bloquear las ventilas para salida de vapor.
Usted puede utilizar el tazón inferior para
cocinar al vapor como una bandeja para
cocinar huevos, colocando en ella
directamente un total de hasta 8 huevos.
(La bandeja para cocinar huevos al vapor
no está disponible en el Modelo 5709)
MEDIDA 1A
PARA VAPORERAS
CÓMO USAR SU VAPORERA
• No opere el aparato mientras esté vacío o sin agua en el tanque.
Coloque la unidad sobre una superficie plana
y resistente, que cuente con el espacio libre
suficiente (por ejemplo, no la coloque debajo
de los gabinetes de la cocina). No debe usar la
vaporera ni sus componentes dentro de hornos
(microondas o convencionales) tampoco sobre
la estufa.
7. Elemento Calefactor
ESTE APARATO ES SÓLO
• Tenga extremo cuidado cuando mueva un aparato que contenga agua
o alimentos calientes o cualquier otro líquido que esté caliente.
(Medida 1A) Llene el tanque con agua limpia
solamente. No coloque ningún otro líquido
en el tanque para agua ni añada sal, pimienta,
etc. Asegúrese de que el agua no exceda el nivel
máximo de llenado HI, o que se encuentre más
abajo del nivel inferior LO, tal como se indica
en el interior del tanque para agua. Después
coloque la bandeja para goteo en la base del
aparato. (Medida 1B)
9. Entrada de Agua
7
8
GUARDE ESTAS INSTRUCCIONES
Español-1
Usted también puede llenar el tanque para agua
desde la entrada externa. En la caja para agua
hay líneas indicadas con el nivel máximo MAX
y mínimo MIN. Aun cuando los alimentos
están cocinándose, si usted considera que
el nivel de agua está bajo, puede revisarlo
claramente desde la caja de agua y añadir el
agua desde la entrada externa sin mover
ningún tazón para cocinar al vapor. (Medida 2)
NOTA: NO DEJE QUE EL NIVEL DEL
AGUA BAJE MÁS ALLÁ DEL NIVEL
(MÍNIMO) “LO”.
• Quite cualquier etiqueta del aparato.
• Antes del primer uso, lave muy bien con agua tibia y jabonosa la tapa,
el tazón para cocinar arroz, el tazón superior para cocinar al vapor, el tazón
inferior para cocinar al vapor, la bandeja de goteo y la cubierta removible
del elemento calefactor. Después enjuague y seque cuidadosamente.
La cubierta del elemento calefactor debe ser instalada alrededor
del elemento calefactor para que funcione en forma correcta.
• Limpie con un paño húmedo el interior del tanque para agua.
2. Tazón para Cocinar Arroz
Se incluye la cubierta removible del elemento
calefactor. Antes de comenzar a cocinar,
coloque la cubierta sobre el elemento
calefactor y la función de vaporización
producirá vapor automáticamente en
sólo 35 segundos. No opere la vaporera
sin la cubierta del elemento calefactor.
What Are the Limits on Sunbeam’s Liability?
• Desconecte de la toma de corriente cuando no esté en uso. Desconecte antes de
colocar o quitar partes y permita que se enfríe antes de limpiar el electrodoméstico.
Sunbeam shall not be liable for any incidental or consequential damages caused by the breach of any
express, implied or statutory warranty or condition.
Except to the extent prohibited by applicable law, any implied warranty or condition of merchantability
or fitness for a particular purpose is limited in duration to the duration of the above warranty.
• No opere ningún aparato con un cordón o con un enchufe dañado o después
de que el aparato ha funcionado inadecuadamente o ha sido dañado en
®
cualquier manera. Regrese el aparato a un Centro de Servicio OSTER
autorizado para su revisión, reparación o ajuste.
Sunbeam shall not be liable for any damages of any kind resulting from the purchase, use or misuse of, or
inability to use the product including incidental, special, consequential or similar damages or loss of profits,
or for any breach of contract, fundamental or otherwise, or for any claim brought against purchaser by any
other party.
Para reducir el riesgo de descargas eléctricas, este aparato cuenta con
un enchufe polarizado (una clavija es más ancha que la otra). Este enchufe
entra en un toma de corriente de una sola manera. Esta es una medida de
seguridad, para reducir el riesgo de choque eléctrico. Si el enchufe no encaja
en el toma de corriente simplemente colóquelo al revés. Si aún así no encaja
llame a un electricista calificado. De ninguna manera intente modificar esta
medida de seguridad.
• No permita que el cordón cuelgue de la orilla de la mesa o del mostrador
o toque superficies calientes.
Some provinces, states or jurisdictions do not allow the exclusion or limitation of incidental
or consequential damages or limitations on how long an implied warranty lasts, so the above
limitations or exclusion may not apply to you.
This warranty gives you specific legal rights, and you may also have other rights that vary from
province to province, state to state or jurisdiction to jurisdiction.
• No coloque este aparato sobre o cerca de quemadores calientes eléctricos
o de estufas de gas o dentro de un horno caliente.
How to Obtain Warranty Service
In the U.S.A. –
If you have any question regarding this warranty or would like to obtain warranty service,
please call 1.800.334.0759 and a convenient service center address will be provided to you.
In Canada –
If you have any question regarding this warranty or would like to obtain warranty service,
please call 1.800.667.8623 and a convenient service center address will be provided to you.
• Levante y abra la tapa cuidadosamente y permita que el agua escurra
dentro de la vaporera para evitar quemaduras.
In the U.S.A., this warranty is offered by Sunbeam Products, Inc., located in Boca Raton,
Florida 33431. In Canada, this warranty is offered by Sunbeam Corporation (Canada) Limited,
located at 5975 Falbourne Street, Mississauga, Ontario L5R 3V8.
• El uso de accesorios o aditamentos que no sean los recomendados por
el fabricante de este aparato pueden causar lesiones o daños.
PLEASE DO NOT RETURN THIS PRODUCT TO ANY OF
THESE ADDRESSES OR TO THE PLACE OF PURCHASE.
English-7
– – – FOLD – – –
– – – FOLD – – –
Cuando maneje y saque los componentes,
utilice PROTECTORES RESISTENTES
AL CALOR para evitar quemaduras
ocasionadas por vapor caliente.
GOTEO
Español-4
Visit us at www.oster.com
VAPORERAS DE DOS O TRES NIVELES
P.N. 111858
Español-5
– – – F OLD – – –
– – – F OLD – – –
English-3
English-4
English-5
Printed in China
3. When reheating leftovers in the rice bowl, always spread leftovers evenly in
RICE BOWL and use aluminum foil to cover.
MULTI-TIERED STEAMING
1. Do not wrap or cover when reheating breads.
5. Adjust steaming times accordingly.
2. For leftovers, reheating times are based on foods at refrigerator temperatures.
6. You can steam fresh, frozen or fully-thawed seafood and fish in the
RICE BOWL.
REHEATING: BREADS
AND
LEFTOVERS
3. Clams, oysters and mussels may open at different times. Check the shells
to avoid overcooking.
AND
Imprimé en Chine
Impreso en China
OSTER® es una marca registrada de Sunbeam Products, Inc.
©2003 Sunbeam Products, Inc. Todos los derechos reservados.
• Plug in and set timer to 20 minutes. When the timer rings, unplug cord from
outlet. Allow the unit to cool completely before emptying the water reservoir.
Use cold water to rinse the water reservoir several times.
THE
Distribuido por Sunbeam Products, Inc., Boca Raton, FL 33431
4. You may steam fish fillets in the RICE BOWL. Serve steamed seafood and
fish plain or use seasoned butter or margarine, lemon or favorite sauces.
FISH
www.oster.com
EE.UU. : 1.800.334.0759
Canadá : 1.800.667.8623
2. Most fish and seafood cook very quickly. Steam in small portions
or in amounts as specified.
Para preguntas sobre los productos llame:
Sunbeam Consumer Service
1. Before steaming, clean and prepare fresh seafood and fish.
• Do not use abrasive cleaners
USING
AND
SEAFOOD
Distribué par Sunbeam Products, Inc., Boca Raton, Florida 33431
OSTER® est une marque déposée de Sunbeam Products, Inc.
©2003 Sunbeam Products, Inc. Tous droits réservés.
www.oster.com
3. Frozen vegetables should not be thawed before steaming.
• Wash lid, steaming bowl, rice bowl and drip tray in hot, soapy water.
Rinse and dry all parts, or wash on top rack of dishwasher.
WATER INLET
États-Unis : 1.800.334.0759
Canada : 1.800.667.8623
Pour les questions de produit:
Sunbeam Consumer Service
1. Clean the vegetables thoroughly. Cut off stems; trim, peel or chop if necessary.
Smaller pieces steam faster than larger ones.
VEGETABLES
Distributed by Sunbeam Products, Inc., Boca Raton, FL 33431
OSTER® is a registered trademark of Sunbeam Products, Inc.
7. Rice may be seasoned with salt, pepper or butter after steaming.
CLEANING
©2003 Sunbeam Products, Inc. All rights reserved.
6. Use only clean water in water reservoir
5. When checking/stirring rice, be careful not to drip the condensate into the
rice bowl which would reduce the quality and flavor of the steamed rice.
RICE BOWL
Place rice or other foods with sauce or liquid
in rice bowl. Place rice bowl in the lower
steaming bowl and cover with the lid.
Plug into wall outlet and set timer.
When food is well cooked, unplug unit.
STEP 2
www.oster.com
3. For softer rice, increase by 1 – 2 tablespoons the water mixed with rice
by the specified amount of water on the chart. For firmer rice decrease
water mixed with rice by the same amount.
For product questions contact:
Sunbeam Consumer Service
4. Check doneness and consistency of rice at minimum time specified
for each type, stirring rice at the same time.
USA : 1.800.334.0759
Canada : 1.800.667.8623
2. Accurately measure rice and water then combine in rice bowl. Pour specified
amount of water in water reservoir. Cover and steam.
1. There are many types of rice. Follow specific directions for variety used.
RICE
RICE BOWL
– – – FOLD – – –
– – – FOLD – – –
– – – FOLD – – –
English-6
4. Experiment with your own leftovers.
DRIP TRAY
9
Cooking times are estimates and depend on the
quantity, size, required degree of cooking and
temperature of food. Consider all the cooking
time given in the following guide as suggested
times for double tier steamer.
STEP 1B
FILLING WATER RESERVOIR
• In hard water areas, the scale may build up on the heating element. If scale
is allowed to accumulate, the steam could turn off before the food is cooked.
So, after 7-10 uses, pour 3 cups clear vinegar into the water reservoir then
fill with water up to the HI level. Do not place lid, steaming bowl, rice bowl
and drip tray in this procedure.
• The lower steaming bowl and the rice bowl can be stored inside the upper
steaming bowl with the lid on top.
4. Some frozen vegetables should be placed in the rice bowl and covered with a
piece of aluminum foil during steaming. The frozen foods should be separated
or stirred after 10 – 12 minutes. Use a long-handled fork or spoon to separate
or stir foods.
• Clean reservoir with soapy water then wipe with damp cloth.
UPPER OR LOWER STEAMING BOWLS
STEP 1A
REMOVABLE HEATING
ELEMENT SLEEVE
2. Quantity, quality, freshness and size/uniformity, temperature of frozen food,
may affect steam timing. Adjust water amounts and cooking time as desired.
• Empty the drip tray and the water reservoir. If there is a small amount
of water remaining inside the water box, you can just turn the unit upside
down and water will come out from the water inlet.
• Never immerse the Base, Cord or Plug in water.
• Unplug cord from outlet. Before cleaning, allow Steamer to cool.
CARE
Set the timer to the recommended cooking
time (steaming times can be adjusted as per
your experiment). The light turns on and
steam comes in 35 seconds. The light will
turn off when cooking is completed and the
timer will give a signal bell.
STEP 3
TO USE UPPER OR LOWER STEAMING BOWL
FIRST USE
AND
GRAINS
– – – FOLD – – –
English-2
11
10
HOUSEHOLD USE ONLY
5
Place the largest piece of food with longest
cooking time in the lower steaming bowl. Place
lower bowl on top of drip tray and base. Place
the upper steaming bowl on top of the base
unit, or you can place upper steaming bowl
directly on top of the lower steaming bowl.
(Upper steaming tray not available on Model 5709).
USING YOUR STEAMER
(Not available on Model 5709)
4. Lower Steaming Bowl
Can Be Used As Egg Tray
1. Lid
NOTE: WATER SHOULD
NEVER GO LOWER THAN
LO (MIN) LINE.
• Wipe the inside of the water reservoir with a damp cloth.
THE
– – – FOLD – – –
FOR
10. Timer
9. Water Inlet
(Step 1A) Fill water reservoir with clean water
8. Base Unit
Place unit on a flat, sturdy surface with
adequate clearance (i.e., do not place under
wall cabinets). The steamer unit and
components are not for use in ovens
(microwave, convection or conventional)
or on stovetop.
7. Heating Element
4
6. Removable Heating
Element Sleeve
SPECIAL INSTRUCTIONS
3
P LEASE N OTE : The heating element sleeve
may be removed to allow cleaning of the
heating element. On the heating element
sleeve, there is a small indentation (cut) which
should face downward when replaced on the
heating element.
3. Upper Steaming Bowl
2
(Step 3) Place vegetable, seafood or other
foods without sauce or liquid into the steaming
bowl. Arrange food in center of bowl.
Try not to block steam vents. You can
use lower steaming bowl as an egg tray
by directly placing a total of 8 eggs on it.
(Egg holding steaming tray not available
on Model 5709).
Included is a removable heating element
sleeve. Before cooking, when this sleeve
is placed around the heating element,
the steam function will automatically produce
steam in 35 seconds. Do not operate the
steamer without the heating element sleeve.
2. Rice Bowl
1
INSTANT STEAM FUNCTION
FOOD STEAMER FEATURES
• Remove any labels or stickers from appliance.
BEFORE
TIMER SETTING (Maximum 75 Minutes)
Or you can fill the water reservoir from the
water inlet. There are MAX and MIN lines on
the water box to indicate the water level. Even
while food is still cooking, if the water box
shows that the water level is low, you can add
water accordingly to the water inlet without
moving any of the steaming bowls. (Step 2)
• Thoroughly wash lid, rice bowl, upper steaming bowl, lower steaming bowl,
drip tray and heating element sleeve in warm, soapy water before first use,
then rinse and dry carefully. The heating element sleeve must be installed
around the heating element for proper operation.
Congratulations on your purchase of an OSTER Food Steamer!
To learn more about OSTER® products, please visit us at www.oster.com.
WELCOME
– – – FOLD – – –
English-1
SAVE THESE INSTRUCTIONS
THIS UNIT IS
8
7
6
FOR 120-V AND 127-V MARKETS ONLY
When handling and removing hot components,
use POTHOLDERS to avoid burns from
hot steam.
only. Do not put any other liquids or add
any salt, pepper, etc., in the water reservoir.
Make sure the water does not exceed the
HI fill level or go lower than the LO fill level
as indicated inside the water reservoir. Then
place the drip tray on the base. (Step 1B)
11. Light
To reduce the risk of electrical shock, this appliance has a polarized plug (one
blade is wider than the other). This plug fits a polarized outlet only one way.
This is a safety feature intended to help reduce the risk of electrical shock. If
the plug does not fit fully into the outlet, reverse the plug. If it still does not
fit, contact a qualified electrician. Do not attempt to defeat this safety feature.
• This appliance is intended for household use only.
• Make sure the voltage in your outlet is the same as the voltage indicated on
the appliance’s rating label.
• The length of the cord used on this appliance was selected to reduce the
hazards of becoming tangled in, or tripping over a long cord.
• For safety it is not recommended to use an electrical extension cord with
this appliance.
• Do not immerse base unit in water or other liquids.
• Use with wall receptacle only.
FOR DOUBLE TIER OR
THREE TIER STEAMER
5. Drip Tray
When using electrical appliances, basic safety precautions should always be followed,
including the following:
• READ ALL INSTRUCTIONS.
• Do not touch hot surfaces. Use potholders when removing cover or handling
hot containers to avoid steam burns.
• To protect against electrical shock, do not immerse cord, plug or base unit in
water or other liquids.
• Close supervision is necessary when any appliance is used by or near children.
• Unplug from outlet when not in use. Unplug before putting on or taking off
parts, and allow to cool before cleaning.
• Do not operate any appliance with a damaged cord or plug, or after the
appliance malfunctions or has been damaged in any manner. Return appliance
to an authorized Oster® Service Center for examination, repair or adjustment.
• Do not use outdoors.
• Do not let cord hang over edge of table or counter, or touch hot surfaces.
• Do not operate appliance while empty or without water in the reservoir.
• Do not place on or near a hot gas or electric burner, or in a heated oven.
• Extreme caution must be used when moving an appliance containing hot food
or water or other hot liquids.
• Do not use appliance for other than intended use.
• Lift and open cover carefully to avoid scalding and allow water to drip into steamer.
• The use of accessory attachments not recommended by this appliance
manufacturer may cause hazards.
®
IMPORTANT SAFEGUARDS