1
s0010_e_qsg_7.fm Page 1 Tuesday, April 10, 2007 5:53 PM
S
T
E
P
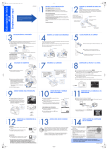
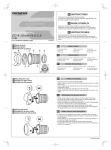
UNPACK THE BOX CONTENTS
S
T
E
P
Start Here
Quick Start Guide
VH963601
Provided contents may differ depending on the camera kit.
Make sure you have all the items shown in the provided contents
list (printed separately).
REVIEW THE DOCUMENTATION
Charge the Lithium ion battery using the provided charger. The
Lithium ion battery is not fully charged when purchased. Before
use, be sure to charge the Lithium ion battery.
Charging indicator
Red light: Charging in progress
Green light: Charging completed
(Charging time: Approx. 5 hours)
Quick Start Guide (this document)
Getting started with your digital camera.
It is strongly recommended that you follow
these step-by-step instructions to set up and
quickly begin using your new Digital
Camera.
CHARGING THE LITHIUM ION
BATTERY
S
T
E
P
Lithium ion battery
(BLM-1)
Quick Reference Guide (reverse side of this document)
Quick guide to using common features and functions.
Remove the protection
cap from the battery.
Instruction Manual
Detailed instructions on all camera features and functions.
Lithium ion charger
(BCM-2)
Software Installation Guide (separate document on OLYMPUS
Master CD-ROM)
Detailed instructions on installing the OLYMPUS Master software.
AC cable
AC wall outlet
Align the battery
with the arrow.
System chart
LOADING THE BATTERY
a. Push the battery compartment lock slightly towards 1 and slide the
2
Battery
compartment
cover
ATTACH THE STRAP
S
T
E
P
This camera can use a CompactFlash, Microdrive or xD-Picture Card. These
cards are optional.
battery compartment cover towards 2.
b. Load and push the battery in until it is locked by the battery lock.
Battery compartment
lock
INSERT THE MEMORY CARD
S
T
E
P
1
a. Insert the card with the contact area facing in the direction shown in the
T Direction indicating mark
a.Thread the strap as indicated by the arrows (1,
2).
2
illustration.
b. Close the card cover.
3
W mark
b.Lastly, pull the strap tight making sure that it is
fastened securely (3).
1
c. Close the battery compartment cover and slide the battery compartment
3
lock in the direction of E.
Unloading the battery
Press the battery lock to
unlock and remove the
battery.
c.Attach the other end of the strap to the other
eyelet in the same way.
Battery lock
CF card slot
ATTACH A LENS
S
T
E
P
2
xD-Picture Card slot
TURN ON THE CAMERA
S
T
E
P
SET THE DATE AND TIME
S
T
E
P
1
Rear cap
a. Remove the body cap from the camera
a. Set the power switch to ON.
and the rear cap from the lens.
AUTO.
To turn off the power, set the
power switch to OFF.
1
a. With the camera on, press the MENU button.
b. Use ac to select [Z] tab, then press d. Use ac to select [X],
b. Set the mode dial to
then press d.
c. Use ac to set the year, then press d.
d. Use ac to set each item and press d to move to the next item.
e. Use ac to select the date format.
f. Press the i button when you have finished entering the date and time.
2
Body cap
b. Align the lens attachment mark (red) on
Alignment mark
(Red)
the camera with the alignment mark
(red) on the lens, then insert the lens
into the camera’s body. Rotate the lens
clockwise until you hear it click.
Lens attachment
mark (Red)
2
3
c. While looking through
the viewfinder, rotate
the diopter adjustment
dial slowly.
When you can see the
AF frame clearly,
adjustment is complete.
1
c. Remove the lens cap.
AF frame
4
3
MENU button
Lens cap
TAKING A PICTURE
S
T
E
P
Y/M/D
REVIEWING AND ERASING
A PICTURE
S
T
E
P
a. Press the q button. The last picture taken
a. Place the AF frame on the subject while
is displayed.
viewing through the viewfinder.
a. Make sure the camera is off.
b. Connect the camera to the computer using the USB cable (included). Set
q button
the camera’s power switch to ON.
b. Use the arrow pad to select images you
b. Press and hold the shutter button halfway to
CONNECTING THE CAMERA TO A
COMPUTER
S
T
E
P
want to view.
lock the focus and exposure, then press the
shutter button completely to take the picture.
c. To return to the shooting mode, press the
shutter button halfway.
Shutter button
AF frame
S button
Arrow pad
ERASING A PICTURE
a. Select the picture you want to erase and
c. Use ac to select [STORAGE]. Press the
press the S button.
i button.
STORAGE
b. Use ac to select [YES], then press the
i button.
VERIFY CAMERA CONNECTION
S
T
E
P
S
T
E
P
CONTROL
EASY PRINT
ABOUT THE CD-ROM DISK
WINDOWS:
a. From the desktop (“Start” menu for XP), open
“My Computer”.
b. Verify that the “Removable Disk” icon
representing the camera is displayed.
MACINTOSH:
a. Verify that the “NO_NAME” icon representing the
camera is displayed.
• The above steps confirm that the camera has been installed
correctly. You can transfer your images immediately using the
standard drag and drop procedure, or enhance your experience
using OLYMPUS Master software (included).
Now that you’ve mastered the basic functionality of your new
Olympus Digital Camera, you are ready to begin exploring the
possibilities that digital photography brings to your computer.
Activities such as photo editing, printing and much more are only steps
away!
OLYMPUS Master software: Download pictures from the camera,
view, organize, retouch, e-mail and print your digital photos and
movies and more!
INSTALLING THE CAMERA
SOFTWARE
S
T
E
P
a. Insert the OLYMPUS Master CD-ROM
into your computer’s CD-ROM drive.
b. For Windows:
Select the display language and click
the “OLYMPUS Master 2” button in
the “OLYMPUS Master 2 Setup”
window.
For Macintosh:
Double-click the “Setup” icon.
c. Follow the on-screen instructions. For
more details, click “Please Read First”.
Please refer to the Quick Reference Guide on the reverse side of this
sheet to familiarize yourself with the commonly used features and
functions of your new Olympus Digital Camera.
Printed in China
s0010_e_qsg_7.fm Page 2 Tuesday, April 10, 2007 5:53 PM
Quick Reference Guide
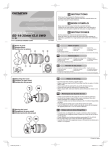
CAMERA DIAGRAM AND CONTROLS
Eyecup
Diopter adjustment dial
Viewfinder
AEL/AFL button
0 (Protect) button
LCD monitor
q (Playback)
button
S (Erase) button
INDEX
INFO (Information
display) button
Tripod socket
Built-in flash
Control dial
Hot shoe
o (Image stabilizer) button
Power switch
# (flash) button
u (Live view) button
< button
P (AF frame) button
F (Exposure
compensation) button
j/Y/<
(Sequential shooting/
Self-timer/Remote control)
button
COPY/< (Copy/Print) button
WB (White balance) button
i button
Arrow pad
AF (Focus mode) button
d (Metering) button
ISO button
MENU button
1. Camera Diagram and Controls
2. How to Use the Mode Dial
3. How to Use the Buttons and Control Dial
4. How to Use the Autofocus
5. Image Quality Modes
6. Flash Modes
7. Viewing Pictures on a TV
8. How to Erase All Pictures
9. E-mailing a Picture
10. Printing a Picture
Mode dial
CF card slot
xD-Picture Card
slot
HOW TO USE THE MODE DIAL
Strap eyelet
Battery
Battery
compartment
compartment
cover
lock
Card cover
Card access lamp
Connector cover
Shutter button
Multi-connector
Eject button
Self-timer/Remote control
lamp/Remote control
receiver
Lens attachment mark
Lens release button
Mount
(Attach the lens after removing the
body cap from the camera to
prevent dust and dirt from
entering the camera body.)
Mirror
HOW TO USE THE BUTTONS AND
CONTROL DIAL
Easy shooting modes
AUTO Full-auto shooting
Allows you to take a picture if you simply press the
shutter button.
i PORTRAIT
Suitable for shooting a portrait-style image of a person.
l LANDSCAPE
Suitable for shooting landscapes and other outdoor
scenes.
& MACRO
Suitable for taking close-up pictures (macro shooting).
This camera has a variety of functions to enable you to optimize settings
for various shooting conditions. You can set the functions using the
buttons and the control dial while viewing the monitor.
j/Y/< (Sequential shooting/Self-timer/Remote control) button:
Sets the Sequential shooting/Self-timer/Remote control.
F (Exposure compensation) button: Sets the exposure compensation value.
j SPORT
Suitable for capturing fast-moving action without blurring.
/ NIGHT & PORTRAIT
Suitable for shooting both the main subject and background at night.
g
18 different shooting modes are available to suit a wide range of shooting situations. When the mode
dial is set to this mode, the shooting mode selection screen is displayed.
(direct button). The direct menu is displayed.
b. Use the control dial to set.
Other buttons
o (Image stabilizer) button: Turns on the image stabilizer.
P (AF frame) button: Selects the AF frame.
S (Erase) button: Erases unwanted images.
ISO button: Sets the ISO sensitivity.
INFO (Information display) button:
Shooting: Displays shooting information on the control panel screen.
Playback: Displays shooting information or histogram of the recorded image.
Each time this button is pressed, the information display is changed.
d (Metering) button: Selects the metering mode.
WB (White balance) button: Selects the white balance appropriate to the light
source from the following options: auto, preset white balance, customized white
balance or one-touch white balance.
P Program shooting
Allows you to shoot using an aperture and shutter speed that the camera sets.
A Aperture priority shooting
Allows you to set the aperture manually. The camera sets the shutter speed automatically.
S Shutter priority shooting
Allows you to set the shutter speed manually. The camera sets the aperture automatically.
M Manual shooting
Allows you to set the aperture and shutter speed manually.
a. Press the button for the function you want to set
u (Live view) button:
Sets the live view mode. The subject is displayed on the LCD monitor. The
display for shooting information can be turned off by pressing the INFO
button.
# (Flash) button: The flash pops up. Sets the flash mode.
Advanced shooting modes
AF (Focus mode) button: Selects the focus mode.
AEL/AFL button: Locks the exposure.
q (Playback) button: Plays back images on the monitor.
MENU button: Displays the menu.
0 (Protect) button: Protects images from being accidentally erased.
HOW TO USE THE AUTOFOCUS
IMAGE QUALITY MODES
FLASH MODES
Your camera is equipped with multiple image quality modes, which
determine the quality and image size of the pictures you take. Below is
a general description of the commonly used modes. For a detailed
description of all quality modes, refer to the Instruction Manual.
This camera features multiple flash modes. You can select the
appropriate flash mode to the suit the situation.
You can set the flash mode from the control panel screen displayed on
the LCD monitor. Press the i button and use the arrow pad to move
the cursor to [FLASH MODE]. Then turn the control dial to select the
setting.
Image becomes clearer
a. While positioning the AF frame over the subject,
Halfway down
press and hold the shutter button halfway.
Shutter button
AF frame
and exposure are locked remains lit as long as the
shutter button is kept depressed.
AF confirmation mark
c. Press the shutter button completely to take the
Number of pixels increases
Application
b. The AF confirmation mark indicating that the focus
Number of
pixels
Low
compression
1/2.7
3648 × 2736
SHQ
Shutter button
VIEWING PICTURES ON A TV
Quality (Compression)
High
High
compression
compression
1/4
1/8
3200 × 2400
2560 × 1920
1600 × 1200
1280 × 960
1024 × 768
Select for the
print size
For small-sized
print and
website
High
compression
1/12
HQ
SQ
640 × 480
You can set the image quality from the control
panel screen displayed on the LCD monitor. Press
the i button and use the arrow pad to move the
cursor to the image quality mode. Then turn the
control dial to select the setting.
D
All the way down
picture.
Lens lock pin
Control panel screen
HOW TO ERASE ALL PICTURES
AUTO
!
• Auto-flash - The camera decides if the flash is needed.
• Red-eye reduction flash - Reduces the incidence of red-eye by
emitting pre-flashes to shrink pupil size before taking the picture.
!SLOW • Slow synchronization + Red-eye reduction flash - This mode is for
SLOW when you want to use slow synchronization, yet also
reduce the red-eye phenomenon.
#SLOW • Slow synchronization (1st curtain) - The flash fires right after the
shutter fully opens.
#SLOW2 • Slow synchronization (2nd curtain) - 2nd curtain flash fires just
before the shutter closes.
#
• Fill-in flash - The flash always fires. Suitable for taking subjects lit
from behind by strong light.
$
• Flash off - The flash is turned off. Suitable for when flash
photography is not permitted. In this mode, the flash can be used
as an AF illuminator when it is raised.
Manual flash: You can also set the amount of light (FULL, 1/4, 1/16, or 1/64) in the
flash mode setting.
E-MAILING A PICTURE
WARNING - PERFORMING THESE STEPS WILL DELETE ALL STORED
PICTURES!
a. Press the MENU button. Use ac to select
a. Turn the camera and TV off, and connect the
[W], then press d.
video cable as illustrated.
b. Use ac to select [CARD SETUP], then
b. Turn on the TV and set it to the video input
press d.
mode. For details on switching to the video
input mode, refer to the TV’s instruction
manual.
c. Turn the camera on and press the q button.
Using the OLYMPUS Master software (included), you can share your pictures with
others by using the built-in e-mail feature.
c. Use ac to select [ALL ERASE], then press
the i button.
q button
After installing OLYMPUS Master, open the program and click “ E-mail” in the
toolbar. Select the image(s) to attach to the e-mail within the thumbnail area, and
drag and drop them into the register area.
d. Use ac to select [YES], then press the i
Multi-connector
button.
Note: If the pictures are not displayed, consult
your TV manual to set up the video source.
At this time, you can resize your pictures to make them more manageable for
e-mail. This helps you stay within the e-mail capacity limitations set by your e-mail
provider.
Video cable
Video input
terminal
PRINTING A PICTURE
Using the OLYMPUS Master software (included), you can make prints of your
pictures using your own photo printer.
After installing OLYMPUS Master, open the program, click “ Print Menu” in
the toolbar, and select “ Photo Print”. With “ Photo Print”, you can drag
and drop the desired image and select a layout to print. “ Index Print” allows
you to print thumbnails with file information. For detailed instructions, please
refer to the “Help” menu in the software.
Alternatively, you can print your pictures by connecting your PictBridge*
compatible camera directly to a PictBridge* compatible printer. This permits fast,
easy printing without using a computer.
When finished, click the “ Launch Mailer” button at the bottom of the
window. Your default e-mail program will open, and the selected picture(s) will
automatically be attached to a new message.
What you can do with OLYMPUS Master software
• The provided software CD includes OLYMPUS Master
software for viewing and editing images. Once
installed, you can take advantage of viewing and
editing your images. For information on how to use
OLYMPUS Master software, see Help after installation.
• Install OLYMPUS Master on your computer from the provided CD-ROM.
OLYMPUS Master allows you to register as the camera’s owner. Doing so will
enable you to receive information on software or firmware upgrades from
Olympus.
CONTACT INFORMATION
3500 Corporate Parkway, P.O. Box 610, Center Valley, PA 18034-0610,
U.S.A.
Technical Support (USA):
24/7 online automated help: http://www.olympusamerica.com/E1
Phone customer support: 1-800-260-1625 (toll free)
Our phone customer support is available from 8am - 10pm, (Monday to
Friday) ET
E-mail: [email protected]
Olympus software updates can be obtained at:
http://www.olympusamerica.com/digital
*For detailed instructions on using PictBridge, please refer to your camera’s
Instruction Manual.
© 2007