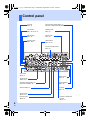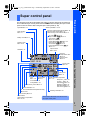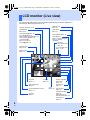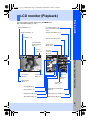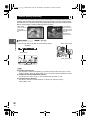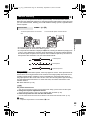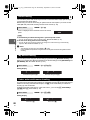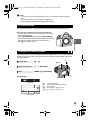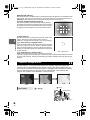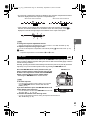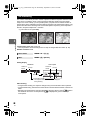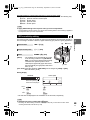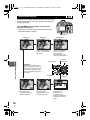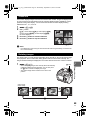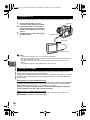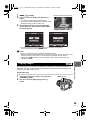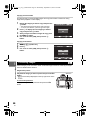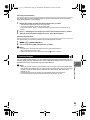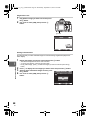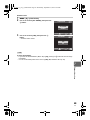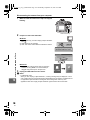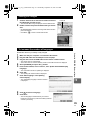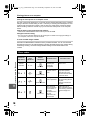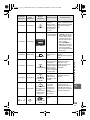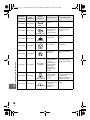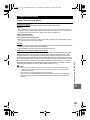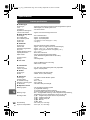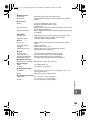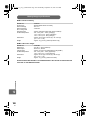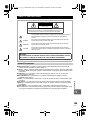
1
s0011_e_00_1_cover_7.fm Page 1 Tuesday, September 25, 2007 12:48 PM DIGITAL CAMERA Basic guide INSTRUCTION MANUAL Printed in China VS026802 INSTRUCTION MANUAL P. 2 Review the camera part names and the basic steps for shooting and playback. Table of Contents P. 20 z Before you start to use your new camera, please read the “Safety Precautions” section in this manual. z We recommend that you take test shots to get accustomed to your camera before taking important photographs. z The screen and camera illustrations shown in this manual were produced during the development stages and may differ from the actual product. z The contents in this manual are based on firmware version 1.0 for this camera. If there are addition and/or modification of functions due to firmware update for the camera, the contents will differ. For the latest information, please visit the Olympus website. s0011_e_00_0_unified.book Page 2 Wednesday, September 12, 2007 4:46 PM Camera Hot shoe gP. 75, 77 External flash connector gP. 77 Built-in flash gP. 73 # (Flash) button gP. 72 w (Flash intensity control) button gP. 73 LIGHT button gP. 14 Control panel gP. 6, 27 WB (White balance) button gP. 63 F (Exposure compensation) button gP. 46 ISO button gP. 49 MODE button gP. 40-44 </Y/j (Remote control/Selftimer/Sequential shooting) button gP. 56-58 AF button gP. 51 G (Metering) button gP. 45 COPY/< (Copy/Print) button gP. 85, 103 Strap eyelet gP. 10 Shutter button gP. 16, 34 VIDEO OUT jack (VIDEO OUT) gP. 84 USB connector gP. 104, 108 Sub dial (k) gP. 27-30 DC-IN jack gP. 125 White balance sensor gP. 64, 99 Connector cover Preview button gP. 45 Lens attachment mark gP. 12 Mount (Attach the lens after removing the body cap from the camera to prevent dust and dirt from entering the camera body.) Mirror #UP (Flash pop-up) button gP. 73 2 EN Remote cable connector gP. 123 Self-timer/Remote control lamp/ Remote control receiver gP. 57, 58 Lens release button gP. 12 Lens lock pin s0011_e_00_0_unified.book Page 3 Wednesday, September 12, 2007 4:46 PM Viewfinder gP. 5 LCD monitor gP. 8, 9, 31 Eyepiece shutter lever gP. 58 Diopter adjustment dial gP. 14 q (Playback) button gP. 18, 79 AEL/AFL button gP. 47, 92 0 (Protect) button gP. 86 Basic guide Eyecup gP. 124 Main dial (j) gP. 27-30 Arrow pad (acbd) gP. 29 i button gP. 29 < button gP. 92 P (AF target) button gP. 53 Card cover gP. 13 Illumination sensor gP. 99 INFO (Information display) button gP. 32, 82 MENU button gP. 29 Tripod socket u (Live view) button gP. 31 SSWF indicator gP. 14, 121 Power switch gP. 14 o (Image stabilizer) button gP. 60 Battery compartment lock gP. 11 xD-Picture Card slot gP. 13 Eject button gP. 13 CF card slot gP. 13 Names of parts and functions S (Erase) button gP. 18, 87 Card access lamp gP. 13, 16, 110 Battery compartment cover gP. 11 Card cover lock gP. 13 3 EN s0011_e_00_0_unified.book Page 4 Wednesday, September 12, 2007 7:29 PM Direct buttons You can set the following functions. Turn the dials while pressing the direct buttons. g“Using the direct buttons” (P. 27) Shooting mode MODE White balance WB gP. 63 Remote control/Self-timer/ Sequential shooting </Y/j gP. 64 j/k gP. 40-44 j j/k WB compensation WB + F gP. 56-58 k Flash mode # gP. 72 j Flash intensity control w WB bracketing WB + MODE gP. 66 j/k Exposure compensation F gP. 46 j/k gP. 73 k Sub dial k Reset F + ISO gP. 33 j/k ISO sensitivity ISO gP. 49 j/k Main dial j Image stabilizer o gP. 60 j/k Metering G gP. 45 k AF mode AF gP. 51 j AE bracketing MODE + AF gP. 48 j/k 4 EN AF target P k gP. 53 s0011_e_00_0_unified.book Page 5 Wednesday, September 12, 2007 4:46 PM Viewfinder Spot metering area gP. 46 Basic guide AF target gP. 53 Shooting mode gP. 40-44 Aperture value gP. 40-43 Shutter speed gP. 40-43 Number of storable sequential pictures gP. 56 Super FP flash gP. 76 Image stabilizer gP. 60 White balance (Displayed when set to a setting other than auto white balance.) gP. 62 AE lock gP. 47 Flash intensity control gP. 73 AF confirmation mark gP. 16, 56 Auto bracket gP. 48, 50, 66, 74 ISO sensitivity value gP. 49 Battery check gP. 14 Names of parts and functions ISO sensitivity gP. 49 Metering mode gP. 45 Exposure level indicator gP. 43 Exposure compensation indicator gP. 46 Flash gP. 73 (blinks: charging in progress, lights up: charging completed) 5 EN s0011_e_00_0_unified.book Page 6 Wednesday, September 12, 2007 4:46 PM Control panel AF mode gP. 51 Exposure level indicator gP. 43 Exposure compensation indicator gP. 46 Auto bracket gP. 48, 50, 66, 74 Metering mode gP. 45 ISO sensitivity gP. 49 Record mode gP. 61 Shooting mode gP. 40-44 White balance gP. 62, 64 Picture mode (Monotone) gP. 67 Flash mode gP. 70 Shutter speed gP. 40-43 Battery check gP. 14 Sequential shooting gP. 56 Noise reduction gP. 69 Image stabilizer gP. 60 Self-timer gP. 57 AF target gP. 53 Aperture value gP. 40-43 Remote control gP. 58 6 EN Number of storable still pictures gP. 133 s0011_e_00_0_unified.book Page 7 Wednesday, September 12, 2007 4:46 PM Super control panel Shutter speed gP. 40-43 My Mode gP. 44 Exposure compensation indicator gP. 46 Exposure level indicator gP. 43 Flash intensity control indicator gP. 73 Flash charging gP. 73 Basic guide The following screen allows the display and setting of shooting settings at the same time and is called the super control panel. Press the INFO button to display the super control panel on the LCD monitor. g“Using the super control panel” (P. 28) RC mode m gP. 76 Super FP flash 1 gP. 76 Auto bracket 0 gP. 48, 50, 66, 74 Image stabilizer H, I gP. 60 Noise reduction O gP. 69 AF illuminator T gP. 90 Internal temperature warning m gP. 119 Battery check gP. 14 Shooting mode gP. 40-44 Aperture value gP. 40-43 Date gP. 15 250 arge Normal Record mode gP. 61 AF mode gP. 51 AF target gP. 53 Flash intensity control gP. 73 Flash mode gP. 70 Remote control/Self-timer/Sequential shooting gP. 56-58 Exposure compensation value gP. 46 Exposure level gP. 43 Picture mode gP. 67 Color space gP. 97 Number of storable still pictures gP. 133 Sharpness N gP. 67 Contrast J gP. 67 Saturation T gP. 67 Gradation z gP. 68 B&W filter x gP. 67 Picture tone y gP. 67 Names of parts and functions RC FP BKT IS 1 NR AF 2007. 12.16 Card gP. 124 F5.6 +2.0 Metering mode gP. 45 ISO sensitivity gP. 49 White balance, White balance compensation gP. 62, 64 The functions within this area can be set on the super control panel. 7 EN s0011_e_00_0_unified.book Page 8 Wednesday, September 12, 2007 4:46 PM LCD monitor (Live view) You can use the LCD monitor to view the subject while shooting. Press the u button to use live view. g“Using live view” (P. 31) Aperture value gP. 40-43 Metering mode gP. 45 Shutter speed gP. 40-43 Flash mode gP. 70 Home position p gP. 55 RC mode q gP. 76 Flash intensity control r gP. 74 Super FP flash s gP. 76 Auto bracket t gP. 48, 50, 66, 74 AE lock u gP. 47 Image stabilizer gP. 60 Flash gP. 73 (blinks: charging in progress, lights up: charging completed) Exposure compensation value gP. 46 Shooting mode gP. 40-44 AF confirmation mark gP. 31, 55 Battery check gP. 14 250 F5.6 +2.0 HP RC FP BKT AEL IS 1 WB AUTO ISO AUTO LN 38 Histogram gP. 117 AF target gP. 53 Number of storable still pictures gP. 133 Spot metering area gP. 46 Internal temperature warning gP. 119 My Mode gP. 44 Record mode gP. 61 Card gP. 124 ISO sensitivity gP. 49 Sequential shooting gP. 56 Self-timer gP. 57 Remote control gP. 58 White balance gP. 62 8 EN s0011_e_00_0_unified.book Page 9 Wednesday, September 12, 2007 4:46 PM LCD monitor (Playback) Record mode gP. 61 Focal distance gP. 126 (The focal distance is displayed in 1 mm units.) Battery check gP. 14 Shooting mode gP. 40-44 Card gP. 124 Aperture value gP. 40-43 Print reservation Number of prints gP. 101 Protect gP. 86 LN Basic guide You can switch the monitor display using the INFO button. g“Information display” (P. 82) Shutter speed gP. 40-43 Exposure compensation gP. 46 x10 [3648x2736,1/8] 15 Single-frame playback information File number gP. 82 Frame number gP. 82 Date and time gP. 15 LN Shooting information Record mode gP. 61 Color space gP. 97 Picture mode gP. 67 AF target gP. 53 Histogram gP. 82 White balance compensation gP. 64 Metering mode gP. 45 Flash intensity control gP. 73 White balance gP. 62 ISO sensitivity gP. 49 Names of parts and functions ’07.12.16 21:56 100-0015 1/250 F5.6 +2.0 45mm ISO 100 0.0 WB : AUTO A : 0 G: 0 NATURAL sRGB 9 EN s0011_e_00_0_unified.book Page 10 Wednesday, September 12, 2007 4:46 PM Unpack the box contents The following items are included with the camera. If anything is missing or damaged, contact the dealer from whom you purchased the camera. Camera Body cap BCM-2 Lithium ion charger OLYMPUS Master 2 CD-ROM Strap BLM-1 Lithium ion battery USB cable Video cable Instruction manual Warranty card Attaching the strap 1 2 Thread the strap as indicated by the arrows (1, 2). 10 EN 3 Lastly, pull the strap tight making sure that it is fastened securely (3). Attach the other end of the strap to the other eyelet in the same way. s0011_e_00_0_unified.book Page 11 Wednesday, September 12, 2007 4:46 PM Preparing the battery Charging the battery Remove the protection cap from the battery. W BLM-1 Lithium ion battery Charging indicator Red light: Charging in progress Green light: Charging completed (Charging time: Approx. 5 hours) Basic guide 1 BCM-2 Lithium ion charger AC cable Align the battery with the arrow. Loading the battery Battery compartment cover 2 Direction indicating mark Battery compartment lock 1 3 Close the battery compartment cover and slide the battery compartment lock in the direction of E Battery lock Unloading the battery Preparations for shooting 3 W 2 AC wall outlet Press the battery lock to unlock the battery. Turn the camera upside-down to remove the battery. It is recommended to set aside a backup battery for prolonged shooting in case the battery in use drains. 11 EN s0011_e_00_0_unified.book Page 12 Wednesday, September 12, 2007 4:46 PM Attaching a lens to the camera 1 Body cap Remove the body cap from the camera and the rear cap from the lens Rear cap 1 2 1 2 2 Attach a lens to the camera • Align the lens attachment mark (red) on the camera with the alignment mark (red) on the lens, then insert the lens into the camera’s body (1). • Rotate the lens in the direction indicated by the arrow until you hear it click (2). Lens attachment mark (Red) Alignment mark (Red) 2 1 Do not press the lens release button. 3 3 Remove the lens cap (3, 4) 3 4 Lens cap Removing the lens from the camera While pressing the lens release button (1), rotate the lens in the direction of the arrow (2). 2 1 Lens release button 12 EN s0011_e_00_0_unified.book Page 13 Wednesday, September 12, 2007 4:46 PM Loading the card xD-Picture Card Slide the card cover lock (1) and open the card cover. Insert the card’s contact area into the slot as far as it can go (2). Slide the card cover lock (1) and open the card cover. Insert the card until it is locked into place (2). Basic guide CompactFlash/Microdrive Card cover 2 2 1 1 CF card slot xD-Picture Card slot W mark Never open the card cover while the card access lamp is blinking. CompactFlash/Microdrive • Press the eject button all the way in to eject the card. • Pull out the card. Eject button xD-Picture Card • Press the inserted card lightly and it will be ejected. • Pull out the card. Preparations for shooting Removing the card Card access lamp 13 EN s0011_e_00_0_unified.book Page 14 Wednesday, September 12, 2007 4:46 PM Power on 1 Set the camera’s power switch to ON • To turn off the power, set the power switch to OFF. Control panel LIGHT button Turns the control panel light on and off. When the camera is turned on, the battery check is displayed on the control panel. Lit up (ready for use) Blinks (charging required) Power switch SSWF indicator Dust reduction function operation The dust reduction function is automatically activated when the camera is turned on. Ultrasonic vibrations are used to remove dust and dirt from the image pickup device’s filter surface. The SSWF (Super Sonic Wave Filter) indicator blinks while dust reduction is working. Adjusting the viewfinder’s diopter Viewfinder Adjust the viewfinder’s diopter in accordance with your vision. While looking through the viewfinder, rotate the diopter adjustment dial little by little. When you can see the AF target clearly, adjustment is complete. Diopter adjustment dial 14 EN AF target s0011_e_00_0_unified.book Page 15 Wednesday, September 12, 2007 4:46 PM Setting the date/time Basic guide Date and time information is recorded on the card together with the images. The file name is also included with the date and time information. Be sure to set the correct date and time before using the camera. 1 Press the MENU button • The menu screen is displayed on the LCD monitor. CARD SETUP CUSTOM RESET PICTURE MODE GRADATION WB CANCEL SELECT 2 Arrow pad acbd MENU button NORM N AUTO 5 Repeat this procedure until the date and time are completely set GO Use ac to select [Z], then press d Y M D TIME 2007 12 01 14 00 Y/M/D ’--.--.---:-- CF/xD EDIT FILENAME SELECT 3 6 Use ac to select the date format GO Use ac to select [X], then press d GO CANCEL • The time is displayed in the 24-hour format. Y M D TIME 2007 12 01 14 00 Y M D TIME GO CANCEL Y/M/D 7 Y/M/D Press the i button CANCEL 4 Y Use ac to select [Y], then press d M D 2007 CANCEL ’07.12.01 14:01 CF/xD EDIT FILENAME VIDEO OUT TIME Y/M/D Preparations for shooting VIDEO OUT CANCEL CF AUTO ENG. NTSC CANCEL 8 SELECT CF AUTO ENG. NTSC GO Press the MENU button to exit 15 EN s0011_e_00_0_unified.book Page 16 Wednesday, September 12, 2007 4:46 PM Shooting Shutter button Viewfinder 1 Place the AF target on the subject while viewing through the viewfinder 2 Adjust the focus Card access lamp Press the shutter button halfway. Viewfinder AF target Control panel Aperture value AF confirmation mark Shutter speed • The focus is locked when a beep tone is output. The AF confirmation mark and the AF target in focus light up in the viewfinder. • The shutter speed and aperture value that have been set automatically by the camera are displayed. • The super control panel is not displayed when the shutter button is pressed. 3 Release the shutter Press the shutter button all the way (fully). • The shutter sounds and the picture is taken. • The card access lamp blinks and the camera starts recording the picture. Never remove the battery or card while the card access lamp is blinking. Doing so could destroy stored pictures and prevent storage of pictures you have just taken. 16 EN s0011_e_00_0_unified.book Page 17 Wednesday, September 12, 2007 4:46 PM Basic guide Holding the camera Keep your fingers and the strap away from the lens, flash, and the white balance sensor. Horizontal grip It is possible to use the LCD monitor as a viewfinder and check the subject’s composition, or shoot while viewing an enlarged display on the LCD monitor. g“Using live view” (P. 31) Taking a picture while viewing the monitor 1 Vertical grip Shutter button Press the u (live view) button 250 F5.6 u button LN 38 2 Press the shutter button all the way down • The picture is taken with the focus adjusted. Preparations for shooting • The subject is displayed on the LCD monitor. When the camera stops operating If no operations are performed for approximately 8 seconds while the camera is on, the monitor backlight turns off to save battery power (when the super control panel is lit). If no operations are performed for approximately one minute thereafter, the camera enters the sleep mode (stand-by) and stops operating. The camera activates again when you touch any button (the shutter button, arrow pad, etc.). g“BACKLIT LCD (Backlight timer)” (P. 95), “SLEEP” (P. 94) 17 EN s0011_e_00_0_unified.book Page 18 Wednesday, September 12, 2007 4:46 PM Playback/Erasing Playing back images Pressing the q button displays the last picture taken. Displays the frame that is stored 10 frames back q button Displays the previous frame Displays the next frame Arrow pad Displays the frame that is stored 10 frames ahead Each time you turn the main dial towards U, the image is incrementally enlarged from 2× to 14×. Close-up playback Main dial Erasing images Play back the image you want to erase and press the S button. Use ac to select [YES] and press the i button to erase. ERASE YES NO S button 18 EN CANCEL SELECT GO s0011_e_00_0_unified.book Page 19 Wednesday, September 12, 2007 4:46 PM Indications used in this manual x Notes Important information on factors which may lead to a malfunction or operational problems. Also warns of operations that should be absolutely avoided. TIPS Useful information and hints that will help you get the most out of your camera. g Reference pages describing details or related information. Basic guide In this manual, j indicates the main dial on the back of the camera. In this manual, k indicates the sub dial on the front of the camera. The operation button icons on the body of the camera are used to indicate the operation buttons in this manual. See “Names of parts and functions” (gP. 2). The following symbols are used throughout this manual. To make the most of this manual You can use the "Table of Contents" (P. 20) or "Index" (P. 151) as well as the following reference to search for information on camera functions and operations. Use this manual according to shooting conditions and to find the desired information. For information on how to operate the camera: g“Using the direct buttons” (P. 27) “Using the super control panel” (P. 28) “Using the menu” (P. 29) To search for a function from a list: g“Menu directory” (P. 135) “Index” (P. 151) Preparations for shooting For information on the possible shooting functions: g“Shooting guides” (P. 34) 19 EN s0011_e_00_0_unified.book Page 20 Wednesday, September 12, 2007 4:46 PM Table of Contents Basic guide 2 Identifies the camera part names and describes the basic steps for shooting and playback. Names of parts and functions........................................................................................ 2 Camera ......................................................................................................... 2 Direct buttons ................................................................................................ 4 Viewfinder ..................................................................................................... 5 Control panel................................................................................................. 6 Super control panel ....................................................................................... 7 LCD monitor (Live view)................................................................................ 8 LCD monitor (Playback) ................................................................................ 9 Unpack the box contents............................................................................. 10 Preparations for shooting ............................................................................................ 11 Preparing the battery................................................................................... 11 Attaching a lens to the camera.................................................................... 12 Loading the card ......................................................................................... 13 Power on ..................................................................................................... 14 Setting the date/time ................................................................................... 15 Shooting ...................................................................................................... 16 Playback/Erasing ........................................................................................ 18 Indications used in this manual ................................................................... 19 1 Basic camera operations 26 Describes the basic operations of the camera. Using the direct buttons............................................................................................... 27 Using the super control panel...................................................................................... 28 Using the menu ........................................................................................................... 29 Using live view............................................................................................................. 31 Switching the information display................................................................ 32 Enlarged display operation.......................................................................... 32 Resetting to the factory default settings ...................................................................... 33 2 Shooting guides k Improving your shooting skills 34 Describes shooting methods for various shooting situations. 20 EN Basic function guides................................................................................................... 34 Focus k Operating the shutter button........................................................ 34 Brightness k Exposure compensation....................................................... 34 Color k White balance............................................................................... 35 Convenient settings k Customizing functions ........................................... 35 A guide to functions for different subjects.................................................................... 36 Taking landscape pictures .......................................................................... 36 Taking flower pictures ................................................................................. 37 Taking night scene pictures ........................................................................ 38 s0011_e_00_0_unified.book Page 21 Wednesday, September 12, 2007 4:46 PM 3 Exposure 40 Describes functions related to exposure, which is important for shooting. These functions are for determining the aperture value, shutter speed, and other settings by measuring the brightness in the picture. Program shooting ........................................................................................................40 Aperture priority shooting ............................................................................................41 Shutter priority shooting...............................................................................................42 Manual shooting ..........................................................................................................43 Bulb shooting ...............................................................................................................44 My Mode shooting .......................................................................................................44 Under water wide/macro shooting ...............................................................................44 Preview function ..........................................................................................................45 Changing the metering mode ......................................................................................45 Exposure compensation ..............................................................................................46 AE lock ........................................................................................................................47 AE bracketing ..............................................................................................................48 ISO sensitivity setting ..................................................................................................49 ISO bracketing .............................................................................................................50 4 Focusing and shooting functions 51 Describes the optimal focusing methods according to the subject and shooting conditions. AF mode selection .......................................................................................................51 S-AF (single AF)..........................................................................................51 C-AF (continuous AF)..................................................................................52 MF (manual focus) ......................................................................................52 Simultaneous use of S-AF mode and MF mode (S-AF+MF) ......................53 Simultaneous use of C-AF mode and MF mode (C-AF+MF) ......................53 AF target selection.......................................................................................................53 Registering an AF target mode ...................................................................55 Focus lock k If correct focus cannot be obtained ......................................................55 Sequential shooting .....................................................................................................56 Self-timer shooting.......................................................................................................57 Remote control shooting..............................................................................................58 Anti-shock ....................................................................................................................59 Image stabilizer ...........................................................................................................60 Checking the image stabilizer effect with live view......................................60 5 Record mode, white balance, and picture mode 61 Describes image adjustment functions specific to digital cameras. Selecting the record mode...........................................................................................61 Recording formats .......................................................................................61 Selecting the record mode ..........................................................................62 21 EN s0011_e_00_0_unified.book Page 22 Wednesday, September 12, 2007 4:46 PM Selecting the white balance......................................................................................... 62 Setting the auto/preset/custom white balance ............................................ 63 WB compensation ....................................................................................... 64 Setting the one-touch white balance ........................................................... 65 WB bracketing ............................................................................................................. 66 Picture mode ............................................................................................................... 67 Gradation..................................................................................................................... 68 Noise reduction............................................................................................................ 69 Noise filter.................................................................................................................... 69 6 Flash shooting 70 Describes how to shoot with the built-in flash and an external flash. Flash mode setting ...................................................................................................... 70 Built-in flash shooting .................................................................................................. 73 Flash intensity control.................................................................................................. 73 Flash bracketing .......................................................................................................... 74 External flash shooting ................................................................................................ 74 Using the external electronic flash .............................................................. 75 Super FP flash ............................................................................................ 76 Shooting with the Olympus wireless RC flash system................................................. 76 Using commercially available flashes.......................................................................... 77 Non-specified commercial flashes .............................................................. 78 7 Playback functions 79 Describes the functions for image playback. Single-frame/Close-up playback.................................................................................. 79 Light box display.......................................................................................................... 80 Index display/Calendar display.................................................................................... 81 Information display ...................................................................................................... 82 Slideshow .................................................................................................................... 83 Rotating images........................................................................................................... 83 Playback on TV ........................................................................................................... 84 Editing still images....................................................................................................... 84 Copying images........................................................................................................... 85 Protecting images........................................................................................................ 86 Erasing images............................................................................................................ 87 8 Customizing your camera 90 Describes how to customize the camera’s settings. 22 EN Custom Menu 1 ........................................................................................................... 90 a AF/MF ..................................................................................................................... 90 AF ILLUMINAT............................................................................................ 90 FOCUS RING.............................................................................................. 90 C-AF LOCK ................................................................................................. 90 AF AREA POINTER.................................................................................... 90 s0011_e_00_0_unified.book Page 23 Wednesday, September 12, 2007 4:46 PM AF SENSITIVITY.........................................................................................90 P SET UP................................................................................................91 RESET LENS ..............................................................................................91 BULB FOCUSING .......................................................................................91 b BUTTON/DIAL ........................................................................................................91 DIAL ............................................................................................................91 AEL/AFL ......................................................................................................92 AEL/AFL MEMO..........................................................................................92 ; FUNCTION...........................................................................................92 MY MODE SETUP ......................................................................................93 BUTTON TIMER .........................................................................................94 A........................................................................................................94 c RELEASE/j.........................................................................................................94 RLS PRIORITY S/RLS PRIORITY C ..........................................................94 O fps.......................................................................................................94 d DISP/8/PC............................................................................................................94 8................................................................................................................94 SLEEP.........................................................................................................94 BACKLIT LCD (Backlight timer) ..................................................................95 4 h TIMER (Auto power off).........................................................................95 USB MODE .................................................................................................95 LIVE VIEW BOOST.....................................................................................95 FRAME ASSIST (Ruled lines display).........................................................95 e EXP/e/ISO ..........................................................................................................96 EV STEP .....................................................................................................96 ISO STEP....................................................................................................96 ISO-AUTO SET ...........................................................................................96 ISO-AUTO ...................................................................................................96 AELMetering................................................................................................96 BULB TIMER...............................................................................................96 f # CUSTOM............................................................................................................96 #X-SYNC. .................................................................................................96 #SLOW LIMIT ............................................................................................96 w+F .........................................................................................................96 g K/COLOR/WB......................................................................................................97 ALL >.....................................................................................................97 COLOR SPACE ..........................................................................................97 SHADING COMP. ......................................................................................97 K SET.......................................................................................................97 PIXEL COUNT ............................................................................................98 h RECORD/ERASE ...................................................................................................98 QUICK ERASE............................................................................................98 RAW+JPEG ERASE ...................................................................................98 FILE NAME .................................................................................................98 PRIORITY SET ...........................................................................................99 dpi SETTING ...............................................................................................99 23 EN s0011_e_00_0_unified.book Page 24 Wednesday, September 12, 2007 4:46 PM i K UTILITY ............................................................................................................ 99 EXT. WB DETECT ...................................................................................... 99 Custom Menu 2 ........................................................................................................... 99 CF/xD .......................................................................................................... 99 EDIT FILENAME ......................................................................................... 99 s (Monitor brightness adjustment)........................................................... 99 W (Changing the display language) .................................................... 100 VIDEO OUT .............................................................................................. 100 REC VIEW ................................................................................................ 100 FIRMWARE............................................................................................... 100 9 Printing 101 Describes how to print your pictures. Print reservation (DPOF) ........................................................................................... 101 Print reservation ........................................................................................ 101 Single-frame reservation ........................................................................... 101 All-frame reservation ................................................................................. 102 Resetting the print reservation data .......................................................... 102 Direct printing (PictBridge)......................................................................................... 103 Connecting the camera to a printer........................................................... 104 Easy printing ............................................................................................. 104 Custom printing ......................................................................................... 105 10 Using the OLYMPUS Master software 107 Describes how to transfer and store your camera images to a computer. Flowchart ................................................................................................................... 107 Using the provided OLYMPUS Master software ....................................................... 107 What is OLYMPUS Master?...................................................................... 107 Connecting the camera to a computer ...................................................................... 108 Start up the OLYMPUS Master software................................................................... 109 Displaying camera images on a computer ................................................................ 109 Downloading and saving images .............................................................. 109 Disconnecting the camera from your computer ........................................ 110 Viewing still images ................................................................................................... 111 To increase the number of languages ....................................................................... 111 Transferring images to your computer without using OLYMPUS Master .................. 112 11 Shooting tips and maintenance 113 Refer to this section for troubleshooting and camera maintenance information. 24 EN Shooting tips and information .................................................................................... 113 Tips before you start taking pictures ......................................................... 113 Shooting tips ............................................................................................. 113 Additional shooting tips and information ................................................... 116 Playback tips ............................................................................................. 117 Viewing pictures on a computer ................................................................ 118 s0011_e_00_0_unified.book Page 25 Wednesday, September 12, 2007 4:46 PM Error codes ................................................................................................................118 Camera maintenance ................................................................................................121 Cleaning and storing the camera ..............................................................121 Cleaning mode k Removing dust ............................................................122 Pixel mapping k Checking the image processing functions ....................122 12 Information 123 Refer to this section for information on optional accessories, camera specifications, and other useful shooting information. Main optional accessories .........................................................................................123 Card basics................................................................................................................124 Usable cards .............................................................................................124 Formatting the card ...................................................................................125 Battery and charger ...................................................................................................125 AC adapter ................................................................................................................125 Using your charger abroad ........................................................................................126 Interchangeable lenses .............................................................................................126 ZUIKO DIGITAL interchangeable lens ......................................................126 ZUIKO DIGITAL lens specifications ..........................................................127 Program line diagram (P mode) ................................................................................128 Flash synchronization and shutter speed ..................................................................129 Exposure warning display..........................................................................................129 Flash distance ...........................................................................................................130 Vignetting of the built-in flash when using an interchangeable lens ..........................130 Flash modes that can be set by shooting mode ........................................................131 White balance color temperature...............................................................................132 Record mode and file size/number of storable still pictures ......................................133 Functions that can be registered with My Mode and Custom Reset Setting .............134 Menu directory ...........................................................................................................135 Glossary ....................................................................................................................139 Specifications ............................................................................................................142 SAFETY PRECAUTIONS..........................................................................................145 Index ..........................................................................................................................151 25 EN s0011_e_00_0_unified.book Page 26 Wednesday, September 12, 2007 4:46 PM 1 Basic camera operations There are three basic ways to make function settings with this camera. 1 Using the direct buttons to operate the camera P. 27 You can make the function settings by rotating the main dial or sub dial while pressing the direct buttons assigned to a function. This is useful for operating the camera while composing the subject in the viewfinder and for quickly operating the camera while checking the settings on the control panel. Basic camera operations Setting while looking at the super control panel P. 28 You can make the function settings with the super control panel on the LCD monitor. You can use the super control panel to view the current settings and directly change the settings. Setting on the menu P. 29 You can use the menu to set shooting and playback settings and customize camera functions. Descriptions in this manual The operating instructions of the direct buttons, super control panel and menu are described as follows in this manual. • “+” indicates operations performed at the same time. • “” indicates you should proceed to the next step. e.g.: When setting the metering mode 26 EN Direct button G+k Super control panel ip: [METERING] Menu MENU[X][METERING] s0011_e_00_0_unified.book Page 27 Wednesday, September 12, 2007 4:46 PM Using the direct buttons There are two ways to use the direct buttons. While holding down a direct button, turn the main dial or sub dial. • Release the button to set the function. • Some functions are set using only the main dial (or sub dial). Sub dial Main dial 1 Basic camera operations • The three buttons next to the flash have two functions each. Use the main dial to operate and set the functions indicated above the buttons, and use the sub dial to operate and set the functions indicated to the side of the buttons. After pressing two direct buttons at the same time, turn the main dial or sub dial. • When the buttons are pressed, the corresponding function is selected. The function remains selected for approximately 8 seconds. You can turn the dial and set the function during that time. If no operations are performed during that time, the setting for that function is then set. Setting information is displayed in the viewfinder and on the control panel and super control panel while you are setting a function. (The setting with the G/AF button is shown in the screenshots.) Viewfinder 2007. 12.16 NR AF arge Normal Control panel Super control panel 27 EN s0011_e_00_0_unified.book Page 28 Wednesday, September 12, 2007 4:46 PM TIPS If you find it difficult to turn the dial while holding down a direct button: j The button may remain selected even after it is released. g“BUTTON TIMER” (P. 94) For details on the functions that can be set with the direct buttons, refer to “Direct buttons” (gP. 4). 1 Using the super control panel Basic camera operations Select an item on the super control panel and change the setting. 1 Press the INFO button to display the super control panel on the LCD monitor. Sub dial • Press the INFO button again to turn off the super control panel. • Press the i button during live view to display the super control panel. 2007. 12.16 Main dial NR AF INFO button i button p Arrow pad arge Normal 2 Press the i button. • The cursor on the super control panel lights. ISO 28 EN Use p to move the cursor to the function you want to set. METERING arge Normal Cursor 3 The name of the selected function is displayed. arge Normal s0011_e_00_0_unified.book Page 29 Wednesday, September 12, 2007 4:46 PM 4 Use the main dial or sub dial to change the setting. • Press the i button to display the direct menu indicated at the position of the cursor. You can also use the direct menu to change the setting. After changing the setting, press the i button to confirm your setting. If no operation is made within a few seconds, your setting is confirmed and the super control panel is displayed. g“BUTTON TIMER” (P. 94) METERING SELECT GO Direct menu Using the menu 1 Press the MENU button. • The menu is displayed on the LCD monitor. CARD SETUP CUSTOM RESET PICTURE MODE GRADATION WB CANCEL SELECT i button NORM N AUTO GO Basic camera operations For details on the functions that can be set with the super control panel, refer to “Super control panel” (gP. 7). 1 MENU button p Arrow pad Operation guide is displayed at the bottom of the screen. CANCEL MENU : Press the MENU button to cancel the setting. SELECT GO OK : Press dac on the arrow pad to move the cursor and select an item. The symbols displayed on the LCD monitor correspond to the arrow pad shown below. t: a u: c 8: d 7: b : Press the i button to confirm your settings. 29 EN s0011_e_00_0_unified.book Page 30 Wednesday, September 12, 2007 4:46 PM 2 Use ac to select a tab and d to set an item. METERING RC MODE 1 AF MODE AF AREA ANTI-SHOCK z CANCEL SELECT Tab 3 METERING RC MODE OFF 0.0 S-AF CANCEL METERING METERING RC MODE OFF 0.0 S-AF AF MODE AF AREA ANTI-SHOCK z OFF GO Use ac to select a function and d to go to the setting screen. AF MODE AF AREA ANTI-SHOCK OFF SELECT GO CANCEL Basic camera operations The current setting is displayed SELECT GO Function Screenshot of menu with the Y tab selected Types of tabs W Sets shooting functions. X Sets shooting functions. q Sets playback functions. Y Customizes shooting functions. Depending on the function being customized, the function is further separated into 9 tabs (A to I). Z Sets the basic functions of the camera. AF/MF BUTTON/DIAL RELEASE/ DISP/8/PC EXP/e/ISO #CUSTOM CANCEL SELECT GO Tab 4 Press the i button to confirm your settings. • Press the i button repeatedly to exit the menu. Using the dials to select a menu • In addition to using the arrow pad, you can also use the dials to select a function. Turn the main dial to move the cursor vertically (the same as pressing ac), and turn the sub dial to move the cursor horizontally (the same as pressing bd). CARD SETUP CUSTOM RESET PICTURE MODE GRADATION WB CANCEL SELECT NORM N AUTO k GO j • Selecting a function and rotating the main dial automatically changes the tab and allows you to select a function on the next tab. CARD SETUP CUSTOM RESET PICTURE MODE GRADATION WB CANCEL SELECT NORM N AUTO GO j METERING RC MODE AF MODE AF AREA ANTI-SHOCK z CANCEL SELECT OFF 0.0 S-AF OFF GO • You can change the operations of the main dial and sub dial. g“DIAL” (P. 91) For details on the functions that can be set with the menu, refer to “Menu directory” (gP. 135). 30 EN s0011_e_00_0_unified.book Page 31 Wednesday, September 12, 2007 4:46 PM Using live view It is possible to use the LCD monitor as a viewfinder. You can view the exposure or white balance effect and the subject’s composition while you take the picture. Close the eyepiece shutter so the light entering through the viewfinder does not affect the exposure while shooting with live view. g“Eyepiece shutter” (P. 58) 1 • The mirror is raised and the subject is displayed on the LCD monitor. • The screen prompting you to close the eyepiece shutter is displayed. Eyepiece shutter lever AEL/AFL button Press the shutter button all the way to take a picture. u button Focusing during live view 250 F5.6 • When you press the shutter button all the way during live view, the focus is locked and a picture is taken. The image display on the monitor freezes as the mirror goes down during focusing. • To focus in advance, hold down the AEL/AFL button and press the shutter button. When the focus is locked, the AF confirmation mark lights up. When the AF confirmation mark is blinking, the focus is not locked. • When the AF mode is set to S-AF, the picture cannot be taken until the focus is locked. • In MF mode, you can press the AEL/AFL button to activate the auto focus. 1 Basic camera operations 2 Press the u button. LN 38 AF confirmation mark Shooting while changing the angle of the LCD monitor You can change the angle of the LCD monitor on the camera. This enables you to shoot at an awkward angle while checking the subject’s composition on the LCD monitor. • Slowly rotate the LCD monitor within the moveable range. 270° 31 EN s0011_e_00_0_unified.book Page 32 Wednesday, September 12, 2007 5:34 PM Switching the information display You can switch the information displayed on the monitor by pressing INFO button repeatedly. Information display on Information display on + Ruled lines display*1 Information display on + Histogram 250 F5.6 250 F5.6 250 F5.6 1 LN 38 38 38 Basic camera operations 250 F5.6 38 Information display off Enlarged display*2 *1 Displayed when [FRAME ASSIST] is set. g“FRAME ASSIST (Ruled lines display)” (P. 95) *2 For operation in the enlarged display, refer to “Enlarged display operation”. Enlarged display operation It is possible to enlarge the subject for display. Enlarging the image during MF makes focus confirmation and adjustment easier. 250 F5.6 1 2 38 Use p to move the frame and press the i button. • Area inside the frame is enlarged and displayed. • Press and hold the i button to return the shifted enlargement frame to the center. Turn the main dial (or sub dial) to change the magnification (5×/7×/10×). • Pressing the i button cancels enlarged display operation. TIPS Checking the image stabilizer effect: j Press and hold the o button. g“Checking the image stabilizer effect with live view” (P. 60) Checking the subject on the monitor even in low light situations: j See “LIVE VIEW BOOST” (gP. 95). x 32 EN Notes • If there is a high-intensity light source within the screen, the image may be displayed darker but will be recorded normally. • If the live view function is used over a long period, the temperature of the image pickup device rises causing images with high ISO sensitivity to appear noisy and unevenly colored. Either lower the ISO sensitivity or turn off the camera for some time. • Exchanging the lens will cause live view to stop. • The following functions are not available during live view. C-AF/AE lock/[AEL/AFL] s0011_e_00_0_unified.book Page 33 Wednesday, September 12, 2007 4:46 PM Resetting to the factory default settings Normally, current camera settings (including any changes you have made) are retained when the power is turned off. To reset the camera to the factory default settings, set [RESET]. You can register settings in advance to [RESET1] and [RESET2]. The camera settings at that time are registered in [RESET1] and [RESET2]. For details on the registered functions, refer to “Functions that can be registered with My Mode and Custom Reset Setting” (gP. 134). Registering [RESET1]/[RESET2] 2 Select either [RESET1]/[RESET2] to register and press d. • If settings have already been registered, [SET] is displayed next to [RESET1]/[RESET2]. Selecting [SET] again overwrites the registered setting. • To cancel the registration, select [RESET]. Select [SET] and press the i button. Using reset settings You can reset the camera to [RESET1] or [RESET2] setting or restore the factory default settings. [RESET] : Resets to the factory default settings. For the default settings, see “Menu directory” (gP. 135). [RESET1]/[RESET2] : Resets to the registered settings. Direct button Basic camera operations 1 1 MENU[W][CUSTOM RESET] Menu F + ISO • Holding down the F button and ISO button at the same time for 2 seconds performs [RESET]. • While pressing two buttons at the same time, turn the dial to select the reset setting. Release the button to reset the settings. Viewfinder : RESET : RESET1 : RESET2 Control panel Menu 1 2 MENU[W][CUSTOM RESET] Select [RESET], [RESET1] , or [RESET2] and press the i button. Use ac to select [YES], then press the i button. RESET1 YES NO CANCEL SELECT GO 33 EN s0011_e_00_0_unified.book Page 34 Wednesday, September 12, 2007 4:46 PM 2 Shooting guides k Improving your shooting skills Basic function guides To familiarize yourself with the camera, you can start off by taking pictures of surrounding subjects, such as children, flowers and pets. If the pictures taken are not to your liking, try adjusting some of the settings below. You can take more satisfying pictures simply by familiarizing yourself with these basic camera functions. Focus k Operating the shutter button 2 Shooting guides k Improving your shooting skills A picture can become out of focus when the focus in the picture is on the foreground, background, or other objects in the picture instead of on the subject. To prevent out-offocus pictures, be sure to focus on the subject you are trying to capture. The shutter button can be pressed halfway down (half-press) and all the way down (full press). Once you are able to operate the shutter button effectively, you can focus accurately even on moving subjects. Halfway down: All the way down: g“Shooting” (P. 16), “Focus lock k If correct focus cannot be obtained” (P. 55) Even when the subject is in focus, the picture can become blurred if you move the camera while the shutter button is being pressed. This is called “camera shake”. Make sure how to properly hold the camera. The camera is particularly subject to shaking when using live view to take pictures while viewing the subject on the monitor. You can reduce camera shake by using the image stabilizer. g“Holding the camera” (P. 17), “Image stabilizer” (P. 60) In addition to incorrect focusing and camera shake, movement of the subject can also cause blurring of the picture. In this case, use a shutter speed that matches the motion of the subject. You can confirm the actual shutter speed and aperture on the displays of the viewfinder, control panel, and monitor by pressing the shutter button halfway. g“Viewfinder” (P. 5), “Control panel” (P. 6), “Super control panel” (P. 7), “LCD monitor (Live view)” (P. 8) Brightness k Exposure compensation The camera automatically determines the aperture value and shutter speed according to the brightness level. This is called auto exposure. However, you may not be able to capture the intended picture with auto exposure alone. In this case, you can increase or decrease the auto exposure setting. Increase the exposure to enhance the brightness of a summer beach or the whiteness of snow. Decrease the exposure when the area to be shot is brighter but smaller compared to its surrounding area. If you are unsure of how much exposure compensation is required, try taking several pictures at various settings and then compare the pictures. 34 EN g“Exposure compensation” (P. 46), “AE bracketing” (P. 48) s0011_e_00_0_unified.book Page 35 Wednesday, September 12, 2007 4:46 PM Color k White balance Besides sunlight, there are other sources for illuminating the subject, such as tungsten and fluorescent lighting. These types of lighting contain particular colors; therefore, the same white object shot under different lighting has slightly different colors. Even under the same sunlight, the colors in the picture differ depending on the sky conditions, the shadows of trees or buildings, and other factors. White balance automatically corrects the effects from these types of lighting and enables shooting with the right colors. You can usually obtain the right colors with the white balance set to [AUTO]. Depending on the shooting conditions, however, you may not be able to obtain the intended colors. In this case, change the setting accordingly. g“Selecting the white balance” (P. 62) Fluorescent light Tungsten light Shade of tree This camera is equipped with various shooting functions that can be customized for ease of use. For example, if you want to take several pictures of the same subject using the same settings, you can register those settings as My Mode for use at a later time. You can then easily load that registered My Mode and use it as the shooting mode. To focus on the subject and then recompose the shot, you can set [AEL/AFL] so that auto focus can be done by pressing the AEL/AFL button, and then you can lock the exposure by pressing the shutter button halfway. You can customize other camera operations, such as by changing the functions assigned to the dials and the < button and by changing the time that the direct buttons remain selected. Shooting guides k Improving your shooting skills Convenient settings k Customizing functions 2 g“MY MODE SETUP” (P. 93), “My Mode shooting” (P. 44), “AEL/AFL” (P. 92), “; FUNCTION” (P. 92), “BUTTON TIMER” (P. 94) 35 EN s0011_e_00_0_unified.book Page 36 Wednesday, September 12, 2007 4:46 PM A guide to functions for different subjects This section describes the functions suitable under different shooting conditions depending on the subject. Taking landscape pictures This section describes how to take outdoor scenery pictures of forests, lakes and beaches in daylight. Changing shooting mode 2 Shooting guides k Improving your shooting skills The proper shooting method varies depending on whether you are trying to capture the silence of a still scene or the dynamism of a motion scene. • To capture the depth of a forest, focus with a wider range of the image. Use A (aperture priority shooting) mode and close the aperture (increase the aperture value) as much as possible. • To capture the waves crashing against the seashore, use S (shutter priority shooting) mode and select a fast shutter speed. To capture a flowing waterfall or river, shoot using a slow shutter speed. Exposure compensation can be used even under different shooting modes. Check the image that you have shot and use + or – to adjust the exposure to obtain better results. Changing white balance The color of water in pictures appears different depending on whether it is a lake reflecting nearby trees or a seashore surrounded by a coral reef. To capture the subtle difference in color, try changing the white balance setting. Change the setting for different situations, such as by using [55300K] for sunny days and [27500K] for outdoor shaded areas on sunny days. Changing metering mode Depending on the depth of the water and the direction of the sun, the brightness of the water can differ significantly in different areas of the same composition. There is also a difference in the brightness of forests depending on the way the trees overlap each other. If you know which areas you want to emphasize the compensation in the image composition, you can change the metering mode. When set to [G] (Digital ESP metering), the camera automatically assesses the brightness in the composition and determines the exposure. To emphasize a specific partial exposure in the composition, change the metering mode to [H] (center weighted metering) or [I] (spot metering), adjust the metering area to the locations that you want to adjust the exposure and then measure the exposure. 36 EN s0011_e_00_0_unified.book Page 37 Wednesday, September 12, 2007 4:46 PM Changing saturation There may be times when you cannot reproduce the desired color even when using white balance or exposure compensation. In this case, you can change the [SATURATION] setting to achieve the desired color. The [SATURATION] setting includes two levels of high and low settings. When the setting is high, a vivid color is used. g“Aperture priority shooting” (P. 41), “Shutter priority shooting” (P. 42), “Changing the metering mode” (P. 45), “Exposure compensation” (P. 46), “Selecting the white balance” (P. 62), “[SATURATION] : Vividness of the color” (P. 67) Taking flower pictures The proper method for taking pictures of flowers differs depending on whether you want to capture, for example, a single flower, a field of blooming flowers, a deep red rose, or the light color of a sweet pea. You can narrow the range of focus, for example, so as to focus on a single flower petal or focus on a single flower in a field of flowers. The default setting enables the camera to focus on an area larger than the selected AF target, but depending on the [AF SENSITIVITY] setting, the camera may focus only on the selected AF target. Changing white balance There are many colors of flowers ranging from light to vivid ones. Depending on the colors of the flowers, subtle color shades may not be captured as seen. In this case, you can check the light conditions and change the white balance setting. At [AUTO], the camera automatically determines the type of light and shoots using the proper white balance. However, you can bring out subtle color shades more effectively by changing the setting according to shooting conditions, such as by using [55300K] for sunny days and [27500K] for outdoor shaded areas on sunny days. Shooting guides k Improving your shooting skills Changing the AF sensitivity 2 Using exposure compensation When shooting flowers against a background, select as simple a background as possible to bring out the shape and color of the flower. When shooting bright and whitish flowers, adjust the exposure compensation to – (minus) so that the flower stands out from the darker background. 37 EN s0011_e_00_0_unified.book Page 38 Wednesday, September 12, 2007 4:46 PM Changing shooting mode 2 Shooting guides k Improving your shooting skills The proper shooting method when taking pictures of flowers differs depending on whether you want to emphasize a single flower or capture a field of flowers. To change the focus area, set the camera to A (aperture priority shooting) mode and select the aperture value. • When you open the aperture (decrease the aperture value), the camera focuses within a shorter range (with a shallow depth of field), emphasizing the subject against a blurred background. • When you close the aperture (increase the aperture value), the camera focuses over a wider range (with more depth of field), producing a picture with both the foreground and background in focus. You can use the preview function to confirm the changes in the depth of field when the aperture is changed. Using live view When using a conventional digital single-lens reflex camera with interchangeable lens system, it was necessary to wait until after taking the picture to check the results of the exposure compensation and white balance settings. With the live view function of this camera, however, you can use the monitor to display and check the subject you want to capture. Changing lenses When the blooming flowers are few and sparse, take the picture using a telephoto lens. With a telephoto lens, you take pictures in which subjects at different distances appear closer together, giving the impression of a more densely blooming flower field. Using the telescopic feature of the zoom lens also achieves the same effect, but it is easier to achieve this effect when the focal distance of the lens is longer, such as 150 mm or 200 mm, rather than 54 mm. g“AF SENSITIVITY” (P. 90), “Aperture priority shooting” (P. 41), “Using live view” (P. 31), “Preview function” (P. 45), “Exposure compensation” (P. 46), “Selecting the white balance” (P. 62) Taking night scene pictures There are different types of night scenes, from the afterglow of a sunset and city lights at night to special light displays and firework displays. Using a tripod Because a slow shutter speed is needed to capture night scenes, a tripod is required to prevent camera shake. If a tripod is not available, you should place the camera on a stable surface to prevent camera shake. Even if the camera is secured, camera shake may occur when pressing the shutter button. Therefore, it is recommended to use the remote control or self timer. 38 EN s0011_e_00_0_unified.book Page 39 Wednesday, September 12, 2007 4:46 PM Changing shooting mode Night scenes have different levels of brightness, and the balance of the brightness in the composition is not uniform. Start by using A (aperture priority shooting) mode to take the picture. Set the aperture to the medium setting (about F8 or F11) and allow the camera to automatically select the shutter speed. When shooting a night scene, because the camera sets the exposure to match the dark areas which occupy a majority of the composition and the image often turns out whitish (overexposed), adjust the exposure compensation to -1 or -1.5. Use [REC VIEW] to check the image and adjust the aperture and exposure compensation as necessary. Image noise can easily occur when shooting at slow shutter speeds. In this case, set [NOISE REDUCT.] to [ON] to reduce noise. Using manual focus g“Program shooting” (P. 40), “Aperture priority shooting” (P. 41), “Remote control shooting” (P. 58), “AF mode selection” (P. 51), “Noise reduction” (P. 69), “REC VIEW” (P. 100) 2 Shooting guides k Improving your shooting skills In cases where you cannot use AF (auto focus) to focus on the subject because the subject is too dark or you cannot focus in time to take pictures, such as during a fireworks display, set the AF mode to [MF] (manual focus) and focus manually. To take pictures of night scenes, turn the focus ring of the lens and check whether you can see the lights of the night scene clearly. To take pictures of a fireworks display, adjust the focus of the lens to infinite unless you are using a long focus lens. If you know the approximate distance to the subject, it is recommended that you focus on something that is at the same distance in advance. 39 EN s0011_e_00_0_unified.book Page 40 Wednesday, September 12, 2007 4:46 PM 3 Exposure Program shooting The camera sets the optimum aperture value and shutter speed automatically according to the subject brightness. Direct button MODE + j[P] MODE button j • When the shutter button is half-pressed, the shutter speed and aperture value are displayed on the viewfinder and control panel. Shooting mode 3 Shutter speed Exposure AF confirmation mark Viewfinder Control panel Aperture value Program shift (%) By turning the main dial (or sub dial) in the P mode, you Program shift can change the combination of aperture and shutter speed while maintaining the optimum exposure. g“Program line diagram (P mode)” (P. 128) Viewfinder • The program shift setting will not be canceled after shooting. To cancel program shift setting, turn the main dial (or sub dial) until the shooting mode indication % on the viewfinder or control panel changes to P or turn off the power. • Program shift is not available when you are using a flash. TIPS The shutter speed and aperture value are blinking: j The optimum exposure cannot be obtained. For details, see “Exposure warning display” (gP. 129). When you want to change the shooting mode using only your right hand: j You can change the shooting mode using the < button and dials. g“; FUNCTION” (P. 92) 40 EN s0011_e_00_0_unified.book Page 41 Wednesday, September 12, 2007 4:46 PM Aperture priority shooting The camera sets the optimum shutter speed automatically for the aperture value you have selected. When you open the aperture (decrease the aperture value), the camera will focus within a shorter range (shallow depth of field) and produce a picture with a blurred background. When you close the aperture (increase the aperture value), the camera will focus within a longer range. Use this mode when you wish to add changes to the background representation. Before shooting, you can use the preview function to check how the background will look in your picture. g“Preview function” (P. 45) When the aperture value (f-number) is increased When the aperture value (f-number) is decreased 3 MODE + j[A] • Turn the main dial (or sub dial) to set the aperture value. Open the aperture (f-number is decreased) Exposure Direct button Viewfinder Aperture value Close the aperture (f-number is increased) Control panel TIPS To check the depth of field with the selected aperture value: j See “Preview function” (gP. 45). To change the exposure adjustment interval: j This can be set in 1/3 EV, 1/2 EV or 1 EV increments. g“EV STEP” (P. 96) Shutter speed is blinking: j The optimum exposure cannot be obtained. For details, see “Exposure warning display” (gP. 129). 41 EN s0011_e_00_0_unified.book Page 42 Wednesday, September 12, 2007 4:46 PM Shutter priority shooting The camera sets the optimum aperture value automatically for the shutter speed you have selected. Set the shutter speed depending on the type of effect you want. A higher shutter speed allows you to capture a fast-moving subject without blur, and a slower shutter speed blurs a moving subject, creating a feeling of speed or motion. A fast shutter speed can freeze a fast action scene without any blur. 3 Direct button A slow shutter speed will blur a fast action scene. This blurring will give the impression of dynamic motion. MODE + j[S] Exposure • Turn the main dial (or sub dial) to set the shutter speed. Slower shutter speed Viewfinder Shutter speed Faster shutter speed Control panel TIPS The picture looks blurred: j The possibility of camera shake spoiling your picture increases greatly during macro or ultratelephoto shooting. Raise the shutter speed or use a monopod or tripod to stabilize the camera. To change the exposure adjustment interval: j This can be set in 1/3 EV, 1/2 EV or 1 EV increments. g“EV STEP” (P. 96) The aperture value is blinking: j The optimum exposure cannot be obtained. For details, see “Exposure warning display” (gP. 129). 42 EN s0011_e_00_0_unified.book Page 43 Wednesday, September 12, 2007 4:46 PM Manual shooting Allows you to set the aperture and shutter speed manually. You can check how much it differs from the appropriate exposure by using the exposure level indicator. This mode gives you more creative control, allowing you to make whatever settings you like, regardless of the correct exposure. Direct button MODE + j[M] To set the aperture value: Turn the main dial. To set the shutter speed: Turn the sub dial. 3 Exposure • The range of aperture values available varies with the lens type. • The shutter speed can be set from 1/8000 to 60 sec. • The exposure level indicator is displayed in M mode, showing the difference (ranging from -3 EV to +3 EV) between the exposure value calculated by the currently selected aperture and shutter speed compared to the exposure value considered optimum by the camera. If the exposure value exceeds ± 3 EV, the entire indicator blinks. Underexposure Overexposure Optimum exposure Noise in images During shooting at slow shutter speeds, noise may appear on-screen. These phenomena are caused when current is generated in those sections of the image pickup device that are not normally exposed to light, resulting in a rise in temperature in the image pickup device or image pickup device drive circuit. This can also occur when shooting with a high ISO setting in a high-temperature environment. To reduce this noise, the camera activates the noise reduction function. g“Noise reduction” (P. 69) TIPS The picture looks blurred: j The use of a monopod or tripod is recommended when taking a picture at slow shutter speed. To change the exposure adjustment interval: j This can be set in 1/3 EV, 1/2 EV or 1 EV increments. g“EV STEP” (P. 96) To switch the operations of the main dial and sub dial: j You can switch the functions that are set with the main dial and sub dial. g“DIAL” (P. 91) x Notes • Exposure compensation is not available in M mode. 43 EN s0011_e_00_0_unified.book Page 44 Wednesday, September 12, 2007 4:46 PM Bulb shooting You can take a picture with a bulb exposure time in which the shutter stays open as long as you hold down the shutter button. Bulb shooting can also be done using an optional remote control (RM-1) or remote control cable (RM-CB1). g“Bulb shooting with the remote control” (P. 59) Direct button MODE + j[B] • “buLb” is displayed in the viewfinder and on the control panel. TIPS To automatically end bulb shooting after a specified period of time: 3 j You can set the maximum time for bulb shooting. g“BULB TIMER” (P. 96) To fix the focus during manual focus shooting: Exposure j You can fix the focus so the focus does not change even if the focus ring is turned during exposure. g“BULB FOCUSING” (P. 91) x Notes • The following functions are not available in A mode. Image stabilizer/sequential shooing/self-timer shooting/AE bracket shooting/flash bracket shooting My Mode shooting You can take pictures using the camera settings registered in the [MY MODE SETUP]. This allows you to register two different combinations of camera settings to both [MY MODE1] and [MY MODE2]. g“MY MODE SETUP” (P. 93) Direct button MODE + j[s]/[T] Setting display When P is assigned to s When S is assigned to T Under water wide/macro shooting This camera has optimal shooting settings for underwater shooting. I (under water wide) is suitable for shooting underwater landscapes, and H (under water macro) is suitable for shooting up close underwater. To shoot using under water wide or under water macro, you must set [; FUNCTION] to [I/H]. g“; FUNCTION” (P. 92) Direct button MODE + j[I]/[H] Setting display 44 EN When set to I When set to H s0011_e_00_0_unified.book Page 45 Wednesday, September 12, 2007 4:46 PM x Notes • To use the camera for underwater shooting, attach a commercially available underwater case. • The following functions are not available in L mode. [CUSTOM RESET]/[PICTURE MODE]/[MY MODE SETUP] Preview function The viewfinder shows the focused area (depth of field) with the selected aperture value. Press the preview button to use the preview function. • You can also use the < button to use the preview function (factory default setting). • When [; FUNCTION] is assigned to [LIVE PREVIEW], pressing the < button automatically switches the camera to live view for a preview of the picture on the monitor. g“; FUNCTION” (P. 92) 3 Changing the metering mode Exposure Preview button There are 5 ways to measure the subject brightness: Digital ESP metering, Center weighted averaging metering, and three types of spot metering. Select the most suitable mode for the shooting conditions. Direct button k G+k G button Super control panel ip: [METERING] Menu MENU[X][METERING] Setting display j i button MENU button Viewfinder G : H : I : IJ : IK : Digital ESP metering Center weighted averaging metering Spot metering Spot metering - highlight control Spot metering - shadow control Control panel 45 EN s0011_e_00_0_unified.book Page 46 Wednesday, September 12, 2007 4:46 PM G Digital ESP metering The camera measures the light levels and calculates the light level differences in 49 separate areas of the image. This mode is recommended for general use. Setting the AF synchronized function to [ESP+AF] enables metering centered around the AF target that is in focus with AF. H Center weighted averaging metering This metering mode provides the average metering between the subject and the background lighting, placing more weight on the subject at the center. Use this mode when you do not want the light level of the background to affect the exposure value. I Spot metering 3 The camera meters a very small area around the center of the subject, defined by the spot metering area mark in the viewfinder. Use this mode when there is very strong backlight. IJ Spot metering - highlight control Exposure When the overall background is bright, white areas of the image will come out gray if you use the camera’s automatic exposure. Using this mode enables the camera to shift to over-exposure, allowing accurate white reproduction. Metering area is the same as spot metering. IK Spot metering - shadow control : Metering area When the overall background is dark, black areas of the image will come out gray if you use the camera’s automatic exposure. Using this mode enables the camera to shift to under-exposure, allowing accurate black reproduction. Metering area is the same as spot metering. Exposure compensation In some situations, you may get better results if you manually compensate (adjust) the exposure value set automatically by the camera. In many cases, bright subjects (such as snow) will turn out darker than their natural colors. Adjusting toward + makes these subjects closer to their real shades. For the same reason, adjust toward – when shooting dark subjects. The exposure can be adjusted in a range of ±5.0 EV. ±0 -2.0EV Direct button F + j/k +2.0EV F button Adjust toward – Adjust toward + 46 EN s0011_e_00_0_unified.book Page 47 Wednesday, September 12, 2007 4:46 PM • The exposure compensation indicator is displayed. The exposure compensation indicator will not be displayed when the exposure is compensated by 0. When set to 1/3 EV increments When set to 1/2 EV increments 1/3 EV 1/2 EV • If the exposure compensation value exceeds the scale of the exposure compensation indicator, the indicator will blink in the viewfinder and on the control panel. A red vw is displayed on the left and right edges of the indicator on the super control panel. 3 j The EV step interval can be selected from 1/3 EV, 1/2 EV or 1 EV. g“EV STEP” (P. 96) To adjust the exposure using only the dials: j You can set the exposure compensation value without pressing F button. g“DIAL” (P. 91) x Notes Exposure TIPS To change the exposure adjustment interval: • Exposure compensation is not available in M and A modes. AE lock The metered exposure value can be locked with the AEL/AFL button (AE lock). Use AE lock when you want a different exposure setting from the one that would normally apply under the current shooting conditions. Normally, pressing the shutter button halfway locks both AF (auto focus) and AE (automatic exposure), but you can lock the exposure alone by pressing the AEL/AFL button. Press the AEL/AFL button at the position where you wish to lock the metering values and the exposure will be locked. The exposure is locked while the AEL/AFL button is pressed. Now press the shutter button. • Releasing the AEL/AFL button cancels AE lock. AEL/AFL button TIPS To lock the exposure: j You can lock the metering result so that it is not canceled when the AEL/AFL button is released. g“AEL/AFL MEMO” (P. 92) If you find it difficult to press the AEL/AFL button and shutter button at the same time: AE lock j You can switch the functions of the AEL/AFL button and the < button. g“A” (P. 94) To activate AE lock with a set metering mode: Viewfinder j You can set the metering mode for locking the exposure with the AE lock. g“AELMetering” (P. 96) 47 EN s0011_e_00_0_unified.book Page 48 Wednesday, September 12, 2007 4:46 PM AE bracketing The camera automatically shoots a number of pictures at different exposure values for each frame. Even in conditions where correct exposure is difficult to obtain (such as a backlit subject or a scene at dusk), you can pick the picture you prefer from a selected number of frames with a variety of different exposure settings (exposure and compensation values). The pictures are taken in the following order: Picture with optimum exposure, picture adjusted in – direction, and picture adjusted in + direction. e.g.) When BKT is set to [3F 1.0EV] 3 -1.0EV ±0 +1.0EV Exposure Compensation value: 0.3, 0.7 or 1.0 • The compensation value will change if the EV step is changed. g“EV STEP” (P. 96) Number of frames: 3 or 5 Direct button MODE + AFj/k Menu MENU[X][AE BKT] Setting display Viewfinder Number of frames Control panel Number of frames EV step EV step Bracketing Compensation range • The exposure value for the next shot is displayed during shooting. Start shooting. • In single-frame shooting, the exposure changes every time the shutter button is pressed. • In sequential shooting, hold down the shutter button until the selected number of frames are taken. • Releasing the shutter button stops auto bracketing shooting. When it stops, 0 blinks in the viewfinder and on the control panel and 0 is displayed in green on the super control panel. 48 EN s0011_e_00_0_unified.book Page 49 Wednesday, September 12, 2007 4:46 PM How AE bracketing compensates exposure in each exposure mode Depending on the selected exposure mode, exposure is compensated in the following way: P mode : Aperture value and shutter speed A mode : Shutter speed S mode : Aperture value M mode : Shutter speed TIPS To apply AE bracketing to the exposure value you have compensated: j Compensate the exposure value, then use the AE bracketing feature. AE bracketing is applied to the exposure value you have compensated. ISO sensitivity setting The higher the ISO value, the greater the camera’s light sensitivity and the better its ability to shoot in low light conditions. However, higher values may give pictures a grainy appearance. ISO button k Super control panel ip: [ISO] Menu MENU[W][ISO] 3 Exposure j ISO + j/k Direct button [AUTO] : The sensitivity is set automatically according to the shooting conditions. For [ISO-AUTO SET], you can set the default (value normally used when the optimal exposure can be MENU button obtained) and upper limit (upper limit of ISO i button that automatically changes). g“ISO-AUTO SET” (P. 96) [100 - 3200]: Fixed ISO sensitivity. [ISO STEP] can be changed to [1/3EV] or [1EV]. g“ISO STEP” (P. 96) Setting display Viewfinder Control panel When set to [AUTO], the default value is displayed. AUTO : 100 : ... ... ... 3200 : • 125 and 1250 are displayed in the viewfinder as 120 and 1200, respectively. TIPS To automatically set the optimal ISO in M mode: j Normally, the AUTO setting is effective in P/A/S mode, but you can set it for use in other shooting modes. g“ISO-AUTO” (P. 96) 49 EN s0011_e_00_0_unified.book Page 50 Wednesday, September 12, 2007 4:46 PM Display after setting 3 Viewfinder Control panel When set to AUTO, ISO-A and the ISO value determined by the camera are displayed. For all other settings, ISO and the set value are displayed. When set to 2000 or a higher value, ISO blinks. When set to a setting other than AUTO, ISO is displayed. When set to 2000 or a higher value, ISO blinks. ISO bracketing Exposure The camera automatically takes pictures at a different ISO sensitivity with the shutter speed and aperture value fixed. 3 images with different exposures are recorded in the order of the set ISO sensitivity (optimum exposure when set to [AUTO]), exposure in the – direction, and exposure in the + direction. Compensation value: 0.3, 0.7 or 1.0 • The compensation value is set in 1/3 EV increments regardless of the ISO step setting. Number of frames: 3 Menu x 50 EN MENU[X][ISO BKT] Notes • Bracketing is performed regardless of the upper limit set with [ISO-AUTO SET]. s0011_e_00_0_unified.book Page 51 Wednesday, September 12, 2007 4:46 PM 4 Focusing and shooting functions AF mode selection The three focus modes S-AF, C-AF, and MF are available with this camera. You can take pictures by combining S-AF or C-AF mode with MF mode. AF button Direct button AF + j Super control panel ip: [AF MODE] Menu MENU[X][AF MODE] j i button MENU button Setting display S-AF : C-AF : MF : Control panel 4 Focusing and shooting functions Viewfinder S-AF+MF : C-AF+MF : S-AF (single AF) Focusing is performed once when the shutter button is pressed halfway. If focusing fails, release your finger from the shutter button and press it halfway again. This mode is suitable for taking pictures of still subjects or subjects with limited movement. Press the shutter button halfway. • When the focus is locked, the AF confirmation mark lights up. • A beep sound is output when the subject is in focus. Viewfinder AF confirmation mark TIPS When it is difficult to focus in the AF mode in low-light conditions: j The built-in flash can function as an AF illuminator. This helps with focusing in low-light conditions in the AF mode. g“AF ILLUMINAT.” (P. 90) When you want to quickly switch from AF mode to MF: j By registering [MF] to the < button, you can press the < button to switch to MF mode. g“; FUNCTION” (P. 92) 51 EN s0011_e_00_0_unified.book Page 52 Wednesday, September 12, 2007 4:46 PM When you want to be able to shoot even if the subject is not in focus: j See “RLS PRIORITY S/RLS PRIORITY C” (gP. 94). To not light up the AF target in the viewfinder when the subject is in focus: j The AF target in the viewfinder lights red when the subject is in focus. You can set the AF target so as not to turn on. g“AF AREA POINTER” (P. 90) C-AF (continuous AF) The camera repeats focusing while the shutter button remains pressed halfway. When the subject is in motion, the camera focuses on the subject in anticipation of its movement (Predictive AF). Even if the subject moves or you change the composition of the picture, the camera continues trying to focus. 4 Press the shutter button halfway and keep it in this position. • When the subject is in focus and locked, the AF confirmation mark lights up. • The AF target does not light up, even when the subject is in focus. • The camera repeats focusing. Even if the subject moves or even if you change the composition of the picture, focusing is tried continuously. • A beep sound is output when the subject is in focus. The beep sound is not output after the third continuous AF operation, even when the subject is in focus. Focusing and shooting functions TIPS The camera focuses on something passing in front of the subject: j You can set the camera so as not to change the focus even if the distance to the subject changes. g“C-AF LOCK” (P. 90) MF (manual focus) This function allows you to manually focus on any subject while looking through the viewfinder. Adjust the focus using the focus ring. Near ) Focus ring TIPS To change the rotational direction of the focus ring: j You can select the rotational direction of the focus ring to suit your preference for how the lens adjusts to the focusing point. g“FOCUS RING” (P. 90) For information on whether the subject is in focus (Focus aid): j When you focus the lens on a subject manually (by turning the focus ring), the AF confirmation mark lights. When B is set with [AF AREA], AF confirmation lights up if the subject is in focus at the center AF target. 52 EN s0011_e_00_0_unified.book Page 53 Wednesday, September 12, 2007 4:46 PM Simultaneous use of S-AF mode and MF mode (S-AF+MF) This function allows you to fine-adjust the focus manually by turning the focus ring after AF is performed in the S-AF mode. When the shutter button is not pressed, MF operation is available. • You can fine-adjust the focus with the focus ring if you have pressed the shutter button halfway and AF is confirmed. You can also fine-adjust the focus with the focus ring when the shutter button is not pressed halfway. x Notes • If the shutter button is pressed again after fine-adjusting the focus with the focus ring, the AF is activated and your adjustments are canceled. Simultaneous use of C-AF mode and MF mode (C-AF+MF) Focus with the focus ring and press the shutter button halfway to activate C-AF mode. • While the shutter button is kept pressed, MF cannot be used. • When the shutter button is not pressed, focusing with MF is possible. TIPS Another way to adjust focus manually in C-AF mode: j You can set the AEL/AFL button to operate C-AF. g“AEL/AFL” (P. 92) x Notes AF target selection This camera has 11 AF targets for focusing on the subject with auto focus. Select the optimal AF target mode according to your subject and the composition. There are two AF target modes: All target AF mode, which uses AF at all AF targets, and Single target AF mode, which uses AF centering around one selected AF target. BAll target AF mode The camera automatically focuses on the subject in front of the camera from among the 11 AF targets. This is useful for shooting moving subjects or relying on the camera for focusing. 4 Focusing and shooting functions • If the shutter button is pressed again after fine-adjusting the focus with the focus ring, the AF is activated and your adjustments are canceled. MSingle target AF mode (o Small-single target AF mode) The camera focuses using one selected AF target. This is useful for accurately focusing on the subject after composing the shot. With M, you can focus using a range that is somewhat larger than one AF target, but you can only set the range within the AF target. When [SMALL] is selected for [AF SENSITIVITY], the setting display changes to o. g“AF SENSITIVITY” (P. 90) 53 EN s0011_e_00_0_unified.book Page 54 Wednesday, September 12, 2007 4:46 PM NDynamic-single target AF mode If the camera cannot focus on the subject using the selected AF target, the camera focuses using the adjacent AF target. Selected AF target Direct button 4 Focusing and shooting functions EN k • When the button is released, the currently selected AF target lights. When M or N is set, you can select the AF target to be used at that point. For operation, refer to Step 2 in “Selecting the AF target position” (gP. 54) in the next section. Super control panel ip: [AF AREA]P +k • When M or N is set, you can turn the dial to select the AF target. Menu MENU button i button MENU[X][AF AREA] • When M or N is set, you can select the AF target with p. Selecting the AF target position Select the AF target to use with Single target AF mode. 1 2 Press the P button and release your finger to enable selection of the AF target. Use the main dial/sub dial or arrow pad to select the AF target. • Use the main dial to perform the same operation as ac, and use the sub dial to perform the same operation as bd. • You can change the operation of the dials and arrow pad for selecting the AF target. g“P SET UP” (P. 91) • Press the i button to return the position of the AF target to the center. 54 P button P+k s0011_e_00_0_unified.book Page 55 Wednesday, September 12, 2007 4:46 PM Registering an AF target mode You can register a frequently used AF target mode and the position of that AF target. You can then quickly load that registered setting (“home position”) and use it when shooting. Registering 1 In the screen of Step 2 of “Selecting the AF target position” (gP. 54), press the < button and F button at the same time. • The home position is registered at the time the buttons are pressed. • The home position cannot be registered when operated from a menu. AF AREA HP SELECT Indicates that the AF target is being registered. 4 Shooting 1 Press the < button. • The registered home position is selected. Press this button again to switch to the original AF target mode. x Notes • The AF sensitivity is not recorded when registering the home position. Focus lock k If correct focus cannot be obtained The camera’s auto focus may not be able to focus on the subject in situations such as when the subject is not in the center of the frame. If this happens, the easiest solution is to use focus lock. Use this when composing the subject outside of the 11 AF targets or when the subject is difficult to focus on. 1 Adjust the AF target with the subject to be focused and press the shutter button halfway until the AF confirmation mark lights up. • The focus is locked. The AF confirmation mark and the AF target in focus light up in the viewfinder. • If the AF confirmation mark blinks, press the shutter button halfway again. • While the shutter button is being pressed, the super control panel disappears. Focusing and shooting functions To use this function, you must assign the [P HOME] function to the < button in advance. g“; FUNCTION” (P. 92) Shutter button Card access lamp 55 EN s0011_e_00_0_unified.book Page 56 Wednesday, September 12, 2007 4:46 PM e.g.) The camera focuses using the center AF target. AF target AF confirmation mark 2 While pressing the shutter button halfway, move to the desired composition and press the button all the way. • The card access lamp blinks while the picture is being stored on the card. 4 Focusing and shooting functions If the subject has lower contrast than its surroundings If the contrast of the subject is weak, such as when the lighting is insufficient or the subject cannot be seen clearly because of fog, the focus may not be achieved. Focus (focus lock) on a high-contrast object the same distance away as the intended subject, recompose your shot and then take the picture. Sequential shooting Single-frame shooting o Shoots 1 frame at a time when the shutter button is pressed (normal shooting mode). Sequential shooting H l Shoots at 5 frames/sec. for as long as the shutter button is pressed (during JPEG). Sequential shooting L O Shoots at the set speed (g“O fps” (P. 94)) for as long as the shutter button is pressed. • Press the shutter button fully and keep it pressed. The camera will take pictures in sequence until you release the button. Number of sequential shots that • Focus, exposure, and white balance are locked at the first can be taken frame (during S-AF, MF). x 56 EN Notes • During sequential shooting, if the battery check blinks due to low battery, the camera stops shooting and starts saving the pictures you have taken on the card. The camera may not save all of the pictures depending on how much battery power remains. s0011_e_00_0_unified.book Page 57 Wednesday, September 12, 2007 4:46 PM Setting method Direct button </Y/j + k Super control panel ip: [</Y/j] </Y/j button k Setting display Viewfinder Control panel 4 Single-frame shooting : Sequential shooting L : 12-second self-timer : 2-second self-timer : Remote control : 2-second remote control : • Anti-shock display: A blinking display in the viewfinder or on the control panel and the D symbol on the super control panel indicates that anti-shock is activated. Self-timer shooting Focusing and shooting functions Sequential shooting H This function lets you take pictures using the self-timer. You can set the camera to release the shutter after either 12 or 2 seconds. Fix the camera securely on a tripod for self-timer shooting. For the setting method, see “Sequential shooting” (gP. 56). Press the shutter button all the way. • A picture is taken. • When Y12s is selected : First, the self-timer lamp lights up for approximately 10 seconds, then it blinks for approximately 2 seconds and the picture is taken. • When Y2s is selected : The self-timer lamp blinks for approximately 2 seconds, and then the picture is taken. • To cancel the activated self-timer, press the </Y/j button. Self-timer lamp 57 EN s0011_e_00_0_unified.book Page 58 Wednesday, September 12, 2007 4:46 PM x Notes • Do not press the shutter button while standing in front of the camera; this could result in the subject being out of focus since focusing is performed when the shutter button is pressed halfway. Eyepiece shutter When shooting without looking through the viewfinder, close the eyepiece shutter to block the viewfinder so that light does not enter the viewfinder and change the exposure. Lift the eyepiece shutter lever. Eyepiece shutter lever Remote control shooting 4 Focusing and shooting functions By using the optional remote control (RM-1), you can take a picture with yourself in it or a night scene without touching the camera. The camera can be set to release the shutter either right away or 2 seconds after the shutter button on the remote control is pressed. Bulb shooting is also possible when using the optional remote control. For the setting method, see “Sequential shooting” (gP. 56). Mount the camera securely on a tripod, point the remote control at the remote control receiver on the camera and press the shutter button on the remote control. • When <0s is selected : The focus and exposure are locked, the remote control lamp blinks and the picture is taken. • When <2s is selected : The focus and exposure are locked, the remote control lamp blinks, and after approximately 2 seconds the picture is taken. Remote control lamp Remote control receiver Transmitted signal effective area Point the remote control at the remote control receiver of the camera within the effective area as shown below. When powerful lighting such as direct sunlight is shining on the remote control receiver, or when fluorescent light or devices emitting electrical or radio waves are nearby, it could narrow the effective area. Remote control 58 EN Remote control receiver s0011_e_00_0_unified.book Page 59 Wednesday, September 12, 2007 4:46 PM TIPS The remote control lamp does not blink after the shutter button on the remote control is pressed: j The transmitted signal may not be effective if the remote control receiver is exposed to powerful lighting. Move the remote control closer to the camera and press the shutter button on the remote control again. j The transmitted signal may not be effective if the remote control is too far from the camera. Move the remote control closer to the camera and press the shutter button on the remote control again. j There is signal interference. Change the channel as described in the remote control’s manual. To cancel the remote control shooting mode: j The remote control shooting mode will not be canceled after shooting. Press the </Y/j button to set to [o] (single-frame shooting), etc. To use the shutter button on the camera in the remote control shooting mode: j The shutter button on the camera still works even in the remote control shooting mode. x Notes • The shutter will not be released if the subject is not in focus. • Under bright light conditions, the remote control lamp may be difficult to see, making it hard to determine whether or not the picture has been taken. • Zoom is not available on the remote control. Bulb shooting with the remote control Press the W button on the remote control to open the shutter. When the time set in “BULB TIMER” (gP. 96) elapses, the shutter closes automatically. Press the T button to close the shutter. Anti-shock You can select the interval from the time the mirror is raised until the shutter is released. This diminishes camera shake caused by vibrations when the mirror moves. This feature can be useful in astrophotography and microscope photography or other photographic situations where a very slow shutter speed is used, and camera vibration needs to be kept to a minimum. 1 2 3 Focusing and shooting functions Set the shooting mode to [A]. g“Bulb shooting” (P. 44) 4 MENU[X][ANTI-SHOCKz] Select from 1 to 30 seconds for the time after the mirror is raised until the shutter is released and press the i button. Anti-shock is added to the shooting functions individually (single-frame shooting, sequential shooting, self-timer shooting, and remote control shooting). For the setting method, see “Sequential shooting” (gP. 56). 59 EN s0011_e_00_0_unified.book Page 60 Wednesday, September 12, 2007 4:46 PM Image stabilizer You can reduce the amount of camera shake that easily occurs when shooting in low light situations or shooting with high magnification. OFF Image stabilizer is off. I.S. 1 Image stabilizer is on. I.S. 2 This is used when panning in the horizontal direction to achieve a blurred background. The horizontal image stabilizer is turned off, and only the vertical image stabilizer is activated. 1 Press and release the o button, and then use the dial to make the setting. j k Setting display Viewfinder 4 : OFF : I.S. 1 Focusing and shooting functions : I.S. 2 o button Control panel Checking the image stabilizer effect with live view You can hold down the o button during live view to see the effect of the image stabilizer on the monitor. While in that position, you can press the shutter button fully to take a picture. • When [IMAGE STABILIZER] is set to [OFF], pressing and holding the o button activates the image stabilizer ([I.S. 1]). • Either releasing the o button or holding down the o button for several seconds turns off the image stabilizer. x 60 EN Notes 250 F5.6 IS 1 LN 38 Green: Image stabilizer active Red : Image stabilizer failure • The image stabilizer cannot correct excessive camera shake or camera shake that occurs when the shutter speed is set to the slowest speed. In these cases, it is recommended that you use a tripod. • When using a tripod, set [IMAGE STABILIZER] to [OFF]. • When using a lens with an image stabilization function, turn off the image stabilization function of either the lens or the camera. • Turning off the camera initializes the image stabilizer function. The camera will vibrate for this operation, but this is not a malfunction. • A red H displayed on the monitor indicates the failure of the image stabilizer function. If you take a picture as is, the composition may be off. Consult your Olympus Authorized Service Center. s0011_e_00_0_unified.book Page 61 Wednesday, September 12, 2007 4:46 PM Record mode, white balance, and picture mode Selecting the record mode You can select a record mode in which to take pictures. Choose the record mode that is best for your purpose (printing, editing on a PC, website editing, etc.). Recording formats JPEG For JPEG images, select a combination of image size (Y, X, W) and compression rate (SF, F, N, B). An image consists of pixels (dots). When you enlarge an image with a low pixel count, it will be displayed as a mosaic. If an image has a high pixel count, the file size (amount of data) will be larger and the number of storable still pictures will be lower. The higher the compression, the smaller the file size. However, the image will have less clarity when played back. Image with a high pixel count 5 Image becomes clearer Application Select for the print size For small-sized prints and use on a web site Number of pixels Pixel count Y (Large) 3648 × 2736 3200 × 2400 2560 × 1920 1600 × 1200 1280 × 960 1024 × 768 X (Middle) W (Small) SF (Super Fine) 1/2.7 YSF Compression rate N F (Fine) (Normal) 1/4 1/8 YF YN B (Basic) 1/12 YB XSF XF XN XB WSF WF WN WB 640 × 480 Record mode, white balance, and picture mode Image with a low pixel count Number of pixels increases 5 RAW This is unprocessed data that has not undergone changes in white balance, sharpness, contrast or color. To display as an image on the computer, use OLYMPUS Master. RAW data cannot be displayed on a different camera or by using common software, and it cannot be selected for print reservation. It is possible to edit images taken with the record mode set to RAW data using this camera. g“Editing still images” (P. 84) 61 EN s0011_e_00_0_unified.book Page 62 Wednesday, September 12, 2007 4:46 PM Selecting the record mode JPEG For JPEG, you can register 4 combinations of images sizes (Y, X, W) and compression rates (SF, F, N, B) from the 12 total combinations available. g“K SET” (P. 97) You can select X or W for the image size and select the pixel size. g“PIXEL COUNT” (P. 98) RAW+JPEG Records both a JPEG and RAW image at the same time each time you take a picture. RAW Records the image in RAW data format. e.g.) The following 9 record modes are available when YF/YN/XN/WN are registered RAW : RAW JPEG : YF/YN/XN/WN RAW+JPEG : RAW+YF/RAW+YN/RAW+XN/RAW+WN 5 Record mode, white balance, and picture mode 62 EN Super control panel ip: [K] Menu MENU[W][K] TIPS To quickly set the record mode: j By setting [RAWK] to the < button, you can turn the dial while pressing the < button to change the record mode. Each time you press the < button, you can easily switch between JPEG data only and JPEG and RAW data. g“; FUNCTION” (P. 92) To find out the file size/number of storable still pictures for each record mode: j “Record mode and file size/number of storable still pictures” (gP. 133) arge Normal CARD SETUP CUSTOM RESETRAW PICTURE MODE F N GRADATION N WB N CANCEL SELECT GO Selecting the white balance Color reproduction differs depending on the light conditions. For instance, when daylight or tungsten lighting is reflected on white paper, the shade of white produced will be slightly different for each. With a digital camera, white color can be adjusted to reproduce more natural white with a digital processor. This is called white balance. There are 4 options for setting the WB with this camera. Auto white balance [AUTO] This function enables the camera to automatically detect white in images and adjust the color balance accordingly. Use this mode for general use. Preset white balance [5][2][3][1][w][x][y][n] 8 different color temperatures are programmed on this camera covering a variety of indoor and outdoor lighting including fluorescent lights, light bulbs, and flashes. For example, use preset WB when you want to reproduce more red in the picture of a sunset, or capture a warmer artistic effect under artificial lighting. s0011_e_00_0_unified.book Page 63 Wednesday, September 12, 2007 4:46 PM Custom white balance [CWB] You can set the color temperature from 2000K to 14000K. For details on color temperature, refer to “White balance color temperature” (gP. 132). g“Setting the auto/preset/custom white balance” (P. 63) One-touch white balance [V1][V2][V3][V4] You can set the optimum white balance for the shooting conditions by pointing the camera at a white object like a sheet of white paper. The white balance achieved with this setting is saved as one of the preset WB settings. 4 one-touch white balance settings are registered. g“Setting the one-touch white balance” (P. 65) WB mode AUTO Light conditions Used for most light conditions (when there is a white portion framed in the viewfinder). Use this mode for general use. 5 5300K For shooting outdoors on a clear day, or to capture the reds in a sunset or the colors in a fireworks display For shooting outdoors in the shadows on a clear day For shooting outdoors on a cloudy day 1 3000K For shooting under a tungsten light w 4000K For shooting under white fluorescent lighting x 4500K For shooting under a neutral white fluorescent lamp y 6600K For shooting under a daylight fluorescent lamp n 5500K For flash shooting 5 V 1–4 Color temperature set by one-touch WB. g“Setting the one-touch white balance” (P. 65) CWB Color temperature set in custom white balance menu. This can be set from 2000K to 14000K. When the value has not been set, it is set to 5400K. Setting the auto/preset/custom white balance You can adjust the white balance by selecting the appropriate color temperature for the light conditions. Direct button Super control panel WB + j/k F button WB button k ip: [WB] • Custom white balance is set by selecting [CWB] and turning the dial while pressing down the F button. Menu Record mode, white balance, and picture mode 2 7500K 3 6000K MENU[W][WB] MENU button j i button 63 EN s0011_e_00_0_unified.book Page 64 Wednesday, September 12, 2007 4:46 PM Setting display Viewfinder Color temperature WB mode • During custom white balance, the color temperature is displayed. : : : : : : : : AWB 5 2 3 1 > > > : : : : : : # V V V V Control panel TIPS When subjects that are not white appear white: j In the auto WB setting, if there is no near-white color in the image framed in the screen, the white balance will not be correctly determined. In such a case, try preset WB or one-touch WB settings. 5 Record mode, white balance, and picture mode White balance sensor This camera has a white balance sensor for determining the light source in the shooting environment. The white balance sensor measures and calculates the infrared and visible light, and determines whether the light source is sunlight, fluorescent lighting, floodlighting, a blue flat lamp, or other lighting. When shooting, be careful not to cover or shade the sensor. WB compensation This function lets you make fine changes to the auto WB and preset WB settings. Direct button WB + Fk: adjust in A direction/ j: adjust in G direction • Use the sub dial to set in the A direction or the main dial to set in the G direction. Super control panel ip: [>] Menu MENU[W][WB] • Select the white balance to adjust and press d. 64 EN White balance sensor s0011_e_00_0_unified.book Page 65 Wednesday, September 12, 2007 4:46 PM Adjusting the white balance in the A direction (AmberBlue) Depending on the original WB conditions, the image will become more amber when adjusted toward +, and bluer when adjusted toward –. Adjusting the white balance in the G direction (GreenMagenta) Depending on the original WB conditions, the image will become greener when adjusted toward +, and magenta when adjusted toward –. • The white balance can be adjusted in 7 increments in each direction. AUTO > A G +2 –5 WB PREVIEW A AEL AFL G GO Direct buttons setting screen Setting display e.g.) When the A direction and G direction are each adjusted toward – Viewfinder Control panel Adjust toward G: -2 5 Adjust toward A: -3 j After setting the compensation value, point the camera at the subject to take test shots. When the AEL/AFL button is pressed, sample images that have been taken with the current WB settings are displayed. Adjusting all WB mode settings at once: j See “ALL >” (gP. 97). Setting the one-touch white balance This function is useful when you need a more precise white balance than preset WB can provide. Point the camera at a sheet of white paper under the light source you want to use to determine the white balance. The optimum white balance for the current shooting conditions can be saved for up to 4 settings in the camera. This is useful when shooting a subject under natural light, as well as under various light sources with different color temperatures. Set [; FUNCTION] to [V] beforehand. (gP. 92) 1 2 3 Point the camera at a sheet of white paper. Record mode, white balance, and picture mode TIPS Checking the white balance you have adjusted: • Position the paper so that it fills the viewfinder. Make sure there are no shadows. While holding down the < button, press the shutter button. < button • The one-touch white balance screen appears. Select the one-touch white balance number to be registered, and press the i button. • The white balance is registered. • The registered white balance will be stored in the camera as a preset WB setting. Turning the power off does not erase the data. 65 EN s0011_e_00_0_unified.book Page 66 Wednesday, September 12, 2007 4:46 PM TIPS After pressing the shutter button, [WB NG RETRY] is displayed: j When there is not enough white in the image, or when the image is too bright, too dark or the colors look unnatural, you cannot register the white balance. Change the aperture and shutter speed settings, then repeat the procedure from Step 1. WB bracketing Three images with different white balances (adjusted in specified color directions) are automatically created from one shot. One image has the specified white balance, while the others are the same image adjusted in different color directions. Direct button WB + MODEk: EV step in A-B direction/ j: EV step in G-M direction • Use the sub dial to set in the A-B direction or the main dial to set in the G-M direction. Menu MENU[X][WB BKT] Setting display EV step in the G-M direction: 2STEP 5 Record mode, white balance, and picture mode Viewfinder • Select from [OFF], [3F 2STEP], [3F 4STEP], or [3F 6STEP] for the EV step for both the A-B (amber-blue) direction and the G-M (green-magenta) direction. • When the shutter button is pressed down all the way, 3 images adjusted in specified color directions are automatically created. EN Control panel WB BKT A-B 3F 4STEP SELECT G-M 3F 4STEP GO Direct buttons setting screen TIPS To apply WB bracketing to the white balance you have adjusted: j Adjust white balance manually, then use the WB bracketing feature. WB bracketing is applied to the white balance you have adjusted. x 66 EV step in the A-B direction: 4STEP Notes • During WB bracketing, the camera cannot shoot in sequence if there is not enough memory in the camera and card for storing more than the selected number of frames. s0011_e_00_0_unified.book Page 67 Wednesday, September 12, 2007 4:46 PM Picture mode You can select image tone to create unique image effects. You can also fine-adjust image parameters such as contrast and sharpness for each mode. The adjusted parameters are recorded in each picture effect mode. [hVIVID] : Produces vivid colors. [iNATURAL] : Produces natural colors. [jMUTED] : Produces flat tones. [ZPORTRAIT] : Produces beautiful skin tones. [MONOTONE] : Produces black and white tone. [CUSTOM] : Select one picture mode, set the parameters, and register the setting. You can also register the gradation to [CUSTOM]. This setting is set separately from [GRADATION] in the menu. g“Gradation” (P. 68) Super control panel ip: [PICTURE MODE] Menu MENU[W] [PICTURE MODE] [N: NEUTRAL] [Ye: YELLOW] [Or: ORANGE] [R: RED] [G: GREEN] [PICT. TONE] : Creates a normal black and white image. : Reproduces clearly defined white cloud with natural blue sky. : Slightly emphasizes colors in blue skies and sunsets. : Strongly emphasizes colors in blue skies and brightness of crimson foliage. : Strongly emphasizes colors in red lips and green leaves. CANCEL SELECT GO iNATURAL CONTRAST SHARPNESS SATURATION CANCEL Lo Hi Lo Hi Lo Hi SELECT GO CONTRAST Lo 0 Hi : Colors the black and white image. [N: NEUTRAL] [S: SEPIA] [B: BLUE] [P: PURPLE] [G: GREEN] : Creates a normal black and white image. : Sepia : Bluish : Purplish : Greenish CANCEL SELECT GO 5 Record mode, white balance, and picture mode The adjustable parameters are classified according to the picture modes. The individual parameters are as follows. [CONTRAST] : Distinction between light and dark [SHARPNESS] : Sharpness of the image [SATURATION] : Vividness of the color [B&W FILTER] : Creates a black and white image. The filter color is brightened and the complementary color is darkened. PICTURE MODE CARD SETUP hVIVID CUSTOM RESET iNATURAL PICTURE MODE GRADATION jMUTED ZPORTRAIT WB MONOTONE 67 EN s0011_e_00_0_unified.book Page 68 Wednesday, September 12, 2007 4:46 PM Gradation In addition to the [NORMAL] gradation setting, you can select from 3 other gradation settings. [HIGH KEY] : Gradation for a bright subject. [LOW KEY] : Gradation for a dark subject. [AUTO] : Divides the image into detailed regions and adjusts the brightness separately for each region. This is effective for images with areas of large contrast in which the whites appear too bright or the blacks appear too dark. [NORMAL] : Use [NORMAL] mode for general uses. HIGH KEY Suitable for a subject that is mostly highlighted. 5 Record mode, white balance, and picture mode 68 EN LOW KEY Suitable for a subject that is mostly shadowed. Super control panel ip: [GRADATION] Menu MENU[W][GRADATION] x Notes • Contrast adjustment does not work when set to [HIGH KEY], [LOW KEY], or [AUTO]. s0011_e_00_0_unified.book Page 69 Wednesday, September 12, 2007 4:46 PM Noise reduction This function reduces the noise that is generated during long exposures. When shooting night scenes, shutter speeds are slower and noise tends to appear in images. When the shutter speed is slow, noise reduction is activated and the camera automatically reduces noise to produce clearer images. However, shooting time is approximately twice as long as usual. OFF Menu ON MENU[W][NOISE REDUCT.] • The noise-reduction process is activated after shooting. • The card access lamp blinks during the noise-reduction process. You cannot take more pictures until the card access lamp turns off. • [busy] is displayed on the viewfinder while noise reduction is operating. Noise reduction [ON] Notes • During sequential shooting, [NOISE REDUCT.] is [OFF] automatically. • This function may not work effectively with some shooting conditions or subjects. Noise filter You can select the noise processing level. Use [STANDARD] for general use. [HIGH] is recommended during high sensitivity shooting. Menu MENU[W][NOISE FILTER] Record mode, white balance, and picture mode x 5 69 EN s0011_e_00_0_unified.book Page 70 Wednesday, September 12, 2007 4:46 PM 6 Flash shooting Flash mode setting The camera sets the flash mode according to various factors such as firing pattern and flash timing. Available flash modes depend on the exposure mode. The flash modes are available to optional external flashes. Auto flash AUTO The flash fires automatically in low light or backlight conditions. To shoot a subject with backlighting, position the AF target over the subject. Flash synchronization speed/Slow limit Shutter speed can be changed when the built-in flash fires. g“#X-SYNC.” (P. 96), “#SLOW LIMIT” (P. 96) Red-eye reduction flash !/H In the red-eye reduction flash mode, a series of pre-flashes are emitted just before the regular flash fires. This helps accustom the subject’s eyes to the bright light and minimizes the redeye phenomenon. In S/M/A mode, the flash always fires. 6 The subject’s eyes appear red x Notes Flash shooting • After the pre-flashes, it takes about 1 second before the shutter is released. Hold the camera firmly to avoid camera shake. • Effectiveness may be limited if the subject is not looking directly at pre-flashes, or if the shooting range is too far. Individual physical characteristics may also limit effectiveness. Slow synchronization (1st curtain) #SLOW The slow synchronization flash is designed for slow shutter speeds. Normally, when shooting with a flash, shutter speeds cannot go below a certain level to prevent camera shake. But when shooting a subject against a night scene, fast shutter speeds can make the background too dark. Slow synchronization allows you to capture both the background and the subject. Since the shutter speed is slow, be sure to stabilize the camera by using a tripod so as not to cause the picture to be blurred. 1st curtain Usually, the flash fires right after the shutter fully opens. This is called 1st curtain. This method is usually used during flash shooting. 70 EN s0011_e_00_0_unified.book Page 71 Wednesday, September 12, 2007 4:46 PM Slow synchronization (2nd curtain) #SLOW2/2nd CURTAIN 2nd curtain flash fires just before the shutter closes. Changing the flash timing can create interesting effects in your picture, such as expressing the movement of a car by showing the tail-lights streaming backwards. The slower the shutter speed, the better the effects turn out. In S/M/A mode, the flash always fires. When the shutter speed is set to 2 sec. 2 seconds 2nd curtain 2 seconds 1st curtain flash fires 0 1st curtain seconds 2nd curtain flash fires Shutter closes Shutter fully opens Slow synchronization (1st curtain)/Red-eye reduction flash !SLOW While using slow synchronization with flash shooting, you can also use this function to achieve red-eye reduction. When shooting a subject against a night scene, this function allows you to reduce the red-eye phenomenon. As the time from emitting pre-flashes to shooting is long in 2nd curtain synchronization, it is difficult to achieve red-eye reduction. Hence, only 1st curtain synchronization setting is available. Fill-in flash # x Notes 6 Flash shooting The flash fires regardless of the light conditions. This mode is useful for eliminating shadows on the subject’s face (such as shadows from tree leaves), in a backlight situation, or for correcting the color shift produced by artificial lighting (especially fluorescent light). • When the flash fires, the shutter speed is set to 1/250 sec. or less. When shooting a subject against a bright background with the fill-in flash, the background may be overexposed. In this case, use the optional FL-50R external flash or a similar flash and shoot in the Super FP flash mode. g“Super FP flash” (P. 76) Flash off $ The flash does not fire. Even in this mode, the flash can be used as an AF illuminator when it is raised. g“AF ILLUMINAT.” (P. 90) 71 EN s0011_e_00_0_unified.book Page 72 Wednesday, September 12, 2007 4:46 PM Manual flash This allows the built-in flash to output a fixed amount of light. To shoot with manual flash, set the f-number on the lens based on the distance to the subject. Ratio of amount of light GN: Guide number (Equivalent to ISO 100) FULL (1/1) 13 1/4 6.5 1/16 3.3 1/64 1.6 Calculate the f-number on the lens using the following formula. GN × ISO sensitivity Aperture (f-number) = Distance to the subject (m) ISO sensitivity 6 ISO value 100 200 400 800 1600 3200 ISO sensitivity 1.0 1.4 2.0 2.8 4.0 5.6 # button Direct button #+j Super control panel ip: [FLASH MODE] j Flash shooting Setting display Viewfinder Control panel Flash mode • For details on displaying the settings, refer to “Flash modes that can be set by shooting mode” (gP. 131). 72 EN s0011_e_00_0_unified.book Page 73 Wednesday, September 12, 2007 4:46 PM Built-in flash shooting 1 Press the #UP button to raise the built-in flash. 2 Press the shutter button halfway. 3 Press the shutter button all the way. #UP button Flash stand-by mark • The # (flash stand-by) mark lights when the flash is ready to fire. If the mark is blinking, the flash is charging. Wait until charging is complete. Viewfinder TIPS To shoot without having to wait for the flash to finish charging: 6 j See “RLS PRIORITY S/RLS PRIORITY C” (gP. 94). Notes • Depending on the distance to the subject or the lens being used, the light emitted by the flash may produce a vignette effect. g“Vignetting of the built-in flash when using an interchangeable lens” (P. 130) Flash intensity control Flash shooting x The flash intensity can be adjusted from +3 to -3. In some situations (e.g., when shooting small subjects, distant backgrounds, etc.), you may get better results by adjusting the amount of light emitted by the flash (“flash intensity”). It is useful when you intend to increase the contrast (distinction between light and dark) of images to make the images more vivid. Direct button w+k Super control panel ip: [w] Menu MENU[X][w] k w button 73 EN s0011_e_00_0_unified.book Page 74 Wednesday, September 12, 2007 4:46 PM Setting display Viewfinder Control panel TIPS To adjust the flash using only the dials: j Assign the flash intensity control function to the main dial (or sub dial). g“DIAL” (P. 91) x Notes • This does not work during manual flash. • This does not work when the flash control mode on the electronic flash is set to MANUAL. • If flash intensity is adjusted on the electronic flash, it will be combined with the camera’s flash intensity setting. • When [w+F] is set to [ON], the flash intensity value will be added to the exposure compensation value. g“w+F” (P. 96) Flash bracketing 6 The camera shoots multiple frames, changing the amount of light emitted by the flash for each shot. The camera shoots 3 frames at a time with the following amount of light: optimum light, light adjusted in the – direction, and light adjusted in the + direction. Menu MENU[X][FL BKT] Flash shooting • The compensation value will change according to the EV step. g“EV STEP” (P. 96) • In single-frame shooting, the amount of light emitted by the flash changes every time the shutter button is pressed. • In sequential shooting, hold down the shutter button until the selected number of frames are taken. • Releasing the shutter button stops flash bracketing shooting. When it stops, 0 blinks in the viewfinder and on the control panel and 0 is displayed in green on the super control panel. External flash shooting In addition to the camera’s built-in flash capabilities, you can use any of the external flash units specified for use with this camera. This enables you to take advantage of a wider variety of flash shooting techniques to suit different shooting conditions. The external flashes communicate with the camera, allowing you to control the camera’s flash modes with various available flash control modes, such as TTL-AUTO and Super FP flash. An external flash unit specified for use with this camera can be mounted on the camera by attaching it to the camera’s hot shoe. You can also attach the flash to the flash bracket on the camera using the bracket cable (optional). Refer to the external flash’s manual as well. 74 EN s0011_e_00_0_unified.book Page 75 Wednesday, September 12, 2007 4:46 PM Functions available with external flash units Optional flash FL-50R Flash control mode GN (Guide number) (ISO100) RC mode FL-50 FL-36R FL-36 TTL-AUTO, AUTO, MANUAL, FP TTL AUTO, FP MANUAL GN50 (85 mm*) GN28 (24 mm*) 9 GN36 (85 mm*) GN20 (24 mm*) k 9 FL-20 RF-11 TTL-AUTO, AUTO, MANUAL GN20 (35 mm*) k TF-22 TTL-AUTO, MANUAL GN11 GN22 k k k * The focal length of the lens that can be used (Calculated based on 35 mm film camera) x Notes • The FL-40 optional flash cannot be used. Using the external electronic flash Be sure to attach the flash to the camera before turning on the flash’s power. 1 Remove the hot shoe cover by sliding it in the direction indicated by the arrow in the illustration. Hot shoe cover • Keep the shoe cover in a safe place to avoid losing it, and put it back on the camera after flash shooting. 2 4 5 6 7 x Turn on the flash. • When the charge lamp on the flash lights up, charging is complete. • The flash will be synchronized with the camera at a speed of 1/250 sec. or less. Lock pin Lock ring Flash shooting • If the lock pin is protruding, turn the shoe lock ring as far as it will go in the direction opposite to LOCK. This will pull the lock pin back inside. 3 6 Attach the electronic flash to the hot shoe on the camera. Select a flash mode. Select the flash control mode. • TTL-AUTO is recommended for normal use. Press the shutter button halfway. • Shooting information such as ISO sensitivity, aperture value, and shutter speed is communicated between the camera and flash. Press the shutter button all the way. Notes • The built-in flash cannot be used when an external flash is attached to the hot shoe. 75 EN s0011_e_00_0_unified.book Page 76 Wednesday, September 12, 2007 4:46 PM Super FP flash Super FP flash is available with the FL-50R or FL-36R. Use the Super FP flash where normal flashes cannot be used with high shutter speed. Fill-in flash shooting with the aperture open (such as in outdoor portrait shooting) is also possible with Super FP flash. For details, refer to the external flash’s manual. Super FP flash Viewfinder Shooting with the Olympus wireless RC flash system Wireless flash shooting is possible with the Olympus wireless RC flash system. With this wireless flash system, you can take pictures using multiple wireless flashes and control the flashes in three groups (A, B, and C). The built-in flash is used to communicate between the camera and the external flashes. For details on using the wireless flash, see the manual of the external flash. Wireless flash setup range Position the wireless flash so that the wireless sensor faces the camera. The setup range guidelines are as shown below. The range changes according to the surrounding environment. Remote sensor Direction of the emitted flash 6 Flash shooting Direction of the camera 30 30° 60 60° 50 50° 100 100° 30 30° 10m 50 50° 5m 1 2 3 76 EN Position the flash while referring to the “Wireless flash setup range”, and turn on the flash. Press the MODE button on the flash to set it to RC mode, and set the channel and group of the flash. Set RC mode on the camera to [ON]. • MENU[X][#RC MODE][ON] • The super control panel switches to RC mode. • You can press the INFO button to switch the super control panel display. s0011_e_00_0_unified.book Page 77 Wednesday, September 12, 2007 4:46 PM 4 Use the super control panel to set the flash mode and other settings for each group. Flash intensity value Group • Select the flash control mode and adjust the flash intensity individually for groups A, B, and C. For MANUAL, select the flash intensity. Normal flash/Super FP flash • Switch between normal flash and Super FP flash. 2007. 12.16 TTL M OFF +1.0 1/8 – LO 2 Flash control Flash mode intensity 5 Communication light level • Set the communication light level to [HI], [MID], or [LO]. Channel • Set the communication channel to the same channel used on the flash. Select a flash mode. • Red-eye reduction flash is not possible in RC mode. 6 7 8 Press the #UP button to raise the built-in flash. After shooting preparations are completed, take some test shots to check the flash operation and images. Begin shooting while checking the charging completed indications of the camera and flash. x Notes 6 Flash shooting • Although there is no limit to the number of wireless flashes you can use, it is recommended that each group have no more than three flashes to prevent flash malfunction due to mutual interference. • In RC mode, the built-in flash is used to control the wireless flash. The built-in flash cannot be used for flash shooting in this mode. • For 2nd curtain synchronization, set the shutter speed and anti-shock settings to within 4 seconds. Wireless flash shooting may not operate properly when using a slower shutter speed or anti-shock setting. Using commercially available flashes You cannot use the camera to adjust the amount of light emitted from a commercially available flash except for a flash specified for use with this camera. To use a commercially available flash, connect it to the hot shoe or connect the synchronization cord to the external flash connector. Set the camera’s shooting mode to M. For details on non-specified commercial flashes, see “Non-specified commercial flashes” (gP. 78). 77 EN s0011_e_00_0_unified.book Page 78 Wednesday, September 12, 2007 4:46 PM 1 2 3 4 Remove the hot shoe cover to connect the flash unit to the camera. Set the shooting mode to M, then set the aperture value and shutter speed. Hot shoe cover • Set the shutter speed to 1/250 sec. or slower. If the shutter speed is faster than this, commercially available flashes cannot be used. • A slower shutter speed may produce blurred images. Turn on the flash. • Be sure to turn on the flash after attaching the flash unit to the camera. External flash connector Set the ISO sensitivity and aperture value on the camera to match the flash control mode on the flash. • Refer to the flash’s manual for instructions on how to set its flash control mode. x Notes • The flash fires each time the shutter is released. When you do not need to use the flash, turn off the flash’s power. • Check beforehand that the flash you are using is synchronized with the camera. Non-specified commercial flashes 6 Flash shooting 78 EN 1) Some commercially available flashes require a voltage of 250V or more for the synchronization connector. The use of this type of flash can damage the camera or prevent the camera from operating properly. Contact the manufacturer of the flash for the specifications of the flash synchronization connector. 2) Some commercially available flashes have a synchronization connector with reversed polarity. This type of flash does not work with this camera. Contact the manufacturer of the flash. 3) Exposures when using a flash require that adjustments be made on the flash. If a flash is used in the auto mode, match it with the f-number and ISO sensitivity settings on the camera. 4) Even if the flash auto f-number and ISO sensitivity are set the same as on the camera, the correct exposure may not be obtained depending on the shooting conditions. In such a case, adjust the auto f-number or ISO on the flash or calculate the distance in the manual mode. 5) Use a flash with an illumination angle that matches the focal length of the lens. The focal length of the lens for 35 mm film is approximately twice as long as the focal length of the lenses designed for this camera. 6) Do not use a flash unit or other accessory TTL flash that has additional communication functions other than the specified flashes, since it may not only fail to function normally, but may also cause damage to the camera’s circuitry. s0011_e_00_0_unified.book Page 79 Wednesday, September 12, 2007 4:46 PM 7 Playback functions Single-frame/Close-up playback The basic procedure for viewing pictures are as shown below. However, before using any of these functions, follow Step 1 below. You can set the camera to automatically switch to single-frame playback mode after shooting. g“REC VIEW” (P. 100) 1 Press the q button (Single-frame playback). < button j • The last recorded image appears. • The LCD monitor turns off after more than 1 minute if no operations are performed. The camera will turn off automatically if there is no operation after 4 hours (factory default setting). Turn on the camera again. 2 k Use p to select images you want to view. You can also turn the dial to switch to U for close-up playback. INFO button (Single-frame playback) p q button (Close-up playback) Press p to change the close-up position. LN Press the INFO button (Close-up position playback) Press p to move the display of the close-up position. Playback functions a : Displays the frame that is stored 10 frames back c : Displays the frame that is stored 10 frames ahead d : Displays the next frame b : Displays the previous frame 7 Press the < button • Plays back the image at a 10× magnified close-up position. Press the INFO button (Close-up frame-by-frame playback) • To exit the playback mode, press the q button. • Pressing the shutter button halfway resumes the shooting mode. Press p to view frame-byframe close-ups. • Press the INFO button to return to close-up playback. 79 EN s0011_e_00_0_unified.book Page 80 Wednesday, September 12, 2007 4:46 PM Light box display You can view the playback image and another image together on the left and right sides of the monitor. This is useful if you want to compare images you recorded using bracketing. 1 2 3 Press the P button while viewing an image. < button P button • The frame being viewed is displayed on the left side of the monitor, and the next frame is displayed on the right side. The image is displayed at the same magnification of the image being viewed. • The image on the left is the benchmark image. j Use p to select an image. • You can protect, erase or copy the image on the right. Press the P button. • The camera returns to single-frame playback of the image on the left at the magnification being viewed. INFO button MENU button 7 Benchmark image Playback functions Operations during light box display • Pressing the i button replaces the image on the left with the image on the right and becomes the new benchmark image. • You can use the dial to change the magnification of both images at the same time. • Pressing the < button or INFO button allows you to move the position of the image on the right with the p button. Pressing the < button or INFO button again allows you to move the positions of both images with the p button. p : Selects the right image p : Scrolls the right image * EN p : Scrolls both images in synchronization * * 80 i button * You can also use the INFO button in the same way for this procedure. s0011_e_00_0_unified.book Page 81 Wednesday, September 12, 2007 4:46 PM Index display/Calendar display This function lets you show several images on the monitor at the same time. This is useful when you want to quickly search a number of pictures to find a particular image. During single-frame playback, each time you turn the dial toward G, the number of images shown changes from 4 to 9 to 16 to 25. b : Moves to the previous frame d : Moves to the next frame a : Moves to the upper frame c : Moves to the lower frame j • To return to single-frame playback, turn the dial to U. (Single-frame playback) (4-frame index display) (9-frame index display) LN 7 Playback functions (Calendar display) (25-frame index display) (16-frame index display) Calendar display With the calendar, you can display images recorded on the card by date. If more than one image was taken on a single date, the image shot first on that date is displayed. Use p to select a date and press the i button to play back images for the selected date in single-frame display. 81 EN s0011_e_00_0_unified.book Page 82 Wednesday, September 12, 2007 4:46 PM Information display This allows you to display detailed information about the image. Luminance information can also be displayed with histogram and highlight graphs. Press the INFO button repeatedly until the desired information is displayed. • This setting is stored and will be shown the next time the information display is called up. INFO button Image only Information 1 Information 2 x10 LN 100-0015 15 Displays the frame number, print reservation, protect, record mode and file number 15 Shooting information *Histogram Playback functions If the bars in the histogram are higher on the right, the image may be too bright. If the bars are higher on the left, the image may be too dark. Compensate the exposure or shoot again. 1/250 F5.6 +2.0 45mm ISO 100 0.0 WB : AUTO A : 0 G: 0 NATURAL sRGB LN Overall information Histogram* LN x10 Shadow display The underexposed (shadowed) parts of the recorded image blink. EN ’07.12.16 21:56 100-0015 Displays the frame number, print reservation, protect, record mode, number of pixels, compression rate, date and time and file number Highlight display 7 82 x10 [3648x2736,1/8] LN LN x10 Highlight display The overexposed (highlighted) parts of the recorded image blink. LN x10 Histogram display Distribution of the brightness of the recorded image is displayed in a histogram (brightness component graph). s0011_e_00_0_unified.book Page 83 Wednesday, September 12, 2007 4:46 PM Slideshow This function displays images stored on the card one after another. Images are displayed one by one for about 5 seconds starting from the currently displayed image. Slideshow can be performed using index display. You can select the number of frames displayed during slideshow from 1, 4, 9, 16 or 25. 1 2 MENU[q][m] Use p to set. [K] (1-frame display)/[L] (4-frame display)/[M] (9-frame display)/[N] (16-frame display)/[O] (25-frame display) 3 4 Press the i button to start the slideshow. Press the i button to stop the slideshow. When selecting [L] x Notes • If the slideshow is left running for about 30 minutes while using the battery, the camera will turn off automatically. Rotating images This function lets you rotate images and display them vertically on the monitor during singleframe playback. This is useful when taking pictures with the camera held vertically. The images will automatically be displayed in the correct direction even if the camera is rotated. 1 MENU[q][y] F button 7 Playback functions • When set to [ON], images shot vertically will be automatically rotated and displayed during playback. You can also press the F button to rotate and display the image. • The rotated image will be recorded on the card in that position. Original image before rotating L N F L N F L N F L N F 83 EN s0011_e_00_0_unified.book Page 84 Wednesday, September 12, 2007 4:46 PM Playback on TV Use the video cable provided with the camera to play back recorded images on your TV. 1 2 Turn the camera and TV off, and connect the video cable as illustrated. Turn on the TV and set it to the video input mode. For details on switching to the video input mode, refer to the TV’s manual. Turn the camera on and press the q (playback) button. 3 q button VIDEO OUT jack Video cable Video input terminal x 7 Notes • To connect the camera to a TV, use the provided video cable. • Make sure that the camera’s video output signal type is the same as the TV’s video signal type. g“VIDEO OUT” (P. 100) • The camera’s monitor turns off automatically when the video cable is connected to the camera. • The image may appear off-center depending on the TV screen. Playback functions Editing still images Recorded images can be edited and saved as new images. Available editing functions depend on the image format (image record mode). A JPEG file can be printed as is without modification. A RAW file, on the other hand cannot be printed as is. To print a RAW file, use the RAW edit function to convert the RAW data format to JPEG. Editing images recorded in RAW data format The camera performs image processing (such as white balance and sharpness adjustment) on images in the RAW data format, then saves the data to a new file in the JPEG format. While checking recorded images, you can edit them to your liking. Image processing is performed based on the current camera settings. Change the camera settings to suit your preferences before editing. Editing images recorded in JPEG data format [Q] Converts the image file size to 1280 × 960, 640 × 480 or 320 × 240. [SHADOW ADJ] Brightens a dark backlit subject. 84 EN s0011_e_00_0_unified.book Page 85 Wednesday, September 12, 2007 4:46 PM 1 2 MENU[q][EDIT] Use bd to select an image, then press the i button. Confirm the data format from here. • The camera recognizes the image data format. • For images recorded in RAW+JPEG, a selection screen will appear, asking you which data to edit. 3 The setting screen varies with the image data format. Select the item you want to edit and do the following steps. CANCEL SELECT GO RAW DATA EDIT JPEG EDIT YES NO SHADOW ADJ CANCEL SELECT GO CANCEL SELECT GO • The edited image is saved as another image, apart from the original image. • To exit the edit mode, press the MENU button. x Notes • Editing of a JPEG image is not possible in the following cases: When an image is recorded in RAW, when an image is processed on a PC, when there is not enough space in the card memory, when an image is recorded on another camera • When resizing ([Q]) an image, you cannot select a larger number of pixels than was originally recorded. 7 Copying images Single-frame copy 1 2 Play back the image you want to copy and press the COPY/< button. Use ac to select [YES], then press the i button. COPY/< button Playback functions This function lets you copy images to and from the xD-Picture Card and CompactFlash or Microdrive. This menu can be selected if both cards are inserted. The selected card is the copying source. g“CF/xD” (P. 99) 85 EN s0011_e_00_0_unified.book Page 86 Wednesday, September 12, 2007 4:46 PM Copying selected frames This function lets you select multiple images and copy them all at the same time during single-frame playback or index display. 1 2 3 4 Display the images you want to copy and press the i button. COPY SELECT • The selected images will be shown with red frames. • To cancel your selection, press the i button again. Press p to display the next images you want to copy and press the i button. After you have selected the images to copy, press the COPY/< button. Use ac to select [YES], then press the i button. YES NO CANCEL SELECT GO Copying all the frames 1 2 3 MENU[q][COPY ALL] Press d. Use ac to select [YES], then press the i button. COPY ALL YES NO CANCEL 7 SELECT GO Protecting images Playback functions Protect images you do not want to erase. Protected images cannot be erased by the singleframe or all-frame erase function. Single-frame protect Play back the image you want to protect and press the 0 button. • 9 (protect mark) is displayed on the top right corner of the screen. 0 button To cancel the protection Display the images that are protected and press the 0 button. i button 86 EN s0011_e_00_0_unified.book Page 87 Wednesday, September 12, 2007 4:46 PM Protecting selected frames This function lets you select multiple images and protect them all at the same time during single-frame playback or index display. 1 Display the images you want to protect and press the i button. • The selected images will be shown with red frames. • To cancel your selection, press the i button again. • During index display, press p to select the images you want to protect and press the i button. 2 3 Press p to display the next images you want to protect and press the i button. After you have selected the images to protect, press the 0 button. Canceling all protections This function lets you cancel the protection of several images at one time. 1 2 MENU[q][RESET PROTECT] Use ac to select [YES], then press the i button. x Notes • Formatting the card erases all images even if they have been protected. g“Formatting the card” (P. 125) • Protected images cannot be rotated even when the F button is pressed. Erasing images Lets you erase recorded images. You can select single-frame erase, which erases only the currently displayed image; all-frame erase, which erases all the images stored on the card; or selected frame erase, which erases only the frames selected. x Notes 7 Playback functions • When you perform all-frame or selected frame erase on images recorded using RAW+JPEG, both the RAW and JPEG images are erased. When using single-frame erase, you can select whether to erase the JPEG, RAW, or both RAW and JPEG images. g“RAW+JPEG ERASE” (P. 98) • Protected images cannot be erased. Cancel protected images, then erase them. • Once erased, images cannot be restored. g“Protecting images” (P. 86) 87 EN s0011_e_00_0_unified.book Page 88 Wednesday, September 12, 2007 4:46 PM Single-frame erase 1 2 Play back the image you want to erase and press the S button. Use ac to select [YES], then press the i button. S button ERASE YES NO CANCEL SELECT GO Erasing selected frames This function lets you erase selected images at one time during single-frame playback or index display. 1 7 Playback functions 2 3 4 Display the images you want to erase and press the i button. • The selected images will be shown with red frames. • To cancel your selection, press the i button again. • During index display, press p to select the images you want to erase and press the i button. Press p to display the next images you want to erase and press the i button. After you have selected the images to erase, press ERASE SELECTED the S button. Use ac to select [YES], then press the i BOTH RAW&JPEG ARE ERASED button. YES NO CANCEL 88 EN SELECT GO s0011_e_00_0_unified.book Page 89 Wednesday, September 12, 2007 4:46 PM All-frame erase 1 2 MENU[W][CARD SETUP] Use ac to select [ALL ERASE], then press the i button. CARD SETUP ALL ERASE FORMAT 3 CANCEL Use ac to select [YES], then press the i button. SELECT GO ALL ERASE • All frames will be erased. YES NO CANCEL SELECT GO TIPS To erase immediately: j If you have set “QUICK ERASE” (gP. 98) to [ON], pressing the S button will erase an image immediately. j You can set the initial position of the cursor to [YES]. g“PRIORITY SET” (P. 99) 7 Playback functions 89 EN s0011_e_00_0_unified.book Page 90 Wednesday, September 12, 2007 4:46 PM 8 Customizing your camera Use the custom menus to customize the camera for ease of use. Use Custom Menu 1 to customize the shooting functions and Custom Menu 2 to set the basic camera functions. Custom Menu 1 has 9 tabs (a to i) that are divided according to the functions to be set. AF/MF BUTTON/DIAL RELEASE/ DISP/8/PC EXP/e/ISO #CUSTOM CANCEL SELECT A DIAL C AEL/AFL MEMO D F BUTTON TIMER Use ac to select [Y], then press d. CANCEL SELECT C AEL/AFL MEMOC-AFOFF OFF D Use ac to select tab a to i, then press d. FUNCTION MF E MY MODE SETUP --OFF GO S-AFS-AF B AEL/AFL S1/C2/M1 FUNCTION E MY MODE SETUP GO AEL/AFL A DIAL B AEL/AFL F BUTTON TIMER CANCEL SELECT GO Use ac to select a function, then press d. For details on using the menu lists, see “Using the menu” (gP. 29). Custom Menu 1a AF/MF AF ILLUMINAT. The built-in flash can function as an AF illuminator. This helps with focusing in low-light conditions in the AF mode. To use this function, raise the flash. FOCUS RING You can customize how the lens adjusts to the focal point by selecting the rotational direction of the focus ring. 8 Customizing your camera 90 EN Near ) ) Near C-AF LOCK When set to [ON], during focusing with C-AF mode, this prevents the focus from changing even if the distance to the subject suddenly changes. This is effective when shooting at a location where something passes in front of or behind the subject. AF AREA POINTER When set to [OFF], the AF target does not light in the viewfinder when the subject is in focus. AF SENSITIVITY You can set the range of the AF target for focusing when [AF AREA] is set to M. [NORMAL] The camera focuses using a range that is somewhat larger than the selected AF target. [SMALL] The camera focuses only within the selected AF target. When [SMALL] is selected, the setting display for [AF AREA] becomes o. s0011_e_00_0_unified.book Page 91 Wednesday, September 12, 2007 4:46 PM P SET UP Selects the operation of the dials or arrow pad when selecting the AF target. [OFF] Stops after moving to the AF target on the end. [LOOP] After moving to the AF target on the end, moves to the AF target on the opposite end of the same row or column. Selects all AF targets before moving to the AF target on the opposite end, and [AF AREA] is set to B. [SPIRAL] After moving to the AF target on the end, moves to the AF target on the opposite end of the next row or column. Selects all AF targets before moving to the AF target on the opposite end, and [AF AREA] is set to B. e.g.) When moving from the top left AF target to the right [OFF] [LOOP] [SPIRAL] Set to B. Set to B. RESET LENS When set to [ON], this resets the focus of the lens (infinity) each time the power is turned off. BULB FOCUSING You can set the camera to enable focus adjustments during bulb shooting with MF. [ON] During exposure, you can turn the focus ring and adjust the focus. [OFF] The focus is locked during exposure. Custom Menu 1b BUTTON/DIAL DIAL 8 DIAL P Ps CANCEL SELECT Sub dial • [F] on [MENU] means the horizontal operation of the dial (the same as pressing bd). [G] means the vertical operation of the dial (the same as pressing ac). GO Main dial DIAL MENU F CANCEL G SELECT bd Customizing your camera In P, A, S, or M mode, you can assign functions other than the default functions to the main dial and sub dial. You can also switch the operations of the main dial and sub dial for menu operations with the default operations. P : [%]/[F]/[w] A : [FNo.]/[F]/[w] S : [SHUTTER]/[F]/[w] M : [SHUTTER]/[FNo.] MENU : [F]/[G] GO ac 91 EN s0011_e_00_0_unified.book Page 92 Wednesday, September 12, 2007 4:46 PM AEL/AFL You can use the AEL/AFL button to perform AF or metering operations instead of using the shutter button. Select the function of the button to match the operation when the shutter button is pressed. Select [mode1] to [mode4] in each focus mode. (You can only select [mode4] in C-AF mode.) AEL/AFL button function Shutter button function Mode Half-press Full press Focus Exposure Focus mode1 S-AF Locked mode2 S-AF k mode3 k Locked mode1 C-AF start Locked mode2 C-AF start k mode3 k Locked mode4 k mode1 mode2 mode3 When holding down AEL/AFL Exposure Focus Exposure k k k Locked k Locked k Locked k k S-AF k Locked k k Locked Locked Locked k Locked Locked k C-AF start k k Locked Locked C-AF start k k Locked k k k Locked k k k Locked k Locked k Locked k k S-AF k [S-AF] [C-AF] [MF] 8 Customizing your camera Basic operations [mode1] For determining the metered exposure while focusing. AE lock is activated while pressing the AEL/AFL button, allowing you to adjust the focus and determine the exposure separately. [mode2] For determining the exposure when you press the shutter button fully. This is useful for shooting scenes with significant changes in lighting, such as on a stage. [mode3] For focusing with the AEL/AFL button instead of the shutter button. [mode4] Press the AEL/AFL button to focus, and press the shutter button fully to determine the exposure. AEL/AFL MEMO You can lock and maintain the exposure by pressing the AEL/AFL button. [ON] Press the AEL/AFL button to lock and maintain the exposure. Press again to cancel the maintaining of the exposure. [OFF] The exposure will be locked only while the AEL/AFL button is pressed. ; FUNCTION You can assign a function to the < button. [PREVIEW]/[LIVE PREVIEW] (electronic) While holding down the < button, you can use the preview function. g“Preview function” (P. 45) 92 EN s0011_e_00_0_unified.book Page 93 Wednesday, September 12, 2007 4:46 PM [V] Press the < button to acquire the WB value. g“Setting the one-touch white balance” (P. 65) [P HOME] Press the < button to switch to the registered AF home position. Press the button again to switch to the original AF target mode. g“Registering an AF target mode” (P. 55) [MF] Press the < button to switch AF mode to [MF]. Press the button again to switch to the original AF mode. [RAWK] Press the < button to switch from JPEG to RAW+JPEG or from RAW+JPEG to JPEG for the record mode. You can change the record mode by turning the main dial/sub dial while holding down the < button. [P/A/S/M] You can change the shooting mode by turning the main dial/sub dial while holding down the < button. [TEST PICTURE] Pressing the shutter button while pressing the < button enables you to check the picture you have just taken on the monitor without having to record the picture to the card. This is useful when you want to see how a picture turned out without saving it. [MY MODE] While holding down the < button, you can take pictures using the camera settings registered in the [MY MODE SETUP]. g“MY MODE SETUP” (P. 93) [L] Press the < button to switch to under water wide and to switch between under water wide and under water macro. Alternatively, turn the main dial while holding down the MODE button to select under water wide or under water macro. g“Under water wide/macro shooting” (P. 44) [OFF] Does not allow function allocation. MY MODE SETUP Registering 1) Select [MY MODE1] or [MY MODE2] and press d. 2) Select [SET] and press the i button. • The current settings are registered in the camera. For details on the functions that can be registered to My Mode, refer to “Functions that can be registered with My Mode and Custom Reset Setting” (gP. 134). • To cancel the registration, select [RESET]. 8 Customizing your camera You can store two frequently used settings as My Mode. There are two basic ways to shoot with the registered My Mode settings. • Use the MODE button to make the settings. g“My Mode shooting” (P. 44) • Assign [MY MODE SETUP] to the < button. g“; FUNCTION” (P. 92) To shoot with My Mode using the < button, follow the steps under “Executing” below and set the My Mode you will use in advance. Executing 1) Select [MY MODE1] or [MY MODE2] and press the i button. 2) Select [YES] and press the i button. • The selected My Mode is set. • When shooting, press the shutter button while holding down the < button. 93 EN s0011_e_00_0_unified.book Page 94 Wednesday, September 12, 2007 4:46 PM BUTTON TIMER The direct button may remain selected even after it is released. [OFF] Available only when the button is pressed. [3SEC]/[5SEC]/[8SEC] The button remains selected during the number of seconds indicated. [HOLD] The button remains selected until you press it again. • Buttons that can be set with [BUTTON TIMER] ISO, F, WB, #, w, MODE, G, AF, BKT, </Y/j A You can switch the functions of the AEL/AFL button and the < button. When you select [ON], the AEL/AFL button will function as the < button, and the < button will function as the AEL/AFL button. • The setting also applies to the < button on the optional power battery holder when attached to the camera. Custom Menu 1c RELEASE/j RLS PRIORITY S/RLS PRIORITY C Normally, this camera does not release the shutter while the AF is operating or the flash is charging. If you want to release the shutter without waiting until these operations have completed, use the setting below. You can set the release priority individually in AF mode. RLS PRIORITY S Sets release priority for S-AF mode gP. 51. RLS PRIORITY C Sets release priority for C-AF mode gP. 52. O fps You can set the number of pictures shot in one second when using sequential shooting with [O] from [1fps] to [4fps]. 8 Customizing your camera 94 EN Custom Menu 1d DISP/8/PC 8 You can turn off the beep sound that is emitted when the focus locks by pressing the shutter button. SLEEP After a specified period of time elapses with no operations being performed, the camera enters the sleep mode (stand-by) to save battery power. After the super control panel is displayed for a specified period of time, the backlight turns off. After a specific period of time has further passed, the camera enters sleep mode. [SLEEP] lets you select sleep timer from [1MIN], [3MIN], [5MIN], or [10MIN]. [OFF] cancels the sleep mode. The camera activates again as soon as you touch any button (the shutter button, arrow pad, etc.). s0011_e_00_0_unified.book Page 95 Wednesday, September 12, 2007 4:46 PM BACKLIT LCD (Backlight timer) To save battery power, after the super control panel is displayed for a specified period of time, the monitor backlight turns off and the monitor darkens. Select from [8SEC], [30SEC], or [1MIN] for the time until the backlight turns off. [HOLD] sets the backlight to stay on. The monitor backlight turns on again as soon as you touch any button (the shutter button, arrow pad, etc.). 4 h TIMER (Auto power off) You can set the camera to turn off automatically if not operated for 4 hours. It will not turn off if this is set to [OFF]. USB MODE LIVE VIEW BOOST During live view shooting, you can brighten the monitor for easier confirmation on the subject. [OFF] The subject is displayed on the monitor with the brightness level that is adjusted according to the exposure being set. You can shoot while confirming through the monitor in advance to get a picture that is to your liking. [ON] The camera automatically adjusts the brightness level and displays the subject on the monitor for easier confirmation. The effect of the exposure compensation adjustments will not be reflected on the monitor. 8 Customizing your camera You can connect the camera directly to a computer or printer with the provided USB cable. If you specify the device you are connecting to beforehand, you can skip the USB connection setting procedure normally required every time you connect the cable to the camera. For details on how to connect the camera to either device, refer to “Connecting the camera to a printer” (gP. 104) and “Connecting the camera to a computer” (gP. 108). [AUTO] The selection screen for the USB connection will be displayed every time you connect the cable to a computer or printer. [STORAGE] Allows you to transfer images to a computer. Also, select to use the OLYMPUS Master software via PC connection. [MTP] Allows you to transfer images to a computer running Windows Vista without using the OLYMPUS Master software. [CONTROL] Allows you to control the camera from a PC using the optional OLYMPUS Studio. [<EASY] Can be set when connecting the camera to a PictBridge-compatible printer. Pictures can be printed directly without using a PC. g“Connecting the camera to a printer” (P. 104) [<CUSTOM] Can be set when connecting the camera to a PictBridge-compatible printer. You can print out pictures with set number of prints, print paper and other settings. g“Connecting the camera to a printer” (P. 104) FRAME ASSIST (Ruled lines display) You can display the ruled lines on the LCD monitor as a guide when confirming the composition. Press the INFO button repeatedly to display the ruled lines. g“Switching the information display” (P. 32) 95 EN s0011_e_00_0_unified.book Page 96 Wednesday, September 12, 2007 4:46 PM Custom Menu 1e EXP/e/ISO EV STEP You can select the EV step for exposure parameter setting, such as shutter speed, aperture value, or exposure compensation value, from [1/3EV], [1/2EV], or [1EV]. ISO STEP You can select the EV step of the ISO sensitivity from [1/3EV] or [1EV]. ISO-AUTO SET You can set the upper limit and default ISO values when ISO is set to [AUTO]. [HIGH LIMIT] This sets the upper limit of the ISO value that automatically changes. The upper limit can be set from 100 to 3200 in 1/3 EV increments. [DEFAULT] This sets the value to be normally used when the optimum exposure can be obtained. The value can be set from 100 to 3200 in 1/3 EV increments. ISO-AUTO You can set the shooting mode in which the ISO [AUTO] setting is activated. [P/A/S] In P/A/S mode, the [AUTO] setting is activated. When [AUTO] is set in other shooting modes, ISO 100 is set. [ALL] The [AUTO] setting is activated for all shooting modes. The ISO is automatically selected to obtain the optimal ISO even in M mode. AELMetering 8 You can set the metering mode when pressing the AEL/AFL button to lock the exposure. • [AUTO] performs metering in the mode selected under [METERING]. BULB TIMER Customizing your camera You can select the maximum time (in minutes) for bulb shooting. Custom Menu 1f # CUSTOM #X-SYNC. You can set the shutter speed that will be used when the flash fires. The speed can be set from 1/60 to 1/250 in 1/3 EV increments. • For details on the synchronization speed of commercially available flashes, refer to their manuals. #SLOW LIMIT You can set the slow limit of the shutter speed that will be used when the flash fires. The speed can be set from 1/30 to 1/250 in 1/3 EV increments. w+F 96 EN When set to [ON], it will be added to the exposure compensation value and flash intensity control will be performed. s0011_e_00_0_unified.book Page 97 Wednesday, September 12, 2007 4:46 PM Custom Menu 1g K/COLOR/WB ALL > You can apply the same compensation value to all the white balance modes at once. [ALL SET] The same compensation value applies to all WB modes. [ALL RESET] The WB compensation value settings applied to each WB mode are all cleared at once. If you select [ALL SET] 1) Use bd to select the color direction. Toward A: Amber-Blue/Toward G: Green-Magenta 2) Use ac to set the compensation value. g“WB compensation” (P. 64) Releasing the AEL/AFL button takes a sample image. You can check the white balance you have adjusted. If you select [ALL RESET] 1) Use ac to select [YES]. COLOR SPACE You can select how colors are reproduced on the monitor or printer. The first character in image file names indicates the current color space. g“FILE NAME” (P. 98) Pmdd0000.jpg P : sRGB _ : Adobe RGB [sRGB] [Adobe RGB] Standardized color space for Windows. Color space that can be set with Adobe Photoshop. SHADING COMP. In some cases, the edges of the image may be shadowed due to the properties of the lens. The shading compensation function compensates by increasing brightness at the dark edge of the image. This function is especially useful when a wide-angle lens is used. x Notes K SET You can combine 3 image sizes and 4 compression rates and register 4 combinations. Select the registered setting with [K]. g“Selecting the record mode” (P. 61) Register 4 different combinations of image settings. DSET 1 Set the number of pixels. 2 3 Y SF X F W N PIXEL COUNT CANCEL SELECT 4 8 Customizing your camera • This function is not available when a teleconverter or an extension tube is attached to the camera. • At higher ISO settings, noise in image edges may be conspicuous. W SF Yarge GO Set the compression rate. 97 EN s0011_e_00_0_unified.book Page 98 Wednesday, September 12, 2007 4:46 PM PIXEL COUNT You can set the pixel size for the image size [X], [W]. [Xiddle] Select [3200 × 2400], [2560 × 1920], or [1600 × 1200]. [Wmall] Select [1280 × 960], [1024 × 768], or [640 × 480]. Custom Menu 1h RECORD/ERASE QUICK ERASE You can erase the picture you have just taken immediately using the S button. [OFF] When the S button is pressed, the confirmation screen appears, asking you if you want to erase the picture. [ON] Pressing the S button erases the picture immediately. RAW+JPEG ERASE You can select the method to erase images recorded in RAW+JPEG. This function can only be used to erase one frame. [JPEG] Erases all JPEG image files, leaving only the RAW image files. [RAW] Erases all RAW image files, leaving only the JPEG image files. [RAW+JPEG] Erases both image file types. x Notes • This function is effective only if deleting one frame. For all-frame erase or erasing selected frames, both RAW and JPEG will be erased regardless of this setting. FILE NAME When you take a picture, the camera assigns it a unique file name and saves it in a folder. File names are assigned as shown in the illustration below. 8 Customizing your camera 98 EN s0011_e_00_0_unified.book Page 99 Wednesday, September 12, 2007 4:46 PM [AUTO] Even when a new card is inserted, the folder numbers are retained from the previous card. If the new card contains an image file whose file number coincides with one saved on the previous card, the new card’s file numbers start at the number following the highest number on the previous card. [RESET] When a new card is inserted, folder numbers start at 100 and file numbers start at 0001. If a card containing images is inserted, the file numbers start at the number following the highest file number on the card. • When both the Folder and File No. reach their respective maximum number (999/9999), it is not possible to store additional pictures even if the card is not full. No more pictures can be taken. Replace the card with a new one. PRIORITY SET You can customize the initial position of the cursor ([YES] or [NO]) on the [ALL ERASE] or [FORMAT] screen. dpi SETTING You can set the resolution for printing images in advance. The set value is recorded on the card with the images. [AUTO] Automatically set according to the image size. [CUSTOM] You can make the desired setting. Press d to display the setting screen. Custom Menu 1i K UTILITY EXT. WB DETECT You can disable the white balance sensor used to determine the light source during auto white balance. This is useful when the light source near the sensor and the light source illuminating the subject are different. Custom Menu 2 8 CF/xD EDIT FILENAME You can rename image files to make them easier to identify and organize. The portion of the filename that can be changed depends on the color space. g“COLOR SPACE” (P. 97) sRGB : Pmdd0000.jpg AdobeRGB : _mdd0000.jpg Customizing your camera You can select which card to use when both a CompactFlash and xD-Picture Card are loaded. You can change the character to OFF, A - Z or 0 - 9. s (Monitor brightness adjustment) You can adjust the brightness of the monitor for optimal viewing. [AUTO] This allows the illumination sensor to measure the surrounding brightness and automatically adjust the monitor for optimal viewing. [+7] – [-7] Use ac to adjust the monitor brightness. 99 EN s0011_e_00_0_unified.book Page 100 Wednesday, September 12, 2007 4:46 PM W (Changing the display language) You can change the language used for the on-screen display and error messages from ENGLISH to another language. • You can add another language to your camera with the provided OLYMPUS Master software. For details, refer to Help in OLYMPUS Master software. g“Using the OLYMPUS Master software” (P. 107) VIDEO OUT You can select NTSC or PAL according to your TV’s video signal type. You will need to set this when you want to connect the camera to a TV and play back images in a foreign country. Make sure the correct video signal type is selected before connecting the video cable. If you use the wrong video signal type, recorded pictures will not play back properly on your TV. TV video signal types in major countries and regions Check the video signal type before connecting the camera to your TV. NTSC North America, Japan, Taiwan, Korea PAL European countries, China REC VIEW You can display the picture you have just taken on the monitor while it is being recorded to the card, and to select how long the picture is displayed. This is useful for making a brief check of the picture you have just taken. Pressing the shutter button halfway while checking the picture lets you resume shooting immediately. [1SEC] – [20SEC] Selects the number of seconds to display each picture. Can be set in units of 1 second. [OFF] The picture being recorded to the card is not displayed. [AUTOq] Displays the image being recorded, and then switches to playback mode. This is useful for erasing a picture after checking it. 8 Customizing your camera 100 EN FIRMWARE Your product’s firmware version will be displayed. When you make inquiries about your camera or accessories or when you want to download software, you will need to state which version of each of the products you are using. Press d. Your product’s firmware version will be displayed. Press the i button to return to the previous screen. s0011_e_00_0_unified.book Page 101 Wednesday, September 12, 2007 4:46 PM 9 Printing Print reservation (DPOF) Print reservation Print reservation allows you to save printing data (the number of prints and the date/time information) with the pictures stored on the card. Pictures set with print reservation can be printed using the following methods. Printing using a DPOF-compatible photo lab You can print the pictures using the print reservation data. Printing using a DPOF-compatible printer Pictures can be printed directly from a dedicated printer without using a PC. For more details, refer to the printer’s manual. A PC card adapter may also be necessary. x Notes • DPOF reservations set by another device cannot be changed by this camera. Make changes using the original device. Moreover, setting new DPOF reservations using this camera will erase the previous reservations set by another device. • Not all functions may be available on all printers or at all photo labs. • RAW data are not printable. Single-frame reservation Follow the operation guide to set print reservation for a picture. 1 MENU[q][<] ON EDIT COPY ALL RESET PROTECT Operation guide 2 CANCEL SELECT GO PRINT ORDER SETTING CANCEL SELECT 9 Printing 3 Select [<] and press the i button. GO Press bd to select the frame that you want to set as print reservation, then press ca to set the number of prints. • To set print reservation for several pictures, repeat this step. 4 Press the i button when you have finished. • The menu screen for single-frame reservation appears. CANCEL SELECT GO 101 EN s0011_e_00_0_unified.book Page 102 Wednesday, September 12, 2007 4:46 PM 5 Select the date and time format and press the i button. [NO] The pictures are printed without the date and time. [DATE] The pictures are printed with the shooting date. [TIME] The pictures are printed with the shooting time. NO DATE TIME 6 CANCEL Select [SET] and press the i button. SELECT GO PRINT ORDER SETTING SET CANCEL CANCEL SELECT GO All-frame reservation Applies print reservation to all the pictures stored in the card. The number of prints is fixed at 1. 1 2 3 4 MENU[q][<] Select [U] and press the i button. Select the date and time format and press the i button. [NO] The pictures are printed without the date and time. [DATE] The pictures are printed with the shooting date. [TIME] The pictures are printed with the shooting time. Select [SET] and press the i button. Resetting the print reservation data You can reset all print reservation data or just the data for selected pictures. 9 1 MENU[q][<] Printing Resetting the print reservation data for all pictures 2 3 Select [<] or [U] and press the i button. Select [RESET] and press the i button. PRINT ORDER SETTING PRINT ORDERED RESET KEEP CANCEL 102 EN SELECT GO s0011_e_00_0_unified.book Page 103 Wednesday, September 12, 2007 4:46 PM Resetting the print reservation data for a selected picture 2 3 4 5 6 Select [<] and press the i button. Select [KEEP] and press the i button. Use bd to select the frame with print reservation data you want to reset, then press c to set the number of prints to 0. Press the i button when you have finished. Select the date and time format and press the i button. • This setting is applied to all frames with print reservation data. 7 Select [SET] and press the i button. Direct printing (PictBridge) By connecting the camera to a PictBridge-compatible printer with the USB cable, you can print out recorded pictures directly. To find out if your printer is compatible with PictBridge, refer to the printer’s manual. PictBridge The standard that enables digital cameras and printers made by different manufacturers to be connected, and also allows pictures to be printed directly from the camera. STANDARD All printers that support PictBridge have standard print settings. By selecting [STANDARD] on the settings screens (gP. 105), you can print pictures according to these settings. For details on your printer’s standard settings, refer to the printer’s manual or contact the printer manufacturer. • The available print modes and settings such as paper size vary with the type of printer. For details, refer to the printer’s manual. • For details on printing paper types, ink cassettes, etc., refer to the printer’s manual. x Notes • Use a fully charged battery for printing. • Images recorded in RAW data cannot be printed. • The camera will not enter sleep mode while it is connected to the USB cable. 9 Printing 103 EN s0011_e_00_0_unified.book Page 104 Wednesday, September 12, 2007 4:46 PM Connecting the camera to a printer Use the provided USB cable to connect the camera to a PictBridge-compatible printer. 1 Turn the printer on and connect the camera’s USB connector to the printer’s USB port with the USB cable • For details on how to turn the printer on and the position of the USB port, refer to the printer’s manual. USB cable 2 3 Turn on the camera. • The selection screen for the USB connection is displayed. Use p to select [EASY PRINT] or [CUSTOM PRINT]. If you select [EASY PRINT] • Go to “Easy printing” (gP. 104) If you select [CUSTOM PRINT] • [ONE MOMENT] is displayed and the camera and printer are connected. GO to “Custom printing” (gP. 105) x 9 Printing EN USB STORAGE MTP CONTROL EASY PRINT CUSTOM PRINT SELECT • If the screen is not displayed after a few minutes, disconnect the USB Cable and start again from Step 1. Easy printing 1 2 GO Notes Use bd to display the pictures you want to print on the camera. • Display the image you want to print on the camera and connect the camera with a printer using a USB cable. The screen on the right appears shortly. Press the < (print) button. • The picture selection screen appears when printing is completed. To print another picture, use bd to select the image and press the < button. • To exit, unplug the USB cable from the camera while the picture selection screen is displayed. 104 USB connector EASY PRINT START PC / CUSTOM PRINT s0011_e_00_0_unified.book Page 105 Wednesday, September 12, 2007 4:46 PM Custom printing 1 Follow the operation guide to set a print option. PRINT MODE SELECT PRINT ALL PRINT MULTI PRINT ALL INDEX PRINT ORDER Follow the operation guide displayed here. EXIT SELECT GO Selecting the print mode Select the type of printing (print mode). The available print modes are as shown below. [PRINT] Prints selected pictures. [ALL PRINT] Prints all the pictures stored in the card and makes one print for each picture. [MULTI PRINT] Prints multiple copies of one image in separate frames on a single sheet. [ALL INDEX] Prints an index of all the pictures stored in the card. [PRINT ORDER] Prints according to the print reservation you made. If there is no picture with print reservation, this is not available. (gP. 101) Setting the print paper items This setting varies with the type of printer. If only the printer’s STANDARD setting is available, you cannot change the setting. [SIZE] Sets the paper size that the printer PRINTPAPER supports. [BORDERLESS] Selects whether the picture is printed on SIZE BORDERLESS the entire page or inside a blank frame. STANDARD CANCEL [PICS/SHEET] Selects the number of pictures per sheet. Displayed when you have selected [MULTI PRINT]. STANDARD SELECT GO PRINTPAPER PICS/SHEET STANDARD 16 CANCEL SELECT 9 Printing SIZE GO 105 EN s0011_e_00_0_unified.book Page 106 Wednesday, September 12, 2007 4:46 PM Selecting pictures you want to print Select pictures you want to print. The selected pictures can be printed later (single-frame reservation) or the picture you are displaying can be printed right away. [PRINT] (f) Prints the currently displayed picture. If there is a picture that [SINGLE PRINT] reservation has already been applied to, only that reserved picture will be printed. [SINGLE PRINT] (t) Applies print reservation to the currently displayed picture. If you want to apply reservation to other PRINT SELECT pictures after applying [SINGLE SINGLEPRINT MORE PRINT], use bd to select them. [MORE] (u) Sets the number of prints and other items for the currently displayed picture, and whether or not to print it. For operation, refer to “Setting printing data” (gP. 106) in the next section. Setting printing data Select whether to print printing data such as the date and time or file name on the picture when printing. [<×] Sets the number of prints. PRINT INFO [DATE] Prints the date and time recorded on the picture. 1 [FILE NAME] Prints the file name recorded on the picture. DATE WITHOUT FILE NAME WITHOUT 2 SELECT SET GO Once you have set the pictures for printing and printing data, select [PRINT], then press the i button. [PRINT] [CANCEL] Transfers images you print to the printer. Resets the settings. All print reservation data will be lost. If you want to keep the print reservation data and make other settings, press b. This returns you to the previous setting. PRINT PRINT CANCEL 9 Printing • To stop and cancel printing, press the i button. CANCEL [CONTINUE] Continues printing. [CANCEL] Cancels printing. All print reservation data will be lost. SELECT GO PRINT CONTINUE CANCEL SELECT 106 EN GO s0011_e_00_0_unified.book Page 107 Wednesday, September 12, 2007 4:46 PM 10 Using the OLYMPUS Master software Flowchart Just connect the camera to a computer with the USB cable and you can easily transfer images stored on the card to the computer with the provided OLYMPUS Master software. Things to prepare • OLYMPUS Master 2 CD-ROM • USB cable • Computer that fulfills the operating environment (For the required operating environment, refer to the OLYMPUS Master installation guide.) Installing OLYMPUS Master (Refer to the installation guide included with the OLYMPUS Master) (gP. 108) Starting OLYMPUS Master (gP. 109) Saving pictures to your computer (gP. 109) Disconnecting the camera from your computer (gP. 110) Using the provided OLYMPUS Master software What is OLYMPUS Master? OLYMPUS Master is an image management program with viewing and editing features for pictures taken with your digital camera. Once installed on your computer, you can take advantage of the following. z Transferring images from the camera or removable media to your computer z Viewing images You can also enjoy slideshows and sound playback. z Grouping and organizing images You can organize images into albums or folders. Transferred images are automatically organized by shooting date, allowing you to quickly find the particular images you want. z Correcting images using filter and correction functions z Editing images You can rotate, trim or change the image size. z A variety of printing formats You can easily make prints of your pictures. z Updating the camera firmware z Developing RAW images Using the OLYMPUS Master software Connecting the camera with your computer using the provided USB cable 10 For information about OLYMPUS Master’s other features, as well as for details on how to use the software, refer to “Help” in OLYMPUS Master software. 107 EN s0011_e_00_0_unified.book Page 108 Wednesday, September 12, 2007 4:46 PM Connecting the camera to a computer Connect the camera to your computer with the provided USB cable. 1 Use the provided USB cable to connect the computer’s USB port to the camera’s USB connector. • The location of the USB port varies with the computer. For details, refer to your computer’s manual. Look for this mark. Terminal USB port USB cable Using the OLYMPUS Master software 10 108 EN 2 3 4 Smaller terminal Set the camera’s power switch to ON. • The selection screen for the USB connection is displayed. Press ac to select [STORAGE]. Press the i button. The computer recognizes the camera as a new device. USB connector USB STORAGE MTP CONTROL EASY PRINT CUSTOM PRINT Windows SELECT GO • When you connect the camera to the computer for the first time, the computer automatically recognizes the camera. Click “OK” when the message saying that the installation is completed appears. The computer recognizes the camera as a “Removable Disk ”. Macintosh • iPhoto is the default image management application for Mac OS. When you connect your Olympus digital camera for the first time, iPhoto will start up automatically. Close iPhoto and start OLYMPUS Master. x Notes • When the camera is connected to the computer, none of the camera buttons are functional. s0011_e_00_0_unified.book Page 109 Wednesday, September 12, 2007 4:46 PM Start up the OLYMPUS Master software Windows 1 Double-click the “OLYMPUS Master 2” icon on the desktop. Macintosh 1 Double-click the “OLYMPUS Master 2” icon folder. in the “OLYMPUS Master 2” • The browse window is displayed. • When OLYMPUS Master is started up for the first time after installation, the OLYMPUS Master initial setting screen and user registration screen are displayed before the browse window. Follow the on-screen instructions. To exit OLYMPUS Master 1 Click “Exit” on any window. • OLYMPUS Master is exited. Displaying camera images on a computer 1 Click “Transfer Images” then click “From Camera” on the browse window, and . • The window for selecting the pictures you want to transfer from the camera is displayed. All the images in the camera are displayed. 2 3 Select “New Album” and enter an album name. Select the image files and click “Transfer Images”. • A window indicating that the download is complete is displayed. 4 Click “Browse images now”. • The downloaded images are displayed in the browse window. Using the OLYMPUS Master software Downloading and saving images 10 109 EN s0011_e_00_0_unified.book Page 110 Wednesday, September 12, 2007 4:46 PM Disconnecting the camera from your computer 1 Make sure that the card access lamp has stopped blinking. Card access lamp 2 Prepare to remove the USB cable. Windows 1) In the system tray, click the “Unplug or Eject Hardware” icon . 2) Click on the pop-up message. 3) Click “OK” on the “Safe to Remove Hardware” window. Using the OLYMPUS Master software 10 110 EN Macintosh 3 x 1) The trash icon changes to the eject icon when the “Untitled” or “NO_NAME” icon on the desktop is dragged. Drag and drop it on the eject icon. Unplug the USB cable from the camera. Notes • For Windows users: When you click “Unplug or Eject Hardware”, a warning message may be displayed. In such case, make sure that no image data is being downloaded from the camera, and that there are no applications open that were accessing the camera image files. Close any such applications and click “Unplug or Eject Hardware” again and then remove the cable. s0011_e_00_0_unified.book Page 111 Wednesday, September 12, 2007 4:46 PM Viewing still images 1 2 Click the “Album” tab on the browse window and select the album that you want to view. Thumbnail • The selected album image is displayed in the thumbnail area. Double-click the still picture thumbnail that you want to view. • OLYMPUS Master switches to the image edit window and the picture is enlarged. • Click “Back” to return to the browse window. To increase the number of languages 1 2 3 4 5 6 7 Make sure that your computer is connected to the Internet. Plug the USB cable into the USB port on the computer. Plug the other end of the USB cable into the camera’s USB connector. • The camera turns on automatically. • The monitor turns on and the selection screen for the USB connection is displayed. Select [STORAGE] and press the i button. In the browse window, select “Camera”, then “Update Camera/Add Display Language”. • The confirmation window for updating is displayed. Click “OK”. • The updating the camera window is displayed. Click “Add Language” in the updating camera display. • The “Add Display Language of Camera” window is displayed. 8 9 Using the OLYMPUS Master software Please take care that your battery is fully charged! 10 Click and select a language. Click “Add”. • The new language is downloaded to your camera. Please do not remove any cable or the battery while the camera is processing. 111 EN s0011_e_00_0_unified.book Page 112 Wednesday, September 12, 2007 4:46 PM 10 After the download procedure the camera display will show “OK”. You can remove the cables and turn power off. After restarting the camera you will be able to choose the new language from [W]. Transferring images to your computer without using OLYMPUS Master Your camera supports the USB Mass Storage Class. You can transfer images to a computer by connecting the camera to the computer with the provided USB cable. This can be done even without using OLYMPUS Master. The following operating systems are compatible with the USB connection: Windows : 2000 Professional/XP Home Edition/XP Professional/Vista Macintosh : Mac OS X v10.3 or later x Using the OLYMPUS Master software 10 112 EN Notes • If your computer is running Windows Vista, select [MTP] in Step 3 on page 108 to use Windows Photo Gallery. • Data transfer is not guaranteed in the following environments, even if your computer is equipped with a USB port. • Computers with a USB port added by means of an extension card, etc. • Computers without a factory-installed OS and home-built computers s0011_e_00_0_unified.book Page 113 Wednesday, September 12, 2007 4:46 PM 11 Shooting tips and maintenance Shooting tips and information Tips before you start taking pictures The camera does not turn on even when a battery is loaded The battery is not fully charged • Charge the battery with the charger. The battery is temporarily unable to function because of the cold • Battery performance declines in low temperatures, and the charge may not be sufficient to turn on the camera. Remove the battery and warm it by putting it in your pocket for a while. No picture is taken when the shutter button is pressed The camera has turned off automatically • To save battery power, if there is no operation, the camera goes into sleep mode after a fixed period of time and the camera stops operating. The camera activates again when you touch the shutter button or any other button. The camera will turn off automatically if there is no further operation for 4 hours. The camera will not work until it is turned back on. g“SLEEP” (P. 94), “4 h TIMER (Auto power off)” (P. 95) The flash is charging • When the flash is activated and the # symbol in the viewfinder is blinking, this indicates that the flash is charging. Wait for the blinking to stop, then press the shutter button. Unable to focus Noise reduction is activated • When shooting night scenes, shutter speeds are slower and noise tends to appear in images. The camera activates the noise-reduction process after shooting at slow shutter speeds. During which, shooting is not allowed. You can set [NOISE REDUCT.] to [OFF]. g“Noise reduction” (P. 69) The date and time has not been set The camera is used with the settings at the time of purchase • The date and time of the camera is not set when purchased. Set the date and time before using the camera. g“Setting the date/time” (P. 15) The battery has been removed from the camera • The date and time settings will be returned to the factory default settings if the camera is left without the battery for approximately 1 day. The settings will be canceled more quickly if the battery was only loaded in the camera for a short time before being removed. Before taking important pictures, check that the date and time settings are correct. Shooting tips and maintenance • When the AF confirmation mark in the viewfinder is blinking, it indicates that the camera is unable to focus using AF. Press the shutter button again. 11 Shooting tips Focusing on the subject There are several ways to focus, depending on the subject. AF target is not focused on the subject • Use focus lock to focus the AF target on the subject. g“Focus lock k If correct focus cannot be obtained” (P. 55) 113 EN s0011_e_00_0_unified.book Page 114 Wednesday, September 12, 2007 4:46 PM Other things instead of the subject are in focus on the respective AF targets • Set [AF AREA] to M and focus on the selected AF target. g“AF target selection” (P. 53) The subject is moving quickly • Focus the camera on a point roughly the same distance away as the subject you want to shoot (by pressing the shutter button halfway), and then recompose your picture and wait for the subject to enter the frame. Close up on the subject using macro lens • When using macro lens to close up on the subject, it is difficult to focus with AF when the enlargement ratio of the subject is bigger. Set to manual focus (MF), rotate the focus ring and focus manually. g“MF (manual focus)” (P. 52) Taking pictures in low light conditions • The built-in flash can be set to function as an AF illuminator. The flash helps to focus in low-light conditions in the AF mode when raised. g“Built-in flash shooting” (P. 73), “AF ILLUMINAT.” (P. 90) Subjects that are difficult to focus on It may be difficult to focus with auto focus in the following situations. AF confirmation mark is blinking. These subjects are not focused. Subject with low contrast Excessively bright light in center of frame Subject with repeated patterns Subjects at different distances Fast-moving subject Subject not inside AF area AF confirmation mark lights up but the subject is not focused. Shooting tips and maintenance 11 In any situation, focus on something with high contrast that is at the same distance as the subject, determine the composition and shoot the picture. Taking pictures without blurring There are several factors that can cause the picture to blur. The subject is too dark • Change the shutter speed to match the brightness of the subject. If the shutter speed is set low to shoot a dark subject, blurring is likely to occur if the subject moves. Increase the value of the ISO setting. When the shutter speed is slow, camera shake becomes easier to see. Mount the camera on a tripod. Using the remote control (optional) to close the shutter is also effective for reducing blurring. The camera or your hand moves when pressing the shutter button • Press the shutter button gently or hold the camera securely with both hands. • Use the image stabilizer function. g“Image stabilizer” (P. 60) Taking pictures with less flash When using auto flash, the flash will light up automatically when it is not bright enough. If the subject is too far away, the flash may have no effect. Here is how to take pictures without the flash in this type of situation. Setting the image stabilizer function • This function reduces camera shake, enabling you to hold the camera and take pictures in low light situations with the flash off. g“Image stabilizer” (P. 60) Increase the ISO setting 114 EN • Increase the value of the ISO setting. The image may become grainy. g“ISO sensitivity setting” (P. 49) s0011_e_00_0_unified.book Page 115 Wednesday, September 12, 2007 4:46 PM The picture is too grainy There are several factors that can cause the picture to appear grainy. Increasing the ISO sensitivity • When you increase the ISO setting, noise, which appears as spots of unwanted color or unevenness in the color, can be introduced and give the picture a grainy appearance. This camera is equipped with a function to allow shooting at high sensitivity while suppressing noise; however, increasing the ISO sensitivity creates grainier pictures than when using a lower sensitivity. g“ISO sensitivity setting” (P. 49) Image taken appears whitish This may occur when the picture is taken in backlight or semi-backlight conditions. This is due to a phenomenon called flare or ghosting. As far as possible, consider a composition where strong light source is not taken in the picture. Flare may occur even when a light source is not present in the picture. Use a lens hood to shade the lens from the light source. If a lens hood does not have effect, use your hand to shade the lens from the light. g“Interchangeable lenses” (P. 126) Taking pictures with the correct color The reason why there are differences between the colors in a picture and the actual colors taken and the actual color is the light source illuminating the subject. [WB] is the function that allows the camera to determine the correct colors. Normally, the [AUTO] setting provides the optimal white balance, but depending on the subject, it may be better to experiment with changing the [WB] setting. • When the subject is in the shade on a sunny day • When the subject is illuminated by both natural light and indoor lighting, such as when near a window • When there is no white in the frame g“Selecting the white balance” (P. 62) In normal cases, white subjects such as snow will appear darker than usual when the picture is taken. There are several ways to capture the whiteness. • Adjust the exposure compensation toward [+]. g“Exposure compensation” (P. 46) • Use [nHI] (Spot metering highlight control). Press the shutter button halfway at the center of the viewfinder where you wish to highlight the whiteness. The metered part at the center will be set to appear whiter. g“Changing the metering mode” (P. 45) • Use the AE bracketing function to take the picture. If you do not know the amount of exposure compensation, try using AE bracketing. The compensation value changes a little every time you press the shutter button. If you set a larger exposure compensation, you can change the compensation value either upwards or downwards based on that value and shoot the picture. g“AE bracketing” (P. 48) Taking pictures of a subject against backlight Shooting tips and maintenance Taking pictures of a white beach or snow scene 11 If the background is too bright compared to the subject, the exposure will be affected at the bright parts and the subject will appear darker. This is because the camera determines the exposure from the brightness of the whole screen. • Set [METERING] to [n] (spot metering) to measure the exposure of the subject in the center of the picture. To change the composition, place the subject in the center of the picture. While holding down the AEL/AFL button, change the composition and press the shutter button. g“Changing the metering mode” (P. 45) • Activate the flash, set the flash mode to [#] (fill-in flash) and shoot the picture. You can shoot a subject against backlight without the face of the subject appearing dark. [#] (fill-in flash) is used for shooting against backlight and under fluorescent and other artificial lighting. g“Flash mode setting” (P. 70) 115 EN s0011_e_00_0_unified.book Page 116 Wednesday, September 12, 2007 4:46 PM Image turns out too bright or too dark When taking pictures in S mode or A mode, the displayed shutter speed or aperture setting may blink. A blinking display means that the correct exposure cannot be obtained. If you take the picture as is, the picture will appear too bright or too dark. If that happens, change the aperture setting or shutter speed. g“Aperture priority shooting” (P. 41), “Shutter priority shooting” (P. 42), “Exposure warning display” (P. 129) Unknown bright dot(s) appear on the subject in the picture taken This may be due to stuck pixel(s) on the image pickup device. Perform [PIXEL MAPPING]. If the problem persists, repeat pixel mapping a few times. g“Pixel mapping k Checking the image processing functions” (P. 122) Additional shooting tips and information Increasing the number of pictures that can be taken The captured image will be recorded on the card. The following ways describe how to record more images. Shooting tips and maintenance 11 • Change the record mode. The size of an image varies with the record mode. When you are not sure of the available card capacity, change the image mode and shoot the picture. The smaller the image size and the higher the compression, the smaller the size of the image becomes. To make the file size small, combine the image size and compression rate and register it with [K SET]. You can further reduce the number of pixels by setting [PIXEL COUNT] to fewer pixels for image size [X] or [W]. g“Selecting the record mode” (P. 61), “K SET” (P. 97), “PIXEL COUNT” (P. 98) • Use a card with large capacity. The number of recordable images varies with the capacity of the card. Use a card with large capacity. Using a new card If you use a non-Olympus card or a card used for another application, such as for a computer, the message [CARD ERROR] is displayed. To use this card with this camera, use the [FORMAT] function to format the card. g“Formatting the card” (P. 125) Extending the useful life of the battery Performing any of the following operations when not actually taking pictures can deplete the battery power. • Repeatedly pressing the shutter button halfway • Repeatedly playing back the captured images over a long period of time • Using the live view function over a long period To save battery power, turn off the camera whenever it is not in use. Functions that cannot be selected from menus Some items may not be selectable from the menus when using the arrow pad. • Items that cannot be set with the current shooting mode • Items that cannot be set because of an item that has already been set: Combination of [l] and [NOISE REDUCT.], etc. 116 EN s0011_e_00_0_unified.book Page 117 Wednesday, September 12, 2007 4:46 PM Selecting the optimal record mode Record modes are divided into 2 main types: RAW and JPEG. RAW records without reflecting the settings for white balance, contrast, etc. on the images themselves. JPEG records as images that reflect these settings. JPEG also compresses images to reduce the file size when recording them. For JPEG, you can register four combinations of images sizes (Y, X, W) and compression rates (SF, F, N, B) from the 12 total combinations available. The higher the compression rate, the grainier the image will appear when enlarged during display. A rough guide for selection is shown below. To make fine-adjustments of the shooting settings on the computer • [RAW] To print large images on A3/A4 paper/To edit and process images on a computer • Images size Y and compression rate SF, F, N, or B To print postcard-size images • Images size X and compression rate SF, F, N, or B To send as an e-mail attachment or post on a web site • Images size W and compression rate SF, F, N, or B g“Record mode and file size/number of storable still pictures” (P. 133) To restore functions to their settings at the time of purchase • The settings are saved even when the power is switched off. • To return to the factory default settings, set [RESET] under [CUSTOM RESET]. You can register up to two types of settings to be reset. Set various functions of the camera and register using [RESET1] or [RESET2] under [CUSTOM RESET]. g“Resetting to the factory default settings” (P. 33) Confirming the exposure when it is difficult to view the monitor outdoors How to read the histogram 1 If the graph has many peaks around here, the image will appear mostly black. 2 If the graph has many peaks around here, the image will appear mostly white. 3 The part indicated in green in the histogram shows the luminance distribution within the spot metering area. g“Using live view” (P. 31) 1 2 3 Leaving set functions in the camera so that they can be used later You can register up to two current camera settings in [MY MODE SETUP]. When shooting with My Mode, switch the shooting mode to s/T. By registering My Mode to the < button, you can instantly shoot with My Mode. g“My Mode shooting” (P. 44), “; FUNCTION” (P. 92), “MY MODE SETUP” (P. 93) Shooting tips and maintenance The monitor may be difficult to view and the exposure difficult to confirm when shooting outdoors. During live view, press the INFO button repeatedly to display the histogram. The following shows you how to read the histogram display easily. 11 Playback tips Understanding the settings and other information of pictures taken Play back a picture, and press the INFO button. Press the button repeatedly to change the amount of information displayed. g“Information display” (P. 82) 117 EN s0011_e_00_0_unified.book Page 118 Wednesday, September 12, 2007 4:46 PM Viewing pictures on a computer Viewing the entire picture on a computer screen The size of the picture displayed on a computer screen changes depending on the computer settings. When the monitor setting is 1024 × 768 and you are using Internet Explorer to view a picture with an image size of 2048 × 1536 at 100%, the entire picture cannot be viewed without scrolling. There are several ways you can view the entire picture on the computer screen. View the picture using image browsing software • Install the OLYMPUS Master software from the provided CD-ROM. Change the monitor setting • The icons on the computer desktop may be rearranged. For details of changing the settings on your computer, refer to the computer’s manual. To view recorded images in RAW Install the OLYMPUS Master software from the provided CD-ROM. You can use the RAW development function in OLYMPUS Master to develop the RAW image in the camera setting used during shooting, as well as change detailed settings such as white balance and contrast. Error codes Viewfinder indications Shooting tips and maintenance Normal indication Control panel indications Monitor indications NO CARD WRITE PROTECT CARD FULL EN Corrective action The card is not inserted, or it cannot be recognized. Insert a card or insert a different card. There is a problem with the card. Insert the card again. If the problem persists, format the card. If the card cannot be formatted, it cannot be used. CARD ERROR 11 118 Possible cause Writing to the The card has been set to card is prohibited. read-only setting with the computer. Reset the card with the computer. The card is full. No more pictures can be taken or no more information such as print reservation can be recorded. Replace the card or erase unwanted pictures. Before erasing, download important images to a PC. s0011_e_00_0_unified.book Page 119 Wednesday, September 12, 2007 4:46 PM Viewfinder indications No indication Control panel indications Monitor indications No indication CARD FULL Possible cause Corrective action The card has no available memory. Print reservations and new data cannot be recorded to the card. Replace the card or erase unwanted pictures. Before erasing, download important images to a PC. xD-Picture Cards cannot be read or is not formatted. • Select [xD CARD CLEAN], press the i button and turn off the camera. Remove the card and wipe dry the metallic surface with a soft, dry cloth. • Select [FORMAT] [YES], and then press the i button to format the card. Formatting the card erases all data on the card. There are no pictures on the card. The card contains no pictures. Record pictures and play back. CARD SETUP No indication No indication Clean the terminal of the xD card with the dry cloth. xD CARD CLEAN FORMAT SELECT No indication GO No indication NO PICTURE No indication No indication No indication No indication No indication THE IMAGE CANNOT BE EDITED Internal camera temperature is too high. Please wait for cooling before camera use. CARD-COVER OPEN Use image processing software to view the picture on a PC. If that cannot be done, the image file is damaged. Pictures taken with another camera cannot be edited on this camera. Use image processing software to edit the picture. Extended use of live view or sequential shooting has increased the internal temperature of the camera. Wait a moment for the camera to turn off automatically. Allow the internal temperature of the camera to cool before resuming operations. The card cover is open. Close the card cover. Shooting tips and maintenance No indication The selected picture cannot be displayed for playback due to a problem with this PICTURE ERROR picture. Or the picture cannot be used for playback on this camera. 11 119 EN s0011_e_00_0_unified.book Page 120 Wednesday, September 12, 2007 4:46 PM Viewfinder indications Control panel indications No indication No indication No indication No indication No indication No indication Monitor indications BATTERY EMPTY NO CONNECTION Possible cause Corrective action The battery is drained. Charge the battery. The camera is not connected to the computer or printer correctly. Disconnect the camera and connect it again correctly. There is no paper in the printer. Load some paper in the printer. The printer has run out of ink. Replace the ink cartridge in the printer. The paper is jammed. Remove the jammed paper. The printer’s paper cassette has been removed or the printer has been manipulated while making settings on the camera. Do not manipulate the printer while making settings on the camera. There is a problem with the printer and/or camera. Turn off camera and printer. Check the printer and remedy any problems before turning the power on again. Pictures recorded on other cameras may not be printed on this camera. Use a personal computer to print. NO PAPER No indication No indication NO INK No indication No indication JAMMED Shooting tips and maintenance 11 120 EN No indication No indication No indication SETTINGS CHANGED No indication PRINT ERROR No indication No indication CANNOT PRINT s0011_e_00_0_unified.book Page 121 Wednesday, September 12, 2007 4:46 PM Camera maintenance Cleaning and storing the camera Cleaning the camera Turn off the camera and remove the battery before cleaning the camera. Exterior: • Wipe gently with a soft cloth. If the camera is very dirty, soak the cloth in mild soapy water and wring well. Wipe the camera with the damp cloth and then dry it with a dry cloth. If you have used the camera at the beach, use a cloth soaked in clean water and well wrung. Monitor and viewfinder: • Wipe gently with a soft cloth. Lens, mirror and focusing screen: • Blow dust off the lens, mirror and focusing screen with a commercially available blower. For the lens, wipe gently with a lens cleaning paper. Storage • When not using the camera for a prolonged period, remove the battery and card. Store the camera in a cool, dry place that is well ventilated. • Insert the battery periodically and test the camera’s functions. x Notes • Do not use strong solvents such as benzene or alcohol, or a chemically treated cloth. • Avoid storing the camera in places where chemicals are treated, in order to protect the camera from corrosion. • Mold may form on the lens surface if the lens is left dirty. • Check each part of the camera before use if it has not been used for a long time. Before taking important pictures, be sure to take a test shot and check that the camera works properly. Shooting tips and maintenance Cleaning and checking the image pickup device This camera incorporates a dust reduction function to keep dust from getting on the image pickup device and to remove any dust or dirt from the image pickup device surface with ultrasonic vibrations. Dust reduction is activated when the power switch is set to ON and when starting and stopping live view. The dust reduction function operates at the same time as the pixel mapping, which checks the image pickup device and image processing circuitry. Since dust reduction is activated every time the camera’s power is turned on, the camera should be held upright for the dust reduction function to be effective. The SSWF indicator blinks while dust reduction is working. g“SSWF indicator” (P. 14) 11 121 EN s0011_e_00_0_unified.book Page 122 Wednesday, September 12, 2007 4:46 PM Cleaning mode k Removing dust If dust or dirt gets on the image pickup device, black dots may appear in the picture. Contact your Olympus Authorized Service Center to have the image pickup device physically cleaned. The image pickup device is a precision device and is easily damaged. When cleaning the image pickup device yourself, be sure to follow the instructions below. If power runs out during cleaning, the shutter will close, which may cause the shutter curtain and mirror to break. Keep an eye on the remaining battery power. 1 2 3 4 5 6 Remove the lens from the camera, and set the power switch to ON. MENU[Y][i][CLEANING MODE] Press d, then press the i button. CLEANING MODE EXT. WB DETECT ON • The camera enters the cleaning mode. Press the shutter button all the way. • The mirror goes up and the shutter curtain opens. Clean the image pickup device. CANCEL SELECT • Carefully blow off any dust on the surface of the image pickup device by using a mechanical blower (commercially available). GO Be careful not to catch the mechanical blower in the shutter curtain when turning the power off to finish cleaning. • If the camera turns off, the shutter curtain closes, causing the mirror to fall. x Shooting tips and maintenance 11 122 EN Notes • Be careful not to let the mechanical blower (commercially available) touch the image pickup device. If the blower touches the image pickup device, the image pickup device will be damaged. • Never put the mechanical blower behind the lens mount. If the power turns off, the shutter closes, breaking the shutter curtain. • Do not use anything other than the mechanical blower. If high-pressure gas is sprayed onto the image pickup device, it will freeze on the image pickup device’s surface, damaging the image pickup device. Pixel mapping k Checking the image processing functions The pixel mapping feature allows the camera to check and adjust the image pickup device and image processing functions. After using the monitor or taking continuous shots, wait for at least one minute before using the pixel mapping function to ensure that it operates correctly. 1 2 MENU[Z][PIXEL MAPPING] Press d, then press the i button. • The [BUSY] bar is displayed when pixel mapping is in progress. When pixel mapping is finished, the menu is restored. x Notes • If you accidentally turn the camera off during pixel mapping, start again from Step 1. s0011_e_00_0_unified.book Page 123 Wednesday, September 12, 2007 4:46 PM 12 Information Main optional accessories You can use the following Olympus accessories with this camera. Power supply HLD-4 Power battery holder Attach the power battery holder and use it as a grip for taking pictures with the camera held vertically. It enables you to use the camera for a long period of time. 1 2 To attach the power battery holder to the camera, remove the camera’s battery cover, as shown in the diagram to the left. BCM-1 Li-ion battery charger This charger is for charging the BLM-1 lithium ion battery included with this camera. It takes about 2 hours to charge the battery with this charger. Wireless flashes FL-50R/FL-36R Olympus wireless RC flash system These external flashes emit a large amount of light and can be used for FP flash and multiple wireless flash shooting. RM-CB1 Remote cable This remote switch is effective for macro and bulb shooting. Connect it to the remote cable connector on the camera. Information Remote cable 12 123 EN s0011_e_00_0_unified.book Page 124 Wednesday, September 12, 2007 4:46 PM Eyecups DE-P3/DE-N3 Diopter compensation eyecups These eyecups enable users to shoot without having to wear their eyeglasses regardless of whether the user is nearsighted or farsighted. To remove the optional eyecup, remove it as shown on the left. Card basics Usable cards “Card” in this manual refers to a recording medium. This camera can use CompactFlash, Microdrive or xD-Picture Card (optional). Information 12 124 EN CompactFlash Microdrive xD-Picture Card A CompactFlash is a largecapacity solid state flash memory card. You can use commercially available cards. A Microdrive is a medium that uses a large-capacity compact hard disk drive. You can use a Microdrive that supports CF+Type II (CompactFlash extension standard). An xD-Picture Card is a recording medium used mainly in compact cameras. Precautions when using a Microdrive A Microdrive is a medium that uses a compact hard disk drive. Because the disk drive rotates, a Microdrive is not as resistant to vibration or impact as other cards. Special care is needed when using a Microdrive (especially during recording and playback) to make sure the camera is not subjected to shock or vibrations. Be sure to read the following precautions before using a Microdrive. Also, refer to the manuals provided with your Microdrive. • Be very careful when putting the camera down during recording. Place it gently on a firm surface. • Do not use the camera in places subject to vibrations or excessive shock, such as at a construction site or in a car while driving along a bumpy road. • Do not take a Microdrive close to areas where it may be exposed to strong magnetism. x Notes • The data in the card will not be erased completely even after formatting the card or deleting the data. When discarding, destroy the card to prevent leakage of personal information. s0011_e_00_0_unified.book Page 125 Wednesday, September 12, 2007 4:46 PM Formatting the card Non-Olympus cards or cards formatted on a computer must be formatted with the camera before they can be used. All data stored on the card, including protected images, is erased when the card is formatted. When formatting a used card, confirm there are no images that you still want to keep on the card. 1 2 3 MENU[W][CARD SETUP] Use ac to select [FORMAT], then press the i button. Use ac to select [YES], then press the i button. CARD SETUP ALL ERASE FORMAT • Formatting is performed. CANCEL SELECT GO TIPS When inserting cards into the two card slots: j Select the card to be used in [CF/xD]. g“CF/xD” (P. 99) Battery and charger z Use the single Olympus lithium-ion battery (BLM-1). Other batteries cannot be used. z The camera’s power consumption varies widely with usage and other conditions. z As the following consume a lot of power even without shooting, the battery will be drained quickly. • Performing auto focus repeatedly by pressing the shutter button halfway in shooting mode. • Using live view. • Displaying images on the LCD monitor for a prolonged period. • When connected to a computer or printer. z When using a drained battery, the camera may turn off without the low battery warning being displayed. z The battery will not be fully charged at the time of purchase. Charge the battery using the designated charger (BCM-2) before use. z The normal charging time of the provided rechargeable battery is approximately 5 hours (estimated). z Do not use chargers other than the one designated. x Notes Information AC adapter It is recommended to use the AC-1 AC adapter (optional) for prolonged slideshows, transferring pictures to a computer, or other operations that may take a long time to perform. Do not use other AC adapters. 12 • Do not remove the battery or unplug the AC adapter when the camera is on or is connected to another device. This can affect the camera settings and functions. • Refer to the manual provided with the AC adapter. 125 EN s0011_e_00_0_unified.book Page 126 Wednesday, September 12, 2007 4:46 PM Using your charger abroad z The charger and AC adapter can be used in most home electrical sources within the range of 100 V to 240 V AC (50/60Hz) around the world. However, depending on the country or area you are in, the AC wall outlet may be shaped differently and the charger may require a plug adapter to match the wall outlet. For details, ask at your local electrical shop or travel agent. z Do not use commercially available travel adaptors as the charger or AC adapter may malfunction. Interchangeable lenses Select the lens that you want to shoot with. Use a specified Four Thirds lens (Four Thirds mount). When a non-specified lens is used, auto focus and light metering will not function correctly. In some cases, other functions may not work either. Four Thirds mount Developed by Olympus as the lens mount standard for the Four Thirds system. These all-new interchangeable lenses featuring the Four Thirds mount were developed from the ground up based on optic engineering exclusively for digital cameras. ZUIKO DIGITAL interchangeable lens Four Thirds system interchangeable lens are designed to withstand rigorous professional use. The Four Thirds system makes it possible for a fast lens to be compact and lightweight as well. Focal distance and depth of field of Four Thirds system lenses Information 12 126 EN When compared to 35-mm cameras, Four Thirds system cameras achieve different effects at the same focal distance and aperture. Focal distance At the same focal distance of a 35-mm camera, a Four Thirds system camera can achieve a focal distance equivalent to twice that of a 35-mm camera. This enables the design of compact telephoto lenses. A 14-50 mm Four Thirds system lens, for example, is equivalent to a 28-100 mm lens for a 35-mm camera. • When the image angle of Four Thirds system lens is converted to that of a 35-mm camera, the perspective is the same as that of a 35-mm camera. Depth of Field A Four Thirds system camera can achieve a depth of field equivalent to two times deeper than that of a 35-mm camera. This enables more light to enter through the aperture. A Four Thirds system lens with f2.0 brightness, for example, is equivalent to f4.0 when converted to the aperture of a 35-mm camera. • You can achieve the same amount of background blur as if you were using a 35-mm camera. x Notes • When you attach or remove the body cap and lens from the camera, keep the lens mount on the camera pointed downward. This helps prevent dust and other foreign matter from getting inside the camera. • Do not remove the body cap or attach the lens in dusty places. • Do not point the lens attached to the camera toward the sun. This may cause the camera to malfunction or even ignite due to the magnifying effect of sunlight focusing through the lens. • Be careful not to lose the body cap and rear cap. • Attach the body cap to the camera to prevent dust from getting inside when no lens is attached. s0011_e_00_0_unified.book Page 127 Wednesday, September 12, 2007 4:46 PM ZUIKO DIGITAL lens specifications Names of parts 1 Hood mount section 2 Filter mount thread 3 Zoom ring 4 Focus ring 5 Mount index 6 Electrical contacts 7 Front cap 8 Rear cap 9 Lens hood Attaching the hood Storing the hood • Use the hood when shooting a backlit subject. Main Specifications Items 12 - 60 mm Mount 50 - 200 mm FOUR THIRDS mount Focal distance 12 - 60 mm Max. aperture f2.8 - 4.0 f2.8 - 3.5 Image angle 84° - 20° 24° - 6.2° 10 groups, 14 lenses 15 groups, 16 lenses Lens configuration Shooting range Multilayer film coating (partially single layered) f2.8 - 22 f2.8 - 22 0.25 m - ) 1.2 m - ) Focus adjustment Weight (excluding hood and cap) Dimensions (Max. diameter × overall length) AF/MF switching 575 g 995 g l79.5 × 98.5 mm l86.5 × 157 mm Lens hood mount Filter mount thread diameter Bayonet 72 mm 67 mm Information Iris control 50 - 200 mm 12 127 EN s0011_e_00_0_unified.book Page 128 Wednesday, September 12, 2007 4:46 PM Can be used with the optional EX-25 extension tube under the following conditions. The focus adjustment when EX-25 is used will be MF. Lens, focal distance 12-60 mm 12 mm 60 mm 50-200 mm Magnification ( ): Calculated based on 35 mm film camera Shooting range Shooting is not possible since subjects cannot be brought into focus at this focal length. 21.0 cm - 25.5 cm 0.43 - 0.58× (0.86 - 1.16×) Can be shot in the whole zoom range 0.12 - 0.49× (0.24 - 0.98×) Storage Precautions • Clean the lens after use. Remove dust and dirt on the surface of the lens with a blower brush or brush. Use commercially available lens cleaning paper to remove the dirt on the lens. Do not use organic solvents. • Always cap the lens and store it when it is not used. • Do not store in an area with insect repellent. x Notes on Shooting • Edges of pictures may be cut off if more than one filter is used or if a thick filter is used. Program line diagram (P mode) In the P mode, the camera is programmed such that the aperture value and shutter speed are automatically selected according to the subject’s brightness as shown below. The program line diagram varies with the type of lens mounted. When using the 14 - 54 mm f2.8 - 3.5 zoom lens (focal length: 14 mm, ISO100) k j Program shift Information 12 128 EN s0011_e_00_0_unified.book Page 129 Wednesday, September 12, 2007 4:46 PM Flash synchronization and shutter speed Shooting mode Shutter speed Flash timing Upper limit of synchronization timing*1 Fixed timing when flash fires*2 P 60 - 1/8000 sec. 1/ (lens focal length × 2) or synchronization timing, whichever is slower 1/250 1/60 A 60 - 1/8000 sec. 1/ (lens focal length × 2) or synchronization timing, whichever is slower 1/250 1/60 S 60 - 1/8000 sec. The set shutter speed 1/250 k M 60 - 1/8000 sec. The set shutter speed 1/250 k *1 Can be changed using menu: 1/60 - 1/250 g“#X-SYNC.” (P. 96) *2 Can be changed using menu: 1/30 - 1/250 g“#SLOW LIMIT” (P. 96) Exposure warning display If the optimum exposure cannot be obtained when pressing the shutter button halfway, the display will blink in the viewfinder and on the control panel. Shooting mode P A Warning display example (blinking) Status Action • Increase the ISO sensitivity. • Use the flash. The subject is too bright. • Decrease the ISO sensitivity. • Use a commercially available ND filter (for adjusting the amount of light). The subject is underexposed. • Decrease the aperture value. • Increase the ISO sensitivity. The subject is overexposed. • Increase the aperture value. • Decrease the ISO sensitivity or use a commercially available ND filter (for adjusting the amount of light). The subject is underexposured. • Set the shutter speed slower. • Increase the ISO sensitivity. S Information The subject is too dark. 12 The subject is overexposured. • Set the shutter speed faster. • Decrease the ISO sensitivity or use a commercially available ND filter (for adjusting the amount of light). * The aperture value at the moment when its indication blinks varies with the lens type and focal length of the lens. 129 EN s0011_e_00_0_unified.book Page 130 Wednesday, September 12, 2007 4:46 PM Flash distance The flash distances when shooting with the built-in flash according to the ISO sensitivity/ aperture value settings are as follows. Aperture value ISO sensitivity 3200 1600 800 400 200 100 Flash distance (m) f8 f5.6 f4 f2.8 f2 f1.4 9.3 f11 f8 f5.6 f4 f2.8 f2 6.5 f16 f11 f8 f5.6 f4 f2.8 4.6 f22 f16 f11 f8 f5.6 f4 3.3 f32 f22 f16 f11 f8 f5.6 2.3 f32 f22 f16 f11 f8 1.6 f32 f22 f16 f11 1.2 f32 f22 f16 0.8 f32 f22 0.6 Vignetting of the built-in flash when using an interchangeable lens Lenses in the range of 14 mm to 150 mm can be used with the built-in flash. The following lenses, however, may interfere with the light emitted by the built-in flash and, therefore, may limit the focal distance and shooting range. Lens Focal distance Shooting range ED14 - 42 mm f3.5 - 5.6 14 mm 1.2 m or more ED14 - 45 mm f3.5 - 5.6 14 mm 1.2 m or more ED14 - 54 mm f2.8 - 3.5 14 mm 1.2 m or more ED12 - 60 mm f2.8 - 4.0 SWD 14 mm 2.0 m or more • The shooting ranges above are for when the lens hood is not mounted. • The flash control may not function properly when macro shooting with the built-in flash at a range closer than 0.5 m (1.6 ft). Information 12 130 EN s0011_e_00_0_unified.book Page 131 Wednesday, September 12, 2007 4:46 PM Flash modes that can be set by shooting mode Shooting mode P Viewfinder indications Control panel indications Super control Flash mode panel indications Y Conditions for Shutter firing the flash speed limit # AUTO Auto flash ! Auto flash (red-eye reduction) Fires automatically in dark/ 1/30 sec. 1st curtain backlit * 1/250 sec. conditions # Fill-in flash Always fires $ Flash off ! SLOW A X Flash timing # SLOW k k k Slow synchronization (red-eye Fires 1st curtain automatically reduction) in dark/ Slow backlit * synchronization conditions # SLOW2 Slow synchronization # FULL Manual flash (FULL) # 1/4 Manual flash (1/4) # 1/16 Manual flash (1/16) # 1/64 Manual flash (1/64) 2nd curtain 60 sec. 1/250 sec. 1st curtain Always fires * When the flash is set to the Super FP mode, it detects backlight with longer duration than for normal flash before firing. g“Super FP flash” (P. 76) Information 12 131 EN s0011_e_00_0_unified.book Page 132 Wednesday, September 12, 2007 4:46 PM Shooting mode S M A Viewfinder indications Control panel indications Super control Flash mode panel indications # Fill-in flash H Fill-in flash (red-eye reduction) $ Flash off Fill-in flash/ 2nd Slow CURTAIN synchronization # FULL Manual flash (FULL) # 1/4 Manual flash (1/4) # 1/16 Manual flash (1/16) # 1/64 Manual flash (1/64) Flash timing Conditions for Shutter firing the flash speed limit 1st curtain Always fires k 60 sec. 1/250 sec. k k Always fires 60 sec. 1/250 sec. 2nd curtain 1st curtain White balance color temperature Information 12 132 EN The higher the color temperature, the richer the light in bluish tones and the poorer in reddish; the lower the color temperature, the richer the light in reddish tones and the poorer in bluish. The spectral balance of different white light sources is rated numerically by color temperature — concept of physics expressed using the Kelvin (K) temperature scale. The color of sunlight and other natural light sources and the color of a • The color temperatures for each light source light bulb and other artificial light sources indicated in the above scale are approximate. can be expressed in terms of color temperature. It follows, then, that the color temperatures of fluorescent lights make them unsuitable as artificial light sources. There are gaps in the hues from the color temperatures of fluorescent light. If these differences in hue are small, they can be calculated with color temperature and this is called correlated color temperature. The 4000K, 4500K and 6600K preset settings in this camera are correlated color temperatures, and should not be considered strictly as color temperatures. Use these settings for shooting conditions under fluorescent lights. s0011_e_00_0_unified.book Page 133 Wednesday, September 12, 2007 4:46 PM Record mode and file size/number of storable still pictures The file size in the table is approximate. Record mode Number of pixels (PIXEL COUNT) RAW YSF YF YN YB XSF XF XN XB XSF XF XN XB XSF XF XN XB WSF WF WN WB WSF WF WN WB WSF WF WN WB x 3648 × 2736 3200 × 2400 2560 × 1920 1600 × 1200 1280 × 960 1024 × 768 640 × 480 Compression Loss-less compression 1/2.7 1/4 1/8 1/12 1/2.7 1/4 1/8 1/12 1/2.7 1/4 1/8 1/12 1/2.7 1/4 1/8 1/12 1/2.7 1/4 1/8 1/12 1/2.7 1/4 1/8 1/12 1/2.7 1/4 1/8 1/12 File format File size (MB) Number of storable still pictures (with 1GB xD-Picture Card) ORF Approx. 11 91 JPEG Approx. 6.8 Approx. 4.7 Approx. 2.2 Approx. 1.5 Approx. 5.3 Approx. 3.7 Approx. 1.7 Approx. 1.1 Approx. 3.6 Approx. 2.2 Approx. 1.1 Approx. 0.7 Approx. 1.3 Approx. 0.8 Approx. 0.5 Approx. 0.3 Approx. 0.8 Approx. 0.5 Approx. 0.3 Approx. 0.2 Approx. 0.5 Approx. 0.4 Approx. 0.2 Approx. 0.1 Approx. 0.2 Approx. 0.2 Approx. 0.1 Approx. 0.1 147 211 460 687 187 267 597 888 280 466 927 1361 799 1163 2284 3198 1230 1776 3366 4920 1881 2665 4920 7107 4569 6396 10661 12793 Notes Information • The number of remaining pictures may change according to the subject or factors like whether print reservations have been made or not. In certain instances, the number of remaining pictures displayed on the viewfinder or the LCD monitor does not change even when you take pictures or stored images are erased. • The actual file size varies according to the subject. 12 133 EN s0011_e_00_0_unified.book Page 134 Wednesday, September 12, 2007 4:46 PM Functions that can be registered with My Mode and Custom Reset Setting Function Information 12 Custom My Mode reset setting registration registration Function Shooting mode 9 k O fps k 9 F 9 9 8 k 9 Image stabilizer k 9 SLEEP k 9 </Y/j* 9 9 BACKLIT LCD k 9 AF MODE 9 9 4 h TIMER k k AF AREA 9 9 USB MODE k k AE BKT 9 9 LIVE VIEW BOOST 9 9 ISO BKT 9 9 FRAME ASSIST k 9 WB BKT 9 9 EV STEP k 9 FL BKT 9 9 ISO STEP k 9 PICTURE MODE 9 9 ISO-AUTO SET k 9 GRADATION 9 9 ISO-AUTO k 9 9 K 9 9 AELMetering k NOISE REDUCT. 9 9 BULB TIMER k 9 WB 9 9 9 9 9 9 > 9 9 #X-SYNC. #SLOW LIMIT METERING 9 9 w+F k 9 ISO 9 9 ALL > k k NOISE FILTER 9 9 COLOR SPACE 9 9 Flash mode 9 9 SHADING COMP. 9 9 #RC MODE 9 9 K SET k 9 w 9 9 PIXEL COUNT k 9 AF ILLUMINAT. 9 9 QUICK ERASE k 9 FOCUS RING k 9 RAW+JPEG ERASE k 9 C-AF LOCK k k FILE NAME k k AF AREA POINTER k k PRIORITY SET k k AF SENSITIVITY k k dpi SETTING k k P SET UP k k CLEANING MODE k k RESET LENS k k EXT. WB DETECT 9 9 BULB FOCUSING k k X k k DIAL k 9 CF/xD k k AEL/AFL k 9 EDIT FILENAME k k AEL/AFL MEMO k 9 s k k ; FUNCTION k 9 W k k MY MODE SETUP k k VIDEO OUT k k BUTTON TIMER k k REC VIEW k 9 A k 9 PIXEL MAPPING k k RLS PRIORITY S 9 9 FIRMWARE k k RLS PRIORITY C 9 9 9: Can be registered. k: Cannot be registered. * Includes anti-shock. 134 EN Custom My Mode reset setting registration registration s0011_e_00_0_unified.book Page 135 Wednesday, September 12, 2007 4:46 PM Menu directory Shooting Menu Tab Function CARD SETUP Setting ALL ERASE/FORMAT Ref. page P. 89 P. 125 RESET CUSTOM RESET RESET1 SET/RESET RESET2 SET/RESET P. 33 PICTURE MODE hVIVID/iNATURAL*/jMUTED/ZPORTRAIT/ MONOTONE/CUSTOM P. 67 GRADATION AUTO/NORMAL*/HIGH KEY/LOW KEY P. 68 K RAW/YF/YN*/XN/WN/RAW+YF/RAW+YN/RAW+XN/ RAW+WN P. 61 WB ISO NOISE REDUCT. NOISE FILTER AUTO* A -7 - +7, G -7 - +7 5 5300K A -7 - +7, G -7 - +7 2 7500K A -7 - +7, G -7 - +7 3 6000K A -7 - +7, G -7 - +7 1 3000K A -7 - +7, G -7 - +7 w 4000K A -7 - +7, G -7 - +7 x 4500K A -7 - +7, G -7 - +7 y 6600K A -7 - +7, G -7 - +7 n 5500K A -7 - +7, G -7 - +7 V1 - 4 A -7 - +7, G -7 - +7 CWB AUTO*/100 - 3200 OFF/ON METERING 2000K - 14000K P. 49 * P. 69 OFF/LOW/STANDARD*/HIGH e* J P. 62 P. 69 ESP + AF*/ESP 5 P. 45 5HI 5SH #RC MODE w OFF*/ON P. 76 -3.0 - 0.0* - +3.0 P. 73 S-AF*/C-AF/MF/S-AF+MF/C-AF+MF P. 51 B*/M/N P. 53 ANTI-SHOCKz OFF*/1SEC - 30SEC P. 59 AE BKT OFF*/3F 0.3EV/3F 0.7EV/3F 1.0EV/5F 0.3EV/5F 0.7EV/ 5F 1.0EV WB BKT A-B G-M OFF*/3F 2STEP/3F 4STEP/ 3F 6STEP P. 48 P. 66 FL BKT OFF*/3F 0.3EV/3F 0.7EV/3F 1.0EV P. 74 ISO BKT OFF*/3F 0.3EV/3F 0.7EV/3F 1.0EV P. 50 Information AF MODE AF AREA 12 * Factory default setting 135 EN s0011_e_00_0_unified.book Page 136 Wednesday, September 12, 2007 4:46 PM Playback Menu Tab q Function Setting Ref. page m K/L/M/N/O P. 83 y OFF/ON* P. 83 RAW DATA EDIT EDIT JPEG EDIT Q/SHADOW ADJ P. 84 < </U COPY ALL YES/NO P. 86 RESET PROTECT YES/NO P. 87 P. 101 * Factory default setting Custom Menu 1 Tab Function a b Setting AF/MF P. 90 AF ILLUMINAT. OFF/ON* P. 90 FOCUS RING b*/c P. 90 C-AF LOCK OFF*/ON P. 90 AF AREA POINTER OFF/ON* P. 90 AF SENSITIVITY NORMAL*/SMALL P. 90 P SET UP OFF*/LOOP/SPIRAL P. 91 RESET LENS OFF/ON* P. 91 BULB FOCUSING OFF/ON* DIAL P. 91 P %*/F/w A FNo.*/F/w M MENU AEL/AFL AEL/AFL MEMO Information 136 EN P. 91 BUTTON/DIAL S 12 Ref. page ; FUNCTION SHUTTER*/F/w Main dial: SHUTTER/FNo.* P. 91 Sub dial: SHUTTER*/FNo. Main dial: F/G* Sub dial: F*/G S-AF* mode1*/mode2/mode3 C-AF mode1/mode2*/mode3/mode4 mode1*/mode2/mode3 MF OFF*/ON PREVIEW*/LIVE PREVIEW/V/P HOME/MF/ RAWK/P/A/S/M/TEST PICTURE/MY MODE/L/ OFF P. 92 P. 92 P. 92 MY MODE SETUP MY MODE1/ MY MODE2 P. 93 BUTTON TIMER OFF*/3SEC/5SEC/8SEC/HOLD P. 94 A OFF*/ON P. 94 s0011_e_00_0_unified.book Page 137 Wednesday, September 12, 2007 4:46 PM Tab Function Setting c RELEASE/j d OFF*/ON P. 94 RLS PRIORITY C OFF/ON* P. 94 Ofps 1fps/2fps/3fps*/4fps P. 94 OFF/ON* P. 94 DISP/ 8/PC OFF/1MIN*/3MIN/5MIN/10MIN P. 94 BACKLIT LCD 8SEC*/30SEC/1MIN/HOLD P. 95 4 h TIMER OFF/4 h* P. 95 USB MODE AUTO*/STORAGE/MTP/CONTROL/<EASY/ <CUSTOM P. 95 LIVE VIEW BOOST OFF*/ON P. 95 FRAME ASSIST OFF*/GRID/GOLDEN SECTION/SCALE P. 95 1/3EV*/1/2EV/1EV P. 96 EXP/e/ISO ISO STEP ISO-AUTO SET P. 96 100 - 3200 (800*) DEFAULT 100 - 3200 (100*) P. 96 AELMetering AUTO*/J/5/5HI/5SH P. 96 BULB TIMER k P. 96 1/60 - 1/250* P. 96 1/30 - 1/250 (1/60*) P. 96 P. 96 # CUSTOM P. 96 OFF*/ON P. 96 K/COLOR/WB P. 97 ALL SET A -7 - +7 G -7 - +7 ALL RESET YES/NO */AdobeRGB P. 97 P. 97 COLOR SPACE sRGB SHADING COMP. OFF*/ON K SET P-Q Y/X/W SF/F/N/B P. 97 Xiddle 3200 × 2400/2560 × 1920*/ 1600 × 1200 P. 98 Wmall 1280 × 960*/1024 × 768/640 × 480 PIXEL COUNT P. 97 RECORD/ERASE P. 98 QUICK ERASE OFF*/ON P. 98 RAW+JPEG ERASE JPEG/RAW/RAW+JPEG* P. 98 FILE NAME AUTO*/RESET P. 98 PRIORITY SET NO*/YES P. 99 dpi SETTING AUTO*/CUSTOM P. 99 CLEANING MODE k P. 122 EXT. WB DETECT OFF/ON* P. 99 K UTILITY P. 99 Information i 1/3EV*/1EV HIGH LIMIT P/A/S*/ALL ALL > h P. 96 ISO-AUTO #X-SYNC. #SLOW LIMIT w+F g P. 94 SLEEP EV STEP f P. 94 RLS PRIORITY S 8 e Ref. page 12 * Factory default setting 137 EN s0011_e_00_0_unified.book Page 138 Wednesday, September 12, 2007 4:46 PM Custom Menu 2 Tab Function Setting k P. 15 CF/xD CF*/xD P. 99 EDIT FILENAME Adobe RGB sRGB OFF*/A-Z/0-9 Information 138 EN P. 99 s AUTO*/-7 W VIDEO OUT *1 P. 100 *1 P. 100 REC VIEW OFF/AUTOq/1SEC - 20SEC (5 SEC*) P. 100 PIXEL MAPPING k P. 122 FIRMWARE k P. 100 - +7 * Factory default setting *1 Settings differ depending on the region where the camera is purchased. 12 Ref. page X P. 99 s0011_e_00_0_unified.book Page 139 Wednesday, September 12, 2007 4:46 PM Glossary Information A (Aperture Priority) Mode You set the aperture yourself and the camera automatically varies the shutter speed so that the picture is taken with the correct exposure. AE (Automatic Exposure) The camera’s built-in exposure meter automatically sets the exposure. The 3 AE modes available on this camera are P mode, in which the camera selects both the aperture and shutter speed, A mode, in which the user selects the aperture and the camera sets the shutter speed, and S mode, in which the user selects the shutter speed and the camera sets the aperture. In M mode, the user selects both the aperture and the shutter speed. Aperture The adjustable lens opening which controls the amount of light that enters the camera. The larger the aperture, the shorter the depth of field and the fuzzier the background. The smaller the aperture, the greater the depth of field and the sharper the background. Aperture is measured in f/stops. Larger aperture values indicate smaller apertures, and smaller aperture values indicate larger apertures. Center weighted averaging metering A light metering mode or technique that uses an average of the center and periphery of the image area but is biased toward the information at the center of the image area. This method is best used when the brightness of the center and periphery of the image area does not vary greatly. See also digital ESP metering and spot metering. Color space A model that describes colors using more than three coordinates. Color spaces such as sRGB, Adobe RGB are occasionally used for encoding/reproducing colors. Color temperature The spectral balance of different white light sources is rated numerically by color temperature - a concept of theoretical physics that, with incandescent lighting, corresponds roughly to the absolute lamp filament temperature, expressed on the Kelvin (K) temperature scale. The higher the color temperature, the richer the light in bluish tones and the poorer in reddish; the lower the color temperature, the richer the light in reddish tones and the poorer in bluish. You may encounter difficulties with color reproduction when shooting indoors under fluorescent lighting, or where sunlight and fluorescent lighting are both present. Your camera is provided with a white balance adjustment feature that you can use to compensate for the odd effects of combinations of color you may occasionally see in your pictures. Compression rate Compression is a method of reducing file size by abbreviating some contents of data, and compression rate denotes the amount of compression. The actual effect of the selected compression rate could vary with the content of the image. The numbers for the compression rate selected with this camera provide only a general scale for reference and are not precise measurements. DCF (Design rule for Camera File system) A standard for image files by the Japan Electronics and Information Technology Industries Association (JEITA). Depth of Field Depth of Field refers to the distance from the nearest to the furthest point of perceived “sharp” focus in a picture. Digital ESP (Electro-Selective Pattern) Light Metering This determines the exposure by splitting the image into 49 areas and metering and calculating the light levels in each area. DPOF (Digital Print Order Format) This is for saving desired print settings on digital cameras. By entering which images to print and the number of copies of each, the user can easily have the desired images printed by a printer or print lab that supports the DPOF format. 12 139 EN s0011_e_00_0_unified.book Page 140 Wednesday, September 12, 2007 4:46 PM Information 12 140 EN Eclipsing (Vignetting) This refers to when an object obscures part of the field of view so that the whole subject is not photographed. Vignetting also refers to when the image seen through the viewfinder does not exactly match the image shot through the objective lens, so the photographed image includes objects not seen through the viewfinder. In addition, vignetting can occur when an incorrect lens hood is used, causing shadowing to appear in the corners of the image. EV (Exposure Value) A system for measuring exposure. EV0 is when the aperture is at F1 and the shutter speed is 1 second. The EV then increases by 1 each time the aperture increases by one F stop or the shutter speed increases by one increment. EV can also be used to indicate brightness and ISO settings. Exposure The amount of light used to capture an image. The exposure is determined by the length of time the shutter is open (shutter speed) and the amount of light that passes through the lens (aperture). Image pickup device This converts light passing through the lens into electrical signals. On this camera, light is picked up and converted into RGB signals to build a single image. ISO International abbreviation for International Organization for Standardization. The sensitivity setting used in digital cameras is based on the same ISO standard used for film sensitivity. The sensitivity is denoted as shown in “ISO 100”. Higher ISO values indicate greater sensitivity to light, so images can be exposed even in low-light conditions. JPEG (Joint Photographic Experts Group) A compression format for color still images. Photographs (images) shot using this camera are recorded onto the card in JPEG format when the Record mode is set to a setting other than [RAW]. By downloading these images to a personal computer, users can edit them using graphics application software or view the images using an Internet web browser. M (Manual) Mode The user sets both the aperture and shutter speed. NTSC (National Television Systems Committee) / PAL (Phase Alternating Line) Television formats. NTSC is mainly used in Japan, North America and Korea. PAL is mainly used in Europe and China. Number of pixels (PIXEL COUNT) The number of dots (pixels) used to create an image denotes the image size. For instance, an image in 640 × 480 pixel count is the same size as the computer screen if the monitor setting is also 640 × 480. If the monitor setting is 1024 × 768, the image only takes up part of the screen. P (Program) Mode Also called Program AE mode. The camera automatically sets the best shutter speed and aperture for the shot. PictBridge A standard that enables digital cameras and printers made by different manufacturers to be connected, and also allows pictures to be printed directly from the camera. Pixels A pixel is the smallest unit (dot) used to make up an image. Clear large-sized printed images require millions of pixels. RAW Refers to raw data, data which has not been enhanced with a camera option like white balance, sharpness, contrast, etc. This file format is for viewing and processing with our own software. You may not be able to open or process these files with other graphics software applications, and these files cannot be selected for DPOF printing. RAW files are assigned an orf file extension (*.orf). s0011_e_00_0_unified.book Page 141 Wednesday, September 12, 2007 4:46 PM S (Shutter Priority) Mode Also called Shutter Priority AE mode. The user selects the shutter speed and the camera automatically varies the aperture so that the picture is taken with the best exposure. Single-lens reflex camera A camera that uses the reflective mirror to bend the light entering from the shooting lens and uses the viewfinder to check. There is no difference between the composition to be captured and the composition viewed on the viewfinder. Sleep Mode A mode designed to save battery life. The camera automatically enters the sleep mode if you do not operate it for a certain time. To get out of the sleep mode, use any button on the camera (shutter button, menu button, etc.). Spot metering The meter reading is taken from a very small area around the center of the subject, defined by the spot metering area mark in the viewfinder. Spot metering is ideal for use in difficult light conditions, or when the important element of the picture (subject’s face) is small. Use spot metering for backlit subjects, or sports and stage performers. See also digital ESP metering and center weighted averaging metering. TFT (Thin-Film Transistor) Color Monitor A color monitor constructed using thin-film technology. TTL phase-contrast detection system This is used to measure the distance to the subject. The camera determines if the image is focused by the detected phase contrast. TTL (Through-The-Lens) System To help adjust exposure, a light receptor built into the camera directly measures the light passing through the lens. Information 12 141 EN s0011_e_00_0_unified.book Page 142 Tuesday, September 25, 2007 4:54 PM Specifications Camera specifications Product type Product type Lens Lens mount Equivalent focal length on a 35 mm film camera : Single-lens reflex digital camera with interchangeable lens system : Zuiko Digital, Four Thirds System Lens : Four Thirds mount : Approx. twice the focal length of the lens Image pickup device Product type No. of total pixels No. of effective pixels Screen size Aspect ratio : : : : : 4/3" Live MOS sensor Approx. 11,800,000 pixels Approx. 10,100,000 pixels 17.3 mm (H) × 13.0 mm (V) (0.7" × 0.5") 1.33 (4:3) Viewfinder Product type Field of view Viewfinder magnification Eye point Diopter adjustment range Optical path fraction Depth of field Focusing screen Eyecup : : : : : : : Eye-level single-lens reflex viewfinder Approx. 100 % (for field of view on recorded images) Approx. 1.15× (-1 m-1, 50 mm lens, infinity) Approx. 20 mm (0.8") from the cover glass (-1 m-1) -3.0 - +1.0 m-1 Quick return half mirror Can be checked with the preview button (when PREVIEW registered with the < button) : Fixed : Interchangeable Live view : Uses Live MOS sensor for shooting : Field of view of 100% LCD monitor Product type Total no. of pixels : 2.5" TFT color LCD (HyperCrystal LCD), adjustable : Approx. 230,000 pixels Shutter Product type Shutter : Computerized focal-plane shutter : 1/8000 - 60 sec., Bulb shooting Auto focus Information 12 Product type Focusing points AF luminance range Selection of focusing point AF illuminator EN TTL phase-contrast detection system 11 points EV -2 - EV 19 Auto, Optional The built-in flash provides light. Exposure control Metering system Metering range Shooting modes 142 : : : : : ISO sensitivity Exposure compensation : TTL full-aperture metering system (1) Digital ESP metering (2) Center weighted averaging metering (3) Spot metering (approx. 2% for the viewfinder screen) : EV 1 - 20 (Digital ESP metering, Center weighted average metering, Spot metering) (At room temperature, 50 mm f2, ISO 100) : (1) P : Program AE (Program shift can be performed) (2) A : Aperture priority AE (3) S : Shutter priority AE (4) M : Manual (5) A : Bulb : 100 - 3200 (1/3, 1 EV step) : ±5 EV (1/3, 1/2, 1 EV step) s0011_e_00_0_unified.book Page 143 Wednesday, September 12, 2007 4:46 PM White balance Product type Mode setting : Image pickup device and white balance sensor : Auto, Preset WB (8 settings), Customized WB, One-touch WB (4 settings) Recording Memory Recording system Applicable standards : CF card (Compatible with Type I and II) Microdrive (Compatible with FAT 16/32) xD-Picture Card : Digital recording, JPEG (in accordance with Design rule for Camera File system (DCF)), RAW Data : Exif 2.2, Digital Print Order Format (DPOF), PRINT Image Matching III, PictBridge Playback Playback mode Information display : Single-frame playback, Close-up playback, Index display, Image rotation, Slideshow, Light box display, Calendar display : Information display, Histogram display Drive Drive mode Sequential shooting Self-timer Optical remote control : Single-frame shooting, Sequential shooting, Self-timer, Remote control : Approx. 5 frames/sec. : Operation time: 12 sec., 2 sec. : Operation time: 2 sec., 0 sec. (instantaneous shooting) (RM-1 Remote Control (optional)) Flash Synchronization Flash control mode External flash attachment Wireless flash function : : : : Synchronized with the camera at 1/250 sec. or less TTL-AUTO (TTL pre-flash mode), AUTO, MANUAL Hot shoe, external flash connector (x attachment) Compatible with the Olympus wireless RC flash system External connector USB connector, DC-IN jack, VIDEO OUT jack, remote cable connector Power supply Battery AC power : Li-ion Battery (BLM-1) ×1 : AC adapter (AC-1) (optional) Dimensions/weight Dimensions Weight : 142.5 mm (W) × 116.5 mm (H) × 74.5 mm (D) (5.6" × 4.6" × 2.9") (excluding protrusions) : Approx. 810 g (1.8 Ib.) (without battery) Operating environment Temperature Humidity : 0°C - 40°C (32°F - 104°F) (operation)/ -20°C - 60°C (-4°F - 140°F) (storage) : 30 - 90% (operation)/10 - 90% (storage) Information 12 143 EN s0011_e_00_0_unified.book Page 144 Wednesday, September 12, 2007 4:46 PM Battery/charger specifications BLM-1 Lithium ion battery MODEL NO. Product type Nominal voltage Nominal capacity No. of charge and discharge times Ambient temperature Dimensions Weight : : : : PS-BLM1 Rechargeable Lithium ion battery DC 7.2 V 1500 mAh : Approx. 500 times (varies with usage conditions) : 0°C - 40°C (32°F - 104°F) (charging) -10°C - 60°C (14°F - 140°F) (operation) -20°C - 35°C (14°F - 95°F) (storage) : Approx. 39 mm (W) × 55 mm (D) × 21.5 mm (H) (1.5" × 2.2" × 0.8") : Approx. 75 g (0.2 Ib.) (without protection cap) BCM-2 Lithium ion charger MODEL NO. Rated input Rated output Charging time Ambient temperature Dimensions Weight : : : : : PS-BCM2 AC 100 V - 240 V (50/60 Hz) DC 8.35 V, 400 mA Approx. 5 hours (room temperature if using BLM-1) 0°C - 40°C (32°F - 104°F) (operation)/ -20°C - 60°C (-4°F - 140°F) (storage) : Approx. 62 mm (W) × 83 mm (D) × 26 mm (H) (2.4" × 3.3" × 1.0") : Approx. 72 g (0.2 Ib.) (without AC cable) SPECIFICATIONS ARE SUBJECT TO CHANGE WITHOUT ANY NOTICE OR OBLIGATION ON THE PART OF THE MANUFACTURER. Information 12 144 EN s0011_e_00_0_unified.book Page 145 Wednesday, September 12, 2007 4:46 PM SAFETY PRECAUTIONS CAUTION RISK OF ELECTRIC SHOCK DO NOT OPEN CAUTION: TO REDUCE THE RISK OF ELECTRICAL SHOCK, DO NOT REMOVE COVER (OR BACK). NO USER-SERVICEABLE PARTS INSIDE. REFER SERVICING TO QUALIFIED OLYMPUS SERVICE PERSONNEL. An exclamation mark enclosed in a triangle alerts you to important operating and maintenance instructions in the documentation provided with the product. DANGER If the product is used without observing the information given under this symbol, serious injury or death may result. WARNING If the product is used without observing the information given under this symbol, injury or death may result. CAUTION If the product is used without observing the information given under this symbol, minor personal injury, damage to the equipment, or loss of valuable data may result. WARNING! TO AVOID THE RISK OF FIRE OR ELECTRICAL SHOCK, NEVER DISASSEMBLE, EXPOSE THIS PRODUCT TO WATER OR OPERATE IN A HIGH HUMIDITY ENVIRONMENT. General Precautions Information Read All Instructions — Before you use the product, read all operating instructions. Save all manuals and documentation for future reference. Cleaning — Always unplug this product from the wall outlet before cleaning. Use only a damp cloth for cleaning. Never use any type of liquid or aerosol cleaner, or any type of organic solvent to clean this product. Attachments — For your safety, and to avoid damaging the product, use only accessories recommended by Olympus. Water and Moisture — For precautions on products with weatherproof designs, read the weatherproofing sections. Location — To avoid damage to the product, mount the product securely on a stable tripod, stand, or bracket. Power Source — Connect this product only to the power source described on the product label. Lightning — If a lightning storm occurs while using an AC adapter, remove it from the wall outlet immediately. Foreign Objects — To avoid personal injury, never insert a metal object into the product. Heat — Never use or store this product near any heat source such as a radiator, heat register, stove, or any type of equipment or appliance that generates heat, including stereo amplifiers. 12 145 EN s0011_e_00_0_unified.book Page 146 Wednesday, September 12, 2007 4:46 PM Product Handling Precautions WARNING ( Do not use the camera near flammable or explosive gases. ( Do not use the flash and LED on people (infants, small children, etc.) at close range. • You must be at least 1 m (3 ft.) away from the faces of your subjects. Firing the flash too close to the subject’s eyes could cause a momentary loss of vision. ( Keep young children and infants away from the camera. • Always use and store the camera out of the reach of young children and infants to prevent the following dangerous situations which could cause serious injury: • Becoming entangled in the camera strap, causing strangulation. • Accidentally swallowing the battery, cards or other small parts. • Accidentally firing the flash into their own eyes or those of another child. • Accidentally being injured by the moving parts of the camera. ( Do not look at the sun or strong lights with the camera. ( Do not use or store the camera in dusty or humid places. ( Do not cover the flash with a hand while firing. CAUTION ( Stop using the camera immediately if you notice any unusual odors, noise, or smoke around it. • Never remove the batteries with bare hands, which may cause a fire or burn your hands. ( Never hold or operate the camera with wet hands. ( Do not leave the camera in places where it may be subject to extremely high temperatures. • Doing so may cause parts to deteriorate and, in some circumstances, cause the camera to catch fire. Do not use the charger or AC adapter if it is covered (such as a blanket). This could cause overheating, resulting in fire. ( Handle the camera with care to avoid getting a low-temperature burn. • When the camera contains metal parts, overheating can result in a low-temperature burn. Pay attention to the following: • When used for a long period, the camera will get hot. If you hold on to the camera in this state, a lowtemperature burn may be caused. • In places subject to extremely cold temperatures, the temperature of the camera’s body may be lower than the environmental temperature. If possible, wear gloves when handling the camera in cold temperatures. ( Be careful with the strap. • Be careful with the strap when you carry the camera. It could easily catch on stray objects - and cause serious damage. Battery Handling Precautions Follow these important guidelines to prevent batteries from leaking, overheating, burning, exploding, or causing electrical shocks or burns. DANGER Information 12 • The camera uses a lithium ion battery specified by Olympus. Charge the battery with the specified charger. Do not use any other chargers. • Never heat or incinerate batteries. • Take precautions when carrying or storing batteries to prevent them from coming into contact with any metal objects such as jewelry, pins, fasteners, etc. • Never store batteries where they will be exposed to direct sunlight, or subjected to high temperatures in a hot vehicle, near a heat source, etc. • To prevent causing battery leaks or damaging their terminals, carefully follow all instructions regarding the use of batteries. Never attempt to disassemble a battery or modify it in any way, by soldering, etc. • If battery fluid gets into your eyes, flush your eyes immediately with clear, cold running water and seek medical attention immediately. • Always store batteries out of the reach of small children. If a child accidentally swallows a battery, seek medical attention immediately. WARNING 146 EN • Keep batteries dry at all times. • To prevent batteries from leaking, overheating, or causing a fire or explosion, use only batteries recommended for use with this product. • Insert the battery carefully as described in the operating instructions. s0011_e_00_0_unified.book Page 147 Wednesday, September 12, 2007 4:46 PM • If rechargeable batteries have not been recharged within the specified time, stop charging them and do not use them. • Do not use a battery if it is cracked or broken. • If a battery leaks, becomes discolored or deformed, or becomes abnormal in any other way during operation, stop using the camera. • If a battery leaks fluid onto your clothing or skin, remove the clothing and flush the affected area with clean, running cold water immediately. If the fluid burns your skin, seek medical attention immediately. • Never subject batteries to strong shocks or continuous vibration. CAUTION • Before loading, always inspect the battery carefully for leaks, discoloration, warping, or any other abnormality. • The battery may become hot during prolonged use. To avoid minor burns, do not remove it immediately after using the camera. • Always unload the battery from the camera before storing the camera for a long period. • This camera uses a lithium ion battery specified by Olympus. Do not use any other type of battery. For safe and proper use, read the battery’s instruction manual carefully before using it. • If the battery’s terminals get wet or greasy, camera contact failure may result. Wipe the battery well with a dry cloth before use. • Always charge a battery when using it for the first time, or if it has not been used for a long period. • When operating the camera with battery power at low temperatures, try to keep the camera and spare battery as warm as possible. A battery that has run down at low temperatures may be restored after it is warmed at room temperature. • The number of pictures you can take may vary depending on the shooting conditions or battery. • Before going on a long trip, and especially before traveling abroad, purchase extra batteries. A recommended battery may be difficult to obtain while traveling. • Please recycle batteries to help save our planet’s resources. When you throw away dead batteries, be sure to cover their terminals and always observe local laws and regulations. Caution for Usage Environment • To protect the high-precision technology contained in this product, never leave the camera in the places listed below, no matter if in use or storage: • Places where temperatures and/or humidity are high or go through extreme changes. Direct sunlight, beaches, locked cars, or near other heat sources (stove, radiator, etc.) or humidifiers. • In sandy or dusty environments. • Near flammable items or explosives. • In wet places, such as bathrooms or in the rain. When using products with weatherproof designs, read their manuals as well. • In places prone to strong vibrations. • Never drop the camera or subject it to severe shocks or vibrations. • When mounted on a tripod, adjust the position of the camera with the tripod head. Do not twist the camera. • Do not leave the camera pointed directly at the sun. This may cause lens or shutter curtain damage, color failure, ghosting on the image pickup device, or may possibly cause fires. • Do not touch electric contacts on cameras and interchangeable lenses. Remember to attach the body cap when removing the lens. • Before storing the camera for a long period, remove the battery. Select a cool, dry location for storage to prevent condensation or mold from forming inside the camera. After storage, test the camera by turning it on and pressing the shutter release button to make sure that it is operating normally. • Always observe the operating environment restrictions described in the camera’s manual. Information LCD Monitor • Do not push the monitor forcibly; otherwise the image may become vague, resulting in a playback mode failure or damage to the monitor. • A strip of light may appear on the top/bottom of the monitor, but this is not a malfunction. • When a subject is viewed diagonally in the camera, the edges may appear zigzagged on the monitor. This is not a malfunction; it will be less noticeable in playback mode. • In places subject to low temperatures, the LCD monitor may take a long time to turn on or its color may change temporarily. When using the camera in extremely cold places, it is a good idea to occasionally place it in a warm place. An LCD monitor exhibiting poor performance due to low temperatures will recover in normal temperatures. • The LCD used for the monitor is made with high-precision technology. However, black spots or bright spots of light may appear constantly on the LCD Monitor. Due to its characteristics or the angle at which you are viewing the monitor, the spot may not be uniform in color and brightness. This is not a malfunction. 12 147 EN s0011_e_00_0_unified.book Page 148 Wednesday, September 12, 2007 4:46 PM Lens • • • • • • • Do not immerse in water or splash with water. Do not drop or exert strong force on the lens. Do not hold at the moving part of the lens. Do not touch the lens surface directly. Do not touch the contact points directly. Do not subject to abrupt temperature changes. Do observe the operating temperature limit. Legal and Other Notices • Olympus makes no representations or warranties regarding any damages, or benefit expected by using this unit lawfully, or any request from a third person, which are caused by the inappropriate use of this product. • Olympus makes no representations or warranties regarding any damages or any benefit expected by using this unit lawfully which are caused by erasing picture data. Disclaimer of Warranty • Olympus makes no representations or warranties, either expressed or implied, by or concerning any content of these written materials or software, and in no event shall be liable for any implied warranty of merchantability or fitness for any particular purpose or for any consequential, incidental or indirect damages (including but not limited to damages for loss of business profits, business interruption and loss of business information) arising from the use or inability to use these written materials or software or equipment. Some countries do not allow the exclusion or limitation of liability for consequential or incidental damages, so the above limitations may not apply to you. • Olympus reserves all rights to this manual. Warning Unauthorized photographing or use of copyrighted material may violate applicable copyright laws. Olympus assumes no responsibility for unauthorized photographing, use or other acts that infringe upon the rights of copyright owners. Copyright Notice All rights reserved. No part of these written materials or this software may be reproduced or used in any form or by any means, electronic or mechanical, including photocopying and recording or the use of any type of information storage and retrieval system, without the prior written permission of Olympus. No liability is assumed with respect to the use of the information contained in these written materials or software, or for damages resulting from the use of the information contained therein. Olympus reserves the right to alter the features and contents of this publication or software without obligation or advance notice. FCC Notice Information 12 • Radio and Television Interference Changes or modifications not expressly approved by the manufacturer may void the user’s authority to operate this equipment. This equipment has been tested and found to comply with the limits for a Class B digital device, pursuant to Part 15 of the FCC Rules. These limits are designed to provide reasonable protection against harmful interference in a residential installation. This equipment generates, uses, and can radiate radio frequency energy and, if not installed and used in accordance with the instructions, may cause harmful interference to radio communications. However, there is no guarantee that interference will not occur in a particular installation. If this equipment does cause harmful interference to radio or television reception, which can be determined by turning the equipment off and on, the user is encouraged to try to correct the interference by one or more of the following measures: - Adjust or relocate the receiving antenna. - Increase the distance between the camera and receiver. - Connect the equipment to an outlet on a circuit different from that to which the receiver is connected. - Consult your dealer or an experienced radio/TV technician for help. Only the OLYMPUS-supplied USB cable should be used to connect the camera to USB enabled personal computers (PC). Any unauthorized changes or modifications to this equipment would void the user’s authority to operate it. 148 EN s0011_e_00_0_unified.book Page 149 Wednesday, September 12, 2007 4:46 PM For customers in North and South America For customers in USA Declaration of Conformity Model Number Trade Name Responsible Party Address : E-3 : OLYMPUS : : 3500 Corporate Parkway, P.O. Box 610, Center Valley, PA 18034-0610, USA Telephone Number : 484-896-5000 Tested To Comply With FCC Standards FOR HOME OR OFFICE USE This device complies with Part 15 of the FCC rules. Operation is subject to the following two conditions: (1) This device may not cause harmful interference. (2) This device must accept any interference received, including interference that may cause undesired operation. For customers in Canada This Class B digital apparatus meets all requirements of the Canadian Interference-Causing Equipment Regulations. For customers in Europe “CE” mark indicates that this product complies with the European requirements for safety, health, environment and customer protection. “CE” mark cameras are intended for sales in Europe. This symbol [crossed-out wheeled bin WEEE Annex IV] indicates separate collection of waste electrical and electronic equipment in the EU countries. Please do not throw the equipment into the domestic refuse. Please use the return and collection systems available in your country for the disposal of this product. Use Only Dedicated Rechargeable Battery and Battery Charger Provisions of warranty 1. If this product proves to be defective, although it has been used properly (in accordance with the written Handling Care and Operating instructions supplied with it), during a period of two years from the date of purchase from an authorized Olympus distributor within the business area of Olympus Imaging Europa GmbH as stipulated on the website: http://www.olympus.com this product will be repaired, or at Olympus’s option replaced, free of charge. To claim under this warranty the customer must take the product and this Warranty Certificate before the end of the two year warranty period to the dealer where the product was purchased or any other Olympus service station within the business area of Olympus Imaging Europa GmbH as stipulated on the website: http://www.olympus.com. During the one year period of the World Wide Warranty the customer may turn the product in at any Olympus service station. Please notice that not in all countries such Olympus service station exists. 2. The customer shall transport the product to the dealer or Olympus authorized service station at his own risk and shall be responsible for any costs incurred in transporting the product. Information We strongly recommend that you use only the genuine Olympus dedicated rechargeable battery and battery charger with this camera. Using a non-genuine rechargeable battery and/or battery charger may result in fire or personal injury due to leakage, heating, ignition or damage to the battery. Olympus does not assume any liability for accidents or damage that may result from the use of a battery and/or battery charger that are not genuine Olympus accessories. 12 149 EN s0011_e_00_0_unified.book Page 150 Wednesday, September 12, 2007 4:46 PM 3. This warranty does not cover the following and the customer will be required to pay repair charge, even for defects occurring within the warranty period referred to above. (a) Any defect that occurs due to mishandling (such as an operation performed that is not mentioned in the Handling Care or other sections of the instructions, etc.) (b) Any defect that occurs due to repair, modification, cleaning, etc. performed by anyone other than Olympus or an Olympus authorized service station. (c) Any defect or damage that occurs due to transport, a fall, shock, etc. after purchase of the product. (d) Any defect or damage that occurs due to fire, earthquake, flood damage, thunderbolt, other natural disasters, environmental pollution and irregular voltage sources. (e) Any defect that occurs due to careless or improper storage (such as keeping the product under conditions of high temperature and humidity, near insect repellents such as naphthalene or harmful drugs, etc.), improper maintenance, etc. (f) Any defect that occurs due to exhausted batteries, etc. (g) Any defect that occurs due to sand, mud, etc. entering the inside of the product casing. (h) When this Warranty Certificate is not returned with the product. (i) When any alterations whatsoever are made to the Warranty Certificate regarding the year, month and date of purchase, the customer’s name, the dealer’s name, and the serial number. (j) When proof of purchase is not presented with this Warranty Certificate. 4. This Warranty applies to the product only; the Warranty does not apply to any other accessory equipment, such as the case, strap, lens cap and batteries. 5. Olympus’s sole liability under this warranty shall be limited to repairing or replacing the product. Any liability for indirect or consequential loss or damage of any kind incurred or suffered by the customer due to a defect of the product, and in particular any loss or damage caused to any lenses, films, other equipment or accessories used with the product or for any loss resulting from a delay in repair or loss of data, is excluded. Compelling regulations by law remain unaffected by this. Notes regarding warranty maintenance 1. This warranty will only be valid if the Warranty Certificate is duly completed by Olympus or an authorized dealer or other documents contain sufficient proof. Therefore, please make sure that your name, the name of the dealer, the serial number and the year, month and date of purchase are all completed or the original invoice or the sales receipt (indicating the dealer’s name, the date of purchase and product type) is attached to this Warranty Certificate. Olympus reserves the right to refuse free-of-charge service if neither Warranty Certificate is completed nor the above document is attached or if the information contained in it is incomplete or illegible. 2. Since this Warranty Certificate will not be re-issued, keep it in a safe place. • Please refer to the list on the web site: http://www.olympus.com for the authorized international Olympus service network. Trademarks • • • • • Information 12 150 EN IBM is a registered trademark of International Business Machines Corporation. Microsoft and Windows are registered trademarks of Microsoft Corporation. Macintosh is a trademark of Apple Inc. xD-Picture Card™ is a trademark. “Shadow Adjustment Technology” function contains patented technologies from Apical Limited. • All other company and product names are registered trademarks and/or trademarks of their respective owners. • The standards for camera file systems referred to in this manual are the “Design Rule for Camera File System/DCF” standards stipulated by the Japan Electronics and Information Technology Industries Association (JEITA). s0011_e_00_0_unified.book Page 151 Wednesday, September 12, 2007 4:46 PM Index Symbols A .......................................................... 94 w+F ........................................................... 96 o (Image stabilizer) ..................................... 60 W (Language selection) ......................... 100 8 (Beep sound) ........................................... 94 < CUSTOM .................................................. 95 Y Custom Menu 1 ....................................... 136 Z Custom Menu 2 ....................................... 138 < EASY ........................................................ 95 ; FUNCTION ............................................. 92 O fps ......................................................... 94 q Playback Menu ...................................... 136 # RC mode ................................................... 76 K SET ......................................................... 97 P SET UP .................................................. 91 W Shooting Menu 1 ..................................... 135 X Shooting Menu 2 ..................................... 135 # SLOW LIMIT ............................................. 96 # X-SYNC. ................................................... 96 a AF/MF ....................................................... 90 b BUTTON/DIAL .......................................... 91 c RELEASE/j .......................................... 94 d DISP/8/PC ............................................. 94 e EXP/e/ISO ............................................ 96 f # CUSTOM ............................................. 96 g K/COLOR/WB ....................................... 97 h RECORD/ERASE ..................................... 98 i K UTILITY .............................................. 99 h VIVID ........................................................ 67 i NATURAL ................................................. 67 j MUTED ..................................................... 67 ZPORTRAIT ................................................ 67 4 h TIMER ..................................................... 95 A AC adapter .................................................. 125 Accessories ................................................. 123 Adobe RGB ................................................... 97 AE BKT .......................................................... 48 AE bracketing ................................................ 48 AE lock .......................................................... 47 AEL/AFL ........................................................ 92 AEL/AFL MEMO ............................................ 92 AELMetering .................................................. 96 AF AREA ....................................................... 54 AF AREA POINTER ...................................... 90 AF ILLUMINAT. ............................................. 90 AF MODE AF ................................................ 51 AF SENSITIVITY ........................................... 90 AF target mode .............................................. 55 AF target P ................................................ 53 ALL > ....................................................... 97 ALL ERASE ................................................... 89 All target AF mode B ................................. 53 ANTI-SHOCK z .......................................... 59 Aperture priority shooting A ......................... 41 Aperture value ........................................ 40, 41 Auto flash AUTO ........................................... 70 Auto focus ............................................. 55, 114 Auto white balance AWB ........................ 62, 63 B B (Basic) ............................................... 61, 117 B&W FILTER ................................................ 67 BACKLIT LCD ............................................... 95 Battery .................................................. 11, 125 BULB FOCUSING ........................................ 91 Bulb shooting A ...................................... 44, 59 BULB TIMER ................................................ 96 BUTTON TIMER ........................................... 94 C C-AF (continuous AF) ................................... 52 C-AF LOCK ................................................... 90 C-AF+MF ...................................................... 53 Calendar display ........................................... 81 CARD SETUP ....................................... 89, 125 Cards .................................................... 13, 124 Center weighted averaging metering H ...... 46 CF/xD ............................................................ 99 CLEANING MODE ...................................... 122 Close-up playback U ................................... 79 COLOR SPACE ............................................ 97 Color temperature ....................................... 132 CompactFlash ....................................... 13, 124 Compression rate ......................................... 61 Continuous AF (C-AF) .................................. 52 CONTRAST .................................................. 67 Control panel .................................................. 6 COPY ALL .................................................... 86 CUSTOM ...................................................... 67 Custom printing ........................................... 104 CUSTOM RESET ......................................... 33 Custom white balance CWB ......................... 63 D Date/time setting X .................................... 15 DIAL .............................................................. 91 Digital ESP metering G ............................... 46 Diopter adjustment ........................................ 14 Direct buttons ............................................ 4, 27 Direct print .................................................. 103 dpi SETTING ................................................ 99 DPOF .......................................................... 101 Dust reduction ....................................... 14, 121 Dynamic-single target AF mode N ............ 54 E Easy printing ............................................... 104 151 EN s0011_e_00_0_unified.book Page 152 Wednesday, September 12, 2007 4:46 PM EDIT FILENAME ........................................... 99 EV STEP ....................................................... 96 Exposure compensation F ........................... 46 EXT. WB DETECT ........................................ 99 Eyepiece shutter ........................................... 58 F F (Fine) .................................................. 61, 117 FILE NAME ................................................... 98 Fill-in flash # ................................................ 71 FIRMWARE ................................................. 100 FL BKT .......................................................... 74 Flash bracketing ............................................ 74 Flash intensity control w ............................. 73 Flash mode # ............................................... 70 Flash off $ ................................................... 71 Focus lock ..................................................... 55 FOCUS RING ................................................ 90 FORMAT ..................................................... 125 Four Thirds system lenses .......................... 126 FRAME ASSIST ............................................ 95 G GRADATION ................................................. 68 H HIGH KEY ..................................................... 68 Histogram ........................................ 32, 82, 117 Home position p ......................................... 55 I IMAGE STABILIZER o ................................ 60 Index display G ........................................... 81 Information display .................................. 32, 82 ISO BKT ........................................................ 50 ISO bracketing .............................................. 50 ISO ISO ........................................................ 49 ISO STEP ...................................................... 96 ISO-AUTO ..................................................... 96 ISO-AUTO SET ............................................. 96 J JPEG EDIT .................................................... 84 L Y (Large) .............................................. 61, 117 Lens ...................................................... 12, 126 Light box display ........................................... 80 Lithium ion battery ................................. 11, 125 Lithium ion charger ........................ 11, 123, 125 LIVE PREVIEW ....................................... 45, 92 Live view ....................................................... 31 LIVE VIEW BOOST ....................................... 95 LOW KEY ...................................................... 68 M 152 EN X (Middle) ............................................. 61, 117 Manual flash .................................................. 72 Manual focus (MF) ........................................ 52 Manual shooting M ....................................... 43 Menu ..............................................................29 METERING G ..............................................45 MF (manual focus) .........................................52 Microdrive ..............................................13, 124 Monitor adjustment s .................................99 MONOTONE .................................................67 MTP .......................................................95, 112 My mode s/T ...................................44, 93 MY MODE SETUP ........................................93 N N (Normal) .............................................61, 117 NOISE FILTER ..............................................69 NOISE REDUCT. ..........................................69 NTSC ...........................................................100 Number of pixels ............................................61 O OLYMPUS Master .......................................107 Olympus wireless RC flash system ...............76 One-touch white balance V ............63, 65, 93 P PAL ..............................................................100 PICT. TONE ..................................................67 PictBridge ....................................................103 PICTURE MODE ...........................................67 PIXEL COUNT ...............................................98 Pixel count .....................................................61 PIXEL MAPPING .........................................122 Power battery holder ...................................123 Preset white balance ...............................62, 63 PREVIEW ......................................................92 Preview ..........................................................45 Print mode < ..............................................105 Print reservation ..........................................101 PRIORITY SET ..............................................99 Program shift % ...........................................40 Program shooting P ......................................40 Protecting 0 ...............................................86 Q QUICK ERASE ..............................................98 R RAW ..............................................................61 RAW DATA EDIT ..........................................84 RAW+JPEG ERASE ......................................98 REC VIEW ...................................................100 Record mode K ............................61, 62, 133 Red-eye reduction flash ! .........................70 Remote control < ...........................................58 RESET LENS ................................................91 RESET PROTECT ........................................87 Resizing Q ..................................................84 RLS PRIORITY C ..........................................94 RLS PRIORITY S ..........................................94 Rotating images y ........................................83 s0011_e_00_0_unified.book Page 153 Wednesday, September 12, 2007 4:46 PM S Z W (Small) ............................................... 61, 117 S-AF (single AF) ............................................ 51 S-AF+MF ....................................................... 53 SATURATION ............................................... 67 Self-timer Y .................................................. 57 Sequential shooting H l .......................... 56 Sequential shooting L O ........................... 56 SF (Super Fine) ..................................... 61, 117 SHADING COMP. ......................................... 97 SHADOW ADJ .............................................. 84 SHARPNESS ................................................ 67 Shutter priority shooting S ............................ 42 Shutter speed .......................................... 40, 42 Single AF (S-AF) ........................................... 51 Single target AF mode M ............................ 53 Single-frame copy ......................................... 85 Single-frame erase S ................................... 88 Single-frame playback ................................... 79 Single-frame protect ...................................... 86 Single-frame shooting o ............................. 56 SLEEP ........................................................... 94 Slideshow m ............................................... 83 Slow synchronization #SLOW ..................... 70 Slow synchronization #SLOW2/2nd CURTAIN ........................................... 71 Small-single target AF mode o .......... 53, 90 Spot metering - highlight control IJ ........ 46 Spot metering - shadow control IK .......... 46 Spot metering I .......................................... 46 sRGB ............................................................. 97 STORAGE ............................................. 95, 108 Strap .............................................................. 10 Super control panel ................................... 7, 28 Super FP flash ............................................... 76 ZUIKO DIGITAL interchangeable lens ........ 126 T TEST PICTURE ............................................ 93 U Under water macro H ........................... 44, 93 Under water wide I .............................. 44, 93 USB MODE ................................................... 95 V VIDEO OUT ................................................. 100 Viewfinder ............................................ 5, 14, 16 W WB ................................................................. 63 WB BKT ......................................................... 66 WB compensation ......................................... 64 White balance bracketing .............................. 66 White balance sensor .................................... 64 White balance WB ........................................ 62 X xD-Picture Card ..................................... 13, 124 153 EN s0011_e_00_0_unified.book Page 154 Wednesday, September 12, 2007 4:46 PM Memo 154 EN s0011_e_00_0_unified.book Page 155 Wednesday, September 12, 2007 4:46 PM Memo 155 EN s0011_e_00_1_cover_7.fm Page 1 Tuesday, September 25, 2007 12:48 PM DIGITAL CAMERA Basic guide INSTRUCTION MANUAL Printed in China VS026802 INSTRUCTION MANUAL P. 2 Review the camera part names and the basic steps for shooting and playback. Table of Contents P. 20 z Before you start to use your new camera, please read the “Safety Precautions” section in this manual. z We recommend that you take test shots to get accustomed to your camera before taking important photographs. z The screen and camera illustrations shown in this manual were produced during the development stages and may differ from the actual product. z The contents in this manual are based on firmware version 1.0 for this camera. If there are addition and/or modification of functions due to firmware update for the camera, the contents will differ. For the latest information, please visit the Olympus website.