1
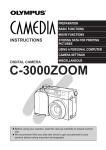
Digital Camera
C-200 ZOOM
D-510 ZOOM
Reference Manual
• Before you use this camera, read this manual and then store it in a
safe location where you can find it for future use.
• We recommend that you spend some time taking test shots and
experimenting with all of the features before you take important
pictures.
C-200 ZO
OM
© Copyright 2001. Olympus Optical Co., Ltd. All rights reserved.
Legal and other notices
• The contents of this document are subject to change without prior notice.
• Although the contents of this document have been carefully checked
to avoid errors, some may still occur. If you have a question about any
point, or you find mistakes or omissions, please contact us.
• No part of this publication may be reproduced or reprinted except for
personal use without prior written permission from Olympus.
• Olympus makes no representations or warranties regarding any
damages, or benefit expected by using this unit lawfully, or any
request from a third person, which are caused by the inappropriate
use of this product.
• Olympus makes no representations or warranties, regarding any
damages or any benefit expected by using this unit lawfully, caused by
erasing picture image data.
Important:
• Your camera may differ slightly from that shown in illustrations.
For Customers in USA
Declaration of Conformity
Model Number: D-510 ZOOM
Trade Name:
OLYMPUS
Responsible party: Olympus America Inc.
Address:
2 Corporate Center Drive, Melville, New York 11747-3157
U.S.A.
Telephone number: 631-844-5000
Tested to comply with FCC standards
FOR HOME OR OFFICE USE
This device complies with Part 15 of the FCC rules. Operation is subject to
the following two conditions:
(1) This device may not cause harmful interference, and
(2) This device must accept any interference received, including
interference that may cause undesired operation.
For Customers in Canada
This Class B digital apparatus meets all requirements of the Canadian
Interference-Causing Equipment Regulations.
For Customers in Europe
“CE” mark indicates that this product complies with the European
requirements for safety, health, environment and customer protection.
Trademarks
• IBM is a registered trademark of International Business Machines
Corporation.
• Microsoft and Windows are registered trademarks of the Microsoft
Corporation.
• Macintosh is a trademark of Apple Computer, Inc.
• All other company and product names are registered trademarks of
their respective owners.
I
Contents
Features of the C-200 ZOOM/D-510 ZOOM ................................................ VI
Using this Manual ........................................................................................ VII
Chapter 1 Getting Started ......................................................... 1
Names of Parts .............................................................................................. 2
Attaching the Strap ........................................................................................ 6
Inserting the Batteries .................................................................................... 7
Inserting the SmartMedia Card .................................................................... 10
Using the Card ............................................................................................. 11
Card Basics ............................................................................................. 11
Setting the Date and Time ........................................................................... 12
Adjusting the Viewfinder ............................................................................... 15
Using the AC Adapter (sold separately) ...................................................... 16
Chapter 2 Learning the Basics
............................................. 17
Turning the Power On .................................................................................. 18
Checking the Monitor ................................................................................... 19
Is the Card Inserted? ............................................................................... 19
Checking the Batteries ............................................................................ 20
Does the Card Have Enough Room for More Pictures? ......................... 21
Holding the Camera ..................................................................................... 23
Shooting Technique Depends on Distance to the Subject ........................... 24
Taking Still Pictures ...................................................................................... 25
Taking Pictures Using the Viewfinder ...................................................... 25
Taking Pictures ........................................................................................ 26
Taking Pictures Using the Monitor ........................................................... 28
Using the Flash to Shoot in Dim Light ..................................................... 30
Enlarging Your Shots (Optical Zoom) ........................................................... 31
Playing Back Your Still Pictures .................................................................... 32
Turning the Power Off .................................................................................. 34
Chapter 3 Playing Images Back
.........................................
Getting Started .............................................................................................
Turning the Power On in Playback Mode ................................................
Turning the Power Off in Playback Mode ................................................
Displaying Images Frame by Frame ............................................................
Displaying All Frames (Index-Display Setting) .............................................
Checking the Focus by Enlarging a Selected Picture
(Displaying Close-ups) .............................................................................
Connecting to a Television Set .....................................................................
To Avoid Accidentally Erasing Pictures You Want to Keep
(Image Protection) ...................................................................................
One-Frame Erase .........................................................................................
Possible Printing Methods ............................................................................
II
35
36
36
37
38
39
41
42
44
45
47
Chapter 4 Taking Better Pictures ........................................ 49
Points to Remember .................................................................................... 50
Viewfinder Discrepancies Depending on Distance .................................. 50
Subjects Difficult to Get in Focus ............................................................ 50
When Not Able to Focus on a Subject While Shooting ............................... 52
Determine the Position of the Subject After Focusing ............................. 52
Fixing a Far-Distance Focus .................................................................... 53
Taking Close-up Pictures (Macro Mode) ...................................................... 55
Taking Sequential Shots .............................................................................. 57
Using the Selftimer ....................................................................................... 59
Taking Movie Pictures .................................................................................. 60
Using the Flash ............................................................................................ 64
Switching Between Flash Modes ............................................................. 64
Auto-Flash ................................................................................................ 66
Red-eye Reduction .................................................................................. 66
Fill-in Flash .............................................................................................. 67
No Flash .................................................................................................. 67
Night Scenes ........................................................................................... 68
Night Scenes + Red-eye Reduction ........................................................ 68
Chapter 5 Advanced Shooting Techniques ................ 69
Use of the Shooting Menu ........................................................................... 70
Functions of the Shooting Menu .............................................................. 70
Using the Shooting Menu ............................................................................. 72
Spot Metering (Placing Exposure Priority on the Center of the Subject) .... 74
Correcting Image Brightness (Exposure Compensation) ............................ 76
ISO Light Sensitivity Level (Setting ISO Sensitivity) .................................... 78
Enlarging Shots Even Further (Digital Zoom) .............................................. 80
Creating Panoramic Pictures (Panorama Function) ..................................... 82
Adjusting the Color Tone (White Balance) ................................................... 85
Picture Preferences: Quality vs. Quantity (Record Mode) ........................... 87
Making Images Sharper (Sharpness) .......................................................... 90
Shooting Pictures with Strong Contrast (Contrast) ...................................... 91
Confirming Pictures Directly After Shooting (Rec View) .............................. 93
Changing How File Names are Assigned (File Naming) ............................. 95
To Retain Settings Even After Power is Turned Off (Clear Settings) ........... 98
Turning Off Warning Sounds (Beep Sound) ................................................ 99
To Adjust Monitor Brightness (Monitor Adjustment) .................................. 100
Chapter 6 Advanced Playback Techniques
.............
Use of the Playback Menu .........................................................................
Functions of the Playback Menu ...........................................................
Using the Playback Menu ..........................................................................
To Play Back Still Images One by One (Automatic Playback) ...................
To Play Back Movie Pictures (Movie Playback) .........................................
101
102
102
104
106
107
III
Contents (continued)
Printing Using DPOF-Compatible Printers or Photo Labs
(Print Reserve) ...................................................................................... 109
Rotating Images During Playback (Rotated Playback) .............................. 112
Displaying Image Information on the Monitor
(Image Information Display) ................................................................... 113
Changing the Color or Size of Images (Edit) ............................................. 114
To Erase All Images (All Erase Frames) .................................................... 115
To Initialize (Format) a Card ....................................................................... 116
To Change the Number of Frames Displayed (Index Display) ................... 118
Chapter 7 Transferring Your Pictures to
a Computer ...................................................................................... 119
Read Before Connecting to a Computer .................................................... 120
Connecting the Camera to a Computer ..................................................... 122
Connecting to a Windows PC ................................................................ 122
Connecting to a Macintosh .................................................................... 126
Transferring Image Files ............................................................................. 127
Transferring Image Files to a Windows PC ........................................... 127
Transferring Image Files to a Macintosh ............................................... 129
Disconnecting the Camera or Removing the SmartMedia Card ............... 131
Disconnecting from a Windows PC ....................................................... 131
Disconnecting from a Macintosh ........................................................... 133
Transferring Files Without Using the Camera ............................................ 134
Appendix
............................................................................................
Answers to Frequently Asked Questions ...................................................
Troubleshooting (Check before Taking in for Repair) .................................
Operating Problems ...............................................................................
Picture Problems ...................................................................................
Error Codes ................................................................................................
Using the Camera with Optional Equipment ..............................................
Optional Items ............................................................................................
Compatibility of the Still Picture Data ........................................................
Specifications .............................................................................................
Glossary of terms .......................................................................................
Index ..........................................................................................................
IV
135
136
138
138
140
142
143
144
145
146
148
150
V
Features of the C-200 ZOOM
/D-510 ZOOM
• With its high-resolution CCD (total 2,110,000 pixels) and highperformance lens, the Olympus CAMEDIA digital camera produces
pictures of extremely high image quality.
• The 3x optical zoom lens and the 3x digital zoom function combine to
offer an impressive 9x maximum zoom.
• Exposure compensation, spot metering, and other functions are
simple using our easy menu operations.
• USB functions
Image downloading is easy with a USB connector connected directly
to a personal computer.*
• Other various features and functions
1.8 inch LCD monitor
Movie functions
TV replay function with video OUT jack
Uses SmartMedia for its removable media.
• In addition to standard AA (R6) alkaline batteries, AA (R6) lithium
batteries, AA (R6) NiMH batteries, two CR-V3 lithium battery packs
can also be used.
* It may be necessary to install the USB driver (provided on the
included CD-ROM) on computers with Windows 98/98SE.
VI
Using this Manual
This manual is divided into seven chapters and one appendix which
cover the main unit (hereafter called “the camera”).
Chapter 1 Getting Started
Details confirming the names of all the parts of the camera and
preparing the camera to be used for the first time are all explained in
this chapter. It is essential to read this before using the camera for the
first time.
Chapter 2 Learning the Basics
Basic operations of the camera are explained, including turning on the
power, shooting a still image, checking that image and turning the
power off. Reading this chapter will make taking pictures with this
camera easy and enjoyable. Be sure to read this section.
Chapter 3 Playing Images Back
After taking a few images, you will probably want to review them
collectively or display them on your TV. This chapter explains how to
turn the power on for playback, view the images, and turn the power off.
Read this after you’ve taken a few practice pictures as explained in
Chapter 2.
Chapter 4 Taking Better Pictures
This chapter explains how to focus the camera, as well as how to set
and use macro mode, flash mode, selftimer, movie shooting, and other
convenient functions that will help you take great pictures. Read this
chapter after you have familiarized yourself with Chapter 2 and taken a
few pictures with the camera.
Chapter 5 Advanced Shooting Techniques
All the functions for using various advanced shooting features are
explained in this chapter. Refer to each of these functions as needed.
Chapter 6 Advanced Playback Techniques
Playing back movie images, as well as other useful display functions, are
explained in this chapter. Refer to each of these functions as needed.
Chapter 7 Transferring Your Pictures to a Computer
The included USB cable can be used to send pictures stored on the
camera to a personal computer for further processing and printing. This
chapter explains the steps used to send images from the camera to a
computer.
VII
Appendix
You will also find a troubleshooting guide and explanations of the key
technical specifications.
Additional information
The following may appear at the bottom of each page.
CAUTION: These sections contain important precautions. Be sure to
read.
HELP: These sections include information and helpful hints on how to
handle problems that may arise during operation.
NOTE: These sections contain tips which are good to know in advance.
VIII
1
Getting Started
This chapter describes the various parts of the
camera and their names, the accessories for
the camera, and how to prepare the camera to
be used for the first time. Please be sure to read
this chapter, starting on the following page,
before using the camera for the first time.
1
Names of Parts
Camera
Shutter button (p.25) Selftimer lamp (p.59)
Flash (p.30)
Zoom lever
(p.31)
Lens barrier (p.18)
Lens
Video OUT jack (p.42)
DC-IN jack
(p.16)
Card cover (p.10)
Card slot
2
USB connector (p.120)
Connector cover
Camera (continued)
Arrow pad (p.12)
Macro button (p.55)/
Protect button (p.44)
Flash mode button
(p.64)
1
Getting Started
Selftimer button (p.59)/
Erase button (p.45)
Diopter
adjustment
dial (p.15)
OK button (p.12)/
Menu button
(p.12)
Viewfinder (p.50)
Monitor (p.28)
Battery
compartment lock
(p.7)
Monitor button (p.12)
Tripod socket
(bottom)
Battery compartment cover (bottom) (p.7)
Viewfinder
Orange lamp
(p.30)
Green lamp
(p.26)
AF target mark (p.25, p.52)
3
Monitor
Shooting mode display
Battery check
(p.20)
AF target mark (p.25, p.52)
+1.5
HQ
Exposure compensation (p.76)
Record mode (p.87)
Flash mode (p.64)
Spot metering (p.74)
Macro (p.55) / Quick focus (p.53)
Sequential shooting (p.57) /
Selftimer (p.59) / Movie (p.60)
White balance (p.85)
ISO sensitivity (p.78)
ISO100
Memory gauge
(p.28)
Number of storable
pictures (p.21)
Playback mode display
Battery check
(p.20)
Print reserve (p.109)
Movie (p.107)
HQ
2001-01-23
15
4
Protect (p.44)
Record mode (p.87)
Date (p.12)
Frame number
Names of Parts (continued)
Playback mode display (with image information display on)
HQ
1600x1200
Resolution (p.87)
1
Getting Started
ISO100
FILE:100-0123
2001-01-23
White balance (p.85)
ISO sensitivity (p.78)
File number (p.95)
5
Attaching the Strap
1
Attach the strap to the camera
as shown in the diagram.
2
After passing the strap
through the loop, give it a
slight tug to make sure that it
does not come loose.
CAUTION
• Attach the strap exactly as shown in the diagram. If the strap is attached
incorrectly the camera may come loose and fall off. In this case, Olympus
will not be responsible for any damage.
6
Inserting the Batteries
This camera uses four AA (R6) alkaline, NiMH, lithium or NiCd batteries.
It can also take two CR-V3 lithium battery packs. Do not use zinc-carbon
(manganese) batteries.
Do not mix different types of batteries or insert the batteries facing in
the wrong direction. As it may overheat and cause irreparable damage
to the camera.
2
1
4
1
2
Slide the battery compartment
lock from
to
.
3
Slide the battery compartment
cover to the side and lift it up
to open.
4
Insert the batteries as shown
in the diagram.
• When using the lithium battery
packs, insert them so the
“CAMEDIA” label on each
battery is facing the lens side
Using AA (R6)
alkaline batteries of the camera.
• Some batteries may have an
insulation seal attached.
Remove this before using the
battery.
Insulation
seal
Using lithium
battery packs
Do not remove
the silver label.
3
-V
CR
7
Getting Started
3
Make sure the power is off.
• The lens barrier must be
closed.
• Make sure the monitor is off.
5
6
5
With the battery compartment
cover closed, press the tab
and slide it over.
• If the battery compartment
cover seems hard to close, do
not force it. Slide the battery
compartment cover toward
“OPEN” while pressing down
to close.
6
Slide the battery compartment
lock from
to
.
CAUTION
• The CR-V3 lithium battery packs are not rechargeable.
• Make sure that the camera power is off before inserting the batteries.
• Alkaline batteries deliver markedly inferior performance, especially in cold
weather. For this reason, we highly recommend using lithium battery packs
or rechargeable NiMH batteries.
• Do not use zinc-carbon (manganese) batteries. Please read battery
warnings.
• Do not to touch the inside of the empty battery compartment.
• If the camera is left for about one hour with the batteries removed and the
optional AC adapter (sold separately) disconnected, all camera settings will
revert to their initial settings.
* See “Battery handling precautions” in the “Safety Precautions” booklet.
8
Inserting the Batteries (continued)
WARNING
Batteries with any part of the outer seal (electrical insulation sheath) peeling
off, or any battery split along the seam, can leak, generate heat, or explode.
Never use damaged batteries in the camera. Store-bought batteries
occasionally may be defective, with all or part of the magnetic insulation
sheath peeling off. Never use batteries in this condition.
These batteries cannot be used:
1
Getting Started
Batteries with all or part of the electrical
insulation sheath peeled off.
Seal (insulation sheath)
Part of the negative electrode (–) has a
protruding bulge, although not covered with
the seal (insulation sheath).
Batteries that have a flat negative (–)
electrode
(Some batteries of this type have their
negative electrode covered with the seal
(insulation sheath) while others have no
such seal. Neither may be used).
9
Inserting the SmartMedia Card
Always insert a SmartMedia card (hereafter called “card”) before taking
pictures.
1 Make sure the power is off.
2
• The lens barrier must be
closed.
• Make sure the monitor is off.
2
Open the card cover.
3
Insert the card as shown in
the diagram, making sure that
it is pushed all the way in.
4
Close the card cover so it
clicks into place.
• If the card cover is not
properly closed, the camera
will not turn on.
3
Insert the
SmartMedia card
To remove the SmartMedia card
Pull it in the opposite direction as that indicated in step 3.
Never open the card cover, eject the card, remove the batteries, or
disconnect the AC adapter while the camera power is turned on. Doing
so may destroy the image data on the card. Destroyed images cannot be
recovered.
When using non-Olympus brand cards
Use only 3V (3.3 V) cards. 5V cards can not be used.
Non-Olympus brand cards or cards formatted by computers or other
devices may not be recognized by the camera. Also, the time required for
writing to the card could become longer, or the number of possible shots
could be reduced. Before making use of the card, use the camera to
format it (p.116).
10
Using the Card
Card Basics
What is SmartMedia?
SmartMedia is the type of memory card this camera uses.
Images recorded and stored on SmartMedia can easily be deleted,
overwritten, and/or edited on a PC.
Compatible SmartMedia cards
1
Contact area
The area where the card comes into contact
with the camera.
Write-protect area
Attach the provided write-protect seal when
you want to protect your data from
accidental erasure or overwriting.
Index area
Use the provided index label to indicate the
card’s contents.
Note:
• Operating temperature: 0°C to 55°C (32°F to 131°F); Storing
temperature: –20°C to 65°C (–4°F to 149°F); Humidity: up to 90 %
• Put the card into its anti-electrostatic case for storage or transportation.
• Do not bend, drop, or apply any physical shock to the card.
• Read the provided SmartMedia instruction manual carefully.
• Do not touch the contact area of the card.
11
Getting Started
• Provided 8 MB standard card.
• Optional Olympus 4 MB/8 MB/16 MB/ 32 MB/64 MB/128 MB cards
• Market-available 3V (3.3V) card 4 MB/8 MB/16 MB/32 MB/64 MB/
128 MB cards
* 2 MB cards cannot be used.
Setting the Date and Time
Time and date information for each picture are recorded at the same
time the picture is taken. Therefore, before taking pictures, be sure to
confirm that the date and time settings are correct.
3 4
2
1
1
Make sure the lens barrier is
closed and SmartMedia is
inserted (p.10), then press the
monitor button (
).
• When a new card is inserted
into the camera, the message
“NO PICTURE” will be
displayed on the monitor.
• With the lens barrier open
(shooting mode), you can set
the date and time.
2
Press the menu button (
).
• The playback menu will be
displayed on the monitor.
3
Press or on the arrow
pad to move the on-screen
arrow to SET, then press .
4
Press or on the arrow
pad to move the on-screen
arrow to date setting, then
press the button.
• The date setting screen will be
displayed.
Monitor (Playback menu)
PLAY
[
[
CARD
]
16
RESET ]
[ ON ]
SET
EXIT OK
SET
Monitor (Settings group menu)
[
[
]
16
RESET ]
[ ON ]
SET
CANCEL
12
SET
5
Monitor
(Date setting screen)
M–D–Y
01–23–2001
12:00
SET
OK
5 6
8
9
Monitor
(Date setting screen)
6
Press or on the arrow
pad to set the first date/time
position (in this case the
month 01), then press .
• The indicator moves to the
next date/time position.
• Pressing returns the display
to the setting one step earlier.
7
Repeat step 6 until both date
and time have been set.
8
When the setting is
completed, press the OK
button.
• The date and time are set and
the screen returns to the
settings group menu.
• Turning the counter to 00
seconds and then pressing the
OK button will allow the
correct time to be set.
9
Press the monitor button.
• The monitor display and the
power both go off.
M–D–Y
01–23–2001
12:00
CANCEL
SET
OK
13
1
Getting Started
CANCEL
Press the arrow pad or to
select how you want the date
displayed:
M-D-Y (Month/Day/Year)
D-M-Y (Day/Month/Year)
Y-M-D (Year/Month/Day)
After making your selection,
press .
• The first date value becomes
highlighted.
Setting the Date and Time (continued)
NOTE
• Until you change it, the date setting will remain current even when the
power is turned off.
• It is possible to set the time even when the lens barrier is open and the
camera is in shooting mode (p.70).
14
Adjusting the Viewfinder
To make the camera easier to use, adjust the viewfinder to match the
eyesight (visual acuity) of the person who will be using the camera.
1
Diopter adjustment dial
Slide the lens barrier open
until it clicks.
• The power turns on, the lens
extends, and the flash pops
up.
2
While looking through the
viewfinder, gently turn the
diopter adjustment dial.
3
Stop turning the dial when the
AF target mark is clearly
visible.
4
You are ready to take some
pictures.
• See Chapter 2.
To turn the power off, close
the lens barrier and press the
flash down (p.30).
3 Viewfinder
AF target mark
15
1
Getting Started
2
1
Using the AC Adapter
(sold separately)
The camera may be operated on ordinary household current from a wall
outlet by using the optional AC adapter (sold separately). The batteries
in the camera are not charged even though the AC adapter is
connected.
CAUTION
• Olympus 3V adapter cannot be used with this camera.
NOTE
AC wall outlet
AC adapter
connector
AC adapter
• When in use for long periods of
time the AC adapter may heat up
slightly. This is normal.
• When connecting or disconnecting
the AC adapter, always make sure
that the camera is turned off.
• Do not connect/disconnect the AC
adapter while the camera is
connected to a personal
computer. The camera always
turns on while it is connected to a
computer.
WARNING
Incorrect use may result in fire, electric shock or burns to the skin.
• Use the AC adapter appropriate for your region.
• Make sure the AC adapter is properly plugged into the outlet.
• Never plug in or unplug the AC adapter with wet hands.
• In the unlikely event that the AC adapter cord becomes hot, or you see or
smell smoke, unplug it immediately and discontinue use. If there is any
problem or malfunction with the AC adapter or camera, please contact your
Olympus dealer or an authorized Olympus service center for assistance.
• Do not use any adapter other than the Olympus adapter. Using a different
adapter can damage the camera or the power source, or cause other
malfunctions. Olympus will not be responsible for damage caused by the
use of other AC adapters.
• When unplugging the AC adapter always grasp the body, not the cord of
the adapter.
• Do not pull, bend, twist or modify the cord.
• If the cord is gouged or otherwise damaged, stop using the adapter and
contact your nearest authorized Olympus service center.
• Always unplug the adapter when the camera is not in use.
16
2
Learning the Basics
The fastest way to learn to use the camera is
simply to start taking pictures with it. This
chapter explains turning the camera on, taking
still shots, checking how they came out, and
turning the camera off.
Please have the camera in hand and practice
the operations described as you read the
following chapter.
17
Turning the Power On
Slide the lens barrier open.
Monitor
Battery check
Record mode
HQ
1
Slide the lens barrier open
until it clicks.
• This turns the power on in
shooting mode.
• The lens extends and the flash
pops up.
• The monitor displays the
information shown at left.
• After a short time, the monitor
will go off.
• If the card cover is not
securely closed, the power is
not turned on even if the lens
barrier is opened.
• To turn off the power, see
“Turning the Power Off” (p.34).
Standby mode
If the lens barrier is left open and nothing is operated after three
minutes, the camera goes into standby mode. In this energy saving
mode, even if the monitor is illuminated, it will automatically go off. To
resume shooting take one of the following procedures.
• Lightly press the shutter button or zoom lever.
• Close (p.34) and then open the lens barrier.
• Press any button on the arrow pad, the OK button, the menu button or
the monitor button.
In the standby mode, the camera will turn off completely after about 4
hours of not being used. When using new batteries, it may take longer
for the camera to shut down automatically, depending on the type of
batteries being used. To extend battery life, turn the camera off
whenever you do not intend to be taking pictures for a while.
CAUTION
• Never open the card compartment cover, remove the card or batteries, or
disconnect the AC adapter while the camera is in operation as this could
result in damage to the data stored on the card.
18
Checking the Monitor
Is the Card Inserted?
If you forget to insert the card, or if there is any other problem with the
card, the monitor will display a message. Read the message and correct
the problem.
When the “NO CARD” error
message is displayed:
Monitor
• The card may not be inserted
properly.
• Turn the power off (p.34). Then
remove and re-insert the card.
2
• Follow the directions on the
monitor. For details, see “Error
Codes” (p.142).
Monitor (Card Setup)
CARD SETUP
When the card setup
screen is displayed:
• You have inserted a card which
needs to be formatted. When a
card is formatted, all of the
recorded images on the card are
deleted.
For details, see “To Initialize
(Format) a Card” (p.116, 117).
GO OK
19
Learning the Basics
For other error messages:
Checking the Batteries
When the monitor is turned on, it displays the estimated remaining
battery life.
After opening the lens barrier and turning on the power (shooting
mode), the monitor will automatically illuminate, display information, and
then go off after a short time.
lights (and turns off automatically).
The batteries are OK and have enough power to take pictures.
blinks and other indicators on the monitor are displayed
normally.
The batteries are low. It is still possible to take pictures, but the power
may cut off while doing so. Replace the batteries.
The monitor will go out and
Orange lamp the green and orange lamps
Green lamp
next to the viewfinder will
illuminate simultaneously.
The batteries are dead. Replace
the batteries.
To recheck the batteries
Display the shooting menu first (p.72). When the shooting menu is
turned off, the remaining battery life will be displayed.
CAUTION
• Keep spare batteries on hand when taking the camera on long trips, when
using it to record important occasions, and during cold weather.
• If the battery is low, the camera may beep continuously after taking a
picture or turning the power on, and the frame number on the monitor may
blink. If this happens after taking a picture, the camera may not be taking
pictures properly. Replace the batteries before continuing to take pictures.
• Note that depending on the type of batteries being used, the timing of the
display may vary. When using NiMH batteries,
will appear
more quickly than when using a lithium battery pack. Depending on the
conditions of use,
may appear very early but the camera will still
continue to function normally for a longer time.
20
Checking the Monitor (continued)
Does the Card Have Enough Room for More Pictures?
When the power is turned on with the camera in shooting mode, the
monitor displays a remaining picture count. When the monitor display has
gone out, press the monitor button (
) to turn the monitor back on (p.28).
The number of storable pictures
Approximate storable still pictures
Record mode
SmartMedia
capacity
✽
Resolution
SQ✽
NORMAL
SQ-HIGH
HQ
640×480
SHQ
TIFF✽
1600×1200
8MB
82
32
16
5
1
16MB
165
66
31
11
2
32MB
331
132
64
22
5
64MB
664
265
128
45
11
The SQ and TIFF modes can be set for different resolutions (p.87).
Approximate maximum movie lengths, in seconds
SmartMedia capacity
Record
mode
Size
(no. of pixels)
8MB
16MB
32MB
HQ
320×240
23
47
96
193
SQ
160×120
105
210
424
851
64MB
1. There is a limit to the number of frames that may be shot when operating the
shutter button a single time (p.62).
2. The maximum movie length may be different from the table above for C-200
ZOOM models sold in the PAL color system regions if movie pictures are shot
with the video cable connected.
21
2
Learning the Basics
• If the count drops to 0, the
camera beeps, the green lamp
blinks and the monitor displays
the message “CARD FULL”.
This will repeat every time the
power is turned on (p.142).
• The number of storable
pictures varies depending on
the record mode (p.62, p.87).
HQ
Checking the Monitor (continued)
HELP
• The number of storable stills and the movie length may vary depending on
the subject being photographed.
• In some cases the number of storable pictures counter may not decrease
every time a picture is taken, nor increase when a frame is erased.
22
Holding the Camera
Proper camera technique
Hold the camera firmly with both hands, keeping your elbows at your
sides.
When holding the camera vertically, make sure the flash is on top.
Horizontal grip
Vertical grip
2
Learning the Basics
Incorrect!
Keep your fingers and the strap away from the lens and flash.
NOTE
• Do not subject the lens to physical shocks.
• Be careful not to press on the flash.
23
Shooting Technique Depends
on Distance to the Subject
Deciding whether to use the viewfinder or the monitor display when
shooting depends on the distance between you and your subject.
Determine the approximate distance before taking the picture.
For normal and long-range photography
(from approx. 1.5m (59″) to ∞ (infinity)):
We recommend using the viewfinder (p.25).
For close-ups (from 0.8m (31″) to approx. 1.5m (59″)):
Although you can use the viewfinder to take pictures, in some cases it
is better to use the monitor (p.28). See below for details.
For extreme close-ups (0.2m (8″) to 0.8m (31″)):
Use the macro mode and compose the shot with the monitor to take
pictures (p.55). Although it is possible to take such shots without using
the macro mode, proper exposure and focus may not be achieved.
Characteristics of the viewfinder and the monitor
You can use either the monitor or the viewfinder to determine the
proper shooting range. Consider the following when deciding
whether to use the viewfinder or the monitor for a particular shot:
Viewfinder
Advantage: You can maintain the proper subject composition with less
camera movement.
Disadvantage: Close-up photography causes inconsistencies between
the picture frame as seen in the viewfinder and the actual edge of
the picture (p.50).
Monitor
Advantage: You can check the subject composition more accurately.
Disadvantage: It is more difficult to hold the camera steady, and
battery life is decreased.
24
Taking Still Pictures
Taking Pictures Using the Viewfinder
Half-press
Viewfinder
1
Compose the picture inside
the viewfinder.
AF target
mark
Orange lamp
2
Press the shutter button
halfway down until the green
lamp next to the viewfinder
lights up (half-press).
• The focus and exposure are
automatically set.
When the lamp is flashing, it
indicates that the subject is
out of focus. Press the shutter
button halfway once more to
correct the focus.
Green lamp
1
2
• If the surroundings are dark,
the orange lamp next to the
viewfinder may light (p.30).
➜ Go on to “Taking Pictures” on the following page.
25
Learning the Basics
Shutter
button
2
Taking Pictures
Full-press
3
Shutter
button
3
Having half-pressed the
shutter button, press it further
all the way down (full-press).
• Press the shutter button
gently. If you press it too hard,
the camera will move and blur
the shot.
• The shot is taken and the
camera beeps.
• When the orange lamp next to
the viewfinder lights, the flash
will fire. Also, the green lamp
next to the viewfinder blinks for
a few moments and then goes
off.
4
When the green lamp goes
off, you can take another
picture.
• If you attempt to take a picture
before the green lamp goes
off, the camera does not beep
but you still cannot take the
picture. Wait for a few seconds
and make sure the green lamp
goes off before taking another
shot.
CAUTION
• Never remove the batteries or card, or disconnect the AC adapter while the
green lamp is blinking. This could damage the pictures you have already
taken, as well as the one currently being written to the card.
26
Taking Still Pictures (continued)
HELP
• The area of the actual picture will be slightly larger than the shot appears
through the viewfinder.
• If you switch the beep function off (p.99), the camera will not beep after
taking a picture. In this case you must watch the green lamp. If the lamp
blinks, the picture was taken successfully.
NOTE
• The green lamp will blink for as few as 2 seconds and as many as 40
seconds, depending on the record mode.
• The time you have to wait and the number of storable pictures vary
depending on the record mode.
2
Learning the Basics
27
Taking Pictures Using the Monitor
1
Compose the shot using the
monitor.
3
The procedure for taking
pictures is the same as when
using the viewfinder (p.25,
26).
• The memory gauge is
illuminated on the monitor.
• No further pictures can be
taken when the memory
gauge is illuminated to indicate
that the memory is full. Wait for
several seconds until the
memory gauge is off before
continuing to take pictures.
4
To go off the monitor, press
the monitor button.
• To turn the power off, see
“Turning the Power Off” (p.34).
1 4
HQ
).
2
2 3
Monitor
With the lens barrier open,
press the monitor button (
• The monitor goes on.
Memory gauge
Memory gauge
Before 1 picture 2 or more
shooting
pictures
Cannot
shoot
CAUTION
• Never remove the batteries or card, or disconnect the AC adapter while the
memory gauge is on. This could damage the pictures you have already
taken, as well as the one currently being written to the card.
28
Taking Still Pictures (continued)
HELP
• Pictures taken using the monitor take more time to write to the card than
those taken when using the optical viewfinder.
• A subject taken at an angle may appear grainy on the monitor, but this will
not affect the quality of the actual picture.
• Vertical lines may appear on the monitor when taking pictures in full
sunlight or other brightly-lit areas. These lines will not be visible in the
actual picture and do not indicate a camera malfunction.
NOTE
29
2
Learning the Basics
• Do not push the monitor forcefully.
• The viewfinder is intended to be used to check picture composition. Use
the monitor for checking focus and exposure. For best results, transfer
image files to a computer to confirm exactly what final pictures will look like
(p.42, p.120).
Taking Still Pictures (continued)
Using the Flash to Shoot in Dim Light
If lighting conditions are dim enough to require a flash, the orange and
green lamps next to the viewfinder will light when the shutter button is
pressed halfway down.
Pressing the shutter at this time will cause the picture to be taken with
the flash.
Viewfinder
If the orange lamp is
Orange lamp blinking
If the orange lamp is blinking, it
means that the flash is charging.
Wait a few seconds for the flash
Green lamp to charge, then confirm that the
orange lamp has gone out
before continuing to take
pictures.
Flash working range
The flash working range changes according to how the zoom lever is
adjusted.
Wide-angle mode: Approx. 0.2m (8″)~ 4.0m (13ft)
Telephoto mode: Approx. 0.2m (8″)~ 2.6m (8.5ft)
* For ranges between 0.2 and 0.8 meters (8″ and 31″), use the macro
function (p.55).
30
Enlarging Your Shots
(Optical Zoom)
Use telephoto (T) to zoom in on a subject so it appears larger.
Use wide angle (W) to capture a wider area.
Push the zoom lever toward W
(Wide angle) to shoot wide-angle
shots.
Pull the zoom lever toward T
(Telephoto) to zoom in.
2
Learning the Basics
Viewfinder
Monitor
HQ
Zoom bar
T
T
W
W
Zoom status
HQ
T
T
W
W
When using the monitor
When the zoom lever is activated, the zoom status will be displayed on
the zoom bar. The zoom bar will disappear when the zoom lever is no
longer being used.
NOTE
• Turning on the digital zoom function allows you to take pictures with up to
9x zooming (p.80).
31
Playing Back Your Still Pictures
You can play back any of the pictures you have taken.
2
1
With the camera in shooting
mode (the lens barrier open),
quickly press the monitor
button (
) twice.
• The camera switches to
playback mode and the
monitor displays the most
recent picture taken.
• If no pictures have been
recorded on the card, the
monitor will show “NO
PICTURE”.
2
Check other images recorded
by rapidly pressing the arrow
pad.
: Displays the previous image.
: Displays the next image.
: Displays the 10th image
back.
: Displays the 10th image
ahead.
3
Press the monitor button.
• The monitor goes off, the
camera returns to shooting
mode and is ready to take
more pictures.
1 3
Shutter button
Taking a picture while
playing back previous
images
You can take a picture even while
playing back previous images on
the monitor. To do this, look through
the viewfinder and full-press the
shutter button (p.25, 26). The image
will be recorded immediately.
32
HELP
• Pressing the buttons on the arrow pad for 1 second or more causes
different functions to activate (p. 44, 45).
2
Learning the Basics
33
Turning the Power Off
1
1
Close the lens barrier halfway.
• Just before the lens barrier
comes in contact with the lens,
it will make a click that you can
feel with your fingers.
• Do not push the lens barrier
against the lens.
• The lens will recess into the
camera.
2
2
Wait until the lens fully
retracts, then close the lens
barrier the rest of the way.
• The power is turned off.
• Close the lens barrier firmly
until a clicking sound is heard.
If the lens barrier is not
securely closed the flash is not
able to be closed.
3
3
Close the flash.
CAUTION
• Do not press firmly on the lens when closing the lens barrier. It could cause
scratches or damage.
NOTE
• The pictures you have taken are stored on the SmartMedia card. Stored
images will not be lost when the power is turned off or when the batteries
are replaced.
34
3
Playing Images Back
The previous chapter explained how to take still
pictures and check them immediately. Chapter
3 explains how to check all of the pictures you
have taken together once you are finished
shooting, as well functions like connecting the
camera to your television set for convenient
playback.
Once you’ve taken a few shots with the camera
according to the instructions in Chapter 2, read
the following section “Getting Started”, then
refer to the appropriate pages to start learning
about the playback functions you want to use.
35
Getting Started
Turning the Power On in Playback Mode
1
1
Make sure the lens barrier is
closed.
2
Press the monitor button (
).
• The camera turns on in
playback mode and the
monitor displays the last image
taken.
• “NO PICTURE” is displayed on
the monitor if no pictures have
been taken.
Any problems with the card
are indicated on the monitor
(p.19).
• The battery check mark blinks
when the batteries are running
low (p.20).
2
If the camera is left untouched for three minutes when using the
batteries, it automatically turns off. It is strongly recommended, however,
that you switch power off promptly when you are finished using the
camera.
When using new batteries, it may take longer for the camera to shut
down automatically depending on the type of batteries being used.
CAUTION
• Never open the card cover, remove the batteries or card, or disconnect the
AC adapter while the camera is in operation as this could result in damage
to the data stored on the card. When changing cards, be sure to turn the
power off before opening the card cover.
• Do not press on the monitor as this could leave a mark on the screen,
interfere with image display, or even crack the monitor.
HELP
• After turning the power on, the monitor may flash and display an image
after 0.5 to 2 seconds. This is not a malfunction.
36
Turning the Power Off in Playback Mode
1
Press the monitor button (
).
• The monitor display shuts
down and the power turns off.
3
Playing Images Back
1
37
Displaying Images Frame by
Frame
To display one frame at a time on the monitor, follow the same steps
described in “Playing Back Your Still Pictures” in Chapter 2 (p.32).
3
1
Press the monitor button (
)
with the lens barrier closed.
• The power turns on in
playback mode and the
monitor displays the last image
taken.
2
Check the images.
• The information for the picture
being played back is displayed
on the monitor.
• Which pieces of information
are shown depends on the
camera’s settings and the type
of image.
• All except the protect mark will
go off after about 3 seconds.
1
Monitor (With image
information display on (p.113))
Battery check
Print reserve Movie
Protect
HQ Record mode
1600x1200 Resolution
ISO100
FILE:100-0123
2001-01-23
124
White balance
ISO sensitivity
File number
Date
Frame number
3
HELP
Check other images recorded
by rapidly pressing the arrow
pad.
: Displays the previous image.
: Displays the next image.
: Displays the 10th image back.
: Displays the 10th image ahead.
• Pressing the buttons on the arrow pad for 1 second or more causes
different functions to activate (p. 44, 45).
38
Displaying All Frames
(Index-Display Setting)
Multiple images can be displayed on the monitor at once, useful when
search through stored images for a specific picture.
2 5
3 4
With the lens barrier closed,
push the monitor button (
).
• The power turns on in
playback mode and the
monitor displays the last image
taken.
2
Push the zoom lever toward
(Wide angle).
• Several frames are displayed,
including the currentlyselected picture.
• To select the number of
frames to be displayed (p.118).
3
In the index-display setting,
rapidly press the arrow pad to
display the next set of frames.
: The monitor displays the
previous set of frames
starting with the frame
immediately preceding the
one appearing in the upper
left corner.
: The monitor displays the
following set of frames
starting with the frame
immediately after the one
appearing in the lower right
corner.
1
Monitor
120
121
122
123
124
125
126
127
128
39
3
Playing Images Back
1
Displaying All Frames (continued)
2 5
4
Press the arrow pad to select
a frame displayed on-screen.
: To select the frame to the
left.
: To select the frame to the
right.
5
Pull the zoom lever toward
(Telephoto).
• The monitor displays the fullsized version of the selected
image (p.38).
• To display the images again in
the index-display setting,
repeat from step 2.
3 4
1
HELP
• Pressing the buttons on the arrow pad for 1 second or more causes
different functions to activate (p. 44, 45).
40
Checking the Focus by
Enlarging a Selected Picture
(Displaying Close-ups)
This function enlarges a selected image.
However, if the image is marked with the movie mark (
enlarged for display.
5 3
2 4
With the lens barrier closed,
press the monitor button (
).
• The camera turns on in
playback mode. The monitor
displays the last image taken.
2
Select the picture that you
want to display by pressing
the arrow pad (p.38~40).
3
Pull the zoom lever toward
(Telephoto).
• Each time you pull the zoom
lever toward
(Telephoto)
the image enlarges as follows:
1x 1.5x 2x 2.5x 3x
4
Press the arrow pad in one of
the four directions to select
the area you want to enlarge.
• The playback frame area
moves left, right, up and down
in the desired direction.
5
Push the zoom lever toward
(Wide angle).
• The selected image returns to
its original size.
• To display a different image,
return the enlargement scale
to the original size.
x1.5
41
3
Playing Images Back
1
1
Monitor
), it cannot be
Connecting to a Television Set
Images stored on the camera can be displayed on a larger screen by
connecting the camera to a television using the included video cable.
2
1
Before connecting, make sure
the camera and television
power are off, and that the
camera lens barrier is closed.
2
Connect the video cable by
inserting one end into the
video OUT jack on the camera
and the other end into the
video IN jack on the
television.
3
Turn on the television, and set
to “video input.”
• Refer to your television
instructions manual for further
information.
4
Press the monitor button (
on the camera.
• Power turns on in playback
mode, and the last image
taken is displayed on the
television screen.
5
Select the image that you
want to display by pressing
the arrow pad (p.38~40).
5
4
3
42
)
HELP
• The camera monitor does not illuminate when the video cable is connected.
• Depending on how your television is adjusted, the picture may appear offcenter on the television screen.
• Your television may produce a black frame around the picture, which may
be undesirable as it also appears if the image is printed using a
conventional video printer.
• Refer to your TV/VCR instruction manual for information about displaying
video images.
• Images shown on screen can be saved to a videotape.
NOTE
• When performing this function, we recommend you use the AC adapter
(sold separately) as the power source for the camera.
• Pictures that have been taken with the camera held vertically can be
rotated for easier viewing (p.112).
3
Playing Images Back
43
To Avoid Accidentally Erasing
Pictures You Want to Keep
(Image Protection)
Use the protection feature to safeguard images you want to keep.
Protected pictures will not be erased by One-Frame Erase (p.45) or by
All Frames Erase (p.115).
The protection setting remains even after the power is turned off.
2 3
1
With the lens barrier closed,
press the monitor button (
).
• The camera turns on in
playback mode. The monitor
displays the last image taken.
2
Select the picture that you
want to protect by pressing
the arrow pad.
• You may also use the
protection feature during oneframe display (p.38) and in the
index-display setting (p.39, 40).
3
Press (
) on the arrow
pad for at least 1 second.
• Protection is engaged for the
selected picture, and the protect
mark appears in the upper right
corner of the picture.
1
Write-protect mark
Monitor
To cancel the image
protection
Press on the arrow pad for at
least 1 second again, in step 3.
The
mark on the monitor
disappears.
CAUTION
• Protected pictures are erased when the card is reformatted with the card
format function.
HELP
• Protection does not work when a write-protect seal is affixed to the card.
44
One-Frame Erase
Erasing unneeded pictures frees storage space for further picturetaking. Storage space increases by an amount equivalent to that taken
by the pictures that have been erased.
One-frame erase cannot be used when a picture is protected, or a writeprotect seal is on the card. To erase these pictures, you must cancel the
protection feature or remove the write-protect seal from the card (The writeprotect seal may not be reused after it has been removed from the card).
2 3
2
Select the picture you want to
erase by pressing the arrow
pad.
• You may also use one-frame
erase in either one-frame
display (p.38) or in the indexdisplay setting (p.39, 40).
3
Press ( ) on the arrow
pad for at least 1 second.
• The one-frame erase screen is
displayed.
• To cancel one-frame erase,
press .
4
Select “YES” by pressing or
, then press the OK button.
• The camera beeps once and
erases the picture.
1
Monitor
YES
NO
CANCEL
GO OK
With the lens barrier closed,
press the monitor button
(
).
• The camera turns on in
playback mode. The most
recent frame is displayed on
the monitor.
To erase all pictures
You may also erase all pictures stored on the card at once (p.115).
45
3
Playing Images Back
4
1
One-Frame Erase (continued)
CAUTION
• Never open the card cover, eject the card, remove the batteries, or
disconnect the AC adapter while erasing pictures. Doing so may destroy
the image data on the card.
HELP
• It may take longer to erase when the “print reserve” function (p.109) has
been activated on the card.
• The number of storable pictures may not increase even after you erase one
image from the card.
46
Possible Printing Methods
Images stored on SmartMedia cards can be printed in the following ways.
Using DPOF-Compatible Printers or Photo Labs
Setting a print order for images you want printed will allow these images
to be printed, without needing to specify them, when the SmartMedia
card is inserted into a DPOF-compatible printer or taken to a DPOFequipped photo printing lab. However, it is not possible to set an order
for the number of prints to be made.
See Chapter 6, “Printing Using DPOF-Compatible Printers or Photo
Labs”, for more details (p.109).
About Digital Print Order Format (DPOF)
Using Dedicated Printers (Sold Separately)
The P-400, P-200 and P-330N(E) Olympus printers are designed
specifically for Olympus digital cameras. Just load the card into the
printer, then use the printer’s buttons to select and manage printing.
Refer to the individual printer’s user’s manual for more detailed
information.
Using Personal Computer Printers
Images can be printed by transferring them to a personal computer and
using the computer’s image printing software to print them on
connected printers.
See Chapter 7 for details about ways to print images using personal
computer printers.
Please consult the user manuals for the specific personal computer and
printer you are using.
47
3
Playing Images Back
Digital Print Order Format (DPOF) is a digital camera function that
records automatic printing information with digital images. It allows
you to record printing information – such as which images to print
and whether to include time and date information – on SmartMedia
cards containing digital images. The images can then be easily
printed by photo labs offering DPOF services or on DPOF-compatible
home printers.
Possible Printing Methods (continued)
CAUTION
• The P-400/P-330N(E)/P-330 cannot be connected to the camera’s USB
connector.
• While it is possible to print from the camera through the video OUT jack,
printer performance will be suboptimal.
HELP
• This camera cannot change automatic print information recorded by other
DPOF-compatible devices. Please change the automatic print information
with the DPOF-compatible device that recorded the information.
• Automatic print information recorded on SmartMedia cards by other DPOFcompatible devices may be cancelled if new print orders are recorded onto
the card using this camera.
• Some printers and photo labs may not be able to include date and time
information on prints.
48
4
Taking Better Pictures
The arrow pad allows easy setting of focus,
flash type, and a number of other convenient
functions. This chapter explains functions that
will be useful to remember in helping you to
take better pictures. Once you’ve taken a few
pictures and familiarized yourself with the
contents of Chapter 2, browse the following
sections to find more information that will help
you master the camera’s various features and
functions.
49
Points to Remember
Viewfinder Discrepancies Depending on Distance
The image as seen through the viewfinder does not always match up
with the final picture depending on the distance between the subject
and the camera.
Viewfinder
Picture frame
Close-up working
range
When shooting subjects 1.5m (59″) to ∞, the viewfinder picture frame
shows the area that can be shot. However, the picture area will move
lower in the viewfinder as you get closer to the subject. Zooming in
(pulling the zoom lever towards T) makes this discrepancy even larger.
When shooting close-ups, you can determine the exact picture area by
viewing the monitor. However, it is more difficult to hold the camera
steady using the monitor, which may result in blurry images. The
batteries will also drain more quickly.
NOTE
• Use the macro function when shooting particularly close objects (from
around 20 to 80cm) (p.55).
Subjects Difficult to Get in Focus
In most cases you need not worry about focusing a shot, as the
autofocus feature takes care of most situations.
However, focusing is more difficult under conditions 1 to 3 listed on the
next page. In such cases, the green lamp next to the viewfinder will
blink to indicate the shot is out of focus. Additionally, in conditions 4 and
5, a picture may still be out of focus even though the green lamp lights
up to indicate that the subject is focused correctly. Under condition 6, it
will be the background, not the subject, that is in focus.
50
In these situations, first focus your camera on an object that is the same
distance from the camera as your subject, then aim back at the subject
to take the picture (focus lock: p.52). Alternatively, set the focus on ∞
(quick focus: p.53) before taking the shot.
When setting up shots that do not contain vertical lines like as shown in
3, first hold the camera vertically and lock the focus on the subject.
Then shift the camera back to the horizontal position and take the
picture.
1 Subjects with low contrast
4 Subjects of varying distances
4
Taking Better Pictures
2 Subjects that appear
5 Fast-moving subjects
excessively bright in the center
3 Subjects with no vertical lines 6 Subjects not within the AF
target mark
AF target mark
51
When Not Able to Focus on a
Subject While Shooting
Determine the Position of the Subject After Focusing
Focus Lock
If your main subject is not centered inside the AF target mark, use the
focus lock feature explained below:
Viewfinder
Shutter
button
1
Open the lens barrier.
• The camera turns on in
shooting mode.
2
Look through the viewfinder
and position the AF target
mark on the subject you wish
to focus on.
3
Half-press the shutter button
so the green lamp next to the
viewfinder lights up.
• The subject is now in focus
and exposure is set.
4
Keep the shutter button halfpressed while you reposition
your subject(s) within the
picture frame. Then full-press
the shutter button.
Half-press
AF target mark
Full-press
CAUTION
• If the flash is pressed down while taking a picture, it does not fire and could
cause the image to be dark.
52
Fixing a Far-Distance Focus
Quick Focus
The lens can be set for far-distance focus (∞). Use this function when it
is difficult to focus on a subject in the background.
Quick focus working range
Beyond flash working range
T
W
0.85m 1.3m 1.8m
(2.8ft) (4.3ft) (5.9ft)
Monitor
HQ
6.7m
(22ft)
4
Taking Better Pictures
2 3 4
4m
(13ft)
1
Open the lens barrier.
• The camera turns on in
shooting mode.
2
Press on the arrow pad.
• The monitor will illuminate.
3
Press on the arrow pad
repeatedly until the ∞ mark is
displayed on the monitor.
4
Take the picture.
• Quick focus is automatically
cancelled after the picture is
taken.
∞ mark
53
When Not Able to Focus on a Subject While Shooting (continued)
To cancel quick focus
Press on the arrow pad several times until the ∞ mark or macro mark
(
) disappears.
Quick focus can also be cancelled simply by turning
the camera off
To retain the quick focus even after the power is turned off, set the clear
settings function in the shooting menu to OFF (p.98).
However, even when the clear settings function is set to “OFF”, quick
focus will be cancelled when a picture is taken.
54
Taking Close-up Pictures (Macro Mode)
Use the macro function to shoot subjects at very close distances.When
using the macro function, maintain a distance of about 20 and 80cm (8″
and 31″). Pictures taken outside this range are likely to be out of focus
or poorly exposed.
Minimum distance: approximately 20cm (8″)
Telephoto: If you wish to further enlarge the image, push the zoom
lever toward T (telephoto).
Monitor is filled by a 8cm (3″) × 6cm (2″) subject.
Wide-angle:If you wish to make the image smaller, push the zoom lever
toward W (wide).
Monitor is filled by a 17cm (6″) × 22cm (8″) subject.
3 4 5
Open the lens barrier.
• The camera turns on in
shooting mode.
2
Press the monitor button (
• The monitor will illuminate.
3
Press (
pad.
4
Press on the arrow pad
repeatedly until the macro
mark is displayed on the
monitor.
5
Confirm the position of the
subject with the monitor and
shoot.
Monitor
HQ
).
) on the arrow
Macro mark
55
Taking Better Pictures
2
4
1
Taking Close-up Pictures (continued)
To cancel the macro mode
Press on the arrow pad several times until the macro mark or ∞ mark
disappears.
The macro mode can also be cancelled simply by
turning the camera off
To make the camera retain the macro mode even after the power is
turned off, set the clear settings function in the shooting menu to OFF
(p.98).
HELP
• Dark shadows may appear when using the flash.
NOTE
• In macro mode, the picture area will not be entirely visible within the frame
of the viewfinder (p.50). Be sure to use the monitor (instead of the
viewfinder) to confirm the picture area before shooting (p.28).
• After taking a picture, check the photographed image by displaying it on the
monitor or such.
56
Taking Sequential Shots
Using the sequence function, the camera will continue taking a series of
up to 45 still shots (When the record mode is set to SQ) for as long as
the shutter button remains pressed.
This function is useful for shooting fast-moving objects, since among the
many shots there are likely to be some that show the subject or action
as you wish.
2
3 4
Open the lens barrier.
• The camera turns on in
shooting mode.
2
Press on the arrow pad.
• The monitor will illuminate and
the sequence mark will be
displayed.
• When the sequence mark is
not displayed, press button
repeatedly until it is displayed.
3
Position the subject in the
picture frame, then press the
shutter button and continue
to hold it down.
• The camera will begin
sequential shooting.
• The flash will not activate.
4
Release the shutter button.
• The camera will stop
sequential shooting.
• When the record mode is set
to SQ, a maximum of 45
pictures can be taken
sequentially.
• When 45 pictures are shot, or
the remaining picture count
reaches 0, sequential shooting
automatically stops.
HQ
Sequence mark
Up to 45 pictures
57
4
Taking Better Pictures
Monitor
1
Taking Sequential Shots (continued)
To cancel sequential shooting
To cancel sequential shooting, press on the arrow pad several times
until the sequence mark, selftimer mark (
), and movie mark (
)
disappear.
Sequential shooting can also be cancelled simply by
turning the camera off
To make the camera retain sequential shooting even after the power is
turned off, set the clear settings function in the shooting menu to OFF
(p.98).
Record modes for sequential shooting
The record mode may be changed when using the sequence function.
If the record mode is TIFF, it automatically switches to HQ when the
sequence function is being used. The record mode will return to the
previous setting when the camera is switched back to the previous
shooting mode setting.
However, if the record mode is manually changed while sequential
shooting is in progress, it will remain in that mode even when the camera
is switched back to the previous shooting mode setting (p.87).
CAUTION
• To avoid losing image data, never open the card cover, remove the card,
remove the batteries or disconnect the AC adapter while the green lamp is
blinking.
HELP
• The number of sequential pictures that can be taken varies depending on
the record mode and the number of storable pictures on the card.
• To avoid the effects of hand-shaking, shutter speed is limited to a maximum
slowest speed of 1/30 of a second. For this reason, darker subjects may
appear in the resulting pictures looking darker than they actually are.
• The camera takes a short while after pictures have been taken to record
the image data onto the SmartMedia card (the green lamp will blink).
58
Using the Selftimer
For when the photographer wants to be in the picture.
Using a tripod is highly recommended.
Selftimer lamp
1
Secure the camera on the
tripod.
2
Open the lens barrier.
• The camera turns on in
shooting mode.
3
Press ( ) on the arrow
pad.
• The monitor will illuminate.
4
Press on the arrow pad
repeatedly until the selftimer
mark is displayed on the
monitor.
5
Set up your shot, then
full-press the shutter button.
• The selftimer lamp lights up for
ten seconds, then blinks for
two seconds before the picture
is taken.
• The selftimer automatically
goes off after the picture is
taken.
2
Monitor
HQ
Selftimer mark
4
To cancel the selftimer
To cancel the selftimer function
after step 3, press on the arrow
pad so that the selftimer mark
disappears. Or, the selftimer can
also be cancelled simply by turning
the camera off.
While the selftimer lamp is
illuminated, it can be canceled by
pressing the OK button.
59
Taking Better Pictures
3 4 5
Taking Movie Pictures
In addition to still pictures, this camera has the ability to take movie (15
frames/sec.). Take advantage of this feature to capture your subjects in
motion.
2 3
4 5
Monitor
(When the movie shooting
automatically stops)
No flash
mark
HQ
Remaining
second count
Memory gauge
60
1
Open the lens barrier.
• The camera turns on in
shooting mode.
2
Press on the arrow pad.
• The monitor will illuminate.
3
Press on the arrow pad
repeatedly until the
(movie) mark is
displayed on the monitor.
• The subject is displayed on
the monitor.
• Also, the no flash mark (
)
appears on the monitor (p.67).
4
Position the subject in the
picture frame, then press the
shutter button all the way
down.
• The bottom of the memory
gauge on the monitor will
illuminate and the remaining
second count will begin
decreasing.
• The flash will not activate.
Movie mark
Memory gauge
The gauge level rises as you
continue to shoot. If you
continue shooting for the
maximum continuous movie
length (see chart on the next
page), the level reaches the top
and the camera stops shooting.
Remaining second count
Indicates the time remaining
before the camera must stop
shooting. Shooting stops
automatically if the count drops
to 0.
5
Green lamp
Full-press the shutter button
again.
• The camera will stop movie
shooting and the green lamp
beside the viewfinder will blink.
• Shooting can continue when
the green lamp beside the
viewfinder goes out.
You can check a movie picture
you have shot by playing it back
on the monitor (p.107).
61
4
Taking Better Pictures
Viewfinder
Movie picture record mode
For movie pictures, there are two modes with different image sizes and
resolutions.
Movie picture record modes are set with the still picture record mode
settings. To change them, first cancel “movie pictures” and enter the still
picture record mode to set the desired resolution (p.87).
Items
on Menu
Record
Mode
Size
(no. of pixels)
Continuous Movie
length
HQ
320 × 240
approx. 16 sec.
SQ
160 × 120
approx. 70 sec.
TIFF
SHQ
HQ
SQ
* The total length of movies that can be stored on a card varies according to
the still-image record mode, as shown in the chart on page 21.
Movie shooting will be canceled when the power is
turned off (C-200 ZOOM only)
The continueus movie length may be different for C-200 ZOOM models
sold in the PAL color system regions if movie pictures are shot with the
video cable connected.
62
Taking Movie Pictures (continued)
To cancel movie shooting
To cancel movie shooting, press on the arrow pad several times until
the movie mark, sequence mark (
), and selftimer mark (
)
disappear.
Movie shooting will be canceled when the power is
turned off
To make the camera retain movie shooting even after the power is
turned off, set the clear settings function in the shooting menu to OFF
(p.98).
HELP
CAUTION
• To prevent destroying the image data, never open the card cover, remove
the card, remove the batteries, or disconnect the AC adapter while the
green lamp is blinking.
63
4
Taking Better Pictures
• Movie picture quality may be grainier than still shots.
• The scope of the shot may actually be slightly narrower than it appears in
the initial composition.
• A strip of light may appear at the top and bottom of the monitor. This does
not indicate a malfunction.
• You can adjust the zoom while shooting but zooming will be slower.
Using the Flash
Switching Between Flash Modes
Select the appropriate flash mode according to the shooting conditions.
Note that the flash will not operate when shooting sequential shots
(p.57), shooting movie pictures (p.60) and taking panoramic shots (p.82).
Also, the working range of the flash changes when you operate the
zoom lever (p.30).
The camera is automatically set to auto-flash mode when the power is
turned on. Changing the flash mode to other settings will cause the
flash mode mark to be displayed on the monitor.
23
1
Open the lens barrier.
• The camera turns on in
shooting mode.
2
Press ( ) on the arrow
pad.
• The monitor will illuminate and
one of the flash mode marks
shown in the table below will
be displayed.
• Each time you press the
flash mode will change to the
next mode shown in the table
below.
3
Press on the arrow pad
several times until the symbol
for the flash mode you want
to use is displayed on the
monitor.
Monitor
HQ
Flash mode mark
(Displayed except
auto-flash mode)
64
See the table on the following page
for a description of the various
possible flash modes.
Flash mode
➔Auto-flash
d
(no Mark)
Red-eye reduction
d
Fill-in flash
d
Function/purpose:
Automatically fires in lowlight and backlit
conditions (p.66).
Significantly reduces the red-eye phenomenon
(i.e. when the flash causes a subject’s eyes to
appear red in the picture) (p.66).
Fires regardless of available light (p.67).
No flash
d
Flash does not fire regardless of the lighting
conditions. Good for taking photos where flash
is prohibited (p.67).
Night scenes
d
Taking photos at night using the flash and
slow shutter speeds (p.68).
Night scenes + Red-eye
reduction
Taking photos of people at night using flash
and slow shutter speeds (p.68).
4
To make the camera retain the selected flash mode even after the
power is turned off, set the clear settings function in the shooting menu
to OFF (p.98).
HELP
• If the orange lamp next to the viewfinder is blinking, it means that the flash
is being recharged and it is not possible to shoot. Take your finger off the
shutter button and wait for the orange lamp to go out before shooting
again.
• When using the flash in macro mode (p.55), a portion of the picture may be
cropped, the contrast may be too extreme. After shooting, be sure to check
such pictures on the monitor.
CAUTION
• If the flash is pressed down while taking a picture, it does not fire and could
cause the image to be dark.
65
Taking Better Pictures
The flash function will automatically return to
auto-flash mode when the power is turned off.
Auto-Flash
In auto-flash mode, the flash will automatically fire in lowlight and backlit
conditions.
Viewfinder
AF target mark
To fire the flash in a backlit shot, position the subject inside the AF
target mark.
Red-eye Reduction
When shooting people, eyes may appear red. Use the red-eye
reduction flash mode to compensate for this phenomenon.
Monitor
HQ
Eyes appear red.
Red-eye reduction flash mark
In the red-eye reduction flash mode, the camera will emit a series of rapid
pre-flashes before the actual flash fires. This makes the subject’s pupils
contract, significantly reducing the red-eye effect. Be sure to hold the camera
firmly until the shutter releases, which takes approximately one second.
Red-eye reduction performance may be limited when:
•
•
•
•
The subject is not looking directly at the flash.
The subject does not watch the pre-flashes.
The subject is too far from the camera.
The subject’s eyes do not respond to the pre-flashes due to individual
characteristics.
66
Using the Flash (continued)
Fill-in Flash
Forces the flash to fire on every shot.
Monitor
HQ
Fill-in flash mark
No Flash
Use this mode in situations where flash photography is prohibited, such
as art museums and live stage performances, or when taking pictures
in twilight or of night scenes.
Monitor
HQ
No flash mark
The shutter speed automatically slows down to 1/2 second in low-light
situations. The use of a tripod is recommended to prevent blurriness
caused by camera movement.
67
4
Taking Better Pictures
Using the fill-in flash mode, the flash fires regardless of available light.
This feature can be used to light up a subject’s face, when shaded by a
tree for example, or to correct uneven lighting conditions caused by
backlighting, fluorescent lighting, etc. This mode may not have the
desired effect in excessively bright light.
Using the Flash (continued)
Night Scenes
For taking pictures at night, using flash and slow shutter speeds.
Monitor
HQ
Night scene flash mark
This setting fires the flash to expose the foreground while the shutter
stays open to expose the details in the background.
Night Scenes + Red-eye Reduction
The combination of these two modes works best for taking pictures of
people at night.
Monitor
yyy
;;;
;;;
yyy
yy
;;
;;;
yyy
HQ
Red-eye reduction flash mark
Night scene flash mark
The night scene flash and red-eye reduction flash (p.66) both operate at
the same time.
The shutter speed automatically slows down to 1/2 second in low-light
conditions. The use of a tripod is recommended to prevent blurriness
caused by camera movement.
The flash will fire automatically when necessary.
68
5
Advanced Shooting Techniques
Useful shooting functions are all made
available within the shooting menu.
After you’ve familiarized yourself with the use of
the shooting menu, consult the following pages
describing each of the various functions.
69
Use of the Shooting Menu
Functions of the Shooting Menu
The shooting menu allows you to adjust image qualities, change the
record mode, and use the various picture-taking functions.
The functions contained in the shooting menu are divided into 4 groups.
See “Using the Shooting Menu” (p.72) for information on how to
operate the shooting menu.
Group
Item
Spot metering mode
Purpose
Page
Exposure is measured at only the center of
the subject.
74
Adjusting image brightness.
➞
CAM
(Shooting)
➞
PIC
(Image)
Exposure compensation
ISO
ISO sensitivity
DIGITAL ZOOM
Digital zoom
Allows up to 9x zoom shooting.
PANORAMA
Panorama shooting
Allows panoramic shots to be taken.
WB
White balance
Canceling automatic color balance
adjustment, and adjusting the setting to
suit daylight, overcast, incandescent or
fluorescent lighting conditions.
Selecting picture size and image
resolution, as well as increasing or
decreasing the number of storable pictures.
Record mode
80
82
85
87
90
Contrast
91
CARD SETUP
Card setup
Formats (initializes) SmartMedia cards.
Used only when necessary.
116
REC VIEW
Rec view
Displays the picture just taken even while it
is still being written to the SmartMedia card.
93
➞
Selecting how files are named.
File naming
95
➞
Clear settings
Retaining all settings in memory even after
the power is turned off.
98
Beep sound
Setting the camera warning beep sound on
or off.
99
Allows the date and time to be set.
Date & time
Monitor adjustment
70
78
Allows a harder contrast (more distinction
between lighter and darker areas) for
pictures to be selected.
FILE
SET
(Settings)
76
Sharpens the distinctness and strength of
the contours of the subject.
Sharpness
CARD
(Card)
By setting the ISO sensitivity, you can
adjust the camera’s sensitivity to light.
Allows the brightness of the monitor to be
adjusted.
12
100
Settings retained after power is turned off
After the power is turned off, some user settings will be retained in the
camera’s memory, but others will return to their factory defaults.
The chart below shows the available settings from this menu:
Group
Shooting
Item
Possible Settings
Memory
(ESP) SPOT
Exposure
compensation
+2.0 +1.5 +1.0 +0.5 (0) –0.5 –1.0 –1.5 –2.0
ISO sensitivity
(AUTO) 100 200 400
Digital zoom
(OFF) ON
White balance
(AUTO)
Record mode
TIFF SHQ (HQ) SQ
Sharpness
HARD (NORMAL) SOFT
Contrast
HIGH (NORMAL) LOW
Rec view
(OFF) ON
File naming
(NAME RESET) AUTO FILE
Clear settings
(RESET) HOLD
Beep sound
(ON) OFF
Date & time
(January 1 2001 00:00)
Monitor
adjustment
(Set to the midpoint of the adjustment bar)
Image
Settings
* The default settings are indicated in parentheses.
The icons in the “Memory” column are designated as follows:
: The setting remains until it is changed.
: Turning the power off normally returns the camera’s settings to their
default values. To allow the settings for a particular setting group to be
maintained even when the camera is turned off, set the clear settings
function for that group to OFF (p.98). However, removing the power
supply from the camera will return the settings to their default values
even if the clear settings function is set to OFF.
CAUTION
• If the batteries are removed and left out of the camera, or if the batteries
run down, the settings will return to their defaults.
71
5
Advanced Shooting Techniques
Spot metering
Using the Shooting Menu
3 4 5 6 7
1
Slide the lens barrier open
until it clicks.
• This turns power on in
shooting mode.
2
Press the menu button (
).
• The shooting menu will be
displayed on the monitor.
3
Press or on the arrow pad
to change the settings group
(Shooting/Image/Card/Settings).
• The selected item is
highlighted in green.
(In the example at left, “Image”
group is selected.)
• The current setting for each
item is indicated in [ ] to the
right of each item name.
4
Press on the arrow pad.
• One of the items is highlighted
in green.
5
Press or on the arrow pad
to move to the desired item.
• The selected item is
highlighted in green.
(In the example at left, “
”
(Sharpness) is selected.)
6
Press on the arrow pad.
• The possible settings for that
item are displayed.
2 8 9
Group
3
CAM
PIC
WB
CARD
AUTO
HQ
NORMAL
NORMAL
[
[
[
[
SET
EXIT OK
]
]
]
]
SET
Items for selection
5
PIC
WB
CANCEL
72
AUTO
HQ
[ NORMAL
[ NORMAL
[
[
SET
]
]
]
]
7
HARD
NORMAL
SOFT
CANCEL
SET
OK
Press or on the arrow
pad to highlight the desired
setting.
• The selected item is
highlighted in green.
(The example at left shows
Sharpness set to “HARD”.)
8
Press the OK button.
• The setting is changed and
the menu returns to the first
screen.
9
Confirm that the new setting
is the one you wanted, then
press the OK button twice.
• The new setting is retained in
the memory and the menu
goes off.
9
PIC
WB
AUTO
HQ
[
HARD
[ NORMAL
[
[
CANCEL
]
]
]
]
SET
To cancel a setting change
Press on the arrow pad instead of the OK button in step 8.
Temporarily changing a setting to shoot pictures
To change the setting temporarily while shooting, follow the procedure
below.
3
3
2
1
2
Follow steps 1 through 7.
3
Press on the arrow pad
twice, then press the OK
button.
• The changed setting returns to
the default setting and the
shooting menu turns off.
Take the picture with the
setting displayed in the menu.
• The picture is taken with the
setting currently selected in
the menu.
73
5
Advanced Shooting Techniques
7
Spot Metering
(Placing Exposure Priority
on the Center of the Subject)
If a shot is backlit, ordinary photometric settings (digital ESP metering)
will make the subject appear too dark. To compensate for this, switch
the camera over to the spot metering mode in the shooting menu. This
feature is used to obtain the right exposure regardless of backlighting.
For operating instructions see “Using the Shooting Menu” (p.72).
Shooting Group Menu Items:
CAM
ESP ]
0.0 ]
ISO
AUTO ]
DIGITAL ZOOM [ OFF ]
PANORAMA
[
[
[
CANCEL
Press to highlight “
setting screen will be
displayed.
”. The
SET
Settings:
ESP (Digital ESP metering):
This is the default setting when the
power is turned on.
Exposure will be calculated based on
an average of the light available in
the image area. However, the
calculation will be biased to the
center of the image area.
ESP
SPOT
CANCEL
SET
OK
Monitor
SPOT (Spot metering):
Adjust the light metering at the center
only. The center will yield the best
exposure results in this mode.
HQ
Switching to spot metering
makes the spot metering
mark appear.
74
Shooting in the spot metering mode
Viewfinder
Look through the viewfinder
and position your subject in
the center of the AF target
mark.
2
Half-press the shutter button
so the green lamp next to the
viewfinder lights up.
• This sets both the focus and
the exposure.
3
If you would like to make any
changes within the
composition, keep the shutter
button half-pressed and
recompose the shot. When
satisfied, full-press the
shutter button to take the
picture.
Settings return to the default when the power is turned off.
When the power is turned off the camera will return to the ESP mode.
To make the camera retain its settings even after the power is turned
off, set the clear settings function in the settings group to OFF (p.98).
75
5
Advanced Shooting Techniques
1
Correcting Image Brightness
(Exposure Compensation)
Exposure is adjusted automatically whenever a picture is taken. The
camera can, however, be set for shorter or longer exposure in five
increments from –2.0 to +2.0 (increased/decreased by 0.5).
If automatic exposure is used, subjects containing a lot of white will
appear darker, while subjects containing a lot of black will appear
lighter. Adjusting the exposure up (+) for white subjects or down (–) for
black subjects will make them appear lighter or darker, respectively, in
the resulting picture.
For operating instructions see “Using the Shooting Menu” (p.72).
Shooting Group Menu Items:
CAM
ESP ]
0.0 ]
ISO
AUTO ]
DIGITAL ZOOM [ OFF ]
PANORAMA
[
[
[
CANCEL
Press to highlight “
”.
The setting screen will be
displayed.
SET
Settings:
+2.0 :
+1.5
+1.0
+0.5
0
When the background +2.0
and surroundings are
bright but the subject
is dark.
↑
CANCEL
SET
OK ±0
: The preset value
when the power is
turned on.
±0
↓
–0.5 :
–1.0
–1.5
–2.0
76
When the background –2.0
and surroundings are
dark and the subject
is bright, but the
details of the subject
are indistinct.
Monitor
+1.5
HQ
The exposure compensation
value appears.
(±0 does not appear.)
Settings return to the default when the power is turned off.
When the power is turned off, exposure compensation returns to ± 0.
To make the camera retain its settings even after the power is turned
off, set the clear settings function in the settings group to OFF (p.98).
• When you change the setting, the brightness of the view on the monitor will
also change. In some cases you may find that the monitor image becomes
difficult to read. After taking the image, you may want to replay it and check
the results.
• The exposure compensation function may have limited performance when
shooting with the flash.
• If the area around the subject is too bright or too dark, it will not be fully
corrected by exposure compensation.
77
Advanced Shooting Techniques
HELP
5
ISO Light Sensitivity Level
(Setting ISO Sensitivity)
This camera can automatically determine the ISO sensitivity level based
on the brightness of the subject.
However, for certain kinds of pictures it is better to set the ISO
sensitivity level manually.
For operating instructions see “Using the Shooting Menu” (p.72).
Shooting Group Menu Items:
CAM
ESP ]
0.0 ]
ISO
AUTO ]
DIGITAL ZOOM [ OFF ]
PANORAMA
[
[
[
CANCEL
Press to highlight “ISO”.
The setting screen will be
displayed.
SET
Settings:
ISO
AUTO
100
200
400
This is the default setting when the
AUTO power is turned on.
100
200
CANCEL
SET
OK
400
Standard: This setting is best for bright
outdoor conditions. Fast moving subjects
may be blurred due to the slower shutter
speed that the camera may set.
Little higher sensitivity: This setting is
best for overcast outdoor conditions.
Good results with moderately fast moving
subject.
High sensitivity: This setting is ideal for
fast-moving subjects and low light
conditions, but the resulting images will
be grainier.
* This ISO sensitivity scale is based on conventional camera film speeds, and
therefore the values are for reference only.
* Raising the ISO sensitivity by selecting a higher ISO value, lowers the picture
quality.
* To determine if the selected setting is the best choice, always check the recorded
image by playing it back on the monitor.
* When setting the ISO level to low, use a tripod and the selftimer to avoid
blurriness due to slow shutter speeds and excess movement of the camera
(p.59).
78
Monitor
HQ
ISO100
Switching from “AUTO” makes
the ISO sensitivity appear.
Settings return to the default when the power is turned off.
When the power is turned off, the camera will return to the “AUTO”
mode.
5
79
Advanced Shooting Techniques
To make the camera retain its settings even after the power is turned
off, set the clear settings function in the settings group to OFF (p.98).
Enlarging Shots Even Further
(Digital Zoom)
If you find that the camera’s normal optical zoom does not provide
enough magnification, use the digital zoom function to increase
magnification to up to 9x.
Within the digital zoom range (3x – 9x), image quality becomes grainy.
For operating instructions see “Using the Shooting Menu” (p.72).
Shooting Group Menu Items:
CAM
ESP ]
0.0 ]
ISO
AUTO ]
DIGITAL ZOOM [ OFF ]
PANORAMA
CANCEL
[
[
[
Press to highlight “DIGITAL
ZOOM”. The setting screen
will be displayed.
SET
Settings:
OFF (default setting at power on):
Optical zoom is set at 3x.
DIGITAL ZOOM
OFF
ON
CANCEL
SET
ON:
3x zoom uses optical zoom only, with
zooms 3x to 9x using digital zoom.
When set to “ON”, the monitor will
illuminate.
OK
Monitor
T
W
80
HQ
The digital zoom range (3x – 9x)
is displayed in red.
Displayed whenever the zoom
lever is being used.
Shooting Using Digital Zoom
2
1
1
Pull the zoom lever to “T”
(Telephoto).
2
Position the subject in the
frame using the monitor.
• 3x will remain in the display in
the viewfinder.
• Digital zoom funution can not
be used when the monitor
display is not illuminated. A
maximum telephoto zoom of
three times (optical zoom) is
possible.
Settings return to their default values when the camera
is turned off.
Turning the camera off also turns off the digital zoom function.
To make the camera retain its settings even after the power is turned
off, set the clear settings function in the settings group to OFF (p.98).
81
Advanced Shooting Techniques
The greater the magnification, the more susceptible images are to even
small amounts of movement, shaking, or vibration. The use of a tripod
and the selftimer is therefore recommended to help prevent blurring.
5
Creating Panoramic Pictures
(Panorama Function)
Using standard Olympus SmartMedia cards also allows you to shoot
panoramic shots easily. This function is not available with other brands
of cards.
With multiple images in which the edges of the subject can be
overlapped, it is possible to use CAMEDIA Master to join the images
into a single panoramic shot.
For operating instructions see “Using the Shooting Menu” (p.72).
Shooting Group Menu Items:
CAM
ESP ]
0.0 ]
AUTO ]
ISO
DIGITAL ZOOM [ OFF ]
PANORAMA
CANCEL
[
[
[
GO
Highlight “PANORAMA” and
press . The lower left screen
will be displayed.
Taking Panoramic shots
Select “PANORAMA”, then press . The direction in which the frames
will be linked and the boundaries indicating frame overlap for each frame
in the panorama will be displayed on the monitor.
Panorama shooting screen
Rectangle
Direction for connecting the
panorama.
82
1
Set the camera on a tripod.
2
Use the arrow pad to set the
panorama arrow to point toward
the next panorama stitch.
: Connect to the right. Take
the current shot, then
move camera to the right
for the next shot.
: Connect to the left.
: Connect up.
: Connect down.
• The arrow indicating direction
in which frames will overlap
changes to the selected
direction. If this direction is up
or down, the boundaries
indicating frame overlap will be
displayed on the top and
bottom edges of the monitor.
2
3 5
3
Take the shot.
• Remember the composition of
the shot, so that you can
correctly line up the next shot.
Pay special attention to the
portion of the image in the
rectangle along the next stitch
edge.
Position the camera for the
next shot, taking care to get
the correct amount of overlap.
• If you are connecting to the
right, for example, move the
camera so that the portion of
the image that was in the right
rectangle is now in the left
rectangle (See the diagram on
p.84).
5
Take the shot.
6
Steps 4 and 5 can be repeated
a maximum of nine times (for
a total of 10 shots).
7
Press the OK button.
• The display returns to the
shooting menu.
7 8
83
Advanced Shooting Techniques
4
5
Creating Panoramic Pictures (continued)
8
Press the OK button several
times until the shooting menu
goes off.
The camera itself is not equipped to create panoramic shots from
overlapping images. Panoramic shots must be pieced together using
CAMEDIA Master. Refer to the CAMEDIA Master online help for
information on how to create composite images.
If connecting to the right: Shift the camera so that the right edge of the
previous shot becomes the left edge of the next shot (If you shift the
camera in the wrong direction, you will not be able to stitch the panorama).
Turning the camera off also turns off the panorama
function.
If the camera is turned off while shooting using the panorama function,
it will return to normal shooting mode when it is turned on again.
NOTE
• The focus, exposure, and white balance are determined by the first shot in
the panorama. You can not change these settings for the subsequent shots.
• Be careful to position the camera correctly when taking your second and
subsequent shots (at Step 4 in the procedure above). Panorama stitching
will not be possible if you do not overlap consecutive images correctly
within the rectangles.
• The flash does not operate when the camera is in panorama mode.
• It is recommended that you use SQ recording mode when shooting large
panoramas. Use of HQ or SHQ mode may result in huge data sizes that
may lead to memory problems when you stitch the panorama at your
computer.
• The camera will not use TIFF recording mode when taking a panorama. If
you have set the recording mode to TIFF, the camera will use SHQ instead.
84
Adjusting the Color Tone
(White Balance)
This camera uses auto white balance to shoot the subject in a naturallooking tone.
However, it may sometimes be difficult to get satisfactory results
automatically due to lighting or weather conditions. In such cases,
change the white balance settings.
For operation instructions see “Using the Shooting Menu” (p.72).
Image Group Menu Items:
PIC
WB
AUTO
HQ
[ NORMAL
[ NORMAL
[
[
Press to highlight “WB”.
The setting screen will be
displayed.
5
SET
Settings:
WB
AUTO
This is the default setting when the power
AUTO is turned on. (You should leave this as
your default setting.)
Shooting outside in full daylight (sunny
weather)
Shooting outside in overcast daylight
(cloudy weather)
CANCEL
SET
OK
Shooting under tungsten lighting
Shooting under fluorescent lighting
* The default settings may be inappropriate
under special lighting conditions.
* To determine if the selected setting is the
best choice, always check the recorded
image by playing it back on the monitor.
85
Advanced Shooting Techniques
CANCEL
]
]
]
]
Adjusting the Tone (continued)
Monitor
HQ
Switching from “AUTO”
makes the white balance
mark appear.
Settings return to the default when the power is turned off.
When the power is turned off the camera will return to the “AUTO”
mode.
To make the camera retain its settings even after the power is turned
off, set the clear settings function in the settings group to OFF (p.98).
86
Picture Preferences: Quality vs.
Quantity (Record Mode)
The camera offers four different recording modes (resolutions) that can
be selected depending on whether you want better image quality or
more pictures. Selecting higher image resolutions will result in better
quality pictures, while selecting lower image resolutions will enable you
to store more images in the camera (p.21).
For operating instructions see “Using the Shooting Menu” (p.72).
Image Group Menu Items:
PIC
WB
AUTO
HQ
[ NORMAL
[ NORMAL
[
[
Press to highlight “
The setting screen
will be displayed.
”.
5
SET
Settings:
Quality Settings Compression
TIFF
SHQ
HQ
SQ
CANCEL
SET
OK
High
TIFF
None
c
SHQ
Low
d
HQ
High
Normal
SQ
Size (Number
of pixels)
1600 × 1200~
640 × 480
1600 × 1200
High/Low 1280 × 960~
640 × 480
* The higher the resolution, the longer the
recording time (time the green lamp is
illuminated) and the longer it takes to play
back the picture. Also, the higher the
resolution, the fewer the number of pictures
that can be stored.
The “TIFF” mode is very slow and can store
relatively few pictures.
* The initial setting is set to “HQ”.
87
Advanced Shooting Techniques
CANCEL
]
]
]
]
TIFF
1600x1200
1280x960
1024x768
640x480
CANCEL
SET
SQ
1280x960 [NORMAL]
[ HIGH ]
1024x768 [NORMAL]
[ HIGH ]
640x480 [NORMAL]
[ HIGH ]
OK
TIFF allows you to
change the number of
pixels.
CANCEL
SET
OK
SQ allows you to change the
number of pixels as well as
the compressibility.
Monitor
HQ
Record mode is
displayed
Tip on selecting a record mode
The record mode can be selected depending on how you will be using
the picture:
• If you want to send the picture attached to an e-mail, select SQ.
• If you want to display or print out the picture with a computer, select
HQ or SHQ.
• If you want to process the picture on your computer, select TIFF.
88
Picture Preferences: Quality vs. Quantity (continued)
Restrictions when using of high image quality settings
Selecting a high resolution setting increases the amount of time you
must wait after taking a shot (the green lamp continues to blink longer),
increases the length of playback time, and reduces the number of
pictures that you can store on a card. The number of pictures you can
store on a card is significantly reduced if you select TIFF.
Selecting a higher quality setting increases the amount of time required to
store each image on a card (the green lamp blinks longer). To prevent
losing the image, never open the card cover, remove the card, remove the
batteries, or disconnect the AC adapter while the green lamp is blinking.
If you select a high resolution setting with insufficient storage space on
the memory card, you will see the screen shown below and you will not
be able to store more images on the card. Select another recording
mode.
5
When the power is turned off it returns to “HQ.”
To make the camera retain its settings even after the power is turned
off, set the clear settings function in the settings group to OFF (p.98).
89
Advanced Shooting Techniques
When the power is turned off the settings return to their
default values.
Making Images Sharper (Sharpness)
To emphasize the subject’s outlines and contours and make them more
distinct and sharp, change the sharpness setting to “HARD”.
If you plan to process the images further on a personal computer, it is
better to change the sharpness setting to “SOFT”.
For operating instructions see “Using the Shooting Menu” (p.72).
Image Group Menu Items:
PIC
WB
CANCEL
AUTO
HQ
[ NORMAL
[ NORMAL
[
[
]
]
]
]
SET
Press to highlight “
”.
The setting screen will be
displayed.
Settings:
HARD:
Makes the image clearer and more
vivid. However, this may also make
the image appear too rough or harsh.
HARD
NORMAL
SOFT
NORMAL (the default setting when
the power is turned on):
For printing and general use.
CANCEL
SET
OK
SOFT:
For images to be processed on a
computer.
Settings return to the default when the power is turned off.
When the power is turned off, the sharpness setting returns to
“NORMAL”.
To make the camera retain its settings even after the power is turned
off, set the clear settings function in the settings group to OFF (p.98).
90
Shooting Pictures with Strong
Contrast (Contrast)
If you want to take pictures with strong contrast (more distinction
between lighter and darker areas), set the camera’s contrast to “HIGH”.
If you intend to process your pictures on a personal computer, it is
better to set the camera’s contrast to “LOW”.
For operating instructions see “Using the Shooting Menu” (p.72).
Image Group Menu Items:
PIC
WB
]
]
]
]
SET
Press to highlight “
”.
The setting screen will be
displayed.
5
Settings:
HIGH:
Gives pictures a stronger distinction
between light and dark areas.
However, high contrast may cause
bright areas to become too white or
dark areas to become too black.
HIGH
NORMAL
LOW
CANCEL
SET
OK
NORMAL (the default mode when
the power is turned on):
Most suitable for pictures that will be
printed or used for general viewing.
LOW:
The best setting for images to be
processed further using a personal
computer.
91
Advanced Shooting Techniques
CANCEL
AUTO
HQ
[ NORMAL
[ NORMAL
[
[
Shooting Pictures with Strong Contrast (continued)
Settings return to the default when the power is turned off.
Turning the camera off also resets the contrast to “NORMAL”.
To make the camera retain its settings even after the power is turned
off, set the clear settings function in the settings group to OFF (p.98).
92
Confirming Pictures Directly
After Shooting (Rec View)
If you want to confirm your pictures on the monitor immediately after
shooting, without using the playback mode set Rec View to “ON”. This
will cause the most recently taken picture to be displayed on the
monitor immediately.
The Rec View setting remains even after the camera has been turned
off.
For operating instructions see “Using the Shooting Menu” (p.72).
Image Group Menu Items:
REC VIEW [ OFF ]
FILE
[ NAME RESET ]
[ RESET ]
[ ON ]
5
SET
Settings:
OFF (default setting):
When the monitor is on, it displays
whatever subject is being seen through
the camera’s lens (except directly after
taking a picture, at which time the
monitor will go black momentarily).
REC VIEW
OFF
ON
CANCEL
SET
OK
ON:
The monitor will display the most
recently taken picture immediately after
it is shot. After a short time, the monitor
will resume displaying whatever subject
is being seen through the camera’s
lens.
If the monitor is turned off, it will turn on
after a picture is taken, display the most
recent picture for a short time, then go
off again.
93
Advanced Shooting Techniques
SET
CANCEL
Press to highlight “REC
VIEW”. The setting screen
will be displayed.
Confirming Pictures Directly After Shooting (continued)
Taking pictures during Rec View playback
Even when the monitor is displaying an image during Rec View, it is still
possible to shoot as long as the green lamp beside the viewfinder has
gone out.
94
Changing How File Names are
Assigned (File Naming)
Pictures are stored in the camera’s memory media as files. It is possible
to change the rules by which these files are named.
This setting remains in memory even after the power is turned off.
For operating instructions see “Using the Shooting Menu” (p.72).
File names and folder names
Image files and folders are named with letters and numbers as follows.
The camera automatically assigns file and folder numbers.
DCIM , Card folder
*** OLYMP , Subfolder
Pmdd****.jpg✽3 ,File
File No.(0001~9999)
Folder No.✽1 Month✽2
(100~999)
Day(01~31)
5
95
Advanced Shooting Techniques
✽1 When file numbering reaches 9999, the numbering returns to 0001 for the
next file, a new folder with a number increased by 1 is created, and
subsequent files are stored in this folder.
✽2 The months January through September are represented within file names
by the numbers 1 through 9. The months October, November and
December are represented with the letters A, B and C, respectively.
✽3 File names have a .jpg extension for ordinary still pictures, .tif for still
pictures recorded in the TIFF format, and .mov for movie pictures.
Settings Group Menu Items:
REC VIEW [ OFF ]
FILE
[ NAME RESET ]
[ RESET ]
[ ON ]
SET
CANCEL
Press to highlight “ FILE ”. The
setting screen will be displayed.
SET
Settings:
FILE
NAME RESET
AUTO FILE
CANCEL
SET
OK
NAME RESET (Initial setting)
When the card is changed, folder and file numbers restart from default
setting.
Example:
Folder No.102
File No.
0005
96
Folder No.100
Card change
File No.
0001
Changing How File Names are Assigned (continued)
AUTO FILE
Folder numbers do not change when changing to a new SmartMedia
card. When copying images onto a personal computer by folder, it is
possible to collect the copied images into the same folder using Copy
command.
(However, under the Mac OS, images in old folders will be erased, so
please use caution to avoid losing image files you want to keep.)
After inserting a new card, file numbers will start with the next number
after the last one recorded on the previous card.
Example:
Folder No.101
File No.
0005
Folder No.101
Card change
File No.
starts from
0006
HELP
• When the folder number has reached 999 or the file number has reached
9999, no further shooting will be possible even if there is free memory
space remaining on the card. Replace the card when this happens and you
will be able to continue shooting. Regardless of setting values, folder
numbers will start again with 100 and file numbers will start again with
0001.
NOTE
• If a different card containing previously stored files is inserted and the
number of files stored on it is greater than the number of files stored on the
previous card, subsequent pictures will be numbered in sequence following
the highest number on the newly inserted card.
• If folder or file names are changed on a personal computer, playback of the
images on the camera may become impossible.
97
5
Advanced Shooting Techniques
Even from multiple cards or when you have shot a great many pictures,
the files numbers will not overlap. However, when you have shot 9999
pictures, the counter returns to 0001.
To Retain Settings Even After
Power is Turned Off (Clear Settings)
If there is a under the memory column of the chart in “Functions of
the Shooting Menu” (p.65, p.103) section, the function in question
returns to the default setting when the power is turned off. Those items
marked with a can be changed and reset to retain the new setting in
memory even after the power is turned off (OFF).
Also settings can be set by the Playback Menu.
For operating instructions see “Using the Shooting Menu” (p.72).
Settings Group Menu Items:
REC VIEW [ OFF ]
FILE
[ NAME RESET ]
[ RESET ]
[ ON ]
SET
CANCEL
Press to highlight “
”.
The setting screen will be
displayed.
SET
Settings:
HOLD
RESET
CANCEL
SET
OK
HOLD:
All the settings for the menu items are
retained.
Settings that are retained include
those for flash, quick focus, macro
shooting, sequential shooting and
movie shooting.
However, removal of the camera’s
battery will cause all settings marked
with a in the “memory” column of
the charts on p.71, p.103 to return to
their defaults.
RESET (default setting):
Those items marked with hold the
last setting used.
98
Turning Off Warning Sounds
(Beep Sound)
When shooting weddings or for wildlife shots, the camera warning
sounds can be a liability. In such cases, the beep sound can be set to
“OFF”.
This setting remains in memory even after the power is turned off.
Also settings can be set by the Playback Menu.
For operating instructions see “Using the Shooting Menu” (p.72).
Settings Group Menu Items:
REC VIEW [ OFF ]
FILE
[ NAME RESET ]
[ RESET ]
[ ON ]
SET
5
Settings:
OFF:
The warning beep does not sound.
OFF
ON
CANCEL
ON:
Depending on the operation, the
warning beep will sound.
SET
OK
99
Advanced Shooting Techniques
SET
CANCEL
Press to highlight “
”.
The setting screen will be
displayed.
To Adjust Monitor Brightness
(Monitor Adjustment)
The brightness of the monitor can be adjusted.
This setting remains in the camera memory even after the power is
turned off.
The same function is also available in the playback mode.
For operating instructions see “Using the Shooting Menu” (p.72).
Settings Group Menu Items:
REC VIEW [ OFF ]
FILE
[ NAME RESET ]
[ RESET ]
[ ON ]
SET
CANCEL
Press to highlight “
”. The
setting screen will be displayed.
SET
Settings:
Adjusting on the + side
(Press the button): The image
gets brighter.
Adjusting on the – side
(Press the button): The image
gets darker.
CANCEL
SET
OK
When you are finished making the
setting, press the OK button to save
it.
Adjust by shifting the bar
up or down while looking
at the subject displayed
on the monitor.
100
6
Advanced Playback Techniques
The playback menu is used for playback
functions including playing movie pictures
stored in the camera and playing stored images
in order. After you’ve familiarized yourself with
use of the playback menu, consult the following
pages describing each of the various functions.
101
Use of the Playback Menu
Functions of the Playback Menu
The playback menu is used for playback functions including
automatically playing images in order and playing movie pictures stored
in the camera.
See “Using the Playback Menu” (p.104) for information on how to
operate the playback menu.
Group
Item
Automatic playback*
(Slide show)
Purpose
Allows images to be played back in order
automatically.
Allows movie pictures to be played back.
Movie playback**
➞
PLAY
(Playback)
➞
CARD
(Card)
106
107
Print reserve
Allows image printing to be set before
taking the SmartMedia card to a DPOFequipped photo lab.
109
ROTATE
Rotated playback
Allows individual images taken with the
camera on its side to be rotated so that
they are played back vertically.
112
INFO
Image information
display
Selects whether or not to display image
information set during shooting on the
monitor.
113
EDIT
Edit
Changes the image color or reduces the
image size.
114
Erase all frames
Allows all images that are not protected to
be erased.
115
Format
Formats (initializes) SmartMedia cards.
Used only when necessary.
116
Allows setting of the number of images that
will be shown on the monitor at one time
when index display is being used.
118
Clear settings
Retaining all settings in memory even after
the power is turned off.
98
Beep sound
Selects whether or not to have the camera
use beeping sounds to indicate alerts.
99
CARD SETUP
Card setup
Index display
➞
SET
(Settings)
Page
Allows setting of date and time information.
Date & time
Monitor adjustment
Allows the monitor brightness to be
adjusted.
12
100
* Appears in the playback menu only when still pictures are being played back on
the monitor.
** Appears in the playback menu only when movie pictures are being played back
on the monitor.
102
Settings after power is turned off
After the power is turned off, some user settings will be retained in the
camera’s memory, but others will return to their factory defaults.
The chart below shows the available settings from this menu:
Group
Playback
Settings
Item
Possible Settings
Memory
Image information
display
(OFF)
ON
Print reserve
(OFF)
DATE
Index display
4
Clear settings
(RESET)
Beep sound
(ON)
Date & time
(January 1 2001 00:00)
Monitor
adjustment
(Set to the midpoint of the adjustment bar)
(9)
TIME
16
HOLD
OFF
* The default settings are indicated in parentheses.
CAUTION
• If the batteries are removed and left out of the camera, or if the batteries
run down, the settings will return to their defaults.
103
6
Advanced Playback Techniques
The icons in the “Memory” column are designated as follows:
: The setting remains until it is changed.
: Turning the power off normally returns the camera’s settings to their
default values. To allow the settings for a particular setting group to be
maintained even when the camera is turned off, set the clear settings
function for that group to OFF (p.98).
Using the Playback Menu
3 4 5 6 7
1
With the lens barrier closed,
push the monitor button (
).
• The power turns on in
playback mode and the
monitor displays the last image
taken.
2
Press the menu button (
).
• The playback menu will be
displayed on the monitor.
3
Press or on the arrow pad
to change the settings group
(Playback/Card/Settings).
• The selected item is
highlighted in green.
(In the example at left,
“Settings group” is selected.)
• The current setting for each
item is indicated in [ ] to the
right of each item name.
4
Press on the arrow pad.
• One of the items is highlighted
in green.
5
Press or on the arrow
pad to move to the desired
item.
• The selected item is
highlighted in green.
(In the example at left, “Index
Display” is selected.)
2 8 9 1
Group
3
PLAY
[
[
CARD
]
9
RESET ]
[ ON ]
SET
EXIT OK
SET
Items for selection
5
PLAY
CARD
[
[
]
9
RESET ]
[ ON ]
SET
EXIT OK
104
SET
7
Press on the arrow pad.
• The possible settings for that
item are displayed.
7
Press or on the arrow
pad to highlight the desired
setting.
• The selected item is
highlighted in green.
(The example at left shows the
Index Display setting set to
“16”.)
8
Press the OK button.
• The setting is changed and the
menu returns to the first
screen.
9
Press the OK button twice.
• The new setting is recorded in
the memory and the menu
goes off.
4
9
16
CANCEL
SET
OK
To cancel the change
To cancel the setting, in step 8 press on the arrow pad instead of
pressing the OK button.
105
6
Advanced Playback Techniques
6
To Play Back Still Images One
by One (Automatic Playback)
Images (the first frames of movie pictures) are automatically played
back in order. This is useful for reviewing images in sequence.
Before displaying the playback menu, be sure to display an image that
does not have the movie ( ) mark.
For operating instructions see “Using the Playback Menu” (p.104).
Playback Group Menu Items:
PLAY
ROTATE
[ OFF ]
INFO
EDIT
CANCEL
Press the OK button to highlight
“
”. Automatic playback will
begin.
SET
Ending the task
To end automatic playback, press the OK button.
Automatic playback does not end even when all images stored on a
card have been displayed. Rather, the display will return to the
beginning and begin the automatic playback again. Further, unless an
AC adapter is being used, the camera will revert to standby mode after
about 30 minutes and the power will automatically go off.
106
To Play Back Movie Pictures
(Movie Playback)
When playing back movie pictures, before going to the playback menu,
the images with the movie “ ” mark that you would like to play back
have to be displayed.
For operating instructions see “Using the Playback Menu” (p.104).
First, display the image with the movie “ ” mark that you would like to
playback, and then go to the playback menu (p.102).
Playback Group Menu Items:
PLAY
ROTATE
[ OFF ]
INFO
EDIT
6
GO
Operations during playback
1 2 3
1
To pause playback, press any
button on the arrow pad.
2
While the camera is on pause,
the following operations are
possible:
: Returns to the beginning of
the movie picture.
: Advances to the end of the
movie picture.
: Fast forward
: Rewind
3
To resume playback, quickly
press on the arrow pad.
• The movie on the monitor will
play back again.
4
To end, press the OK button
while the image is paused.
• Returns to the playback menu.
4
107
Advanced Playback Techniques
CANCEL
Press to highlight “
”. Movie
playback will begin shortly.
To Play Back Movie Pictures (continued)
To play back different movie picture
Close the playback menu once, select the movie picture you want to
play, then display the playback menu once more.
For C-200 ZOOM models sold in the PAL color system regions.
Play back pictures under the same conditions that they were
taken.
Movies shot at the normal frame rate (15 frames/sec.) are played
back on the monitor at the same rate.
Movies are played back at 12.5 frames/sec. when played back on
the TV with the video cable connected.
With the video cable connected, movies are shot and played back at
12.5 frames/sec. The maximum movie length in this case would
therefore be different from that seen in the chart on p.21.
HELP
• If you attempt to play back movies shot at the normal frame rate (15
frames/sec.) with the video cable connected, then some frames may be
skipped during playback.
• If you attempt to play back movies shot with the video cable connected at
the normal frame rate, then playback may occasionally halt.
108
Printing Using DPOF-Compatible
Printers or Photo Labs (Print Reserve)
DPOF allows you to specify in advance which images you want printed
by a dedicated printer, DPOF-compatible printer or DPOF-equipped
photo lab (p.47). However, it is not possible to set a print reserve for
images that have the movie ( ) mark.
For operating instructions see “Using the Playback Menu” (p.104).
First, display the image that you would like to set a print reserve, and
then go to the playback menu.
Playback Group Menu Items:
PLAY
ROTATE
[ OFF ]
INFO
EDIT
Press the OK button to highlight
“ ”. Print reserve screen will be
displayed.
6
SET
Print Reserve Operation
Within the print reserve screen, first specify whether or not you wish the
date or time to appear on the printed pictures. Next, select “Reserve
Print” or “Remove”.
1
OFF
DATE
TIME
CANCEL
NEXT
1
Press or on the arrow
pad to select the information
you want to appear on the
printed pictures.
OFF No information will be
included on the
printed pictures.
DATE The shooting date will
be included on the
printed pictures.
TIME The shooting time will
be included on the
printed pictures.
• These settings will be applied
to all of the pictures on the
card.
109
Advanced Playback Techniques
CANCEL
3
CANCEL
110
Press on the arrow pad.
• The print reserve/print cancel
screen is displayed.
3
Press or on the arrow
pad to select 1-frame reserve,
then press .
1-frame reserve
The image you want to
reserve printing for
can be selected.
All-frame reserve
Printing can be
ordered for all images.
Reserve cancel
Printing can be
cancelled for all images.
• A screen allowing you to select
images is displayed.
4
The zoom lever may be
pushed toward
(wide
angle) as necessary to see a
list display.
5
Press the arrow pad to select
the images you want to print.
: Displays the previous
image.
: Displays the next image.
6
Press on the arrow pad for
at least 1 second until the
print reserve mark (
)
appears.
GO
4
120
121
122
123
124
125
EXIT126
OK
2
127
128
RESERVE
Printing Using DPOF-Compatible Printers or Photo Labs (continued)
7
EXIT
OK
CANCEL
Print reserve
mark
7
To cancel print reserve, press
on the arrow pad for at
least 1 second again until the
print reserve mark
disappears.
8
Press the OK button.
• Print reserve information is
recorded on the SmartMedia
card and the menu returns to
the first screen.
To set print reserve for all images
In step 3, select all-frame reserve, then press the OK button. Print
reserve will be set for all images.
6
Print reserve instructions remain on the SmartMedia card even after
images are printed. When selecting new images for print reserve, first
erase the current print ordering instructions.
In step 3, select “Reserve cancel”, then press the OK button. This will
erase all print reserve settings currently stored on the card.
HELP
• Print reserve is not possible if there is no free memory on the card or if the
card has been covered with a write-protect seal.
• It may take a few moments for the print reserve mark to appear.
• Some printers and photo labs may not be able to include date or time
information on prints.
111
Advanced Playback Techniques
If printing is completed
Rotating Images During
Playback (Rotated Playback)
Images taken with the camera held vertically will normally be displayed
on their sides when played back on the monitor. The rotated playback
function allows you to rotate such images to the upright position.
+90°
Rotation
Display the image you want to rotate before the Playback Menu is
displayed. Protected (p.44) images may not be rotated.
This setting is retained for images even after the camera is turned off
and on again.
For operating instructions see “Using the Playback Menu” (p.104).
Playback Group Menu Items:
PLAY
ROTATE
[ OFF ]
INFO
EDIT
CANCEL
Press to highlight “ROTATE”.
The setting screen will be
displayed.
SET
Settings:
+90°:
Rotates the image 90 degrees to the
right (clockwise) for playback.
ROTATE
+90°
-90°
0
CANCEL
112
SET
–90°:
Rotates the image 90 degrees to the
left (counter-clockwise) for
playback.
OK
0 (initial setting):
Returns the image to its original
rotation.
Displaying Image Information
on the Monitor (Image Information Display)
Information recorded with the image when it was shot can be displayed
on the monitor. This information appears 3 seconds after the image
appears on the monitor.
For operating instructions see “Using the Playback Menu” (p.104).
Playback Group Menu Items:
PLAY
ROTATE
[ OFF ]
INFO
EDIT
CANCEL
Press to highlight “INFO”.
The setting screen will be
displayed.
SET
6
OFF (default when camera is
turned on):
Displays resolution, date/time, and
frame number. Depending on the
image, the movie mark, print mark,
and/or protect mark may also be
displayed.
INFO
OFF
ON
CANCEL
SET
OK
ON:
The following information is added to
the default information.
Size (number of pixels), exposure
compensation value, white balance
and ISO value.
Also, the file name (p.95) is included
in place of the frame number.
For examples of monitor displays, see “Monitor” in “Names of Parts” (p.4).
Settings return to the default when the power is turned off.
Cutting the power will return “Image Information Display” to “OFF”.
To make the camera retain its settings even after the power is turned
off, set the clear settings function in the settings group to OFF (p.98).
113
Advanced Playback Techniques
Settings:
Changing the Color or Size of
Images (Edit)
This takes images in black and white or sepia tones. Also small images
(recorded images at low resolution) may be made. Images that have
had their color changed or been changed in size are saved in memory
as a new image. The original image is not changed.
Display the image you want to edit before the playback menu is displayed.
However, protected images cannot be edited (p.44). Also, images on
cards that have been locked with a protect seal cannot be edited.
For operating instructions see “Using the Playback Menu” (p.104).
Playback Group Menu Items:
PLAY
ROTATE
[ OFF ]
INFO
EDIT
CANCEL
Press to highlight “EDIT”. The
setting screen will be displayed.
SET
Settings:
EDIT
BLACK&WHITE
SEPIA
RESIZE
CANCEL
GO OK
BLACK & WHITE:
Takes black and white images.
SEPIA:
Takes sepia tone images.
RESIZE:
Works on images in memory at 320 ×
240 resolution.
Best used for home pages and e-mail.
When “Remaining Shots 0” is displayed.
No more images may be stored in memory. Either replace the memory
card or delete unwanted images (p.45).
Tip on editing
This camera can edit images with the following resolution.
• TIFF images:
1600×1200, 1280×960, 1024×768, 640×480
• Other images (JPEG): 1600×1200, 1360×1024, 1280×960, 1024×768,
640×480
114
To Erase All Images
(Erase All Frames)
This erases all the pictures stored on a card. Protected images (p.44),
however, will not be erased.
For operating instructions see “Using the Playback Menu” (p.104).
Card Group Menu Items:
Check the contents
carefully before erasing
:
Erases all pictures on the card.
CANCEL
GO OK
:
(For details, see p.116.)
CAUTION
• Never open the card cover, eject the
card, remove the batteries or
disconnect the AC adapter while
erasing pictures. Doing so could
result in damage to the data on the
card.
YES
NO
CANCEL
GO OK
115
6
Advanced Playback Techniques
• It is not possible to retrieve
images once they have been
erased. Be sure that you are not
CARD CARD SETUP
deleting important picture data
before performing Erase All
Frames a card on which pictures
CANCEL
GO
have been stored. Set “Protect” to
images you want to keep.
• Erase All Frames cannot be
Press performed on cards affixed with
write-protect seals. Remove the
write-protect seal from the card
before attempting to erase. The
Settings:
write-protect seal cannot be
CARD SETUP
reused after it has been removed
from the card.
To Initialize (Format) a Card
Using SmartMedia cards by companies other than Olympus, as well as
cards formatted on another device including a personal computer, may
result in longer image-writing times and decreased storage capacity.
Such cards should be reformatted by the camera before use.
Using Olympus brand pre-formatted cards is highly recommended.
When a card that needs to be formatted is inserted into the camera, the
camera will automatically go into formatting mode.
For operating instructions see “Using the Playback Menu” (p.104).
Before formatting a card, beware of the following:
• All images, including those that have been write-protected, will be
erased. When reformatting a card that has been used, make sure that
you are not erasing important picture data.
• Formatting cannot be performed on cards affixed with write-protect
seals. Remove the write-protect seal from the card before formatting.
The write-protect seal cannot be reused after it has been removed
from the card.
Card Group Menu Items:
CARD CARD SETUP
CANCEL
116
GO
Press Settings:
CARD SETUP
:
(For details, see p.115.)
:
This initializes the card.
CANCEL
GO OK
Starting and canceling formatting
Select “ ” in card setup screen, then press the OK button. The follwing
screen will be displayed:
YES:
Starts formatting
CANCEL
6
NO:
Cancels formatting
GO OK
CAUTION
• Once formatting has been started, it can not be canceled part way through.
• Never open the card cover, disconnect the AC adapter, remove the
batteries or remove the card while formatting, as doing so could damage
the data on the card.
117
Advanced Playback Techniques
YES
NO
To Change the Number of
Frames Displayed (Index Display)
In playback mode, you can press the zoom lever and display the images
catalog style. It is also possible to change the number of images that
are displayed on the monitor when using the “Index Display.”
This setting remains in the camera memory even after the power is
turned off.
For operating instructions see “Using the Playback Menu” (p.104).
Settings Group Menu Items:
PLAY
[
[
CARD
]
9
RESET ]
[ ON ]
Press to highlight “
”. The
setting screen will be displayed.
SET
SET
CANCEL
Settings:
4: The monitor displays in quarter
screen panels.
4
9
16
9: The monitor displays in 9th
screen panels (Initial setting).
16: The monitor displays in
sixteenth screen panels.
CANCEL
SET
OK
*When images are displayed in
sixteenths, the image frame
number does not appear.
To show images catalog style
Depending on the index display setting, you can display 4 to 16 images
at a time index-style on a split screen. For more about this operation,
see “Displaying All Frames” (p.39).
118
7
Transferring Your Pictures
to a Computer
Images can be transferred to a computer in a
number of ways. This chapter primarily explains
how to do this using the special USB (Universal
Serial Bus) cable that comes included with the
camera.
119
Read Before Connecting to a
Computer
Connecting the camera to a personal computer using the included USB
(Universal Serial Bus) cable allows you to transfer images stored on the
SmartMedia card installed in the camera to the computer’s hard disk.
Using the USB cable to connect the camera and computer may require
a computer equipped with a USB connector and certain pieces of
supporting software (driver), which will vary (see below) depending on
the computer’s operating system.
Please consult the computer manufacturer for more information about
your computer’s operating system and the level of USB support.
Operating System
Windows 2000 Professional
Windows Millennium Edition (Me)
Mac OS 9~9.1 *1
Software Needed for
Connection
None
Notes on
First-Time Use
None
Install the USB driver
software after
connecting the USB
cable (p.124).
USB connections are not supported. Use
other transfer methods such as a floppy disk
adapter (sold separately), etc. (p.134).
USB driver *2
Windows 98
software
Windows 98 Second Edition (98SE) (included
CD)
Windows 95
Windows NT
System 7.5.1~Mac OS 8.5.1
*1 For Macintosh computers running Mac OS 8.6, systems with the following
specification have been verified as to be compatible.
• Standard USB equipped.
• Mac OS 8.6 and USB MASS Storage Support 1.3.5 have been preinstalled at
the time of shipment.
Contact Apple Computer, Inc. for USB support.
*2 Newest version download, able from the Olympus Website, too.
Playing movie pictures on the computer requires QuickTime 4.0 or
higher. QuickTime 4.0 is available on the included software CD.
120
Do not leave the camera connected for an extended
period of time when using the batteries
The camera will automatically turn on when it is connected to the
computer. Also while it is connected, the camera will not go into standby
(power saving) mode.
If the battery power becomes insufficient while the computer is
uploading or downloading data from the SmartMedia card in the
camera, images (image files) on the card could be destroyed or an error
with the computer could occur.
Before connecting the camera to the computer, confirm that there is
enough battery power remaining. Also after the image files from the
memory card have been downloaded into the computer, quickly
disconnect the camera.
It is recommended that an AC adapter (sold separately) be used if the
camera is to be connected for extended periods of time.
Caution on using the AC adapter
CAUTION
• Connecting the camera to a computer via a USB hub may cause unstable
computer behavior, depending on the compatibility between the hub and
computer. If this is the case, connect the camera to the computer directly,
without using the USB hub.
• Proper functioning of the USB cable cannot be guaranteed for computers
that have had their operating systems upgraded from Windows 95. Use
other transfer methods such as a floppy adapter (sold separately), etc.
(p.134).
• Proper operation cannot be guaranteed for computers that provide their
USB connector on an expansion card.
• Proper operation cannot be guaranteed for versions of Windows or Mac OS
other than those shown in the table.
121
7
Transferring Your Pictures to a Computer
Before connecting the AC adapter, always make sure that the camera is
turned off.
When disconnecting the AC adapter, first disconnect the camera from
the computer and confirm that the camera is turned off.
Connecting the Camera to a
Computer
Connecting to a Windows PC
If you are using a computer installed with the Windows 98/98SE
operating system, install the USB driver during operation using the
included software CD.
A
1
Make sure the camera’s power
is off.
2
Open the camera’s connector
cover.
3
3
Insert the end of the USB
cable marked “A” into the
USB connector on the
computer.
4
4
Insert the end of the USB
cable marked “B” into the
USB connector on the
camera.
• The green lamp next to the
viewfinder will be illuminated if
the camera is connected to the
computer correctly.
B
2
Viewfinder
Green lamp
122
Under Windows 98/98SE
When connecting for the first time, use the included software CD to
install the USB driver. Refer to the instructions in “Installing the USB
Driver” on the following section.
Under Windows 2000/Me
When connecting for the first time, the computer will load the USB
driver automatically.
A message saying that installation has been finished will be displayed.
Click the OK button and the message will disappear. If further
messages prompting to restart the computer or other actions appear,
follow their instructions.
To continue, turn to “Transferring Image Files” (p.127).
7
Transferring Your Pictures to a Computer
123
Installing the USB Driver (For Windows 98/98SE users
only)
1
1
After connecting the camera
to the computer, the computer
will recognize the camera as
new hardware and the screen
shown at left will be
displayed.
2
2
Click the [Next] button.
3
3
Confirm that “Search for the
best driver for your device,
[Recommended].” is selected,
then click the [Next] button.
4
4
Place the included software
CD in the computer’s CD-ROM
drive and wait for a moment.
• If some other software installer
screen appears when the CD
is set in the drive, click the
[Quit] button to make it
disappear.
ex; CAMEDIA Master
CD-ROM
124
Connecting the Camera to a Computer (continued)
5
Click the check marks on both
“Floppy disk drives” and “CDROM Drive” to remove them
from the list. Next, click
“Specify a location” and
check, then click the
[Browse...] button.
6
6
Click [ + ] to open the USB
folder, and select the Win98
folder by double clicking on it
then press the [OK] button.
7
7
Continue clicking the [OK]
buttons until a message
informs you that installation
is finished.
• If this message does not
appear, try connecting the
USB cable again.
8
Click the [Finish] button to
make the message disappear.
• If further messages prompting
to restart the computer or
other actions appear, follow
their instructions.
8
125
7
Transferring Your Pictures to a Computer
5
Connecting the Camera to a Computer (continued)
Connecting to a Macintosh
Check the version of Mac OS and make sure that if the computer can
be connected to the camera (p.120).
A
1
Make sure the camera’s power
is off.
2
Open the camera’s connector
cover.
3
3
Insert the end of the USB
cable marked “A” into the
USB connector on the
computer.
4
4
Insert the end of the USB
cable marked “B” into the
USB connector on the
camera.
• The green lamp next to the
viewfinder will be illuminated if
the camera is connected to the
computer correctly.
• A card icon (usually named
“untitled”) will appear on the
desktop.
• If the card icon does not
appear, try connecting the
USB cable again.
B
2
Viewfinder
Green lamp
To continue, turn to “Transferring Image Files” (p.127).
126
Transferring Image Files
Transferring Image Files to a Windows PC
If the camera and computer are connected correctly, the SmartMedia
card inserted in the camera should be displayed in “My Computer”
folder. It is then possible to handle the files on the card in the same way
you would files on a floppy disk.
Connect the camera and
computer according to the
steps (p.122).
2
Double-click the “My
Computer” icon on the
desktop to open it.
3
Double-click the “Removable
Disk” icon to open it.
• The “DCIM” folder is displayed.
• If the “DCIM” folder does not
appear, it means the camera
and computer are not
connected correctly. Try
reconnecting them according
to the instructions.
4
Double-click the icon of the
folder you want to make the
copy destination.
5
Drag the “DCIM” folder onto
the destination folder and
release the mouse button.
• The “DCIM” folder is copied
into the destination folder.
127
7
Transferring Your Pictures to a Computer
1
Viewfinder
Orange lamp
• When electronic
communication between
camera and computer is
occurring, for example when
copying image files, the
orange lamp next to the
viewfinder will blink.
Image files are stored inside a folder in the “DCIM” folder (generally
named “100OLYMP”).
In addition, Explorer and other file management software can also be
used to handle image files. See the instructions of Windows Help and in
the computer’s user manual for more details on copying and moving
files.
Image files transferred to the computer can be viewed using any
software application capable of viewing JPEG-format files, for
example image processing software (CAMEDIA Master, Paint Shop
Pro, Photoshop, etc.) and web browsers (Netscape Communicator,
Microsoft Internet Explorer, etc.). See the instructions that came
with the software for details.
For users of CAMEDIA Master
When images are being manipulated using CAMEDIA Master while the
camera is connected to a computer, electronic communication between
camera and computer cannot take place, even if the [My Camera] icon
is double-clicked. Double-click [Removable Disk].
128
Transferring Image Files (continued)
Transferring Image Files to a Macintosh
If the camera and computer are connected correctly, the SmartMedia
card inserted in the camera should be displayed on the desktop. It is
then possible to handle the files on the card in the same way you would
files on the computer’s hard disk.
Connect the camera and
computer according to the
steps (p.126).
• The camera’s icon (generally,
the “PC untitled” icon) is
displayed on the desktop.
• If the PC untitled icon does not
appear, it means the camera
and computer are not
connected correctly. Try
reconnecting them according
to the instructions.
2
Double-click the PC untitled
icon on the desktop to open
it.
• The “DCIM” folder is displayed.
3
Double-click the icon of the
folder you want to make the
copy destination to open it.
4
Drag the “DCIM” folder onto
the destination folder and
release the mouse button.
• The “DCIM” folder is copied
into the destination folder.
• When electronic
communication between
camera and computer is
occurring, for example when
copying image files, the
orange lamp next to the
viewfinder will blink.
Card icon
Viewfinder
Orange lamp
129
7
Transferring Your Pictures to a Computer
1
Transferring Image Files (continued)
Image files are stored inside a folder in the “DCIM” folder (generally
named “100OLYMP”).
See the instructions in Mac OS Online Help and in the computer’s user
manual for more details on copying and moving files.
Image files transferred to the computer can be viewed using any
software application capable of viewing JPEG-format files,
including image processing software (CAMEDIA Master,
Photoshop, etc.) and web browsers (Netscape Communicator,
Microsoft Internet Explorer, etc.). See the instructions that came
with the software for more details.
For users of CAMEDIA Master
When images are being manipulated using CAMEDIA Master while the
camera is connected to a computer, electronic communication between
camera and computer cannot take place, even if the [My Camera] icon
is double-clicked. Double-click [PC untitled].
130
Disconnecting the Camera or
Removing the SmartMedia Card
Disconnecting from a Windows PC
In order to prevent computer error, be sure to make the following
disconnection preparations before proceeding.
• Remove the SmartMedia card from the camera.
• Disconnect the camera from the computer (unplug the USB cable).
If the computer generates an error, disconnect the USB cable and
restart the computer.
Disconnection Preparations
Viewfinder
1
Orange lamp
Confirm that the orange lamp
beside the viewfinder of the
camera is not lit.
• If the orange lamp is blinking,
wait for it to stop.
Double-click the “My
Computer” icon on the
desktop to open it.
3
Select the “Removable Disk”
icon and right-click the
mouse.
• A menu will be displayed.
4
Select “Eject” from the menu
and click the mouse.
When using Windows 98/98SE
After performing Step 4, you can remove the card or disconnect USB
cable.
131
Transferring Your Pictures to a Computer
2
7
When using Windows 2000/Me
After performing Step 4 from the previous page, you can remove the card.
When disconnecting the USB cable, be sure to take the following steps.
1
Follow the procedures on the
previous page.
2
On the taskbar (bottom right
of the screen), click the
“Remove/Eject Hardware”
icon (shown in the circle).
• A message will appear
indicating that the drive will be
stopped.
3
Click on the message.
• A “Safe To Remove Hardware”
message indicating that it is
safe to remove the hardware
will be displayed.
4
Click the [OK] button.
5
Disconnect the USB cable
from both the computer and
the camera.
Double-clicking the “Remove/Eject Hardware” icon on the taskbar will
bring up the Remove Hardware screen. Select the camera from the list
of devices, then click the [Stop] button.
132
Disconnecting the Camera or Removing the SmartMedia Card (continued)
Disconnecting from a Macintosh
When removing the card from the camera or disconnecting the camera
(USB cable) from the computer, take the following steps so that a
computer error does not occur.
If the computer generates an error, disconnect the USB cable and
restart the computer.
Disconnection Preparations
Viewfinder
Confirm that the orange lamp
beside the viewfinder of the
camera is not lit.
• If the orange lamp is blinking,
wait for it to stop.
2
Drag the PC untitled icon on
the desktop to the “Trash”.
Or, click the PC untitled icon,
then select “Eject” from the
“Special” menu in the Finder.
3
Press the OK button when the
message is displayed.
4
Remove the card from the
camera.
Or disconnect the USB cable
from the computer and the
camera.
Orange lamp
133
7
Transferring Your Pictures to a Computer
1
Transferring Files Without Using
the Camera
Using an adapter capable of accepting SmartMedia cards allows image
files to be transferred from the camera to a computer without directly
connecting the two.
Consult your Olympus Customer Support Center for the most up-todate information on the various available devices and products.
Computer Conditions
Usable Devices
Floppy disk adapter
FlashPath
3.5-inch floppy disk drive
available
PC card adapter
PC card slot available
USB terminal present
SmartMedia card reader/writer
CAUTION
• Adapter may not be usable depending on the computer’s operating
environment and the card’s storage capacity. Confirm these before using.
• Consult your user manual for more detailed information on using each
specific device.
134
Appendix
Please read the following pages if you suspect
your camera may not be working properly.
Information on camera specifications and other
details are also explained.
135
Answers to Frequently Asked
Questions
Q
A
How long will the camera batteries last?
The alkaline battery included with the camera should be able to
take at least 100 pictures (assuming the flash is used for 50% of
these), but this is only a rough estimate. Battery life is affected by
many variables, such as how often you use the monitor, how often
you use the flash, the type of batteries used and environmental
conditions. In particular, keeping the monitor on constantly will
cause the battery to drain more quickly. Be sure to turn the monitor
off whenever you don’t need it, and also turn the camera’s power
off quickly when you are finished using the camera. Use of the
optional AC adaptor is recommended.
Q
How can I set the clock in the camera for recording the date on
image data?
A
The camera does not ship with the date pre-set, and therefore you
must set the correct date before shooting (p.12). Leaving the
battery removed from the camera for approximately 1 hour will
return the date to its un-set state.
Q
A
Can I use a filter or a hood with this camera?
Q
A
Can I use an extension flash with this camera?
Q
A
Such accessories cannot be connected to the camera.
This camera was not designed for use with extension flash units.
Also, a slave unit may not function with this camera.
Why do the subject’s eyes sometimes appear red in the pictures?
This red-eye phenomenon occurs with all cameras when shooting
people using a flash. This is caused by the light from the flash
reflecting off the back of the eye. Red-eye varies depending on the
individual, as well as on shooting conditions such as ambient
lighting and distance from the subject.
Use of the Red-eye Reduction Flash Mode significantly reduces
this phenomenon (p.66).
136
Q
A
How should I store the camera?
Cameras can be damaged by dust, moisture and salt. Wipe the
camera with a slightly damp cloth and dry thoroughly before
storing. Do not store with mothballs. Remove the batteries if you do
not plan to use the camera for a long period of time.
Appendix
137
Troubleshooting
(Check before Taking in for Repair)
Operating Problems
The camera does not work
The power is off. ➜ Open the lens barrier and turn on the power.
The batteries are loaded incorrectly. ➜ Reload the batteries correctly.
The batteries are dead. ➜ Replace with new batteries.
The card cover is not properly closed. ➜ Securely close the card cover.
The batteries do not work in to cold weather. ➜ Keep the batteries
warm before the camera is to be used.
• The standby function is on. ➜ Close the lens barrier, then reopen it.
• The camera is connected to a computer and does not work. ➜ The
camera will not function while connected to a computer. Disconnect
the camera.
•
•
•
•
•
The battery drains quickly
• The battery was left in the camera for a long period of time without
using the camera. ➜ Remove the battery if you do not intend to use
the camera for a long period of time.
• The monitor is being left on continuously while shooting. ➜ Make
efforts to turn the monitor off in between shots whenever possible.
No picture is taken when the shutter button is full-pressed
• The camera is not in record mode. ➜ Open the lens barrier.
• There is no card in the camera. ➜ Insert a new card into the camera.
• The card is full. ➜ Insert a new card, erase unwanted images or transfer
the data to a computer and delete all of the pictures from the card.
• The card is defective. ➜ Refer to the error chart.
• A write-protect seal has been placed on the card. ➜ Remove the
write-protect seal, or insert a new card into the camera.
• The flash has not finished charging or the previous picture is being
written to memory. ➜ Remove your finger from the shutter button and
wait until the green lamp or the orange lamp stops blinking.
• The memory gauge is illuminated. ➜ The camera’s internal memory is
full. Further shooting will only be possible if the memory gauge is no
longer illuminated.
• The memory gauge is illuminated after movie shooting. ➜ The movie
pictures taken are being written to the card. Wait until the memory
gauge is off.
• The batteries are dead. ➜ Replace with new batteries.
• The battery power is low. ➜ Replace with new batteries. (Do not open
the battery compartment cover when the green light is blinking.)
138
The flash does not fire
• The flash is not fully opened. ➜ Use your finger to push the flash
housing all the way up before resuming use.
• The subject is well lit. ➜ Set the flash mode to Fill-in if you want the
flash to fire regardless of lighting conditions. The flash does not work
with shooting in the sequence, panorama, or movie picture modes.
Pictures already taken do not appear on the monitor
• The camera is in record mode. ➜ Close the lens barrier and press the
monitor button ( ) to turn on the monitor in playback mode.
• The SmartMedia card is empty. ➜ “NO PICTURE” appears on the
monitor. Take some pictures before displaying.
• The SmartMedia card is defective. ➜ Refer to the error chart.
• The camera is connected to a television. ➜ The monitor shuts down
when the camera is connected to a television.
The monitor is hard to see
• The brightness may be set incorrectly. ➜ Adjust the brightness.
• The camera is in direct sunlight. ➜ Block the sunlight or move to the
shade.
Editing, Protection, One-Frame Erase, All Erase Frames
or Card Formatting does not function
The camera is connected to a computer and an error
message appears while data is being transferred
• The cable may be connected incorrectly. ➜ Connect the cable
correctly.
• The batteries are dead. ➜ Replace the batteries, or use the optional
AC adapter.
• The USB driver has not been installed correctly. ➜ Reinstall the USB
driver according by following the steps in the instructions.
139
Appendix
• A write-protect seal has been placed on the card. ➜ Remove the seal
from the card. Do not use the seal again.
Picture Problems
The picture is out of focus
• The camera was jarred when the shutter button was pressed. ➜ Hold
the camera firmly and press the shutter button smoothly.
• The viewfinder AF target mark was not positioned on the subject. ➜
Position the autofocus frame on the subject, or use the focus lock.
• The lens is dirty. ➜ Clean the lens with a soft, dry cloth.
• The mode was not selected correctly. ➜ Shoot in the macro mode
where the subject is within the range of 0.2m (8″) to 0.8m (31″). For
greater distances, shoot in the standard mode.
• The shutter button was pressed while standing directly in front of the
camera when using the selftimer. ➜ When using the selftimer, press
the shutter button while looking into the viewfinder, not while standing
in front of the camera.
• The flash was needed to take a clear picture, but the camera was set
to No Flash. ➜ The shutter speed become slower and the exposure
time becomes longer, so use the tripod or hold the camera as steady
as possible to avoid camera movement.
• Quick Focus was used in the wrong focal range. ➜ Use the correct
Quick Focus setting for the distance you’re shooting at.
The picture is too bright
• The flash is set to fill-in flash mode. ➜ Set the flash a different mode.
• The subject being shot is excessively bright. ➜ Use the exposure
compensation feature, or change the angle of the camera.
The picture is too dark
• The flash was blocked by a finger. ➜ Hold the camera correctly,
keeping your fingers away from the flash.
• The subject was out of the working range of the flash. ➜ Shoot within
the flash working range.
• The flash mode is set to No Flash despite that lighting conditions
require a flash. ➜ Change the flash mode setting to one appropriate
for the surrounding lighting conditions.
• The subject was too small or was backlit. ➜ Set the flash to fill-in
mode, or use the spot metering mode.
• The picture was taken in the sequence mode. ➜ Pictures will appear
dark in the sequence mode because of the fast shutter speed,
especially in dim light.
140
Troubleshooting (continued)
The colors of pictures taken indoors look unnatural
• The lighting affected the picture. ➜ Set the flash to fill-in mode.
• The subject is mostly dark. ➜ Use flash or increase exposure
compensation +.
• The white balance setting is incorrect. ➜ Set the white balance to suit
lighting conditions.
The picture has obscured edge(s)
• The lens was partly blocked by a finger or the strap. ➜ Hold the
camera correctly, keeping your fingers and the strap away from the
lens.
• The shooting distance was too close. ➜ Use the monitor.
Appendix
141
Error Codes
The monitor displays error codes to alert you to various problems.
Warning
Monitor Display
Error
Remedy
There is no card in the
camera.
Insert the card.
The card is not inserted
correctly.
Remove and reinsert the
card.
The card is full.
Replace the card, erase
unwanted pictures, or
transfer the data to a
computer and erase all the
data to free up space on
the card.
The camera cannot enter
picture, erase or cardformat mode.
Remove the write-protect
seal before taking any
pictures.
You are unable to shoot,
playback, or erase
pictures with this card.
Wipe the contact area of
the card (the gold-colored
area) with a clean, soft, dry
cloth and insert the card
again. If the error occurs
again, it means that the
card cannot be used.
NO CARD
CARD FULL
WRITE PROTECT
CARD ERROR
142
Using the Camera with Optional
Equipment
This camera can be used with the following optional equipment:
Printer (P-400/P-200/P-330N(E))
FlashPath
PC card adapter
SmartMedia
SmartMedia
reader/writer
Camera
As of March 2001
143
Appendix
Computer
TV
AC adapter
MO drive
Optional Items
• Photo Printers For Olympus Digital Cameras (P-400/P-200/P-330N
(E))
• AC Adapter
• Standard SmartMedia Card (8/16/32/64/128MB)
• FlashPath Floppy Disk Adapter
• PC Card Adapter
• NiMH Batteries
• NiMH Battery Charger Set
• USB SmartMedia Reader/Writer
As of March 2001
Visit the Olympus web site for the latest information on optional items.
http://www.olympus.com
144
Compatibility of the Still Picture
Data
Notes about playback
Pictures taken with this camera and recorded on a card can be played
back on another Olympus digital camera. However, there are some
limitations depending on the playback camera:
• Still pictures larger than the maximum picture size available on the
playback camera may be displayed as thumbnails.
• Pictures played back on a camera with a different picture aspect ratio
will have black frames.
• Pictures taken in the TIFF mode may not be played back. In some
cases, incompatible picture sizes may prevent playback. These
limitations also apply to printing out pictures via a camera that prints
out directly to a printer.
• Movie playback time may be limited, depending on the size of the
buffer memory in the playback camera. Movies that exceed the
maximum playing time cannot be played back.
• Movie playback is not possible if the playback camera is not equipped
with the same movie picture quality settings (resolution, shooting
speed fps).
Appendix
145
Specifications
Product type:
Digital Camera Image Recording System for
shooting and playing back photo images.
Still pictures:
Digital recording, JPEG, TIFF non-compression
DCF compliant/DPOF compliant
Movie pictures:
QuickTime Motion JPEG compliant
Recording medium:
3V (3.3V) SmartMedia card
4MB, 8MB, 16MB, 32MB, 64MB, 128MB
No. of storable still
1 shot (TIFF Mode/1600 × 1200 pixels)
pictures (8MB card):
Approx. 5 shots (SHQ Mode)
Approx. 16 shots (HQ Mode)
Approx. 32 shots (SQ-HIGH Mode/640 × 480 pixels)
Approx. 82 shots (SQ Mode/640 × 480 pixels)
Erase:
One-Frame Erase, Erase All Frames
Image pickup element: 1/2.7 inch CCD solid-state image pickup
2,110,000 pixels (gross)
Resolution (number of pixels): 640 × 480 pixels ~ 1600 × 1200 pixels (still picture)
White balance:
Full auto TTL, Preset (daylight, overcast, tungsten
light, fluorescent light)
Lens:
Olympus lens 5.4 ~ 16.2mm,
F2.8 ~ 4.4, 8 elements in 6 groups (equivalent to
35 ~ 105mm lens on a 35mm camera)
Photometric system:
Digital ESP metering system, Spot metering
system
Exposure control:
Program auto exposure
Aperture*:
W: F2.8, F5.6
T: F4.4, F8.6
Shutter*:
1/2 ~ 1/1000 sec.
(used with mechanical shutter)
*Manual setting of shutter speed is not supported
Shooting range:
0.8m (31″) ~ ∞ (in standard mode)
0.2m (8″) ~ 0.8m (31″) (in macro mode)
Viewfinder:
Optical real image viewfinder (with AF target
mark), monitor
Monitor:
1.8 inch TFT color LCD
No. of pixels:
Approx. 61,000
On-screen display:
Date/time, frame number, write-protect, picture
mode, battery check, file number display, print
reserve, menu, etc.
146
Specifications are subject to change without any notice or obligation on the
part of the manufacturer.
147
Appendix
Battery charging time for flash:
Approx. 8 sec. or less (at room temperature with
new batteries)
Flash working range:
W: Approx. 0.2m (8″) ~ 4m (13ft)
T: Approx. 0.2m (8″) ~ 2.6m (8.5ft)
Flash modes:
Auto-Flash (automatic flash activation in low light
and backlight), Red-eye Reduction Flash, Off (no
flash), Fill-In Flash, Night Scene Flash, Night
Scene Flash + Red-eye Reduction Flash
Autofocus:
TTL system autofocus
Exposure compensation: Exposure compensation system
Focusing range:
0.2m (8″) ~ ∞
Selftimer:
12 sec. delay
External connectors:
DC-IN jack,
USB connector,
Video OUT jack
Date and time:
Recorded in picture data
Automatic calendar system: Up to year 2031
Calendar power supply: Backup by capacitor
Usage environment:
Temperature: 0 ~ 40°C (32 ~ 104°F) (in use) /
–20 ~ 60°C (–4 ~ 140°F) (in storage)
Humidity: 30 ~ 90% (in use) / 10 ~ 90% (in
storage)
Power supply:
This camera uses either four AA (R6) alkaline,
NiMH, lithium or NiCd batteries. Two CR-V3
lithium battery packs are also available. Do not
use zinc-carbon (manganese) batteries in this
camera.
Exclusive AC adapter (optional)
Dimensions (excluding the raised portion):
117.5mm (4.6″) (W) x 49.5mm (1.9″) (H) x 66.0mm
(2.6″) (D)
Weight:
240g (8.5oz) (excluding batteries/SmartMedia
card)
Glossary of Terms
Aperture
This is a mechanism for adjusting the
amount of light that passes through the
lens. Lower values allow more light to
pass, while higher values lessen the
amount of light.
Backlight
A light source that is behind the
subject.
CCD (Charge-coupled Device)
A pickup element that converts light
passing through the lens into electrical
signals. On this camera, light is picked
up at 2.11 million points and converted
to RGB signals to build a single image.
Contrast Detection Auto-Focus
This is a method used to measure the
distance to the subject. The camera
determines whether the image is
focused by detecting the level of
contrast in the subject.
Conventional Photograph
This refers to the system of recording
images using silver halide. (This is the
method for recording images on film in
conventional, non-digital photography.)
This system is in contrast to still video
and digital photography.
DCF (Design rule for Camera File
system)
A standard formulated for image files
by the Japanese Electronic Industry
Development Association (JEIDA).
Digital ESP (Electro-Selective
Pattern) light metering
A light metering method that
determines the exposure by metering
and calculating the light levels in the
center and around the periphery of the
image separately.
148
DPOF (Digital Print Order Format)
A format used for recording automatic
print settings for digital cameras. By
recording which images are to be
printed the user can automatically have
the desired images printed by a printer
or print lab that supports the DPOF
format.
Eclipsing (Vignetting)
This refers to the situation where there
is an object that obscures part of the
field of view so that part of the subject
is not photographed. Vignetting also
refers to the situation where the image
seen through the viewfinder does not
exactly match the image shot through
the objective lens so that the
photographed image includes objects
not seen through the viewfinder.
Vignetting can also occur when the
incorrect lens hood is used and
shadowing appears in the corners of
the image.
EV (Exposure Value)
An exposure measurement system in
which the exposure for an aperture of
F1and a shutter speed of 1 second is
taken as EV0. The EV value then
increases by 1 each time the aperture
increases by one F stop or the shutter
speed increases by one increment. EV
can also be used to indicate brightness
and ISO settings.
Exposure
The amount of light used to capture an
image. The exposure is determined by
the time for which the shutter is open
(shutter speed) and the amount of light
that passes through the lens
(aperture).
ISO
A method for indicating film speed laid
down by the International Organization
for Standardization (ISO) (e.g.
“ISO100”). Higher ISO values indicate
greater sensitivity to light so that
images can be exposed even in lowlight conditions.
JPEG (Joint Photographic Experts
Group)
A compression format for color still
images. Photographs (images) shot
using this camera are recorded onto
the SmartMedia card in JPEG format
when the Record mode is set to SHQ,
HQ or SQ. By downloading these
images to a personal computer, users
can edit them using graphics
application software or view the images
using an Internet web browser.
TIFF (Tagged Image File Format)
A format used for saving black and white
and color image data. TIFF image files
can be handled by software programs for
scanners and graphics applications.
TTL (Through-The-Lens) System
An exposure adjustment mechanism in
which a light receptor built into the
camera directly measures the light
passing through the lens.
Appendix
NTSC (National Television Standards
Committee)
Originally the name of a US committee
responsible for setting a standard for
television broadcast transmission, now
known more as the video signal
standard it developed. The NTSC
standard is used mainly in North
America and Japan.
PAL (Phase Alternate Line)
Video signal standard used in most
western European countries. Not
compatible with the NTSC standard.
Pixels
A pixels the smallest unit (dot) used to
make up an image. Large size clear
printed images require large number of
pixels.
TFT (Thin-Film Transistor) Color
Monitor
A color Monitor constructed using thinfilm technology.
149
Index
A
AC adapter ................................. 16
All Erase Frames .............. 115, 139
Auto-Flash .................................. 66
Automatic Playback .................. 106
B
Backlighting,
backlit ................. 66, 67, 74, 140
Battery(-ies) ................... 7, 20, 136
Beep Sound ............................... 99
BLACK & WHITE ...................... 114
C
CAMEDIA Master ....... 82, 128, 130
Card ....... 10, 47, 82, 115, 116, 134
Clear Settings ............................. 98
Close-ups ................................... 41
Computer ............... 90, 91, 97, 120
Contrast ...................................... 91
D
Digital ESP ................................. 74
Digital Zoom ............................... 80
Diopter adjustment ..................... 15
DPOF ................................. 47, 109
E
Edit ........................................... 114
Error Codes ........................ 19, 142
Exposure Compensation ............ 76
ESP ............................................ 74
F
File Naming ................................ 95
File No. ....................................... 95
Fill-in Flash ................................. 67
150
Flash ..................... 26, 30, 64, 136,
138, 139, 140
Fluorescent lightning .................. 67
Focus ........................... 50, 52, 140
Focus Lock ................................. 52
Folder No. ................................... 95
Formatting ................................ 116
Frame number
(Frame No.) ............................ 38
Full-press .................................... 26
H
Half-press ................................... 25
I
Image Information Display ....... 113
Image Protection (protected
images, write-protected,
Protection) ..... 44, 115, 116, 139
Index-display
(Index Display) ............... 39, 118
Initialize ............................ 116, 139
ISO Sensitibity Level .................. 78
M
Macro mode ............................... 55
Memory gauge ............. 28, 60, 138
Monitor ....... 4, 24, 28, 36, 100, 139
Monitor Adjustment .................. 100
Movie pictures ............ 60, 107, 120
N
Night Scenes ..............................
Night Scenes
+ Red-eye Reduction .............
No flash ......................................
Number of storable pictures .......
68
68
67
21
O
T
One-Frame Erase ............... 45, 139
Optical Zoom .............................. 31
Telephoto ................. 30, 31, 55, 80
W
P
Panorama
(panoramic pictures) .............. 82
Playback Menu ......................... 102
Print Reserve ........................... 109
Printing ............................... 47, 109
Q
Warning Sound(s) ...................... 99
White Balance .................... 85, 141
Wide angle
(wide-angle) ............... 30, 31, 55
Z
Zoom .............................. 30, 31, 80
Quick Focus ....................... 53, 140
R
Appendix
Record mode ........... 21, 58, 62, 87
Rec View .................................... 93
Red-eye Reduction ..................... 66
Remaining
second count ............. 21, 60, 61
RESIZE .................................... 114
Resolution ................. 5, 21, 62, 87,
113, 114, 145
Rotated Playback ..................... 112
S
Selftimer ............................. 59, 140
Sequence ................................... 57
SEPIA ....................................... 114
Shaded by a tree ........................ 67
Sharpness .................................. 90
Shooting Menu ........................... 70
Shooting Movies ....................... 107
SmartMedia ................................ 11
Spot Metering Mode ................... 74
151
http://www.olympus.com
OLYMPUS OPTICAL CO., LTD.
San-Ei Building, 22-2, Nishi Shinjuku 1-chome, Shinjuku-ku, Tokyo, Japan.
(Customer support) Tel. 0426-42-7499 Tokyo
OLYMPUS AMERICA INC.
Two Corporate Center Drive, Melville, NY 11747-3157, U.S.A. Tel. 631-844-5000
(Technical support) Tel. 1-888-553-4448 (Toll-free for within 30 days of purchase.)
Tel. 1-631-844-5520 (After 30 days of purchase, contact this number.)
[email protected]
OLYMPUS OPTICAL CO. (EUROPA) GMBH.
(Premises/Goods delivery) Wendenstraße 14-18, 20097 Hamburg, Germany. Tel. 040-237730
(Letters) Postfach 10 49 08, 20034 Hamburg, Germany.
(Hotline Numbers)
Tel. 01805-67 10 83
Tel. 00800-67 10 83 00
Tel. +49 180 5-67 10 83
Tel. +49 40-237 73 899
for Germany
for Austria, Belgium, Denmark, France, Netherlands,
Norway, Sweden, Switzerland, United Kingdom
for Finland, Italy, Luxemburg, Portugal, Spain,
Czech Republic
for Greece, Croatia, Hungary and the Rest of Europe
Our Hotline is available from 9 am to 6 pm (Monday to Friday)
(E-Mail) [email protected]
Printed in Japan
VT256601