1
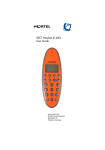
DECT Industrial Handset User Guide
Issue 02
DECT
Industrial Handset
User Guide
Galway M1 Design Support
1
DECT Industrial Handset User Guide
Issue 02
Table of Contents
TABLE OF CONTENTS ........................................................................................ 2
1
HANDSET INFORMATION .......................................................................... 4
2
GENERAL ....................................................................................................... 5
2.1
2.2
3
HANDSET .................................................................................................... 5
DISPLAY ..................................................................................................... 6
INSTALLATION............................................................................................. 7
3.1
INSTALLING THE CHARGER.......................................................................... 7
3.2
WALL MOUNTING THE CHARGER ................................................................ 7
3.3
CHARGING RACK ......................................................................................... 7
3.5.
BATTERY MANAGEMENT ............................................................................ 8
3.5.1.
Battery Installation / Removal ............................................................ 8
3.5.2.
Charge before Use.............................................................................. 8
3.6.
IMPORTANT BATTERY INFORMATION ........................................................... 8
3.7.
OPERATING TIMES ...................................................................................... 9
3.8.
BATTERY CHARGING INFORMATION ............................................................ 9
CHARGE PROGRESS INDICATION .................................................................. 9
3.9
3.10 LOW BATTERY WARNING ......................................................................... 10
4
INITIAL SETUP............................................................................................ 11
4.1
4.2
4.3
4.4
5
INITIAL SETUP AND OPERATION................................................................. 11
CREATE SUBSCRIPTION ............................................................................. 11
REMOVE SUBSCRIPTION ............................................................................ 12
SELECTING A DECT SYSTEM (ROAMING) .................................................. 13
USING THE HANDSET ............................................................................... 14
5.1
OPERATING IN STANDBY MODE ................................................................. 14
5.2
HANDSET ON/OFF ................................................................................... 14
5.3
KEYPAD LOCK .......................................................................................... 14
5.4
VOLUME CONTROL ................................................................................... 15
5.5
MAKING CALLS ........................................................................................ 15
5.5.1
On-Hook Dialing.............................................................................. 15
5.5.2
Off-Hook Dialing.............................................................................. 16
5.5.3
Dial from the Personal Phone Book.................................................. 16
5.5.4
Redial............................................................................................... 17
5.5.5
Caller List (CLIP) ............................................................................ 18
5.6
RECEIVING CALLS..................................................................................... 18
5.7
SILENT MODE ........................................................................................... 19
5.8
SOS BUTTON ............................................................................................ 19
6
FEATURES DURING CONVERSATION................................................... 19
6.1
6.2
6.3
CALL TRANSFER ....................................................................................... 19
CALL HOLD .............................................................................................. 19
MICROPHONE MUTE.................................................................................. 20
Galway M1 Design Support
2
DECT Industrial Handset User Guide
Issue 02
6.4
PERSONAL PHONE BOOK ........................................................................... 20
6.4.1
Add Personal Phone Book Entry....................................................... 20
6.4.2
Edit a Number in the Personal Phone Book ...................................... 21
6.4.3
Edit a Name in the Personal Phone Book ......................................... 22
6.4.4
Delete Personal Phone Book Entry................................................... 22
6.5
LANGUAGE SELECTION ............................................................................. 23
6.6
MESSAGE WAITING INDICATION FOR VOICE MAIL ..................................... 23
6.7
USER SETUP (PROFILES)............................................................................ 24
6.8
SETTINGS .................................................................................................. 25
6.9
RINGER TONE ........................................................................................... 25
6.10 RINGER VOLUME ...................................................................................... 26
6.11 KEY CLICK TONE ...................................................................................... 26
6.12 VIBRATOR ................................................................................................ 27
6.13 AUTOMATIC CALL ANSWERING (B-ANSWER)............................................. 27
6.14 START VOLUME ........................................................................................ 28
6.15 BACKLIGHTING ......................................................................................... 28
7
OUT OF RANGE........................................................................................... 29
8
E2 MESSAGING ........................................................................................... 29
9
SHORTCUT LIST......................................................................................... 30
10
MENU TREE ............................................................................................. 31
Galway M1 Design Support
3
DECT Industrial Handset User Guide
1
Issue 02
HANDSET INFORMATION
This product is classified with IP52 classification as defined in EN60529.
Ensure the adapter voltage is the same as the electrical outlet voltage.
The DECT Industrial Handset uses radio signals and does not guarantee a connection
in all circumstances. Do not rely on a cordless telephone to make emergency
calls.
Never use your handset:
•
in the vicinity of electrical detonators
•
in shielded rooms
•
in areas where radio transmission is forbidden
•
in aircraft
Do not place a handset near:
•
water, moisture, or damp areas
•
heat sources, direct sunlight, or unventilated areas
•
devices that generate strong magnetic fields such as electrical appliances,
fluorescent lamps, computers, radios, televisions or fax machines
•
areas where the handset can be under ventilated or exposed to liquid, or
exposed to the insertion of foreign objects
•
areas with excessive vibration, shock, or temperature
Do not open the handset, the charger, or the charger rack.
Galway M1 Design Support
4
DECT Industrial Handset User Guide
2
Issue 02
GENERAL
2.1
Handset
The handset has 22 keys which are described as follows:
Voice (short press) & E2 (long press) Message function.
In Menu - Cursor left
After a digit - delete last digit.
Long press - delete all.
In on hook - Redial menu.
In Menu - Cursor right.
Confirmation or jump to next level in the menu.
In off hook - Mute.
Long key press turns the handset OFF.
In off hook - Recall.
In on hook - Enter or exit the menu structure.
On hook/off hook and turn ON handset.
”*”
Used with
“0-9”
Digits or letters in alphanumeric mode
“#“
Choose uppercase or lowercase letters in alphanumeric mode.
to enable keypad lock. Long press for a pause.
Telephone book
Blue top key SOS button.
The two keys at the right hand side of the handset are for volume control.
Galway M1 Design Support
5
DECT Industrial Handset User Guide
2.2
Issue 02
Display
Three lines, of 12 alphanumeric characters in length, can show text or caller
information.
The bottom line displays 5 icons, they are described as follows:
ON – Handset in range
OFF – Handset out of range
ON – New E2 message received
OFF – NO new voice mail or all voice mails read
ON - Handset is off hook
OFF – Handset is on hook
Flashing – Number being dialed
User can go to next line or step
User can go back to the previous line or step
The display has a backlight which is activated after a key press or on an incoming
call. It switches OFF automatically after 10 seconds. Also, the backlight can be
switched OFF permanently.
Galway M1 Design Support
6
DECT Industrial Handset User Guide
3
Issue 02
INSTALLATION
3.1 Installing the Charger
Connect the power line cable to the back of the charger and then plug the AC adapter
into the mains socket outlet.
3.2
Wall Mounting the Charger
• Drill two holes in the wall, with a horizontal spacing of 45 mm and insert the
screws.
• Use a screwdriver to remove the two screws in the top plate of the charger.
• Turn the top insert plate 90 degrees in the charger and put the screws back in.
• Plug the power cable into the wall socket.
• Hang the charging unit on the screws in the wall.
• Place the telephone handset on the charger.
3.3
Charging rack
The charging rack can contain a maximum of 5 chargers. A maximum of 4 charger
racks can be connected together, using the same AC adapter, with a maximum current
of 5 A.
Galway M1 Design Support
7
DECT Industrial Handset User Guide
Issue 02
Installation of the Chargers on the Charging Rack
The chargers can be placed in two different positions, depending on the usage of the
chargers. If the chargers are placed on the desktop the chargers should be connected
with 2 screws.
When the charging racks are wall-mounted the chargers should be connected as
follows:
3.5.
Battery Management
3.5.1. Battery Installation / Removal
The handsets are equipped with a rechargeable NiMh battery pack. The battery pack
is installed in the back of the handset housing.
The batteries can be charged and discharged hundreds of times, but sooner or later
they will be worn out. If the operating time is significantly shorter than usual, then it
is time to have the batteries replaced.
Note: The batteries should not be removed by the user. This should be carried out by
qualified service personnel only.
3.5.2. Charge before Use
The handset is delivered with an almost uncharged battery. The handset has to be
placed in a charger or a charging rack and charged for at least 24 hours before use.
When the handset is placed in a charger or charging rack, it switches on and the
display shows the battery status.
3.6.
Important Battery Information
The battery pack consists of a NiMh battery pack, that should not be removed by the
user, this action should only be performed by authorized service personnel.
Heat or cold reduces the performance and service life of the batteries.
Preferred operating temperature is between 15° C and 25° C.
Galway M1 Design Support
8
DECT Industrial Handset User Guide
3.7.
Issue 02
Operating Times
Standby time - up to 90 hours.
Talk time – up to 10 hours.
3.8.
Battery Charging Information
The battery capacity can be checked using the menu option. As follows:
1. Press the
key to enter the menu display and use the
Menu battery.
or
keys to select
2. Press the
status.
key to enter the battery display. The display will show the battery
3. Press the
key to go one step back.
4. Press the
3.9
key to go back to normal mode.
Charge Progress Indication
When the handset is in the charger, the charging progress is indicated by a flashing
red LED on top of the handset. The charge status is also indicated in the display.
Completion of the charge cycle is indicated by switching ON the red LED
continuously and the display will return to normal mode.
Galway M1 Design Support
9
DECT Industrial Handset User Guide
Issue 02
Note: When the handset is placed in the charger, the vibrator and B-answer (auto
answer functions are disabled.
3.10
Low Battery Warning
If the battery capacity reaches a certain minimum value:
On-Hook
• The display flashes battery low.
Off-Hook
• The display flashes battery low
• The handset gives 4 short bleeps every 5 seconds.
Galway M1 Design Support
10
DECT Industrial Handset User Guide
4
4.1
Issue 02
INITIAL SETUP
Initial Setup and Operation
The handset can be operated on a maximum of 10 DECT systems. Before you can
make a call via a DECT system, the handset has to be subscribed to the Meridian 1.
A pin code is necessary for the subscription process.
A complete menu tree is located at the end of this document for reference.
4.2
Create Subscription
To subscribe a handset to a system:
1. Press the menu
select menu login.
key to enter the menu display and use the
2. Press the
key to enter the login display and use the
subscription create.
or
or
key to
key to select
key to continue subscription and wait until the SEARCH.ID
3. Press the
(PARK) is visible in the display. If there is more than one PARK ID available, ensure
that the correct PARK is selected.
4. Use the
or
be subscribed. Press the
key to select the system number to which the handset has to
key.
Enter the Authentication Code (AC) and press the
key.
5. Enter name and/or number (NO) and press the
key to complete the
subscription. The handset name can be edited in the subscription edit menu.
Galway M1 Design Support
11
DECT Industrial Handset User Guide
Issue 02
The default handset name ‘PHILIPS’ is displayed on handsets that are not subscribed.
When the handset cannot be subscribed to the system, the display will show
‘subscription failed’. Press the
return to the stand-by display.
4.3
key to leave the subscription failed display and to
Remove Subscription
To remove a subscription from the handset:
1. Press the
menu login.
key to enter the menu display and use the
2. Press the
key to enter the login display and use the
subscription remove.
3. Press the
key to continue the remove option and use the
select the system that has to be removed.
4. Press the
or
key to select
or
key to select
or
key to
key to remove the system from the handset.
Note: If the handset requests a password, enter the appropriate 4 digit password. The
default password is 0000. The current selected system is shown with a *
Galway M1 Design Support
12
DECT Industrial Handset User Guide
Issue 02
4.4 Selecting a DECT System (Roaming)
Roaming between Meridian 1 systems is only possible when the handset is subscribed
to each system.
Manual
To switch between DECT systems manually:
1. Press the
menu login.
key to enter the menu display and use the
2. Press the
key to enter the system display and use the
select menu select login.
or
key to select
or
key to
3. Press the
key to enter the login display. Use the
or
key to select
the system to which the handset has to login. The current system is indicated with a *,
e.g. system 01*. Press the
can be cancelled by pressing the
key to login to the selected system. The login option
key.
Automatic
To switch between DECT systems automatically:
1. Execute the same steps as before, in the last step select select login auto with
the
or
key instead of e.g. system 1. Press the
login option can be cancelled by pressing the
key to execute. The
key.
Note 1: When a system is manually selected, it is indicated in the menu select login
with an *: e.g. system 01*.
Note 2: When the auto login option is selected, it is indicated in the menu select login
with an additional A e.g. system 01A.
Galway M1 Design Support
13
DECT Industrial Handset User Guide
5
Issue 02
USING THE HANDSET
A complete menu tree is located at the end of this document for reference.
5.1
Operating in Standby Mode
The menu feature operates as follows:
1. Press the
key to enter the menu display.
2. Use the
or
3. Press the
4. Press the
5.2
key to select the next or previous option.
key to go to the selected option, e.g. MENU LOGIN.
key to return to the stand-by display.
Handset ON/OFF
The handset can be switched ON by pressing the
when placed in the charger.
The handset can be switched OFF by pressing the
5.3
key for a few seconds, or
key for a few seconds.
Keypad Lock
Galway M1 Design Support
14
DECT Industrial Handset User Guide
Issue 02
The keypad lock can be activated by pressing the
key immediately followed by
the * key. The same operation is required to deactivate the keypad lock. ‘KEY
LOCKED’ is displayed when the keypad lock is activated.
5.4
Volume Control
The volume switch for the earpiece is located at the right hand side of the handset.
When the volume switch is pressed, the display shows the current volume setting. The
volume can be increased with the + key, it can be decreased with the - key.
5.5
Making Calls
There are a number of ways to make a phone call:
• On-hook dialing
• Off-hook dialing
• Dial a number from the personal phone book
• Redial numbers.
These methods are described in the following subsections.
5.5.1
On-Hook Dialing
On-hook dialing is used to dial a phone number using the numeric keys. On-hook
dialing allows you to check and correct the number before the call is made.
To dial a number while on-hook:
1. Use the numeric keys to type the number that has to be dialed, e.g. 4370.
Numbers entered incorrectly can be deleted with the
key.
Galway M1 Design Support
15
DECT Industrial Handset User Guide
Note: When deleting a digit, use the
Issue 02
or
digit to the right of the digit to be removed. Press the
to remove the digit.
2. Press the
key to dial the number.
3. Press the
key to end the call.
keys to place the cursor on the
key for extended duration
If a space is needed in a number, e.g. to access an external phone line, press the
key for 2 seconds. The display will show a '-'.
5.5.2
Off-Hook Dialing
To dial a number off-hook:
1. Press the
key to enter the dial display.
2. Use the numeric keys to type the number that has to be dialed, e.g. 4370. The
handset automatically dials the number.
3. Press the
5.5.3
key to end the call and return to the idle display.
Dial from the Personal Phone Book
The personal phone book can contain up to 80 entries.
Galway M1 Design Support
16
DECT Industrial Handset User Guide
Issue 02
To dial a number from the personal phone book:
1. Press the
key to enter the Phone Book. The first entry appears in the
display. If the phone book is empty, the
key will not function.
2. From this display, there are 2 methods to find a name:
- Use the
or
key to move through the personal phone book entries.
- Pressing an alphanumeric key will result in a quick search..
3. Press the
5.5.4
key to dial the person visible in the display, e.g. Mattie.
Redial
The redial option allows you to redial one of the last ten dialed phone numbers.
To use the redial feature:
1. Press the
key from the standby mode to enter the redial display.
2. Press the
or
3. Press the
4. Press the
key to move to various numbers in the redial list.
key to dial the selected number.
key on the selected number to do the following:
- Delete a number, after DELETE? Press the
key.
- Store a number in the phone book, after STORE NO? Press the
key.
- Delete all numbers in the redial list, after DELETE ALL? press the
key.
The Redial Menu can also be entered via the Menu Key, scroll with the
or
key to enter Menu Redial.
When a name is available in the Phone book, the name will be shown in the redial
menu.
Galway M1 Design Support
17
DECT Industrial Handset User Guide
5.5.5
Issue 02
Caller List (CLIP)
When the handset rings and the call is not answered, it will be stored in the Caller list
(CLIP). The Caller list contains a maximum of 10 entries. The entries in the Caller list
and the Redial list can be accessed the same way. An item in the Caller list can be
distinguished from an item in the Redial list as follows: an item in the Caller list will
also turn the red LED on at the top of the handset..
When an item in the Caller list has been called back, it will be removed from the list.
To use the Caller list (CLIP) feature:
1. Press the
key to enter the Redial menu. Press the
display shows the CLIP display. The LED is also switched on.
2. The display will show the last 10 missed call numbers.
3. Press the
3. Press the
or
until the
key to dial the selected number.
key on a selected number to:
- Delete a number, after DELETE? Press the
key.
- Store a number, after STORE NO.? press the
key.
- All numbers in the redial list can be deleted, after DELETE ALL? press the
key.
When an item is viewed in the Redial list, REDIAL is displayed and the LED is
switched OFF.
When an item is viewed in the Caller list, it is shown with CLIP and the LED is
switched ON.
When there is an item in the Caller list, you will be notified via a flashing red LED
on top of the handset.
5.6
Receiving Calls
When a handset receives a phone call it will ring. To accept a call, press the
key.
When a conversation has ended press the
the
key again. Mute ringing by pressing
key. The display will show RINGER MUTED.
Galway M1 Design Support
18
DECT Industrial Handset User Guide
Issue 02
If automatic call answering is used, the phone call will be accepted automatically. It is
not necessary to press the
5.7
key.
Silent Mode
In Silent mode the handset will use the vibrator instead of ringer and bleep sounds.
To switch the Silent mode ON/OFF:
Press the
key immediately followed by the # key to switch the Silent mode ON
or OFF. SILENT is displayed when this option is switched on.
5.8
SOS Button
Press the
key to enter Profile Set Up.
Press the
key to enter Set Profile.
key two times to select SOS Profile.
Press the
Press the
6
6.1
key to enter the SOS number.
FEATURES DURING CONVERSATION
Call Transfer
• Press the
key to place the call on hold.
• Dial the number to which the phone call must be transferred
• Inform the person at the other end
• Press the
key.
• The call is transferred
If the called number does not answer, the original phone call can be resumed by
pressing the
6.2
key again.
Call Hold
key to place the call on hold
• Press the
• Dial a number.
• Press the
key again to resume the original call
Galway M1 Design Support
19
DECT Industrial Handset User Guide
6.3
Issue 02
Microphone Mute
The microphone mute can be activated or deactivated during conversation by pressing
key. When the microphone mute is active the display shows MIC. MUTED.
the
6.4
Personal Phone Book
Press the
key to enter the Phone Book.
Note: If there is no entry in the phone book, then the
key will not function.
The personal phone book is a list of names and numbers, which can be filled out by
the user. This list is stored in the handset and can contain up to 80 entries. The
personal phone book enables you to add, edit or delete entries. These features are
described in the following sections.
6.4.1
Add Personal Phone Book Entry
If the phone book contains 80 entries, it is not possible to add a new entry.
To add a personal phone book entry:
1. In the stand-by mode (on-hook) enter the number to be stored.
2. Press the
key to enter the number in the phone book, the display shows
STORE NO? and the number just typed in.
Galway M1 Design Support
20
DECT Industrial Handset User Guide
Issue 02
3. Press the
key to enter the number. The display will show NAME:, type in a
name using the alphanumeric keys.
4. Press the
mode again.
5. Pressing the
key to enter the name in the phone book and return to the stand-by
key at any time cancels and returns to stand-by mode.
Numbers from the Caller list or Redial List can be stored in the personal
phone book.
6.4.2
Edit a Number in the Personal Phone Book
To edit a personal phone book entry:
1. Press the
key to enter the phone book and use the
select the required number.
or
2. Press the
key when the required number is found. Use the
select the edit menu. The display will show EDIT NO?
3. Press the
key to edit the number. Use the
4. When the correct number is entered press the
mode.
5. Press the
key to
or
key to
key to remove wrong digits.
key to return to the stand-by
key at any place cancels and returns to stand-by mode.
Galway M1 Design Support
21
DECT Industrial Handset User Guide
Note: When deleting a digit, use the
Issue 02
or
keys to place the cursor on the
key for extended duration to
digit to the right of the digit to be deleted. Press the
remove the digit.
6.4.3
Edit a Name in the Personal Phone Book
To edit a personal phone book entry:
1. Press the
key to enter the phone book and use the
select the required number
or
key to
2. Press the
key when the required number is found. Use the
select the edit menu. The display will show EDIT NAME?
3. Press the
characters.
key to edit and use (extended press) the
4. When the correct name is entered, press the
mode.
5. Press the
6.4.4
or
key to
key to remove wrong
key to return to the stand-by
key to cancels or return to stand-by mode.
Delete Personal Phone Book Entry
Galway M1 Design Support
22
DECT Industrial Handset User Guide
Issue 02
To delete a personal phone book entry:
1. Press the
2. Press the
'DELETE?'
3. Press the
6.5
key to enter the phone book and select the entry to be deleted.
key to select this entry for deletion. The display will show
key to confirm deletion and return to the standby mode.
Language Selection
The handset is designed to contain all the menus in 6 different languages stored in
memory. The actual language to be used can be selected via the menus. The following
languages are available:
- English
- German
- French
- Italian
- Spanish
- Dutch
MENU
LANGUAGE
SELECT
LANGUAGE
ENGLISH
6.6
SELECT
LANGUAGE
GERMAN
SELECT
LANGUAGE
FRENCH
SELECT
LANGUAGE
ITALIAN
SELECT
LANGUAGE
SPANISH
SELECT
LANGUAGE
DUTCH
Message Waiting Indication for Voice Mail
‘Voice Mail’ is displayed when there is a voice mail. It will be removed when the
voice mail is listened to.
It is possible to program the
To program the
1. Press the
key to enter voice mail.
key:
key, then press the
key.
to select Voice Number, then press the
2. Press the
3. Enter the voice mail number followed by #.
key.
Galway M1 Design Support
23
DECT Industrial Handset User Guide
Issue 02
4. The DN and password can also be entered to access voice mail directly.
Note 1: It is possible for another party to determine the password of your voice mail if
it is programmed.
Note 2: Long press the * for a pause.
5. Short press the
6.7
key to enter voice mail.
User Setup (Profiles)
There are two user defined profiles. The profiles can be used to select different
handset settings. A typical example of where the 2 different profiles may be used is
where the user requires different handset settings for indoor and outdoor usage.
To change a User Profile:
1. Press the Menu key to enter the menu Profile Set Up.
2. Press the
key to enter this menu. Use the
Profile Indoors (1) or Profile Outdoors (2). Press the
Profile.
3. The following settings can be changed:
-
or
key to select Set
key to enter the selected
Ringer Tone
Ringer Volume
Key Click
Vibrator
B-Answer (Automatic Answering)
Start Volume (of loudspeaker)
Backlight
Galway M1 Design Support
24
DECT Industrial Handset User Guide
4. Press the
6.8
Issue 02
key to return to stand-by mode.
Settings
Within a profile the user can define several settings. These are described in the
following sections. Each setting will have a default as shown in the table below.
6.9
Ringer Tone
There are 9 different ringer tones.
To set a ringer tone:
1. Enter the Set Profile display and use the
or
key to select ringer tone.
key to enter the ringer display. Use the
or
keys to switch
2. Press the
between ringer types. The handset will produce the ringer sound when a scroll key
is pressed.
3. Press the
key to set the visible ringer type. E.g. ringer tone 5. The handset will
return to the Set Profile display.
Galway M1 Design Support
25
DECT Industrial Handset User Guide
Issue 02
6.10 Ringer Volume
The 5-step ringer volume option enables users to set the loudness of the bleep and
ringing tones.
To set the ringer volume:
1. Enter the Set Profile display and use the
or
key to select ringer vol..
key to enter the ringer volume display. Use the
or
keys to
2. Press the
increase or decrease the volume. The handset will produce the ringer sound in the
increased or decreased loudness setting. It is also possible to switch the ringer
volume OFF in this setting.
3. Press the
display.
key to set the volume. The handset will return to the Set profile
6.11 Key Click Tone
The key click tone setting determines whether or not the handset bleeps every time a
key is pressed. The key click tones can be switched ON or OFF.
To switch the key click tones ON/OFF:
1. Enter the Set Profile display and use the
or
key to select key click.
key to enter the key click display and use the
or
key to
2. Press the
select ON or OFF and the loudness of the key click. The display will show the
loudness of key click or key click OFF.
3. Press the
key to return to the Set Profile Menu.
Galway M1 Design Support
26
DECT Industrial Handset User Guide
Issue 02
6.12 Vibrator
The vibrator functions when the handset is ringing or bleeping, it vibrates in the same
pattern as the ringer or bleep sound.
To switch the vibrator ON/OFF:
1. Enter the Set profile display use the
or
key to select vibrator.
2. Press the
key to enter the vibrator display and use the
select ON or OFF. The current setting is shown in capitals.
or
key to
3. To activate or deactivate the vibrator, press the
key. The display will show
vibrator on or vibrator off before switching to the Set Profile display.
6.13 Automatic Call Answering (B-answer)
The automatic call answering can be switched ON or OFF with the B-answer item of
the settings menu.
To switch the B-answer ON/OFF:
1. Enter the Set Profile display and use the
or
key to select B-answer.
key to enter the B-answer display and use the
2. Press the
select ON or OFF. The current setting is shown in capitals.
or
key to
3. To activate or deactivate the B-answer press the
key. The display will show
B-answer ON or B-answer OFF before switching to the Set Profile display.
Note: This function is especially handy when a headset is used.
Galway M1 Design Support
27
DECT Industrial Handset User Guide
Issue 02
6.14 Start Volume
The 5-step start volume option enables users to set the loudness of the earpiece to a
certain value to start from. Adjustment during conversation can be made with the –
and the + keys at the side of the handset. After conversation the volume is set to the
start volume setting.
To set the start volume:
1. Enter the Set Profile display and use the
or
key to select start volume.
key to enter the ringer volume display. Use the
or
keys to
2. Press the
increase or decrease the volume. The handset will produce the ringer sound in the
increased or decreased loudness setting. It is also possible to switch the ringer
volume OFF in this setting.
3. Press the
display.
key to set the volume. The handset will return to the Set profile
6.15 Backlighting
As soon as a key is pressed or a call is received, the backlighting switches ON. The
backlighting switches off automatically to save power.
To switch the backlighting ON/OFF:
1. Enter the Set Profile display and use the
or
key to select backlight.
2. Press the
key to enter the backlight display and use the
select on or off. The current setting is shown in capitals.
3. To activate or deactivate the backlight feature press the
or
key to
key. The display will
Galway M1 Design Support
28
DECT Industrial Handset User Guide
Issue 02
show backlight on or backlight off before switching to the Set Profile display.
7
OUT OF RANGE
Each handset is equipped with an out of range detection option. There are three
detection mechanism for out of range. They are:
1. Display OUT OF RANGE and the disappearance of the
2. A handset will give 3 short bleeps.
3. The LED on top of the handset will flash for 4 seconds.
icon.
When the user re-enters the coverage area, the handset will give one short bleep and
all out of range displays are removed.
8
E2 MESSAGING
If there are no messages, then long press the
If there are messages, then long press the
key to enter New Message menu.
key and the
key to select different
or
Messaging operations. Press the
Delete All? and New Message operations.
keys to select Read, Send, Delete?
Alternatively, press the
or
Menu. Press the
key and the
keys to select the Message
key to select the different Messaging operations.
Galway M1 Design Support
29
DECT Industrial Handset User Guide
9
Issue 02
SHORTCUT LIST
The following features can be accessed easily via the shortcuts mentioned in the table
below.
Galway M1 Design Support
30
DECT Industrial Handset User Guide
Issue 02
10 MENU TREE
KIRK
MEN
MENU
LOGIN
PROFILE
SET UP
MENU
BATTERY
MENU
PHONE
BOOK
MENU
REDIAL
MENU
LANGUAGE
BATTERY
CAPACITY
■■■■
A
SET PROFILE
INDOORS (1)
SET PROFILE
OUTDOORS (2)
SET PROFILE1
BACKLIGHT
SET PROFILE1
RINGERTONE
SET PROFILE1
RINGER VOL.
SET PROFILE1
KEY CLICK
SET PROFILE1
VIBRATOR
SET PROFILE1
B-ANSWER
SET PROFILE1
START VOLUME
BACKLIGHT
ON/OFF
RINGERTONE
1,2......
RINGER VOL
■■■
KEY CLICK
■■■---
VIBRATOR
ON/OFF
B-ANSWER
ON/OFF
START VOLUME
■■■
B
B
A
MENU
SELECT LOGIN
SUBSCRIPTION
CREATE
SUBSCRIPTION
EDIT
SUBSCRIPTION
REMOVE
CREATE
SEARCH ID:
123456789012
SELECT LOGIN:
SYSTEM 01*
1630
REMOVE ?
PASSWORD:
----
SUBSCRIPTION
EDIT NO:
1630
SUBSCRIPTION
REMOVE ?
LOGIN
SYSTEM 01*
REMOVE
SYSTEM 10
123456789015
REMOVE
SYSTEM 1*
1630
REMOVE
SYSTEM 2
POB 212
REMOVE
SYSTEM 3
BUILDING 2
Galway M1 Design Support
31