1
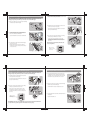
4. Replace the cable storage cover, feeding the cable through
the slot at the top of the compartment.
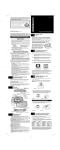
Configuration 1: Zapper – Nunchuk Attached
NOTE: If your Wii Remote has the Wii Remote Jacket, remove it before attaching the remote to the
Wii Zapper. Replace the jacket when you remove the remote from the Wii Zapper.
1. Remove the cable storage cover by pressing and sliding it
towards the bottom of the Wii Zapper.
5. Thread the wrist strap cord through the connector hook
on the bottom of the connector plug.
Insert the plug into the External Extension Connector on
the bottom of the Wii Remote.
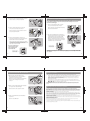
2. Open the Nunchuk lock. Place the Nunchuk into the
compartment, aligning the projections with the screw
holes on the underside of the Nunchuk.
Screw
holes
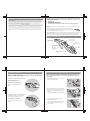
6. Place the remote into the compartment, front end first,
while pressing the Wii Remote lock release.
Close the Nunchuk lock over the base of the Nunchuk.
Let go of the lock release when the remote is fully
inserted into the compartment. The tabs on the lock
should be inserted into the two holes on the bottom of
the remote.
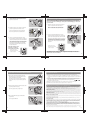
3. Feed the cable along the underside of the Wii Zapper,
pressing it into the slot.
NOTE: Extra cable can be tucked back into the cable
storage compartment.
Wrap the cable around the projections inside the
compartment 3-1/2 times, leaving some extra cable to
connect to the remote.
Press
Make sure that the
Wii Remote is securely
locked in place.
4
5
Configuration 2: Zapper – Nunchuk Separate
Removing the Wii Remote and Nunchuk
NOTE: If your Wii Remote has the Wii Remote Jacket, remove it before attaching the remote to the
Wii Zapper. Replace the jacket when you remove the remote from the Wii Zapper.
1. Thread the wrist strap cord through the connector hook
on the bottom of the connector plug.
1. Press and hold the Wii Remote lock release and remove
the Wii Remote from the compartment, bottom end first.
Unplug the connector from the bottom of the remote and
remove the wrist strap cord from the connector hook.
Press
Insert the plug into the External Extension Connector on
the bottom of the Wii Remote.
2. Remove the cable storage cover by pressing and sliding it
towards the bottom of the Wii Zapper.
2. Place the remote into the compartment, front end first,
while pressing the Wii Remote lock release.
Unwind and remove the cable and replace the cover.
Let go of the lock release when the remote is fully
inserted into the compartment. The tabs on the lock
should be inserted into the two holes on the bottom of
the remote.
Make sure that the
Wii Remote is securely
locked in place.
3. Open the Nunchuk lock and remove the Nunchuk from the
compartment.
Press
Replace the Nunchuk lock.
IMPORTANT: Wear the wrist strap and tighten the strap lock for this configuration. Review the Wii
Operations Manual - System Setup for more information on wrist strap usage.
6
7