1
WG302 install guideƒ.r2.qxd
11/19/03
9:44 AM
Page 1
d.
802.11g ProSafe Wireless Access Point WG302
™
Turn on your computer, connect the power adapter to the
WG302 and verify the following:
•
The PWR power light goes on.
•
The LAN light of the wireless access point is lit when
connected to a powered on PC.
the WG302 Access Point
3 Deploy
a. Disconnect the WG302 and position it where you will deploy it.
The best location is elevated, such as wall mounted or on the top
of a cubicle, at the center of your wireless coverage area, and
within line of sight of all the mobile devices.
b.
Installation Guide
Follow these quick steps to install your wireless
access point.
Lift the antenna on either side so that they are vertical.
Note: Consult the antenna positioning and configuration information in the Reference Manual on the Resource CD for ProSafe
Wireless Access Point.
LAN and Wireless Access
2 Configure
a. Configure the WG302 Ethernet port for LAN access.
•
Connect to the WG302 by opening your browser and
entering http://192.168.0.228 in the address field.
c.
You can also consult the Install Assistant or the Reference Manual on the
Resource CD for ProSafe Wireless Access Point.
•
When prompted, enter admin for the user name and
password for the password, both in lower case letters.
Connect an Ethernet cable from your WG302 Access Point to a
LAN port on your router, switch, or hub.
d.
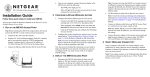
1 Set up the WG302 Access Point
Tip: Before mounting the WG302 in a high location, first set up and
•
Click the IP Settings link and configure the IP Settings for
your network.
Connect the power adapter to the wireless access point and plug
the power adapter in to a power outlet. The PWR, LAN, and
Wireless LAN lights should light up.
test the WG302 to verify wireless network connectivity.
a.
Unpack the box and verify the contents and attach the antennas.
b.
Prepare a PC with an Ethernet adapter. If this PC is already part
of your network, record its TCP/IP configuration settings.
Configure the PC with a static IP address of 192.168.0.210 and
255.255.255.0 for the Subnet Mask.
c.
Connect an Ethernet cable from the WG302 to the PC (A).
A
Primary
Reset
Console 9600,N,8,1
LAN/POE
[email protected]
Secondary
WG302 802.11g
ProSafe™ Wireless
Access Point
b.
c.
Configure the wireless interface for wireless access. See the online
help or “Understanding Basic Wireless Settings” section in the
Reference Manual for full instructions.
Test wireless connectivity using a PC with a wireless adapter
configured according to the wireless settings you just set in the
WG302, establish a wireless connection to the WG302.
Now that you have finished the setup steps, you are ready to deploy
the WG302 in your network. If needed, you can now reconfigure the
PC you used in step 1 back to its original TCP/IP settings.
Wireless Connectivity
4 Verify
Using a computer with an 802.11g or 802.11b wireless adapter, verify
connectivity by using a browser such as Netscape® or Internet
Explorer to connect to the Internet, or check for file and printer
access on your network.
Note: If you cannot connect, see to Troubleshooting Tips in this
guide or the Reference Manual on the Resource CD for ProSafe Wireless
Access Point.
WG302 install guideƒ.r2.qxd
11/19/03
9:44 AM
Page 4
Troubleshooting Tips
If you have trouble setting up your WG302, check the tips below.
I cannot configure the wireless access point from
a browser.
Check these items:
No lights are lit on the access point.
The access point has no power.
•
Make sure the power cord is connected to the access point and
plugged in to a working power outlet or power strip.
•
Make sure you are using the correct NETGEAR power adapter
supplied with your access point.
•
The WG302 is properly installed, LAN connections are OK, and it is
powered on. Check that the LAN port LED is green to verify that the
Ethernet connection is OK.
•
If you are using the NetBIOS name of the WG302 to connect,
ensure that your PC and the WG302 are on the same network segment or that there is a WINS server on your network.
•
The Ethernet LAN light is not lit.
There is a hardware connection problem.
•
Make sure the cable connectors are securely plugged in at the access
point and the network device (hub, switch, or router).
•
Make sure the connected device is turned on.
If your PC uses a Fixed (Static) IP address, ensure that it is using an
IP Address in the range of the WG302. The WG302 default IP
Address is 192.168.0.228 and the default Subnet Mask is
255.255.255.0. The WG302 default setting is for a static IP address.
If the network where you are connecting it is using DHCP, configure
it accordingly. See the Reference Manual on the Resource CD for
ProSafe Wireless Access Point for more details.
The Wireless LAN activity light is not lit.
I cannot access the Internet or the LAN with a
wireless capable computer.
The access point’s antennas are not working.
There is a configuration problem. Check these items:
•
If the Wireless LAN activity light stays off, disconnect the adapter
from its power source and then plug it in again.
•
You may not have restarted the computer with the wireless adapter to
have TCP/IP changes take effect. Restart the computer.
•
Make sure the antennas are tightly connected to the WG302.
•
•
Contact NETGEAR if the Wireless LAN light remains off.
The computer with the wireless adapter may not have the correct
TCP/IP settings to communicate with the network. Restart the
computer and check that TCP/IP is set up properly for that network.
The usual setting for Windows on the Network Properties is set to
“Obtain an IP address automatically.”
*M-10178-01*
M - 1 0 1 7 8 - 0 1
November 2003
•
The access point’s default values may not work with your network.
Check the access point default configuration against the configuration
of other devices in your network.
•
For full instructions on changing the access point’s default values,
see the Reference Manual on the Resource CD for ProSafe Wireless
Access Point.
Technical Support
PLEASE REFER TO THE SUPPORT INFORMATION CARD THAT
SHIPPED WITH YOUR PRODUCT.
By registering your product at www.NETGEAR.com/register, we can
provide you with faster expert technical support and timely notices of
product and software upgrades.
NETGEAR, INC.
Support Information
Phone: 1-888-NETGEAR (For US & Canada only) - 24 x7 phone support
See Support information card for other countries.
E-mail: [email protected] (24 x 7 online support)
www.NETGEAR.com
0678 !
Attention: When you configure the wireless settings of the device please make sure to select
the correct country settings. Due to EU-law the country settings must be identical to the
country, where the device is operating (important due to non-harmonized frequencies in
the EU).
©2003 NETGEAR, Inc. NETGEAR, the Netgear logo, The Gear Guy. Everybody’s
Connecting and Auto Uplink are trademarks or registered trademarks of Netgear, Inc. in the
United States and/or other countries. Microsoft and Windows are registered trademarks of
Microsoft Corporation in the United States and/or other countries. Other brand and
product names are trademarks or registered trademarks of their respective holders.
Information is subject to change without notice. All rights reserved.


![[PDF(1.22MB)] (日)](http://vs1.manualzilla.com/store/data/006579176_3-0d525429d6d795b363266d5cbe93562e-150x150.png)