1
Trademarks
NETGEAR, the NETGEAR logo, and Connect with Innovation are trademarks and/or registered
trademarks of NETGEAR, Inc. and/or its subsidiaries in the United States and/or other
countries. Information is subject to change without notice. © NETGEAR, Inc. All rights
reserved.
Package Contents
Installation
The box contains the following items.
Compliance
For the current EU Declaration of Conformity, visit:
http://support.netgear.com/app/answers/detail/a_id/11621/.
For regulatory compliance information, visit:
http://www.netgear.com/about/regulatory/.
See the regulatory compliance document before connecting the power supply.
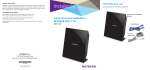
WAC120 Wireless Access Point
NETGEAR 802.11ac Wireless Access Point
WAC120
Ethernet cable
WiFi On/O
ff
WPS
Power adapter
WiFi On/O
ff
WPS
NETGEAR, Inc.
350 East Plumeria Drive
San Jose, CA 95134 USA
June 2014
You can use these diagrams to connect your wireless access point or follow the detailed instructions in this booklet.
Support
Option 1
Internet
1. Configure your access point for your network.
For more information, see Set Up the Access Point on page 1.
2. Connect your modem to the Internet.
Ethernet cable
3. Connect your modem to the LAN port on the rear of the
access point.
Modem
Access point
Option 2
1. Configure your access point for your
Internet
network.
For more information, see Set Up the Access
Access point
Point on page 1.
Network switch
2
3
To contact NETGEAR for support, visit
http://support.netgear.com/general/contact or call (US only)
1-888-NETGEAR. In other countries, visit
http://support.netgear.com/general/contact/default.aspx for phone
numbers.
For product updates and web support, visit http://support.netgear.com.
Ethernet cable
1
Thank you for selecting NETGEAR products. After installing your
device, locate the serial number on the label of your product and
use it to register your product at https://my.netgear.com. You must
register your product before you can use NETGEAR telephone support.
NETGEAR recommends registering your product through the NETGEAR
website.
2. Connect your modem to the Internet.
3. Connect your modem to a network switch.
4
4. Connect the access point to the same
Ethernet cable
Ethernet cable
network switch.
NETGEAR recommends that you use only the official NETGEAR support
resources.
You can get the user manual online at
http://downloadcenter.netgear.com or through a link in the product’s
user interface.
Contents
Set Up the Access Point............................................................................................. 1
Install Your Access Point............................................................................................. 2
LEDs................................................................................................................................. 4
Join the WiFi Network................................................................................................. 5
View or Change the Access Point Settings........................................................... 6
Troubleshooting Tips.................................................................................................... 8
Set Up the Access Point
Before you can use the access point you must connect to the
access point and configure the LAN and wireless access settings.
¾¾ To connect to the access point:
1. Configure a computer with a static IP address of
192.168.0.210 and a subnet mask of 255.255.255.0.
For help configuring a static IP address on your computer, check
the instructions or online help that came with that computer.
2. Connect the Ethernet cable to the computer.
3. Connect the other end of the Ethernet cable to the LAN port on
the access point.
4. Connect the power adapter to the access point and plug the
power adapter into a power outlet.
5. Press the On/Off button on the access point.
6. On the computer that is connected to the access point, enter
http://192.168.0.100 in the address field of a browser.
A login screen displays.
7. Enter admin for the user name and password for the
password.
The web management interface of the access point displays.
1
¾¾ To configure the LAN and wireless access settings:
1. Log in to the access point.
2. Select Configuration > IP > IP Settings.
3. Configure the IP settings for your LAN.
For more information about IP settings, see the reference
manual.
4. Click the Apply button.
Your settings are saved.
5. Select Configuration > Security > Profile Settings.
6. Configure a security profile for your wireless network.
For more information about security profile settings, see the
reference manual.
7. After configuring a security profile, click the Apply button.
8. Using a computer or another wireless device, verify that you
can establish a wireless connection to the access point.
Install Your Access Point
Make sure that your Internet service is active before you install
your access point.
¾¾ To install your access point:
1. Prepare your network.
2
Make sure that your modem is cabled only to the wall jack for
your Internet service.
2. Connect your devices.
1
2
3
4
a. Plug in, then turn on your gateway or modem.
b. With an Ethernet cable, connect your gateway or modem to
a network switch.
c. With the Ethernet cable that came with the access point,
connect the network switch to the LAN port on your access
point.
3. Add power to the access point.
1
2
3
4
3
a. Connect the power adapter to the access point and plug
the power adapter into an outlet.
on the front panel to light
b. Wait for the Power LED
amber and turn green.
If no LEDs are lit, press the Power On/Off button on the
rear panel of the access point.
4. Connect a computer.
1
2
3
4
LEDs
The LEDs on the wireless access point light to indicate wireless
access point activity:
LED
Description
Power
LED
•Off. Power is off.
•Green. Power in on.
•Amber. A self-test is running. During startup the LED is amber, then
blinking green before turning steady green after 45 seconds. If the LED is
amber or continues blinking green after one minute, a system fault exists.
Activity
LED
•Off. No ethernet traffic is detected.
•Green or blinking green. Ethernet traffic is detected.
4
LED
Description
LAN
LED
•Off. No link is detected.
•Green. A 1000 Mbps link is detected.
•Amber. A 100 Mbps or 10 Mbps link is detected.
WiFi
LED
•Off. Both 2.4G and 5G are off.
•Green. 2.4G, 5G, or both are ready.
•Blinking green. Wireless activity of 2.4G or 5G is detected.
•Slow blinking green. WPS is enabled.
Join the WiFi Network
You can either use WiFi Protected Setup (WPS) or select your WiFi
network and type its password. For help with the WPS button on
your computer or WiFi device, check the instructions or online help
that came with that computer or device. Some older equipment
cannot use WPS.
¾¾ To join the network using WPS:
1. Press the WPS button on the access point for two to three
seconds.
The WiFi LED on the access point blinks slowly, green for three
seconds, then off for three seconds.
2. Within two minutes, on your computer or WiFi device, press its
WPS button or click its onscreen WPS button.
The WiFi LED on the access point blinks green when the
computer or WiFi device connects to your access point.
3. Repeat this process to add other computers or WiFi devices.
¾¾ To select your network and enter its password:
1. Open the software utility that manages your WiFi connections
5
on the computer or WiFi device that you want to connect to
your access point.
This utility scans for WiFi networks in your area.
2. Find and select your access point’s WiFi network name (SSID).
The SSID is on the product label.
3. Enter the access point’s password (or your custom password if
you changed it) and click the Connect button.
The password is on the product label.
4. Repeat Step 1 through Step 3 to add other computers or WiFi
devices.
View or Change the Access Point Settings
You can log in to the access point to view or change its settings.
Log In to the Access Point
¾¾ To log in to the access point:
1. Connect a computer or WiFi device to the access point.
You can use an Ethernet cable or connect with WiFi:
• For a wired connection, use an Ethernet cable to connect
your computer to the network switch that your access
point is currently connected to.
• To connect with WiFi, select and join your WiFi network.
2. Launch a web browser.
3. Enter http://192.168.0.100 in the address field of the
browser.
A login screen displays.
4. Enter admin for the user name and password for the password
(or your custom password if you changed it).
The web management interface of the access point displays.
6
Change the admin Password
¾¾ To change the admin password:
1. Launch a web browser.
2. Enter http://192.168.0.100 in the address field of the
browser.
A login screen displays.
3. Enter admin for the user name and password for the password
(or your custom password if you changed it).
The web management interface of the access point displays.
4. Select Maintenance > Password > Change Password.
5. Type your old password and type the new password twice.
6. Click the Apply button.
Your changes are saved.
Find a Forgotten WiFi Security Password
The preset WiFi password is on the product label. If you changed
your WiFi password and forgot what it is, log in to the access point
to view its current WiFi password.
¾¾ To connect to the wireless access point and view its WiFi
password:
1. Use an Ethernet cable to connect your computer to a black
Ethernet port on the access point.
2. Launch a web browser.
3. Enter http://192.168.0.100 in the address field.
A login screen displays.
4. Enter the access point user name and password.
The default user name is admin and the default password is
password. You can use the default credentials if you did not
7
change them.
The web management interface of the access point displays.
5. Select Wireless Settings.
The Security Options section of the screen displays your WiFi
password.
Troubleshooting Tips
This section provides some tips for correcting simple problems that
you might encounter. For more troubleshooting information, see the
troubleshooting chapter in the reference manual.
Problem
Cause
Possible Solution
No LEDs are
lit on the
access point.
The access
point has no
power.
•Make sure that the power cord is connected to
the access point and plugged in to a working
power outlet.
•Make sure that the On/Off button is in the On
position.
•Make sure that you are using the NETGEAR
power adapter supplied with your access point.
The LAN LED
is off.
A hardware
connection
problem
exists.
•Make sure that the cable connectors are
securely plugged into the access point and
to the network switch. Make sure that the
network switch is turned on.
The Wireless
LED is off.
The wireless
connection
does not
work.
•If the Wireless LED stays off, disconnect the
power adapter from its power source and then
plug it in again.
•Log in to the access point and verify that the
radio or radios are turned on.
•Contact NETGEAR if the Wireless LED remains
off.
8
Problem
Cause
Possible Solution
You cannot
configure
the access
point from a
browser.
Multiple
causes.
•Make sure that the access point is correctly
installed, it is powered on, and the LAN LED is
lit.
•Make sure that your computer is using an
IP address in the same range as the access
point. The access point default IP address is
192.168.0.100, and the default subnet mask is
255.255.255.0.
•Quit the browser, clear the cache, delete the
cookies, and launch the browser again.
You cannot
access the
Internet or
the LAN from
a wireless
device.
•Make sure that the SSID and wireless security
A
configuration settings of the wireless device are the same as
those of the access point.
problem
exists.
•The wireless device might not have the correct
TCP/IP settings to communicate with the
network. Restart the wireless device and check
that TCP/IP is set up correctly for that network.
•The access point default values might not work
with your network. Check the access point
default configuration against the configuration
of other devices in your network. For
information about changing the default values
of the access point, see the reference manual.
9
10
11