1
Installing the Server
Follow these steps to become familiar with your server documentation
and to complete your installation successfully.
Checking the Accessory Box
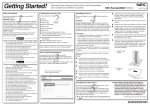
Getting Started!
Safety Precautions
Follow the Server Setting Up Information in your User’s
Guide to install your server.
WARNING:
■
■
■
■
■
■
■
Place the rack on a carpet not subject to the anti-static
process.
Locate the rack where corrosive gas is generated, (ex.
the area, where the vapor of sulphur is generated)
chemicals are nearby, or chemicals may be sprayed
accidentally.
Locate the rack where intense vibration may be generated.
Locate the rack in an area that has drastic temperature
change (near a heater, air conditioner, or refrigerator).
Locate the rack on an uneven or slanting floor
Locate the rack in a place where stabilizers cannot be
installed or where the rack can be installed only after
proper earthquake-resistant is constructed.
Locate the rack on a floor that cannot bear the total
weight of the rack and devices mounted in the rack.
Locate a rack in a narrow space that would inhibit
devices from being pulled out from the rack completely.
■ To order a disk, contact your sales representative or
dealer.
Your server does not contain any hard disk drives. Follow
these steps to install the hard disk drive.
If you have additional adapter boards and devices for your
server, install them before putting the server in the location
you have selected. Follow procedures in the Upgrading Your
Server chapter of your User’s Guide, plus installation inserts
and vendor documents that come with the option.
5
Installing Hard Disk Drives
■
Before you begin the rack installation review the following
guidelines.
Do Not:
Avoid Injury. It is required that two people are present when
lifting and assembling the server into a rack cabinet.
Anchor the Rack Cabinet. The rack cabinet must be anchored to an unmovable support or a front stabilizer to prevent it from falling over when one or more units are extended
in front of it on slide assemblies. The anchors must be able to
withstand a force of up to 113 kg (250 lbs.). You must also
consider the weight of any other device installed in the rack.
4
The accessory box contains:
❏
Click here to install the PDF
viewer (Adobe Acrobat Reader).
Click here to view or
print documents.
Use Adobe™ Acrobat™ Reader to read and print the
documents. If you do not have it, install it from NEC
EXPRESSBUILDER CD-ROM.
To read and print the User's Guide, insert NEC
EXPRESSBUILDER CD-ROM into the CD-ROM drive
on a system running Microsoft® Windows® (Winodws
95 or later, Windows NT 4.0 or later).
3
Your System Documentation
Save the packing material and carton box in case you ever
need to repack and move the server to another location.
■ Server
■ Front Bezel
■ Security key
■ Rack installation kit
■ Branch cable (PS/2)
■ NEC EXPRESSBUILDER bootable CD-ROM containing
the setup utility and system documentation
■ Getting Started! (this guide)
2
Follow the instructions for your safety to use the NEC
Express server.
WARNING LABELS
1
The warning labels are attached to components with possible
danger or their vicinity in your server to inform the user that a
hazardous situation may arise when operating the server. (Do
not intentionally remove or damage any of the labels.)
If you find any labels totally/partially removed or illegible due
to damage, contact your sales representative.
SAFETY NOTES
Read this section carefully to ensure proper and safe use of
the server (Refer to User’s Guide for detail).
•
Failure to heed this sign could result in serious injury or death.
•
•
•
•
•
•
•
•
•
•
•
Do not use the server for services where critical high availability may directly affect human lives.
Do not use the server if any smoke, odor, or noise is present.
Keep needles or metal objects away from the server.
Do not use the server in any unapproved place.
Always install the server on the standard EIA 19-inch rack cabinet.
Do not hold the power plug with a wet hand.
Do not connect the ground wire to a gas pipe.
Disconnect the power cord before installing or removing the
server.
Do not disassemble, repair, or alter the server.
Do not look into the CD-ROM drive.
Do not remove the lithium battery.
Disconnect all the power plug before accessing inside the
server, or connecting the peripherals.
Keep water or foreign matter away from the server.
Plug into a proper power source.
Do not connect the power cord to an outlet that has an illegal
number of connections.
Insert the power plug into the outlet as far as it goes.
Use the authorized power cord only.
Never attempt to lift the server only by yourself.
Do not install the server in any place other than specified.
Do not install the server on a rack with leaving covers removed.
Do not pinch your finger with rails or other components.
Do not apply any load on the server pulled out from the rack.
Do not connect any interface cable when the power cord of
the server is plugged into a power source.
Do not use any unauthorized interface cable.
Avoid installation in extreme temperature conditions.
Make sure of complete board installation.
Do not pull out or remove the server from the rack unnecessarily.
Do not touch the fan blades when moving.
Avoid contact with the server during thunderstorms.
Keep animals away from the server.
Do not place any object on top of the server.
Do not use a cellular phone or pager around the server.
Do not remove the cooling fans.
Failure to heed this sign could result in personal injury
or damage to properties.
•
•
•
•
•
•
•
•
•
•
•
•
•
•
•
•
•
•
•
•
•
■
■
■
Locate the rack where the power cord of the server must
be connected to an AC outlet that shares other devices
with large power consumption.
Locate the rack near a device that is generating intense
magnetic fields (such as a TV, radio, broadcast/communication antenna, power transmission wire, and electromagnetic crane.) If unavoidable, contact your service
representative to request proper shielding.)
Locate the rack where some objects may fall on the rack.
7-2003, Rev.00
■
Locate the rack next to equipment that generates power
noise (e.g., contact spark at power-on/power-off of
commercial power supply through a relay). If you must
install the server close to such equipment, request your
service representative for separate power cabling or
noise filter installation.
1. Install the rack
cabinet.
2. Install the
server.
3. Fix the
server.
Captive thumbscrews
■ Electrostatic discharge (ESD) can damage disk
drives, boards, and other parts. This system can
withstand normal levels of environmental ESD while
you are installing hard disk drives. However, we
recommend that you do all procedures in this instruction only at an ESD workstation or provide some
ESD protection by wearing an antistatic wrist strap
attached to chassis ground – any unpainted metal
surface – on your system when handling parts.
See the back side to continue the setting up.
Keyboard
LAN devices
USB device*1
Mouse
Serial interface
device*2
*3
Front panel
6
Connecting the Peripherals
SCSI device
Connect the peripherals with the server.
USB device*1
Monitor
Rear panel
Serial nterface
device*2
Connect the
power plug to the
wall outlet after
completing all
connections*4.
USB device*1
*1 Any USB keyboard and mouse are not supported.
*2 A leased line cannot be connected directly to this connector. The console of a
management PC can be connected to only serial port 2 (BIOS setting requied).
Connect the console to only serial port 2 on either the front or rear panel. This
connector is capped for preventing incorrect connection at the factory.
*3 Use the provided branch cable.
*4 Connect the power cord(s) to a circuit breaker of 15 A or less.
Turning on the Server
7
Press the POWER switch on the front of the server to power-up the server. If your
server does not include Network Operating System (NOS) software, use the DOS
diskettes to boot-up the DOS prompt indicating your system is operational.
POWER LED
turned on.
POWER switch
Configuring the Server
Installing Application Software
Locked
Position
Put the NEC EXPRESSBUILDER CD-ROM in the CD-ROM drive on a system running Microsoft Windows(Windows 95 or later, Windows NT 4.0 or
later). The following menu will appear automatically.
Use this menu to:
■ Read documentation.
■ Install the management software.
Unlocked
Position
Refer to Installing and Using Utilities in your User's Guide for detail.
http://www.nec.co.jp/express/
NEC Express5800 Web Site
BSMI STATEMENT:
Warning: This is a Class A product. In domestic environment this product may cause radio
interference in which case the user may be required to take adequate measures (EN55022).
CE STATEMENT:
This equipment has been tested and found to comply with the limits for a Class A digital
device, pursuant to Part 15 of the FCC Rules. These limits are designed to provide
reasonable protection against harmful interference when the equipment is operated in a
commercial environment. This equipment generates, uses, and can radiate radio frequency energy and, if not installed and used in accordance with the instruction manual,
may cause harmful interference to radio communications. Operation of this equipment in a
residential area is likely to cause harmful interference in which case the user will be
required to correct the interference at his own expense.
FCC STATEMENT:
Your server installation is now complete.
To help prevent unauthorized system entry
or use, the system includes full lockable
front bezel.The bezel provides access to the
front panel switches, the front panel USB
and serial port, the hot-swap drive bays,
and the hot-swap power supplies.
Refer to Chapter 2 of User’s Guide for detail
instruction
Installing Front Bezel
❏
❏
Power-on or reboot the system. The following message is displayed.
10
11
Configure the server with the BIOS Setup Utility and SCSI/RAID Configuration
Utilities.
BIOS Setup Utility
8
Press F2. The BIOS Setup Utility starts and the Main Menu is displayed.
NOTE: It might be displayed with another message. The massage depends
on the configuration of your server.
Power-on or reboot the system. “Press <F2> to enter SETUP” displays.
The BIOS Setup Utility is used to change system configuration parameters. The
utility is resident in the system FLASH memory and does not require a diskette
or an operating system present to run.
You access the BIOS Setup utility when you turn on or reboot your system. To run
the BIOS Setup Utility, perform the following procedure:
1.
2.
SCSI Configuration Utility
1.
Press Ctrl-A. The SCSI configuration utility starts and the channel selection
menu is displayed.
The SCSI configuration utility is used to change default values and check and/or
change SCSI device settings that may conflict with those of other devices in the
server.
To run the SCSI configuration utility, perform the following procedure:
2.
Optional RAID Configuration Utility
The Optional RAID controller include the configuration utility.
The RAID configuration utility allows you to configure your disk array. The RAID
controllers support various versions of RAID technology (RAID level). To use any
RAID level, you must configure the RAID controller using the RAID configuration
utility prior to installing your Network Operating System.
For an explanation of these utility, refer to the documentation that was shipped with
these controllers.
To run the NEC EXPRESSBUILDER CD-ROM, insert the CD-ROM into the
CD-ROM device, reboot the system and follow the screen prompts.
■ Run the maintenance utilities.
■ Install the Network Operating System (NOS).
■ Create driver diskettes, BIOS update diskettes and so on.
Run the NEC EXPRESSBUILDER CD-ROM to:
9
Running the NEC EXPRESSBUILDER CD-ROM
❏
❏
Trademarks
NEC ESMPRO and NEC EXPRESSBUILDER are trademarks of NEC Corporation. Microsoft and
Windows are registered trademarks of Microsoft Corporation in the United States and other countries.
Adobe, Adobe logo, and Acrobat are trademarks of Adobe Systems Incorporated.
All other product, brand, or company names used in this publication are the trademarks or registered
trademarks of their respective holders.
Copyright © 2003 NEC Corporation
To allow for design and specification improvements, the information in this document is subject to
change at any time, without notice. Reproduction of this document or portions thereof without prior
written approval of NEC is prohibited.
Recycled paper is used.