1
5/7/06
®
11:45 AM
Page 1
T515
PORTUGUÊS
SVENSKA
Owner’s Manual
Manuel de l'utilisateur
Bedienungsanleitung
Gebruikershandleiding
Manual del Usuario
Manuale delle Istruzioni
Manual do Proprietário
Bruksanvisning
ITALIANO
ESPAÑOL
NEDERLANDS
DEUTSCH
FRANÇAIS
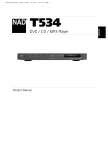
DVD / CD / MP3 Player
ENGLISH
T515_NAD_English_Final.qxd
T515_NAD_English_Final.qxd
5/7/06
11:45 AM
Page 2
Introduction
IMPORTANT SAFETY INSTRUCTIONS
CAUTION
RISK OF ELECTRIC SHOCK
DO NOT OPEN
ENGLISH
WARNING: TO REDUCE THE RISK OF ELECTRIC
SHOCK, DO NOT REMOVE THE COVER OR BACK
OF THIS PRODUCT. THERE ARE NO USERSERVICEABLE PARTS INSIDE. REFER SERVICING
TO QUALIFIED SERVICE PERSONNEL.
FRANÇAIS
WARNING: TO REDUCE THE RISK OF FIRE OR
ELECTRIC SHOCK, DO NOT EXPOSE THIS PRODUCT
TO DRIPPING OR SPLASHING WATER, RAIN, OR
MOISTURE. DO NOT PLACE OBJECTS FILLED WITH
WATER SUCH AS VASES, ON THE PRODUCT.
DEUTSCH
NEDERLANDS
WARNING: THIS DIGITAL VERSATILE DISC PLAYER
EMPLOYS A LASER SYSTEM. USE OF CONTROLS,
ADJUSTMENTS, OR THE PERFORMANCE OF
PROCEDURES OTHER THAN THOSE SPECIFIED
HEREIN MAY RESULT IN HAZARDOUS RADIATION
EXPOSURE.
CAUTION
This apparatus should not be exposed to water (dripping or splashing)
and no objects filled with liquids, such as vases, should be placed on the
apparatus.
FCC WARNING
This equipment may generate or use radio frequency energy. Changes
or modifications to this equipment may cause harmful interference
unless the modifications are expressly approved in the instruction
manual. The user could lose the authority to operate this equipment if
an unauthorized change or modification is made.
REGULATORY INFORMATION: FCC PART 15
This product has been tested and found to comply with the limits for a
Class B digital device, pursuant to Part 15 of the FCC Rules. These limits
are designed to provide reasonable protection against harmful
interference when the product is operated in a residential installation.
This product generates, uses and can radiate radio frequency energy
and, if not installed and used in accordance with the instruction manual,
may cause harmful interference to radio communications. However,
there is no guarantee that interference will not occur in a particular
installation. If this product does cause harmful interference to radio or
television reception, which can be determined by turning the product
off and on, the user is encouraged to try to correct the interference by
one or more of the following measures:
• Reorient or relocate the receiving antenna.
• Increase the separation between the product and receiver.
• Connect the product into an outlet on a circuit different from that to
which the receiver is connected.
• Consult the dealer or an experienced radio/TV technician for help.
ESPAÑOL
WARNING: TO PREVENT DIRECT EXPOSURE TO
LASER BEAM, DO NOT OPEN THE ENCLOSURE.
VISIBLE LASER RADIATION WHEN OPEN.
WARNING: NEVER STARE DIRECTLY INTO THE
LASER BEAM.
ITALIANO
CAUTION
Do not install this product in a confined space such as a book
case or similar unit.
PORTUGUÊS
NOTES ON ENVIRONMENTAL PROTECTION
At the end of its useful life, this product must not be disposed
of with regular household waste but must be returned to a
collection point for the recycling of electrical and electronic
equipment. The symbol on the product, user's manual and
packaging, point this out.
The materials can be reused in accordance with their
markings. Through re-use, recycling of raw materials, or other
forms of recycling of old products, you are making an
important contribution to the protection of our environment.
Your local administrative office can advise you of the
responsible waste disposal point.
SVENSKA
NAD is a trademark of NAD Electronics International, a division of Lenbrook Industries Limited
Copyright 2006, NAD Electronics International, a division of Lenbrook Industries Limited
2a
T515_NAD_English_Final.qxd
5/7/06
11:45 AM
Page 3
Introduction
IMPORTANT SAFETY INSTRUCTIONS
11.Only use attachments/accessories specified by the
manufacturer.
3. Heed all warnings. – All warnings on the product and in
the operating instructions should be adhered to.
4. Follow all instructions. – All operating and use
instructions should be followed.
6. Clean only with dry cloth. – Unplug this product from
the wall power before cleaning. Do not use liquid cleaners.
7. Do not block any ventilation openings. Install in
accordance with the manufacturer’s instructions.
– Slots and openings in the cabinet are provided for
ventilation and to ensure reliable operation of the product
and to protect it from over-heating. The openings should
never be blocked by placing the product on a bed, sofa, rug
or other similar surface. This product should not be placed in
a built-in installation such as a bookcase or rack unless
proper ventilation is provided or the manufacturer’s
instructions have been adhered to.
12.Use only with the cart, stand, tripod, bracket, or
table specified by the manufacturer, or sold with
apparatus. When a cart is used, use caution when
moving the cart/product combination to avoid
injury from tip-over.
13.Unplug this product during lightning storms or
when unused for long periods of time.
14.Refer all servicing to qualified service personnel.
Servicing is required when the product has been
damaged in any way, such as power-supply cord
or plug is damaged, liquid has been spilled or
objects have fallen into the product, the product
has been exposed to rain or moisture, does not
operate normally, or has been dropped.
FRANÇAIS
PORTUGUÊS
5. Do not use this product near water. – For example:
near a bath tub, wash bowl, kitchen sink, laundry tub, in a
wet basement; or near a swimming pool; and other areas
located near water.
DEUTSCH
2. Keep these instructions. – The safety, operating and
use instructions should be retained for future reference.
10.Protect the power cord from being walked on or
pinched particularly at plugs, convenience
receptacles, and the point where they exit from
the product.
NEDERLANDS
1. Read these instructions. – All these safety and
operating instructions should be read before the product is
operated.
ESPAÑOL
DO NOT REMOVE THE CABINET COVER, OR YOU MAY BE EXPOSED TO DANGEROUS VOLTAGE. REFER
SERVICING TO QUALIFIED SERVICE PERSONNEL ONLY.
ITALIANO
This product has been designed and manufactured to assure personal safety. Improper use can result in electric shock or
fire hazard. The safeguards incorporated in this product will protect you if you observe the following procedures for
installation, use, and servicing.
This product does not contain any parts that can be repaired by the user.
ENGLISH
CAUTION: PLEASE READ AND OBSERVE ALL WARNINGS AND INSTRUCTIONS IN THIS OWNER’S
MANUAL AND THOSE MARKED ON THE PRODUCT. RETAIN THIS MANUAL FOR FUTURE
REFERENCE.
8. Do not install near any heat sources such as
radiators, heat registers, stoves, or other
apparatus (including amplifiers) that produce
heat.
SVENSKA
9. Do not defeat the safety purpose of the polarized
or grounding-type plug. A grounding-type plug
has two blades with one wider than the other. A
grounding type plug has two blades and a third
grounding prong. The wide blade or the third
prong are provided for your safety. If the
provided plug does not fit into your outlet,
consult an electrician for replacement of the
obsolete outlet.
2b
T515_NAD_English_Final.qxd
5/7/06
11:45 AM
Page 4
Introduction
IMPORTANT SAFETY INSTRUCTIONS
ENGLISH
FRANÇAIS
DEUTSCH
NEDERLANDS
ESPAÑOL
ITALIANO
PORTUGUÊS
SVENSKA
2c
T515_NAD_English_Final.qxd
5/7/06
11:45 AM
Page 3
Introduction
FRANÇAIS
DEUTSCH
ITALIANO
ESPAÑOL
NEDERLANDS
REFERENCE
Troubleshooting . . . . . . . . . . . . . . . . . . . . . . . . . . . . . . . . . . . . . . .30
Table of Languages and Their Abbreviations . . . . . . . . . . . . . . .31
Country Codes List . . . . . . . . . . . . . . . . . . . . . . . . . . . . . . . . . . . . .32
Specifications . . . . . . . . . . . . . . . . . . . . . . . . . . . . . . . . . . . . . . . . .33
PORTUGUÊS
INSTALLATION AND SETUP
Connections . . . . . . . . . . . . . . . . . . . . . . . . . . . . . . . . . . . . . . . . . .10
Setting up the Player . . . . . . . . . . . . . . . . . . . . . . . . . . . . . . . . . .10
DVD Player Connections . . . . . . . . . . . . . . . . . . . . . . . . . . . . . . .10
HDMI Connection . . . . . . . . . . . . . . . . . . . . . . . . . . . . . . . . . . . .11
Audio Connection to Optional Equipment . . . . . . . . . . . . . . . . .12
Before operation . . . . . . . . . . . . . . . . . . . . . . . . . . . . . . . . . . . . . .13
On-Screen Display . . . . . . . . . . . . . . . . . . . . . . . . . . . . . . . . . . . .13
Initial Settings . . . . . . . . . . . . . . . . . . . . . . . . . . . . . . . . . . . . . . .14
Language. . . . . . . . . . . . . . . . . . . . . . . . . . . . . . . . . . . . . . . . . . . 14
Display. . . . . . . . . . . . . . . . . . . . . . . . . . . . . . . . . . . . . . . . . . . . . 14
AUDIO . . . . . . . . . . . . . . . . . . . . . . . . . . . . . . . . . . . . . . . . . . . . . 15
Others . . . . . . . . . . . . . . . . . . . . . . . . . . . . . . . . . . . . . . . . . . . . . 16
LOCK (Parental Control) . . . . . . . . . . . . . . . . . . . . . . . . . . . . . . . 17
OPERATION
Operation with DVD and Video CD . . . . . . . . . . . . . . . . . . . . . . .18
Playing a DVD or Video CD . . . . . . . . . . . . . . . . . . . . . . . . . . . . .18
General Features . . . . . . . . . . . . . . . . . . . . . . . . . . . . . . . . . . . . .18
Special DVD Features . . . . . . . . . . . . . . . . . . . . . . . . . . . . . . . . . .20
DVD Audio Discs . . . . . . . . . . . . . . . . . . . . . . . . . . . . . . . . . . . . .21
Operation with Audio CD and MP3 / WMA Disc . . . . . . . . . . . .22
Playing an Audio CD or MP3/WMA Disc . . . . . . . . . . . . . . . . . . .22
Audio CD and MP3 / WMA Disc Features . . . . . . . . . . . . . . . . . .23
Programmed Playback . . . . . . . . . . . . . . . . . . . . . . . . . . . . . . . . .24
Operation with JPEG Disc . . . . . . . . . . . . . . . . . . . . . . . . . . . . . . .25
Viewing a JPEG Disc . . . . . . . . . . . . . . . . . . . . . . . . . . . . . . . . . .25
Operation with a DVD VR format Disc . . . . . . . . . . . . . . . . . . . .26
Maintenance and Service . . . . . . . . . . . . . . . . . . . . . . . . . . . . . .26
Operation with a DivX Movie Disc . . . . . . . . . . . . . . . . . . . . . . .27
Additional Information . . . . . . . . . . . . . . . . . . . . . . . . . . . . . . . . .28
Additional Features . . . . . . . . . . . . . . . . . . . . . . . . . . . . . . . . . . .28
SVENSKA
INTRODUCTION
Important Safety Instructions . . . . . . . . . . . . . . . . . . . . . . . . .2a-2c
Before use . . . . . . . . . . . . . . . . . . . . . . . . . . . . . . . . . . . . . . . . . . . . .4
Symbol used in this Manual . . . . . . . . . . . . . . . . . . . . . . . . . . . . .4
About the ( ) Symbol Display . . . . . . . . . . . . . . . . . . . . . . . . . .4
Notes on Discs . . . . . . . . . . . . . . . . . . . . . . . . . . . . . . . . . . . . . . . .4
Types of Playable Discs . . . . . . . . . . . . . . . . . . . . . . . . . . . . . . . . . .5
Disc-related terms . . . . . . . . . . . . . . . . . . . . . . . . . . . . . . . . . . . . .6
Front Panel and Display Window . . . . . . . . . . . . . . . . . . . . . . . . .7
Rear Panel . . . . . . . . . . . . . . . . . . . . . . . . . . . . . . . . . . . . . . . . . . . . .8
Remote Control . . . . . . . . . . . . . . . . . . . . . . . . . . . . . . . . . . . . . . . .9
ENGLISH
TABLE OF CONTENTS
3
T515_NAD_English_Final.qxd
5/7/06
11:45 AM
Page 4
Introduction
BEFORE USE
To ensure proper use of this product, please read this owner’s manual
carefully and retain for future reference.
ENGLISH
This manual provides information on the operation and maintenance of
your DVD player. Should the unit require service, contact an authorized
service location.
SYMBOL USED IN THIS MANUAL
FRANÇAIS
The lightning flash symbol alerts you to the presence of
dangerous voltage within the product enclosure that may
constitute a risk of electric shock.
ABOUT THE
SYMBOL DISPLAY
“ ” may appear on your TV display during operation and indicates
that the function explained in this owner’s manual is not available on
that specific DVD video disc.
NOTES ON DISCS
HANDLING DISCS
Do not touch the playback side of the disc. Hold the disc by the edges
so that fingerprints do not get on the surface. Never stick paper or tape
on the disc.
The exclamation mark alerts you to the presence of important
operating and maintenance / servicing instructions.
DEUTSCH
Indicates hazards likely to cause harm to the unit itself or other
material damage.
NOTE:
Indicates special notes and operating features.
NEDERLANDS
TIP:
Indicates tips and hints for making the task easier.
STORING DISCS
After playing, store the disc in its case. Do not expose the disc to direct
sunlight or sources of heat and never leave it in a parked car exposed to
direct sunlight.
CLEANING DISCS
Fingerprints and dust on the disc can cause poor picture quality and
sound distortion. Before playing, clean the disc with a clean cloth. Wipe
the disc from the centre out.
A section whose title has one of the following symbols is applicable only
to the disc represented by the symbol.
ESPAÑOL
ITALIANO
DVD-V
DVD and finalized DVD±R/RW
DVD-A
DVD Audio discs
VCD
Video CDs
CD
Audio CDs
MP3
MP3 Discs
WMA
WMA Discs
JPEG
JPEG Discs
DivX
DivX Discs
PORTUGUÊS
SVENSKA
4
Do not use strong solvents such as alcohol, benzine, thinner,
commercially available cleaners, or anti-static spray intended for older
vinyl records.
T515_NAD_English_Final.qxd
5/7/06
11:46 AM
Page 5
Introduction
BEFORE USE
Notes:
• Depending on the conditions of the recording equipment or the CDR/RW (or DVD±R/RW) disc itself, some CD-R/RW (or DVD±R/RW)
discs cannot be played on the unit.
• Do not attach any seal or label to either side (the labelled side or the
recorded side) of a disc.
• This DVD player requires discs and recordings to meet certain
technical standards in order to achieve optimal playback quality. Prerecorded DVDs are automatically set to these standards. There are
many different types of recordable disc formats (including CD-R
containing MP3 or WMA files) and these require certain pre-existing
conditions (see above) to ensure compatible playback.
CUSTOMERS SHOULD NOTE THAT PERMISSION IS REQUIRED IN
ORDER TO DOWNLOAD MP3 / WMA FILES AND MUSIC FROM
THE INTERNET. OUR COMPANY HAS NO RIGHT TO GRANT SUCH
PERMISSION. PERMISSION SHOULD ALWAYS BE SOUGHT FROM
THE COPYRIGHT OWNER.
CONSUMERS SHOULD NOTE THAT NOT ALL HIGH DEFINITION
TELEVISION SETS ARE FULLY COMPATIBLE WITH THIS PRODUCT AND
MAY CAUSE ARTIFACTS TO BE DISPLAYED IN THE PICTURE. IN CASE OF
525 OR 625 PROGRESSIVE SCAN PICTURE PROBLEMS, IT IS
RECOMMENDED THAT THE USER SWITCH THE CONNECTION TO THE
‘STANDARD DEFINITION’ OUTPUT. IF THERE ARE QUESTIONS
REGARDING OUR TV SET COMPATIBILITY WITH THIS MODEL 525p AND
625p DVD PLAYER, PLEASE CONTACT OUR CUSTOMER SERVICE
CENTER.
ENGLISH
FRANÇAIS
Notes on Copyrights:
It is forbidden by law to copy, broadcast, show, broadcast via cable, play
in public, or rent copyrighted material without permission. This product
features the copy protection function developed by Macrovision. Copy
protection signals are recorded on some discs. When recording and
playing the pictures of these discs picture noise will appear. This product
incorporates copyright protection technology that is protected by
method claims of certain U.S. patents and other intellectual property
rights owned by Macrovision Corporation and other rights owners. Use
of this copyright protection technology must be authorized by
Macrovision Corporation, and is intended for home and other limited
viewing uses only unless otherwise authorized by Macrovision
Corporation. Reverse engineering or disassembly is prohibited.
DEUTSCH
In addition, this unit plays DVD±R/RW and CD-R/RW that contains audio
titles, DivX, MP3, WMA, and/or JPEG files.
NEDERLANDS
Audio CD
(8 cm / 12 cm disc)
• If you try to play a DVD with a different regional code from your
player, the message “Check Regional Code” appears on the TV
screen.
ESPAÑOL
Video CD (VCD/SVCD)
(8 cm / 12 cm disc)
Notes on Regional Codes
• Most DVD discs have a globe with one or more numbers in it clearly
visible on the cover. This number must match your unit’s regional
code or the disc cannot play.
ITALIANO
DVD audio discs
(8 cm / 12 cm disc)
This unit has a regional code printed on the rear of the unit. This unit
can play only DVD discs labelled same as the rear of the unit or “ALL”.
PORTUGUÊS
DVD
(8 cm / 12 cm disc)
Regional Code
SVENSKA
TYPES OF PLAYABLE DISCS
5
T515_NAD_English_Final.qxd
5/7/06
11:46 AM
Page 6
Introduction
BEFORE USE
DISC-RELATED TERMS
ENGLISH
DVD ±R / DVD ±RW
DVD -R and DVD +R are two different standards for recordable DVD
drives and discs. This format allows information to be recorded onto the
DVD disc only once. DVD +RW and DVD -RW are two standards for
re-writable media, meaning the DVD content can be erased and
re-recorded. Single-sided discs can hold 4.38 Gigabytes and doublesided discs hold twice as much. There are no dual layer single sided
recordable discs.
FRANÇAIS
VCD (VIDEO CD)
A VCD holds up to 74 minutes (650 MB disc) or 80 minutes (700 MB
disc) of MPEG-1 full-motion video along with quality stereo sound.
DEUTSCH
MPEG
MPEG is an international standard for video and audio compression.
MPEG-1 is used in encoding video for VCD and provides for
multichannel surround sound coding such as PCM, Dolby Digital, DTS
and MPEG audio.
NEDERLANDS
MP3
MP3 is a popular compression format used for digital audio files that
yields very high near-CD quality.
WMA
Windows media audio file. A type of coding / decoding developed by
Microsoft Corp.
ESPAÑOL
JPEG
Joint Pictures Expert Group. JPEG is a compressed file format that allows
you to save images with no limit on the number of colors.
DIVX
DivX is the name of a revolutionary new video codec which is based on
the new MPEG-4 compression standard for video. You will be able to
play DivX movies using this DVD player.
ITALIANO
PORTUGUÊS
SVENSKA
6
PBC: PLAYBACK CONTROL (VIDEO CD ONLY)
Playback control is available for Video CD (VCD) version 2.0 disc
formats. PBC allows you to interact with the system via menus, search
functions, or other typical computer-like operations. Moreover, still
pictures of high resolution can be played if they are included in the disc.
Video CDs not equipped with PBC (Version 1.1) operate in the same
way as audio CDs.
TITLE (DVD VIDEO DISCS ONLY)
A title is generally a distinct section of a DVD disc. For example the main
feature could be title 1, a documentary describing how the film was
made could be title 2, and cast interviews could be title 3. Each title is
assigned a reference number enabling you to locate it easily.
CHAPTER (DVD VIDEO DISCS ONLY)
A chapter is a segment of a title such as a scene in a film or one
interview in a series. Each chapter is assigned a chapter number,
enabling you to locate the chapter you want. Depending on the disc,
chapters may not be recorded.
GROUP (DVD AUDIO DISCS ONLY)
The main audio content or accompanying feature content or additional
feature content, or music album. Each group is assigned a group
reference number enabling you to locate it easily.
SCENE (VCD)
On a video CD with PBC (playback control) functions, moving pictures
and still pictures are divided into sections called “scenes”. Each scene is
displayed in the menu screen and assigned a scene number, enabling
you to locate the scene you want. A scene is composed of one or several
tracks.
TRACK
A distinct element of audiovisual information, such as the picture or
sound track for a specific language (DVD), or a musical piece on a
video or audio CD. Each track is assigned a track number, enabling
you to locate the track you want. DVD discs allow one track of video
(with multiple angles) and several tracks of audio.
T515_NAD_English_Final.qxd
5/7/06
11:46 AM
Page 7
Introduction
FRONT PANEL AND DISPLAY WINDOW
ENGLISH
Front Panel
POWER
Switches
the player
player ON
ON and
and OFF.
OFF.
Switches the
SKIP((
))
SKIP
Moves to
to PREVIOUS
Moves
PREVIOUS or
or
NEXT
NEXT chapter/track.
chapter/track.
DEUTSCH
OPEN / CLOSE
OPEN
CLOSE
Opens/ or
closes the disc tray.
Opens or closes the disc tray.
Remote Sensor
Point
Point the
the DVD Player
remote
remote control
control here.
SCAN
SCAN
( ( /
))
and than
hold
Press and hold forPress
greater
for greater
than 3search
seconds
3 seconds
fast reverse
or
fast reverse
search
or
forward
search.
forward search.
NEDERLANDS
STOP
STOP
Stops
Stops playback.
playback.
Disc Tray
Disc
InsertTray
a disc here.
Insert a disc here.
ESPAÑOL
PLAY
PLAY
Starts
Starts playback.
playback.
Display window
Shows the
the current
currentstatus
status
Shows
of the
theplayer.
player.
of
FRANÇAIS
PAUSE
PAUSE
Pause playback
playbacktemporarily/press
temporarily/press
Pause
repeatedly for
forframe-by-frame
frame-by-frame
repeatedly
playback.
playback.
ITALIANO
Display Window
PORTUGUÊS
Display window
Display
window
Shows the
Shows
thecurrent
currentstatus
status
of the
theplayer.
player.
SVENSKA
Remote Sensor
Remote
Sensor
Point
Player
Pointthe
the DVD
DVD Player
remote
here.
remotecontrol
control here.
7
T515_NAD_English_Final.qxd
5/7/06
11:46 AM
Page 8
Introduction
REAR PANEL
HDMI
HDMIOUT
OUT
HDMI
output
providing
HDMI
output
providinga ahigh
highquality
quality
interface
digital
audioand
andvideo.
video.
interface
forfor
digital
audio
COMPONENT/PROGRESSIVE
SCAN
VIDEO
COMPONENT/PROGRESSIVE
SCAN
VIDEO
OUT OUT
Connect
with
Y Cb/Pb
Cr/PrCr/Pr
inputs.
Connecttotoa aTVTV
with
Y Cb/Pb
inputs.
ENGLISH
AUDIO
AUDIOOUT
OUT(Left/Right)
(Left/Right)
Connect
amplifier,receiver,
receiver,
Connect
to to
ananamplifier,
or
stereo
system.
or stereo system.
EUROPEAN
230 VOLT
VERSION ONLY
FRANÇAIS
DEUTSCH
OPTICAL(TOS
(TOS link)
link)
OPTICAL
Connect to digital
Connect
digital
audioequipment.
equipment.
audio
VIDEO OUT
VIDEO OUT
Connecttotoa TV
a TV
Connect
withvideo
videoinputs.
inputs.
with
SCART/RGB OUT
COAXIAL
(Digital
audio
COAXIAL
(Digital
audioout
outjack)
jack)
Connecttotodigital
digital(coaxial)
(coaxial)
Connect
audioequipment.
equipment.
audio
SCART/RGB OUT
Connecttotoa aTVTV
with
SCART
Connect
with
SCART
jack.jack.
S-VIDEO OUT (North American-version only)
NEDERLANDS
IR IN
IR IN
By connecting this DVD player to another
By connecting this DVD player to another NAD audio
NAD audio component or system
component or system controller equipped with an IR
controller equipped with an IR output,
output, you can remotely operate the T515.
you can remotely operate the T515.
ESPAÑOL
ITALIANO
PORTUGUÊS
SVENSKA
8
S-VIDEO OUT
Connecttotoa aTVTV
with
S-Video
inputs.
Connect
with
S-Video
inputs.
ACPower
Power Cord
Cord
AC
Plug
intothe
thepower
powersource.
source.
Plug
into
T515_NAD_English_Final.qxd
5/7/06
11:46 AM
Page 9
Introduction
REMOTE CONTROL
OFF
Switches DVD Player OFF.
ON
Switches DVD Player ON.
PROGRAM
Enters to the program edit mode or exits from that.
AUDIO
Selects an audio language (DVD).
ENGLISH
CLEAR
Removes a track number on the program list or a mark
on the MARKER SEARCH menu.
SUBTITLE
Selects a subtitle language.
ZOOM
Enlarges video image.
ANGLE
Selects a DVD camera angle if available
RPT A-B
Repeat sequence.
FRANÇAIS
RESOLUTION
You can change the resolution depending on your TV.
- HDMI mode : You can switch among the 480p/576p,
720p or 1080i resolution.
- Component mode : You can switch among 480i/576i,
480p/576p, 720p or 1080i resolution.
REPEAT
Repeat chapter, track, title, all.
RANDOM
Plays tracks in random order.
0-9 number buttons
Selects numbered items in a menu.
MARKER
Marks any point during playback.
SCAN (
)
Press for fast reverse search or forward search.
SEARCH
Displays MARKER SEARCH menu.
(
/
) SKIP
Go to beginning of current chapter or track or go
to previous chapter or track.
DEUTSCH
MENU
Accesses menu on a DVD disc.
RTN
Displays the menu of a video CD with PBC.
TITLE
Displays the discs Title menu, if available.
NEDERLANDS
OPEN/CLOSE (
)
Opens and closes the disc tray.
SETUP
Accesses or removes setup menu.
Forward SLOW (
)
Press to advance slow playback.
(left/right/up/down)
- Selects an item in the menu.
STOP ( )
Stops playback.
ENTER
Acknowledges menu selection
ESPAÑOL
PAUSE/STEP ( )
Pauses playback temporarily/ press repeatedly
for frame-by-frame playback.
DISP
Accesses On-Screen display
PORTUGUÊS
ITALIANO
PLAY ( )
Starts playback.
PLACE BATTERIES INTO OPENING. ENSURE
THE CORRECT FITTING IS OBSERVED
REPLACE BATTERY COVER BY ALIGNING AND
INSERTING THE TWO TABS INTO THE HOLES.
SVENSKA
PRESS IN AND LIFT TAB TO REMOVE
BATTERY COVER OUT FROM RECESS
PRESS BATTERY COVER INTO PLACE UNTIL IT
'CLICKS' CLOSED
9
T515_NAD_English_Final.qxd
5/7/06
11:46 AM
Page 10
Installation and Setup
CONNECTIONS
SETTING UP THE PLAYER
The picture and sound of a nearby TV, VCR, or radio may be distorted
during playback. If this occurs, position the player away from the TV,
VCR, or radio, or turn off the unit after removing the disc.
ENGLISH
DVD PLAYER CONNECTIONS
Depending on your TV and other equipment there are various ways
you can connect the player. Please refer to the manuals of your TV,
stereo system or other devices as necessary for additional connection
information.
FRANÇAIS
Rear of TV
NOTES
• For VIDEO OUT and S-VIDEO OUT jack connection, resolution must
be set to 480i/576i or 480p/576p by pressing RESOLUTION, however
VIDEO OUT and S-VIDEO OUT is always at 480i/576i standard
resolution.
Component Video (Color Stream®)
Connect the COMPONENT VIDEO OUT/PROGRESSIVE SCAN jacks on
the DVD Player to the corresponding in jacks on the TV using an Y
Cb/Pb Cr/Pr cable (C).
PROGRESSIVE SCAN (COLORSTREAM® PRO):
• If your television is a high-definition or “digital ready” television, you
may take advantage of the DVD Player’s progressive scan output for
the highest video resolution possible.
• If your TV does not accept the Progressive Scan format, the picture
will appear scrambled if you try Progressive Scan on the DVD Player.
DEUTSCH
NEDERLANDS
NOTES
• You can change the resolution (480/576, 720p, 1080i) for the
component/progressive scan video output by pressing RESOLUTION.
• For 720p and 1080i resolution, only non-copy protected discs can be
played back. If the disc is copy protected, it will be displayed at the
480p/576p resolution.
• Progressive scan does not work with the analog video connections
(VIDEO OUT & S-VIDEO).
ESPAÑOL
Audio Connection to Your TV:
Connect the left and right AUDIO OUT jacks of the DVD Player to the
audio left and right IN jacks on the TV (A) using the audio cables. Do
not connect the DVD Player’s AUDIO OUT jack to the Phono In jack
(record deck) of your audio system.
Rear of
DVD player
Rear of TV
ITALIANO
Video and Audio Connections to Your TV
Make sure the DVD player is connected directly to the TV and not to a
VCR, otherwise the DVD image could be distorted by the copy
protection system.
Video
Connect the VIDEO OUT jack on the DVD player to the video in jack on
the TV using the video cable (V).
PORTUGUÊS
S-Video (North American version only)
Connect the S-VIDEO OUT jack on the DVD Player to the S-Video in
jack on the TV using the S-Video cable (S).
SCART connection (European version only)
Connect the TO TV SCART jack on the DVD Player to the
corresponding in jacks on the TV using the SCART cable (T).
SVENSKA
10
Rear of DVD player
T515_NAD_English_Final.qxd
5/7/06
11:46 AM
Page 11
Installation and Setup
CONNECTIONS
HDMI compatible TV
HDMI CONNECTION
If you have a HDMI TV or monitor, you can connect it to this player using
a HDMI cable.
• When you use HDMI, the other connections (Yellow VIDEO OUT,
S-Video and Component Video (Y Cb/Pb Cr/Pr)) will not work.
• If there is noise or lines on the screen, please check the HDMI cable.
FRANÇAIS
ABOUT HDMI
HDMI (High Definition Multimedia Interface) supports both video and
audio on a single digital connection for use with DVD Players, Set-Top
Boxes, and other AV devices.
HDMI was developed to provide the technologies of HDCP (High
Definition Contents Protection). HDCP is used to protect digital content
transmitted and received.
HDMI has the capability to support standard, enhanced, or
highdefinition video plus standard to multi-channel surround-sound
audio, HDMI features include uncompressed digital video, a bandwidth
of up to 5 gigabytes per second, one connector (instead of several
cables and connectors), and communication between the AV source
and AV devices such as DTVs.
DEUTSCH
Rear of DVD player
NEDERLANDS
NOTES
• No sound will be output from HDMI cable if the AUDIO setup is not
set to PCM / 48 kHz.
• The arrow on the cable connector body should face up for correct
alignment with the connector on the player.
• If a distorted or abnormal colour picture appears on the monitor,
switch Off and then back On the T515 via front panel power switch.
ENGLISH
1 Connect the HDMI OUT jack on the player to the HDMI jack on a
HDMI compatible TV or monitor (H).
2 Set the TV’s source to HDMI (refer to TV’s Owner’s manual).
3 Press RESOLUTION repeatedly to select the resolution you wish to
change to then press PLAY.
The DVD disc must not be playing in order to set the resolution.
OUTPUT CONNECTION
Available Resolution
HDMI
VIDEO OUT
1920 x 1080i
1280 x 720p
720 x 576p
1920 x 1080i
1280 x 720p
720 x 480p
HDMI
VIDEO OUT
1920 x 1080i
1280 x 720p
720 x 480p
COMPONENT
VIDEO OUT
1920 x 1080i
1280 x 720p
720 x 576p
720 x 576i
11920 x 1080i
1280 x 720p
720 x 480p
720 x 480i
COMPONENT
VIDEO OUT
11920 x 1080i
1280 x 720p
720 x 480p
720 x 480i
VIDEO OUT
720 x 576i
720 x 480i
VIDEO OUT
720 x 480i
S-VIDEO
720 x 480i
SCART
720 x 576i
720 x 480i
ITALIANO
Available Resolution
PAL
NTSC
PORTUGUÊS
OUTPUT
CONNECTION
HDMI, the HDMI logo and High-Definition Multimedia Interface are
trademarks or registered trademarks of HDMI licensing LLC.
SVENSKA
When you use HDMI connection, you can change the resolution
(480p/576p, 720p, 1080i) for the HDMI output by pressing
RESOLUTION. 480i/576i is not available. You can only change the
resolution within your TV’s and Monitor’s resolution capabilities.
For S-VIDEO OUT connection, black and white scramble signal will
appear if you select an incompatible resolution.
ESPAÑOL
TIP
11
T515_NAD_English_Final.qxd
5/7/06
11:46 AM
Page 12
Installation and Setup
CONNECTIONS
AUDIO CONNECTION TO OPTIONAL EQUIPMENT
Connect the DVD player to your optional equipment for audio output.
Rear of
Rear
of DVD
DVDplayer
player
ENGLISH
Amplifier equipped with 2-channel analogue stereo or Dolby Pro
Logic ll / Pro Logic
Connect the left and right AUDIO OUT jacks on the DVD player to the
audio left and right IN jacks on your amplifier, receiver, or stereo system,
using the audio cables (A).
FRANÇAIS
Amplifier equipped with 2-channel digital stereo (PCM) or
audio / video receiver equipped with a multi-channel decoder
(Dolby Digital™, MPEG 2, or DTS)
1 Connect one of the DVD Player’s DIGITAL AUDIO OUT jacks
(OPTICAL O or COAXIAL X) to the corresponding in jack on your
amplifier.
2 Use an optional digital (optical O or coaxial X) audio cable.
O
X
DEUTSCH
OPTICAL
A
COAXIAL
DIGITAL INPUT
R
L
AUDIO INPUT
NEDERLANDS
Amplifier(Receiver)
(Receiver)
Amplifier
ESPAÑOL
ITALIANO
PORTUGUÊS
SVENSKA
12
DIGITAL MULTI-CHANNEL SOUND
A digital multi-channel connection provides the best sound quality. For
this you need a multi-channel audio / video receiver that supports one
or more of the audio formats supported by your DVD player such as
MPEG 2, Dolby Digital and DTS. Check the receiver manual and the
logos on the front of the receiver.
NOTES
• If the audio format of the digital output does not match the
capabilities of your receiver, the receiver produces a strong, distorted
sound or no sound at all.
• Six Channel Digital Surround Sound via a digital connection can only
be obtained if your receiver is equipped with a Digital Multi-channel
decoder.
• To see the audio format of the current DVD in the on-screen display,
press AUDIO.
T515_NAD_English_Final.qxd
5/7/06
11:46 AM
Page 13
Installation and Setup
BEFORE OPERATION
Example: On-Screen Display during
playing DVD Video
1 Press DISPLAY during playback.
2 Press
to select an item. The selected item is highlighted.
3 Press
to change the setting. You can also use the number
buttons if appropriate (e.g. inputting the title number). For some
functions, press ENTER to execute the setting.
NOTES
• Some discs may not provide all of the features shown below.
• If no button is pressed for 10 seconds, the on-screen display
disappears.
Items
Selection Method
Title Number
, Numbers
ENTER
1/3
Chapter Number
, Numbers
ENTER
1 / 12
Time search
Numbers, ENTER
0:20:09
Audio language
and Digital Audio
Output mode
Subtitle language
Angle
or
AUDIO
ABC
1 ENG
or
SUBTITLE
1/3
or
ANGLE
PLAYBACK STATUS/RESTRICTIONS
Sound
3D SUR
Repeat title
DEUTSCH
Title
ENGLISH
You can display the general playback status on the TV screen. Some
items can be changed using the menu. To use the on-screen display:
FRANÇAIS
ON-SCREEN DISPLAY
Repeat sequence
Example: On-Screen Display during
playing VCD
Marker Search menu
Resume play from this point
Selection Method
Items
Action prohibited or not available
Track Number
(or PBC mode)
Time search
, Numbers
ENTER
1/3
Numbers
ENTER
0:20:09
or
AUDIO
Audio Channel
Sound
Example: On-Screen Display during
playing DivX movie disc
Track Number
1/3
, Numbers
ENTER
Selection Method
Items
Group Number
, Numbers
ENTER
Track Number
, Numbers
ENTER
Numbers, ENTER
Time search
0:20:09
Audio language
and Digital Audio
Output mode
Subtitle language
3D SUR
Example: On-Screen Display during
playing DVD Audio
Selection Method
Items
1
MP3
ABC
ENG
NEDERLANDS
MARKER SEARCH
ESPAÑOL
Enter a Marker
or
AUDIO
or
Time search
0:20:09
DVD Audio
Output mode
ITALIANO
1/9
Display only
PORTUGUÊS
A-B
or
AUDIO
SUBTITLE
Subtitle language
OFF
ABC
Display only
3D SUR
Page (or Angle)
or
or
SVENSKA
Sound
ANGLE
1/3
13
T515_NAD_English_Final.qxd
5/7/06
11:46 AM
Page 14
Installation and Setup
BEFORE OPERATION
ENGLISH
INITIAL SETTINGS
By using the Setup menu, you can make various adjustments to items
such as picture and sound. You can also set a language for the subtitles
and the Setup menu, among other things. For details on each Setup
menu item, see pages 14 to 17.
LANGUAGE
LANGUAGE
TO DISPLAY AND EXIT THE MENU:
Press SETUP to display the menu. A second press of SETUP will take you
back to initial screen.
Menu Language
English
Disc Audio
Original
Disc Subtitle
Off
Disc Menu
Original
Move
FRANÇAIS
To go to the next level:
Press
on the remote control.
To go back to the previous level:
Press
on the remote control.
GENERAL OPERATION
DEUTSCH
NEDERLANDS
1 Press SETUP. The Setup menu appears.
2 Use
to select the desired option then press
to move to the
second level. The screen shows the current setting for the selected
item, as well as alternate setting(s).
3 Use
to select the second desired option then press
to move
to the third level.
4 Use
to select the desired setting then press ENTER to confirm
your selection. Some items require additional steps.
5 Press SETUP or PLAY to exit the Setup menu.
Select
MENU LANGUAGE
Select a language for the Setup menu and on-screen display.
DVD-A
DISC AUDIO / SUBTITLE / MENU DVD-V
Select the language you prefer for the audio track (disc audio), subtitles,
and the disc menu.
Original: Refers to the original language in which the disc was
recorded.
Other: To select another language, press number buttons then ENTER
to enter the corresponding 4-digit number according to the language
code list in the reference chapter. If you enter the wrong language code,
press CLEAR.
DISPLAY
DISPLAY
ESPAÑOL
TV Aspect
16 : 9 Wide
Display Mode
Widescreen
TV Output Select
RGB
Move
Select
ITALIANO
DVD-A
TV ASPECT DVD-V
4:3: Select when a standard 4:3 TV is connected.
16:9 Wide: Select when a 16:9 wide TV is connected.
PORTUGUÊS
DVD-A
DISPLAY MODE DVD-V
Display Mode setting works only when the TV Aspect mode is
set to “4:3”.
Letterbox: Displays a wide picture with bands on the upper and lower
portions of the screen.
SVENSKA
Panscan: Automatically displays the wide picture on the entire screen
and cuts off the portions that do not fit.
TV OUTPUT SELECT (European version only)
Set the player’s TV Output Select options according to the TV
connection type.
YPbPr – When your TV is connected with the COMPONENT VIDEO
OUT/(576p/720p/1080i) jacks on the DVD player.
RGB – When your TV is connected with the SCART (RGB signal) jack
14
T515_NAD_English_Final.qxd
5/7/06
11:46 AM
Page 15
Installation and Setup
DYNAMIC RANGE CONTROL (DRC)
DVD-V
DVD-A
DivX
Each DVD disc has a variety of audio output options. Set the player’s
AUDIO options according to the type of audio system you use.
With the DVD format, you can hear a program’s soundtrack in the
most accurate and realistic presentation possible, thanks to digital
audio technology. However, you may wish to compress the dynamic
range of the audio output (the difference between the loudest
sounds and the quietest ones). This allows you to listen to a movie
at a lower volume without losing clarity of sound. Set DRC to On
for this effect.
AUDIO
Dolby Digital
Bitstream
DTS
Bitstream
MPEG
PCM
Sample Freq.
48 kHz
DRC
On
Move
FRANÇAIS
AUDIO
ENGLISH
BEFORE OPERATION
Select
DEUTSCH
DVD-A
DivX
DOLBY DIGITAL / DTS / MPEG DVD
BITSTREAM: Select “Bitstream” if you connect the DVD Player’s
DIGITAL OUT jack to an amplifier or other equipment with a Dolby
Digital, DTS or MPEG decoder.
NEDERLANDS
PCM (FOR DOLBY DIGITAL / MPEG): Select when connected
to a two-channel digital stereo amplifier. DVDs encoded in Dolby
Digital or MPEG will be automatically downmixed to two-channel
PCM audio.
OFF (FOR DTS): If you select “Off”, the DTS signal is not output
through the DIGITAL OUT jack.
ESPAÑOL
DVD-A
SAMPLE FREQ. (FREQUENCY) DVD-V
If your receiver or amplifier is NOT capable of handling 96 kHz
signals, select 48 kHz. When this choice is made, this unit
automatically converts any 96 kHz signals to 48 kHz so your system
can decode them.
If your receiver or amplifier is capable of handling 96 kHz signals,
select 96 kHz. When this choice is made, this unit passes each type
of signal through without any further processing.
SVENSKA
PORTUGUÊS
ITALIANO
Check the documentation for your amplifier to verify its capabilities.
15
T515_NAD_English_Final.qxd
5/7/06
11:46 AM
Page 16
Installation and Setup
BEFORE OPERATION
OTHERS
The PBC, Auto Play, B.L.E. and DivX(R) VOD settings can be changed.
OTHERS
ENGLISH
PBC
On
Auto Play
Off
B.L.E.
On
DivX(R) VOD
Select
FRANÇAIS
Move
B.L.E. (BLACK LEVEL EXPANSION)
To select the black level of playback pictures. Set your preference and
monitor’s ability.
On: Expanded grey scale. (0 IRE cut off)
Off: Standard grey scale. (7.5 IRE cut off)
NOTE
The B.L.E. function can be operated only in 480/576 resolution.
Select
DIVX(R) VOD DivX
You can show the DivX DRM (Digital Right Management) Registration
code for your unit only.
PBC VCD
Set Playback Control (PBC) to On or Off.
On: Video CDs with PBC are played according to the PBC.
Off: Video CDs with PBC are played the same way as Audio CDs.
DEUTSCH
NEDERLANDS
AUTO PLAY DVD-V
You can set up the DVD Player so a DVD disc automatically starts
playing whenever the DVD is inserted.
If Auto Play mode is set to On, this DVD player will search for the title
that has the longest playback time and then play back the title
automatically.
On: Auto Play function is active.
Off: Auto Play function is not active.
The Registration code is used for VOD (Video-On- Demand) service
agent. You can purchase or rent an encrypted movie file.
NOTE
If you rent the DivX VOD file, it has several options of viewing limits
as show below.
• Displays the number of times that you can watch the file.
NOTE
The Auto Play function may not work for some DVDs.
ESPAÑOL
• Shows if the rental has expired.
ITALIANO
PORTUGUÊS
• Displays an authorization error.
SVENSKA
16
T515_NAD_English_Final.qxd
5/7/06
11:46 AM
Page 17
Installation and Setup
LOCK (PARENTAL CONTROL)
PASSWORD (SECURITY CODE)
You can enter or change password.
1 Select Password on the LOCK menu then press .
2 Follow step 2 as shown left (Rating). “Change” or “New” is
highlighted.
3 Enter the new 4-digit code, then press ENTER. Input it again to verify.
4 Press SETUP to exit the menu.
LOCK
Rating
Unlock
Password
New
Country Code
UK
ENGLISH
BEFORE OPERATION
If you forget your Security Code
1 Select “Rating” on the LOCK menu then press .
2 To access the Rating, Password and Country Code features, you
must input the 4-digit security code you created. If you have not yet
entered a security code you are prompted to do so.
Input a 4-digit code and press ENTER. Enter it again and press ENTER
to verify. If you make a mistake before pressing ENTER, press CLEAR.
3 Select a rating from 1 to 8 using the
buttons.
Rating 1-8
Rating one (1) has the most restrictions and rating eight (8) is the
least restrictive
Unlock
If you select unlock, parental control is not active and the disc plays
in full.
DEUTSCH
The parental control feature allows you to block access to scenes
below the rating you input, thereby preventing your children from
being able to view material you believe is unsuitable.
COUNTRY CODE DVD-V
Enter the code of the country/area whose standards were used to
rate the DVD video disc, based on the list in the reference chapter.
1 Select “Country Code” on the LOCK menu then press .
2 Follow step 2 as shown in the left column (Rating).
3 Select the first character using
buttons.
4 Press ENTER and select the second character using
buttons.
5 Press ENTER to confirm your country code selection.
NEDERLANDS
RATING DVD-V
Some movies contain scenes that may not be suitable for children to
view. Many of these discs contain parental control information that
applies to the complete disc or to certain scenes on the disc. Movies
and scenes are rated from 1 to 8, depending on the country. Some
discs offer more suitable scenes as an alternative.
If you forget your security code you can clear it using the following
steps:
1 Press SETUP to display the Setup menu.
2 Input the 6-digit number “210499” and the security code is cleared.
3 Enter a new code as described above.
FRANÇAIS
Select
ESPAÑOL
Move
PORTUGUÊS
ITALIANO
NOTE
If you set a rating for the player, all disc scenes with the same
rating or lower are played. Higher rated scenes are not played
unless an alternate scene is available on the disc. The alternative
must have a lower rating. If no suitable alternative is found,
playback stops. You must enter the 4-digit password or change
the rating level in order to play the disc.
SVENSKA
4 Press ENTER to confirm your rating selection, then press SETUP to
exit the menu.
17
T515_NAD_English_Final.qxd
5/7/06
11:46 AM
Page 18
Operation
OPERATION WITH DVD AND VIDEO CD
ENGLISH
FRANÇAIS
PLAYING A DVD OR VIDEO CD
PLAYBACK SETUP
You can enter or change password.
1 Turn on the TV and select the video input source connected to the
DVD player.
2 Turn on the audio system (if applicable) and select the input source
connected to the DVD player.
3 Press OPEN/CLOSE to open the disc tray and load your chosen disc
in the tray, with the playback side down.
4 Press OPEN/CLOSE to close the tray. Playback starts automatically. If
playback does not start, press PLAY.
GENERAL FEATURES
NOTES
Unless stated otherwise, all operations described use the remote
control. Some features may also be available on the Setup menu.
In some cases, the disc menu might appear instead:
MOVING TO ANOTHER CHAPTER/TRACK
DVD-V
DVD-A
VCD
DivX
DVD-A
MOVING TO ANOTHER TITLE/GROUP DVD-V
When a disc has more than one title/group, you can move to another
title/group. Press DISP while playback is stopped then the appropriate
number (0-9) or use
to move to another title/group. You can
play any title by inputting its number while playback is stopped.
DVD-V
DEUTSCH
Use the
buttons to select the title/chapter you want to
view, then press ENTER to start.
Press TITLE or DVD MENU to return to the menu screen.
DVD-A
NEDERLANDS
Use the
buttons to select an option you want, then press
ENTER to view the option.
When a title on a disc has more than one chapter or a disc has more
than one track, you can move to another chapter/track as follows:
• Press SKIP
or
briefly during playback to select the next
chapter/track or to return to the beginning of the current
chapter/track.
• Press SKIP
twice briefly to step back to the previous
chapter/track.
• To go directly to any chapter during DVD playback, press DISPLAY
and press
to select the chapter/track icon. Then, input the
chapter/track number or use
.
VCD
SEARCH
Use the number buttons to select the track you want to view and
press RETURN to return to the menu screen. Menu settings and
operating procedures may differ. Follow the instructions on the each
menu screen. You also may set PBC to Off (See “PBC” on page 16).
ESPAÑOL
NOTES
• If parental control is set and the disc is not within the rating settings
you must input the password. (See “Lock Menu” on page 17.)
• DVDs may have a region code. Your player will not play discs that
have a region code different from your player.
t
DVD-V
VCD
DivX
1 Press SCAN (
or
) during playback..
2 Press SCAN (
or
) repeatedly to select the required speed.
DVD, DivX disc; X2, X4, X16 or X100
Video CD; X2, X4 or X8
3 To exit SEARCH mode, press PLAY.
NOTE
When using a DVD audio disc that includes pictures, this operation
may be permitted in some picture segments.
ITALIANO
CHANGING THE AUDIO CHANNEL VCD
Press AUDIO repeatedly during playback to hear a different audio
channel (Stereo, Left, or Right).
PORTUGUÊS
SVENSKA
18
T515_NAD_English_Final.qxd
5/7/06
11:46 AM
Page 19
Operation
OPERATION WITH DVD AND VIDEO CD
DVD-A
VCD
DivX
REPEAT DVD-V
You can play a title/chapter/all/track/group on a disc. Press REPEAT
during playback to select a desired repeat mode.
Karaoke DVD
RANDOM VCD
1 Press RANDOM during playback. The unit automatically begins
random playback and RANDOM appears on the TV screen.
2 Press RANDOM again to return to normal.
TIP
By pressing SKIP
during random playback, the unit selects
another title (track) and resumes random playback.
NOTE
On a Video CD with PBC, You must set PBC to Off on the setup menu
to use the random function
(See “PBC” on page 16).
VCD
DivX
REPEAT A-B DVD-V
To repeat a sequence.
1 Press A-B at your chosen starting point. “ A * ” appears briefly on
the TV screen.
2 Press A-B again at your chosen end point. “A B” appears briefly on
the TV screen and the repeat sequence begins.
3 Press A-B again to cancel.
ENGLISH
FRANÇAIS
NOTES
• On a Video CD with PBC, you must set PBC to Off on the setup
menu to use the repeat function (See “PBC” on page 16).
• If you press SKIP (
) once during Repeat Chapter (Track) playback,
the repeat playback cancels.
VCD
DivX
3D SURROUND DVD-V
To produce a 3D surround effect that simulates multi- channel audio
from two stereo speakers (instead of the five+ speakers normally
required for multi-channel audio from a home theatre system).
1 Press DISP during playback.
2 Use
to select the sound option.
The sound option will be highlighted.
3 Use
to select “3D SUR”.
To turn off the 3D Surround effect, select “Normal”.
VCD
DivX
TIME SEARCH DVD-V
To start playing at any chosen time on the disc:
1 Press DISP during playback. The time search box shows the elapsed
playing time.
2 Press
to select the time clock icon and “-:--:--” appears.
3 Input the required start time in hours, minutes, and seconds from
left to right. If you enter the wrong numbers, press CLEAR to remove
the numbers you entered. Then input the correct numbers.
4 Press ENTER to confirm. Playback starts from the selected time.
DEUTSCH
NOTES
• There is no slow motion playback in reverse.
• When using a DVD audio disc that includes pictures, this operation
may be permitted in some picture segments.
DVD AUDIO DISCS - REPEAT TRACK/GROUP/OFF
1 Track: repeats the current track.
2 Group: repeats the current Group.
3 Off: does not play repeatedly.
NEDERLANDS
1/16,
ESPAÑOL
VCD
DivX
SLOW MOTION DVD-V
1 Press SLOW forward (
) during playback.
The player will enter SLOW forward mode.
2 Use the SLOW (
) to select the required speed:
1/8,
1/4, or
1/2 (forward).
3 To exit Slow Motion mode, press PLAY.
VIDEO CDS, DIVX DISCS - REPEAT TRACK/ALL/OFF
1 Track: repeats the current track
2 All: repeats all the tracks on a disc.
3 Off: does not play repeatedly.
ITALIANO
NOTE
When using a DVD audio disc that includes pictures, this operation
may be permitted in some picture segments.
DVD VIDEO DISCS - REPEAT CHAPTER/TITLE/OFF
1 Chapter: repeats the current chapter.
2 Title: repeats the current title.
3 Off: does not play repeatedly.
PORTUGUÊS
1 Press PAUSE/STEP on the remote control during playback. Advance
the picture frame-by-frame by pressing PAUSE/STEP repeatedly.
2 To exit still motion mode, press PLAY.
SVENSKA
STILL PICTURE AND FRAME-BY-FRAME PLAYBACK
DVD-V
DVD-A
VCD
DivX
19
T515_NAD_English_Final.qxd
5/7/06
11:46 AM
Page 20
Operation
OPERATION WITH DVD AND VIDEO CD
ENGLISH
VCD
DivX
ZOOM DVD-V
Use zoom to enlarge the video image.
1 Press ZOOM during playback or still playback to activate the Zoom
function. The square frame appears briefly in the right bottom of the
picture.
2 Each press of the ZOOM button changes the TV screen in the
sequence: normal size ➜ 200% size ➜ 400% size ➜ 900% size
normal size mode ➜ 200% size.
Navigating Zoomed TV Screen:
3 Use the
buttons to move through the zoomed picture.
4 To resume normal playback, press CLEAR.
FRANÇAIS
NOTES
• Zoom may not work on some DVDs.
SPECIAL DVD FEATURES
CHECKING THE CONTENTS OF DVD DISCS: MENUS
DVDs may offer menus that allow you to access special features. To
use the disc menu, press MENU. Input the corresponding number or use
the
buttons to highlight your selection.
Then press ENTER.
DVD-A
TITLE MENU DVD-V
1 Press TITLE. If the current title has a menu, the menu appears on the
screen. Otherwise, the disc menu may appear.
2 The menu offers features such as camera angles, spoken language
and subtitle options, and chapters for the title.
3 Press TITLE to exit.
DVD-A
DISC MENU DVD-V
1 Press MENU and the disc menu is displayed.
2 Press MENU again to exit.
DEUTSCH
NEDERLANDS
VCD
DivX
MARKER SEARCH DVD-V
To enter a Marker
You can start playback from up to nine memorized points. To enter a
marker, press MARKER at the desired point on the disc. The Marker icon
appears on the TV screen briefly. Repeat to enter up to nine markers.
ESPAÑOL
To Recall or Clear a Marked Scene
1 During disc playback, press SEARCH. The marker search menu
appears on the screen.
2 Within 10 seconds, press
to select a marker number that you
want to recall or clear.
3 Press ENTER and playback starts from the marked scene. Or, Press
CLEAR and the marker number is erased from the list.
4 You can play any marker by inputting its number on the marker
search menu.
ITALIANO
DVD-A
VCD
PAUSE DVD-V
1 Press PAUSE/STEP during playback.
2 To return to playback, press PLAY.
DVD-A
CAMERA ANGLE DVD-V
If the disc contains scenes recorded at different camera angles, you can
change to a different camera angle during playback. Press ANGLE
repeatedly during playback to select a desired angle. Note that the
number of the current angle appears on the display.
TIP
The angle indicator will blink on the TV screen during scenes
recorded at different angles as an indication that angle switching is
possible.
CHANGING THE AUDIO LANGUAGE
DVD-V
DVD-A
DivX
Press AUDIO repeatedly during playback to hear a different audio
language or audio track.
With DVD-RW discs recorded in VR mode that have both a main and a
Bilingual audio channel, you can switch between Main (L), Bilingual (R),
or a mix of both (Main + Bilingual) by pressing AUDIO.
DivX
DivX
SUBTITLES DVD-V
Press SUBTITLE repeatedly during playback to see the different subtitle
languages.
PORTUGUÊS
NOTES
• The subtitle file of the DivX file is displayed only in smi, srt and sub.
• If there is no information or there is a code that cannot be read in
the DivX file, “1” etc., is displayed.
SVENSKA
20
T515_NAD_English_Final.qxd
5/7/06
11:46 AM
Page 21
Operation
NOTE
Since the authoring of DVD Audio Discs varies, some of the on-screen
display choices might not be available for the disc you’re playing.
FRANÇAIS
DEUTSCH
NEDERLANDS
VIEWING ANOTHER PAGE
Since DVD Audio discs can hold a lot of content, there are various ways
to see what’s available on the disc.
1 Press DISP during playback.
2 Press
to select Page icon.
3 Press
to select a page number.
What appears on the screen will vary from disc to disc because the
information available depends upon the way the disc was created.
ESPAÑOL
NOTE
To enjoy maximum sound quality and surround effect of DVD Audio,
you must use the DIGITAL OUT (OPTICAL or COAXIAL) for your audio
connection, the sound will only be similar to CD-quality sound even
though you’re playing a DVD Audio disc.
NOTE
Sometimes the author of the disc creates hidden content that can
only be accessed by entering a password. If the lock icon appears on
the TV screen, enter the password (sometimes you’ll find it on the
disc’s jacket cover or on a web site). This password control isn’t
dictated by your DVD Player — it is a function of the disc.
Since the authoring of DVD Audio Discs varies, some of the on-screen
display choices might not be available for the disc you’re playing.
ITALIANO
A typical DVD Audio disc contains up to seven times the data capacity
of a CD. This additional space is used for music, either Advanced
Resolution multi- channel sound quality that is closer to the artist’s
master recording or for longer recordings. Many DVD Audio discs
contain on-screen text, such as artist biographies, playlists, or lyrics.
Some DVD Audio discs contain photo galleries or video clips.
PORTUGUÊS
DVD Audio can provide higher quality stereo than Audio CDs with a
sampling rate of up to 192 kHz (compared to 44.1 kHz for CDs). DVD
Audio digital sound can be delivered with up to 24 bits of data
(compared to 16 bits for a standard CD).
MOVING TO ANOTHER GROUP
Some DVD Audio discs divide content into different groups. Your player
enables you to quickly access different groups during playback via the
on-screen display.
1 Press DISP during playback on in stop mode.
2 Press
to select Group icon.
3 Press
or the numbered buttons (0-9) to select a group number.
SVENSKA
DVD AUDIO DISCS
DVD Audio is a new disc format building on the success of DVD to
provide high quality, uncompressed, multi-channel audio for a new
experience in audio quality. A DVD Audio disc can be identified by the
DVD audio logo on the disc jacket or on the disc itself.
ENGLISH
OPERATION WITH DVD AND VIDEO CD
21
T515_NAD_English_Final.qxd
5/7/06
11:46 AM
Page 22
Operation
OPERATION WITH AUDIO CD AND MP3 / WMA DISC
PLAYING AN AUDIO CD OR MP3/WMA DISC
The DVD player can play MP3/WMA formatted recordings on CD-ROM,
CD-R, or CD-RW discs.
ENGLISH
AUDIO CD
Once you insert an audio CD a menu appears on the TV screen.
Press
to select a track then press PLAY or ENTER and playback
starts.
AUDIO CD
0:52:07
1 / 12
List
Program
FRANÇAIS
Track1
Track2
Track3
Track4
Track5
Track6
Track7
Clear All
Track8
PROGRAM Edit
DEUTSCH
MP3 / WMA
1 Press
to select a folder, and press ENTER to see the folder
contents.
2 Press
to select a track then press PLAY or ENTER. Playback
starts.
NEDERLANDS
MUSIC
0:00:00
1 / 12
List
Program
1-Music1
2-Music2
3-Music3
4-Music4
5-Music5
6-Music6
Clear All
7-Music7
ESPAÑOL
DISPLAY Info
PROGRAM Edit
ID3 TAG
• When playing a file containing information such as track titles, you
can see the information by pressing DISP.
[ Title, Artist, Album, Year, Comment ]
ITALIANO
• If there is no information, “NO ID3 TAG” appear on the display.
PORTUGUÊS
TIP
• If you are in a file list on the MUSIC menu and want to return to the
Folder list, use the
to highlight
and press ENTER.
• Press MENU to move to the next page.
• On a CD with MP3/WMA and JPEG you can switch MP3/WMA and
JPEG. Press TITLE and MUSIC or PHOTO word on top of the menu is
highlighted.
SVENSKA
22
MP3 / WMA disc compatibility with this player is limited as
follows:
1 Sampling frequency: within 8 - 48 kHz (MP3), within 32 - 48 kHz
(WMA)
2 Bit rate: within 8 - 320kbps (MP3), 32 - 384kbps (WMA)
3 The player cannot read an MP3/WMA file that has a file extension
other than “.mp3” / “.wma”.
4 CD-R physical format should be ISO 9660
5 If you record MP3 / WMA files using software that cannot create a
file system (eg. Direct-CD) it is impossible to playback MP3 / WMA
files. We recommend that you use Easy-CD Creator, which creates
an ISO 9660 file system.
6 File names should have a maximum of 8 letters and must
incorporate an .mp3 or .wma extension.
7 They should not contain special letters such as / ? * : “ < > l etc.
8 The total number of files on the disc should be less than 1012.
This DVD player requires discs and recordings to meet certain
technical standards in order to achieve optimal playback quality. Prerecorded DVDs are automatically set to these standards. There are
many different types of recordable disc formats (including CD-R
containing MP3 or WMA files) and these require certain pre-existing
conditions (see above) to ensure compatible playback.
Customers should note that permission is required in order to
download MP3 / WMA files and music from the Internet. NAD
ELECTRONICS INTERNATIONAL has no right to grant such
permission. Permission should always be sought from the
copyright owner.
T515_NAD_English_Final.qxd
5/7/06
11:46 AM
Page 23
Operation
MP3
WMA
SEARCH CD
1 Press SCAN (
or
) during playback.
2 Press SCAN (
or
) repeatedly to select the required speed:
X2, X4, X8 backward or forward.
3 To exit SEARCH mode, press PLAY.
FRANÇAIS
DEUTSCH
) once during Repeat Track playback, the repeat
3D SURROUND CD
To produce a 3D surround effect that simulates multi- channel audio
from two stereo speakers (instead of the five+ speakers normally
required for multi-channel audio from a home theatre system).
1 Press AUDIO during playback.
“3D SUR.” appears on the menu screen.
2 To return to normal playback, press AUDIO repeatedly until
“3D SUR.” disappears from the menu screen.
NEDERLANDS
NOTE
If you press SKIP (
playback cancels.
REPEAT A-B CD
1 To repeat a sequence during disc playback press A-B at your chosen
starting point. The Repeat icon and “A” appear on the menu screen.
2 Press A-B again at your chosen end point. The Repeat icon and
“A-B” appear on the menu screen, and the sequence begins to play
repeatedly.
3 To exit the sequence and return to normal play, press A-B again. The
Repeat icon disappears from the menu screen.
ESPAÑOL
MP3
WMA
REPEAT TRACK/ALL/OFF CD
You can play a track/all on a disc.
1 Press REPEAT when playing a disc. The repeat icon appears.
2 Press REPEAT to select a desired repeat mode.
Track: repeats the current track
All: repeats all the tracks on a disc.
Off(No display): does not play repeatedly.
TIP
By pressing SKIP:
during random playback, the unit selects
another track and resumes random playback.
ITALIANO
MP3
WMA
MOVING TO ANOTHER TRACK CD
1 Press SKIP (
or
) briefly during playback to go to the next
track or to return to the beginning of the current track.
2 Press SKIP
twice briefly to go back to the previous track.
3 You can play any track by inputting its number.
PORTUGUÊS
MP3
WMA
PAUSE CD
1 Press PAUSE/STEP during playback.
2 To return to playback, press PLAY, ENTER or press PAUSE/STEP again.
MP3
WMA
RANDOM CD
1 Press RANDOM during playback. Random Playback begins
immediately and RANDOM appears on the menu screen.
2 To return to normal playback, press RANDOM repeatedly until
RANDOM disappears from the menu screen.
SVENSKA
AUDIO CD AND MP3 / WMA DISC FEATURES
ENGLISH
OPERATION WITH AUDIO CD AND MP3 / WMA DISC
23
T515_NAD_English_Final.qxd
5/7/06
11:46 AM
Page 24
Operation
PROGRAMMED PLAYBACK
ENGLISH
The program function enables you to store your favourite tracks from
any disc in the player memory. A program can contain 30 tracks.
1 Insert a disc.
Audio CD or MP3/WMA Discs:
AUDIO CD or MUSIC menu appears.
2 Press PROGRAM.
The E mark will appear to the right of the word“ Program” on the
right side of the menu screen.
FRANÇAIS
NOTE
Press PROGRAM again, then the
Program Edit mode.
E
mark will disappear to exit the
MUSIC
AUDIO CD
0:52:07
0:00:00
1 / 12
List
Track1
Track5
Track2
Track7
Track3
Track4
Track4
Track1
List
E
Program
1 / 12
Program
E
2-Music2
1-Music1
4-Music4
2-Music2
6-Music6
3-Music3
1-Music1
DEUTSCH
Track5
4-Music4
Track6
5-Music5
6-Music6
Track7
Clear All
Track8
Clear All
7-Music7
PROGRAM Edit
PROGRAM Edit
DISPLAY Info
Audio CD Menu
MP3/WMA Menu
NEDERLANDS
VIDEO CD
Press PROGRAM while playback is stopped. The program menu
appears. Press PROGRAM again and hold it down for a few seconds to
exit the menu.
ESPAÑOL
NOTE
On a Video CD with PBC, you must set PBC to Off on the setup menu
to use the programmed playback (See “PBC” on page 16).
VIDEO CD
List
Program
Track1
Track5
Track2
Track2
Track3
Track3
Track4
Track1
E
Track5
Clear All
ITALIANO
Video CD Menu
PORTUGUÊS
3 Select a track on the “List”, then press ENTER to place the selected
track on the “Program” list. Repeat to place additional tracks on the
list.
4 Press .
Select the track you want to start playing on the “Program” list.
SVENSKA
24
5 Press PLAY or ENTER to start. Playback begins in the order in which
you programmed the tracks. Playback stops after all of the tracks on
the “Program” list have played once.
6 To resume normal playback from programmed playback, select a
track of AUDIO CD (or MUSIC) list and then press PLAY.
REPEAT PROGRAMMED TRACKS
1 Press REPEAT when playing a disc. The repeat icon appears.
2 Press REPEAT to select a desired repeat mode.
Track: repeats the current track
All: repeats all the tracks on the programmed list.
Off (No display): does not play repeatedly.
NOTE
If you press :
playback cancels.
once during Repeat Track playback, the repeat
ERASING A TRACK FROM PROGRAM LIST
1 Use
to select the track that you wish to erase from the
Program list.
2 Press CLEAR. Repeat to erase additional tracks on the list.
ERASING THE COMPLETE PROGRAM LIST
1 Press
to move to the “Program” list.
2 Use
to select “Clear All”, then press ENTER.
NOTE
The programs are also cleared when the disc is removed.
T515_NAD_English_Final.qxd
5/7/06
11:46 AM
Page 25
Operation
OPERATION WITH JPEG DISC
JPEG Folder 3
JPEG Folder 5
JPEG Folder 6
JPEG Folder 7
JPEG Folder 8
2 Press
to select a folder, and press ENTER. A list of files in the
folder appears. If you are in a file list and want to return to the
previous Folder list, use the
buttons on the remote to highlight
and press ENTER.
3 If you want to view a particular file, press
to highlight a file and
press ENTER or PLAY. Viewing the file proceeding starts. While
viewing a file, you can press STOP to move to the previous menu
(PHOTO menu).
TIP
• Press DVD MENU to move to the next page.
• There are three Slide Speed options
:
>>> (Fast), >> (Normal), and > (Slow).
Use
to highlight the Speed. Then, use
to select the
option you want to use then press ENTER.
• On a disc with MP3/WMA and JPEG you can switch MP3/WMA and
JPEG. Press TITLE and MUSIC or PHOTO word on top of the menu is
highlighted.
• Press RETURN, file information is hidden.
SLIDE SHOW JPEG
Use
to highlight the
JPEG DISC COMPATIBILITY WITH THIS PLAYER IS LIMITED AS
FOLLOWS:
• Depending upon the size and number of JPEG files, it could take a
long time for the DVD player to read the disc’s contents. If you don’t
see an on- screen display after several minutes, some of the files may
be too large — reduce the resolution of the JPEG files to less than
5 million pixels and burn another disc..
• The total number of files and folders on the disc should be less
than 1012.
• Some discs may be incompatible due to a different recording format
or the condition of the disc.
• Ensure that all the selected files have the “.jpg” extensions when
copying into the CD layout.
• If the files have “.jpe” or “.jpeg” extensions, please rename them as
“.jpg” files.
• File names without a “.jpg” extension will not be able to be read by
this DVD player even though the files are shown as JPEG image files
in Windows Explorer.
ESPAÑOL
JPEG Folder 4
ENGLISH
Preview
JPEG Folder 2
FRANÇAIS
List
JPEG Folder 1
TO ROTATE PICTURE JPEG
Press
during showing a picture to rotate the picture clockwise or
counter clockwise.
DEUTSCH
PHOTO
ZOOM JPEG
Use zoom to enlarge the photo image.
(see page 20)
NEDERLANDS
VIEWING A JPEG DISC
Using this DVD Player you can view discs with JPEG files.
1 Insert a disc and close the tray. The PHOTO menu appears on the TV
screen.
(Slide Show) then press ENTER.
ITALIANO
STILL PICTURE JPEG
1 Press PAUSE/STEP during slide show. The player will now go into
PAUSE mode.
2 To return to the slide show, press PLAY or press PAUSE/STEP again.
SVENSKA
PORTUGUÊS
MOVING TO ANOTHER FILE JPEG
Press SKIP (
or
) or cursor (
) once while viewing a picture
to advance to the next or previous file.
25
T515_NAD_English_Final.qxd
5/7/06
11:46 AM
Page 26
Operation
OPERATION WITH A DVD VR FORMAT DISC
This unit will play DVD-R/RW discs recorded using the DVD-Video
format that have been finalized using a DVD-recorder.
• This unit will play DVD-RW discs recorded using the Video Recording
(VR) format.
MAINTENANCE AND SERVICE
Refer to the information in this chapter before contacting a service
technician.
ENGLISH
HANDLING THE UNIT
1 Insert a disc and close the tray. The DVD-VR menu appears on the
TV screen.
DVD-VR
When shipping the unit
Please save the original shipping carton and packing materials. If you
need to ship the unit, for maximum protection, re-pack the unit as it was
originally packed at the factory.
FRANÇAIS
Keeping the exterior surfaces clean
• Do not use volatile liquids such as insecticide spray near the unit.
• Do not leave rubber or plastic products in contact with the unit for
a long period of time. since they leave marks on the surface.
2 Press
starts.
to select a track then press PLAY or ENTER and playback
DEUTSCH
NEDERLANDS
NOTES
• Unfinalized DVD-R/RW discs cannot be played in this player.
• Some DVD-VR disc are made with CPRM data by DVD RECORDER.
Player does not support these kinds of discs and display the “CHECK
DISC”.
ESPAÑOL
WHAT IS ‘CPRM’?
CPRM is a copy protection system (with scramble system) only
allowing the recording of ‘copy once’ broadcast programs. CPRM
stands for Content Protection for Recordable Media.
This player is CPRM compatible, which means that you can record
copy-once broadcast programs, but you cannot then make a copy of
those recordings. CPRM recordings can only be made on DVD-RW
discs formatted in VR mode, and CPRM recordings can only be
played on players that are specifically compatible with CPRM.
ITALIANO
PORTUGUÊS
SVENSKA
26
Cleaning the unit
To clean the player, use a soft, dry cloth. If the surfaces are extremely
dirty, use a soft cloth lightly moistened with a mild detergent solution.
Do not use strong solvents such as alcohol, benzine, or thinner, as these
might damage the surface of the unit.
Maintaining the Unit
The DVD player is a high-tech, precision device. If the optical pick-up
lens and disc drive parts are dirty or worn, the picture quality could be
diminished.
Depending on the operating environment, regular inspection and
maintenance are recommended after every 1,000 hours of use.
For details, please contact your nearest authorized service centre.
T515_NAD_English_Final.qxd
5/7/06
11:46 AM
Page 27
Operation
OPERATION WITH A DIVX MOVIE DISC
MOVIE
0:00:00
DivX disc compatibility with this player is limited
as follows:
• Available resolution size of the DivX file is under
720x576 (W x H) pixels.
ENGLISH
Using this DVD Player you can play DivX discs.
1 Insert a disc and close the tray. The MOVIE menu appears on the TV
screen.
List
Movie Folder 1
Movie Folder 2
Movie Folder 3
Movie Folder 4
Movie Folder 5
• The file name of the DivX subtitle is available by
56 characters.
Movie Folder 6
Movie Folder 7
FRANÇAIS
DEUTSCH
• If the video and audio structure of recorded file is
not interleaved, either video or audio is outputted.
NEDERLANDS
• If the file is recorded with GMC, the unit supports
only 1-point of the record level.
* GMC?
GMC is the acronym for Global Motion Compensation.
It is an encoding tool specified in MPEG4 standard.
Some MPEG4 encoders, like DivX or Xvid, have this
option. There are different levels of GMC encoding,
usually called 1-point, 2-point, or 3-point GMC.
Playable DivX files
.avi, .mpg, .mpeg
ESPAÑOL
Playable Subtitle format
SubRip(*.srt/*.txt)
SAMI(*.smi)
SubStation Alpha(*.ssa/*.txt)
MicroDVD(*.sub/*.txt)
SubViewer 1.0(*.sub)
SubViewer 2.0(*.sub/*.txt)
TMPlayer(*.txt)
ITALIANO
TIP
• Press MENU to move to the next page.
• On a CD with MP3/WMA, JPEG and MOVIE files, you can switch to
the MUSIC, PHOTO and MOVIE menu. Press TITLE and MUSIC,
PHOTO and MOVIE at the top of the menu is highlighted.
• The disc subtitle may not be displayed properly, if a DivX subtitle is
downloaded through the internet.
• If the number of screen frames is over 30 per
1 second, this unit may not operate normally.
Playable Codec format
"DIVX3.xx", "DIVX4.xx", "DIVX5.xx", "XVID", "MP43",
"3IVX".
PORTUGUÊS
2 Press
to select a folder, and press ENTER. A list of files in the
folder appears. If you are in a file list and want to return to the Folder
list, use the
buttons on the remote to highlight
and press
ENTER.
3 If you want to view a particular file, press
to highlight a file and
press ENTER or PLAY.
4 Press STOP to exit.
• If there is an impossible code to express the DivX file, it
may be displayed as " _ " mark on the display.
Playable Audio format
"Dolby Digital", "DTS", "PCM", "MP3", "WMA".
• Sampling frequency: within 8 - 48 kHz (MP3),
within 32 - 48kHz (WMA)
• Bit rate: within 8 - 320kbps (MP3), 32 - 384kbps (WMA)
• Not all the WMA Audio format is compatible with this
unit.
SVENSKA
Movie Folder 8
27
T515_NAD_English_Final.qxd
5/7/06
11:46 AM
Page 28
Operation
ADDITIONAL INFORMATION
ADDITIONAL FEATURES
LAST SCENE MEMORY
CD
DVD-A
DVD-V
VCD
ENGLISH
This player memorizes the last scene from the last disc that is viewed.
The last scene remains in memory even if you remove the disc from the
player or switch off the player. If you load a disc that has the scene
memorized, the scene is automatically recalled.
FRANÇAIS
NOTE
This player does not memorize the scene of a disc if you switch off
the player before commencing to play the disc.
SCREEN SAVER
The screen saver appears when you leave the DVD player in Stop mode
for about five minutes. If the Screen Saver is displayed for five minutes,
the DVD Player automatically turns itself off.
DEUTSCH
NEDERLANDS
ESPAÑOL
ITALIANO
PORTUGUÊS
SVENSKA
28
Page 29
Operation
ESPAÑOL
NEDERLANDS
DEUTSCH
FRANÇAIS
ENGLISH
NOTES
ITALIANO
11:46 AM
PORTUGUÊS
5/7/06
SVENSKA
T515_NAD_English_Final.qxd
29
T515_NAD_English_Final.qxd
5/7/06
11:46 AM
Page 30
Reference
TROUBLESHOOTING
Check the following guide for the possible cause of a problem before contacting service.
ENGLISH
SYMPTOM
CAUSE
CORRECTION
FRANÇAIS
•
The power cord is disconnected.
•
Plug the power cord into the wall outlet securely.
The power is on, but the DVD player does not
work.
•
No disc is inserted.
•
Insert a disc. (Check that the DVD or, audio CD
indicator in the display window is lit.)
No picture.
•
The TV is not set to receive DVD signal output.
•
Select the appropriate video input mode on
the TV.
•
The video cable is not connected securely.
•
Connect the video cable securely.
•
Unit output setting and TV resolution capabilities
mismatch.
•
•
Check TV capability.
Check mode of connections (eg. S-Video,
Component etc.).
Check unit Resolution setting according to TV
capability and mode of connection.
DEUTSCH
No power.
•
NEDERLANDS
No sound.
ESPAÑOL
The DVD player does not start playback.
ITALIANO
The remote control does not work properly.
PORTUGUÊS
SVENSKA
30
•
The equipment connected with the audio cable
is not set to receive DVD signal output.
•
Select the correct input mode of the audio
receiver so you can listen to the sound from the
DVD player.
•
The power of the equipment connected with the
audio cable is turned off.
•
Turn on the equipment connected with the
audio cable.
•
The AUDIO options are set to the wrong
position.
•
Set the Digital Audio Output to the correct
position, then turn on the DVD player again by
pressing POWER.
•
The Digital Audio Output mismatch with the
amplifier.
•
Select the proper audio setting in AUDIO setup.
•
An unplayable disc is inserted.
•
Insert a playable disc. (Check the disc type, color
system, and regional code.)
•
The rating level is set.
•
Cancel the rating function or change the rating
level.
•
The remote control is not pointed at the remote
sensor on the DVD player.
•
Point the remote control at the remote sensor of
the DVD player.
•
The remote control is too far from the DVD
player.
•
Operate the remote control closer to the
DVD player.
•
The remote control batteries are dead.
•
Replace the remote control batteries.
T515_NAD_English_Final.qxd
5/7/06
11:46 AM
Page 31
Reference
TABLE OF LANGUAGES AND THEIR ABBREVIATIONS
Language Code List
Use this list to input your desired language for the following initial settings: Disc Audio, Disc Subtitle, Disc Menu.
ENGLISH
Language
Singhalese
Slovak
Slovenian
Somali
Spanish
Sudanese
Swahili
Swedish
Tagalog
Tajik
Tamil
Tatar
Telugu
Thai
Tibetan
Tigrinya
Tonga
Turkish
Turkmen
Twi
Ukrainian
Urdu
Uzbek
Vietnamese
Volapük
Welsh
Wolof
Xhosa
Yiddish
Yoruba
Zulu
FRANÇAIS
Code
8373
8375
8376
8379
6983
8385
8387
8386
8476
8471
8465
8484
8469
8472
6679
8473
8479
8482
8475
8487
8575
8582
8590
8673
8679
6789
8779
8872
7473
8979
9085
DEUTSCH
Language
Lingala
Lithuanian
Macedonian
Malagasy
Malay
Malayalam
Maltese
Maori
Marathi
Moldavian
Mongolian
Nauru
Nepali
Norwegian
Oriya
Panjabi
Pashto, Pushto
Persian
Polish
Portuguese
Quechua
Rhaeto-Romance
Rumanian
Russian
Samoan
Sanskrit
Scots Gaelic
Serbian
Serbo-Croatian
Shona
Sindhi
NEDERLANDS
Code
7678
7684
7775
7771
7783
7776
7784
7773
7782
7779
7778
7865
7869
7879
7982
8065
8083
7065
8076
8084
8185
8277
8279
8285
8377
8365
7168
8382
8372
8378
8368
ESPAÑOL
Language
Fiji
Finnish
French
Frisian
Galician
Georgian
German
Greek
Greenlandic
Guarani
Gujarati
Hausa
Hebrew
Hindi
Hungarian
Icelandic
Indonesian
Interlingua
Irish
Italian
Japanese
Javanese
Kannada
Kashmiri
Kazakh
Kirghiz
Korean
Kurdish
Laothian
Latin
Latvian, Lettish
ITALIANO
Code
7074
7073
7082
7089
7176
7565
6869
6976
7576
7178
7185
7265
7387
7273
7285
7383
7378
7365
7165
7384
7465
7487
7578
7583
7575
7589
7579
7585
7679
7665
7686
PORTUGUÊS
Language
Abkhazian
Afar
Afrikaans
Albanian
Ameharic
Arabic
Armenian
Assamese
Aymara
Azerbaijani
Bashkir
Basque
Bengali; Bangla
Bhutani
Bihari
Breton
Bulgarian
Burmese
Byelorussian
Cambodian
Catalan
Chinese
Corsican
Croatian
Czech
Danish
Dutch
English
Esperanto
Estonian
Faroese
SVENSKA
Code
6566
6565
6570
8381
6577
6582
7289
6583
6588
6590
6665
6985
6678
6890
6672
6682
6671
7789
6669
7577
6765
9072
6779
7282
6783
6865
7876
6978
6979
6984
7079
31
T515_NAD_English_Final.qxd
5/7/06
11:46 AM
Page 32
Reference
COUNTRY CODE LIST
Choose a country code from this list.
ENGLISH
Code
AD
AE
AF
AG
AI
AL
AM
AN
AO
AQ
AR
AS
AT
AU
AW
AZ
BA
BB
BD
BE
BF
BG
BH
BI
BJ
BM
BN
BO
BR
BS
BT
BV
BW
BY
BZ
CA
CC
CF
CG
CH
CI
CK
CL
CM
CN
CO
CR
CS
CU
CV
CX
CY
CZ
DE
DJ
DK
DM
DO
DZ
EC
EE
EG
EH
FRANÇAIS
DEUTSCH
NEDERLANDS
ESPAÑOL
ITALIANO
PORTUGUÊS
SVENSKA
32
Country
Andorra
United Arab Emirates
Afghanistan
Antigua and Barbuda
Anguilla
Albania
Armenia
Netherlands Antilles
Angola
Antarctica
Argentina
American Samoa
Austria
Australia
Aruba
Azerbaidjan
Bosnia-Herzegovina
Barbados
Bangladesh
Belgium
Burkina Faso
Bulgaria
Bahrain
Burundi
Benin
Bermuda
Brunei Darussalam
Bolivia
Brazil
Bahamas
Bhutan
Bouvet Island
Botswana
Belarus
Belize
Canada
Cocos (Keeling) Islands
Central African Republic
Congo
Switzerland
Ivory Coast
Cook Islands
Chile
Cameroon
China
Colombia
Costa Rica
Former Czechoslovakia
Cuba
Cape Verde
Christmas Island
Cyprus
Czech Republic
Germany
Djibouti
Denmark
Dominica
Dominican Republic
Algeria
Ecuador
Estonia
Egypt
Western Sahara
Code
ER
ES
ET
FI
FJ
FK
FM
FO
FR
FX
GA
GB
GD
GE
GF
GH
GI
GL
GM
GN
GP
GQ
GR
GS
GT
GU
GW
GY
HK
HM
HN
HR
HT
HU
ID
IE
IL
IN
IO
IQ
IR
IS
IT
JM
JO
JP
KE
KG
KH
KI
KM
KN
KP
KR
KW
KY
KZ
LA
LB
Country
Eritrea
Spain
Ethiopia
Finland
Fiji
Falkland Islands
Micronesia
Faroe Islands
France
France (European
Territory)
Gabon
Great Britain
Grenada
Georgia
French Guyana
Ghana
Gibraltar
Greenland
Gambia
Guinea
Guadeloupe (French)
Equatorial Guinea
Greece
S. Georgia &
S. Sandwich Isls.
Guatemala
Guam (USA)
Guinea Bissau
Guyana
Hong Kong
Heard and McDonald
Islands
Honduras
Croatia
Haiti
Hungary
Indonesia
Ireland
Israel
India
British Indian Ocean
Territory
Iraq
Iran
Iceland
Italy
Jamaica
Jordan
Japan
Kenya
Kyrgyzstan
Cambodia6
Kiribati
Comoros
Saint Kitts & Nevis Anguilla
North Korea
South Korea
Kuwait
Cayman Islands
Kazakhstan
Laos
Lebanon
Code
LC
LI
LK
LR
LS
LT
LU
LV
LY
MA
MC
MD
MG
MH
MK
ML
MM
MN
MO
MP
MQ
MR
MS
MT
MU
MV
MW
MX
MY
MZ
NA
NC
NE
NF
NG
NI
NL
NO
NP
NR
NU
NZ
OM
PA
PE
PF
PG
PH
PK
PL
PM
PN
PR
PT
PW
PY
QA
RE
RO
RU
RW
SA
SB
Country
Saint Lucia
Liechtenstein
Sri Lanka
Liberia
Lesotho
Lithuania
Luxembourg
Latvia Islands
Libya
Morocco
Monaco
Moldavia
Madagascar
Marshall Islands
Macedonia
Mali
Myanmar
Mongolia
Macau
Northern Mariana Islands
Martinique (French)
Mauritania
Montserrat
Malta
Mauritius
Maldives
Malawi
Mexico
Malaysia
Mozambique
Namibia
New Caledonia (French)
Niger
Norfolk Island
Nigeria
Nicaragua
Netherlands
Norway
Nepal
Nauru
Niue
New Zealand
Oman
Panama
Peru
Polynesia (French)
Papua New Guinea
Philippines
Pakistan
Poland
Saint Pierre and Miquelon
Pitcairn Island
Puerto Rico
Portugal
Palau
Paraguay
Qatar
Reunion (French)
Romania
Russian Federation
Rwanda
Saudi Arabia
Solomon Islands
Code
SC
SD
SE
SG
SH
SI
SJ
SK
SL
SM
SN
SO
SR
ST
SU
SV
SY
SZ
TC
TD
TF
TG
TH
TJ
TK
TM
TN
TO
TP
TR
TT
TV
TW
TZ
UA
UG
UK
UM
US
UY
UZ
VA
VC
VE
VG
VI
VN
VU
WF
WS
YE
YT
YU
ZA
ZM
ZR
ZW
Country
Seychelles
Sudan
Sweden
Singapore
Saint Helena
Slovenia
Svalbard and
Jan Mayen
Slovak Republic
Sierra Leone
San Marino
Senegal
Somalia
Suriname
Saint Tome and Principe
Former USSR
El Salvador
Syria
Swaziland
Turks and Caicos Islands
Chad
French Southern
Territories
Togo
Thailand
Tadjikistan
Tokelau
Turkmenistan
Tunisia
Tonga
East Timor
Turkey
Trinidad and Tobago
Tuvalu
Taiwan
Tanzania
Ukraine
Uganda
United Kingdom
USA Minor Outlying
Islands
United States
Uruguay
Uzbekistan
Vatican City State
Saint Vincent &
Grenadines
Venezuela
Virgin Islands (British)
Virgin Islands (USA)
Vietnam
Vanuatu
Wallis and Futuna Islands
Samoa
Yemen
Mayotte
Yugoslavia
South Africa
Zambia
Zaire
Zimbabwe
T515_NAD_English_Final.qxd
5/7/06
11:46 AM
Page 33
Reference
SPECIFICATIONS
GENERAL
ENGLISH
Power requirements: AC 120 V, 60 Hz NTSC Region 1, 200-240 50/60 Hz PAL Region 2
10 W
435 x 45 x 250 mm (W x H x D) with feet and RCA plugs
2 kg (4.4 lb)
5 °C to 35 °C (41 °F to 95 °F)
5 % to 90 %
SYSTEM
FRANÇAIS
Signal-to-noise ratio
Harmonic distortion
Dynamic range
Semiconductor laser, wavelength 650 nm
NTSC for 120V North American version, NTSC/PAL for 230V European version
DVD (PCM 96 kHz): 8 Hz to 44 kHz
DVD (PCM 48 kHz): 8 Hz to 22 kHz
CD: 8 Hz to 20 kHz
More than 100 dB (ANALOG OUT connectors only)
Less than 0.008%
More than 90 dB (DVD/CD)
OUTPUTS
COMPONENT VIDEO OUT
AUDIO OUT
DIGITAL OUT (COAXIAL)
DIGITAL OUT (OPTICAL)
DIGITAL OUT (HDMI)
HDMI VIDEO OUT
1 Vp-p 75 Ω, sync negative, RCA jack x 1
(Y) 1.0 V (p-p), 75 Ω, negative sync, Mini DIN 4-pin x 1 (North American version only)
(C) 0.3 V (p-p) 75 Ω
(Y) 1.0 V (p-p), 75 Ω, negative sync, RCA jack x 1
(Cb/Pb)/(Cr/Pr) 0.7 V (p-p), 75 Ω, RCA jack x 2
2.0 Vrms (1 KHz, 0 dB), 600 Ω, RCA jack (L, R) x 2, RCA jack (FL, FR, C, RL, RR, SW) x 6
0.5 V (p-p), 75 Ω, RCA jack x 1
3 V (p-p), 75 Ω, Optical Connector x 1
2-channel 48 kHz PCM/Bitstream
HDCP 480p/720p/1080i (NTSC)
HDCP 576p/720p/1080i (PAL)
ESPAÑOL
VIDEO OUT
S-VIDEO OUT
ACCESSORIES
1
1
1
2
ITALIANO
Video cable
Audio cable
Remote control
Batteries
DEUTSCH
Laser
Signal system
Frequency response
NEDERLANDS
Power requirements
Power consumption
Dimensions (approx.)
Weight (approx.)
Operating temperature
Operating humidity
SVENSKA
PORTUGUÊS
Note: Design and specifications are subject to change prior notice.
33
T515_NAD_English_Final.qxd
5/7/06
11:46 AM
Page 34
www.NADelectronics.com
©2006 NAD ELECTRONICS INTERNATIONAL
A DIVISION OF LENBROOK INDUSTRIES LIMITED
All rights reserved. No part of this publication may be reproduced, stored or transmitted in any form without the written permission of NAD Electronics International
T 515 Manual 05/06