1
®
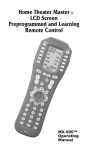
HTR-5
LCD TOUCH SCREEN PREPROGRAMMED
AND LEARNING REMOTE CONTROL
ENG
ENG
2
TABLE OF CONTENTS
Introduction . . . . . . . . . . . . . . . . . . . . . . . . . . . . . . . . . . . . . . . . . . . . . . . . . . . . . . . . .4
Battery Installation . . . . . . . . . . . . . . . . . . . . . . . . . . . . . . . . . . . . . . . . . . . . . . . . . . .5
Summary of Operations . . . . . . . . . . . . . . . . . . . . . . . . . . . . . . . . . . . . . . . . . . . . . . .6
LCD Screen and Button Layout . . . . . . . . . . . . . . . . . . . . . . . . . . . . . . . . . . . . . . . . . .7
Getting Ready with System Setting . . . . . . . . . . . . . . . . . . . . . . . . . . . . . . . . . . . . .10
Programming the Remote Control . . . . . . . . . . . . . . . . . . . . . . . . . . . . . . . . . . . . . .11
Preprogramming Method . . . . . . . . . . . . . . . . . . . . . . . . . . . . . . . . . . . . . . . . . . . . . 11
Learning method . . . . . . . . . . . . . . . . . . . . . . . . . . . . . . . . . . . . . . . . . . . . . . . . . . . 14
Erasing the learned buttons . . . . . . . . . . . . . . . . . . . . . . . . . . . . . . . . . . . . . . . . . . . 16
System and Operations Set Up . . . . . . . . . . . . . . . . . . . . . . . . . . . . . . . . . . . . . . . . .18
Setting up the system. . . . . . . . . . . . . . . . . . . . . . . . . . . . . . . . . . . . . . . . . . . . . . . . 18
Macro and Punch Through Programming . . . . . . . . . . . . . . . . . . . . . . . . . . . . . . . . . 19
Programming Punch Through Functions . . . . . . . . . . . . . . . . . . . . . . . . . . . . . . . . . . 21
To Edit the Buttons on LCD . . . . . . . . . . . . . . . . . . . . . . . . . . . . . . . . . . . . . . . . . . . .22
To Move buttons . . . . . . . . . . . . . . . . . . . . . . . . . . . . . . . . . . . . . . . . . . . . . . . . . . . 22
To Copy buttons. . . . . . . . . . . . . . . . . . . . . . . . . . . . . . . . . . . . . . . . . . . . . . . . . . . . 23
To Delete buttons . . . . . . . . . . . . . . . . . . . . . . . . . . . . . . . . . . . . . . . . . . . . . . . . . . . 24
To Insert buttons . . . . . . . . . . . . . . . . . . . . . . . . . . . . . . . . . . . . . . . . . . . . . . . . . . . 25
To Change buttons. . . . . . . . . . . . . . . . . . . . . . . . . . . . . . . . . . . . . . . . . . . . . . . . . . 26
To Edit a text . . . . . . . . . . . . . . . . . . . . . . . . . . . . . . . . . . . . . . . . . . . . . . . . . . . . . . 27
Clock Setting . . . . . . . . . . . . . . . . . . . . . . . . . . . . . . . . . . . . . . . . . . . . . . . . . . . . . . .28
Loading Programs with PC . . . . . . . . . . . . . . . . . . . . . . . . . . . . . . . . . . . . . . . . . . . .28
LCD Screen Alignment . . . . . . . . . . . . . . . . . . . . . . . . . . . . . . . . . . . . . . . . . . . . . . . .29
LCD Screen Contrast . . . . . . . . . . . . . . . . . . . . . . . . . . . . . . . . . . . . . . . . . . . . . . . . .29
Caution on LCD Screen . . . . . . . . . . . . . . . . . . . . . . . . . . . . . . . . . . . . . . . . . . . . . . .30
Memory Lock . . . . . . . . . . . . . . . . . . . . . . . . . . . . . . . . . . . . . . . . . . . . . . . . . . . . . . .30
Erasing all the Programs . . . . . . . . . . . . . . . . . . . . . . . . . . . . . . . . . . . . . . . . . . . . . .30
Warranty . . . . . . . . . . . . . . . . . . . . . . . . . . . . . . . . . . . . . . . . . . . . . . . . . . . . . . . . . .30
Specifications . . . . . . . . . . . . . . . . . . . . . . . . . . . . . . . . . . . . . . . . . . . . . . . . . . . . . . .31
Appendix A. Set up Function Table . . . . . . . . . . . . . . . . . . . . . . . . . . . . . . . . . .32 - 43
Appendix B. Set up code Table . . . . . . . . . . . . . . . . . . . . . . . . . . . . . . . . . . . . .44 - 57
ENG
NAD is a trademark of NAD Electronics International, a division of Lenbrook Industries Limited
Copyright 2002, NAD Electronics International, a division of Lenbrook Industries Limited
3
INTRODUCTION
Thank you for choosing the NAD HTR-5 Home Theater Remote Control. The HTR-5 is one of
the most powerful and flexible remote controllers on the market today, allowing you to have
complete control of up to twelve different components (devices). Powerful “macros” are
available to send a complex series of commands which allow you to automate the process of
turning on and selecting the correct inputs and proper settings of all your audio and
video components.
The HTR-5 includes a LCD touch panel that features a “paged” display with 4 pages for each
of the 12 devices. This keeps operation simple by only showing the buttons needed for
operating the chosen device. Pressing the “page” button sequentially shows all the available
functions for the selected device. Frequently used buttons like Volume and Channel are
always available.
The remote commands and custom button layouts for all NAD products are already
programmed into the HTR-5. Other components (your TV and Satellite Receiver, for example)
can be easily programmed, either from the included pre-programmed code library or you can
teach up to 780 buttons into the HTR-5 from your original remote controls.
With the HTR-5 you can change the button size and shape and edit the text on the button in
the LCD, allowing you to customize your remote control exactly to your own preferences.
These changes can be directly programmed using just the HTR-5, or you can link the HTR-5 to
your personal computer with the supplied cable to make programming easier.
The HTR-5 is easy to program and operate once you understand the way it is organized. We
strongly recommend that you read completely through the manual to familiarize yourself and
other members of your family with the many features and operating conventions of
the HTR–5.
ENG
4
BATTERY INSTALLATION
HTR-5 uses four AA batteries. Please be sure to match the batteries with the (+) and (-)
markings inside the battery compartment during installation.
The remote control self-tests for three seconds after the batteries are installed and then
automatically moves to the setting mode for programming.
ENG
NOTE
Please do not mix old batteries with new ones or mix different types of batteries.
5
SUMMARY OF OPERATIONS
DESCRIPTION OF DEVICES
The HTR-5 is designed to operate up to twelve components. They are Audio, CATV, Satellite,
TV, DVD, VCR1, VCR2, Laser Disc, Tuner, CD, Tape and AUX. However, the device button
name can be changed to meet your exact needs. You can also create a favorite device page
and transfer the frequently used devices to the favorite device page in order to change the
device button sizes and shapes. Once you create the favorite device page, it will appear as a
default device page. Please refer to COPY in EDITING Section on page 23 for details.
There are also four pages of the LCD screen for each device and you can use them to create,
delete or edit any functional buttons to customize with your audio/video components. Please
refer to EDITING on page 22 for details.
PRE-PROGRAMMED CODES
The HTR-5 comes with preprogrammed codes for practically all the major audio and video
equipment that are on the market. You can operate all of your components with the HTR-5
simply by punching in the three-digit code number that is assigned to your brand. The code
numbers for various brands and components are listed in the instruction manual. Please refer
to the programming instruction shown on page 11 for details.
LEARNING
The HTR-5 can also learn practically all the codes from your original remote controls. There are
50 LCD screens in the remote control and all the functional buttons in the LCD can be taught.
In addition, there are eleven rubber buttons and a joystick that contains five functions. Each of
these buttons and the joystick functions can be taught in each of the twelve devices. In
general, you can teach up to 780 new functions into the remote control. Please refer to
page 14 in the instruction manual for details.
ENG
6
SUMMARY OF OPERATIONS
MACRO OPERATION
The remote control is capable of sending out a series of commands with the single press of a
button. There are three types of macro buttons you can use for such macro operations and
they are as follows:
1 M1, M2 and M3 buttons on MAIN page. Each of these three buttons are designed to
send out up to 28 series of commands you programmed into the buttons. It is generally
used to turn on and turn off all of your A/V components with the single press of a button.
2 Device buttons on Main page. There are twelve device buttons on the MAIN page and
each of these device buttons can send out up to 14 commands which you have
programmed into the device button. It is generally used to send out audio input codes so
that the audio receiver will make an automatic input switch when you press the respective
device button in the remote control.
3 Favorite Channel buttons. You can create up to 60 favorite channel buttons in the
remote control by programming the most often watched channel numbers into these
buttons. Each of these buttons can send out up to 14 commands. You can also use them
for any other purpose. Please refer to page 19 of the manual for programming the macro
operations.
PUNCH THROUGH
This is designed to operate audio equipment volume control buttons (VOLUME UP and DOWN
and MUTE) while all the other buttons control video equipment. You can also operate transport
functions (PLAY, STOP, REWIND and FAST FORWARD buttons) from VCR, DVD, LD, CD or any
other mode while all other buttons in the remote control are operating different components.
You can also set up “punch-through” on CHANNEL buttons. Please refer to page 21 in the
manual for details.
ENG
7
SUMMARY OF OPERATIONS
EDITING THE BUTTONS ON LCD SCREEN
You can change the size and shape of the buttons on the LCD screen. You can also create,
delete, copy and move the buttons from one location to another on the LCD. In addition, you
can erase text and write your own on the buttons using different font sizes. This can be done
either directly on the remote control without a personal computer or with the aid of a personal
computer. Please refer to page 22 in the manual for details.
LOADING PROGRAM
The HTR-5 is capable of receiving software programs and data through the Internet. You can
also upload programs and data in the remote control to your personal computer and
download them to another HTR-5. Please refer to page 28 in the manual for details.
ALL OTHER OPERATIONS
You can set the duration of the back light or the LCD display to stay on as well as low battery
warning level and the “beep” sound level. Please refer to page 18 in the manual for details.
You can also set the time, date and year that are displayed in the remote control by following
the procedures shown on page 28 of the manual.
ENG
8
LCD SCREEN AND BUTTON LAYOUT
ENG
1
2
3
4
5
6
7
8
9
10
11
12
13
14
15
Displays the name of the device selected
Displays the data and clock
Displays page number
Displays the device names
LIGHT button
MACRO buttons
MAIN DEVICE menu button
LCD Page change button
POWER
MUTE
VOLUME
CHANNEL
Previous channel button
TRANSPORT functions (PLAY, STOP, REWIND and FF) for VCR, CD and DVD etc.
JOYSTICK button (UP, DOWN, LEFT,RIGHT and ENTER) to move the cursor and enter the
selection by pushing down the joystick.
9
GETTING READY WITH SYSTEM SETTING
All the programming is done by first entering the SYSTEM SETTING mode in the remote
control. Press both the MAIN and PAGE buttons simultaneously for five seconds to enter the
SYSTEM SETTING mode.
Move the cursor on the screen with the joystick to your selection in the list. Enter the selection
by pushing down the joystick.
You can exit the setting mode by simply pressing the MAIN button or bring the cursor to
8. TO EXIT with joystick and push the joystick down.
ENG
10
PROGRAMMING THE REMOTE CONTROL
You can program the HTR-5 to make it compatible with all of your components by following
either the preprogramming method or teaching it using your original remote controls.
PREPROGRAMMING METHOD
USING A THREE-DIGIT CODE NUMBER:
1 Turn on the component you plan to operate manually.
2 Go to the program setting mode by pressing both the MAIN and PAGE buttons
simultaneously for five seconds.
3 Using the joystick, move the cursor down in the LCD screen to 3. PREPROGRAM.
4 Push the joystick down to enter the preprogramming mode.
5 Select the device on the LCD screen that you wish to program, (e.g. To program DVD,
press the DVD device button).
6 Select the device from which the three digit code number table will be selected, (e.g. If
it is from the DVD code table, press the DVD device button).
7 Point the remote control toward the component and enter the three-digit code number
you selected for your component from the code table on page 44 - 57. (Please enter
the code number within 20 seconds of programming). If there is more than one code
number assigned to your brand, try one code number at a time until you find the right
code number. (If you entered the right code number, the component will turn off
immediately after you entered the number). When the right code number has been
entered, save the code by pressing the SAVE button on the LCD.
ENG
11
PROGRAMMING THE REMOTE CONTROL
8 Confirm that you entered the right code number that matches your component by
pressing other buttons such as POWER, VOLUME, MUTE and CHANNEL. If any of the
buttons do not operate as they should, please repeat from Step 5.
9 Continue to program other components by repeating from the above step 5.
10 Once you have completed programming all the devices, exit from the programming
mode by pressing both the MAIN and PAGE buttons simultaneously.
11 You will now be in the setting mode once again. Move the cursor to 8. TO EXIT and
press the joystick down or simply press the MAIN button to exit to main menu.
AUTO SCAN WITH BRAND NAMES
ENG
12
1 Manually turn on the component you plan to operate.
2 Go to program setting mode in the remote control by pressing both the MAIN and
PAGE buttons simultaneously for five seconds.
3 Using the joystick, move the cursor down in the LCD screen to 3. PREPROGRAM.
4 Push the joystick down to enter the preprogram mode.
5 Select the device you wish to program in the LCD screen, (e.g. To program DVD, press
the DVD device button).
6 Select the device from which the three digit code number will be selected, (e.g. If it is
from the DVD code table, press the DVD device button).
PROGRAMMING THE REMOTE CONTROL
7 Point the remote control to the component and press the BRAND button.
8 Press the number button on LCD screen that bears the first alphabetical character of
your brand name. (Please press the number button within 20 seconds of
programming).
ENG
Please note that pressing the number button once will only show the first letter in that
alphabet group. You will need to press again to obtain the other letters.
9 If the first code number assigned to the brand is the right one, it will turn off the
component. If it is not the right one or if it is not the right brand name, press the
Channel Up button. It will automatically send out a POWER OFF command either from
the next code number from the same brand or the code from the next brand. Keep the
Channel Up button pressed until it turns off the component. When the component
turns off, save the code by pressing the SAVE button on the LCD. Note: It is quite
possible that the code number that works with your component may have a different
brand name because of the way it was made by its manufacturer.
NOTE
Confirm that it is the right code number for your component by pressing other buttons
such as POWER, VOLUME, MUTE and CHANNEL, etc. If any of the buttons do not operate
as they should, please repeat from Step 5.
13
PROGRAMMING THE REMOTE CONTROL
10 Continue to program other components by repeating from Step 5.
11 Once you have completed programming all the devices, exit from the programming
mode by pressing both the MAIN and PAGE buttons simultaneously.
12 You will be in the setting mode. Move the cursor to 8. TO EXIT and press the joystick
down or simply press the MAIN button to exit to the main menu.
LEARNING METHOD
You can also teach any of the buttons in the remote control except the MAIN and PAGE
buttons with the following steps:
1 Go to the program setting mode by pressing both the MAIN and PAGE buttons
simultaneously for five seconds.
2 Move the cursor to 4. LEARNING with the joystick and then push the joystick down to
enter the learning mode.
3 If you wish to teach any of the functional buttons in the device, keep the cursor to
COMMON BUTTON and select the device that you wish to enter. If you wish to teach
the twelve device buttons shown on the LCD, press the MUTE button to move the
cursor to the DEVICE BUTTON and select the device on the LCD that you wish to teach.
ENG
14
PROGRAMMING THE REMOTE CONTROL
4 Place your original remote control to the HTR-5 head to head about 2-3 inches apart as
shown below.
HTR-5
Original Remote
5 Press either the device button or functional button, whichever you wish to teach in the
HTR–5. It is now ready to learn on the button you selected.
6 Press the button on your original remote control that you wish to teach the HTR-5. The
HTR-5 will “beep” indicating that it has received the signal and the LCD will show
“RETRY”. (Please enter the code signal within 20 seconds of programming).
7 Press the same button on the original remote control a second time to ensure correct
learning. The HTR-5 will beep a second time with “GOOD” flashed on the LCD screen,
indicating that it learned the code correctly. If it flashes “FAIL”, repeat from Step 5 until
it learns successfully.
8 Move on to the next button (or device) that you wish to teach by repeating from Step 5.
If you are teaching functional buttons, you can also move on to teach the buttons in
the next page by pressing the PAGE button.
9 Once you complete the teaching and wish to exit from the learning mode, press the
MAIN button to go back to the main page of the learning mode. Exit from the Main
page by pressing both the MAIN and PAGE buttons simultaneously.
10 You will now be in the setting mode once again. Move the cursor to 8. TO EXIT and
press down the joystick or simply press the MAIN button to exit to the main menu.
ENG
15
PROGRAMMING THE REMOTE CONTROL
TO ERASE THE LEARNED BUTTONS
TO ERASE A SINGLE BUTTON:
1 Go to the program setting mode by pressing both the MAIN and PAGE buttons
simultaneously for five seconds.
2 Move the cursor to 4. Learning with the joystick and then push the joystick down to
enter the learning mode.
3 Move the cursor to COMMON BUTTON and select the device that contains the
functional button you wish to erase. If you wish to erase the function in the device
button, move the cursor to DEVICE BUTTON.
ENG
4 Press the functional button or device button you wish to erase for three seconds or
more and it will flash “ERASED”. Repeat this step for other buttons you wish to erase.
5 Once you completed erasing and wish to exit from this mode, press the MAIN button
to go back to the main page of the learning mode. Exit from the Main page by pressing
both the MAIN and PAGE buttons simultaneously.
6 You will now be in the setting mode once again. Move the cursor to 8. TO EXIT and
press down the joystick or simply press the MAIN button to exit to the main menu.
TO ERASE ALL THE LEARNED COMMANDS IN A SINGLE DEVICE:
1 Go to the program setting mode by pressing both the MAIN and PAGE buttons
simultaneously for five seconds.
2 Move the cursor to 4. Learning with the joystick and then push the joystick down to
enter the learning mode.
16
PROGRAMMING THE REMOTE CONTROL
3 Press the MUTE button to move the cursor to the DEVICE BUTTON and keep the device
button you wish to erase all the learned commands down for five seconds until the LCD
shows ERASED. This will erase the function taught in the device button. If you continue
to press the device button for another five seconds, it will erase all the functions in the
device.
4 Once you complete the erasing and wish to exit from this mode, press the MAIN button
to go back to the main page of the learning mode. Exit from the Main page by pressing
the MAIN and PAGE buttons simultaneously.
5 You will be in the setting mode once again. Move the cursor to 8. TO EXIT and press
down the joystick or simply press the MAIN button to exit to the main menu.
TO ERASE ALL THE LEARNED COMMANDS IN ALL TWELVE DEVICES:
1 Go to the program setting mode by pressing both the MAIN and PAGE buttons
simultaneously for five seconds.
2 Move the cursor to 4. LEARNING with the joystick and then push the joystick down to
enter the learning mode.
3 Press both the POWER and STOP buttons simultaneously for five seconds in the learning
mode. The LCD will show ERASED after it has erased all the learned commands in the
remote control.
4 Once you complete the erasing and wish to exit from this mode, press both the MAIN
and PAGE buttons simultaneously.
5 You will be in the setting mode once again. Move the cursor to 8. TO EXIT and press
down the joystick or simply press the MAIN button to exit to the main menu.
NOTE
Preprogrammed code will be automatically restored when the learned function is erased.
ENG
17
SYSTEM AND OPERATIONS SETUP
Go to the program setting mode by pressing both the MAIN and PAGE buttons simultaneously
for five seconds. Move the cursor on the LCD screen to 2. SYSTEM & OPTIONS with the
joystick. Enter this mode by pushing the joystick down and the following can be programmed:
SETTING UP THE SYSTEM
The LCD screen will list the following choices:
Buzzer Status:
Back Light On Time:
LCD on Time:
Warning of Low Battery:
ENG
Range
High, Low, Off
0 - 120 seconds
5 - 120 seconds
10% - 50% level
Default
High
20 seconds
30 seconds
10 %
Select the button you wish to change from the list first. Press the UP or DOWN buttons on the
LCD to set them up. Once you set them up, press the SAVE button to store them.
You will now be in the setting mode once again. To return to the main menu, move the cursor
to 8. TO EXIT and press the joystick down or simply press the MAIN button to exit to
main menu.
18
SYSTEM AND OPERATIONS SET UP
MACRO AND PUNCH THROUGH PROGRAMMING
The MACRO and PUNCH THROUGH can be also programmed in this mode. Press the button
you wish to program and follow procedures shown below:
MACRO PROGRAMMING
There are three type of macro functions you can program. They are as follows:
1 M1, M2 and M3 in the Main menu. Designed to send out up to twenty eight
commands from each of the three buttons.
2 Twelve device buttons in the Main menu. Send out up to fourteen commands from
each device button.
3 Favorite Channel Buttons. You can create and design up to 60 buttons as your
Favorite Button in video modes. Each favorite channel button can send out up to
fourteen commands with one button press.
TO PROGRAM MACRO FUNCTIONS:
Press MACRO PROGRAM button in 2. SYSTEM & OPTIONS
ENG
FOR M1 – M3 BUTTON:
1 Press one of the three macro buttons, M1 – M3, for which you want to store the macro.
2 Select functional buttons you wish to store in the macro button. You can store up to
28 commands.
3 Store the commands you selected to the macro button by pressing CH (UP) button. To
cancel the macro commands, press CH (DOWN).
19
SYSTEM OPERATIONS AND SET UP
FOR DEVICE BUTTONS:
1 Press one of the twelve device buttons you wish to store macro functions with the
cursor on DEVICE BUTTON.
2 Move the cursor to COMMON BUTTON and select again either the same or another
device button whose functional buttons you wish to store in the device macro button
you first selected. You can store up to 14 commands in the device macro buttons.
3 Store the commands you selected to the macro button by pressing CH (UP) button. To
cancel the macro commands press CH (DOWN).
FOR FAVORITE CHANNEL BUTTON:
1 Press the device you wish to program favorite channels with cursor on COMMON
BUTTON.
2 Press one of the favorite channel buttons and enter the channel number you wish to
store in the FAVORITE channel button. You can store up to 14 commands.
3 Store the commands you selected in the Favorite channel button by pressing Channel
UP button. To cancel the macro commands, press CH (DOWN).
Once you complete the macro programming and wish to exit, press both the MAIN and PAGE
buttons simultaneously. This will take you to the setting mode. Move the cursor to 8. TO EXIT
in setting mode and press the joystick down to exit or simply press the MAIN button to exit to
main menu.
NOTE
Pressing the Volume Up button during the macro programming will add a time delay of
0.5 seconds between the commands, e.g. pressing the Volume Up button twice will cause
a pause of 1 second between the commands where the delay was inserted.
ENG
20
TO ERASE MACRO FUNCTIONS
To erase the functions you stored in any of the macro buttons, press the Channel Up button
without entering any commands during the macro programming mode.
SYSTEM OPERATIONS AND SET UP
TO PROGRAM PUNCH THROUGH FUNCTIONS
You can use audio receiver volume control in a different mode (e.g. Audio receiver Volume Up
and Volume Down and Mute in Satellite mode) using a volume punch through feature. You
can also have four VCR (or DVD) transport buttons, Play, Stop, Fast Forward and Rewind,
operate in another mode such as in Satellite, Cable and Audio modes. You can also set
CHANNEL for punch through.
PROGRAMMING:
1 Press PUNCH THROUGH in the LCD screen in 2. SYSTEMS & OPTIONS mode.
2 Press VOLUME UP button for Volume Punch Through or press the PLAY button for
Transport Punch Through. or CHANNEL up button for Channel Punch Through.
3 Select the device you wish to punch through to (1st device).
4 Select the device you wish to punch through from (2nd device).
5 Repeat from Step 2 to program Punch Through to other devices.
Once you complete the Punch Through programming and wish to exit, press both the MAIN
and PAGE buttons simultaneously. This will take you to the setting mode. Move the cursor to
8. TO EXIT in the setting mode and press down the joystick to exit or simply press the MAIN
button to exit to main menu.
TO ERASE PUNCH THROUGH FUNCTIONS:
Press the same device button in the PUNCH THROUGH TO? and PUNCH THROUGH FROM?
during the Punch Through programming.
ENG
21
TO EDIT THE BUTTONS ON THE LCD
You can add or delete buttons, change the button size and shape, move the button locations
and edit the text on the buttons on LCD screen in the EDITING Mode.
1 Go into setting mode by pressing both the MAIN and PAGE buttons simultaneously for
five seconds.
2 Move down the cursor in the LCD screen to 5. EDIT BUTTONS using joystick.
3 Push down the joystick to enter the EDITING mode. The LCD will list the following six
choices to choose from and select the button you wish to enter.
TO MOVE BUTTONS
This operation moves functional buttons to any location on the LCD screen. It also moves the
button from one page to another within the selected device.
ENG
1 Set the cursor to COMMON BUTTON and select the device you wish to enter. Select the
functional button you wish to move in the device page and move them with the joystick
within the same page or move to the next page by pressing the PAGE button. Once
you position the button at the location or page you desire, push the joystick down to
save it.
2 Repeat the above step to continue to move other buttons in the same device.
3 If you wish to move buttons in another device, return to the main menu by pressing
the MAIN button and repeat from STEP 1.
4 Once the operation is completed and you wish to exit from this mode, return to the
main menu by pressing the MAIN button and then exit from the main menu by pressing
both the MAIN and PAGE buttons, simultaneously
NOTE
You may first relocate or delete the buttons that are currently at the position you plan to
locate the new button. However, you can also relocate or delete the buttons after you
superimpose the new button above them.
22
TO EDIT THE BUTTONS ON ON LCD
The device buttons in favorite device page can be moved. Please refer to “To Copy - Creating
a Favorite Device Page”
TO COPY BUTTONS
You can copy any functional button and move them anywhere in the LCD screen or to any
other 3 pages within the same device mode.
1 Move the cursor either to COMMON BUTTON or DEVICE BUTTON with the MUTE
button.
2 Select the device you wish to enter.
3 Select the functional button you wish to copy and move it with the joystick within the
same page or move to the next page by pressing the PAGE button. Once you position
the copied button at the location or page you desire, push the joystick down to save it.
4 Repeat from Step 2 to continue to copy other buttons in the same device.
5 If you wish to copy buttons in another device, return to the main menu by pressing
MAIN button and repeat from Step 1.
6 Once the operation is completed and you wish to exit from this mode, return to the
main menu by pressing the MAIN button and then exit from main menu by pressing
both the MAIN and PAGE buttons simultaneously.
TO COPY - CREATING A FAVORITE DEVICE PAGE (MAIN 1)
You can also create your favorite device page and transfer the device buttons you use most
often to this page with the following steps:
1 Move the cursor to DEVICE BUTTON with the MUTE button.
2 Select the device you wish to store in your favorite device page.
3 Press the MAIN button. The device you selected will appear in a favorite page you just
created. You can also move the device button to a different location in the LCD page
with the joystick in this step.
4 Press the joystick down to save the device button you copied.
5 Repeat Step 2 to Step 4 to copy other device buttons you wish to store to your favorite
device page.
6 Once you completed it, exit by pressing both the MAIN and PAGE button
simultaneously.
ENG
NOTE
You may also want to change the size and text of the buttons in the favorite device page
using CHANGE and TEXT EDIT in EDIT mode. However, the text on the button should be
written on the main device page before the device button is stored in favorite device.
23
TO EDIT THE BUTTONS ON LCD
TO DELETE BUTTONS
You can delete any button on the LCD screen except the twelve device buttons in the MAIN
page. With this operation you can delete both the device buttons in the favorite page and the
functional buttons with the following steps:
1 Select the functional button you wish to delete in the device page and push the joystick
down for three seconds to delete the button. If you wish to delete the device button in
favorite page, press the MAIN button and select the device button you wish to delete.
Press down the joystick for three seconds to delete the button.
2 Repeat the above step to continue to delete other buttons in the same device
3 If you wish to delete functional buttons in another device, return to the main menu by
pressing the MAIN button and repeat from Step 1.
4 Once the operation is completed and you wish to exit from the delete mode, return to
the main menu by pressing the MAIN button and then exit from the main menu by
pressing both the MAIN and PAGE buttons simultaneously.
WARNING
The preprogrammed command of the deleted button can be restored only by creating a
button at exactly the same location it was originally assigned. It can also be restored by
clearing the entire memory in the remote control and a new program loaded to the remote
control. The learned functions will be lost permanently with the deletion of the button.
Please use caution in deleting the button.
ENG
24
TO EDIT THE BUTTONS ON LCD
TO INSERT BUTTONS
This is designed to create new functional buttons in any of the twelve devices.
The following choices of button sizes and
shapes are available:
1 Select INSERT button in EDITING mode.
2 Select the device you wish to create as a new button.
3 Move to the page you wish to create a new button by pressing the PAGE button. Press
the CHANNEL UP or DOWN buttons and various sizes and shapes of buttons will
appear on the top left side of the LCD screen.
4 Continue to press the Channel button until you find the button you wish to use.
5 Move the button you created to the location you wish to position with the joystick and
press the joystick down to save it in that location.
6 Repeat from Step 3 to continue to create new buttons in the same device.
7 If you wish to create new buttons in another device, return to the main menu by
pressing the MAIN button and repeat from STEP 2.
8 Once the operation is completed and you wish to exit from this mode, return to the
main menu by pressing the MAIN button and exit from the main menu by pressing both
the MAIN and PAGE buttons simultaneously.
ENG
25
TO EDIT THE BUTTONS ON LCD
TO CHANGE BUTTONS
This is designed to change the size and shape of any functional buttons and device buttons (in
favorite device page) with the steps shown below:
The following choices of buttons are
available:
ENG
26
1 Press CHANGE button in EDITING MODE.
2 If you wish to change the functional buttons, press the device that contains the
functional button you wish to change and then select the functional button. If you wish
to change the device buttons in the favorite device page, press the MAIN button in
main menu and then select the device button you wish to change.
3 After selecting the button you wish to change size and shape, press the CHANNEL UP
or CHANNEL DOWN button and various sizes and shapes of buttons will appear on the
button you selected.
4 Continue to press the Channel button until you find the button you wish to use and
press the joystick down to save the shape of the button.
5 Repeat from Step 3 to continue to change buttons in the same device.
6 If you wish to change button sizes and shapes in another device, return to the main
menu by pressing the MAIN button and repeat from Step 2.
7 If you wish to exit from this mode, return to the main menu by pressing the MAIN
button and then exit from the main menu by pressing both the MAIN and PAGE
buttons simultaneously.
TO EDIT THE BUTTONS ON LCD
TO EDIT A TEXT
This is designed to write a new text on any of the buttons in the LCD screen with the following
steps:
The following choices of fonts are available in
two sizes for text editing:
1 Select TEXT EDIT button in EDITING MODE.
2 If you wish to write on the functional buttons, move the cursor to COMMON BUTTON
with the MUTE button and select the device you wish to enter. Select the functional
button you wish to write text. If you wish to write on the device buttons or on the M1
- M3 buttons, move the cursor to DEVICE BUTTON and select the device button.
3 After the selection of the button you wish to write, move the cursor to the location with
joystick to write a text in the button, press the Volume UP or Down button to select the
characters you wish to use, press the Channel UP or Channel Down button to move on
to next or move back to the previous characters, press the PRE CH button to move to
the second line of the text and the POWER button for different font sizes. You can
select font sizes by pressing the POWER button either before you start to write the
characters or after you write the text. For a space between the characters, press the
PLAY button.
4 Press the joystick down to save the new text on the button you selected.
5 Repeat from Step 3 to continue to change the text on other buttons in the same device.
6 If you wish to change the text in another device, return to the main menu by pressing
the MAIN button and then repeat from Step 2.
7 If you wish to exit from this mode, return to the main menu first by pressing the MAIN
button and exit from the main menu by pressing both the MAIN and PAGE buttons
simultaneously.
ENG
27
CLOCK SETTING
Enter the Setting mode by pressing both the MAIN and PAGE button simultaneously for five
seconds. Move the cursor on the LCD screen to 6. SET DATE & CLOCK by using the joystick.
Enter this mode by pushing the joystick down.
Press the selection you wish to change from the LCD screen and change them using the UP
and DOWN buttons.
Once you complete the setting, store them by pressing the SAVE button.
LOADING PROGRAM USING A PC
This program enables you to both upload the program to PC as well as download from PC
using the cable that is provided.
ENG
Move the cursor in the setting mode to 7. PROGRAM LOADING using the joystick and press
it down to enter the mode.
Please visit our website www.NADelectronics.com for the further instruction.
28
LCD ALIGNMENT
You may need to align the LCD screen after you down load the program to the HTR-5.
Enter the Setting mode by pressing both the MAIN and PAGE button simultaneously for five
seconds. Move the cursor on the LCD screen to 1. TOUCH PAD ALIGNMENT with joystick.
Press the joystick down to enter the mode. Align the screen by pressing the three points that
appear on LCD one point at a time.
@ - Press Here (1)
To Align LCD Screen:
Press the three points
using pencil tip.
@ - Press here (2)
To Cancel:
Press Main button.
Press Here (3) - @
LCD SCREEN CONTRAST
The contrast of the LCD screen can be adjusted by pressing either the CHANNEL UP or DOWN
button while holding down the MAIN button. Release the buttons when you have reached the
optimal level of contrast.
ENG
29
CAUTION WITH LCD SCREEN
Please note that the LCD screen is made of a breakable glass. Please use necessary caution in
handling LCD screen.
MEMORY LOCK
The HTR-5 has an internal memory lock system that retains all the programs and learned
functions for an extended period.
ERASING ALL THE PROGRAMS
Pressing the button shown through the opening in the battery compartment after removing
the batteries from the HTR-5 will erase all the programs in the remote control.
WARRANTY
We guarantee HTR-5 against any manufacturing defects for one year from the date of
purchase.
ENG
30
SPECIFICATIONS
Operating range
Power requirements
Battery life
Weight
Dimensions
13 m ~ 20 m, depending upon components.
Four size AA batteries
About 4 months
209.2 g (not including batteries)
226 mm x 76 mm x 38 mm (W x H x D)
Programmed Code Numbers:
AUDIO
__ __ __
TUNER
__ __ __
CD
__ __ __
DVD
__ __ __
LD
__ __ __
TAPE
__ __ __
SAT
__ __ __
CABLE
__ __ __
TV
__ __ __
VCR1
__ __ __
VCR2
__ __ __
AUX
__ __ __
ENG
31
SET-UP FUNCTION TABLE - AUDIO
2
Button Name
CD
AUX
TUNER
VIDEO 1
VIDEO 2
VIDEO 3
VIDEO 4
VIDEO 5
VIDEO 6
TAPE 1
TAPE 2
EXT 5.1
AM
FM
Audio Functions
CD
Aux
Tuner
LD/Video 1
VCR 1/Video 2
VCR 2/Video 3
Video 4
Video 5
Video 6
Tape 1
Tape 2
External 5.1
AM
FM
Button Name
SURR UP
CNTR UP
SUB. W UP
SURR DOWN
CNTR DOWN
SUB. W DOWN
CUSTOM PRESET 1
CUSTOM PRESET 2
CUSTOM PRESET 3
CUSTOM PRESET 4
CUSTOM PRESET 5
Audio Functions
Surround Up
Centre Up
Sub Woofer Up
Surround Down
Centre Down
Sub Woofer Down
Preset 1
Preset 2
Main/Preset 3
CAR-CDR/Preset 4
S-Filter/Preset 5
Audio Functions
Enter
Cursor Up
Cursor Down
Cursor Left
Cursor Right
Page 2
Page 1
Standby
Preset Up
Preset Down
Volume Up
Volume Down
Mute
Tune/Preset
Button Name
PLAY
STOP
REW
F.F.
CURSOR ENTER
CURSOR UP
CURSOR DOWN
CURSOR LEFT
CURSOR RIGHT
Button Name
ON
OFF
SLEEP
SURR MODE
THX
TONE
CHANNEL
DYNAMIC RANGE
TEST
MULTISOURCE VOL+
MULTISOURCE VOLSOURCE
Audio Functions
Power On
Power Off
Sleep
Surround Mode
THX
Tone
Channel Select
Late Night
Surround Test
MultiSource Volume Down
MultiSource Volume Up
Multi Source
Page 4
Audio Functions
Page 3
Button Name
Device Name
POWER
CH UP
CH DOWN
VOL UP
VOL DOWN
MUTE
PRE. CH
Button Name
1
2
3
4
5
6
7
8
9
0
DISPLAY
ENTER
Audio Functions
Tuner 1
Tuner 2
Tuner 3
Tuner 4
Tuner 5
Tuner 6
Tuner 7
Tuner 8
Tuner 9
Tuner 0
Display
Tuner Enter
SATELLITE - SET-UP FUNCTION TABLE
SAT Functions
1
2
3
4
5
6
7
8
9
0
TV/SAT
Enter
Button Name
FAV1
FAV2
FAV3
FAV4
FAV5
FAV6
FAV7
FAV8
SAT Functions
SAT Functions
Select
Cursor Up
Cursor Down
Cursor Left
Cursor Right
Page 2
Button Name
1
2
3
4
5
6
7
8
9
0
DISPLAY
ENTER
Button Name
PLAY
STOP
REW
F.F.
CURSOR ENTER
CURSOR UP
CURSOR DOWN
CURSOR LEFT
CURSOR RIGHT
Button Name
MENU
GUIDE
EXIT
INFO
FAV. CH.
ACTION
ALPHA
NEXT
VIEW
ALT AUDIO
REC
FETCH
SAT Functions
Power On
Power Off
Sleep
Surround Mode
THX
Tone
Channel Select
Late Night
Surround Test
MultiSource Volume Down
MultiSource Volume Up
Multi Source
Page 4
Page 1
SAT Functions
SAT (On)
On/Off (On)
Channel Up
Channel Down
Volume Up
Volume Down
Mute
Prev. Ch.
Page 3
Button Name
Device Name
POWER
CH UP
CH DOWN
VOL UP
VOL DOWN
MUTE
PRE. CH
Button Name
FAV9
FAV10
FAV11
FAV12
FAV13
FAV14
FAV15
FAV16
SAT Functions
3
SET-UP FUNCTION TABLE - TV
4
Standby
Channel Up
Channel Down
Volume Up
Volume Down
Mute
Review
Button Name
1
2
3
4
5
6
7
8
9
0
100
ENTER
TV Functions
Digit 1
Digit 2
Digit 3
Digit 4
Digit 5
Digit 6
Digit 7
Digit 8
Digit 9
Digit 0
100
Button Name
AUTO:CH
ADD
DELETE
PIP ON
PIP OFF
SWAP
FREEZE
POSITION
MTS
K1
K2
FAV1
TV Functions
MTS
Button Name
PLAY
STOP
REW
F.F.
CURSOR ENTER
CURSOR UP
CURSOR DOWN
CURSOR LEFT
CURSOR RIGHT
Page 2
TV Functions
Page 4
Page 3
Page 1
Button Name
Device Name
POWER
CH UP
CH DOWN
VOL UP
VOL DOWN
MUTE
PRE. CH
TV Functions
Cursor Up
Cursor Down
Button Name
MENU
DISPLAY
EXIT
TV/VCR
TV/CATV
INPUT
SLEEP
CC
CH.SCAN
AUDIO
PICTURE
RESET-STD
TV Functions
Button Name
FAV2
FAV3
FAV4
FAV5
FAV6
FAV7
FAV8
TV Functions
Recall
TV/CATV
Video
Timer/Clock
Audio
Picture
Reset
VCR - SET-UP FUNCTION TABLE
VCR1,2 Functions
1
2
3
4
5
6
7
8
9
0
1-100
Enter
Button Name
MENU-PGM
DISPLAY
AUDIO MONITOR
COUNTER
RESET
CLEAR
INDEX
INDEX MARK
INDEX ERASE
TAPE SPEED
TOMER REC
EJECT
VCR1,2 Functions
Program
Display
Audio Monitor
C-Counter
Reset
Clear
Index
Index Mark
Index Erase
Tape Speed
Timer Rec
Eject
VCR1,2 Functions
Play
Stop
Rewind
Fast Forward
Page 2
Button Name
1
2
3
4
5
6
7
8
9
0
100
ENTER
Button Name
PLAY
STOP
REW
F.F.
CURSOR ENTER
CURSOR UP
CURSOR DOWN
CURSOR LEFT
CURSOR RIGHT
Button Name
PAUSE
X2
REC
SRCHSRCH+
F.ADV
SLOWSLOW+
SLOW
V/T
INPUT
VCR+
VCR1,2 Functions
Pause
ºø2
Record
SearchSearch+
Frame Advance
SlowSlow+
Slow
VCR/TV
Input
VCR Plus
Page 4
Page 1
VCR1,2 Functions
VCR (On)
On/Off (Off)
Channel Up
Channel Down
Volume Up
Volume Down
Mute
Page 3
Button Name
Device Name
POWER
CH UP
CH DOWN
VOL UP
VOL DOWN
MUTE
PRE. CH
Button Name
AUTO TRK
TRKTRK+
AUTO CH
ADD
DELETE
EDIT
QTR ON
QTR OFF
K1
K2
K3
VCR1,2 Functions
Auto Tracking
TrackingTracking+
Auto Ch
Add+
DeleteEdit
Qtr On
Qtr Off
5
SET-UP FUNCTION TABLE - CABLE
6
Cable Functions
1
2
3
4
5
6
7
8
9
0
Switch A/B
Enter/Memory
Button Name
A
B
C
REW
PLAY
F.F.
PAUSE
STOP
REC
FAV1
FAV2
FAV3
Cable Functions
P/Delete
Record
Cable Functions
Select
Cursor Up
Cursor Down
Cursor Left
Cursor Right
Page 2
Button Name
1
2
3
4
5
6
7
8
9
0
INPUT
ENTER
Button Name
PLAY
STOP
REW
F.F.
CURSOR ENTER
CURSOR UP
CURSOR DOWN
CURSOR LEFT
CURSOR RIGHT
Button Name
MENU
GUIDE
EXIT
INFO
FAV
PPV
PAGEPAGE+
BYPASS
DAYDAY+
HELP
Cable Functions
Menu
Guide/Recall
Exit
Info
Fav
PPV/Buy
PagePage+
Bypass
DayDay+
*/Help
Page 4
Page 1
Cable Functions
Cable (On)
On/Off (Off)
Channel Up
Channel Down
Volume Up
Volume Down
Mute
Prev. Ch
Page 3
Button Name
Device Name
POWER
CH UP
CH DOWN
VOL UP
VOL DOWN
MUTE
PRE. CH
Button Name
FAV4
FAV5
FAV6
FAV7
FAV8
FAV9
FAV10
FAV11
FAV12
FAV13
FAV14
Cable Functions
DVD - SET-UP FUNCTION TABLE
Page 3
DVD Functions
Standby
Skip Forward
Skip Back
Button Name
PAUSE
OPEN/CLOSE
NEXT DISC
AUDIO
SUBTITLE
ANGLE
TITLE
MENU
RETURN
ZOOM
DISPLAY
SET-UP
DVD Functions
Pause
Open/Close
Button Name
1
2
3
4
5
6
7
8
9
0
PROGRAM
CLEAR
SOUND
DVD Functions
Digit 1
Digit 2
Digit 3
Digit 4
Digit 5
Digit 6
Digit 7
Digit 8
Digit 9
Digit 0
Program
Clear
Audio
Subtitle
Angle
Title
Menu
Return
Zoom
Display
Set Up
Button Name
PLAY
STOP
REW
F.F.
CURSOR ENTER
CURSOR UP
CURSOR DOWN
CURSOR LEFT
CURSOR RIGHT
Page 2
Page 1
Button Name
Device Name
POWER
CH UP
CH DOWN
VOL UP
VOL DOWN
MUTE
PRE. CH
Button Name
REPEAT
MARKER
A-B
MARKER SEARCH
RANDOM
RESUME
SLOWSLOW+
DVD Functions
Play
Stop
Scan Back
Scan Forward
Enter
Cursor Up
Cursor Down
Cursor Left
Cursor Right
DVD Functions
Repeat
Marker
Repeat A-B
Marker Search
Random
Resume
Slow Back
Slow Forward
7
SET-UP FUNCTION TABLE - CD
8
Button Name
1
2
3
4
5
6
7
8
9
0
+10
PROGRAM
DELETE
DISC
CD Functions
CD 1
CD 2
CD 3
CD 4
CD 5
CD 6
CD 7
CD 8
CD 9
CD 0
CD +10
CD Program
CD Clear/Delete
CD Next Disc
Button Name
DISC1
DISC2
DISC3
DISC4
DISC5
DISC6
10
K1
K2
K3
K4
K5
K6
CD Functions
CD Disc 1
CD Disc 2
CD Disc 3
CD Disc 4
CD Disc 5
CD Disc 6
CD 10
CD Functions
CD Play/Pause
CD Stop
CD Scan Back
CD Scan Forward
Page 2
Page 1
Standby
CD Skip Forward
CD Skip Back
Volume Up
Volume Down
Mute
Button Name
PLAY
STOP
REW
F.F.
CURSOR ENTER
CURSOR UP
CURSOR DOWN
CURSOR LEFT
CURSOR RIGHT
Button Name
PAUSE
EJECT
TIME
EDIT
RANDOM
INTRO
REPEAT
A-B
CD Functions
CD Pause
CD Open/Close
CD Time
CD Edit
CD Random
CD Intro Scan
CD Repeat
CD A-B
Page 4
CD Functions
Page 3
Button Name
Device Name
POWER
CH UP
CH DOWN
VOL UP
VOL DOWN
MUTE
PRE. CH
Button Name
K7
K8
K9
K10
K11
K12
K13
K14
K15
K16
CD Functions
LASER DISC - SET-UP FUNCTION TABLE
LD Functions
1
2
3
4
5
6
7
8
9
0
+10
Display
Button Name
AUTO PGM
DISC A
DISC B
AUDIO MONITOR
ANALOG
BACK
AV TIME
PICTURE CHANGE
INTRO
K1
K2
K3
LD Functions
Auto Program
Disc A
Disc B
Audio Monitor
Analog
Back
Time
Picture Change
Intro
Random
Disc
LD Functions
Play
Stop
Rew/SearchFF/Search+
Page 2
Button Name
1
2
3
4
5
6
7
8
9
0
+10
DISP
Button Name
PLAY
STOP
REW
F.F.
CURSOR ENTER
CURSOR UP
CURSOR DOWN
CURSOR LEFT
CURSOR RIGHT
Button Name
PAUSE
OPEN/CLOSE
STILL/STEPSTILL/STEP+
PROGRAM
REPEAT
ALL
A-B
SHUFFLE
FRAME/TIME
CLEAR
LD Functions
Pause
Open/Close
SearchSearch+
Program
Repeat
All
A-B
Shuffle
Frame
Clear
Page 4
Page 1
LD Functions
LD (On)
On/Off (Off)
Track+ / Skip+
Track- / Track+
Volume Up
Volume Down
Mute
Page 3
Button Name
Device Name
POWER
CH UP
CH DOWN
VOL UP
VOL DOWN
MUTE
PRE. CH
Button Name
K4
K5
K6
K7
K8
K9
K10
K11
K12
K13
K14
K15
LD Functions
Disc 1
Disc 2
Disc 3
Disc 4
Disc 5
Edit
9
SET-UP FUNCTION TABLE - TAPE
10
Button Name
DECK B REVERSE PLAY
TAPE MON1
DECK B REC/PAUSE
TAPE MON 2
DECK B PAUSE
Tape Functions
Standby
Volume Up
Volume Down
Mute
Tape Functions
Tape B Reverse Play
Tape 1
Tape B Record/Pause
Tape 2
Tape B Pause
Button Name
PLAY
STOP
REW
F.F.
CURSOR ENTER
CURSOR UP
CURSOR DOWN
CURSOR LEFT
CURSOR RIGHT
Page 2
Page 1
Button Name
Device Name
POWER
CH UP
CH DOWN
VOL UP
VOL DOWN
MUTE
PRE. CH
Button Name
DECK A REVERSE PLAY
DECK A PLAY
DECK A REC/PAUSE
DECK A STOP
DECK A REW
DECK A FF
Tape Functions
Tape B Play
Tape B Stop
Tape B Rewind
Tape B Fast Forward
Tape Functions
Tape A Reverse Play
Tape A Play
Tape A Record/Pause
Tape A Stop
Tape A Rewind
Tape A Fast Forward
AUX - SET-UP FUNCTION TABLE
AUX Functions
1
2
3
4
5
6
7
8
9
0
Disp
Enter
Button Name
K13
K14
K15
K16
K17
K18
K19
K20
K21
K22
K23
K24
AUX Functions
AUX Functions
Page 2
Button Name
1
2
3
4
5
6
7
8
9
0
DISP
ENTER
Button Name
PLAY
STOP
REW
F.F.
CURSOR ENTER
CURSOR UP
CURSOR DOWN
CURSOR LEFT
CURSOR RIGHT
Button Name
K1
K2
K3
K4
K5
K6
K7
K8
K9
K10
K11
K12
AUX Functions
Page 4
Page 1
AUX Functions
AUX Functions
AUX (On)
On/Off (Off)
Up
Down
Page 3
Button Name
Device Name
POWER
CH UP
CH DOWN
VOL UP
VOL DOWN
MUTE
PRE. CH
Button Name
K25
K26
K27
K28
K29
K30
K31
K32
K33
K34
K35
K36
AUX Functions
11
SET-UP FUNCTION TABLE - TUNER
12
Page 1
Standby
Preset Up
Preset Down
Volume Up
Volume Down
Mute
Tune/Preset
Button Name
1
2
3
4
5
6
7
8
9
0
DISPLAY
ENTER
Tuner Functions
Tuner 1
Tuner 2
Tuner 3
Tuner 4
Tuner 5
Tuner 6
Tuner 7
Tuner 8
Tuner 9
Tuner 0
Display
Tuner Enter
Button Name
SEARCH UP
TUNING UP
SEARCH DOWN
TUNING DOWN
Tuner Functions
Search Up
Tune Up
Search Down
Tune Down
Button Name
PLAY
STOP
REW
F.F.
CURSOR ENTER
CURSOR UP
CURSOR DOWN
CURSOR LEFT
CURSOR RIGHT
Page 2
Tuner Functions
Page 3
Button Name
Device Name
POWER
CH UP
CH DOWN
VOL UP
VOL DOWN
MUTE
PRE. CH
Button Name
AM
FM
MONO
BLEND
ANTENNA
IF
Tuner Functions
Tuner Functions
AM
FM
Mono
Blend
Antenna
IF Wide/Narrow
** - SET-UP FUNCTION TABLE
Button Name
CD
AUX
TUNER
VIDEO 1
VIDEO 2
VIDEO 3
VIDEO 4
VIDEO 5
VIDEO 6
TAPE 1
TAPE 2
EXT 5.1
AM
FM
Audio Functions
CD
Aux
Tuner
LD/Video 1
VCR 1/Video 2
VCR 2/Video 3
Video 4
Video 5
Video 6
Tape 1
Tape 2
External 5.1
AM
FM
Button Name
SURR UP
CNTR UP
SUB. W UP
SURR DOWN
CNTR DOWN
SUB. W DOWN
CUSTOM PRESET 1
CUSTOM PRESET 2
CUSTOM PRESET 3
CUSTOM PRESET 4
CUSTOM PRESET 5
Audio Functions
Surround Up
Centre Up
Sub Woofer Up
Surround Down
Centre Down
Sub Woofer Down
Preset 1
Preset 2
Main/Preset 3
CAR-CDR/Preset 4
S-Filter/Preset 5
Audio Functions
Enter
Cursor Up
Cursor Down
Cursor Left
Cursor Right
Page 2
Page 1
Standby
Preset Up
Preset Down
Volume Up
Volume Down
Mute
Tune/Preset
Button Name
PLAY
STOP
REW
F.F.
CURSOR ENTER
CURSOR UP
CURSOR DOWN
CURSOR LEFT
CURSOR RIGHT
Button Name
ON
OFF
SLEEP
SURR MODE
THX
TONE
CHANNEL
DYNAMIC RANGE
TEST
MULTISOURCE VOL+
MULTISOURCE VOLSOURCE
Audio Functions
Power On
Power Off
Sleep
Surround Mode
THX
Tone
Channel Select
Late Night
Surround Test
MultiSource Volume Down
MultiSource Volume Up
Multi Source
Page 4
Audio Functions
Page 3
Button Name
Device Name
POWER
CH UP
CH DOWN
VOL UP
VOL DOWN
MUTE
PRE. CH
Button Name
1
2
3
4
5
6
7
8
9
0
DISPLAY
ENTER
Audio Functions
Tuner 1
Tuner 2
Tuner 3
Tuner 4
Tuner 5
Tuner 6
Tuner 7
Tuner 8
Tuner 9
Tuner 0
Display
Tuner Enter
13
SET-UP CODE TABLE - AUDIO
GB
2
Manufacturer/Brand
Set-Up Code Number
ADC
ADCOM
AIWA
AKAI
AMC
AMEND
AMX
ANGSTROM
ARCAM
AUDIO ACCESS
AUDIO ALCHEMY
AUDIO DESIGN
AUDIO EASE
AUDIO FILE
AUDIO MATRIX
AUDIO SOURCE
AUDIO TECHNICA
B&K
BOSE
BRYSTON
CARVER
CASIO
CHIRO
CINEMA SOUND
CITATION
CLARION
CURTIS MATHES
DENON
EIGER
ELAN
ENLIGHTENED AUDIO
FISHER
FOSGATE
GE
GOLDSTAR
HAFLER
HARMAN KARDON
HITACHI
INKEL
JBL
JCPENNY
JEFF ROWLAND
JENSEN
JVC
KENWOOD
KINERGETICS
KOSS
KRELL
KYOCERA
LEXICON
LINN
LUXMAN
LXI
MAGNAVOX
MARANTZ
MCINTOSH
MCS
MERIDIAN
MITSUBISHI
MONDIAL
MYRYAD
NAD
007
082 092 225 161 269
018 104 170 202 203 213 211 188
138 189
125 126 127 128 258 281 282
054
196
142
141
147
135
194 221 011
021 196 207
071
167
273
134
096 097
070 170 224
023
006 028 061 071 201 214 226 180 185 022 029 077 284
076
140
034 134
148 272
026
076
002 034 109 215 229 230 027 037 234 259
149
057
099 098
047 214 180 182
062 231
056 260
008
174
231 233 254 153 154 118 121 227 277
020
197
263
076 216
206
058
240 163 191 114 266 279
026 066 145 146 181 190 197 192 182 199 151 222 180 005 280
220 140
216
150 072
007
120 235 236 237
124
137 139 052 165 115 004 009
076 056
086 164 152 208
006 028 031 040 063 185 186 251 265
238
076
100 012 013
242 243 204
157 158 042 043 081 112
276
186 113 283 003
AUDIO - SET-UP CODE TABLE
Manufacturer/Brand
Set-Up Code Number
NAKAMICHI
NEC
ONKYO
OPTIMUS
PANASONIC
PARASOUND
PHAST
PHILIPS
PIONEER
PROCEED
RCA
REALISTIC
REVOX
ROTEL
SAMSUNG
SANSUI
SANYO
SCOTT
SEARS
SHARP
SHERWOOD
SONY
SOUNDESIGN
SOUNDSTREAM
SSI
SUMO
TAEKWANG
TEAC
TECHNICS
THETA DIGITAL
TOSHIBA
WARDS
YAMAHA
ZENITH
111 244 245 172 183
176
017 046 064 107 108 187 079 080 090 179 209 270 275
026 041 138
032 195 219 177
129 130 132 261
196
249 250 251 063
014 033 039 044 045 050 069 159 168 116 035 078 198
144 268
010 048 117 156 067
019 056 073 075 095
162
074 083 085
016
040 048 110 119 065 228
047 059
019 091
076
026 094 131 175 181
024 038 055 102 103 105 106 051 030
018 093 223 247 248 160 166 015 101 184 218 271
036
084 088
068
171
138
005 019 049 111 212 217
122 176 193 219 178 177 200 257 262
136
060 087 198 278
180
026 253 169 067 173 205 264 232 089 264 274 285
143 210
GB
3
SET-UP CODE TABLE - SAT
4
Manufacturer/Brand
Set-Up Code Number
ALPHASTAR
AMPLICA
BIRDVIEW
BSR
CAPETRONICS
CHANNEL MASTER
CHAPARRAL
CITOH
CURTIS MATHES
DRAKE
DX ANTENNA
ECHOSTAR
ELECTROHOME
EUROSAT
FUJITSU
GENERAL ELECTRIC
GENERAL INSTRUMENT
HITACHI
HOME CABLE
HOUSTON TRACKER
HUGHES
HYTEK
HYUNDAI
ICR
JANIEL
KATHREIN
LEGEND
LUTRON
LUXOR
MACOM
MEMOREX
NEXTWAVE
NORSAT
PACE
PANASONIC
PANSAT
PERSONAL CABLE
PHILIPS
PL
PRESIDENT
PRIMESTAR
PROSAT
PROSCAN
RCA
REALISTIC
SAMSUNG
SATELLITE SERVICE
SONY
STARCAST
SUPERGUIDE
TEECOM
TOSHIBA
TOWN & COUNTRY
UNIDEN
VIEWSTAR
WINEGARD
ZENITH
123
050
129 113 051 126
053
053
013 014 015 018 036 055
008 009 012 077
054
050
005 006 007 010 011 112 116 141 052
024 046 056 076
038 040 057 058 093 094 095 096 097 098 099 100 122
089
114
017 021 022 027 133 134
151 106 150
003 004 016 029 031 059 101 148
139 140
080 044 029
033 037 039 104 057 051
068 154
053
149
023
060 147
108
057
132
144 062
010 059 063 064 065
057
028 124 125
069 070
143
142 060
121
117
071 152 153
023 026
019 102
110 030
072
151 106 150
151 106 150
043 074
123
028 035 047 085
103
041
020 124 125
023 026 075 087 088 090 107 130 137
002 127
023 026
016 025 042 043 044 045 048 049 078 079 080 086 101 135 136
115
128 146
081 082 083 084 091 120
TV - SET-UP CODE TABLE
Manufacturer/Brand
Set-Up Code Number
ADMIRAL
AKAI
AMARK
AMPRO
AMSTRAD
ANAM
AOC
AUDIOVOX
BLAUPUNKT
CAIRN
CANDLE
CAPEHART
CETRONIC
CITIZEN
CLASSIC
CONCERTO
CONTEC
CORONADO
CRAIG
CROWN
CURTIS MATHES
CXC
DAEWOO
DAYTRON
DWIN
DYNASTY
DYNATECH
EIKI
ELECTROHOME
EMERSON
FISHER
FUJITSU
FUNAI
FUTURETECH
GE
GOLDSTAR
HALL MARK
HITACHI
INFINITY
JBL
JCPENNY
JENSEN
JVC
KEC
KENWOOD
KLOSS
KMC
KTV
LODGENET
LOGIK
LUXMAN
LXI
MAGNAVOX
MARANTZ
MATSUI
MEMOREX
METZ
MGA
MINERVA
MITSUBISHI
MTC
072 081 161 160
197 146
112 143
073 167 157 183
052
043 054 056 080 112 131
197 004 112 058
076
088
201
197 002 003 004
058
043
197 002 003 004 043 101 103 143
043
004
043 050 051
143
043 054
043 143
197 101 004 143
043
004 016 043 044 076 103 114 125 127 143
004 143
177
043
062
187
024 076 143 196
197 004 005 028 043 047 048 050 051 076 096 143 151 153 154 155
007 057
198
028 043
043
197 008 009 034 056 073 074 130 144 155 160 161 165 004 091 157 183
004 102 106 112 113 116 119 127 143
004
004 009 010 011 012 023 075 143 158 163 166 072
164
164
197 004 008 009 024 030 065 101 143 156 160
013
034 038 070 083 145 199
043
197 070
002 059
143
197 043 143 154
072
072
004
166 007 015 052 081 160 164
197 003 004 022 059 060 061 063 064 127 160 164 094
197 164
164
007 072 004
088
197 004 024 028 042
088
004 024 028 040 042 109 124 146 191
197 004 062 101
5
SET-UP CODE TABLE - TV
6
Manufacturer/Brand
Set-Up Code Number
NAD
NEC
NIKEI
ONKING
ONWA
OPTONICA
ORION
PANASONIC
PHILCO
PHILIPS
PIONEER
PORTLAND
PROSCAN
PROTON
QUASAR
RADIO SHACK
RCA
REALISTIC
ROCTEC
RUNCO
SAMPO
SAMSUNG
SANYO
SCOTT
SEARS
SELECO
SHARP
SIEMENS
SIGNATURE
SONY
SOUNDESIGN
SPECTRICON
SSS
SUPRE MACY
SYLVANIA
TANDY
TATUNG
TECHNICS
TECHWOOD
TEKNIKA
TELEFUNKEN
TELERENT
TERA
TMK
TOSHIBA
TOTEVISION
UNIVERSAL
VIDEO CONCEPTS
VIDIKRON
VIDTECH
WARDS
WESTING HOUSE
YAMAHA
YORK
YUPITERU
ZENITH
ZONDA
015 025
132 130 134 197 040 016 024 056 019
043
043
043
019 081
096
034 056 080 092 164
197 003 024 056 059 060 063 064 164 004
197 003 004 005 038 059 093 164 127
197 018 023 025 116 135 190
004 143
144 160 161 165 167
004 058 131 143 171 173 193
034 056 092
019 043 143 004 127
160 161 165 065 156 144 197 004 023 024 056 074 152
007 019 043 047
186
168 169 178 179 180 181 182 183 073 157
197 058 004 202
004 050 089 101 105 127 143 160
166 007 020 053 057 082 187
004 028 043 048 143
015 030 004 007 028 057 143 094 160 082 165 166
189 200
170 081 019 028 029 014 004 022 143 175
088
072
070 085 139 147 126 185 194
004 028 003 043
112
004 043
002
197 003 059 060 063 064 164 044 160 127
081
056 062
034 080
004
002 003 004 024 028 043 072 101 143
037 046 086 087
072
172
004
007 015 030 040 062 101 138
143
008 009
146
174 184 188 192
004
004 008 009 019 028 060 061 063 064 072 074 143 164 034
076
197 004
004
043
072 073 095 103 157 183
112
VCR1 - SET-UP CODE TABLE
Manufacturer/Brand
Set-Up Code Number
AIWA
AKAI
AMPRO
ANAM
AUDIO DYNAMICS
BROOKSONIC
CANON
CAPEHART
CRAIG
CURTIS MATHES
DAEWOO
DAYTRON
DBX
DYNATECH
ELECTROHOME
EMERSON
FISHER
FUNAI
GE
GO VIDEO
GOLDSTAR
HARMAN KARDON
HITACHI
INSTANTREPLAY
JCL
JCPENNY
JENSEN
JVC
KENWOOD
LLOYD
LXI
MAGIN
MAGNAVOX
MARANTZ
MARTA
MATSUI
MEI
MEMOREX
MGA
MINOLTA
MITSUBISHI
MTC
MULTITECH
NEC
NORDMENDE
OPTONICA
ORION
PANASONIC
PENTAX
PHILCO
PHILIPS
PILOT
PIONEER
PORTLAND
PULSAR
QUARTZ
QUASAR
RADIO SHACK
RCA
REALISTIC
RICO
034 161
016 043 046 124 125 142 146
072
031
012 023 039 043
035 037 129
028 031
108
003 040 135
031 041
005 007 010 065 108 110 111 112 116 117 119
108
012 023 039 043
034 053
059
006 017 025 027 029 031 034 035 036 037 046 101 129 131 138 153 162 116
003 008 009 010
034
031 063 072 107 109 144 147
132 136 155 040 115
012 013 020 101 106 114 123
012 045
004 018 026 034 043 063 137 150 160 013
031
031
012 013 015 040 066 101
043
012 031 043 048 050 055 060 130 150 152
014 048 034 047
034
003 009 017 034 106
040
031 034 041 067 068 156 164
012 031 067 069
101
027 030
031
003 010 014 031 034 053 072 101 102 134 139
045 046 059
013 020
013 020 045 046 051 059 061 142 151 049
034 040
024 034
012 023 039 043 048
043
053 054
025
066 070 083 133 140 145 157 163 074
013 020 031 063
031 034 067
031 034 054 067 071 101
101
013 021 048
108
072
002 014
066 145 075
123
013 020 041 107 109 140 144 145 147 034 040 158
003 008 010 014 031 034 040 053 054 101
058
7
SET-UP CODE TABLE - VCR1
8
Manufacturer/Brand
Set-Up Code Number
RUNCO
SALORA
SAMSUNG
SANSUI
SANYO
SCOTT
SEARS
SHARP
SHINTOM
SIGNATURE
SONY
SOUNDESIGN
STS
SYLVANIA
SYMPHONIC
TANDY
TATUNG
TEAC
TECHNICS
TEKNIKA
THOMAS
TMK
TOSHIBA
TOTEVISION
UNITECH
VECTOR RESEARCH
VICTOR
VIDEO CONCEPTS
VIDEOSONIC
WARDS
YAMAHA
ZENITH
148
014
032 040 066 102 104 107 109 112 113 115 120 122 125
022 043 048 135
003 007 010 014 134 102
017 037 112 129 131
003 008 009 010 013 014 081 101 017 073 112
031 054 149 159 165
024
034
003 031 052 056 057 058 076 077 078 149 154
034
013
031 034 059 067
034
010 034
039 043
034 039 043
031 070
019 031 034 101
034
006
008 013 042 047 059 079 082 112 131 081
040 101
040
012
048
012 034 046 141
040
003 013 017 024 031 034 040 053 054 131
012 034 039 043
034 048 056 058 072 080 101
CABLE - SET-UP CODE TABLE
Manufacturer/Brand
Set-Up Code Number
ABC
AMERICAST
ANTRONIX
ARCHER
BELL SOUTH
CENTURION
CENTURY
CITIZEN
COMBANO
COMSAT
COMTRONICS
DIGICABLE
EAGLE
EASTERN
ECHOSTAR
ELECTRICORD
GEMINI
GENERAL ELECTRIC
GENERAL INSTRUMENT
GNC
GOLDEN CHANNEL
HAMLIN
HITACHI
JERROLD
MAGNAVOX
MEDIA ONE
MEMOREX
MITSUBISHI
M-NET
MOVIE TIME
NOVAPLEX
NSC
OAK
PANASONIC
PARAGON
PHILIPS
PIONEER
PRUCER
PTS
PULSAR
RCA
RECOTON
REGAL
REGENCY
SAMSUNG
SCIENTIFIC ATLANTA
SIGNAL
SIGNATURE
SL MARX
SONY
SPRUCER
STARCOM
STARGATE
TADIRAN
TIME WARNER
TOCOM
TOSHIBA
UNIKA
UNITED CABLE
UNIVERSAL
VIEWSTAR
ZENITH
103 003 004 039 042 046 053
099
014
005 007 014
099
092
007
007
080 081
074
030
101
020 030 040
057 066
106
032
008 054
072
103 074 104
099
030
049 050 055
103 055
103 002 003 004 008 009 010 069 074
010 012 064 079 095 094
107
052
102
037
028 032
092
015 028 038 071
031 037 053
044 047
052
006 012 013 020 085 095
103 034 051 063 076 105
059
011 071 074
052
047
098
049 050
057
030
003 011 041 042 043 045 046
030
103
030
096
047 078
002 004 008 009
008 030 097 104
030
043
039 040 056
052
007 014
004 053
005 007 014 032 035
012 015 018 086 087 088 089
052 060 093 100
9
SET-UP CODE TABLE - DVD
10
Manufacturer/Brand
Set-Up Code Number
APEX DIGITAL
DENON
GE
HARMAN KARDON
JVC
LG
MAGNAVOX
MARANTZ
MITSUBISHI
NAD
ONKYO
PANASONIC
PHILIPS
PIONEER
PROCEED
PROSCAN
RCA
SAMSUNG
SHARP
SONY
THETA DIGITAL
THOMPSON
TOSHIBA
YAMAHA
ZENITH
087
007 080
026 027
084
012
091 057 074
066
083
017
088 091
076 035
021 042
066
023 092
086
026 027
026 027
056 070
094
033
032
026 027
035 034
042 089
057 074 091
CD - SET-UP CODE TABLE
Manufacturer/Brand
Set-Up Code Number
ADCOM
AIWA
AKAI
AMC
AMEND
ARCAM
AUDIO ACCESS
AUDIO EASE
AUDIO TECHNICA
BSR
CALIFORNIA AUDIO
CAPETRONIC
CARRERA
CARVER
CASIO
CLARINETTE
CREEK
CROWN
DENON
EMERSON
FISHER
FRABA
GENEXXA
GOLDSTAR
HAITAI
HARMAN KARDON
HITACHI
INKEL
JC PENNY
JENSEN
JVC
KENWOOD
KOSS
KRELL
KYOCERA
LOTTE
LUXMAN
LXI
MAGNAVOX
MARANTZ
MCINTOSH
MCS
MEMOREX
MISSION
MITSUBISHI
MITSUMI
MODULAIRE
MONDIAL
MYRYAD
NAD
NAKAMICHI
NEC
NIKKO
NSM
ONKYO
OPTIMUS
PANASONIC
PARASOUND
PHILIPS
PIONEER
PROCEED
PROTON
062 042
059 065 088 089 105 122 170 187
085 195 202
231 232
118
238
119 147
165
046
037 057
103 008
063
057 080
185 041 044 050 086 107 130 134 135 138 139 203 204 167
111 182
182
159
035
002 123
042 069 102
050 185 134 008
111
010 069 102
080
093
018 033 047 208
042 175
130 143 144
014 061 092 141
158
004 022 136 163 213 214 242 243
185 007 023 055 071 072 142 137
061
241
005
102
011 028 070 076
059
044 107
027 041 044 051 077 107 209
212
014 073 092
010
044 107
179
153
182
147
244
006 005 178
217 218 219 095
014 062
046
044 107
030 038 039 168 169
010 050 057 058 081 082 083 085 093 195
103 201 172 008 068
233
041 044
010 020 025 056 174 175 176
239
044 107 228
11
SET-UP CODE TABLE - CD
12
Manufacturer/Brand
Set-Up Code Number
QUASAR
RADIO SHACK
RCA
REALISTIC
ROTEL
SAE
SANSUI
SANYO
SCOTT
SHARP
SHERWOOD
SIGNATURE
SONY
SOUNDESIGN
SUMO
SYLVANIA
SYMPHONIC
TAEKWANG
TANDY
TEAC
TECHNICS
TECHWOOD
THETA DIGITAL
TOSHIBA
VECTOR RESEARCH
VICTOR
WARDS
YAMAHA
YORX
103 008
182
017 042 150
042 050 051 102 181 182 187
044 107 161 178 250
044 107
044 069 107 128 171 190 125
050
069 102
026 031 051 066
003 019 051 096 112 115 119 166
033
048 081 097 126 133 177 225 226 164
251
155
044 107
052 181
195 085
010
015 034 036 051 052 101 131 140 079
060 103 200 172 184 008 068
076
234 235
006 067 091 160 148
080
004 022 114 124
185 033
024 046 054 186 183 245
182
LD - SET-UP CODE TABLE
Manufacturer/Brand
Set-Up Code Number
DENON
FUNAI
KENWOOD
MAGNAVOX
MARANTZ
MITSUBISHI
OPTIMUS
PANASONIC
PHILIPS
PIONEER
RADIO SHACK
RCA
REALISTIC
RUNCO
SANYO
SHARP
SONY
TECHNICS
THETA DIGITAL
TOSHIBA
YAMAHA
206 207
120
152 013
032 121
211
121
049 013
113
032
106 117 121
120
002
049
127
075
152 013
053 110
113
032
152 106
043 129
13
SET-UP CODE TABLE - TAPE
14
Manufacturer/Brand
Set-Up Code Number
AIWA
CARVER
DENON
FISHER
GOLDSTAR
HARMAN KARDON
JVC
KENWOOD
LINN
LUXMAN
MAGNAVOX
MARANTZ
MCINTOSH
MITSUBISHI
NAD
NAKAMICHI
ONKYO
OPTIMUS
PANASONIC
PHILIPS
PIONEER
QUASAR
SANSUI
SHARP
SHERWOOD
SONY
TEAC
TECHNICS
TOSHIBA
VICTOR
YAMAHA
015 071 100 114
006 008 027 024 036
105 227 229
064
011
233
106 116 239 240
005 013 023 026 064 145 146 181 190
124
035 137 139
027
014 027 056 065 087
238
242 243
029
244 245 025
002 012 016 017 018 019 115
026 054 055
007 010 032 088 195
027 087
003 039 047 050 066 098 222
007 088
027 113 119 224
026 057 131 175 181
038 004 028 030 033 034
020 022 052 084 089
009 059 212
007 010 076 088 109 122 193
112
106
021 026 031 067 040
AUX - SET-UP CODE TABLE
Manufacturer/Brand
Set-Up Code Number
3M
AIWA
ARCHER
AUTON
DMX
DRAPER SCREEN
DWIN
EVERQUEST
EXTRON
FAROUDJA
FUJI
JERROLD
JVC
KENWOOD
LITE-TOUCH
LUTRON
MAKITA
MINDPATH
NILES
NSM
PIANO DISC PLUS
POLKAUDIO
REPLAY
RUSSOUND
SCIENTIFIC ATLANTA
SIMA
SOLO ELECTRONICS
SOMFY
SONY
STARCOM
TIVO
TURBOSCAN
VELODYNE
X-10
XANTECH
152
164
155
191
156
204
080
206
151
184
209
153
185
185
208
077 158 159
186 201
205
160 187
161
085
162
075
081
156 163
082
207
078 079
164 165 166
153
090
167
203
093 183
168 169 170 171 172 188 189
15
www.NADelectronics.com
©2002 NAD ELECTRONICS INTERNATIONAL
All rights reserved. No part of this publication may be reproduced, stored or transmitted in any
form without the written permission of NAD Electronics International
HTR-5 Manual 01/02 Printed in Korea