1
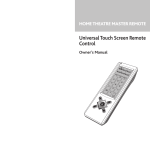
HTR1 manual 120mm
20/4/01
8:17 pm
Page 1
HTR-1
SYSTEM REMOTE CONTROL
OWNER’S MANUAL
GB
HTR1 manual 120mm
GB
2
20/4/01
8:17 pm
Page 2
HTR1 manual 120mm
20/4/01
8:17 pm
Page 3
NAD HTR-1 UNIVERSAL REMOTE CONTROL
Introduction . . . . . . . . . . . . . . . . . . . . . . . . . . . . . . . . . . . . . . . . . . . . . . . . . . . . . . . . . . . . . . . . . . . . .6
General . . . . . . . . . . . . . . . . . . . . . . . . . . . . . . . . . . . . . . . . . . . . . . . . . . . . . . . . . . . . . . . . . . . . . . . .6
Inserting & replacing batteries & back-up . . . . . . . . . . . . . . . . . . . . . . . . . . . . . . . . . . . . . . . . . . . . . 6
Key Backlighting . . . . . . . . . . . . . . . . . . . . . . . . . . . . . . . . . . . . . . . . . . . . . . . . . . . . . . . . . . . . . . . 6
Operating range . . . . . . . . . . . . . . . . . . . . . . . . . . . . . . . . . . . . . . . . . . . . . . . . . . . . . . . . . . . . . . . 6
Using the HTR-1 . . . . . . . . . . . . . . . . . . . . . . . . . . . . . . . . . . . . . . . . . . . . . . . . . . . . . . . . . . . . . . . . . .6
Device keys . . . . . . . . . . . . . . . . . . . . . . . . . . . . . . . . . . . . . . . . . . . . . . . . . . . . . . . . . . . . . . . . . . . 6
Status LED . . . . . . . . . . . . . . . . . . . . . . . . . . . . . . . . . . . . . . . . . . . . . . . . . . . . . . . . . . . . . . . . . . . 7
Setting up Pre-programmed codes . . . . . . . . . . . . . . . . . . . . . . . . . . . . . . . . . . . . . . . . . . . . . . . . . . .7
By Library search . . . . . . . . . . . . . . . . . . . . . . . . . . . . . . . . . . . . . . . . . . . . . . . . . . . . . . . . . . . . . . . 7
By Manufacturing ID code. . . . . . . . . . . . . . . . . . . . . . . . . . . . . . . . . . . . . . . . . . . . . . . . . . . . . . . . 8
Code Recall. . . . . . . . . . . . . . . . . . . . . . . . . . . . . . . . . . . . . . . . . . . . . . . . . . . . . . . . . . . . . . . . . . . 9
Learning remote commands . . . . . . . . . . . . . . . . . . . . . . . . . . . . . . . . . . . . . . . . . . . . . . . . . . . . . . . .9
Setting up Macros . . . . . . . . . . . . . . . . . . . . . . . . . . . . . . . . . . . . . . . . . . . . . . . . . . . . . . . . . . . . . . .10
Reset to factory default settings . . . . . . . . . . . . . . . . . . . . . . . . . . . . . . . . . . . . . . . . . . . . . . . . . . .11
Code listing table . . . . . . . . . . . . . . . . . . . . . . . . . . . . . . . . . . . . . . . . . . . . . . . . . . . . . . . . . . . . . . .12
GB
3
HTR1 manual 120mm
20/4/01
8:17 pm
Page 4
USING THE NAD HTR-1 UNIVERSAL REMOTE CONTROL WITH THE NAD T761 AV RECEIVER
The NAD HTR-1 Universal Remote control packed with your NAD T761 AV receiver has been pre-configured to
operate all controls. Besides operating the receiver, the HTR-1 can replace up to eight remote controls for different
devices. It has a database of remote control commands built-in for a large range of different brands and devices.
In case your particular brand or model isn’t featured in the database, the HTR-1 can also “learn” remote commands
from the original remote control of the device. Refer to the HTR-1 instruction manual on how to program.
The table below indicates the locations and functions available; the numbers refer to the drawing in the NAD HTR1 manual. Refer to the T761 instruction manual for explanation of specific functions.
Make sure the “AMP” mode has been selected when using the HTR-1 Universal Remote Control to operate your
receiver.
No.
2
3
4
5
6
7
8
9
10
11
12
13
14
15
16
17
18
19
20
21
22
23
24
25
GB
4
Key description
POWER ON/OFF
AMP (VCR), TUNER (TV), CD (CABLE), DVD (AUX)
VOLUME UP/DOWN
CHANNEL UP/DOWN
SELECT
POWER OFF & POWER ON
SLEEP
SHIFT
1 (CD), 2 (AUX), 3 (DISC),... ...9 (VIDEO 6), 0
AM (+10 -/—)
FM (TV/VIDEO)
PAUSE
MUTE
&
PLAY/ENTER
STOP
AUDIO
SUBTITLE
EXT 5.1/7.1
DISPLAY
SURR.
MACRO
SETUP/REC
TEST
T761 function
Power On/Off
Select AMP for T761
Master Volume Up/Down
Preset/Tune Up/Preset/Tune Down
Preset/Tune mode
Power Off & Power On
Sleep
—Input select
Select AM
Select FM
OSD Cursor Up
Volume Mute
OSD Cursor Right & Left
Enter
OSD Cursor Down
Tone Control
Dynamic Range
Ext 5.1
Display
Surround Mode
—Channel select
Surround Test On/Off
HTR1 manual 120mm
20/4/01
8:17 pm
Page 5
GB
5
HTR1 manual 120mm
20/4/01
8:17 pm
Page 6
INTRODUCTION
The NAD HTR-1 Universal Remote Control can replace up to eight different individual remote controls, offering
command of the most important and often used controls, thus significantly reducing “remote control clutter”:
Amplifier, Tuner, CD, DVD, VCR, TV, Cable, Custom.
If the NAD HTR-1 came packed with an NAD product, such as an AV receiver, all commands will already have been
programmed in and is ready for use with the product. Where appropriate, the correct generic remote control
commands for other NAD products, such as CD players for instance, have also been programmed in.
The HTR-1 comes with a large database of remote control commands for other brands, making it easy to configure
to suit the particular mix of brands and models in your system. The database contains remote control commands for
over four hundred brands. In the unlikely case you are not able to find the remote control commands for a specific
brand, the HTR-1 also allows you to “learn” remote commands from the original remote control so that that device
can still be remotely operated with the NAD HTR-1.
GENERAL
Alkaline batteries are recommended for maximum operating life. Three AAA (R 03) batteries should be fitted in the
battery compartment at the rear of the Remote Control handset. When replacing batteries, check that they have
been put in the right way round, as indicated on the base of the battery compartment.
The keys on the HTR-1 are backlit for ease of operation in darkened environments. Backlighting is automatically
activated as soon as any key is pressed. To preserve batteries, it switches itself off automatically five seconds after
the last key press.
When you find that operating range and angle are rapidly decreasing and that the key backlighting is getting
dimmer, it may be time to replace the batteries. The NAD HTR-1 has a non-volatile memory so that, even if the
batteries are removed for a prolonged period of time, it will retain all settings and commands as programmed. The
HTR-1 will operate up to a distance of 16ft (5m). Direct sunlight or very bright ambient lighting may affect the
operating range and angle.
NOTE
There must be a clear line-of-sight path from the remote control to each of the devices’ infrared receiver (usually
located behind a display window on the front panel); if that path is obstructed, the remote control may work
erratically or not at all.
USING THE NAD HTR-1
The HTR-1 will replicate the most common commands for the device selected. For instance, “CHANNEL UP” will
advance preset or channel selection for either Tuner, TV or Cable device; but will move cursor up with DVD selected
as device. Once the remote control has been configured to suit your system (refer to chapters “Setting up Preprogrammed Remote commands” and “Learning Remote Commands”) it is ready for use. The numbers refer to
the drawing.
GB
The table below specifies what commands are available for all devices in the factory default setting. The devices
Amp, Tuner, CD and DVD come standard with remote control commands suitable for most NAD remote controlled
products.
NOTE
The key listing below specifies what each key will do from the factory default setting for the various devices.
Refer to the original instruction manual for the devices in your system to check how these respond to specific
commands.
Not all commands on the HTR-1 may be available for the devices it is used with or there may be commands
not available on your specific device. The key listing below assumes factory default setting or settings from
database but not remote commands learned from an original remote control
SELECTING WHICH DEVICE TO OPERATE
Each of the four device keys allows operation of two different devices, up to eight different devices can be
controlled. The devices that can be controlled are labelled on the key itself and directly over it.
SELECTING PRIMARY DEVICES
To access one of the four primary devices (the ones as labelled on the key itself: AMP, TUNER, CD, DVD), simply
press the required key.
Primary Device keys: AMP; TUNER; CD; DVD (No. 3).
SELECTING SECONDARY DEVICES
To access one of the secondary devices, first press the “SHIFT” key (No. 9) (STATUS LED, No. 1, lights up), and within
the default time of 5 seconds, press the required device key (VCR, TV, CABLE, CUSTOM). The Device key will light
up with Status LED briefly to confirm, after which both will extinguish.
Secondary Device keys: VCR; TV; CABLE; CUSTOM (No. 3).
6
HTR1 manual 120mm
20/4/01
8:17 pm
Page 7
After selecting a primary or secondary device by pressing the key(s) as described above, the other keys on the
remote control will be set to operate the chosen device. For instance, with TUNER selected as device, the
“CHANNEL UP” and “DOWN” keys (No. 5) will select the next higher, respectively next lower tuner preset station.
With DVD selected as device, the same keys will move the DVD Menu cursor Up or Down.
When pressing a key, the selected Device key will flash to indicate a command is being transmitted. If the selected
device key doesn’t flash when pressing a key, it means that the key doesn’t have a function for the device selected.
STATUS LED (NO.1)
This LED will light up to indicate status: Use of “SHIFT” key (No. 9) and Set-up mode. The LED will light up green for
up to 5 seconds once the “SHIFT” key (No. 9) has been pressed. Within these 5 seconds, one of the four device keys
(No. 3) can be pressed to switch the remote control to one of the secondary devices (VCR, TV, CABLE, CUSTOM).
The Device key will light up with Status LED briefly to confirm, after which both will extinguish. The LED will
extinguish within 5 seconds if no other key is pressed or if “SHIFT” is pressed again.
The LED will light up red to enter set-up mode (pressing “POWER ON/OFF” No. 2; and “MUTE” No. 14
simultaneously for two seconds). Refer to chapters “Setting up Pre-programmed Codes” and “Learning Remote
Commands” for additional information.
SETTING UP PRE-PROGRAMMED CODES
The HTR-1 has an extensive library built-in for pre-programmed remote control commands for many different
brands. By entering the device code for the particular device and brand, all major functions for that device can be
controlled with the HTR–1.
There are two ways of setting up the remote control for pre-programmed remote commands:
• By using the LIBRARY SEARCH routine
• By entering the MANUFACTURER ID CODE
SET-UP BY LIBRARY SEARCH
1 Switch on your device manually or with your original remote control.
2 Press the POWER ON/OFF (No. 2) and MUTE keys (No. 14) together for approximately 2 seconds until STATUS
LED (No.1) stays red.
3 Press the required DEVICE key (No. 3); the DEVICE key will light up.
4 Press the POWER ON/OFF key (No. 2) and hold down for 2 seconds then release for 2 seconds. Repeat this
process until your device switches off or to Stand-by. NOTE: If you accidentally skipped a code that turned
your device off, you can go one code back by pressing the MUTE key (No. 14). If there is no Power On/Off
code for a particular device, the HTR-1 will transmit a “Play” command instead.
5 After your device has switched off, press the lit DEVICE Key once to stop the LIBRARY SEARCH.
6 Try the appropriate keys to see if the corresponding function for your device work (in case your device switched
off completely, it may be necessary to manually power it up again).
• If find you find that not all the keys appropriate for your device operate correctly, press the DEVICE Key
for 1 second; the DEVICE Key will flash once. Repeat step 4 to find the set of remote commands that
best operates your device. Once found, proceed with step 7 to store.
7 If you find all the major functions work correctly with your device, press the DEVICE Key (No.3) 3 times until
the DEVICE Key and STATUS LED (No. 1) go out. The code is now stored.
GB
Example
You wish to set up the remote control to operate your TV:
1 Switch on your television
2 Press the POWER ON/OFF (No. 2) and MUTE keys (No. 14) together for approximately 2 seconds until STATUS
LED (No.1) stays red.
3 Press SHIFT (No. 9); the STATUS LED changes to green. Press the TUNER/TV device key (No.3). The STATUS LED
will change to red again.
4 Press the POWER ON/OFF key (No. 2) and hold down for 2 seconds then release for 2 seconds. Repeat this
process until the TV switches off or switches to Stand–by.
5 Press the lit DEVICE KEY once, and now try the other function keys on the HTR-1. Switch the TV back on (if
it switched off completely, it may be necessary to this manually) and try out all the keys appropriate for your
TV; such as Volume Up/Down; Channel Up/Down; Mute, etc. (refer also to table).
• If you find not all keys operate your TV correctly, press the DEVICE Key for 1 second; the DEVICE Key will
flash once. Repeat step 4 until you find the set of remote commands that best operates your TV. Once
found, proceed with step 6 to store.
6 If all major functions work, press the TUNER/TV key 3 times; The TUNER/TV device key and STATUS LED will
extinguish. The code is now stored and the remote control is ready for use with the TV.
When you reach the end of the library, The STATUS LED will flash twice per second and the set up mode is cancelled.
7
HTR1 manual 120mm
20/4/01
8:17 pm
Page 8
ENTERING MANUFACTURER ID CODE
Instead of searching the library, you can also enter a Manufacturer ID code directly for your brand and model.
In the code listing table, look up the device brand name to find the correct code for your brand. Switch on your
device manually or with your original remote control.
1 Press the POWER ON/OFF (No. 2) and MUTE keys (No. 14) together for approximately 2 seconds until STATUS
LED (No.1) stays red.
2 Press the required DEVICE key (No.3); the DEVICE key will light up.
3 Using the numeric keys (No.10); enter the 4-digit Manufacturer ID code from the code list.
4 Again using the numeric key-pad (No. 10):
Press 1 to set-up a TUNER & TV;
Press 2 to set-up an AMP & VCR;
Press 3 to set-up a CD & CABLE or Satellite receiver.
Press 4 to set up a DVD orif you are programming any other devices (CUSTOM).
If the entered code is correct, the STATUS LED will flash once. If the code is wrong, the STATUS LED will flash
twice.
5 It is quite common for a brand to have various sets of remote control commands. In order to find the correct
set of remote control commands for your particular model, you will need to search within the manufacturer’s
ID code for the correct device code:
• Press the POWER ON/OFF key and hold down for 2 seconds then release for 2 seconds, repeat this process
until your device switches off (or switches to Stand-by). NB: If you accidentally skipped a code that turned
your device off, you can go one code back by pressing the MUTE key.
6 Press the lit DEVICE KEY once and now try out the other function keys on the HTR–1.
• If you find not all keys appropriate for the device operate correctly, press the DEVICE Key for 1 second;
the DEVICE Key will flash once. Repeat step 6 to find the set of remote commands that best operates
your device. Once found, proceed with step 8 to store.
7 When you have found a suitable set of remote control commands, press the DEVICE Key 3 times until the
DEVICE Key and STATUS LED go out. The code is now stored.
Example
You wish to set up the HTR-1 to operate your Philips TV:
1 Look up the Manufacturer ID code for Philips (which is 3232).
2 Press the POWER ON/OFF (No. 2) and MUTE keys (No. 14) together for approximately 2 seconds until STATUS
LED (No.1) stays red. Press SHIFT (No. 9); the STATUS LED changes to green. Press the TUNER/TV device key
(No.3). The STATUS LED will change to red again.
3 Using the numeric keys (No.10); enter 3232 (Philips’ Manufacturer ID code).
4 Again using the numeric key-pad (No. 10), Press 1. The STATUS LED will flash once (if the code is wrong, the
STATUS LED will flash twice).
GB
5
6
7
8
Philips has many different sets of remote commands. In order to find the correct set of remote control
commands for your particular model, you will need to search within the Philips’ ID code:
• Press the POWER ON/OFF key and hold down for 2 seconds then release for 2 seconds, repeat this process
until your device switches off (or switches to Stand-by). NB: If you accidentally skipped a code that turned
your device off, you can go one code back by pressing the MUTE key.
Press the lit DEVICE KEY once and now try out the other function keys on the HTR–1.
• You mayfind that not all keys device operate the TV correctly; press the DEVICE Key for 1 second; the DEVICE
Key will flash once. The second set that turns off your TV does operate all major functions correctly: Proceed
to the next step to store.
Press the DEVICE Key 3 times until the DEVICE Key and STATUS LED go out. The code is now stored and the
HTR-1 is ready for use with your Philips TV.
HTR1 manual 120mm
20/4/01
8:17 pm
Page 9
CODE RECALL FUNCTION
The Code Recall function allows you to look up the exact code specific for your device’s brand and model. Note
this is not the manufacturer IC code, but the specific device code that operates your device; this is a 5-digit number.
1
2
3
4
5
Press the POWER ON/OFF (No. 2) and MUTE keys (No. 14) together for approximately 2 seconds until STATUS
LED (No.1) stays red.
Press the required DEVICE key (No.3); the DEVICE key will light up.
Using the numeric key-pad (No. 10) engage Code Recall Mode:
Press 88881 to check the code for a Tuner.
Press 88882 to check the code for an Amp.
Press 88883 to check the code for a CD player.
Press 88884 to check the code for a DVD player.
Press 88885 to check the code for a TV.
Press 88886 to check the code for a VCR.
Press 88887 to check the code for a Cable or Satellite receiver.
Press 88888 to check the code for any other devices (CUSTOM).
If the entered code is correct, the STATUS LED will flash once. If the code is wrong, the STATUS LED will flash
twice.
To find out the number for the first digit of the code, press 1 on the Numeric keypad (No.10) and count the
number of times the DEVICE flashes. To find the 2nd digit of your code press 2, for the 3rd digit press 3, for
the 4th digit press 4 and for the 5th digit press 5 and each time count the number of times the DEVICE key
flashes. NOTE: IF the DEVICE key doesn’t flash, the digit’s number is zero.
Press the DEVICE key to exit Code Recall mode. The DEVICE key will extinguish.
In case the HTR-1 gets accidentally re-programmed, it is advisable to note down in the table below which exact
codes were set up to operate your devices.
Device
AMP
TUNER
CD
DVD
code
Device
VCR
TV
CABLE
CUSTOM
code
You can use the recalled device code to enter it directly into the HTR-1; this voids the need of having to go through
each separate device within a manufacturer ID code:
1
2
3
4
Press the POWER ON/OFF (No. 2) and MUTE keys (No. 14) together for approximately 2 seconds until STATUS
LED (No.1) stays red.
Press the required DEVICE key (No.3); the DEVICE key will light up.
Using the numeric keys (No.10); enter the 5-digit device code as found using Code Recall Function. If the
entered code is correct, the STATUS LED will flash once. If the code is wrong, the STATUS LED will flash twice.
With the correct code entered, press the DEVICE Key 3 times until the DEVICE Key and STATUS LED go out.
The code is now stored.
GB
LEARNING REMOTE COMMANDS
The HTR-1 allows you to learn commands within already set-up devices. This way, you can add a desired specific
function for your device to the selected pre-programmed set of remote commands, by learning that command into
the required key for that device. In case none of the pre-programmed set of remote commands are suitable for
your device, you can let the HTR-1 learn the remote commands for the device.
You can over-write already learned commands or commands from the pre-programmed library; this does not affect
the other commands already available for the selected device.
NOTE
The NAD HTR-1 can only learn infrared commands. It is not compatible with UHF and Ultrasonic remote
controls. There are some infrared remote controls that use encoding methods, which the HTR-1 cannot learn.
At least104 commands can be learned.
No remote commands can be learned into the DEVICE keys (No. 3) and SHIFT key (No. 9).
9
HTR1 manual 120mm
20/4/01
8:17 pm
Page 10
To learn remote commands from the original remote control into the NAD HTR-1:
1 Position the original remote control 3 to 5 cm away from the HTR-1’s Infrared receiver, located at the bottom
of the remote control (see drawing), with the original’s remote transmission window or LED (usually at the top)
pointing towards to the HTR-1’s Infrared receiver.
2 Press the POWER ON/OFF (No. 2) and MUTE keys (No. 14) together for approximately 2 seconds until STATUS
LED (No.1) stays red.
3 Press the required DEVICE key (No.3); the DEVICE key will light up.
4 Using the numeric key-pad (No. 10) engage Learning Mode:
Press 55551 to learn remote commands for TUNER DEVICE key.
Press 55552 to learn remote commands for AMP DEVICE key.
Press 55553 to learn remote commands for CD DEVICE key.
Press 55554 to learn remote commands for DVD DEVICE key.
Press 55555 to learn remote commands for TV DEVICE key.
Press 55556 to learn remote commands for VCR DEVICE key.
Press 55557 to learn remote commands for CABLE DEVICE key.
Press 55558 to learn remote commands for CUSTOM DEVICE key.
If the entered code is correct, the STATUS LED will flash once. If the code is wrong, the STATUS LED will flash
twice.
5 Press and release the function key on the HTR-1, which you want to duplicate/learn a similar function from the
original remote into; the DEVICE key flashes once.
6 Press and hold down the function key on the original remote. When the HTR-1 has finished copying the code,
the STATUS LED will then flash once. Release the key on the original remote. If the STATUS LED flashes twice,
an error has occurred in the learning process; repeat the learning process from step 5 onwards.
7 To program the next function key for the same device repeat steps 5-6.
8 When you have finished programming the various commands for the selected device, press the DEVICE key.
The STATUS LED and DEVICE will extinguish. The remote commands have now been learned and stored, the
HTR-1 is ready to be used with the device.
NOTE
If no key is pressed for over 10 seconds, the HTR-1 will switch back from learning mode to normal use mode.
SETTING UP AND USING MACRO FUNCTION
The Macro function allows you to send up to 6 remote commands with just one key press. This can be useful, for
example to switch on your AV receiver, TV and DVD player, select the DVD input on the receiver and engage the
DVD Play function with a single key press.
For each of the 8 devices, a Macro function can be set up:
1 Press the POWER ON/OFF (No. 2) and MUTE keys (No. 14) together for approximately 2 seconds until STATUS
LED (No.1) stays red.
2 Press the required DEVICE key (No.3); the DEVICE key will light up.
3 Using the numeric key-pad (No. 10) engage Macro Setup Mode:
Press 77771 to record Macros for TUNER DEVICE key.
Press 77772 to record Macros for AMP DEVICE key.
Press 77773 to record Macros for CD DEVICE key.
Press 77774 to record Macros for DVD DEVICE key.
Press 77775 to record Macros for TV DEVICE key.
Press 77776 to record Macros for VCR DEVICE key.
Press 77777 to record Macros for CABLE DEVICE key.
Press 77778 to record Macros for CUSTOM DEVICE key.
If the entered code is correct, the STATUS LED will flash once. If the code is wrong, the STATUS LED will flash
twice.
4 Record your Macro by selecting the functions you wish to carry out when Macro is selected, just as if you were
using the remote control. You can switch devices to have remote commands from other devices within the
same Macro.
5 Press the Macro key (No. 23) to store the Macro. The STATUS LED and DEVICE key will go out and the Macro
is programmed.
GB
NOTE
Some devices may not be capable in executing remote commands in rapid succession. When recording your
macro, this problem can be avoided by alternating each commands for the various devices, see example below.
10
HTR1 manual 120mm
20/4/01
8:17 pm
Page 11
Example
With just pressing Macro for AMP as device, you wish to switch on your AV receiver, TV and DVD player; select the
Video 1 input on the receiver and activate Play on the DVD player.
1
2
3
4
5
Press the POWER ON/OFF (No. 2) and MUTE keys (No. 14) together for approximately 2 seconds until STATUS
LED (No.1) stays red.
Press the required AMP DEVICE key (No.3); the AMP key will light up.
Using the numeric key-pad (No. 10) engage Macro Setup Mode for AMP Device: Press 77772. The STATUS
LED will flash once. If the code is wrong, the STATUS LED will flash twice.
Record the Macro by selecting the functions:
• Press POWER ON/OFF (No.2) (command for switching on AV receiver).
• Press SHIFT (No. 9); the STATUS LED changes to green. Press the TUNER/TV device key (No.3). The STATUS
LED will change to red again. Press POWER ON/OFF (command for switching on TV).
• Press DVD Device key; press POWER ON/OFF (command for switching on DVD player).
• Press AMP Device key; press VIDEO 1 (inside No. 10) (command for switching AV receiver to Video 1
input).
• Press DVD Device key; press PLAY/ENTER (No. 16) (command for activating Play on DVD player.
Press the Macro key (No. 23) to store the Macro. The STATUS LED and DEVICE key will go out and the Macro
is programmed.
To play back a Macro, select the required device and press Macro. The macro is now executed, for each remote
command send in succession, the corresponding DEVICE key will light up briefly.
NOTE
Set-up mode is automatically cancelled if no key is pressed for 15 seconds.
RESET TO FACTORY DEFAULT SETTINGS
Sometimes it may be necessary to reset the HTR-1 to its factory default settings, for instance, if you change many
components in your system or do not recall how keys were programmed.
TO RESET THE NAD HTR-1
Press the POWER ON/OFF (No. 2) and SELECT keys (No. 6) together for approximately 5 seconds until STATUS LED
(no.1) flashes twice.
NOTE
When you reset the remote to factory default settings, you will LOOSE ALL SETTINGS AND LEARNED REMOTE
COMMANDS; ONCE ACTIVATED, RESET CAN NOT BE UNDONE!
GB
11
12
AMP / VCR
3
CD
AUX
DISC (DVD)
VIDEO 1
VIDEO 2
VIDEO 3
VIDEO 4
VIDEO 5
VIDEO 6
TAPE1
3 / DISC
4 / VIDEO 1
5 / VIDEO 2
6 / VIDEO 3
7 / VIDE0 4
8 / VIDEO 5
9 / VIDEO 6
0 / TAPE
10
SLEEP
1 / CD
SHIFT
2 / AUX
SLEEP
9
POWER ON
POWER ON
PRESET 0
PRESET 9
PRESET 8
PRESET 7
PRESET 6
PRESET 5
PRESET 4
PRESET 3
PRESET 2
PRESET 1
-
POWER ON
POWER OFF
PRESET/TUNE
PRESET-
PRESET+
VOLUME-
VOLUME+
TUNER
POWER ON/OFF
0
9
8
7
6
5
4
3
2
1
-
POWER ON
POWER OFF
-
-
-
-
-
CD
POWER ON/OFF
CD
(NAD)
0
9
8
7
6
5
4
3
2
1
ZOOM
-
-
ENTER
CURSOR LEFT
CURSOR RIGHT
CURSOR DOWN
CURSOR UP
DVD
POWER ON/OFF
DVD
(NAD)
0
9
8
7
6
5
4
3
2
1
SHIFT
-
-
-
VCR MENU
VCR PROGRAM -
VCR PROGRAM +
TV VOLUME -
TV VOLUME +
AMP
POWER ON/OFF
VCR
(Shift + AMP)
0
9
8
7
6
5
4
3
2
1
SHIFT
-
-
-
C/P ,MENU
PROGRAM -
PROGRAM +
TV VOLUME -
TV VOLUME +
TUNER
POWER ON/OFF
TV
(Shift + TUNER)
0
9
8
7
6
5
4
3
2
1
SHIFT
-
-
-
CAB MENU
CAB PROGRAM -
CAB PROGRAM +
TV or CAB VOL -
TV or CAB VOL +
CD
POWER ON/OFF
CABLE
(Shift + CD)
-
-
-
-
-
-
-
-
-
-
-
-
-
-
-
-
-
-
-
CUSTOM
(Shift + DVD)
8:17 pm
8
POWER OFF
POWER OFF
7
PRESET-
PRESET/TUNE (ENTER)
SELECT
CHANNEL-
6
PRESET+
VOLUME-
VOLUME-
CHANNEL+
VOLUME+
VOLUME+
DVD / CUSTOM
CD / CABLE
AMP
(NAD)
TUNER
20/4/01
5
4
POWER ON/OFF
2
TUNER / TV
AMP
No.
POWER ON/OFF
(NAD)
Remote
Drawing
HTR1 manual 120mm
Page 12
GB
AUDIO
SUBTITLE
EXT.5.1/7.1
DISPLAY
SURR.
MACRO
SET UP / REC
TEST
18
19
20
21
22
23
24
25
STOP
SKIP+ / FF
PLAY / ENTER
SKIP- / REW
15
17
CURSOR RIGHT
MUTE
14
16
CURSOR LEFT
PAUSE
13
SURR.TEST
CHANNEL SELECT
-
-
-
-
-
BANK
-
-
-
-
ENTER
TUNE+
TUNE-
MUTE
-
FM
AM
REPEAT
-
-
RANDOM
TIME
PROGRAM
-
-
STOP
PLAY
SKIP+
SKIP-
-
PAUSE
-
+10
-/—
-
-
RANDOM
RECORD
-
SETUP
RETURN
-
-
ANGLE
DISPLAY
-
C/P MENU STORE
-
-
-
-
MENU STORE
-
-
-
-
-
-
-
-
-
-
-
-
-
-
-
-
-
-
-
RECALL
DOWN
RIGHT
LEFT
TV or CAB MUTE
UP
-
SAT -/—
AUDIO
-
-
-
TV MUTE
TV/VIDEO
SUBTITLE
PLAY
STOP
FF
SKIP+
PLAY
REW
SKIP-
STOP
PAUSE
TV MUTE
PAUSE
-
RESUME
VCR [-/—]
TITLE
MENU
20/4/01
SURR.MODE
DISPLAY
EXT. 5.1
DYNAMIC RANGE
TONE CONTROL
CURSOR DOWN
SELECT / ENTER
MUTE
CURSOR UP
FM
12
AM
AM / +10 -/—
FM / TV/VIDEO
11
HTR1 manual 120mm
8:17 pm
Page 13
GB
13
HTR1 manual 120mm
Manufacturer
20/4/01
ID code
ACURA
ADMIRAL
AGASHI
AIWA
AKAI
AKKAI
AKURA
AKUSTIK
ALBA
ALBIRAL
ALLORGAN
AMSTRAD
ANITSCH
ANITECH
ANKARO
ARC EN CIEL
ARCON
ARISTONA
ARTHUR MARTIN
ASA
ASTRA
ASUKA
ASWO
ATLANTIC
AUDIOSONIC
AUDIOTON
AUSIND
AUTOVOX
BAIRD
BARCO
BARCOM
BASIC LINE
BAUR
BAZIN
BEKO
BLAUPUNKT
BOOTS
BPL
BRANDT
BRANDT ELECTRONIQUE
BRION VEGA
BRUNS
BSR
BT SATELLITE
BUSH
CABLETIME
CAMBRIDGE
CAMBRIDGE ARD200
CAPEHART
CENTURY
CGE
CHAPARRAL
CIHAN
CINEMA
CLARIVOX
CLAYTON
COMTEL
CONDOR
CONNEXIONS
CONTEC
CONTINENTAL
CONTINENTAL EDISON
CRAIG
CROSLEY
CROWN
CTC CLATRONIC
CURTISMATHES
DAEWOO
DAYTRON
DECCA
DEGRAAF
DENON
DESMET
DISKXPRESS
DIXI
DORIC
DRAKE
DYNATRON
DUAL
GB
14
4310
2001
2001
2002
4334
4311
4340
2003
2004
4234
2010
2011
2011
2012
2013
2014
2020
2021
2022
2023
4312
4341
2024
2030
4240
2031
2032
2034
2040
2040
2041
4304
2042
2042
2043
4313
4314
2044
2044
2100
2101
2102
4332
2103
4103
2104
2110
2111
2112
2113
2114
2120
2120
2121
2121
2122
2123
2124
2130
2131
2131
2132
2133
2134
2140
2141
2142
2143
2144
2200
4342
4342
2201
2202
4244
2203
2204
2210
8:17 pm
Manufacturer
DUAL-TEC
DUMONT
DUMONT-FINLUX
DYNATECH
ECHOSTAR
EDISON
ELBE
ELBIT
ELCIT
ELECTRO TEC
ELECTRONIC
ELECTRONSK
ELMAN
ELIN
ELTA
ELTASAT
EMERSON
ERRES
ESTEL
EUROCOM
EUROPHON
EXPERT
FENNER
FERGUSON
FIDELITY
FILMNET CABLECRYPT
FILSAI
FINLANDIA
FINLUX
FIRST LINE
FISCHER
FISHER
FORGESTONE
FORMENTI
FORMENTI-PHOENIX
FORTRESS
FRACARRO
FRONTECH
FTE
FUBA
FUJITSH
FUNAI
GALERIA
GBC
GE
GEC
GELOSO
GENEXXA
GIUCAR RECORD
GOLDSTAR
GOODMANS
GORENJE
GRAETZ
GRANADA
GRANDIN
GRUNDIG
HANSEATIC
HANTAREX
HARMAN
HEMMER MANN
HEXA
HIFIVOX
HIGASHI
HIGH PERFORMANCE
HINARI
HIRSCHMANN
HITACHI
HYPER
IMPERIAL
INGELEN
INGERSOL
INNO HIT
INTERFUNK
INTERVISION
IRRADIO
ITT
ITT-NOKIA
JEEMON
JENSEN
Page 14
ID code
Manufacturer
ID code
2211
2212
2213
2214
2220
2220
2221
2222
2223
4430
4430
4430
2224
2224
2230
2231
2232
2233
2233
2234
2234
4303
4422
2240
2241
4322
4422
2242
2243
2244
JERROLD
JOHNSON
JOHANSSON
JVC
KAISER
KAISUI
KAPSCH
KARCHER
KARDON
KATHREIN
KENDO
KENNEDY
KENWOOD
KORTING
KRIESLER
KTV
KYOTO
LENCO
LENOIR
LEYCO
LLOYD
LOEWE
LOEWE OPTA
LOGIK
LUMA
LUXMAN
LUXOR
LXI
MACAB
MAGAI
MAGNADYNE
MAGNFON
MAGNASONIC
MAGNAVOX
MANHATTAN
MARANTZ
MASPRO
MATSUI
MATSUSHITA
MAXIMAL
McMICHAEL
M ELECTRONIC
MEMOREX
METZ
MGA
MINERVA
MINOLTA
MISSON
MISTRAL
MITSUBISHI
MIVAR
MNARTT
MTC
MULTISTAR
MULTITECH
MURPHY
NAD
NAGOMA
NAONIS
NATIONAL
NEC
NECKERMANN
NEI
NEIRU
NEWTECH
NIKKAI
NOBLIKO
NOGAMATIC
NOKIA
NONAME
NORDMENDS
NORFOLK
NORSAT
OCEANIC
OKANO
ONKYO
ONCEAS
OPTONICA
ORION
2430
2431
2431
2432
2433
2433
4301
2434
4344
2440
2441
2442
2443
2444
3000
3001
3001
3002
3003
3002
3004
3010
3011
3012
3013
4400
3014
3020
3021
3022
3023
3024
3030
3031
4321
3032
3033
3034
4233
3040
3041
4300
3042
3043
3044
3100
3101
4401
3102
3103
3104
3104
3110
3111
3112
3113
4430
3114
3114
3120
3121
3122
3123
3124
4241
3130
3131
3132
3134
4402
3140
3140
3141
3142
4403
4404
3143
3144
3200
2244
2300
2301
2301
2302
2303
2304
2310
2311
2312
2312
2313
2313
2314
2320
2321
2322
2323
2324
2330
2331
2332
2333
2334
2334
2341
2342
4343
2343
4343
2344
4423
2400
2401
2402
2403
2404
2410
2411
2412
2413
2414
2420
2420
2421
2422
2423
2424
HTR1 manual 120mm
Manufacturer
OSAKI
OSIO
OSUME
OTTO VERSAND
P.T ACTRON
PACE
PACE MSS SERIES
PAEL
PALCOM
PALLADIUM
PALSAT
PANASONIC
PATHE
PATHE’CINEMA
PATHE’MARCONI
PAUSA
PENTAX
PERDIO
PHILCO
PHILIPS
PHOENIX
PHONOLA
PIONEER
PMG
PORTLAND
PRANDONI-PRINCE
PREMIER
PRINCE
PROFEX
PROLINE
PROSAT
PROTECH
PYE
QUARTZ
QUASAR
QUELLE
RADIOLA
RADMOR
RADIOMARELLI
RADIONETTE
RADIX
RANK
RBM
RC-1000
RCA
REALISTIC
REDIFFUSION
REVOX
REX
ROADSTAR
ROBERTS
ROBOTRON
ROWSONIC
RTF
SABA
SAISHO
SAKURA
SALORA
SAMBERS
SAMPO
SAMSUNG
SANSUI
SANYO
SATECO
SATPROTNER
SBR
SCHAUB LORENZ
SCHNEIDER
SCHNEIDER F
SCIEN TIFIC ATLANTA
SEG
SEI
SEI-SINUDYNE
SELECO
SENTRA
SHARP
SHINTOM
SHORAI
SIAREM
20/4/01
ID code
3201
3202
3203
3204
3210
3211
3212
3213
3214
4410
3220
3221
3222
3222
3223
3213
3224
3230
3231
3232
3233
3234
3240
4411
3241
3242
3243
3244
3300
3300
3301
3302
3303
3304
3310
3311
3312
4412
3313
4333
3314
3320
3321
3322
3323
3324
3330
4413
3331
3332
3333
3333
4424
3334
3340
3341
3342
3343
3344
3400
3401
3402
3403
3404
3410
3411
3412
3413
3413
4231
3414
3420
3421
3422
3423
3424
3430
3430
3431
8:17 pm
Manufacturer
SICATEL
SIEMENS
SIERA
SILVA
SILVER
SINGER
SINOTEC
SINTRACK
SINUDYNE
SOLAVOX
SONOKO
SONOLOR
SONY
SOUND WAVE
STANDARD
STARCOM
STARSAT
STELLA
STERN
STRONG
STS
STUDER
STV
SUNKAI
SUPERTECH
SYLVANIA
SYMPHONIC
T+A ELECTROTANDBERG
TANDY
TASHIKO
TATUNG
TEAC
TEC
TECHNICS
TECHNISAT
TEKNIKA
TELEAVIA
TELECOM
TELEFUNKEN
TELEMAX
TELETECH
TELETON
TELEVIDEON
TENOSAL
TENSAI
TESLA
THOMSON
THORN
THORN-FERGUSON
TOSHIBA
TOTEVISION
TRANS CONTINENS
TRIACL
TRIAD
TRIUMPH
UHER
ULTRAVOX
UNIDEN
UNITED CABLE
UNITECH
UNIVERSUM
UNIVOX
UTAX
VECO
VEGAVOX
VESTEL
VICTOR
VIDION
VIDIO WAY
VISIOPASS
VORTEC
VOXSON
WARDS
WALTHAM
WATSON
WATT RADIO
WEGA
WEGA COLOR
Page 15
ID code
3432
3433
3434
3440
3441
3442
4414
3443
3444
4000
4000
3444
4001
4320
4242
4232
4002
4003
4004
4010
4011
4420
4012
4013
4013
4014
4020
4421
4021
4022
4023
4024
4030
4031
4331
4032
4033
4034
4040
4041
4042
4043
4302
4044
4100
4101
4302
4102
4104
4110
4111
4112
4113
4114
4120
4121
4122
4123
4124
4202
4130
4131
4132
4243
4133
4133
4134
4140
4140
4141
4324
4142
4143
4144
4200
4200
4201
4203
4204
Manufacturer
WEGAVOX
WESTMINSTER CABLE
WHITE WESTINGHOUSE
WINERSAT
WINTERNITZ
WISI
WOLSEY
YAMAHA
YOKO
ZANUSSI
ZEHNDER
ZENDER
ZENITH
ZOPPAS
ID code
4204
4330
4210
4211
4212
4212
4213
4214
4220
4221
4222
4223
4224
4230
GB
15
HTR1 manual 120mm
20/4/01
8:18 pm
Page 104
www.NADelectronics.com
©2001 NAD ELECTRONICS INTERNATIONAL
All rights reserved. No part of this publication may be reproduced, stored or transmitted
in any form without the written permission of NAD Electronics International
HTR-1 Manual 04/01 Printed in Hong Kong