1
M6R SST S INGLE -S TEREO
T ECHNOLOGY ® S PEAKER
I NSTRUCTION M ANUAL
INTRODUCTION
INSTALLING THE SPEAKERS
Thank you for purchasing Moderno speakers. When properly installed
your new speakers will give you years of entertainment pleasure.
This manual will teach you about your new speakers and will show
you how to install and get the very best performance from them.
Please read it thoroughly.
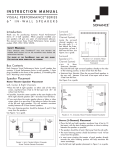
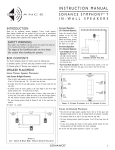
Step 1. Determine the location for the
speaker (see Speaker Placement on
page 1). Center the speaker
between the wall studs or ceiling
joists. Tap the wall or ceiling and listen for a “hollow” sound, or use a
stud finder to locate studs.
Step 2. Position the included cutout template
where the speaker is to be located
and trace the outline on the wall or
ceiling with a pencil.
• Make sure the speakers are even
with each other and level.
TOOLS NEEDED
You will need the following tools to install your Moderno speakers:
•
•
•
•
•
•
•
•
•
Pencil
Keyhole or drywall saw
Philips screwdriver
Small level
Fish tape or coat hanger
Wire strippers
Gloves
Safety goggles
Drill with ¼” – ½” bit (for test hole) and 1”
Flat bit (if drilling through studs)
Steps 1 and 2
IMPORTANT: The edges of the cutout outline
must be at least ¾” away from any studs, to
allow room for the RotoLock ® clamps to operate.
N OTE : R EAD S TEP 6
ABO UT RU N N I N G SPEAKER WI RE BEFO RE D ECI D I N G
O N TH E FI NAL SPEAKER LO CATI O NS .
Step 3. Drill a small hole in the center of the outline you just traced.
BOX CONTENTS
Your Moderno speaker box should contain the following items:
(1) Moderno M6R SST speaker
(1) Paintable grille
(1) Mounting cutout template (in packaging)
Step 4. Insert a coat hanger wire into the hole to feel-around for possible obstructions. If there are obstructions, patch the hole and
select another location for the speaker. Make sure that any
studs will be at least ¾” away from the edges of the cutout.
Step 5. Carefully cut the outline of the mounting hole using a keyhole
or drywall saw. Remove the drywall from the cutout.
SPEAKER PLACEMENT
Moderno M6R SST Single Stereo Technology ® speakers are ideal for
use in hallways, bathrooms, closets, or in any location where listeners
will be moving around or where a pair of stereo speakers would be
impractical. Because a single M6R SST speaker reproduces both
stereo channels from a single location, it will deliver outstanding
audio performance from an extremely wide variety of mounting
locations and can be mounted in either a wall or a ceiling.
Moderno M6R SST speakers have very smooth and predictable offaxis response, so they provide excellent coverage in distributed audio
systems from a wide variety of installation locations. The chart below
show how far apart the speakers can be placed at different ceiling
heights while still providing good coverage for all listeners.
The distances are based on ear heights of 62” for standing listeners
and 40” for seated listeners.
S PEAKER S PACING ( IN FEET )
FOR A D ISTRIBUTED A UDIO S YSTEM
STANDING
LISTENER
SEATED
LISTENER
8-FOOT CEILING
5.7’ Apart
9.5’ Apart
10-FOOT CEILING
9.7’ Apart
13.5’ Apart
12-FOOT CEILING
14-FOOT CEILING
13.7’ Apart
17.7’ Apart
17.5’ Apart
21.5’ Apart
Step 4
Step 3
Step 5
I M PORTANT: Make sure your amplifier’s
is turned off before performing Step 6.
power
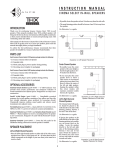
Step 6. Run the speaker cable from the speaker outputs of your
amplifier to the speaker locations.
Use high-quality cable such as
HomeTech HTC100 16/4 cable. Pull
the cables through the mounting
holes you cut in the wall.
• Allow a few extra feet of cable, and
leave enough cable slack so you
can strip the insulation from the
conductors when you’re ready to
connect to the speakers.
N OTE : I F
SPEAKER CABLE IS TO BE RU N
TH RO U G H WALLS O R CEI LI N GS , TH E CABLE
MUST
BE
UL-
AN D
CL- R ATED
FO R YO U R
SAFETY AN D BU I LD I N G CO D E CO M PLIAN CE .
C O N T I N U E D O N PAG E
Step 6
2
1
MOD E R NO M 6 R SST S I NG LE - STE R EO TECH NOLOGY ® S PEAKE R
C O N T I N U E D F R O M PAG E
1
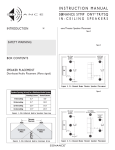
Step 11. Install the grilles by placing them
into the speaker baffles. Powerful
magnets on the grilles and on the
speaker baffles will hold the grilles
firmly on the speakers.
Step 7. Speaker
performance
can
be
enhanced by insulating the wall or
ceiling cavity with fiberglass insulation. When insulating speakers, it is
best to use a sheet of unfaced fiberglass insulation behind and around
the sides of the speaker.
PAINTING THE
GRILLES
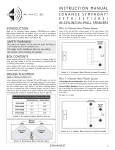
Step 8. Connect the positive (“+”) wires from
b oth amplifier channels to the
speaker’s red terminals. Connect
the negative (“–”) wires from both
amplifier channels to the speaker’s
black terminals.
Step 7
• The speaker’s connector posts are
spring-loaded. Push the top of
each connector post down to open the connector and insert
the exposed wires into the holes in the posts.
IMPORTANT: Be sure not to let any stray ‘+’ and ‘–’
wires touch each other. Touching wires can cause a
short-circuit that could damage your amplifier.
• Double-check that you connected amplifier “+” to speaker
“+” and amplifier “–” to speaker “–”.
Moderno grilles may be painted to colormatch their surroundings.
1. Remove the grilles from the speakers.
Step 11
2. Remove the scrim cloth that is attached
to the backs of the grilles. (The adhesive that holds the cloth in
place is reusable.)
3. Paint the grilles with very thin paint (5 parts thinner to 1 part
paint), being careful not to plug the holes.
4. When the paint has fully dried, re-attach the scrim cloths to the
backs of the grilles.
5. Re-install the grilles on the speakers.
ADJUSTMENTS
Tweeter Level Control
Black Cap
“—”
Red Cap
“+”
The Moderno M6R SST speaker
has a tweeter level control
switch that lets you boost or cut
the tweeter level by 3dB. This
allows you to adjust the
speaker’s brightness to better
match your listening room or
personal taste.
Tweeter Level
Control
Once you have installed the
speakers, listen to a variety of
music that you are familiar with.
If the music all tends to sound
too bright or dull, use the
Tweeter Level Control to
compensate. If some recordings sound dull and some sound bright
the speaker is accurately reproducing differences in the recordings,
and you should leave the control in the middle (0dB) position.
SPECIFICATIONS
M6R SST
Black Cap
“—”
Red Cap
“+”
Step 8
Tweeter:
Two 1" (25mm) Silk domes
Woofer:
6½" (133mm) Woven glass fiber cone,
rubber surround
Frequency Response:
45Hz – 20kHz ±3dB
Impedance:
8 Ohms nominal
Power Handling:
100 Watts maximum
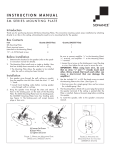
Step 9. Make sure all the RotoLock clamps are in the full clockwise
position so that they are tucked within the mounting hole’s
border. Insert the speaker into the mounting hole.
Sensitivity:
92dB SPL (2.83V 1 meter)
Grille Material:
Perforated metal
Step 10. Tighten the four screws on the front of
the speaker baffle evenly until the
speaker is seated snugly and evenly
against the wall or ceiling.
Adjustments:
±3dB Tweeter Level
Dimensions (Dia x D):
9” x 3¾” (229mm x 95mm)
Cutout Dim. (Dia):
8 1/8 " (206mm)
Shipping Weight:
4 lbs. (3.2kg) Each
IMPORTANT: If you are using a
drill or electric screwdriver to
tighten the screws be sure use the
lowest torque setting.
Step 10
2
MOD E R NO M 6 R SST S I NG LE - STE R EO TECH NOLOGY ® S PEAKE R
TECHNICAL ASSISTANCE
WARRANTY COVERAGE (USA ONLY)
For answers to installation questions or an installation walk-through,
please call our Technical Assistance Department on any business day
at: (800) 582-7777, from 7am to 5pm, Pacific Time.
If within five (5) years from the date shown on the bill of sale the product fails due to a defect in workmanship or material, Dana Innovations
will, at its option and at no charge, repair or replace the components
of the product which prove to be defective.
OBTAINING SERVICE
If this product should need repair or service, contact your Authorized
Moderno Dealer for help, or use the following procedure:
1. Prior to calling, note the product’s model number, serial number,
purchase date, and the name and address of the dealer where you
purchased the product.
2. Contact our Technical Assistance Department at the above number
and describe the problem the unit is experiencing.
If applicable, they will issue a Return Authorization Number.
IMPORTANT: Do not return the unit to Moderno without first obtaining a Return Authorization Number!
3. If you’re directed to return the unit to Moderno for repair, pack the
unit in its original shipping carton. If needed, you can obtain
replacement packaging from us for a small charge. Note: it is best
if you place the box into an additional outer “overcarton” before
shipment to minimize a chance of theft in shipment. Please include
a copy of the original bill of sale inside the package.
4. Contact a package delivery service such as United Parcel Service
or Federal Express to arrange prepaid (not collect) shipping. Do
not use the U.S. Postal Service.
IMPORTANT: Freight collect shipments will be refused.
For this warranty to be effective, the bill of sale must show that the
product was purchased from an “Authorized Moderno Dealer”. This
warranty shall apply exclusively to the original purchaser and shall not
apply to products purchased for industrial or commercial use.
Furthermore, this warranty shall not apply if:
1. Damage to the unit was caused by accident, abuse or misuse;
2. The unit was opened, modified, or repaired by unauthorized
personnel; or
3. The unit was not used as outlined in the instruction manual.
EXCLUSIONS AND LIMITATIONS
The warranty set forth above is in lieu of all other warranties, express
or implied, of merchantability, fitness for a particular purpose, or otherwise. The warranty is limited to Dana Innovations products registered herein and specifically excludes any damage to loudspeakers
and other allied or associated equipment which may result for any
reason from use with this product.
Dana Innovations shall, in no event, be liable for incidental or
consequential damages arising from any breach of this warranty or
otherwise. This warranty gives you specific legal rights, and you may
have rights which vary from state to state.
5. Write the Return Authorization Number on the outside of the shipping
carton. For warranty work, please include a copy of the original bill
of sale inside the package.
6. Ship the packaged unit to:
Returns Depar tment
Moderno
2 12 Avenida Fabricante
San Clemente, CA 92672-753 1
3
©2007 Moderno. All rights reserved. Moderno, Single- Stereo Technology and RotoLock are registered trademarks of Dana Innovations.
Due to continuous product improvement, all features and specifications are subject to change without notice.
For the latest Moderno product specification information visit our website: www.modernoaudio.com
MODER NO • 212 Avenida Fabricante • San Clemente, CA 92672-7531 USA • (800) 582-7777
w w w. m o d e r n o a u d i o . c o m
33-4654
03/07