1
Instant Gigabit Series
®
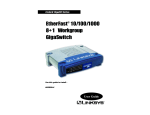
EtherFast 10/100/1000
8+1 Workgroup
GigaSwitch Starter Kit
Use this guide to install :
EG0801SK
User Guide
COPYRIGHT & TRADEMARKS
Copyright © 2001 Linksys, All Rights Reserved. EtherFast is a registered trademark of
Linksys. Microsoft, Windows, and the Windows logo are registered trademarks of
Microsoft Corporation. All other trademarks and brand names are the property of their
respective proprietors.
LIMITED WARRANTY
Linksys guarantees that every EtherFast® 10/100/1000 8+1 Workgroup GigaSwitch
Starter Kit is free from physical defects in material and workmanship under normal use
for ONE year from the date of purchase. If the product proves defective during this
warranty period, call Linksys Customer Support in order to obtain a Return
Authorization number. BE SURE TO HAVE YOUR PROOF OF PURCHASE AND A BARCODE FROM THE PRODUCT’S PACKAGING ON HAND WHEN CALLING. RETURN
REQUESTS CANNOT BE PROCESSED WITHOUT PROOF OF PURCHASE. When
returning a product, mark the Return Authorization Number clearly on the outside of the
package and include your original proof of purchase. All customers located outside of
the United States of America and Canada shall be held responsible for shipping and
handling charges.
IN NO EVENT SHALL LINKSYS’ LIABILITY EXCEED THE PRICE PAID FOR THE PRODUCT FROM DIRECT, INDIRECT, SPECIAL, INCIDENTAL, OR CONSEQUENTIAL DAMAGES RESULTING FROM THE USE OF THE PRODUCT, ITS ACCOMPANYING SOFTWARE, OR ITS DOCUMENTATION. LINKSYS OFFERS NO REFUNDS FOR ITS PRODUCTS. TAMPERING WITH OR DISASSEMBLING THE PRODUCT VOIDS THE LINKSYS
WARRANTY. Linksys makes no warranty or representation, expressed, implied, or
statutory, with respect to its products or the contents or use of this documentation and
all accompanying software, and specifically disclaims its quality, performance, merchantability, or fitness for any particular purpose. Linksys reserves the right to revise or
update its products, software, or documentation without obligation to notify any individual or entity. Please direct all inquiries to:
Linksys P.O. Box 18558, Irvine, CA 92623.
FCC STATEMENT
The EtherFast® 10/100/1000 8+1 Workgroup GigaSwitch Starter Kit has been tested
and found to comply with the limits for a Class B digital device, pursuant to Part 15 of
the FCC Rules. These limits are designed to provide reasonable protection against
harmful interference in a residential installation. This equipment generates, uses, and
can radiate radio frequency energy and, if not installed and used according to the
instructions, may cause harmful interference to radio communications. However, there
is no guarantee that interference will not occur in a particular installation. If this equipment does cause harmful interference to radio or television reception, which is found
by turning the equipment off and on, the user is encouraged to try to correct the interference by one or more of the following measures:
•
•
•
•
Reorient or relocate the receiving antenna
Increase the separation between the equipment or device
Connect the equipment to an outlet other than the receiver’s
Consult a dealer or an experienced radio/TV technician for assistance
UG-EG0801SK-10208NC DG
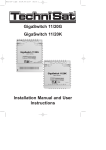
Instant Gigabit Series
EtherFast® 10/100/1000 8+1 Workgroup GigaSwitch Starter Kit
Contents
Introduction
Your EtherFast®10/100/1000 8+1 Workgroup GigaSwitch
Features
Package Contents
System Requirements (for the PCI Adapter)
1
1
1
2
2
Getting to Know the EtherFast 10/100/1000 8+1
Workgroup GigaSwitch
The 10/100/1000 Workgroup GigaSwitch’s Rear Panel
The 10/100/1000 Workgroup GigaSwitch’s Front Panel
3
3
4
®
Getting to Know the Instant Gigabit Network
Adapter
LEDs
The RJ-45 Port
5
5
5
Planning Your Network
Overview
Switches Versus Hubs
Where to Install the Instant Gigabit Network Adapter
6
6
6
8
Installing the EtherFast® 10/100/1000 8+1 Workgroup
GigaSwitch Starter Kit onto Your Network
10
Overview
10
Installing the Instant Gigabit Network Adapter
10
Installing the Workgroup GigaSwitch
12
Connecting Your Hardware Together and Booting Up
12
Tips on Switching Your Network
13
Installing the Drivers for Windows 95
Overview
Installing the Drivers in Windows 95 Version B
14
14
15
Installing the Drivers for Windows 98
Overview
Installing the Network Adapter’s Driver
18
18
18
Installing the Drivers for Windows Millennium
Overview
Installing the Network Adapter’s Driver
22
22
22
Windows NT 4.0 Installation and Setup
Overview
Installing NT Networking and the Network Adapter Driver
Installing the Network Adapter Driver if Networking is Already Installed
26
26
27
33
Windows 2000 Installation and Setup
Overview
Installing the Network Adapter’s Driver
37
37
37
Advanced Properties
41
Configuring the Instant Gigabit Network Adapter
Configuring the Adapter for Windows 95, 98, and Millennium
43
43
Appendix
Sharing Your Files and Printers
Installing the Driver in Windows 95 Version A
Novell NetWare 3.x Client Setup for Windows 95, 98, or Millennium
Starting Over in Windows 95, 98 or Millennium
Starting Over in Windows 2000
Manually Installing the Network Components in
Windows 95, 98, or Millennium
Installing and Configuring Wake-On-LAN
About Plug-and-Play PCI Technology
Linux, Open Source and Beta Operating Systems
Twisted Pair Cabling
48
48
50
51
52
56
59
Troubleshooting
64
Glossary
68
Specifications
Specifications for EG1032
Specifications for EG0801W
Environmental
76
76
77
78
Warranty Information
79
Contact Information
80
61
61
63
63
Instant Gigabit Series
Introduction
EtherFast® 10/100/1000 8+1 Workgroup GigaSwitch Starter Kit
Package Contents
Your EtherFast® 10/100/1000 8+1 Workgroup Gigaswitch
Congratulations on purchasing your new Linksys EtherFast® 10/100/1000
Workgroup GigaSwitch Starter Kit for your network's 10/100/1000 migration
needs. The EtherFast® 10/100/1000 Workgroup GigaSwitch Starter Kit is the
easiest, most versatile way to boost your network's performance while migrating to the speed and power of Gigabit. Unlike hubs that ration your network
bandwidth and may slow down with high data traffic, your Linksys Switch
fuels each of your computers with full duplex transfer mode on top of dedicated bandwidth to unleash your network speed.
In migrating your network to Fast Ethernet’s 1000Mbps speed, your new
Linksys 10/100/1000 GigaSwitch is ready to go to work for you immediately.
Apply this switching power to your network, and your data traffic efficiency
improves several times over. Connect your file server to the Gigabit port, and
speed up access time for all your users in just one move. And when you're
ready, switch your way to full duplex speeds of up to 2000Mbps--the speed is
yours!
Every Switch packs a complete suite of advanced data error detection features for surefire communication every time. Auto partitioning and data collision control ensure that not a single bit is lost during even the heaviest
moments of network traffic. Built to last, your new EtherFast® 10/100/1000
Workgroup GigaSwitch delivers optimal high-end video, gaming, multimedia,
database, and other speed-intensive applications at blazing speeds.
Features
• 8 Port 10/100 Mbps Auto-Detect Half/Full Duplex Switch Ports and 1
Gbps Full Duplex Switch Port
• Internal Built-In 256 KB SRAM for Buffer Memory (Switch)
• Capable of Storing Up to 4096 MAC Addresses with Address Learning
• Non-BLocking Shared Memory Architecture
• Supports Aging Function and 802.3x Flow Control for Full Duplex and
Back-Pressure Function for Half-Duplex Operation (Switch)
• Easy to Use Plug-and-Play 10/100/1000 PCI Network Card
• Full Duplex Capability at Speeds Up To 2000Mbps (Adapter)
• Connects to 10Mbps, 100Mbps, and Gigabit Ethernet Networks (Adapter)
• Signal Regeneration Ensures Data Transfer Integrity
• Free Technical Support—24 Hours a Day, 7 Days a Week for North
America Only
• One-Year Limited Warranty
1
•
•
•
•
•
•
•
One Instant Gigabit (32-Bit) Adapter
One 10/100/1000 8+1 Workgroup Gigaswitch®
One Category 5E Network Crossover Cable (10 ft.)
One 3.5” Driver Disk
One AC Power Adapter
One Stacking/Wall Mounting Module
One User Guide and Registration Card
System Requirements (for the PCI Adapter)
• Pentium 90Mhz or Faster
• Minimum 16MB of RAM
• PCI Local Bus 2.1 or higher compliant
• Windows 95 (or higher) Operating System
2
Instant Gigabit Series
Getting to Know the EtherFast®
10/100/1000 Workgroup
GigaSwitch
EtherFast® 10/100/1000 8+1 Workgroup GigaSwitch Starter Kit
The 10/100/1000 Workgroup GigaSwitch’s Front Panel
The 10/100/1000 Workgroup GigaSwitch’s Rear Panel
The LED Indicators
Power
Amber. The Power LED lights up when the Switch is powered on.
Link/Act
Green. The Link/Act LED serves two purposes. If the LED
is continuously lit up, the Switch is successfully connected to
a device through the corresponding port (1 through 8). If the
LED is flickering, the GigaSwitch is actively sending or
receiving data over that port.
FD/Col
Green. The FD/Col LED also serves two purposes. If this
LED is lit up continuously, the connection made through the
corresponding port is running in Full Duplex mode. If the
LED flickers, the connection is experiencing collisions.
Infrequent collisions are normal.
If this LED flickers too often, there may be a problem with
your network.
10/100
Amber. The 10/100 LED lights up for any port when that port
is operating at 100Mbps. If the LED is off while the network
is operating, the port is operating at 10Mbps.
1000
Amber. The 1000 LED lights up when the Gigaswitch port is
operating at 1000Mbps. If the LED is flickering, data is
being transmitted through the port.
1000 Link/Act
Green. The 1000 Link/Act LED lights up when the Gigabit
port is operating at 1000Mbps.
1000 FD/Col
Green. The 1000 FD/Col LED lights up continuously when
the switch is operating at 2000Mbps and flickers when experiencing data collisions.
The Workgroup GigaSwitch’s Ports
GigaSwitch
3
The GigaSwitch port is used to connect to the PC
into which you have installed your Instant Gigabit
Network Adapter. Or, it can be used to expand your
network by connecting to a 1000Mbps hub or
switch, which is done by simply running the included Category 5e cable from the GigaSwitch port to
the uplink port on the 1000Mbps hub or switch.
When connecting to your Instant Gigabit Network
Adapter, just plug one end of the included Category
5e cable into the RJ-45 port on the Adapter and the
other end into the GigaSwitch port on the
GigaSwitch.
Ports 1-8
These eight LAN (Local Area Network) ports connect to network devices, such as PCs, print servers,
network attached storage, and remote hard drives at
10/100Mbps.
Power
The Power port is where you will connect the
power adapter.
4
Instant Gigabit Series
Getting
Gigabit
Getting
Gigabit
to Know the Instant
Network Adapter
to Know the Instant
Network Adapter
EtherFast® 10/100/1000 8+1 Workgroup GigaSwitch Starter Kit
Planning Your Network
Overview
Building a Gigabit network involves more topology rules in addition to the
10BaseT/100Base-TX network rules. These rules specify distance limitations
and cabling specifications. Data loss, collisions, and other network problems
causing down time are likely to occur if the rules below are not followed.
LEDs
The LEDs
• Use UTP Category 5 (or better) Ethernet cabling with four pairs of wires
and RJ-45 tips for all Fast Ethernet connections. Gigabit connections
require Category 5e (or better).
Link/Act The Link LED will illuminate when the card has been successfully
connected to a network and flicker when there is network activity.
• Use the chart below to position your switches, hubs and workstations.
1000
The 1000 LED will illuminate when the card is operating at
1000Mbps. If the 1000 LED is not illuminated and the PC is powered on, the card will have automatically determined that your network is operating at a slower speed and compensate accordingly.
From
To
Maximum Distance
Switch
Switch or Hub*
100 meters (328 feet) 1
Hub*
Hub*
5 meters (16.4 feet) 1
Switch or Hub
Workstation 1
100 meters (328 feet) 1
*Hub refers to any type of 100Mbps hub, including regular hubs and stackable hubs. A
10Mbps hub connected to another 10Mbps hub can span up to 100 meters (328 feet).
The RJ-45 Port
The RJ-45 Port
The RJ-45 Port is where you will connect your network cabling.
• No more than two hubs should be uplinked in a row in a Fast Ethernet network. A set of stacked hubs, which must be stacked with a stacking cable,
counts as one hub or node on the network.
• In Fast Ethernet networks, your 10/100 Switch acts as a repeater, regenerating data signals before passing them on to the next device. Passive hubs
do not function as repeaters.
Switches Versus Hubs
Your Workgroup GigaSwitch boosts your network performance several times
over, conserving your time, money and resources. The scalability of your
Switch, its full duplex data transfer and dedicated bandwidth all contribute to
maximizing efficiency in your Fast Ethernet network.
Your Switch’s 10/100 feature gives you a key advantage over other forms of
networking by upgrading speed-critical network segments to 100Mbps while
allowing existing 10BaseT networks to operate with the Switch. Allowing
10BaseT and 100BaseTX hardware speeds to run alongside each other elimi-
5
6
Instant Gigabit Series
nates the need to purchase new hardware, rewire and reconfigure an entire
site all at once. This scalability factor ensures that Fast Ethernet will not fall
obsolete to upgrades in speed standards and maintains use of all your old
equipment until you decide to buy speedier replacements.
Scalability allows you to budget for your networking needs over time.
Now networks can run fast and slow segments at the same time for different
users and departments.
Switches also feature full-duplex data transfer, meaning that all computers
on the switch can “talk” to the switch at the same time. Plus, switches can
send and receive data simultaneously to all connections, whereas a hub cannot. A hub simply works with one computer at a time and only sends or
receives data, since it cannot handle two way communication.
EtherFast® 10/100/1000 8+1 Workgroup GigaSwitch Starter Kit
Where to Install the Instant Gigabit Network Adapter
If you are setting up a network for the first time, or if you already have a
10/100 BaseT network without Gigabit capability, you may be wondering
which PC should have the Instant Gigabit Network Adapter installed in it for
best performance. In either of the above situations, we recommend that you
set up your network in the configuration shown below (Configuration A).
The Instant Gigabit Network Adapter is installed in your File Server (or your
Internet gateway) and connected to your Workgroup GigaSwitch using the
provided cable, which is in turn connected to the rest of your network. If you
do not have a File Server or Internet gateway, the Adapter should be installed
in the PC that is most often accessed on the network.
Note: Use the crossover
cable provided to connect
directly to your Instant
Gigabit Network Adapter or
to an Uplink port on your
Gigabit hub or switch.
In addition to full-duplex transfer, your Switch surges your network with
dedicated bandwidth to each node. For instance, if you connect five computers to your EtherFast 10/100/1000 8+1 Workgroup GigaSwitch, then each
computer will get a dedicated bandwidth of 100Mbps at full duplex transfer.
If you run 5 computers from a 100Mbps hub, then each computer will only
share a part of the 100Mbps bandwidth.
A network without a switch is called a shared network because every node
on the network competes for a fraction of the total bandwidth. In a shared
network, data packets are randomly broadcasted to all stations until they
discover their intended destination. Consequently, considerable time and
bandwidth is wasted on data packets swimming along network lines before
they find their correct address. A switch, on the other hand, looks at the
address for each data packet and delivers it directly to the correct destination.
Gigabit Ethernet is ideal for deployment as a backbone interconnect between
10/100BASE-T switches, and as a connection to high-performance servers.
With the addition of Gigabit Ethernet, Ethernet delivers scalable solution
(10/100/1000 Mbps) for the LAN from the desktop to the workgroup, and the
backbone.
7
Configuration A
8
Instant Gigabit Series
If you are already operating in a Gigabit environment, we suggest a configuration like the one shown below (Configuration B). Your Instant Gigabit
Network Adapter would be installed in your file server, which would be
attached to your Gigabit hub or switch, maximizing your file server’s bandwidth. The Workgroup GigaSwitch would be connected to one of the other
Gigabit ports on your Gigabit switch or hub, acting like a bridge between the
1000Mbps section of your network and the 10/100 portion of your network.
EtherFast® 10/100/1000 8+1 Workgroup GigaSwitch Starter Kit
Installing the EtherFast®
10/100/1000 8+1 Workgroup
GigaSwitch Starter Kit onto Your
Network
Overview
Installing your Starter Kit will involve installing both the Adapter and the
GigaSwitch. If you are integrating these items into an existing nework, some
additional steps may be necessary involving settings for your existing equipment. Consult your Network Administrator for more information about how
the Starter Kit will interface with your existing network components.
Installing The Instant Gigabit Network Adapter
Each Instant Gigabit Network Adapter is equipped with an RJ-45 port that
automatically adjusts to either 10Mbps, 100Mbps, or 1000Mbps speeds, allowing your PC to attach to either Gigabit Ethernet, Fast Ethernet, or regular
Ethernet network segments without additional hardware or software.
The card should only be used with twisted-pair cabling, such as 10BaseT,
100BaseTX, or 1000BaseT cabling. For best results, we recommend using
Category 5e or better unshielded twisted-pair cabling although category 3 can
be used for 10BaseT segments. Only Category 5e or better cable will work
for Gigabit transfer. If you use the cable included in your Starter Kit, both
your Adapter and Gigaswitch will operate at the maximum speed of your network. In any case, the cable that runs from your PC’s Instant Gigabit Network
Adapter card to your network should not exceed 100 meters (328 feet).
Installing the Network Card & Cabling
1. Power off your PC and any peripheral equipment attached to it. Unplug
your PC’s power cord. For suggestions on choosing the PC in which to
install the Adapter, see the section called Planning Your Network.
2. Remove your computer's outside cover.
9
Configuration B
10
Instant Gigabit Series
3. Open your computer and locate the PCI slot(s) on your motherboard. PCI
slots are easily identified by their beige or white color, and by the fact that
network cards fit snugly into them. Remove the metal slot cover on the
back of the PC, then insert the Instant Gigabit Network Adapter into any
available PCI card slot.
4. If you are interested in Wake-On-LAN, refer to the Appendix for instructions on Wake-on-Lan installation. Wake-On-LAN can be installed at any
time, so there is no need to do it now.
5. Once your Instant Gigabit Network Adapter is firmly in place, secure
its fastening tab to your PC's chassis with a mounting screw.
6. Replace your PC's cover.
7. Connect one end of the twisted-pair cable to your PC at the Instant
Gigabit Network Adapter’s RJ-45 port.
EtherFast® 10/100/1000 8+1 Workgroup GigaSwitch Starter Kit
Installing The Workgroup Gigaswitch
Connecting Computers To Your Switch
Your Switch’s rear panel has eight standard RJ-45 ports, plus a Gigabit port.
Each 10/100 port automatically detects the speed and duplex of the attached
cabling to a network card, switch, hub, etc. The ports operate in either full or
half duplex, which lets you run at speeds of 200Mbps, 100Mbps, 20Mbps or
10Mbps. The Gigabit port operates at 2000 Mbps.
Each 10/100 port on your Switch can connect to workstations, file servers,
hubs, repeaters, bridges, routers or other switches. Connections to the switch
require UTP Category 5 network cabling with RJ-45 tips, not to exceed 100
meters (328 feet) in length.
To connect a computer directly to the switch, plug one end of a standard network cable into the switch, then plug the other end of the cable into the computer's network adapter.
8. Plug the other end of the cable into your network’s Gigabit hub or switch
port.
To connect the Instant Gigabit Network Adapter to the Workgroup
GigaSwitch, plug one end of the cable provided in the package into the RJ-45
port on the Instant Gigabit Network Adapter and the other into the
GigaSwitch port on the back of the Workgroup GigaSwitch.
9. Reconnect your PC’s power, then power on your computer. Your computer will automatically recognize the card and assign it a unique IRQ ("interrupt") and I/O address.
Uplinking to Other Switches and Hubs
The card installation is complete. Next, you must configure your PC’s
operating system to work with the Instant Gigabit Network Adapter.
Your GigaSwitch can be uplinked to other switches, hubs, and similar network devices, provided that those devices have an uplink port. Attach the
Category 5e cabling to the uplink port of the network device that you are
uplinking to, and plug the other end of the cable into one of the open ports
(not the Gigabit port) on your GigaSwitch.
Turn to the appropriate section for your PC’s operating system for driver
installation instructions.
Connecting Your Hardware Together and Booting Up
Plug in the GigaSwitch's AC power adapter. The Power LED will light up. As
devices make connections to the Switch’s ports, each port's corresponding
Link/Act LED will light up. The remaining LEDs will also light up according to how your connection is made, e.g. full or half duplex, 10Mbps or
100Mbps.
If the Switch experiences excessive data collisions, verify that your network
cabling is securely crimped and installed properly.
11
12
Instant Gigabit Series
Tips on
on Switching
Switching Your
Your Network
Network
Tips
EtherFast® 10/100/1000 8+1 Workgroup GigaSwitch Starter Kit
Here are some of the ways your new EtherFast® 10/100/1000 8+1 Workgroup
GigaSwitch can help you optimize your network speed.
Installing the Drivers for
Windows 95
• Speed up Nodes From Your 10BaseT Network
Overview
In a 10BaseT network, connect your hubs, file servers, and key users, such as
network administrators, directly to your Switch to channel dedicated bandwidth in full-duplex mode (if operating in full-duplex) to each station. The
Switch will have dedicated communication with all its connections simultaneously, whereas a hub will only communicate in half-duplex transfer mode and
broadcasts information to all ports.
After installing the Instant Gigabit Network
Adapter in your computer, follow these
instructions for installing the network driver. The installation procedure for the network driver will vary slightly depending on
the version of Windows 95 you are using
and your current system configuration. For
troubleshooting tips during setup, refer to
the Troubleshooting section.
• Conserving Bandwidth with 10Mbps & 100Mbps Segments
10BaseT and 100BaseTX hardware are not readily compatible, but your
10/100 Switch can designate network segments of different speeds. This
allows you to run one 10Mbps segment to serve users without a need for considerable speed, and a faster 100Mbps segment devoted to users who depend
heavily on graphics, multimedia, database, or other speed-intensive applications. With switched segmentation, your 100Mbps users will not be slowed
down by the users on the 10Mbps segment.
• Run 10Mbps Peripherals in Your Fast Ethernet Network
Most of the network peripherals in place today run at 10Mbps, since 10BaseT
has been the standard network speed to date. These peripherals, designed to
operate at 10Mbps, cannot readily communicate with 100BaseTX equipment.
A 10Mbps interface is also required for cable and DSL connections, which
are quickly becoming very popular ways to access the Internet. Your 10/100
Switch provides your 10BaseT equipment and cable and DSL lines with a
10Mbps interface while still running your Fast Ethernet devices at 100Mbps.
There are different versions of Windows 95:
• Version A
• Version B (also known as OSR2)
Note: During the installation, Windows 95 may ask
you for a computer or workgroup name. If so, turn to
step eight in Network
Component Configuration .
Once you have established
your computer and workgroup names, go back to
where you left off and continue with the installation.
The installation procedure for the network driver will vary slightly depending
on which version of Windows 95 you are using. To begin the driver installation,
and to determine which version of Windows 95 you are using:
1. Start up your PC.
2. Windows 95 will automatically detect the Network Adapter in your computer. If the Update Device Driver Wizard window appears (see next page),
you are using Windows 95 version B. If a window other than this appears,
you are using Windows 95 version A. For Windows 95 version A driver
installation, refer to the Appendix.
• Strengthen Data Transfers Through Signal Regeneration
Your Switch functions as a repeater, which regenerates data signals as they
pass through it. This feature acts as a safeguard to deter data loss and ensure
that transmissions arrive at their destination intact. Switches positioned
between hubs can preserve your data’s integrity and eliminate your need to
buy and use repeaters in your Fast Ethernet network.
13
14
Instant Gigabit Series
Installing the Driver in Windows 95 Version B
1. While the Update Device Driver Wizard window is visible, insert the Instant
Gigabit Network Adapter Driver Disk into your floppy drive and click the
Next button.
EtherFast® 10/100/1000 8+1 Workgroup GigaSwitch Starter Kit
3. If you clicked the Other Locations button, this window will appear. Enter
a:\win95. Windows will begin copying the Network Adapter’s driver files
to your PC.
4. Once Windows has located the drivers, the following window will appear.
To use this driver, click the Finish button.
2. Windows 95 will find the Linksys EG1032/EG1064 Instant Gigabit Network
Adapter driver on the disk. Click the Finish button to continue. If Windows
fails to find the driver, click the Other Locations button to browse for the
driver.
At this point, the installation may require files from your Windows 95 CDROM. If prompted, insert your Windows 95 CD-ROM into your CD-ROM
drive and enter d:\win95 in the box that appears (where “d” is the letter of
your CD-ROM drive). If you were not supplied with a Windows 95 CDROM, your Windows files may have been placed on your hard drive by
your computer manufacturer. While the location of these files may vary ,
many manufacturers use c:\windows\options\cabs as the path. Try entering this path into the box. If no files are found, check your computer’s documentation or contact your computer manufacturer for more information.
15
16
Instant Gigabit Series
5. Once the driver is installed, the following screen will appear. The default
settings should allow the Adapter to function properly. Click the OK button to continue. For more information about these settings, refer to the
Advanced Settings section of this manual.
EtherFast® 10/100/1000 8+1 Workgroup GigaSwitch Starter Kit
Installing the Drivers for
Windows 98
Overview
Overview
After physically installing the Instant Gigabit Network Adapter in your computer, follow these instructions to install the network driver. The installation
procedure for the network driver will vary slightly depending on which version
of Windows 98 you are using, and on your current system configuration. If at
any time during the installation you encounter problems, consult the
Troubleshooting section.
Installing
Driver
Installing the
the Network
Network Card’s
Adapter’s
Driver
1. If you haven’t already, start up your computer.
2. Windows 98 will automatically detect the presence of the PCI Ethernet
Controller hardware in your computer.
3. Insert the Instant Gigabit Network Adapter Driver Disk into your floppy
drive while the Add New Hardware Wizard window is visible. Click Next.
6. When asked if you want to restart your PC, remove all disks from your
computer’s drives and click the Yes button. If Windows does not ask you
to restart your PC, click the Start button, choose Shut Down, choose
Restart, then click Yes.
The Windows 95 Version B driver installation is complete. Refer to the section on Configuring the Instant Gigabit Network Adapter for Windows 95, 98,
and Millennium for more information about the setup of the Adapter.
Note: From this point on, you must provide Windows with a User
name and Password every time you are prompted to do so.
Remember to click OK to properly log into Windows. If you click
Cancel or hit the Escape (ESC) key, you will not log into the network.
17
18
Instant Gigabit Series
EtherFast® 10/100/1000 8+1 Workgroup GigaSwitch Starter Kit
4. Select Search for the best driver for your device (Recommended). Click
Next.
6. A window will open saying that Windows is now ready to install the Linksys
EG1032/EG1064 Instant Gigabit Network Adapter driver. Click Next.
5. Select Specify a location and enter a:\win98 in the drop down box. Click
Next to continue.
7. Windows will begin copying the Instant Gigabit Network Adapter’s driver
files to your PC.
At this point, the installation may require files from your Windows 98 CDROM. If prompted, insert your Windows 98 CD-ROM into your CD-ROM
drive and enter d:\win98 in the box that appears (where “d” is the letter of
your CD-ROM drive). If you were not supplied with a Windows 98 CDROM, your Windows files may have been placed on your hard drive by
your computer manufacturer. While the location of these files may vary ,
many manufacturers use c:\windows\options\cabs as the path. Try entering this path into the box. If no files are found, check your computer’s documentation or contact your computer manufacturer for more information.
Note: Windows 98 may ask you for a computer or workgroup
name . If so, see the next section, Network Component
Configuration. Once you have established your computer and
workgroup names, return to where you left off and continue with
the installation.
19
20
Instant Gigabit Series
8. Once the driver is
installed, the following
screen will appear.
The default settings
should allow the
Adapter to function
properly. Click the
OK button to continue.
For more information
about these settings,
refer to the Advanced
Settings section of this
manual.
EtherFast® 10/100/1000 8+1 Workgroup GigaSwitch Starter Kit
Installing the Drivers for
Windows Millennium
Overview
After physically installing the Instant Gigabit Network Adapter in your computer, follow these instructions to install the network driver. The installation
procedure for the network driver will depend on your current system configuration. If at any time during the installation you encounter problems, consult the
Troubleshooting section.
Installing the
the Network
NetworkAdapter’s
Card’s Driver
Installing
Drivers
1. If you haven’t already, start up your computer.
2. Windows Millennium will automatically detect the presence of the PCI
Ethernet Controller hardware in your computer.
9. When asked if you want to restart your PC, remove all disks and click Yes.
If Windows does not ask you to restart your PC, click the Start button,
choose Shut Down, choose Restart, then click Yes.
3. Insert the Instant Gigabit Network Adapter Driver Disk into your floppy
drive while the Add New Hardware Wizard window is visible. Select Specify
the location of the driver (Advanced) option. Click Next.
The Windows 98 driver installation is complete. Refer to the section on
Configuring the Instant Gigabit Network Adapter for Windows 95, 98, and
Millennium for more information about the setup of the Adapter.
Note: From this point on, you must provide Windows with a
User name and Password every time you are prompted to
do so. Remember to click OK to properly log into Windows.
If you click Cancel or hit the Escape (ESC) key, you will not
log into the network.
21
22
Instant Gigabit Series
4. Make sure that Search for the best driver for your device
(Recommended) is selected. Check the Specify a location option and
enter A:\WINME in the drop down box. Click Next.
EtherFast® 10/100/1000 8+1 Workgroup GigaSwitch Starter Kit
6. At this point, the installation may require files from your Windows
Millennium CD-ROM. If prompted, insert your Windows Millennium CDROM into your CD-ROM drive and enter d:\win9x in the box that appears
(where “d” is the letter of your CD-ROM drive). If you were not supplied
with a Windows Millennium CD-ROM, your Windows files may have been
placed on your hard drive by your computer manufacturer. While the location of these files may vary , many manufacturers use
c:\windows\options\cabs as the path. Try entering this path into the box. If
no files are found, check your computer’s documentation or contact your
computer manufacturer for more information.
7. Once the driver is installed, the following screen will appear. The default
settings should allow the Adapter to function properly. Click the OK button
to continue. For more information about these settings, refer to the
Advanced Settings section of this manual.
5. Once the driver has been located, the following screen will appear. Click the
Next button.
23
24
Instant Gigabit Series
8. The following screen will appear next, indicating that the drivers have been
installed successfully. Click the Finish button.
EtherFast® 10/100/1000 8+1 Workgroup GigaSwitch Starter Kit
Windows NT 4.0 Installation &
Setup
Overview
The following instructions will set up the Instant Gigabit Network Adapter in a
computer running NT 4.0 server/workstation. You should have your original
Windows NT CD-ROM available during the installation, as you might be asked
to supply it. Always contact your network administrator or consult your NT
documentation if you have questions.
To install the network driver for an NT 4.0 Server or Workstation
1. Log into Windows NT as an administrator (or as a user with administrative rights) .
9. When asked if you want to restart your PC, remove all disks and click Yes.
If Windows does not ask you to restart your PC, click the Start button,
choose Shut Down, choose Restart, then click Yes.
2. Click on Start, Settings, Control Panel, and then double-click on the
Network icon.
3. If you have not previously installed Windows NT networking on your computer, a message will appear that reads: Windows NT Networking is not
installed. Do you want to install it now?
• If you see this message, click Yes to install NT networking along with the
Instant Gigabit Network Adapter's network driver, and continue to the next
section.
The Windows Millennium driver installation is complete. Refer to the section on Configuring the Instant Gigabit Network Adapter for Windows 95, 98,
and Millennium for more information about the setup of the Adapter.
Note: From this point on, you must provide Windows with a
User name and Password every time you are prompted to
do so. Remember to click OK to properly log into Windows.
If you click Cancel or hit the Escape (ESC) key, you will not
log into the network.
25
• If you don't see this message, NT networking is already installed and you
should turn to the Installing the Instant Gigabit Network Adapter
Driver if Networking is Already Installed section.
26
Instant Gigabit Series
Installing NT Networking and the Network Adapter Driver
EtherFast® 10/100/1000 8+1 Workgroup GigaSwitch Starter Kit
5. Highlight the Linksys EG1032/EG1064 Instant Gigabit Network
Adapter entry in the window that appears. Click OK.
1. After clicking on Yes, the Network Setup Wizard window will appear.
2. Put a checkmark next to the Wired to the network option. Click Next.
3. Click on the Select from list... button to select a network adapter.
6. The adapter will be added to the list of installed Network Adapters. Click
Next.
4. Click on the Have Disk button. Insert the Instant Gigabit Network Adapter
Driver Disk into drive A. Type a:\ into the box on your screen and click
OK.
27
28
Instant Gigabit Series
7. Place check marks beside each listed network protocol that you wish to
install. See your Microsoft Windows NT user guide or talk to your network
administrator for more information about network protocols. When you're
finished, click Next.
EtherFast® 10/100/1000 8+1 Workgroup GigaSwitch Starter Kit
9. NT will probably ask you to supply your original Windows NT CD-ROM
or setup disks. If so, place your Windows NT CD-ROM in your CD drive.
If the CD-ROM loads a pop-up window, close it. Type D:\i386 (or the
appropriate CD-ROM drive letter) in the box and click Continue.
10. NT will ask you to choose a media type for the Instant Gigabit Network
Adapter. Choose AutoSense. You can change these settings later if needed. When finished, click OK.
8. A list of services will appear. Click Next to approve these services, followed by Next again.
Note: If you install the TCP/IP protocol, refer to your system administrator or your Windows NT documentation when installation steps that
aren’t listed in this User Guide appear. Linksys does not provide technical support for the configuration or troubleshooting of the TCP/IP
protocol.
29
30
Instant Gigabit Series
11. NT will copy the necessary network
drivers to your PC. When the copying
is complete, you will see a list of
installed bindings. Change the bindings settings if needed and click Next.
Click Next again.
Note: For information and
help on choosing your bindings, services and protocols,
ask your network administrator, or check your Windows
NT documentation.
EtherFast® 10/100/1000 8+1 Workgroup GigaSwitch Starter Kit
13. Click Finish. When asked if you want to restart your computer, remove the
Driver Disk and click Yes.
14. Once your PC has rebooted and you are logged in, double-click the
Network Neighborhood icon on your desktop. Ensure that you have
access to the network. If you do, your card has been properly installed.
• If you had previously installed a NT service pack, you must re-install that
now.
• If you need to install the TCP/IP protocol, refer to your system administrator or your Windows NT documentation. Linksys does not provide technical support for the configuration or troubleshooting of the TCP/IP protocol
12. Choose either Workgroup or Domain, depending on the type of network
you're setting up. (Your Microsoft documentation explains the difference
between Workgroups and Domains.) Click Next.
The Windows NT Installation and Setup of the Instant Gigabit Network
Adapter is complete. Do not continue on with the next set of instructions.
They are for NT users who already have their networking configured.
Note: For information and help on choosing your bindings, services and protocols, ask your network administrator, or check your Windows NT documentation.
Note: If you had previously installed an NT service pack,
you must reinstalll it now.Otherwise, you may receive
Not Enough Service Storage Space errors in the Event
Viewer.
31
32
Instant Gigabit Series
Installing the
the Instant
Instant Gigabit
GigabiMNetwork
NetworkAdapter
Adapterifif
Installing
Networking
is
Already
Installed
Networking is Already Installed
EtherFast® 10/100/1000 8+1 Workgroup GigaSwitch Starter Kit
3. When the list of available network adapters appears, click the Have Disk button.
The following steps will install the Instant Gigabit Network Adapter’s driver
software on your PC, enabling your PC to properly communicate with the card.
Remember that you must be logged on as a network administrator (or as a
user with administrative rights) to continue.
1. Click on Start, Settings, Control Panel, then double-click on the Network
icon.
2. When the networking window appears, choose the Adapters tab. Click the
Add button.
Note: If you install the TCP/IP protocol, refer to your system administrator or your Windows NT documentation when installation steps
that aren’t listed in this User Guide appear. Linksys does not provide
technical support for the configuration or troubleshooting of the
TCP/IP protocol.
4. Put the Instant Gigabit Network Adapter disk into drive A. Type a:\ into the
box on your screen and click OK.
33
34
Instant Gigabit Series
5. Highlight the Linksys EG1032/EG1064 Instant Gigabit Network Adapter
entry in the window that appears. Click OK.
EtherFast® 10/100/1000 8+1 Workgroup GigaSwitch Starter Kit
8. Click on the Protocols tab. Add any protocols you require by clicking the
Add button. (Refer to your Microsoft documentation if you have any questions on adding protocols.)
9. After your bindings, settings, and services are set, click the Close button.
10. Remove your Driver Disk and CD-ROM and click Yes to restart your PC.
6. Windows NT then asks you for the media type. Choose the AutoSense
option. When finished, click on OK. Click Close.
11. Once your PC has rebooted, double-click the Network Neighborhood icon
on your desktop. Ensure that you have access to the network. If you do,
your card has been properly installed.
• If you had previously installed a NT service pack, you must re-install that
now. Otherwise, you may receive Not Enough Service Storage Space errors
in the Event Viewer.
7. NT will probably ask you to supply your original Windows NT CD-ROM or
setup disks. Direct Windows NT to the proper location (most likely
D:\i386).
• If you need to install the TCP/IP protocol, refer to your system administrator or your Windows NT documentation. Linksys does not provide technical support for the configuration or troubleshooting of the TCP/IP protocol
The Windows NT Installation and Setup of the Instant Gigabit Network
Adapter is complete
Note: If you had previously installed an
NT service pack, you must reinstalll it
now.Otherwise, you may receive Not
Enough Service Storage Space errors
in the Event Viewer.
35
36
Instant Gigabit Series
Installing the Drivers for
Windows 2000
EtherFast® 10/100/1000 8+1 Workgroup GigaSwitch Starter Kit
3. Windows will display the Welcome to the Found New Hardware Wizard
box. Click Next.
Overview
Overview
After physically installing the Instant
Gigabit Network Adapter in your computer, follow these instructions to install the
network driver. The installation procedure
for the network driver will vary slightly
depending on which version of Windows
2000 you are using, and on your current
system configuration. If at any time during
the installation you encounter problems,
consult the Troubleshooting section.
Note: Prior to proceeding, ensure
that you are operating
Windows
2000 with administrative
rights. If you log into Windows
2000 without administrative
rights, you may run into problems during the installation.
Installing the
the Network
Driver in Adapter’s
Windows Drivers
2000
Installing
After physically installing the Instant Gigabit Network Adapter in your computer, follow these instructions to install the network driver.
4. The Install Hardware Device Drivers dialog box will appear. When
Ethernet Controller is displayed, select “Search for a suitable driver for my
device (Recommended)”. Click Next.
1. Start your computer if you haven’t already done so, and boot Windows
2000. Log in if you are asked to. You must have administrative rights to
complete this installation.
2. The Found New Hardware window will appear, indicating that Windows
has found the Adapter.
37
38
Instant Gigabit Series
5. The Locate Driver Files dialog box will appear. Select “Specify a location”. Click Next.
6. When the Found New Hardware Wizard box appears, insert the Linksys
Instant Gigabit Network Adapter Driver Disk into your floppy drive. In the
“Copy manufacturer’s files from” field, type “A:\Win2000”. Click OK.
EtherFast® 10/100/1000 8+1 Workgroup GigaSwitch Starter Kit
6. The Driver File Search Results dialog box will appear. Click Next.
7. The Completing the Found New Hardware Wizard dialog box will
appear. The following adapter name will be shown: Linksys
EG1032/EG1064 Instant Gigabit Network Adapter. Click Finish.
8. Remove the driver disk from the floppy drive.
The Windows 2000 driver installation is complete. If you want to share
files or printers, refer to your Windows 2000 documentation or check
with your system administrator.
39
40
Instant Gigabit Series
Advanced Properties
Overview
These settings are provided to help troubleshoot the Adapter and to help configure the Adapter if your situation involves unusual circumstances. The
default settings of the Adapter should work in most cases. These settings
should not be altered without a thorough understanding of the specifics of
your network. If you change ANY of these settings, there is a good possibility
that the Adapter will not function properly and/or not be recognized by the
network.
Auto Negotiate
Capabilities: (Enable
or Disable)
Auto negotiates LAN
speed and duplex.
IEEE Compliance
Enable: (Enable or
Disable)
Choosing Disable may
prevent the device from
commmunicating with
other devices set to
operate on the IEEE
Standard.
Interrupt Hold Off
Time: 1 (0-255)
Specifies the time the
adapter will wait for a
busy interrupt request.
Higher values indicate
a longer wait time for
the IRQ to be free
before repeating a request.
Jumbo Frame Size: 0 (0 - 65,535)
The IEEE 802.3 standard specifies the maximum size of Ethernet frames at
1,518 bytes. A jumbo frame is simply one having up to 65,535 bytes. In a
case where a server has to receive a massive amount of data, the required
overhead of processing the individual frames could have negative effects on
the server's CPU, and ultimately on overall server performance.
41
EtherFast® 10/100/1000 8+1 Workgroup GigaSwitch Starter Kit
Network Address:
Allows the user to configure the network address of the adapter, rather than
using the one in ROM. If not specified, the address on the adapter will be
used.
Network Media:
Specifies the maximum speed at which the adapter will try to negotiate a
connection.
Offload Rx IP Checksum: Enabled
Offload Rx TcP Checksum: Enabled
Offload Rx UDP Checksum: Enabled
Offload Tx IP Checksum: Enabled
Offload Tx TCP Checksum: Enabled
Offload Tx UDP Checksum: Enabled
The above commands allow offloading various Tx and Rx processes to the
Instant Gigabit Network Adapter, freeing up system resources.
Pause Frames Count:
Flow control uses pause frames to communicate buffer status between linked
transmitting and receiving devices (transmitters and receivers). A receiver
sends a pause frame to tell a transmitter to stop transmitting data frames for a
specified period, allowing the receiver's input port buffers to empty.
Pause Frames High Threshold:
When a transmitter receives pause frames, it suspends transmission for the
specified period or until the High Threshold is reached.
Receive Drain Threshold:
Number of bytes in the current packet being drained from the rxDataFIFO
that are in fact currently in the rxDataFIFO (Note: packets larger than FIFO
size, this number will never be greater than the FIFO size).
Transmit Buffer Count: 1024 (64 - 4096)
This specifies number of transmit buffers to configure.
Transmit Drain Threshold:
This sets the maximum packet size that can be handled by the adapter since
transmit packets cannot span buffers. If not specified, this will default
depending on the amount of SRAM available and the maximum packet size
supported by the adapter.
Transmit Fill Threshold:
This setting determines the maximum number of transmits which may be
queued.
42
Instant Gigabit Series
Configuring The Instant Gigabit
Network Adapter
Configuring the Adapter for Windows 95, 98, and Millennium
1.
Once you are back at the Windows desktop, click on your taskbar's Start
button, then Settings, then Control Panel, and then double-click the
Network icon.
EtherFast® 10/100/1000 8+1 Workgroup GigaSwitch Starter Kit
2. The Network window will appear (below).
Click on the Configuration tab. A window
similar to the one below will appear. There
may be other components listed in addition
to the ones shown below (for example, Dialup Adapter), which is normal. If any of the
components shown below are missing, however, you’ll need to manually install them. If
that’s the case, refer to the Manually
Installing the Network Components section.
Note: If you need to
install the TCP/IP
Protocol, refer to the
section on Installing
TCP/IP of this manual.
• Client for Microsoft
Networks
• Linksys EG1032/EG1064
Instant Gigabit Network
Adapter
• IPX/SPX-compatible
Protocol
• NetBEUI
• TCP/IP
3. Click
on
the
Configuration tab, followed by the File and
Print Sharing button.
The File and Print
Sharing window will
appear.
4. If you would like others
to be able to access the
files on your PC's hard
drive, select I want to be Note: If you do not enable File and Print
able to give others Sharing, your PC will be invisible on the
access to my files.
network and inaccessible to other users.
5. If you would like to share your printer with other users on the network,
select I want to be able to allow others to print to my printer.
6. Click the OK button. File and Printer Sharing for Microsoft Networks
should now appear in the list of installed components.
43
44
Instant Gigabit Series
7. After ensuring that all
of the listed network
components
are
installed on your system, ensure that Client
for
Microsoft
Networks is listed in
the Primary Network
Logon box.
8. Click
on
the
Identification
tab.
Type the name of your
computer
in
the
Computer Name box.
Choose a name that is
unique from the other
computer names on the
network.
9. Type the name of your
workgroup in the
Workgroup box. The
Workgroup
name
should be the same
Workgroup Name in
use by all of the other
PCs on the network.
Use
the
same
Workgroup Name that
is in use on your other
computers. Do not click
OK when you have
completed these fields.
10. Enter a description of
your computer in the
Computer Description
box. This box is optional. Do not click OK
when you have completed these fields.
45
EtherFast® 10/100/1000 8+1 Workgroup GigaSwitch Starter Kit
11. Optional: Choose the
Access Control tab.
Ensure that Shared-level
access control is selected.
If the setting is on UserLevel access control and
you can’t change it, skip
to the Troubleshooting
section
.
Note: Your Computer
and Workgroup Names
must be fewer than 15
alphanumeric characters.
12. Click the OK button. Your system may or may not ask you for your
Windows CD-ROM or the location of the Windows installation files.
Direct Windows to D:\win95(win98 for Windows 98, win9x for
Windows Millennium where D: is your CD-ROM Drive) if you have your
Windows CD-ROM, or to C:\windows\options\cabs if you don’t.
13. Once Windows has copied the necessary files, the System Settings Change
window appears. Remove all disks from your PC and click on Yes to restart
your PC. If you don't see this window, simply shut down Windows and
restart your PC. Remember to remove the installation disk and CD-ROM,
if necessary, prior to rebooting.
14. A Logon window will appear, requiring you to enter a username and password. Make up a username and password and click OK. Do not click the
ESC or Cancel buttons, or you won't be able to log onto the network. If
the logon does not appear or if it does not allow you to log on, refer to the
Troubleshooting section.
46
Instant Gigabit Series
15. Once you are at the Windows desktop, double-click on the Network
Neighborhood icon. You should see an icon for the entire network and the
names of the other PCs on the network. Open the Entire Network icon.
• If you can see your computer along with all the other computers on
the network in Network Neighborhood, then the Windows 95 network configuration is complete. Continue on the Sharing Your Files
and Printers section if you want data from your PC to be available to
others on the network.You may stop here, however, if you wish to configure File and Printer Sharing at a later time.
• If you don't see anything at all in Network Neighborhood, press the F5
key on your keyboard a few times to refresh the screen. If that doesn’t
work, go to the Troubleshooting section.
EtherFast® 10/100/1000 8+1 Workgroup GigaSwitch Starter Kit
Appendix
Sharing Your Files and Printers
Overview
By sharing your files and printers, other PCs on your network will be able to
access the resources on your PC.
Before sharing your files and printers, you should prepare your computer to be
used with any file servers that may be on the network. If you are not using
Windows 95 or Windows 98 with an NT or NetWare file server, or if you are
not sure if you have a file server, continue below.
• If you only see your own computer in Network Neighborhood, skip to the
Troubleshooting section.
If you are using a NetWare or NT file server, refer to the Novell NetWare 3.x
Client Setup for Windows 95 or 98 or Windows 95 or 98 Client for
Windows NT section, for client setup.
• If you see all computers on the network except yours, press the F5 key a
few times. If, after a minute or so, you still can’t see your own PC, see
the Troubleshooting section.
Enabling File Sharing
• If you only see computers that are running the same operating system as
you and you don’t see any others, go to the Troubleshooting section.
1. Double-click your My Computer icon. A window of available disk drives
will appear.
2. Using your right mouse button, click once on the drive or folder that you
want to make available to other users.
3. Click on Sharing, followed by the Sharing tab. Click on Share As.
4. In the Share Name box, enter a name for the drive or folder you are sharing.
This can be any drive on your PC—floppy drive, hard drive, CD drive, zip
drive, etc.
5. Decide on the type of access that you want to give other users.
• Read-Only access allows other users to view the files on the selected drive.
• Full access allows other users to create,
Note: If you are only
change, or delete files on the selected drive.
using
your
PC to
• Depends on Password allows other users to
access
the
Internet,
it is
have Read-Only and/or Full access to the
highly
recommended
selected drive, depending on the password that
that you create passyou decide to give them.
words for your shares.
47
48
Instant Gigabit Series
6. If you want to assign access passwords, type the passwords into the Password
boxes.
7. When you're done, click on the Apply button, followed by OK. Repeat steps
1-7 for any drive or folder you desire to share on the network.
EtherFast® 10/100/1000 8+1 Workgroup GigaSwitch Starter Kit
Installing the Driver in Windows 95 Version A
1. Windows 95 will detect the Instant Gigabit Network Adapter and display a
New Hardware Found window.
You have successfully enabled File Sharing on your PC. Your selected
drives or folders can now be accessed by other network users. If a user tries
to access one of your password-protected drives or folders, he or she will
be asked for the appropriate Read-Only or Full-Access password.
Continue on if you wish to share your PC’s printer over the network.
Enabling Printer Sharing
1. Double-click on the My Computer icon.
2. Double-click the Printers folder. A window of
available printers will appear.
Note: Any printer
you wish to share
from your PC must
be physically connected to your PC.
2. Insert the Instant Gigabit Network Adapter Driver Disk into drive A.
3. Using your right mouse button, click once on the printer that you want to
share with other users. Click on Sharing, followed by the Sharing tab.
4. Click on Share As. In the Share Name box,
give a name to the printer you want to share.
If you want to assign a password to the printer so that only certain users can access it, type
a password in the Password box.
Note: Not all printers
may be shared on the
network. Others may
require special instructions. Refer to your printer’s user guide or con5. Click on the Apply button, followed by OK. tact your printer manuYour printer(s) are now shared.
facturer if you think this
may be the case with
your printer.
The Printer Sharing setup and installation is complete. Your printer can
now be accessed by other network users. The printer’s driver may have to
be installed on other PCs. Consult your printer’s documentation.
3. Select Driver from disk provided by hardware manufacturer, then click OK.
4. When asked for the location of the files, type a:\Win95 and click OK. If
Windows 95 goes straight to the desktop, refer to the Troubleshooting section.
5. Windows 95 will copy the appropriate network drivers to your PC. If
Windows 95 asks you to supply your original Windows 95 installation CDROM or setup files, enter the appropriate path for those files (e.g.: A:\,
D:\WIN95, C:\WINDOWS\OPTIONS\CABS).
6. During the installation, windows may ask you for a computer and workgroup name. Once you have established computer and workgroup names,
return here to continue with the installation.
7. After Windows 95 has completed copying the necessary files to your PC, it
may ask you to restart your computer. Remove the floppy disk and click
OK.
The Windows 95 Version A driver installation is complete. Please continue
on to Windows 95 Network Component Configuration section. Consult
your network administrator for network configuration information if necessary.
49
50
Instant Gigabit Series
Novell NetWare 3.x Client Setup for Windows 95, 98, or
Millennium
The instructions below explain how to set up the regular Novell NetWare 3.x
client for use on a Windows 95, 98, or Millennium PC. If you are installing
NetWare’s Client32 software instead, follow the instructions on page 38.
1. Follow the Windows 95 setup instructions or the Windows 98 setup instructions.
EtherFast® 10/100/1000 8+1 Workgroup GigaSwitch Starter Kit
Starting Over in Windows 95, 98, or Millennium
If you experience installation difficulties, you may need to re-install all of the
Windows networking components from scratch. The instructions below explain
how to give your PC a clean sweep so that you can retry the Instant Gigabit
Network Adapter software installation.
1. At the desktop click on the Start Button, highlight Settings, click on
Control Panel.
2. Double-click on the Network Icon.
2. Start up Windows. Click on Start, Settings, then Control Panel. Doubleclick on Network. The Network window appears. Click on the
Configuration tab.
3. In the Primary Logon Box, choose Client for NetWare Networks.
4. Under the The following network components are installed box, highlight
Client for NetWare Networks and click on the Properties button.
5. The Client for NetWare Networks Properties window appears. Under the
General tab, enter the name of your network’s Preferred Server. Assign the
First Network Drive Letter; the default is F. Make sure the Enable logon
script processing is checked.
6. Click OK. Click on the Access Control tab. Make sure the Share-level
access control option is selected; do not select User-level access control.
7. When you’re done, click OK to restart your computer.
The NetWare portion of your Windows setup is complete.
Note: The screen shot above, and the ones
on the next three pages, are examples only.
They may differ from system to system.
51
52
Instant Gigabit Series
3. If the Configuration box has a component called Dial-Up Adapter, skip
forward to step 5. If it doesn’t, continue with step 4.
4. Remove any instance of the name Linksys in the box. This includes
IPX/SPX…Linksys, NetBEUI…Linksys, and TCP/IP…Linksys. Also remove
Client for Microsoft Networks, Client for NetWare Networks, and File and
Printer Sharing for Microsoft Networks.
In some cases, removing one of these components may in turn automatically remove other components as well. If this happens, skip ahead to step
6.
53
EtherFast® 10/100/1000 8+1 Workgroup GigaSwitch Starter Kit
5. For PCs with Dial-Up Networking and/or an AOL adapter, remove any
instance of the name Linksys, all IPX/SPX protocols, all NetBEUI, all
Clients, and File and Printer Sharing for Microsoft Networks. Do not
remove Dial-Up Adapter, AOL Adapter, TCP/IP-Compatible Protocol-AOL
Adapter or TCP/IP-Compatible Protocol-Dial-Up Adapter.
6. When you have completed the removal of all unnecessary components,
click OK. When asked to restart, click No.
7. Return to the Windows Control Panel. Double-click on the System Icon.
The System Properties window will appear. Click on the Device Manager
Tab.
54
Instant Gigabit Series
8. Scroll down to the Network Adapters listing and expand it by clicking on
the plus [+] sign.
EtherFast® 10/100/1000 8+1 Workgroup GigaSwitch Starter Kit
Starting Over in Windows 2000
1. Click the Start button, choose Settings, choose Control Panel, then doubleclick the System icon.The System Properties window will open.
2. Choose the Hardware tab.
9. Remove all devices with the name Linksys in its description. (If at any
point you are asked to restart the computer, Click No).
10. Scroll down to the Other Devices listing. Click the plus [+] sign. Remove
PCI Ethernet Controller or PCI Ethernet Adapter. (If Other Devices is not
listed, proceed to the next step.)
11.Click the Close button, shut down Windows, and restart your computer.
3. Click the Device Manager button. The Device Manager window will open.
4. Click the plus sign (+) beside Network Adapters. The EG1032 or EG1064
Instant Gigabit Network Adapter listing should appear.
12.After your computer has restarted, follow the setup instructions for
Windows 95, 98, or Millennium.
55
56
Instant Gigabit Series
5. Right-click on Linksys EG1032/EG1064 Instant Gigabit Network
Adapter. A menu box should open (below).
EtherFast® 10/100/1000 8+1 Workgroup GigaSwitch Starter Kit
8. Right-click on Linksys EG1032/EG1064 Instant Gigabit Network
Adapter again. This time, select Uninstall. Click OK.
9. The Network Adapters category should be removed from the Device
Manager listing.
10. Click the OK button, and restart your computer.
Manually Installing the Network Components in Windows
9
6. First, choose Disable.
7. When asked if you want to Disable the device, click Yes.
57
58
Instant Gigabit Series
Manually Installing the Network Components in Windows
95, 98, and Millennium
There may be times when you will need to manually install missing Windows
networking components.
1. Click on Start, Settings, then Control Panel.
EtherFast® 10/100/1000 8+1 Workgroup GigaSwitch Starter Kit
IPX/SPX-compatible Protocol
Click the Add button. Choose Protocol and click the Add button. Select
Manufacturer and choose Microsoft. Under the Network Protocol box, highlight IPX/SPX-compatible protocol. If you are done installing components,
click OK. Otherwise, choose the next component you want to install. When
you have chosen all the components you wish to install, click OK and the computer will begin copying files to your system. When the installation is complete, you will be asked if you want to reboot. Click Yes.
2. Double-click the Network icon. The Network window appears.
3. Click the Configuration tab. Make sure that the following network components are installed.
• Client for Microsoft Networks
• Linksys
EG1032/EG1064
Instant GigabitTM Network
Adapter
• IPX/SPX-compatible Protocol
• NetBEUI
• TCP/IP
Note: You will most
likely need your
Windows CD-ROM to
install network components. If your CD-ROM isn’t
available, try directing Windows
to “c:\windows\options\cabs”
when asked for a file location.
There may be other components listed in addition to the ones shown above. If
any of the above components are missing, add them as follows.
Client for Microsoft Networks
If you plan on connecting to an NT file server or peer-to-peer network, click
the Add button. Highlight Client and click Add. Choose Microsoft as the manufacturer in the Network Client box. Highlight Client for Microsoft Networks.
If you are done installing components, click OK. Otherwise, choose the next
component you want to install. When you have chosen all the components you
wish to install, click OK and the computer will begin copying files to your system. When the installation is complete, you will be asked if you want to reboot.
Click Yes.
NetBEUI
Click the Add button. Select Protocol, then click Add. Under Manufacturer,
highlight Microsoft. Under Network Protocol, highlight NetBEUI. If you are
done installing components, click OK. Otherwise, choose the next component
you want to install. When you have chosen all the components you wish to
install, click OK and the computer will begin copying files to your system.
When the installation is complete, you will be asked if you want to reboot.
Click Yes.
TCP/IP
Click the Add button. Select Protocol, then click Add. Under Manufacturer,
highlight Microsoft. Under Network Protocol, highlight TCP/IP. If you are
done installing components, click OK. Otherwise, choose the next component
you want to install. When you have chosen all the components you wish to
install, click OK and the computer will begin copying files to your system.
When the installation is complete, you will be asked if you want to reboot.
Click Yes.
Client for NetWare Networks
If you plan on connecting to a Novell NetWare server (3.x), click the Add button. Highlight Client and click Add. In the Network Client window, select
Manufacturer and choose Microsoft. Highlight Client for Microsoft Networks.
If you are done installing components, click OK. Otherwise, choose the next
component you want to install. When you have chosen all the components you
wish to install, click OK and the computer will begin copying files to your system. When the installation is complete, you will be asked if you want to reboot.
Click Yes.
59
60
Instant Gigabit Series
Installing and Configuring Wake-On-LAN
Overview
The Instant Gigabit Network Adapter supports both Magic Packet and Link
Change remote wake-up events.
Magic Packet An administrator can send a “wake-up” packet to a specific PC
on the network. That computer then boots up, allowing the administrator to
access the PC’s drives. After the work is done, the PC goes into a sleep mode
(using about 10% of the normal amount of power) or shuts off completely,
depending on the management software being used.
Link Change is a remote wake up event that is triggered by any change in the
Network Adapter’s link state. If you have Wake-On-LAN networking set up on
the PC, plugging an active network cable into the LAN Card will cause the PC
to automatically turn itself on.
Motherboard Support
WOL-compatible motherboards can offer
support for a number of different WakeOn-LAN interfaces. The Instant Gigabit
Network Adapter is compatible with
PME and RWU-high. Consult the motherboard documentation that came with
your PC to find out which type of WOL
interface your computer will use to communicate with the network card. In some
cases, you may need to enable the WOL
support in your PC’s BIOS.
61
Note: Some PME-supporting
motherboards may not require
the WOL wire to be connected.
Check your PC’s documentation for more information.
EtherFast® 10/100/1000 8+1 Workgroup GigaSwitch Starter Kit
When a PCI card is used in a computer that supports Plug-and-Play, the card is
automatically configured each time the computer is booted. The card's IRQ,
I/O address, and other operating parameters are automatically assigned.
There is no easy way to change a Plug-and-Play card's IRQ and other settings
outside of the BIOS menu(s) that your computer provides. If the resources that
are assigned to your Network Adapter seem to conflict with other devices in
your computer, you will need to use your system's BIOS to resolve the conflicts. If you have problems configuring your BIOS or resolving IRQ or other
hardware conflicts, consult your computer’s manual or contact your PC's manufacturer for BIOS setup and configuration directions.
Here are some general guidelines to follow when installing a PCI card (such as
the Network Adapter) into your computer:
1. The Instant Gigabit Network Adapter should be used in a 32-bit PCI slot that
supports PCI Bus Mastering. It cannot be plugged into a PCI Bus Slave slot.
Consult your motherboard's documentation for more information on master
and slave slots.
2. When using NT, set your system’s PNP OS option in the BIOS settings to
MANUAL or DISABLE. NT is not a Plug-and-Play OS, and will not usually recognize LAN cards if they are set to be automatically detected and configured. If you need to configure your PC's BIOS in order to resolve an IRQ
or other conflict with the EtherFast card, there are a few possibilities:
About Plug-and-Play PCI Technology
No Changes Allowed Your PC may not allow you to change the IRQ value(s) of
the PCI slot(s). In this case, you will ONLY be able to use the IRQ and I/O values that have been pre-assigned to each slot. The popular BIOS from Phoenix,
for example, does not generally allow you to modify BIOS-assigned IRQ settings.
The Instant Gigabit Netword Adapter is designed to run in a 32-bit desktop
computer equipped with PCI expansion slots. The EG1032 is built to the PCI
2.2 standard.
Jumper Changes You may be able to change the IRQ & I/O values for a given
PCI slot by setting jumpers on your PC motherboard. Please refer to your PC's
motherboard user guide for specific instructions.
Short for Peripheral Components Interconnect, PCI is a technology that
allows special Plug-and-Play expansion cards to be automatically configured
by a computer’s BIOS (Basic Input/Output System) once they have been
installed. (Refer to your computer’s user guide for more information about its
BIOS.)
Menu Changes Your PC may allow you to change the IRQ & I/O values for a
given PCI slot by accessing the PC's BIOS setup menu. Please refer to your
PC's user guide for specific details. The BIOSs from companies like AMI and
Award are fully customizable from their BIOS menus, for example.
62
Instant Gigabit Series
Linux, Open Source and Beta Operating Systems
Linksys does not provide technical support for Linux, BSD, or other freeware
and open source operating systems. Although many Linksys products have
been proven to perform well under Linux and other freeware OSes, technical
support for setup and troubleshooting is not provided. For information on
where to find device drivers and setup instructions for Linux and other freeware
OSes, visit the support pages and FAQ files on the Linksys website at
www.linksys.com.
Linksys does not provide technical support for Beta operating systems.
Twisted-Pair Cabling
There are different grades, or categories, of twisted-pair cabling. Category 5e
is the most reliable and is highly recommended (and is required for Gigabit
connections). Category 3 is a good second choice. Straight-through cables are
used for connecting computers to a hub. Crossover cables are used for connecting a hub to another hub (there is an exception: some hubs have a built-in
uplink port that is crossed internally, which allows you to link or connect hubs
together with a straight-through cable instead).
EtherFast® 10/100/1000 8+1 Workgroup GigaSwitch Starter Kit
Troubleshooting
This section provides possible solutions to problems regarding the installation
and operation of the Instant Gigabit Network Adapter. If you can’t find an
answer here, check the Linksys website at www.linksys.com.
s
1.Windows does not detect the Instant Gigabit Network Adapter installed, or it
attempts to reinstall the Network Adapter each time you restart your PC.
• You might not have inserted the PCI card correctly or securely into the
appropriate slot of your computer. Make sure that the card is securely
inserted in the appropriate slot.
• Insert your card into an alternate PCI slot.
• You may have previously aborted a new hardware setup. Go to the Starting
Over in Windows 95, 98, Millennium or 2000 section.
• The motherboard in your system might not be Plug-and-Play compatible, or
your PC’s Plug-and-Play settings may not be enabled, or the motherboard
may have Plug-and-Play options not supported by Windows 95/98. If you
are not sure, contact your PC’s manufacturer.
2. Windows can’t locate the driver for the Instant Gigabit Network Adapter.
• You may have inserted the wrong diskette into your PC’s drive.
• The diskette may be defective or files may be missing. Make sure the disk
has a few files in a:\ starting with EG10 or a folder called Win95 or Win98.
3. The Windows Logon screen doesn’t appear after you restart your computer.
• Click on Start, Shut Down, then Close All Programs and Logon as a
Different User, (in Windows 98, select Log Off). If this doesn’t solve the
problem, your PC’s manufacturer may have disabled Windows’ networking.
Contact your computer’s manufacturer for help.
4. After entering a username and password, a window appears that reads, “No
Domain Server could be found to validate your Username and Password.”
• Click on Start, Settings, Control Panel. Double-click on Network. Click on
the Configuration tab. Under The Following Network Components are
Installed box, highlight Client for Microsoft Networks and click on the
Properties button. Once you are in the Client For Microsoft Networks
Properties window, make sure that Log on to Windows NT Domain is
unchecked. Once you have made sure that it is unchecked, click on the OK
button and restart your computer.
63
64
Instant Gigabit Series
5. On the Access Control Tab, User Level Access is selected, but Shared Level
Access is grayed out and not accessible.
• You previously had your primary network logon set to Client for NetWare
Networks. On the Configuration tab of the Network Properties window,
ensure that your primary network logon is set to Client for Microsoft
Networks.
• Your personal web server PC or Microsoft Front Page may require you to
choose a user level for security reasons.
6. In Network Neighborhood you can only see yourself and no other computers on
the network.
• Make sure that the cables are connected correctly. Make sure you are getting Link or Activity lights on both the EtherFast Card and your hub. Try
changing to a new cable that you know is working.
• Your workgroup name may be different from other computers on your network. Make sure each PC on the network is using the same workgroup
name and protocol.
• Try using the Find Computer function.
7. In Network Neighborhood, you can see all other computers on the network but
not yourself, and all other computers can see each other and not your computer.
• You may not have enabled File and Printer Sharing.
• The network card might not be setup properly. Try reinstalling the card’s
drivers. To clean your system of the old installation, follow the procedure in
the Starting Over in Windows 95, 98, Millennium or 2000 section and
then re-install.
8. Network Neighborhood is Empty.
• Verify that your Microsoft Client is installed. See the Windows 95 or 98
setup instructions in this guide for directions. Verify that you have logged
in correctly. Refresh the screen by pressing F5 several times.
9. You receive DHCP Errors in Windows.
• If you are connecting to a DHCP server, check your cabling connection. If
your network requires TCP/IP, check with your network administrator or
your Windows documentation for proper settings.
• If you don’t have a DHCP server on your network and your network does
not require TCP/IP, you may remove the TCP/IP Protocol from Windows’
networking. To do this, click on Start, Settings, Control Panel, then double-click on Network. Click once on the component entry with the words
TCP/IP and Linksys or TCP/IP, then click on the Remove button. Click OK
when finished and restart your PC.
65
EtherFast® 10/100/1000 8+1 Workgroup GigaSwitch Starter Kit
10. In Network Neighborhood you can only see computers running the same operating system as your computer (i.e., your PC is running Windows 95 and it can
only see other Windows 95 computers and not any computer running Windows
98).
• Choose Start, Find, Computer and type the name of the computer in the
Network Neighborhood window that appears and click Find Now.
• Next, make sure that the you are using the same protocol(s) and workgroup
name on the 95 and 98 computers. To do this, click Start, Settings, Control
Panel on two computers running different Windows operating systems.
Click on the Network icon, choose the Configuration tab, then click on the
Identification tab for Workgroup name. Compare the protocols on both
computers and make sure that they are the same. If any protocols are missing, refer to page 60 to install any needed protocol(s).
• If all computers are using the same protocol(s) and Workgroup name, and
Windows 95 computers can't see Windows 98 computers, enable NetBIOS
on all the computers using Windows 95 and 98. Follow these instructions:
• The IPX/SPX-compatible protocol should be installed on all Windows computers (see the Manually Installing the Network Components in
Windows 95, 98, and Millennium section if you need to add this protocol). Bring up the properties of the IPX/SPX-compatible protocol by clicking on Start, Settings, Control Panel, then double-click the Network icon.
Choose the Configuration tab and highlight IPX/SPX-compatible Protocol.
Click on Properties. Now, to install NetBIOS, click on the NetBIOS tab. Put
a check next to I want to enable NetBIOS over IPX/SPX. Click OK, then
OK again. Windows will copy the appropriate files to your computer. When
asked to restart your PC, remove any floppy disks and click OK. Be sure to
do this on all of your computers that are having trouble seeing your entire
network.
11. The workgroup, protocols, cabling and driver are all working properly, but the
PC uses an AMD processor and it can only see itself in network neighborhood.
• In some instances with PCs using AMD processors, the IRQ assigned to the
card by the BIOS (as it gets listed on the bootup screens of most PCs) doesn't correspond to the IRQ assigned by Windows. This can be fixed by disabling the IRQ holder for PCI Steering in the Windows Device Manager.
Refer to your PC's documentation for instructions or you can follow the
suggested instructions below. Keep in mind that this procedure will vary
depending on your computer’s configuration.
• Click on Start, Settings, Control Panel, then double click the System icon.
Click on the Device Manager tab. Open System Devices, then open PCI
Bus.
66
Instant Gigabit Series
• Click on the IRQ Steering tab. Remove the check from Use IRQ Holder
and click OK. Windows will ask you to restart the PC (if it doesn’t ask
you, then reboot the PC manually).
• After the computer boots up, Windows will try to re-detect the PCI
Steering. Continue rebooting the PC until Windows stops detecting new
hardware and settings for PCI Steering. This normally takes a total of four
reboots.
EtherFast® 10/100/1000 8+1 Workgroup GigaSwitch Starter Kit
Glossary
10BaseT - An Ethernet standard that uses twisted wire pairs.
100BaseTX - IEEE physical layer specification for 100 Mbps over two pairs of
Category 5 UTP or STP wire.
1000BASE-T - provides half-duplex (CSMA/CD) and full-duplex 1000Mbps
Ethernet service over Category 5 links as defined by
ANSI/TIA/EIA-568-A. Topology rules for 1000BASE-T are the same as those
used for 100BASE-TX. Category 5 link lengths are limited to
100 meters by the ANSI/TIA/EIA-568-A cabling standard. Only one
CSMA/CD repeater will be allowed in a collision domain.
Adapter - Printed circuit board that plugs into a PC to add to capabilities or
connectivity to a PC. In a networked environment, a network interface card
(NIC) is the typical adapter that allows the PC or server to connect to the
intranet and/or Internet.
Auto-negotiate - To automatically determine the correct settings. The term is
often used with communications and networking. For example, Ethernet
10/100 cards, hubs and switches can determine the highest speed of the node
they are connected to and adjust their transmission rate accordingly.
Backbone - The part of a network that connects most of the systems and networks together and handles the most data.
Bandwidth - The transmission capacity of a given facility, in terms of how
much data the facility can
transmit in a fixed amount of time; expressed in bits per second (bps).
Bit - A binary digit. The value - 0 or 1-used in the binary numbering system.
Also, the smallest form of data.
Boot - To cause the computer to start executing instructions. Personal computers contain built-in instructions in a ROM chip that are automatically executed
on startup. These instructions search for the operating system, load it and pass
control to it.
67
68
Instant Gigabit Series
CAT 3 - ANSI/EIA (American National Standards Institute/Electronic
Industries Association) Standard 568 is one of several standards that specify
"categories" (the singular is commonly referred to as "CAT") of twisted pair
cabling systems (wires, junctions, and connectors) in terms of the data rates
that they can sustain. CAT 3 cable has a maximum throughput of 16 Mbps and
is usually utilized for 10BaseT networks.
CAT 5 - ANSI/EIA (American National Standards Institute/Electronic
Industries Association) Standard 568 is one of several standards that specify
"categories" (the singular is commonly referred to as "CAT") of twisted pair
cabling systems (wires, junctions, and connectors) in terms of the data rates
that they can sustain. CAT 5 cable has a maximum throughput of 100 Mbps
and is usually utilized for 100BaseTX networks.
CAT 5e - The additional cabling performance parameters of return loss and farend crosstalk (FEXT) specified for 1000BASE-T and not specified for
10BASE-T and 100BASE-TX are related to differences in the signaling implementation. 10BASE-T and 100BASE-TX signaling is unidirectional-signals
are transmitted in one direction on a single wire pair. In contrast, Gigabit
Ethernet is bi-directional-signals are transmitted simultaneously in both directions on the same wire pair; that is, both the transmit and receive pair occupy
the same wire pair .
CPU (Central Processing Unit) - The computing part of the computer. Also
called the "processor," it is made up of the control unit and ALU.
Data Packet - One frame in a packet-switched message. Most data communications is based on dividing the transmitted message into packets. For example,
an Ethernet packet can be from 64 to 1518 bytes in length.
Default Gateway - The routing device used to forward all traffic that is not
addressed to a station within the local subnet.
DHCP (Dynamic Host Configuration Protocol) - A protocol that lets network
administrators manage centrally and automate the assignment of Internet
Protocol (IP) addresses in an organization's network. Using the Internet's set of
protocol (TCP/IP), each machine that can connect to the Internet needs a
unique IP address. When an organization sets up its computer users with a connection to the Internet, an IP address must be assigned to each machine.
Without DHCP, the IP address must be entered manually at each computer and,
if computers move to another location in another part of the network, a new IP
address must be entered. DHCP lets a network administrator supervise and distribute IP addresses from a central point and automatically sends a new IP
address when a computer is plugged into a different place in the network.
69
EtherFast® 10/100/1000 8+1 Workgroup GigaSwitch Starter Kit
DHCP uses the concept of a "lease" or amount of time that a given IP address
will be valid for a computer. The lease time can vary depending on how long a
user is likely to require the Internet connection at a particular location. It's especially useful in education and other environments where users change frequently. Using very short leases, DHCP can dynamically reconfigure networks
in which there are more computers than there are available IP addresses.
DHCP supports static addresses for computers containing Web servers that
need a permanent IP address.
Dynamic IP Address - An IP address that is automatically assigned to a client
station in a TCP/IP network, typically by a DHCP server. Network devices that
serve multiple users, such as servers and printers, are usually assigned static IP
addresses.
Dynamic Routing - The ability for a router to forward data via a different route
based on the current conditions of the communications circuits. For example, it
can adjust for overloaded traffic or failing lines and is much more flexible than
static routing, which uses a fixed forwarding path.
Ethernet - IEEE standard network protocol that specifies how data is placed on
and retrieved from a common transmission medium. Has a transfer rate of 10
Mbps. Forms the underlying transport vehicle used by several upper-level protocols, including TCP/IP and XNS.
Fast Ethernet - A 100 Mbps technology based on the 10Base-T Ethernet
CSMA/CD network access method.
FTP (File Transfer Protocol) - A protocol used to transfer files over a TCP/IP network (Internet, UNIX, etc.). For example, after developing the HTML pages for a
Web site on a local machine, they are typically uploaded to the Web server using
FTP.
FTP includes functions to log onto the network, list directories and copy files. It
can also convert between the ASCII and EBCDIC character codes. FTP operations
can be performed by typing commands at a command prompt or via an FTP utility running under a graphical interface such as Windows. FTP transfers can also
be initiated from within a Web browser by entering the URL preceded with ftp://.
Unlike e-mail programs in which graphics and program files have to be
"attached," FTP is designed to handle binary files directly and does not add the
overhead of encoding and decoding the data.
70
Instant Gigabit Series
Full Duplex - The ability of a device or line to transmit data simultaneously in
both directions.
Gateway - A device that interconnects networks with different, incompatible communications protocols.
Half Duplex - Data transmission that can occur in two directions over a single
line, but only one direction at a time.
Hardware - Hardware is the physical aspect of computers, telecommunications,
and other information technology devices. The term arose as a way to distinguish
the "box" and the electronic circuitry and components of a computer from the program you put in it to make it do things. The program came to be known as the software.
Hub - The device that serves as the central location for attaching wires from
workstations. Can be passive, where there is no amplication of the signals; or
active, where the hubs are used like repeaters to provide an extension of the
cable that connects to a workstation.
IEEE - The Institute of Electrical and Electronics Engineers. The IEEE
describes itself as "the world's largest technical professional society -- promoting the development and application of electrotechnology and allied sciences
for the benefit of humanity, the advancement of the profession, and the wellbeing of our members."
The IEEE fosters the development of standards that often become national and
international standards. The organization publishes a number of journals, has
many local chapters, and several large societies in special areas, such as the
IEEE Computer Society.
IP Address - In the most widely installed level of the Internet Protocol
(Internet Protocol) today, an IP address is a 32-binary digit number that identifies each sender or receiver of information that is sent in packet across the
Internet. When you request an HTML page or send e-mail, the Internet
Protocol part of TCP/IP includes your IP address in the message (actually, in
each of the packets if more than one is required) and sends it to the IP address
that is obtained by looking up the domain name in the Uniform Resource
Locator you requested or in the e-mail address you're sending a note to. At the
other end, the recipient can see the IP address of the Web page requestor or the
e-mail sender and can respond by sending another message using the IP address
it received.
71
EtherFast® 10/100/1000 8+1 Workgroup GigaSwitch Starter Kit
IPCONFIG - A Windows NT or 2000 utility that provides for querying, defining and managing IP addresses within a network. A commonly used utility for
configuring networks with static IP addresses.
IPSec - IPSec (Internet Protocol Security) is a developing standard for security at the network or packet processing layer of network communication. A big
advantage of IPSec is that security arrangements can be handled without
requiring changes to individual user computers.
LAN - A local area network (LAN) is a group of computers and associated
devices that share a common communications line and typically share the
resources of a single processor or server within a small geographic area (for
example, within an office building).
Latency - The time delay between when the first bit of a packet is received and
the last bit is forwarded.
MAC Address - The MAC (Media Access Control) address is your computer's
unique hardware number.
Mbps (MegaBits Per Second) - One million bits per second; unit of measurement for data transmission.
mIRC - mIRC runs under Windows and provides a graphical interface for logging onto IRC servers and listing, joining and leaving channels.
Motherboard - A motherboard is the physical arrangement in a computer that
contains the computer's basic circuitry and components.
Network - A system that transmits any combination of voice, video and/or data
between users.
Network Mask - Also known as the "Subnet Mask".
NIC (Network Interface Card) - A board installed in a computer system, usually a PC, to provide network communication capabilities to and from that computer system. Also called an adapter.
72
Instant Gigabit Series
PCI (Peripheral Component Interconnect) - A peripheral bus commonly used
in PCs, Macintoshes and workstations. It was designed primarily by Intel and
first appeared on PCs in late 1993. PCI provides a high-speed data path
between the CPU and peripheral devices (video, disk, network, etc.). There are
typically three or four PCI slots on the motherboard. In a Pentium PC, there is
generally a mix of PCI and ISA slots or PCI and EISA slots. Early on, the PCI
bus was known as a "local bus."
STP (Shielded Twisted Pair) - Telephone wire that is wrapped in a metal sheath
to eliminate external interference.
PCI provides "plug and play" capability, automatically configuring the PCI
cards at startup. When PCI is used with the ISA bus, the only thing that is generally required is to indicate in the CMOS memory which IRQs are already in
use by ISA cards. PCI takes care of the rest.
TCP (Transmission Control Protocol) - A method (protocol) used along with
the Internet Protocol (Internet Protocol) to send data in the form of message
units between computers over the Internet. While IP takes care of handling the
actual delivery of the data, TCP takes care of keeping track of the individual
units of data (called packet) that a message is divided into for efficient routing
through the Internet.
PCI allows IRQs to be shared, which helps to solve the problem of limited IRQs
available on a PC. For example, if there were only one IRQ left over after ISA
devices were given their required IRQs, all PCI devices could share it. In a PCIonly machine, there cannot be insufficient IRQs, as all can be shared.
Port - A pathway into and out of the computer or a network device such as a
switch or router. For example, the serial and parallel ports on a personal computer are external sockets for plugging in communications lines, modems and
printers.
PPPoE (Point to Point Protocol over Ethernet) - A method used mostly by DSL
providers for connecting personal computers to a broadband modem for
Internet access. It is similar to how a dial-up connection works but at higher
speeds and quicker access.
RJ-11 (Registered Jack-11) - A telephone connector that holds up to six wires.
The RJ-11 the common connector used to plug a telephone into a wall.
RJ-45 (Registered Jack-45) - A connector similar to a telephone connector that
holds up to eight wires, used for connecting Ethernet devices.
Static IP Address - A permanent IP address that is assigned to a node in an IP
or a TCP/IP network.
Static Routing - Forwarding data in a network via a fixed path. Static routing
cannot adjust to changing line conditions as can dynamic routing.
Storage - The semi-permanent or permanent holding place for digital data.
73
EtherFast® 10/100/1000 8+1 Workgroup GigaSwitch Starter Kit
Subnet Mask - The method used for splitting IP networks into a series of subgroups, or subnets. The mask is a binary pattern that is matched up with the IP
address to turn part of the host ID address field into a field for subnets.
TCP/IP - Transmission Control Protocol/Internet Protocol (TCP/IP) is the
basic communication language or protocol of the Internet. It can also be used
as a communications protocol in a private network (either an intranet or an
extranet). When you are set up with direct access to the Internet, your computer is provided with a copy of the TCP/IP program just as every other computer
that you may send messages to or get information from also has a copy of
TCP/IP.
TFTP (Trivial File Transfer Protocol) - A version of the TCP/IP FTP protocol
that has no directory or password capability.
Throughput - The amount of data moved successfully from one place to
another in a given time period.
TX Rate - Transmission Rate.
UDP (User Datagram Protocol) - A communications method (protocol) that
offers a limited amount of service when messages are exchanged between computers in a network that uses the Internet Protocol (IP). UDP is an alternative
to the Transmission Control Protocol (TCP) and, together with IP, is sometimes
referred to as UDP/IP. Like the Transmission Control Protocol, UDP uses the
Internet Protocol to actually get a data unit (called a datagram) from one computer to another. Unlike TCP, however, UDP does not provide the service of
dividing a message into packets (datagrams) and reassembling it at the other
end. Specifically, UDP doesn't provide sequencing of the packets that the data
arrives in. This means that the application program that uses UDP must be able
to make sure that the entire message has arrived and is in the right order.
74
Instant Gigabit Series
Network applications that want to save processing time because they have very
small data units to exchange (and therefore very little message reassembling to
do) may prefer UDP to TCP.
Upgrade - To replace existing software or firmware with a newer version.
Upload - To receive a file transmitted over a network. In a communications session, upload means transmit, download means receive.
URL (Uniform Resource Locator) - The address that defines the route to a file
on the Web or any other Internet facility. URLs are typed into the browser to
access Web pages, and URLs are embedded within the pages themselves to
provide the hypertext links to other pages.
UTP - Unshielded twisted pair is the most common kind of copper telephone
wiring. Twisted pair is the ordinary copper wire that connects home and many
business computers to the telephone company. To reduce crosstalk or electromagnetic induction between pairs of wires, two insulated copper wires are
twisted around each other. Each signal on twisted pair requires both wires.
Since some telephone sets or desktop locations require multiple connections,
twisted pair is sometimes installed in two or more pairs, all within a single
cable.
VLAN (Virtual LAN) - A logical association that allows users to communicate
as if they were physically connected to a single LAN, independent of the actual physical configuration of the network.
Wake-on-LAN - Wake on LAN is a technology that allows a network professional to remotely power on a computer or to wake it up from sleep mode.
EtherFast® 10/100/1000 8+1 Workgroup GigaSwitch Starter Kit
Specifications
Specifications for EG1032
Model
EG1032
Standards
IEEE 802.3, IEEE 802.3ab, IEEE 802.3x
PCI 2.1, PCI 2.2, ACPI
Protocol
CSMA/CD
Ports:
1 Straight-Through
10BaseT/100BaseTX/ 1000BaseT RJ-45 Port
Interface:
PCI Local Bus Version 2.1 or better
Cabling Type:
10BaseT: UTP/STP Category 3 or better
100BaseTX: UTP/STP Category 5 or better
1000BaseT: UTP/STP Category 5e or better
Topology:
Star
Speed:
Full Duplex: 20Mbps, 200Mbps or 2000Mbps
Half Duplex:10Mbps, 100Mbps or 1000Mbps
WOL Support:
Remote Wake-Up
Power Management Event (PME)
Bus Type:
32-Bit PCI
LEDs:
Link/Activity, 1000Mbps
WAN - A communications network that covers a wide geographic area, such as
state or country.
WINIPCFG - Configuration utility based on the Win32 API for querying,
defining and managing IP addresses within a network. A commonly used utility for configuring networks with static IP addresses.
Workgroup - Two or more individuals that share files and databases.
75
76
Instant Gigabit Series
Specifications for EG0801W
77
Model Number
EG0801W
Standards
IEEE 802.3, IEEE 802.3ab, IEEE 802.3u, IEEE
802.3x
EtherFast® 10/100/1000 8+1 Workgroup GigaSwitch Starter Kit
Environmental
EG1032
Dimensions
6.3” x 4.3” x 1.4” (160mm x 110mm x 35mm)
Unit Weight
9 oz. (.25kg)
Protocol
CSMA/CD
Power
3.3VDC, 3A
Ports
Eight 10/100 RJ-45 Ports, One Gbps FullDuplex Switch Port
Certifications
FCC Class B, CE Mark Commercial
Operating Temp
32ºF to 131ºF (0ºC to 55ºC)
Cabling Type
10BaseT: UTP/STP Category 3 or better
100BaseTX: UTP/STP Category 5 or better
1000BaseT: UTP/STP Category 5e or better
Storage Temp
-4ºF to 158ºF (-40ºC to 70ºC)
Operating Humidity
10% to 85% Non-Condensing
Storage Humidity
5% to 90% Non-Condensing
Topology
Star
Speed Per Port
10Mbps or 100Mbps (Half Duplex)
20Mbps or 200Mbps (Full Duplex)
1000Mbps or 2000Mbps (Gigabit Port)
LEDs
Power, 1000, 10/100, FD/Col, Link/Act, Full/Half
Duplex, 1000 Link/Act, 1000 FD/Col
EG0801W
Dimensions
7.31” x 6.06” x 1.88” (186mm x 154mm x 48mm)
Unit Weight
13.6 oz. (.39Kg)
Power
3.3V DC, 5A
Certifications
FCC Class B,
CE Mark Commercial
Operating Temp.
32ºF to 122ºF (0ºC to 50ºC)
Storage Temp.
-4ºF to 158ºF (-20ºC to 70ºC)
Operating Humidity
10% to 85% Non-Condensing
Storage Humidity
5% to 90% Non-Condensing
78
Instant Gigabit Series
EtherFast® 10/100/1000 8+1 Workgroup GigaSwitch Starter Kit
Warranty Information
Contact Information
BE SURE TO HAVE YOUR PROOF OF PURCHASE AND A BARCODE
FROM THE PRODUCT'S PACKAGING ON HAND WHEN CALLING.
RETURN REQUESTS CANNOT BE PROCESSED WITHOUT PROOF OF
PURCHASE.
For help with the installation or operation of this product, contact Linksys
Customer Support at one of the phone numbers or Internet addresses below.
IN NO EVENT SHALL LINKSYS’ LIABILITY EXCEED THE PRICE PAID
FOR THE PRODUCT FROM DIRECT, INDIRECT, SPECIAL, INCIDENTAL, OR CONSEQUENTIAL DAMAGES RESULTING FROM THE USE
OF THE PRODUCT, ITS ACCOMPANYING SOFTWARE, OR ITS DOCUMENTATION. LINKSYS DOES NOT OFFER REFUNDS FOR ANY PRODUCT.
Information
Tech Support and RMA Issues
Fax
Email
Web
FTP Site
800-546-5797 (LINKSYS)
800-326-7114
949-261-1288
949-261-8868
[email protected]
http://www.linksys.com
ftp.linksys.com
LINKSYS OFFERS CROSS SHIPMENTS, A FASTER PROCESS FOR PROCESSING AND RECEIVING YOUR REPLACEMENT. LINKSYS PAYS
FOR UPS GROUND ONLY. ALL CUSTOMERS LOCATED OUTSIDE OF
THE UNITED STATES OF AMERICA AND CANADA SHALL BE HELD
RESPONSIBLE FOR SHIPPING AND HANDLING CHARGES. PLEASE
CALL LINKSYS FOR MORE DETAILS.
79
80
h t t p : / / w w w. l i n k s y s . c o m
© Copyright 2001 Linksys, All Rights Reserved.
Printed in the USA.