1
READ AND UNDERSTAND THESE INSTRUCTIONS BEFORE INSTALLING FIXTURE
This fixture is intended for installation in accordance with the National Electrical Code and local regulations.
To assure full compliance with local codes and regulations, check with your local electrical inspector before
installation. To prevent electrical shock, turn off electricity at fuse box before proceeding.
Retain these instructions for maintenance reference.
INSTRUCTION SHEET NO.
IS:46531
0198
Page 1 of 3
INSTALLATION OF ALICE BATH LIGHTING SERIES
UNPACKING FIXTURE:
•
•
Carefully unpack FIXTURE HOUSING, DIFFUSER DOOR and PARTS BAG from carton.
Gently remove protective plastic film from outside of FIXTURE HOUSING and any protective paper or plastic film from DIFFUSER DOOR
and discard.
FIXTURE INSTALLATION:
The Alice Bath Series can be installed in a variety of ways:
• Directly to standard electrical outlet boxes.
• End to end (continuous runs), using Linear Adapter Kit provided with fixture.
• Using Wall Wiring Mounting Kit (Lightolier Cat. No. 46700) for outlet boxes installed above existing mirrors.
WARNING: (RISK OF FIRE) FOR SUPPLY CONNECTIONS USE WIRE RATED MINIMUM 90°C. MOST DWELLINGS BUILT
BEFORE 1985 HAVE SUPPLY WIRE RATED 60°C. CONSULT A QUALIFIED ELECTRICIAN BEFORE INSTALLATION.
INSTALLATION TO STANDARD OUTLET BOXES:
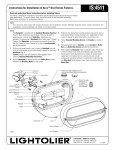
1. Remove two REFLECTOR MOUNTING SCREWS and gently lift
REFLECTOR from FIXTURE HOUSING to expose wiring. (Fig. 1)
2. Remove round center KNOCK-OUT HOLE in FIXTURE HOUSING
and snap PLASTIC BUSHING into opening. (Fig. 1 & Fig. 2)
3. Remove the appropriate slotted KNOCK-OUTS in FIXTURE
HOUSING to match the outlet box mounting holes.
4. Carefully pull supply wires from outlet box through CENTER
KNOCK-OUT HOLE and mount FIXTURE HOUSING to outlet box
using outlet box screws (provided with outlet box).
Note: In addition to outlet box mounting, it is also recommended
to use AUXILIARY MOUNTING HOLES at each end of
FIXTURE HOUSING. (Fig. 1) Use appropriate mounting
hardware for the wall surface (i.e.: wood screws, toggle
bolts, molly screws, etc.).
5. Make electrical connections: black fixture lead or fixture lead
without tracer mark to black (hot) supply lead; white fixture lead
or fixture lead with tracer mark to white (neutral) supply lead.
Green fixture wire is a ground wire and must be connected to a
ground screw or ground lead within outlet box. Use wire nuts
(local hardware item) to make connections. Carefully push all
wire connections through center opening making certain all
connections are inside of outlet box.
6. Re-install REFLECTOR ASSEMBLY by placing two TABS on
REFLECTOR into SLOTS in FIXTURE HOUSING and pivot REFLECTOR back until HOLES in REFLECTOR ASSEMBLY aligns with
HOLES in FIXTURE HOUSING. Secure REFLECTOR ASSEMBLY in
position by re-installing two REFLECTOR MOUNTING SCREWS.
MOUNTING
HOLE
REFLECTOR
MOUNTING
SCREW
REFLECTOR
FIXTURE
HOUSING
OUTLET BOX
SCREWS
SLOTTED
KNOCK-OUTS
(provided with
outlet box)
CENTER KNOCKOUT WITH
PLASTIC BUSHING
WIRE NUTS
OUTLET BOX
TAB
SLOT
END TO END (CONTINUOUS RUNS) INSTALLATION:
1. Remove two REFLECTOR MOUNTING SCREWS and gently lift
REFLECTOR from FIXTURE HOUSING to expose wiring. (Fig. 1)
2. Remove round center KNOCK-OUT HOLE in FIXTURE HOUSING
that will be mounted to outlet box/supply wires and snap PLASTIC
BUSHING into opening. (Fig. 1)
3. Remove SMALL DIAMETER KNOCK-OUT in the end of FIXTURE
HOUSING closest to the next adjoining FIXTURE HOUSING to be
mounted and snap PLASTIC BUSHING into opening. (Fig. 2)
AUXILIARY
MOUNTING
HOLES
Fig. 1
LIGHTOLIER a GENLYTE company.
631 Airport Road, Fall River, MA 02720
READ AND UNDERSTAND THESE INSTRUCTIONS BEFORE INSTALLING FIXTURE
This fixture is intended for installation in accordance with the National Electrical Code and local regulations.
To assure full compliance with local codes and regulations, check with your local electrical inspector before
installation. To prevent electrical shock, turn off electricity at fuse box before proceeding.
Retain these instructions for maintenance reference.
4. Using the wire provided in parts bag; pass approximately half
the length of each black, white and green wire through opening
in back of FIXTURE HOUSING. (Fig. 2)
5. Position LINEAR ADAPTER COVER over back of FIXTURE HOUSING
allowing two THREADED STUDS to pass through mounting holes
surrounding KNOCK-OUT OPENING.
Caution: Make certain not to pinch wires between FIXTURE
HOUSING and LINEAR ADAPTER. Secure LINEAR ADAPTER in
place by placing LOCK WASHERS and HEX NUTS (from front of
fixture housing) over threaded STUDS and fully tighten.
6. Carefully pull supply wires from outlet box through center
KNOCK-OUT HOLE and mount FIXTURE HOUSING to outlet box
using outlet box screws (provided with outlet box).
Note: In addition to outlet box mounting, it is also recommended
to use AUXILIARY MOUNTING HOLES at each end of
FIXTURE HOUSING. (Fig. 1) Use appropriate mounting
hardware for the wall surface (i.e.: wood screws, toggle
bolts, molly screws, etc.).
7. In second adjoining FIXTURE HOUSING, remove SMALL
DIAMETER KNOCK-OUT in the end closest to first FIXTURE and
snap PLASTIC BUSHING into opening.
8. Pass the other half of black, white and green wires through
opening.
9. Position second FIXTURE HOUSING over end of LINEAR ADAPTER
allowing MOUNTING STUDS on ADAPTER to pass through
MOUNTING HOLES in back of FIXTURE HOUSING. Secure FIXTURE
HOUSING to wall surface using appropriate mounting hardware
for the wall surface (i.e.: wood screws, toggle bolts, molly
screws, etc.).
Note: If additional FIXTURES are to be installed; follow steps 3
through 5 prior to mounting second FIXTURE HOUSING.
Secure LINEAR ADAPTER in place by placing LOCK WASHER
and HEX NUT (from front of fixture housing) over threaded
STUDS and fully tighten.
10. Make electrical connections: FIXTURE HOUSING containing
supply wires (in coming power); connect black fixture lead and
black wire from LINEAR ADAPTER to black (hot) supply lead;
white fixture lead and white wire from LINEAR ADAPTER to
white (neutral) supply lead. Green fixture wire and green LINEAR
ADAPTER wire are ground wires and must be connected to a
ground screw or ground lead within outlet box. Use wire nuts
(local hardware item) to make connections. Carefully push all
wire connections through center opening making certain all
connections are inside of outlet box.
11. Using WIRE NUTS (provided with fixture) connect second fixtures
black lead to black LINEAR ADAPTER lead; white fixture lead to
white LINEAR ADAPTER lead; green fixture lead (ground) to
green LINEAR ADAPTER lead. Repeat procedure if other fixtures
are installed in continuous run.
12. Re-install REFLECTOR by placing two TABS on REFLECTOR into
SLOTS in FIXTURE HOUSING and pivot REFLECTOR back until
HOLES in REFLECTOR aligns with HOLES in FIXTURE HOUSING.
Secure REFLECTOR in position by re-installing two REFLECTOR
MOUNTING SCREWS. Repeat procedure for remaining FIXTURES
in run.
INSTRUCTION SHEET NO.
IS:46531
0198
Page 2 of 3
SMALL DIAMETER
KNOCK-OUTS
AUXILIARY
MOUNTING
HOLES
SMALL DIAMETER
KNOCK-OUTS WITH
PLASTIC BUSHING
LOCK
WASHER
HEX
NUT
CENTER
KNOCK-OUT
KNOCK-OUT
SLOTS
FIXTURE
HOUSING
LINEAR ADAPTER
COVER
THREADED
STUD
WIRE:
BLACK, WHITE, & GREEN
(provided with fixture)
Fig. 2
BACK-VIEW OF FIXTURE HOUSING
SPRING CLIP
DIFFUSER DOOR
SLOT
ALLEN
SCREW
DRAW
BOLT
ALLEN
WRENCH
SLOT
FINGER
NOTCH
SPRING
CLIP
NOTCH
MOUNTING
BOSS
Fig. 3
LIGHTOLIER a GENLYTE company.
631 Airport Road, Fall River, MA 02720
READ AND UNDERSTAND THESE INSTRUCTIONS BEFORE INSTALLING FIXTURE
This fixture is intended for installation in accordance with the National Electrical Code and local regulations.
To assure full compliance with local codes and regulations, check with your local electrical inspector before
installation. To prevent electrical shock, turn off electricity at fuse box before proceeding.
Retain these instructions for maintenance reference.
INSTRUCTION SHEET NO.
IS:46531
0198
Page 3 of 3
LAMP PINS
SLOT
WALL WIRING KIT INSTALLATION:
Follow instructions provided with WALL WIRING KIT 46700. Keep
these instructions for reference purposes.
FLUORESCENT
LAMP
DIFFUSER DOOR INSTALLATION:
1. Loosen two ALLEN SCREWS in each of the two DRAW BOLTS
(use allen wrench provided). (Fig. 3)
2. Slide both DRAW BOLTS towards the center of DIFFUSER
DOOR; hook the NOTCHES in each end of DIFFUSER DOOR
around each MOUNTING BOSS on ends of FIXTURE HOUSING.
Slide DRAW BOLTS to ends of DIFFUSER DOOR making certain
DRAW BOLTS fully engage over each MOUNTING BOSS.
Secure DRAW BOLTS in position by tightening all four ALLEN
SCREWS.
3. Swing DIFFUSER DOOR closed against FIXTURE HOUSING
allowing two SPRING CLIPS to engage in SLOTS in FIXTURE
HOUSING. Gently push DIFFUSER DOOR at each end until
SPRING CLIPS fully snap into FIXTURE HOUSING.
Note: To open DIFFUSER DOOR for relamping; place finger
into FINGER NOTCHES in each end of DIFFUSER DOOR
and gently pull DIFFUSER DOOR away from front edge
of FIXTURE HOUSING. (Fig. 3 )
SOCKET
Fig. 4
FLUORESCENT FIXTURES
HALOGEN
LAMP
LAMP PINS
CAUTION: Maximum wattage as marked on fixture must
not be exceeded.
LAMPING FIXTURE:
FLUORESCENT FIXTURES:
•
Position pins in each end of lamp straight into SLOT in each
SOCKET and twist lamp counterclockwise until lamp snaps into
position (twist lamp approximately 90°). (Fig. 4)
CAUTION:
RECTANGULAR
OPENING
PIN
PROTECTOR
Fig. 5
INCANDESCENT FIXTURES
• DISCONNECT POWER TO FIXTURE BEFORE RELAMPING.
• DO NOT USE 12V LAMPS WITH THIS FIXTURE.
• DO NOT TOUCH LAMP WITH BARE HANDS.
Oils from hands could reduce LAMP life. Use tissue paper or
cloth when inserting LAMP into SOCKET.
• DO NOT OPERATE FIXTURE WITH DIFFUSER DOOR OPEN.
INCANDESCENT (HALOGEN) FIXTURES:
•
Insert LAMP BASE into RECTANGULAR OPENING in PINPROTECTOR aligning PINS of LAMP with HOLES in SOCKET.
Gently push LAMP into SOCKET until LAMP is fully seated
into SOCKET.
LIGHTOLIER a GENLYTE company.
631 Airport Road, Fall River, MA 02720