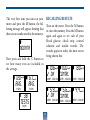
1
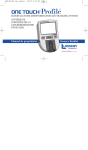
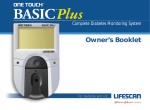
™
™
Complete Diabetes Tracking System
Owner’s Booklet
For diabetes and life.
CAUTION
Before using any product
to test your blood
glucose (blood sugar),
read all instructions and
practise the test. Do all
quality control checks
as directed and consult
with a diabetes healthcare professional.
The One Touch™ Profile™ System is intended for use
outside the body (in vitro diagnostic use). It should be
used only for testing purposes and only with whole blood
(not plasma or serum). It should not be used for the
diagnosis of diabetes and has not been validated for
testing the blood of newborns.
The One Touch Profile System contains many small parts
which may be dangerous if swallowed. It is therefore best
to keep the system away from small children.
1
TABLE OF CONTENTS
Introduction
Precautions and limitations
One Touch™ Profile™ Blood Glucose Meter
One Touch™ Test Strips
4
5
6
8
SETTING THE SYSTEM
Coding the meter
Check strip test
Control solution test
10
12
16
TESTING YOUR BLOOD
Getting a drop of blood
Step- by- step test procedure
Event labelling
22
29
35
USING THE METER MEMORY
Entering the memory
Recalling results
37
38
CHANGING METER SETTINGS
Entering the set-up (options) mode
Beep prompts
40
42
2
Time and date
Event averaging
Insulin prompt
Insulin programming
Display language
Time format
Date format
Decimal separator
Unit of measure
Exiting the set-up mode
43
44
45
46
48
49
49
50
51
51
SOLVING PROBLEMS
Test procedure messages
Error messages
52
56
TAKING CARE OF YOUR METER
Cleaning the meter
Replacing the batteries
63
66
SPECIFICATIONS
Performance characteristics
Warranty
Insulin Types
69
70
71
3
The One Touch Profile Glucose
Monitoring System consists of three main
products: The One Touch ™ Profile ™
Blood Glucose Meter, One Touch Test
Strips and One Touch™ Normal Control
Solution.
INTRODUCTION
The One Touch ™ Profile ™ Glucose
Monitoring System is for people with
diabetes who need to check the level of
glucose (sugar) in their blood. To perform a blood glucose test, a One Touch™
Test Strip is inserted into the meter and
a small sample of blood is applied to
the test strip. The meter then measures
the blood glucose level and displays the
result in just 45 seconds. Easy-tounderstand symbols guide you through
the test procedure and help you if any
problems arise.
For reliable results and to maintain the
manufacturer’s total service, support,
and warranty, use only One Touch ™
Profile ™ System products made by
LifeScan.
4
PRECAUTIONS AND LIMITATIONS
• If you experience symptoms that are not consistent with your blood glucose results,
and you have carefully followed the procedure described in your owner’s booklet,
contact your healthcare professional immediately.
• DO NOT make significant changes to your medication program or ignore physical
symptoms without consulting your healthcare professional.
• If the message HI DANGER appears on the meter display, this indicates severe high
blood sugar (hyperglycemia); contact your doctor immediately.
• Note that extremes in whole blood hematocrits, above 60% or below 25%, can cause
false low results.
• Reducing substances, such as Vitamin C (ascorbic acid), have little effect on blood
glucose results when found in normal blood concentrations. However, abnormally
high concentrations of reducing substances in blood will cause false low test results.
• DO NOT use blood samples with preservatives that contain fluoride (in gray top test
tubes). You will get false low results.
• When testing, removal of the test strip prior to display of the blood glucose result
may give you a false result.
5
ONE TOUCH™ PROFILE™ BLOOD GLUCOSE METER
Study this diagram to become familiar with all of the parts of your
One Touch™ Profile™ Meter.
Display
Battery
Compartment
(on back)
C Button
M Button
Test Strip
Holder
M
C
Data Port
On/Off
Button
Test Area
with protective
coating
6
Test strip holder. The test strip holder holds
a One Touch ™ Test Strip in place
when you perform a blood glucose or
control solution test.
On/off button. This button turns the meter
on and off.
Display. This is where you read the simple
messages that guide you through testing, setting options, and using the
memory. Your test results will be displayed here.
Test area. The test area is located under the
test strip holder.
Battery compartment. Holds two AAA
batteries. The batteries are already
installed in your meter.
M Button. The One Touch Profile
Meter automatically stores your test
results. Use the M button to recall the
information stored in your meter’s
memory and to review your meter’s
set-up options.
™
™
Data port. Allows you to transfer the information stored in the meter’s memory
to a computer to view, analyse, and
print. Please call your authorized
LifeScan representative for more
information about our Diabetes
Management System software.
C Button. Use the C button to set the code
on the One Touch Profile Meter and
to change the meter’s set-up options.
7
ONE TOUCH™ TEST STRIPS
NOTE: Your test strip may look
like THIS
When blood is applied to the white test
spot on the test strip, compounds on the
test strip react with the blood to form a
blue color. The meter reads the color to
determine the blood glucose level.
OR THIS
TEST SPOT
TEST SPOT
Consult your test strip package insert
for specific test strip information.
8
IMPORTANT TEST STRIP INFORMATION
• One Touch Test Strips are sensitive to heat and light. Keep them sealed in the original vial and store in a cool, dry place below 30ºC (86ºF). Do not refrigerate or place
in direct heat or sunlight.
• DO NOT use One Touch Test Strips beyond the expiration date on the vial.
• DO NOT use One Touch Test Strips with plasma or serum samples, as the results
will not be accurate. The strips are intended for use with fresh whole blood or
One Touch™ Normal Control Solution.
• When you open a new vial of test strips, record the date vial first opened. Discard
unused test strips four months after first opening the vial.
• DO NOT use One Touch Test Strips that are bent, torn, cut, or changed in any way.
• Use each test strip immediately after removing it from the vial.
• Replace the test strip vial cap immediately after removing a test strip from the vial.
Close cap tightly.
• Do not transfer the test strips from the original vial to any other container.
• Do not carry unwrapped test strips in your meter case.
• DO NOT use bleach, or products containing bleach, near the test strips.
• For reliable results, use only One Touch Test Strips made by LifeScan.
™
9
SETTING THE SYSTEM
Step 1: Turn on the meter
The meter code will appear on the
display for a moment along with the
current time and date and then the
message INSERT CODE 9 (for
example) STRIP will appear.
CODING THE METER
Code numbers are used to calibrate the
meter with the test strips for reliable
results.
Make sure you set the code:
• Before using the meter for the first
time.
• Every time you change to another vial
of test strips.
CODE 9
INSERT
CODE 9
STRIP
7:26AM 1/06/00
Check that the code number on the
display matches the code number on the
test strip vial.
10
Step 3: Code the Meter.
After the word
INSERT is displayed on the meter,
CODE 10
press and release the
C button; the code
number will appear.
Continue pressing
the C button until
the number on the
display matches the
code number on the
test strip vial.
The code number is now set for the vial
of test strips you are using, and the
meter will remember this code number
until you change it. You are now ready
to do a test.
Step 2: Match the Code Numbers.
If the code number on the display
matches the code number on your test
strip vial, you may begin testing.
If the two code numbers do not match,
follow Step 3 to code the meter.
M
C
25
Te
st
Str
ips
CODE 9
M
Do
T e n ot s
o ut st Striptore
sid e s
t h e vi
al
Co de
10
Te
me st for
in asure the qu
an
w
m
Fo hole ent of titative
Blor use blood. glucose
w
o
In d Blu ith ONE
cose
T
pa struc
M OUC H
usi ckagetions: R eters.
ng
e
i
this nsert b ad
Fo
prod efore
Sto r in v
re itr
uct.
od
at
i
t in
(30 empe a cool agnostic
,
r
˚
Vi C). D atures dry pla use only.
moal Ca o not r under 8ce
p
6
e
r
Pr e tha : cont frigerate ˚F
U. otecte n 3g s ains not .
an S. Pat d und ilica gel
d o ent er t
the s 4, he fo
r pa 935,3 llowin
g
4
tent
s pe 6, 5,049,487
n d in g
,
.
11
C
Do a check strip test:
• At least once a day
• After cleaning the meter
• Whenever your blood glucose test
results are not consistent with how you
feel, or when you think your results are
not accurate
It is very important that you do the following two simple checks routinely to
make sure you get accurate results.
CHECK STRIP TEST
A purple and white check strip is
included in your meter case. Before
doing a check strip
test, make sure the
Front
Back
test strip holder, test
area, and check strip
are clean, dry, and
lint-free. Do the
1
2
check strip test at
✔
✔
room temperature
between 18° and
26°C (64°F - 79°F).
• Whenever the REDO message
appears before the INSERT CODE
10 (for example) STRIP prompt.
REDO
12
Step 3: Remove the check strip.
When the message APPLY SAMPLE
appears on the display, remove the
check strip from the test strip holder.
Step 1: Turn on the meter.
The code number will appear on the
display. Next, INSERT CODE 10 (for
example) STRIP will appear.
Note: This is the only time you should
remove a strip during a test.
Step 2: Insert the check strip
Slide the notched
end of the check
strip into the test
INSERT
strip holder with the
purple side facing
up. After the check
strip has been inserted, WAIT PLEASE
appears for a moment.
M
SAMPLE
M
C
C
1
1
13
The display will show ✓
OK if your result falls
within the correct check
strip range printed on the
back of your meter.
Step 4: Turn the check strip over and
insert it back into the meter.
When INSERT SIDE 2 ✓ STRIP
appears, turn the check strip over and
slide it back into the test strip holder. It
must go in notched end first, the white
side facing up. The
meter counts down
from 4 to 0 and then
gives you a check
strip result.
M
✓
80
mg/dL
OK
7:40AM 1/06/00
4,4
✓
mmol/L
OK
If the reading is not 7:40AM 1/06/00
within the recommended
Example
range, the meter display
will show ✓ NOTOK REDO ✓. Repeat
the check strip test until your result
falls within
mg/dL
mg/dL
the correct
✓ NOTOK REDO ✓
range.
7:40AM 1/06/00
C
2
58
58
3,2
3,2
mmol/L
✓ NOTOK
7:40AM 1/06/00
REDO ✓
Example
14
mmol/L
IMPORTANT CHECK STRIP INFORMATION
• If your check strip result is repeatedly out of range, your meter may not be
working properly. Do not use the meter to test your blood until you get a
check strip result that is within the correct range.
• Make sure both sides of the check strip are clean. If necessary, wipe the check
strip with a soft cloth or tissue dampened with water. Dry it completely.
• Do not get blood, alcohol, control solution, or any other fluid on the
check strip.
• Do not scratch the check strip.
• Do not leave the check strip in sunlight.
• If you lose or damage the check strip, call your authorized LifeScan
representative for a free replacement.
15
CONTROL SOLUTION TEST
Do a control solution test:
One Touch™ Normal Control Solution is
used instead of blood to tell you that the
meter and test strips are working together properly. The control solution contains a known amount of glucose that
reacts with a One Touch™ Test Strip.
• Before using your meter for the first
time.
• Each time you open a new vial of test
strips.
• At least once a week.
• Whenever you suspect that the meter
or test strips are not working properly.
R
• When your results do not reflect how
you feel.
Normal Glucose Control
Solution
Sha
For
Nor
Dis
• If you drop the meter.
Un
Lot
LIF
AW
16
IMPORTANT CONTROL SOLUTION TEST INFORMATION
• Use only One Touch™ Normal Control Solution.
• Check the expiration date of the control solution. Do not use if expired.
Record the discard date on the vial. Discard the vial 90 days after first opening.
• The control solution range printed on the test strip vial is for One Touch
Normal Control Solution only. It is NOT a recommended range for your
blood glucose level.
• Store the glucose control solution at room temperatures below 30°C (86°F).
• Do not refrigerate or freeze.
WARNINGS
• Control solution is not to be used as a cleaning solution.
• Do not swallow or inject control solution or place drops into the eyes.
17
Step 2: Insert a test strip.
When INSERT CODE 10 (for example) STRIP appears, slide a test strip
into the test strip holder, notched end
first with the test spot facing up. Make
sure you push the test strip in all the
way until it stops.
The control solution test follows the
normal test procedure, using control
solution instead of blood.
Step 1: Turn on the meter.
The code number, time, and date will
appear. The code number should match
the code number on the test strip vial.
INSERT
CODE 10
M
7:50AM 1/06/00
M
C
18
C
Step 3: Apply control solution.
After the test strip is in the test strip
holder, WAIT PLEASE appears for a
moment, then APPLY SAMPLE
appears. Shake the control solution vial
well before removing the cap and adding
a drop of control solution to the middle
of the test spot, covering it completely.
APPLY
se
Co
ntr
ol
R
19
co
C
Glu
al
rm on
No oluti
S
M
Step 4: The result appears within
45 seconds.
Compare the control solution test result
with the control solution range printed
on the One Touch ™ Test Strip vial.
When the control solution test result lies
within the control range, you are ready
to test your blood.
Record control solution tests in the logbook provided by placing a C next to the
result. If test results fall outside the
expected range, repeat the test. If you are
unable to resolve the problem, call your
authorized LifeScan representative.
100
mg/dL
CONTRL.
7:52AM 1/06/00
M
C
5.6
Example
mmol/L
CONTRL
7:52AM
1/06/00
Example
20
TESTING YOUR BLOOD
DETAILED TEST PROCEDURE
Choose a clean, dry
work surface. Make sure
you have all the items
needed to test.
Sterile
Lancet
C
One Touch™
Test Strip
M
Meter
Ejection/Cocking Control
Cap
Release Button
Depth Settings
Depth
Adjustment
Knob
Penlet™ Plus Adjustable Blood Sampler
21
Depth Indicator
GETTING A DROP OF BLOOD
Step 1: Insert a Lancet into the
Penlet ™ Plus Adjustable Blood Sampler.
CAUTION: To reduce the chance
To remove the Penlet™ Plus Cap, twist
the cap counterclockwise. Insert a lancet
into the lancet holder. Push down firmly until the lancet is secure in the holder. Do not twist the lancet. For best
results and safety, use only LifeScan
lancets. (Note: To reduce the chance of
contamination and to prevent the cap
from rolling away, set it down on a flat
surface with the small hole pointing up.)
of infection:
• Never share a lancet with another
person.
• Always use a new, sterile LifeScan
Lancet. Lancets are for single use only.
• The Penlet™ Plus Sampler should be
used by only one person. However, in
the event the sampler is shared with
another person, always use a new
lancet and a new or disinfected cap.
• Avoid getting hand lotion, oils, dirt,
or debris in or on the lancets and the
Penlet Plus Sampler.
22
Step 2: Adjust Puncture Depth.
Gently twist off the
lancet’s protective
disk. Make two full
turns to ensure that
the lancet separates
from the protective
disk.
Twist the depth adjustment knob
located at the end of the Penlet™ Plus
Sampler to desired puncture setting.
Smaller bumps are for shallower punctures, while larger bumps are used for
deeper punctures.
Optional: For safe disposal, save protective
disk to cover lancet after use. See Step 6 option.
Replace the Penlet™ Plus Cap. Turn the
cap clockwise until it is snug but not
overly tight.
23
Step 3: Cock the Penlet ™ Plus Sampler.
Step 4: Wash Your Hands.
Slide the ejection/cocking control back
until you hear a click. If it does not click,
the Penlet Plus Sampler may have been
cocked when the lancet was inserted.
Wash your hands with soap and warm
water. Warm water stimulates blood
flow to the fingers. Rinse and dry
hands thoroughly.
24
• Choose a spot on the side of a different
finger each time you test. Repeated
punctures in the same spot may cause
soreness and calluses.
Step 5: Get a Drop of Blood.
Helpful tips:
• To increase blood flow to your fingertips, massage the hand from the wrist
to the fingertip two or three times
without touching the puncture site.
• Hang your arm down at your side for
10 to 15 seconds before pricking
your finger.
25
Hold the Penlet™ Plus Sampler firmly
against the side of your finger with the
cap resting on your finger. (Greater
pressure of the device against the finger
will cause a deeper puncture.) Press the
release button.
Gently massage your finger to obtain
the required blood volume. Proceed
with your blood glucose test (see “Stepby-Step Test Procedure”, page 29).
26
Optional: To replace
the protective disk on
the lancet, place the disk
on a hard surface and
push the exposed tip
into the protective disk.
Step 6: Remove the Lancet.
To remove the Penlet™ Plus Cap, twist
the cap counterclockwise.
Caution: Always use caution when
removing the lancet.
27
Point the lancet down and away from you.
Push forward on the ejection/cocking
control and eject the lancet directly into an
appropriate container for sharp objects.
CLEANING THE PENLET™ PLUS
SAMPLER
• Clean the Penlet Plus Sampler with
soap and water as needed.
• To disinfect the Penlet Plus Sampler
and cap, prepare a disinfectant solution of one part household bleach to
10 parts water. Dampen a cloth in this
solution then wipe the Penlet Plus
Sampler thoroughly. Soak only the
cap for at least 30 minutes in the disinfectant solution. Rinse the Penlet Plus
Sampler and cap with water and dry
thoroughly.
Return the ejection/cocking control to
the middle position. Replace the cap.
28
STEP- BY- STEP TEST
PROCEDURE
CODE 10
Step 1: Turn on the meter.
Press the power button. A code number
and the date and time will appear. The
code number must match the code
number on the test strip vial. If it does
not, change the meter code number following the instructions on page 11.
8:00AM 1/06/00
M
C
CODE 10
8:00AM 1/06/00
29
Step 2: Insert a test strip.
INSERT
INSERT CODE 10 STRIP
M
C
Example
Next, INSERT CODE 10 (for example) STRIP appears. Slide a test strip
into the strip holder, notched end first,
with the test spot facing up. Make sure
you push the test strip in all the way
until it stops. After WAIT PLEASE, the
meter shows APPLY SAMPLE. You
then have 5 minutes to apply blood to
the test spot, otherwise the meter automatically turns off.
WAIT
PLEASE
APPLY
30
SAMPLE
Step 3: Apply blood to the test spot
Apply blood to the test spot so as to cover
it completely with a round drop. It is very
important that enough blood is applied.
Many times, the meter can detect if there
is not enough blood and will show
NOT ENOUGH
BLOOD RETEST
Do not:
but you should also look at the test strip
to make sure.
• Smear blood onto
the test spot.
• Apply a second
drop after the test
begins.
APPLY
M
C
• Move the test strip
as you apply blood.
• Remove the test
strip from the meter
to apply blood.
31
trations you may have smeared the blood
or the drop was too small.
Checking the amount of blood on the
test strip.
• Remove the test
Side
Front
strip from the meter
and look at the test
spot. It should still
have a wet shiny
drop that completely covers the circle. If the blood sample
has a dull, dry appearance, you may not
have applied enough blood or you may
have smeared it.
• In either case, you have an inaccurately low result. Repeat test with a new
test strip.
• Look at the back of
Back
the strip. You should
see a full dark circle.
If there are any
white patches or streaks as shown in illus32
Accurate results in 45 seconds.
The meter then counts down from 45
to 0 seconds, beeps, and displays your
result. Remove the test strip only after
the result is displayed.
The meter displays results above 600 mg/dL
or 33.3 mmol/L as HI DANGER. A
result that reads HI DANGER means
very high blood glucose (severe
hyperglycemia).
HI
mg/dL
8:01 AM 1/06/00
8:01AM 1/06/00
M
HI
mg/dL
DANGER CALL.DR.
106
mg/dL
HI
C
mmol/L
TEST KETONES
HI
mmol/L
DANGER CALL.DR.
8:01 AM 1/06/00
5,9
mmol/L
8:01AM 1/06/00
33
CHECK KETONES
Test results below 60 mg/dL or
3.3 mmol/L mean your blood glucose
is low (hypoglycemia).
60
mg/dL
8:01AM 1/06/00
3,3
mmol/L
8:01AM 1/06/00
Contact your healthcare professional
immediately if you continue to get
HI DANGER test results or results
below 60 mg/dL or 3.3 mmol/L.
60
mg/dL
DO YOU
Record your test result in your logbook.
You may also want to add event labels
or insulin information. Instructions on
how to do this are provided on pages
35-47.
NEED A SNACK
3,3
mmol/L
DO YOU
NEED A SNACK
Press the power button to turn off
the meter.
IMPORTANT: If you get a HI DANGER result or a result below 60 mg/dL
or 3.3 mmol/L and your test result does
not reflect how you feel, follow the
guidelines on pages 16-20 to ensure
testing accuracy. Then repeat the test
using a new test strip.
34
You can link an event label to your
blood glucose result immediately after
testing or later when reviewing the tests
stored in your meter’s memory.
EVENT LABELLING
Immediately after testing your blood,
you may want to mark your glucose
readings with event labels. The
One Touch™ Profile™ meter has 15 separate event labels.
• FASTING
• AFTER BREAKFAST
• AFTER NOON MEAL
• AFTER DINNER
• BEDTIME
• PRE EXERCISE
• ILLNESS
• OTHER
• PRE BREAKFAST
• PRE NOON MEAL
• PRE DINNER
• DIFFERENT FOOD
• DURING NIGHT
• AFTER EXERCISE
• HYPOGLYCEMIA
35
To select an event label, press the C button while the blood glucose test result is
still showing on
the meter dis130
play. Each time
AFTER BREAKFAST
you press the C
button, a new
event label will
7,2
appear on the
AFTER
BREAKFAST
display. Hold
the C button
down to move
130
more rapidly
PRE NOON MEAL
through the list.
When you stop,
the event label is
7,2
set and stored in
PRE
NOON MEAL
memory.
It will appear on the meter display with
your test result, alternating with the
time and date.
mg/dL
M
130
11:00AM 1/06/00
PRE NOON MEAL
7,2
7,2
11:00AM 1/06/00
PRE NOON MEAL
mg/dL
C
mmol/L
mmol/L
mg/dL
M
130
C
mmol/L
36
mg/dL
mmol/L
USING THE METER MEMORY
The One Touch™ Profile™ Meter stores
up to 250 test results with date and
time. Event labels and insulin records
are also stored. When the memory is
full, the oldest record is dropped as a
new one is added.
ENTERING THE MEMORY
MEMORY
INSERT
M
However, if you have used the meter at
least once in the past 14 days, the average of your blood glucose test results
over the past 14 days will appear.
Check strip and control solution tests
are not included.
M
C
C
Turn on the meter. Press the M button
to enter the meter memory.
The word MEMORY will appear briefly.
MEMORY
37
The very first time you turn on your
meter and press the M button, the following message will appear, showing that
there are no results stored in the memory:
RECALLING RESULTS
Turn on the meter. Press the M button
to enter the memory. Press the M button
again and again to see each of your
blood glucose, check strip, control
solution and insulin records. The
records appear in order, the most recent
being shown first.
NODATA
Now press and hold the C button to
see how many tests are included in
the average.
120
AVG.
14 DAY
mg/dL
106
mg/dL
✓ OK
6.7
AVG.
14 DAY
100
mg/dL
CONTRL
80
mg/dL
8:01AM 1/06/00 7:52AM 1/06/00 7:40AM 1/06/00
mmol/L
5,9
38
TESTS
14 DAY
✓ OK
mmol/L
5,6
mmol/L
CONTRL
4,4
mmol/L
8:01AM 1/06/00 7:52AM 1/06/00 7:40AM 1/06/00
38
You can change or add event labels or
insulin information stored in memory
while they are displayed on the meter.
To delete an insulin record, simply
select ‘00’ for the units.
Any event labels added to blood glucose
tests will alternate with the time and
date when shown on the meter.
130
130
11:00AM 1/06/00
PRE NOON MEAL
7,2
7,2
mg/dL
mmol/L
11:00AM 1/06/00
mg/dL
45
UNITS
INTERM
8:05AM 1/06/00
mmol/L
See pages 35 on event labelling and
pages 45-47 on the insulin prompt and
insulin programming.
PRE NOON MEAL
39
CHANGING METER SETTINGS
You can change, or in some cases turn off,
11 features of your One Touch™ Profile™
Meter to suit your individual needs.
•
Beep prompts
•
Time
•
Date
•
Event averaging
•
Insulin prompt
•
Insulin programming
•
Display language
•
Time format
•
Date format
•
Unit of measure
•
Decimal separator
ENTERING THE SET-UP
(OPTIONS) MODE.
1. Make sure the meter is off.
2. Press and hold the power button for
about three seconds until the display
begins to flash.
3. Release the power button.
4. The following screens will appear:
SET-UP
OPTIONS MODE
The meter will then automatically present the first option screen. The options
map below will help guide you through
the option screens.
40
• Use the M button to scroll through
the options or move within an option.
• If you want to change an option setting, use the C button.
• Once you have finished setting an option, turn the meter off, or press the
M button to move to the next option.
ON
BEEP
M-MOVE C-CHANGE
M-MOVE C-CHANGE
10:00AM
08.15.00
OFF
OFF
00
M-MOVE C-CHANGE
M-MOVE C-CHANGE
ENGL.
M-MOVE C-CHANGE
M-MOVE C-CHANGE
INSULN
Note: You can exit the options mode at
any time by turning off the meter. If
after two minutes you have not made a
selection, the meter will turn itself off
automatically. All option settings are
saved as they are made.
Entering insulin records in the set-up
mode is not recommended.
mg/dL
M-MOVE C-CHANGE
41
AVG.
AM/PM
0.0
DEC PT
M-MOVE C-CHANGE
M-MOVE C-CHANGE
UNITS
SHORT
M-MOVE C-CHANGE
MDY
M-MOVE C-CHANGE
Press the C button to
turn off the beep
prompts. The following
display will appear.
BEEP PROMPTS
The One Touch™ Profile™ Meter uses
beeping tones to signal various steps in
the meter procedures.
OFF
BEEP
M-MOVE C-CHANGE
You may now turn off the meter or
press the M button to move to the
next option.
The beep option is seen immediately
after entering the set-up
mode. The current setBEEP
ting will automatically
M-MOVE C-CHANGE
appear on the display.
ON
With the “ON” setting, the meter will
continue to provide beep prompts during the test procedure.
42
To set the date, press the M button in
set-up mode. The current date will
show. Press the C button; the year will
flash. Press the C button again to
change the year to the correct setting.
Now press the M button and the
month will flash. Use the C button to
change the month. Press the M button
and the day will flash. Press the C button to change the day.
Press the M button
again to display the new
6.01.00
M-MOVE C-CHANGE
date setting.
TIME AND DATE
In the set-up mode, use the M button
to choose the Time option. The current
time will show. Press the C button to
change the time; the hour and AM or
PM will flash. Press the C button again
to advance the hour to the correct setting. Now press the M button and the
minutes will flash. Use the C button to
change the minutes.
Press the M button to
9:00AM
see the new time setting.
M-MOVE C-CHANGE
43
Averages for each event are displayed by
pressing the M button to move from
one event to the next. Averages for up
to 15 separate events, and the 30-day
test average of your blood glucose test
results are shown. At
mg/dL
least one blood glucose
AVG.
result must have been
FASTING
linked to an event in the
previous 14 days for it to
mmol/L
appear.
AVG.
EVENT AVERAGING
In the set-up mode, use
the M button to choose
the event averaging
option.
Press the C button to
turn on the event averaging option.
OFF
AVG
M-MOVE C-CHANGE
120
ON
AVG
6,7
M-MOVE C-CHANGE
FASTING
Note: When the time and date are
changed, the calculated 14-day, 30-day,
and event averages may change.
44
Press the M
button to allow you to
set the units.
INSULIN PROMPT
You can add information about your
insulin type and dosage after each blood
glucose test result. In the set-up mode,
use the M button to choose the insulin
prompt option.
The above example will
appear. To turn on the insulin prompt, press the C
button.
INSULN
FIRST TYPE
00
UNITS
SHORT
M-MOVE C-CHANGE
Step 1: Change the insulin type.
When a type of insulin, SHORT for
example, is flashing on the meter,
press the C button until your first type
of insulin
UNITS
UNITS
appears on
SHORT INTERM
the display.
OFF
INSULN
M-MOVE C-CHANGE
From now on, leave the
meter on after completing
a test. Then whenever INSULN
you remove the test strip M-MOVE C-CHANGE
or check strip, insulin prompts will be
displayed on the meter.
ON
45
00
00
M-MOVE C-CHANGE
M-MOVE C-CHANGE
Step 2: Change the insulin units.
When the units area is flashing ‘00’, press
the C button
UNITS
UNITS
until your
INTERM
insulin dose INTERM
M-MOVE C-CHANGE M-MOVE C-CHANGE
is displayed.
00
INSULIN PROGRAMMING
If you want to enter several insulin records
at a time, or if you forgot to enter your
insulin information after a test, use the
insulin programming option in the meter
set-up.
In the set-up mode, use the M button to
choose the insulin programming option.
Press the C button; the insulin type will
flash. Continue pressing the C button until
your insulin type is displayed. Press the M
button to move to the units area. Use the
C button to enter your insulin units. In the
same way, pressing the M button will allow
you to move to the hour, minutes, year,
month, and day to complete your insulin
record. Use the C button to change the
information in each area.
45
Press the M button again and follow the
same steps to enter your second type of
UNITS
insulin and
the dose.
INSULN
SECOND TYPE
00
SHORT
M-MOVE C-CHANGE
46
CARBOHYDRATE COUNTING
After you have moved through each
area, the complete record will be displayed for two seconds, followed by
another insulin programming screen.
You may then press the C button to
enter another insulin record.
You can use the insulin programming
feature to record the number of grams
of carbohydrate in your diet. Follow the
steps for insulin programming, but
select CARBOH instead of an insulin
type. Enter the number of carbohydrates, from 1 to 150.
000
CARBOH
M-MOVE C-CHANGE
47
35
CARBOH
M-MOVE C-CHANGE
The One Touch Profile Meter is pre-set
to prompt you in English. To change
the display language, enter the set-up
mode. Use the M button to choose the
display language option. Press the C
button until the language you want
appears on the display.
DISPLAY LANGUAGE
The One Touch ™ Profile ™ Meter can
display messages in 19 languages:
English [ENGL.], Spanish [ESPAN.],
French [FRANC.], Italian [ITALIA],
Hungarian [MAGYAR], Dutch [NEDER.],
Norwegian [NORSK], Polish [POLSKI],
Portuguese [PORT.], Russian [PYCCK.],
Finnish [SUOMI], Swedish [SVENS.],
Turkish [TURKCE], Symbolic [0XOOXO],
British [BRIT.], Czech [CESKY],
Danish [DANSK], German [DEUTS.],
and Greek [E^^IKA].
48
TIME FORMAT
DATE FORMAT
The meter is pre-set to display the time
in the 12-hour AM/PM format.
However, an alternative 24-hour time
format is available.
The meter is pre-set to display the date
as month-day-year. For example: June
01, 2000 reads as 6-01-00. You can set
the meter to display day-month-year.
M.D.Y
AM/PM
M-MOVE C-CHANGE
M-MOVE C-CHANGE
To change the time format, enter the
set-up mode. Use the M button to
choose the time format option. Press
the C button to change the time format.
D.M.Y
M-MOVE C-CHANGE
To change the date format, enter the
options mode. Use the M button to
choose the date format option. Press the
C button to change the date format.
49
To change the decimal separator, enter
the set-up mode. Use the M button to
choose the decimal separator option.
Press the C button to choose the decimal separator.
DECIMAL SEPARATOR
The meter is pre-set to display millimoles per litre (mmol/L) and basal
insulin rate values using a decimal
point. This option allows you to select a
comma instead of a decimal point as a
decimal separator.
0.0
mmol/L
DEC PT
M-MOVE C-CHANGE
0,0
mmol/L
COMMA
M-MOVE C-CHANGE
50
UNIT OF MEASURE
EXITING THE SET-UP MODE
The meter is pre-set to display test
results in milligrams per decilitre
(mg/dL). You have the option to select
millimoles per litre (mmol/L).
After you have completed viewing or
changing your option settings, simply
turn the meter off. The meter will automatically exit the set-up mode and turn
itself off after two minutes.
mg/dL
M-MOVE C-CHANGE
mmol/L
M-MOVE C-CHANGE
To change the unit of measure, enter
the set-up mode. Use the M button to
choose the unit of measure option.
Press the C button to change the unit of
measure.
51
SOLVING PROBLEMS
The display messages that appear on your One Touch™ Profile™ Meter will guide you
through testing procedures, alert you to any problems as they occur, and give you information about test results stored in the meter’s memory. This section provides you with a complete listing of the display messages, what they mean, and what to do if there is a problem.
TEST PROCEDURE MESSAGES
MESSAGE
APPEARS WHEN
CODE 10
The meter is first turned on. The code number (1-16) on the
meter must match the code number on the test strip vial.
(for example)
7:26 AM 6 01 00
INSERT
The meter is ready to perform a blood, check strip, or control
CODE 10 (for example) solution test.
STRIP
WAIT
PLEASE
The meter is performing internal checks.
APPLY
SAMPLE
The meter is ready to receive a blood or control solution sample.
If performing a check strip test, this is your signal to remove the check
strip (purple side up) from the meter.
52
MESSAGE
APPEARS WHEN
45. . . . 0
The meter is counting down from 45 seconds to 0.
106 MG/DL or 5.9 MMOL/L
A blood test has been completed. This indicates a blood glucose
resultwhen the meter is set for mg/dL or for mmol/L.
(for example)
8:01 AM 6-01-00
100 MG/DL or 5.6 MMOL/L
CONTRL
7:52 AM 6-01-00
A control solution test has been completed. If you have just
performed a blood glucose test, this means that the blood
sample was too small and the meter read it as control solution. Repeat the test with a new test strip.
INSERT
SIDE 2
You are performing a check strip test. Turn the check strip
over and insert Side 2.
80 MG/DL or 4.4 MMOL/L
The check strip test result falls into the acceptable range which is
printed on the back of your meter.
(for example)
(for example)
✓OK
7:40 AM 6-01-00
53
MESSAGE
APPEARS WHEN
60 MG/DL or 3.3 MMOL/L
Your blood glucose test result is 60 mg/dL (3.3 mmol/L).The
message DO YOU NEED A SNACK appears when your
blood glucose test is 60 mg/dL (3.3 mmol/L) or below, possibly indicating hypoglycaemia, you may need food immediately.
(for example)
8:01 AM 6-01-00
alternating with
60 MG/DL or 3.3 MMOL/L
(for example)
DO YOU NEED A SNACK
240 MG/DL or 13.3 MMOL/L
(for example)
8:01 AM 6-01-00
alternating with
240 MG/DL or 13.3 MMOL/L
CHECK
KETONES
Your blood glucose test result is 240 mg/dL (13.3 mmol/L).
The message CHECK KETONES appears when your blood
glucose test is above 240 mg/dL (13.3 mmol/L) and below
600 mg/dL (33.3 mmol/L).
You may need to check your urine for ketones.
54
MESSAGE
APPEARS WHEN
HI MG/DL or HI MMOL/L
DANGER
8:01 AM 6-01-00
alternating with
Your blood glucose test result is 600 mg/dL (33.3 mmol/L).
This level is severe hyperglycemia. Contact your doctor
immediately.
HI MG/DL or HI MMOL/L
CALL. DR.
TEST KETONES
Appears briefly when the meter is turned on. You can see that
all of the display segments are working properly.
55
ERROR MESSAGES
When any of the following messages appear, there is a problem with your One Touch™
Profile™ Meter or the way in which you are performing a test. In most cases, problems
are easy to fix. If you still have trouble, call your authorized LifeScan representative.
MESSAGE
PROBLEM
WHAT TO DO
When this symbol appears and
stays on the screen, it means the
batteries are getting low. This
symbol will remain on the display while the meter is on until
the batteries are replaced.
Test results will still be accurate, but
replace the batteries as soon as possible.
When this symbol is flashing,
the batteries are too low.
Replace the batteries immediately.
The meter will not operate.
56
MESSAGE
PROBLEM
WHAT TO DO
CLEAN
TEST
AREA
1. There is dirt, blood, or lint
on the test area.
2. Your hand or an object covered the test area during testing.
3. The meter was used in very
bright light.
1. Clean the test area according to
instructions.
2. Repeat the test. Keep test area
clear.
3. Move the meter away from the
light source. Repeat the test with a
new test strip.
REMOVE
STRIP
The test strip was inserted
before the word INSERT
appeared on the display.
Remove the strip. Wait for the word
INSERT before inserting test strip.
100 MG/DL or
5.6 MMOL/L
If the word CONTRL appears
after a blood test, your blood
sample was too small, smeared,
or another drop was added after
the test began.
Repeat the test with a new test strip
and apply a larger drop of blood.
(for example)
CONTRL
8:01AM 6-01-00
57
MESSAGE
PROBLEM
WHAT TO DO
ERROR 1
RETEST
The sample was applied before
the words APPLY SAMPLE
appeared.
Repeat the test with a new test strip.
ERROR 2
RETEST
1. The test strip moved during
the test.
1. Repeat the test with a new
test strip.
2. The test strip was not inserted correctly.
2. Repeat the test with a new
test strip.
3. The test strip was removed
before the test was completed.
3. Repeat the test with a new test
strip.
4. There was not enough blood
on the test strip.
4. Repeat the test with a new
test strip.
5. The meter was used in very
bright light.
5. Move the meter away from the
light source. Repeat the test with a
new test strip.
58
MESSAGE
NOT
ENOUGH
BLOOD
RETEST
PROBLEM
WHAT TO DO
6. The check strip procedure
was incorrect.
6. Repeat the check strip test.
7. The meter may not be
operating correctly.
7. Call your authorized LifeScan
representative.
1. The blood or control solution sample was too small or
smeared.
1. Repeat the test with a new test
strip and a large, shiny drop of blood
or control solution.
2. Your hand or an object covered the test area while the
meter was turned on.
2. Repeat the test with a new test
strip. Keep the meter’s test area clear.
3. The test strip was not inserted far enough into the test strip
holder.
3. Repeat the test, pushing the test
strip all the way into the test strip
holder.
59
MESSAGE
PROBLEM
WHAT TO DO
NOT OK
1. If appearing when you turn
your meter on, your meter may
have an electronic problem.
1. Call your authorized LifeScan
representative.
2. If appearing at the end of a
test, your meter may have been
moved while applying blood or
during the test process.
2. Repeat the test, try not to move
the meter.
3. If appearing during the test,
the strip has been removed at
the WAIT PLEASE screen.
3. Repeat the test with the new
test strip.
The check strip test result is
outside the acceptable range.
Clean the meter and check strip if
necessary.
Repeat the test.
58 MG/DL or
3,2 MMOL/L
(for example)
✓NOT OK
7:40 AM
6-01-00
60
MESSAGE
PROBLEM
WHAT TO DO
REDO✓
The last check strip test was
outside the acceptable range
and an acceptable repeat test
was not performed.
Repeat the checkstrip test.
RETEST
The last test failed after the
countdown started.
Repeat the test.
RESET CODE
The meter has lost some
important information,
including the code number.
Use the C button to reset the meter code
to match the code on the test strip vial.
You should also check all of your meter
option settings to be sure they are correct. If this continues to happen, there
may be a problem with your meter. Call
your authorized LifeScan representative.
Some parts of the display are
not working.
Call your authorized LifeScan representative.
61
TAKING CARE OF YOUR METER
place. Check the meter by doing
check strip and control solution tests
to be sure your meter is working
properly.
To keep your One Touch ™ Profile ™
Blood Glucose Meter in good operating
condition, follow these simple rules:
• Keep the test strip holder and test area
clean.
• Do not take the meter apart. Sensitive
parts could be damaged, causing false
results. Taking the meter apart will
void the warranty.
• Keep your meter dry. If you accidentally get water or other liquids inside
the meter, check the meter by doing
check strip tests (see page 12) and
control solution tests (see page 16) to
be sure it is operating properly. Avoid
exposing your meter to extremes in
temperature or humidity. For example, do not leave it in your car.
• Do not clean the meter with alcohol,
as this will damage the meter.
CAUTION:
• Do not get water inside the meter.
• Do not immerse the meter or
hold if under running water.
• If you drop the meter make sure the
test strip holder is still securely in
62
Step 1: Remove the test strip holder
from the meter.
Hold the meter and place your thumbs on
the two raised dots on the test strip holder.
CLEANING THE METER
DO A DAILY CHECK: Look through
the small hole in the test strip holder to
make sure there is no lint, dirt, or blood
blocking it.
M
If there is anything blocking the hole, or
if the test area has dirt, lint, or blood on
it, remove the test strip holder and clean
the test area by following the instructions
given below. Then do a check strip test.
C
Press down on the raised dots and slide
the test strip holder toward you.
Clean the meter and test strip holder:
• At least once each week
• Whenever the test area looks dirty
• Whenever CLEAN TEST AREA
appears on the display.
Clean the meter using these easy steps:
Remove the test strip holder to expose
the test area.
63
Step 3: Clean the test area.
Step 2: Clean the test strip holder.
Wash the test strip holder with soap and
water.
CAUTION:
Do not use the following agents for
cleaning, as they will damage the
meter:
• Alcohol
• Cleansers with ammonia or phenol
• Glass cleaners
• Abrasive cleaners
Clean the underside of the test strip holder. Using a cotton swab, clean the small
hole to remove any dirt, blood, or lint.
Rinse well.
Dry completely with a soft cloth or tissue.
Check the clear,
protective coating
over the test area to
make sure it is not
scratched or damaged.
64
M
C
Step 4: Replace the Test Strip Holder.
Rub the test area with a cotton swab or
soft cloth dampened with water to
remove all blood, dirt, or lint from the
test area. If necessary, a mild liquid dish
washing detergent mixed with water
may also be used. Do not apply fullstrength detergent
to the test area. Be
careful not to
scratch the test
area. Dry the test
area with a soft,
dry tissue or cloth.
Remove any lint.
M
Hook the bottom of the test strip holder onto
the square notch on the meter.
C
M
C
Press down on the raised dots of the test strip
holder until it snaps firmly into place.
M
65
C
Press forward on the base of the test strip
holder to be sure it is properly in place.
M
REPLACING THE BATTERIES
The One Touch™ Profile™ Meter comes
with batteries already installed. When
the batteries need to be replaced, use
two AAA, 1.5 volt, alkaline batteries.
C
The batteries should last about one year
when testing up to 4 times a day. When
the battery symbol appears on the meter
display, the batteries are getting low.
The meter will still provide accurate test
results with low batteries, but they
should be replaced as soon as possible.
You are now ready to do a check strip
test. If the check strip will not slide into
the test strip holder, repeat Step 4.
66
Step 2: Remove the
battery compartment door.
Turn the meter
over so that the
front is resting in the palm of your
hand. With your thumb, press upward
on the opening tab
of the battery
compartment door
and lift upward
until it releases
from the clasp.
When
BATTRY`
REPLACE NOW
appears flashing on
the display, the meter will no longer give
results and you must replace the batteries before you can perform another test.
Dead batteries or battery removal will
not affect the information stored in the
meter memory. The time and date will
be saved in the meter for approximately
an hour without the batteries.
Step 1: Turn the meter over and locate
the battery compartment door.
Make sure the meter is turned off before
you remove the batteries.
67
Step 3: Remove the old batteries.
Remove the old
batteries by gently
slapping the meter
against the palm of
your hand. Never
tap the meter
against a hard surface.
Step 4: Insert the new AAA batteries
into the battery compartment.
Make sure that the
plus (+) and minus
(–) signs on the
batteries are correctly aligned.
the slot in the top of the battery compartment.
Press the opening tab upward toward the
top of the meter.
Lower the battery compartment door
until it snaps shut.
Check to see that your meter is working.
If not, reinstall the batteries.
To replace the battery compartment door,
insert the tab on the top of the door into
68
SPECIFICATIONS
PERFORMANCE CHARACTERISTICS
Power Supply:
Battery Life:
Result Range:
2 x 1.5V. alkaline batteries (AAA)
Approximately one year when testing up to four times a day.
0–600 mg/dL (0–33.3 mmol/L). Values of 600 mg/dL
(33.3 mmol/L) and above displayed as HI.
Display Type:
Liquid crystal.
Blood Source:
Whole blood (capillary or venous). Do not use samples
that contain fluoride (grey top tubes).
Haematocrit Range:
25–60%.
Dimensions:
Length, 10.9 cm. (4.3 inches); Width, 6.6 cm. (2.6 inches);
Height, 3.0 cm. (1.2 inches).
Weight:
127.5 grams (4.5 ounces) with batteries.
Operating Temperatures:
15°–35°C (59°-95°F).
Operating Humidity Range: 0–90% relative humidity (non-condensing).
Altitude:
One Touch™ Brand Glucose Monitoring Systems, based on One
Touch technology, have been shown to give equivalent performance when tested at altitudes up to 2200 meters (7200 feet).
Memory:
Up to 250 records with time and date.
Data Port:
RS-232 serial communications with special LifeScan cable for
interface with LifeScan InTouch™ Diabetes Management System
Software.
69
The One Touch™ Profile™ Meter has a
full five-year warranty from the original
date of purchase. Write your date of
purchase here:
WARRANTY
Five-Year Warranty
If, at any time during the first five years
after purchase, the meter does not work
for any reason (except for obvious abuse),
LifeScan will replace it with a new meter
or equivalent product free of charge.
The warranty policy does not apply to
the performance of the One Touch
Profile Meter when used with any test
strip other than One Touch ™ Test
Strips, or when the One Touch Profile
Meter or One Touch Test Strips are
changed or modified in any way.
The warranty policy applies only to the
original purchaser of this meter and
does not include the batteries supplied
with the meter.
This warranty is in lieu of all other warranties, express or implied, including
any implied warranty of merchantability
or fitness for a particular purpose.
Before you return your meter, or any
product, call your authorized LifeScan
representative.
Please complete the warranty service
card and mail it to LifeScan.
70
INSULIN TYPES
BOLUS
SHORT
Short insulin
INTERM
Intermediate insulin
LONG
Long insulin
CARBOH Carbohydrate intake
XLONG
Extra long insulin
20/80
30/70
Mixture 20% Short and
80% Intermediate
Mixture 30% Short and
70% Intermediate and
40/60
50/50
Mixture 40% Short and
60% Intermediate
Mixture 50% Short and
50% Intermediate
MIXTUR
OTHER
Insulin pump setting, insulin
taken over baseline amount
UNITS WILL ADVANCE ON
THE DISPLAY AS FOLLOWS
Mixture other than mixtures
identified
Other insulin types not
specified
BOLUS
0.0 - 20.0 (steps of 0.1)
CARBOH
0 - 150 (steps of 1)
All others 0 - 99 (steps of 1)
71
1995
The enclosed LifeScan Blood Glucose Meter, as an electro-medical device, has been thoroughly
tested and found to comply with the essential requirements of the ElectroMagnetic
Compatibility Directive (EMC 89/336/EEC), 1995.
For further information on LifeScan products,
please call your authorized LifeScan representative.
© LifeScan, Inc. 2000
Milpitas, California 95035, U.S.A.
U.S. and foreign patents;
other patents pending.
IFD/OB/OTP
Rev.: 02/2000