1
ESTABLISHED 1931
MANUFACTURING CORPORATION
THIS WARRANTY SHALL BE IN LIEU OF ALL OTHER WARRANTIES; EXPRESSED, IMPLIED, OR
STATUTORY, INCLUDING WARRANTIES OF MERCHANTABILITY ARISING OUT OF THE USE OF,
OR AN INABILITY TO USE THE PRODUCT.
Repeat-O-Type Manufacturing Corporation warrants its refill ink products against defects in materials and
workmanship for one year from date of purchase. In the unlikely event that a Repeat-O-Type refill ink product does not perform
satisfactorily when used as directed, Repeat-O-Type will replace it at no charge. If a cartridge is refilled and will not produce
acceptable prints, the ink cartridge may be worn out or damaged. Repeat-O-Type makes no warranty on the life of an ink
cartridge of which it is not the manufacturer.
Furthermore, Repeat-O-Type guarantees that when used as directed, our ink will not damage your printer. If the
use of Repeat-O-Type ink is cited as the cause of damage to a printer, you should request a written statement from the service
company specifying exactly how Repeat-O-Type's ink was responsible for the damage. This statement must be on the service
company's letterhead, dated and signed by the company's representative. Before authorizing repair, forward the statement
to Repeat-O-Type along with the following: 1) Written estimate of cost to repair damage caused by use of Repeat-O-Type
ink, 2) Store receipt showing purchase of Repeat-O-Type ink, and 3) Ink cartridge in which Repeat-O-Type ink was used.
After verification, Repeat-O-Type will either agree to pay reasonable service or repair charges or will authorize shipment of
printer to a repair facility of Repeat-O-Type's choice for repair at no charge.
This warranty gives you specific legal rights and you may have other rights which vary from state to state.
for U.S.A. and Canada
Inkjet Products Limited Warranty
In the unlikely event that ink gets on your fingers, it can easily be removed by moistening a paper towel with a solution
of laundry bleach diluted with an equal amount of water. Be sure to wash hands thoroughly after using bleach solution.
INSTRUCTIONS
FOR REFILLING
LEXMARK COLOR
CARTRIDGES
Also for some Compaq,
Xerox and Sharp
IMPORTANT! You will have much better success in refilling if you add ink
as soon as a color is depleted. It is difficult to unclog a dried-out cartridge.
LEXM
ARK
All Lexmark
Color Cartridges
Except 10N0026
See Page 1
Lexmark 10N0026 ONLY
See Page 2
IF YOU HAVE ANY QUESTIONS OR ENCOUNTER ANY DIFFICULTY
IN USING THIS PRODUCT, PLEASE CONTACT:
MANUFACTURING CORPORATION
665 State Highway 23 • Wayne, NJ 07470-6892 U.S.A. • (973) 696-3330 • (800) 288-3330
Fax: (973) 694-7287 • Email: [email protected] • www.repeatotype.com
ESTABLISHED 1931
Lexmark is a registered trademark of Lexmark International.
Scotch Tape is a registered trademark of 3M Corp. Compaq is a trademark of Compaq Computer Co.
Xerox is a trademark of Xerox Corp. Sharp is a trademark of Sharp Electronics Corp.
©2002 Repeat-O-Type Manufacturing Corporation.
LX80RC 5/02
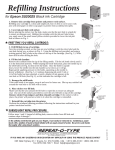
Refilling Instructions —All except 10N0026
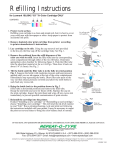
Refilling Instructions—ONLY 10N0026
for Lexmark 12A1980/12A1985/15M0120/15M0125/17G0060/16G0065; CONTAINS SHARP BLADE
KEEP KIT AND TOOL
Compaq 337710-001; Xerox 8R7880/8R7882/8R12591
OUT OF REACH OF
and Sharp AJ-C50C Tri-Color Cartridges
CHILDREN
for Lexmark 10N0026 Tri-Color Cartridge ONLY
CONTENTS:
Ink Dispensers
Cyan/Magenta/Yellow
3 x 15cc
CONTENTS:
Ink Dispensers
Cyan/Magenta/Yellow
3 x 15cc
1 Cap
Removal Tool
1. Protect work surface.
Refilling your cartridge is a clean and simple job, but it is best to cover your
work area with newspaper or other scrap paper to protect from accidental
ink spills.
2. Remove depleted color print cartridge from printer
according to printer manufacturer's instructions.
1. Protect work surface.
Refilling your cartridge is a clean and simple job, but it is
best to cover your work area with newspaper or other
scrap paper to protect from accidental ink spills.
Pry off cap with
blade tool supplied
Yellow
Fig. 2
Fig. 2
Magenta
5. Tilt the bottle until the filler tube is in the fully inverted
position Fig. 3. Squeeze the bottle with moderate pressure and keep
pressure applied until you see ink appear at the top of the color
compartment. Immediately stop squeezing the bottle. Draw filler tube most
of the way out then release pressure on bottle and allow the refill bottle to
suck back any excess ink.
Fig. 3
6. Bring the bottle back to the position shown in Fig. 2
(filler tube in horizontal position) and remove the filler tube.
Recap the ink bottle and save for future refills. Replace the cap
on the print cartridge and tape into place with pressure sensitive
TM
Scotch Tape . See Fig. 4. Inspect the print head and wipe off
any excess ink immediately to prevent possible contamination
of print nozzles.
Dispense ink
into selected
color chamber
Fig. 4
Tape
ve
e Sensiti
Pressur
619
1380
4076
Color
Print
ge
Car trid
Magenta
4. Remove the scabbard from the refill dispenser of the
color you wish to refill. Insert the filler tube into the corresponding
color compartment through either of the two fill holes. Determine
appropriate color chamber by following figure 2. Push the filler tube
into the absorbent material as far as it will go. Then draw it back
out about 1/4" (6.5mm). See Fig. 2
5. Tilt the bottle until the filler tube is in the fully inverted
position Fig. 3. Squeeze the bottle with moderate pressure
and keep pressure applied until you see ink appear at the top of
the color compartment. Immediately stop squeezing the bottle.
Draw filler tube most of the way out then release pressure on
bottle and allow the refill bottle to suck back any excess ink.
Magenta
Yellow
Cyan
-1-
Pry off cap with
blade tool supplied
3. Lay cartridge on its side. CAREFULLY using the razor
knife provided in the kit, work the blade into the joint
between the green cap and black cartridge body on all four
sides to pry off cap. See Fig. 1.
4. Remove the scabbard from the refill dispenser of the color
Yellow
you wish to refill. Insert the filler tube into the corresponding color
Cyan
compartment through either of the two fill holes. Determine
appropriate color chamber by following figure 2. Push the filler tube
into the absorbent material as far as it will go. Then draw it back
out about 1/4" (6.5mm). See Fig. 2
7. Reinstall the cartridge into the printer.
If asked “Installing a new cartridge” or “Reinstalling a used cartridge,”
choose “Installing a new cartridge.” This will reset the ink level
monitor to read “Full.” Run a priming/cleaning cycle and print test
following the instructions included with your printer. It may be
necessary to repeat the print test several times to bring the color
balance back to normal.
Fig. 1
2. Remove depleted color print cartridge from printer
according to printer manufacturer's instructions.
Fig. 1
3. Lay cartridge on its side. CAREFULLY using the razor knife provided
in the kit, work the blade into the joint between the green cap and black
cartridge body on all four sides to pry off cap. See Fig. 1.
1 Cap
Removal Tool
CONTAINS SHARP BLADE
KEEP KIT AND TOOL
OUT OF REACH OF
CHILDREN
Place pressure
sensitve
Scotch Tape
firmly on
cartridge cap
TM
6. Bring the bottle back to the position shown in Fig. 2
(filler tube in horizontal position) and remove the filler tube.
Recap the ink bottle and save for future refills. Replace the cap
on the print cartridge and tape into place with pressure sensitive
Scotch TapeTM see Fig. 4. Inspect the print head and wipe off
any excess ink immediately to prevent possible contamination
of print nozzles.
7. Reinstall the cartridge into the printer.
If asked “Installing a new cartridge” or “Reinstalling a used
cartridge,” choose “Installing a new cartridge.” This will reset
the ink level monitor to read “Full.” Run a priming/cleaning
cycle and print test following the instructions included with
your printer. It may be necessary to repeat the print test several
times to bring the color balance back to normal.
-2-
Cyan
Fig. 3
Yellow
Cyan
Magenta
Dispense ink
into selected
color chamber
Fig.4
e
e Tap
nsitiv
ure Se
Press
Place pressure
sensitve
Scotch Tape
firmly on
cartridge cap
TM
LX80RC 5/02