1
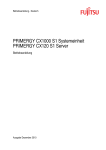
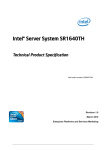
ThinkServer TD230
Remote Management User Guide
ThinkServer TD230
Remote Management User Guide
Note:
Before using this information and the product it supports, be sure to read and understand the following:
• The Important Notices that came with your product
• The Safety Information and the Warranty and Support Information on the ThinkServer Documentation DVD
that came with your product
Second Edition (September 2010)
© Copyright Lenovo 2010.
LENOVO products, data, computer software, and services have been developed exclusively at private expense and are
sold to governmental entities as commercial items as defined by 48 C.F.R. 2.101 with limited and restricted rights to
use, reproduction and disclosure.
LIMITED AND RESTRICTED RIGHTS NOTICE: If products, data, computer software, or services are delivered pursuant
a General Services Administration “GSA” contract, use, reproduction, or disclosure is subject to restrictions set forth
in Contract No. GS-35F-05925.
Contents
Chapter 1. Introduction . . . . . . . . . 1
Target audience . . . . . . . . . . . . . . .
Terminology . . . . . . . . . . . . . . . . .
Safety information . . . . . . . . . . . . . .
1
1
1
Chapter 2. Remote Management
Module overview . . . . . . . . . . . . 3
Remote Management Module features . . . . . .
3
Chapter 3. Configuring the remote
management module . . . . . . . . . . 5
Chapter 4. Getting started with
Remote Management Module . . . . . 7
Before you begin . .
Client browsers
Logging in . . . .
Navigation . . . .
Online help . . . .
Logging out . . . .
.
.
.
.
.
.
.
.
.
.
.
.
.
.
.
.
.
.
.
.
.
.
.
.
.
.
.
.
.
.
.
.
.
.
.
.
.
.
.
.
.
.
.
.
.
.
.
.
.
.
.
.
.
.
.
.
.
.
.
.
.
.
.
.
.
.
.
.
.
.
.
.
Chapter 5. Remote Console (KVM)
operation . . . . . . . . . . . . . . .
Launch the redirection console . . .
Main window . . . . . . . . . .
Remote Console control bar . . . .
Remote Console video menu . .
Remote Console keyboard menu
Remote Console mouse menu. .
Remote Console options menu .
© Copyright Lenovo 2010
.
.
.
.
.
.
.
.
.
.
.
.
.
.
.
.
.
.
.
.
.
.
.
.
.
.
.
.
.
.
.
.
.
.
.
.
.
.
.
.
.
7
7
7
8
9
9
11
11
11
12
12
12
12
13
Remote Console device menu . . . . . . .
Remote Console status line . . . . . . . . .
13
14
Chapter 6. Remote Management
Module Web Console options . . . .
15
System Information . . . . . . . . .
Viewing System Information . . .
Viewing the Field Replaceable Unit
information . . . . . . . . . .
Server Health . . . . . . . . . . .
Viewing Server Readings . . . . .
Viewing Event Log . . . . . . .
Configuring settings . . . . . . . .
Configuring network settings . . .
Managing users . . . . . . . .
Log-in security configuration . . .
Configuring LDAP Settings . . . .
Configuring SSL Upload . . . . .
Configuring Remote Session . . . . .
Configuring Mouse Mode Setting .
Macro-variables of the keyboard . .
Remote Control . . . . . . . . . .
Console Redirection. . . . . . .
Server power control . . . . . .
. . . .
. . . .
15
15
.
.
.
.
.
.
.
.
.
.
.
.
.
.
.
.
.
.
.
.
.
.
.
.
.
.
.
.
.
.
.
.
15
15
15
16
16
16
17
17
17
18
18
18
19
19
19
19
Appendix A. FAQ . . . . . . . . . . .
21
Appendix B. Notices . . . . . . . . .
23
Trademarks . . . . . . . . . . . . . . . .
24
.
.
.
.
.
.
.
.
.
.
.
.
.
.
.
.
.
.
.
.
.
.
.
.
.
.
.
.
.
.
.
.
iii
iv
ThinkServer TD230 Remote Management User Guide
Chapter 1. Introduction
The Lenovo® ThinkServer® Remote Management Module works as an integrated solution on your server
system. Based on an embedded operating system, the Lenovo ThinkServer Remote Management Module
add-on card provides both exceptional stability and permanent availability independent of the present state
of the server’s operating system. As a system administrator, you can use the Lenovo ThinkServer Remote
Management Module to gain location-independent remote access to respond to critical incidents and
to undertake necessary maintenance.
Designed to work with the Baseboard Management Controller (BMC), this small form-factor mezzanine card
enables server control via a built-in Web Console from anywhere, anytime.
This User Guide describes how to use the Lenovo ThinkServer Remote Management Module (hereinafter
referred to as Remote Management Module). It provides an overview of the features of the module and
instructions on how to set up and operate the Remote Management Module.
Target audience
This Guide is intended for system technicians who are responsible for installing, troubleshooting, upgrading,
and repairing the Remote Management Module. As a system administrator, you can use it to work on the
Remote Management Module to gain location-independent remote access to respond to critical incidents.
Terminology
The following table lists the terminology used in this document and the description.
Definition
Word/Acronym
BMC
Baseboard Management Controller
DHCP
Dynamic Host Configuration Protocol
IPMI
Intelligent Platform Management Interface
KVM
Keyboard, Video and Mouse
MAC
Media Access Controller
TCP/IP
Transmission Control Protocol / Internet Protocol
Safety information
Before working with your Remote Management Module server product — whether you are using this
guide or any other resource as a reference — pay close attention to the safety instructions. You must
adhere to the assembly instructions in this guide to ensure and maintain compliance with existing product
certifications and approvals. Use only the described regulated components specified in this guide. Use of
other products/components will void the UL listing and other regulatory approvals of the product and will
most likely result in noncompliance with product regulations in the region(s) in which the product is sold.
Warnings:
• System power on / off: The server power button DOES NOT turn off the system power or Remote
Management Module power. To remove power from the Remote Management Module you must unplug
© Copyright Lenovo 2010
1
the server AC power cord from the wall outlet. Make sure the AC power cord is unplugged before you
open the chassis to add or remove the Remote Management Module.
• Hazardous conditions, devices and cables: Hazardous electrical conditions may be present on
power, telephone, and communication cables. Turn off the server and disconnect the power cord,
telecommunications systems, networks, and modems attached to the server before opening it. Otherwise,
personal injury or equipment damage can result.
• Electrostatic discharge (ESD) and ESD protection: ESD can damage disk drives, boards, and other
parts. We recommend that you perform all procedures in this chapter only at an ESD workstation. If one
is not available, provide some ESD protection by wearing an antistatic wrist strap attached to chassis
ground — any unpainted metal surface — on your server when handling parts.
• ESD and handling boards: Always handle boards carefully. They can be extremely sensitive to ESD.
Hold boards only by their edges. After removing a board from its protective wrapper or from the server,
place the board component side up on a grounded, static free surface. Use a conductive foam pad if
available but not the board wrapper. Do not slide board over any surface.
• Installing or removing jumpers: A jumper is a small plastic encased conductor that slips over two
jumper pins. Some jumpers have a small tab on top that you can grip with your fingertips or with a pair of
fine needle nosed pliers. If your jumpers do not have such a tab, take care when using needle nosed
pliers to remove or install a jumper; grip the narrow sides of the jumper with the pliers, never the wide
sides. Gripping the wide sides can damage the contacts inside the jumper, causing intermittent problems
with the function controlled by that jumper. Take care to grip with, but not squeeze, the pliers or other
tools you use to remove a jumper, or you may bend or break the pins on the board.
2
ThinkServer TD230 Remote Management User Guide
Chapter 2. Remote Management Module overview
This section gives you an overview of the Remote Management Module and highlights significant benefits of
its features.
The Remote Management Module is a 1.23-inch x 2.30-inch printed circuit board. When installed onto
the Remote Management Module connector on Lenovo server boards, it provides an increased level of
manageability over the basic server management available to the server board. It works as an integrated
solution on your server system.
Remote Management Module features
The Remote Management Module add-on card offers convenient, remote KVM access and control via LAN
or Internet. It captures, digitizes, and compresses video and transmits it with keyboard and mouse signals
to and from a remote computer. Remote access and control software runs in the integrated Baseboard
Management Controller, utilizing expanded capabilities provided by the Remote Management Module
hardware.
Figure 1. Remote Management Module
In addition, the Remote Management Module add-on card offers integrated remote power management
using IPMI. Key features of the Remote Management Module add-on card are:
• Embedded Web Console UI supports remote power on / off, system health, system info, event log
• KVM redirection via either the Remote Management Module NIC or the baseboard NIC used for
management traffic; high performance, up to two simultaneous KVM sessions
• USB 2.0 media redirection - boot over remote media
• Security – open SSL, open LDAP
• OEM Customization of the Web Console
• IPMI V2.0 Compliance
• KVM - automatically senses video resolution for best possible screen capture, high-performance mouse
tracking and synchronization. It allows remote viewing and configuration in pre-boot POST and BIOS setup
© Copyright Lenovo 2010
3
4
ThinkServer TD230 Remote Management User Guide
Chapter 3. Configuring the remote management module
This chapter describes how to use the Setup Utility program to configure the remote management module
from the un-configured status to the running status. It is recommended that you manually set a static IP
address in the Setup Utility program.
To set an IP address, do the following:
1. Connect the server to a working electrical outlet and turn on the server by pressing the power button.
2. Press F2 as soon as you see the logo screen. The Setup Utility program opens. If you have set an
administrator password, you must type the administrator password to access the full Setup Utility
program menu. When working with the Setup Utility program, you must use the keyboard. The keys
used to perform various tasks are displayed at the bottom of each screen.
3. From the main menu, select Server Management ➙ BMC LAN Configuration. Refer to Table 1 “BMC
LAN Configuration” on page 5 for information about the subitems.
4. Under Intel (R) RMM3 LAN configuration, make sure the status of the Intel RMM3 is Present. Then
you can choose Static or DHCP to set the IP address from the IP source option. It is recommended
that you manually set a static IP address.
Note: The RMM3 IP address must be on a different subnet from the baseboard IP address used for
management traffic.
5. Under User configuration, you can set the user ID and user password. For example:
User ID: root
User password: superuser
6. When you finish the configuration, press F10 to save and exit.
Table 1. BMC LAN Configuration
BMC LAN Configuration
© Copyright Lenovo 2010
Baseboard LAN configuration
Use this option to configure the
Baseboard LAN.
Intel (R) RMM3 LAN configuration
Use this option to configure the
RMM3 LAN.
User configuration
Use this option to configure the user
ID and password.
5
6
ThinkServer TD230 Remote Management User Guide
Chapter 4. Getting started with Remote Management Module
The Remote Management Module features an embedded web server and applications offering a variety of
standardized interfaces. This section describes both the interfaces and how to use them. The interfaces are
accessed using TCP/IP protocol.
Before you begin
For initial setup information, refer Chapter 4 “Getting started with Remote Management Module” on page 7.
Before you log in, you must enable the intended user. The examples in this chapter will use user “root”, but
other usernames and passwords could be used.
The Remote Management Module add-on card may be accessed using a standard Java enabled web
browser. You may use the HTTP protocol or a secure encrypted connection via HTTPS.
Client browsers
In order to access the web console using a securely encrypted connection, you will need a browser that
supports the HTTPS protocol. Strong security is only assured by using a Cipher Strength (encryption) of 128
- Bit. Some older browsers may not have a strong 128 Bit encryption algorithm.
If you are using Windows* Internet Explorer 6.0 or higher, you can verify strong encryption by opening the
“Help / About” menu to read about the key length that is currently activated.
In order to use the Remote Console (KVM) window of your managed server, you must install the Java
Runtime Environment* (JRE*) version 1.6 or higher.
Note: The Web Console is designed for a screen size of 1280 pixels by 1024 pixels or larger. In smaller
screens, the browser will display slider controls to enable the user to see the full content of each web page.
Logging in
Step 1.
Enter the configured IP address of the Remote Management Module add-on card into your web
browser.
For example:
http://10.223.131.36/
To use a secure connection, type in as the following example:
https://10.223.131.36/
This will take you to the Remote Management Module module login page.
Step 2.
Log in by entering the username and password.
For example:
• Username = root
• Password = superuser
Note: The Username and Password are case sensitive. Any username and password could be
used (except anonymous).
Step 3.
Click Login to view the Remote Management Module home page.
© Copyright Lenovo 2010
7
After the initial log in, System Administrators may change passwords, create new users, and have full control
over access to the Remote Management Module.
Navigation
After successful login to the Remote Management Module module, the Remote Management Module
home page is displayed.
The top horizontal toolbar within the Remote Management Module home page has four tabs. Click these
tabs to get specific system information and perform tasks as shown in the following table:
Tab
System Information
Features
Click this tab to access general information about
the server. The tab automatically opens the System
Information page:
• System Information
• FRU Information
Server Health
Click this tab for access to the sensors and event log.
The tab automatically opens the Sensor Readings page
• Sensor Readings
• Event Log
Configuration
Click this tab to configure various settings for the server.
The tab automatically opens the network configuration
page.
• Network
• Users
• LDAP
• SSL
• Remote Session
• Mouse Mode
Remote Control
Click this tab for access to the remote console and to
control the power state of the server.
• Console Redirection
• Server Power Control
The four tabs on the horizontal menu allow you to navigate within the Remote Management Module Web
Console. Each of these tabs contains a secondary menu on the left edge of the browser window. For
detailed information on the specific functions of secondary menu item, see Chapter 6 “Remote Management
Module Web Console options” on page 15.
The top horizontal tool bar also has the LOGOUT, REFRESH and HELP buttons to perform tasks as shown
in the following table:
8
ThinkServer TD230 Remote Management User Guide
Button
Features
LOGOUT
Click this button to end the current Web Console session.
Note that a remote console (KVM) window, if active, will
be closed when you log out. After logging out, the Web
Console will return to the Login screen.
REFRESH
Click this button to refresh the current web page, including
any data shown on the page.
HELP
Click this button to view a brief description of the current
page in a frame at the right-hand side of the browser
window. Close the Help frame by clicking the “X” in the
upper right corner of the frame or by clicking the HELP
button again.
Online help
The Web Console user interface gives specific online help for each page. For additional information on a
certain topic or group of options, click HELP on the top horizontal toolbar to view the online help. The right
Help frame is visible only when the online Help is being accessed.
Logging out
Click LOGOUT to log out the current user and revert to a new login screen.
Note: Automatic Timeout: If the Web console detects no user activity within 15 minutes, the current
session will be automatically terminated. If the user has opened the KVM remote console window, then the
Web session will not automatically timeout. After the automatic timeout happens, if the user tries to take the
next operation, the system will inform the user that logon again is needed if he wants to continue to access
the Web console. If there is no user activity detected by the Web Console for 30 minutes, the current session
will be automatically terminated. If the user has an open KVM remote console window, the web session will
not automatically timeout. The next action attempted by the user after the automatic timeout will inform the
user of the need to login again for continued access to the Web Console.
Chapter 4. Getting started with Remote Management Module
9
10
ThinkServer TD230 Remote Management User Guide
Chapter 5. Remote Console (KVM) operation
The Remote Console is the redirected screen, keyboard and mouse of the remote host system where the
Remote Management Module is installed. To use the Remote Console window of your managed host
system, the browser must include a Java* Runtime Environment plug-in. If the browser has no Java support,
such as with a small handheld device, the user can maintain the remote host system using the administration
forms displayed by the browser.
Starting the Remote Console opens a new window to display the screen content of the host system. The
Remote Console acts as if the administrator were sitting directly in front of the screen of his/her remote
system. This means the keyboard and mouse can be used in the usual way.
Launch the redirection console
The Remote Console is the redirected keyboard, video and mouse of the remote host system where the
Remote Management Module is installed. Launch the remote console KVM redirection window from this
page.
Step 1.
Click Launch Console to launch the redirection console and remotely manage the server.
Step 2.
A pop-up window is displayed and begins to download the Java Network Launch Protocol —
jviewer.jnlp file. This in turn downloads the standalone Java application implementing the Remote
Console.
Both Microsoft Internet Explorer and Mozilla Firefox browsers are supported.
Notes:
• You must install the Java Run-Time Environment (JRE, version 6 update 10 or later) on the client
prior to the launch of a JNLP file.
• The client browser must allow pop-up windows from the Remote Management Module IP
address.
The Remote Console window is a Java Applet that establishes TCP connections to the Remote
Management Module module. The protocol that is run over these connections is a unique KVM
protocol and not HTTP or HTTPS. This protocol uses ports #7578 for KVM, #5120 for CDROM
media redirection, and #5123 for Floppy/USB media redirection. Your local network environment
must permit these connections to be made, i.e. your firewall and, in case you have a private internal
network, your NAT (Network Address Translation) settings have to be configured accordingly.
Main window
Starting the Remote Console opens an additional window.
The window displays the screen content of your remote server. The Remote Console will behave as if
you were located at the remote server. The responsiveness may be slightly delayed depending on the
bandwidth and latency of the network between the Remote Management Module and Remote Console.
Enabling KVM and/or media encryption on the Configuration ➙ Remote Session web page will degrade
performance as well.
The Remote Console window always shows the remote screen in its optimal size. This means it will adapt its
size to the size of the remote screen initially and after the screen resolution of the remote screen has been
changed. However, you can always resize the Remote Console window in your local window as usual.
© Copyright Lenovo 2010
11
Remote Console control bar
The upper part of the Remote Console window contains a control bar. Using its elements you can see the
status of the Remote Console and influence the local Remote Console settings.
The following sub sections describe the tasks you can perform within each control.
Remote Console video menu
Click Video in the Remote Console control bar to open the Remote Console Video Menu.
Using this menu, you can do the following:
• Pause Redirection: Temporarily pauses redirection of keyboard, video, and mouse. The Remote Console
window stops being updated. Keyboard shortcut is ALT+P.
• Resume Redirection: Resume redirection after a pause. Shortcut is ALT+R.
• Refresh Video: Refreshes the Remote Console window. Shortcut is ALT+E.
• Compression: Enabling compression improves the responsiveness of the Remote Console. Disabling
compression maximizes the quality of the redirected video.
• Full Screen: Toggles windowed/full screen mode of the Remote Console. Shortcut is ALT+F.
• Exit: Close Remote Console.
Remote Console keyboard menu
Click Keyboard to open the keyboard menu with options to perform tasks.
Using this menu, you can do the following:
• Hold Ctrl/Alt/Windows keys: Allows simulating holding down these special keys on the remote
keyboard. On the local keyboard these special keys are processed by the local operating system and
not passed on to the remote operating system.
• Ctrl+Alt+Del: Issue a Ctrl+Alt+Del to the remote operating system.
Remote Console mouse menu
Click Mouse to open the mouse menu with options to perform tasks
The Mouse submenu offers two options:
• Show Cursor: This option toggles the cursor display in the Remote Console window. It does not affect
the remote system cursor. Shortcut is ALT+C.
• Calibrate Mouse Acceleration: This option is used to detect the acceleration settings on the remote
system and set the local client’s acceleration setting accordingly. It only applies when in Relative Mouse
Mode, selected in the web page Configuration ➙ Mouse Mode. Absolute Mouse Mode does not
require calibration. Shortcut is ALT+A.
For Relative Mouse Mode operation, following is the mechanism to synchronize the mouse settings.
Mouse Acceleration Calibration
1. If the remote mouse and local mouse cursor are not in sync, start mouse acceleration calibration by
selecting Calibrate Mouse Acceleration menu item or pressing ALT+A.
12
ThinkServer TD230 Remote Management User Guide
2. Once started, you will see two mouse cursors moving diagonally across the screen (starting at 0, 0
location). The local mouse cursor is displayed in RED color to differentiate between the two mouse
cursors.
3. Depending upon the difference in acceleration settings on both ends, mouse cursors may eventually
go out of sync.
4. Press the + or - key to change the acceleration settings.
5. If the local mouse cursor is lagging behind the host cursor, press the + key to try to be in sync. If the
local cursor is moving ahead of the host cursor, press the - key to sync it up.
6. Adjust the sync using the + or - key, until you achieve the maximum sync possible. A good indicator
of that setting is that the mouse movement switches from lagging to leading or vice-versa when the
most optimal value is crossed.
7. To ensure that both cursors are in sync, wait until they reach the bottom of the screen and are still in sync.
8. Once in sync, press ALT+A to stop acceleration calibration and save the current acceleration settings.
9. Now when acceleration sync is done, start mouse threshold calibration by selecting Calibrate Mouse
Threshold menu item or pressing ALT+T.
10. The behavior is same as in mouse acceleration case. Once started, you will see two mouse cursors
moving diagonally across the screen (starting at 0, 0 location). The local mouse cursor is displayed in
RED color to differentiate between the two mouse cursors.
11. Depending upon the difference in threshold settings on both ends, mouse cursors may eventually
go out of sync.
12. Press the + or - key to change the threshold settings.
13. If the local mouse cursor is lagging behind the host cursor, press the + key to try to be in sync. If the
local cursor is moving ahead of the host cursor, press the - key to synch it up.
14. Adjust the sync using the + or - key, until you achieve the maximum sync possible. A good indicator
of that setting is that the mouse movement switches from lagging to leading or vice-versa when the
most optimal value is crossed.
15. To ensure that both cursors are in sync, wait until they reach the bottom of the screen and are still in sync.
16. Once in sync, press ALT+T to stop threshold calibration and save the current threshold settings. At this
point, both local and the remote mouse cursors should be in synchronization.
Note: Once the acceleration calibration is preformed, you must calibrate threshold settings for the mouse to
be in sync.
Remote Console options menu
Using the Options menu, you can do the following:
• Bandwidth: Changing the bandwidth setting affects low-level connection protocol parameters like
fragment size and timeouts. If you experience performance problems when operating over a slow
connection such as a modem, the bandwidth setting may need to be adjusted. Use the Auto Detect
option to find the correct setting for your connection.
• Keyboard/Mouse Encryption: Keyboard and Mouse data are normally encrypted before being sent over
the connection, but this can be disabled for a small performance increase.
Remote Console device menu
This menu option allows starting/stopping remote media redirection. The first two options allow you to
redirect either a local CDROM/DVD drive or else an ISO image on your local client file system as a virtual
CDROM device on the remote system. The last two options allow you to redirect either a local floppy drive,
a local USB key drive, or a floppy .img file as a virtual floppy device on the remote system.
Chapter 5. Remote Console (KVM) operation
13
The virtual devices act just like any other CDROM or floppy on the remote system. They can be read, written
(assuming they are not read-only), and booted. The pair of virtual devices only appear on the remote
operating system or BIOS setup menus when some media redirection is active. The virtual devices persist
across remote system resets and power up/downs. They do not disappear from the remote system until the
checkboxes are unchecked in the Remote Console window.
Note that the virtual devices are not limited to normal floppy/CDROM sizes and will be as large as the
device or file being redirected. A USB Key drive is redirected as a virtual floppy device rather than a USB
device to allow the loading of custom device drivers during remote operating system installation which may
require a floppy drive.
There is only one virtual CDROM and one virtual floppy device on the remote system allowed so only one
local item of each type can be redirected at a time. Only one Remote Console window can be doing media
redirection at any given time.
Remote Console status line
The status line at the bottom of the Remote Console screen shows the console state. As you navigate the
menu options, the status line gives a more detailed definition of each option.
14
ThinkServer TD230 Remote Management User Guide
Chapter 6. Remote Management Module Web Console options
This chapter gives you a detailed description of each Web Console page. It is organized in sections
corresponding to the four tabs in the horizontal menu. Within each section, each menu choice from the
left-hand menu is illustrated and described in detail.
Notes:
• The first menu item for each tab is the default page which appears when the tab is selected.
• Similar information about each page is available in the Web Console by clicking HELP at the right side
of the horizontal menu.
• When the Web Console is working on current user request, a busy indicator bar is displayed.
System Information
By default, the Remote Management Module home page opens in the System Information page.
It contains general information about the system as explained in the following sub sections.
Viewing System Information
The System Information page displays a summary of the general system information.
The System Information page has the following information about the server:
Information
Description
Host Power Status
Shows the power status of the host (on/off).
Remote Management Module Status
Indicates if the Remote Management Module card is
present and if the firmware is up to date.
Device (BMC) Available
Indicates whether the BMC is available for normal
management tasks.
BMC FW Build Time
The date and time of the installed BMC firmware.
BMC FW Rev
Major and minor revision of the BMC firmware.
Boot FW Rev
Major and minor revision of the BOOT firmware.
Viewing the Field Replaceable Unit information
The FRU Information page displays information from the FRU (Field Replaceable Unit) repository of the host
system, including chassis information, board information and product information.
Server Health
The Server Health page shows you data related to the server's health, such as sensor readings and the event
log. Click the Server Health tab to display the page. By default, this tab opens the Sensor Readings page.
Viewing Server Readings
The Sensor Readings page displays system sensor information including readings and status.
The following table lists the options available in this page:
© Copyright Lenovo 2010
15
Task Description
Option
Sensor selection pull-down box
Select the type of sensor readings to display in the list.
The default is to see all sensors.
Sensor Readings list
Selected sensors shown with their name, status, and
readings.
Show Thresholds button
Click it to expand the list, showing low and high threshold
assignments. See the critical (CT) and non-critical (NC)
thresholds for the selected sensors. Use scroll bar at the
bottom to move display left and right.
Hide Thresholds button
Click it to return to original display, hiding the threshold
values.
Refresh
Click it to refresh the selected sensor readings.
Viewing Event Log
The Event Log page displays the event logs.
The following table lists the options available in this page:
Task Description
Option
Event Log category drop-down list
Select the type of events to display in the list.
Event Log list
Selected sensors are shown with their name, status, and
readings. This includes a list of the events with their ID,
time stamp, sensor name, sensor type, and description.
Clear Event Log button
Click it to clear the event logs.
Configuring settings
The Configure Settings page is used to configure settings. By default, it opens in the Network Settings
window.
Warning: The Remote Management Module IP address must be on a different subnet than the baseboard IP
address used for management traffic.
Configuring network settings
The Network Settings page is used to configure the network settings. It provides options to do either
of the following:
• Automatic: Obtain the IP address automatically (use DHCP).
• Manual: Manually configure one.
The following table lists the options available in this page:
16
ThinkServer TD230 Remote Management User Guide
Task Description
Option
LAN Channel number drop-down box
It lists the LAN Channel(s) available for server
management. The LAN channels describe the physical
NIC connection on the server. Remote Management
Module channel is the add-in Remote Management
Module NIC.
The Baseboard Mgmt channel (BMC LAN Channel 1) is
the onboard, shared NIC configured for management and
shared with the operating system.
MAC Address
The MAC address of the device (read only)
IP Address
Select the type of IP assignment with the radio buttons.
If configuring a static IP, enter the requested address,
subnet mask, and gateway in the given fields.
Notes:
• IP Address made of 4 numbers separated by dots as
in “xxx.xxx.xxx.xxx”.
• “xxx” ranges from 0 and 255.
• First “xxx” must not be 0.
Save button
Click it to save any changes made.
Managing users
The User List page lists the configured users, along with their status and network privilege.
This page has options to configure the IPMI users and privileges for this server. To add a user, select an
empty slot in the list and click Add User to add a new user. To modify a user, select a user in the list and click
Modify User to modify the settings. To delete a user, select a user in the list and click Delete User to delete.
Notes:
• UserID 1 (anonymous) may not be renamed or deleted.
• UserID 2 (root) may not be renamed or deleted; nor can the network privileges of UserID 2 be changed.
• User Names cannot be changed. To rename a User you must first delete the existing User, and then add
the User with the new name.
Log-in security configuration
You can set the login security of the user in this page.
Failed Login Attempts: set the number of failed login attempts by the user. In case the user has exceeded
the maximum number of unsuccessful attempts, the user account will be locked. 0 means no lockout.
The default number of failed login attempts is 3.
User Lockout Time (min): set the account lockout time in minutes by the user in consideration of user’s
need.
Configuring LDAP Settings
To enable or disable LDAP, check or uncheck the Enable LDAP Authentication check box respectively.
The following table lists the options available in this page:
Chapter 6. Remote Management Module Web Console options
17
Task
Option
Enable LDAP Authentication
Check this box to enable LDAP authentication, then enter
the required information to access the LDAP server.
Port
Specify the LDAP Port.
IP Address
The IP address of LDAP server
Notes:
• IP Address made of 4 numbers should be separated by
dots as in “xxx.xxx.xxx.xxx”.
• “xxx” must range from 0 to 255.
• First “xxx” must not be 0.
Bind Password
Authentication password for LDAP server; the password
must be at least 4 characters long.
Bind DN
The Distinguished Name of the LDAP server, for example,
“cn=Manager, dc=my-domain, dc=com”
Searchbase
The searchbase of the LDAP server, for example,
“dc=my-domain, dc=com”
Save button
Click it to save the current settings.
Configuring SSL Upload
Use this page to upload an SSL certificate and privacy key, which allows the device to be accessed
in secured mode.
First upload the SSL certificate and then the device will prompt to upload privacy key. If either of the files is
invalid the device will notify. The device will give notification on successful upload. On successful upload,
device will prompt to reboot the device. If you want to reboot, click Ok or click Cancel to cancel the
reboot operation.
First upload the SSL certificate and then the device will prompt to upload the privacy key. Click Upload.
On successful upload, a notification is displayed.
Configuring Remote Session
Use this page to enable or disable the encryption on KVM or Media during a redirection session.
The following table lists the options allowing you to enable or disable the encryption on KVM or media data
during a redirection session:
Task
Option
Enable/Disable Encryption mode
Enable/Disable the encryption on KVM or Media data
during a redirection session.
Notes:
• KVM and Media encryption are enabled by default.
• Disabling encryption can improve performance of KVM
or Media redirection.
Save button
Click it to use selected modes.
Configuring Mouse Mode Setting
Click the Mouse Mode tab to view the Mouse Mode Setting window.
18
ThinkServer TD230 Remote Management User Guide
The Redirection Console handles mouse emulation from local window to remote screen in either of two
methods:
• Absolute Mode: Select it to have the absolute position of the local mouse sent to the server. Use this
mode for Windows operating systems.
• Relative Mode: Select it to have the calculated relative mouse position displacement sent to the server.
Use this mode for Linux operating systems.
Click Save to use the selected mode.
Macro-variables of the keyboard
You can view and change the macro-variables of the keyboard in this page. The macro-variables defined
herein will correspond to the buttons in the right top corner of remote control window. The buttons may be
selected at your option. Help may be used to view the name of supported key.
Remote Control
The Remote Control page helps you perform the following remote operations on the server:
• Console redirection
• Server power control
Console Redirection
By default, the Remote Control tab opens in the Console Redirection page. Launch the remote console
KVM redirection window from this page.
Click Launch Console to launch the redirection console and manage the server remotely.
Note: Java Run-Time Environment (JRE, version 6 update 10 or later) must be installed on the client prior
to launch of JNLP file.
Server power control
The server power control page shows the power status of the server.
The following power control operations can be performed:
Option
Task
Reset Server
Select the option to hard reset the host without powering
off.
Power OFF Server
Select the option to. immediately power off the host.
Power ON Server
Select the option to power on the host.
Power Cycle Server
Select the option to immediately power off the host, then
power it back on after one second.
Perform Action button
Click it to execute the selected remote power command.
Note: All power control actions are done through the BMC and are immediate actions. It is suggested to gracefully
shut down the operating system via the KVM interface or other interface before initiating power actions.
Chapter 6. Remote Management Module Web Console options
19
20
ThinkServer TD230 Remote Management User Guide
Appendix A. FAQ
1. Failure to log in the Lenovo ThinkServer Remote Management
Check your user name and password.
2. Failure to get connection with the Lenovo ThinkServer Remote Management.
Check hardware and make sure that the power supply is correctly connected to the server, on which the
Lenovo ThinkServer Remote Management resides. Check your network configuration, such as the IP
address and router.
3. Uppercase/Lowercase on the keyboard out of Synch.
1) In the case of moving the mouse from desktop on the control side to the remote JAVA menu, it is
recommended to click the mouse, and wait for 10~20 seconds and then enter characters, so as to ensure
the synchronized keyboards at both sides.
2) Whenever the uppercase/lowercase is out of synch, it is recommended to return to the desktop on
control side, wait for about 20 seconds, and then move the mouse to the remote JAVA menu. Click the
remote control desktop and then click the Windows/Linux Terminal few seconds later. Here you will find the
synch is thus achieved.
3) In the case of failed synch due to network, it is recommended to shift the Caps Lock key for correct input.
© Copyright Lenovo 2010
21
22
ThinkServer TD230 Remote Management User Guide
Appendix B. Notices
Lenovo may not offer the products, services, or features discussed in this document in all countries. Consult
your local Lenovo representative for information on the products and services currently available in your
area. Any reference to a Lenovo product, program, or service is not intended to state or imply that only that
Lenovo product, program, or service may be used. Any functionally equivalent product, program, or service
that does not infringe any Lenovo intellectual property right may be used instead. However, it is the user's
responsibility to evaluate and verify the operation of any other product, program, or service.
Lenovo may have patents or pending patent applications covering subject matter described in this
document. The furnishing of this document does not give you any license to these patents. You can send
license inquiries, in writing, to:
Lenovo (United States), Inc.
1009 Think Place - Building One
Morrisville, NC 27560
U.S.A.
Attention: Lenovo Director of Licensing
LENOVO PROVIDES THIS PUBLICATION “AS IS” WITHOUT WARRANTY OF ANY KIND, EITHER EXPRESS
OR IMPLIED, INCLUDING, BUT NOT LIMITED TO, THE IMPLIED WARRANTIES OF NON-INFRINGEMENT,
MERCHANTABILITY OR FITNESS FOR A PARTICULAR PURPOSE. Some jurisdictions do not allow
disclaimer of express or implied warranties in certain transactions, therefore, this statement may not apply
to you.
This information could include technical inaccuracies or typographical errors. Changes are periodically
made to the information herein; these changes will be incorporated in new editions of the publication.
Lenovo may make improvements and/or changes in the product(s) and/or the program(s) described in this
publication at any time without notice.
The products described in this document are not intended for use in implantation or other life support
applications where malfunction may result in injury or death to persons. The information contained in this
document does not affect or change Lenovo product specifications or warranties. Nothing in this document
shall operate as an express or implied license or indemnity under the intellectual property rights of Lenovo
or third parties. All information contained in this document was obtained in specific environments and is
presented as an illustration. The result obtained in other operating environments may vary.
Lenovo may use or distribute any of the information you supply in any way it believes appropriate without
incurring any obligation to you.
Any references in this publication to non-Lenovo Web sites are provided for convenience only and do not in
any manner serve as an endorsement of those Web sites. The materials at those Web sites are not part of
the materials for this Lenovo product, and use of those Web sites is at your own risk.
Any performance data contained herein was determined in a controlled environment. Therefore, the result
obtained in other operating environments may vary significantly. Some measurements may have been
made on development-level systems and there is no guarantee that these measurements will be the same
on generally available systems. Furthermore, some measurements may have been estimated through
extrapolation. Actual results may vary. Users of this document should verify the applicable data for their
specific environment.
© Copyright Lenovo 2010
23
Trademarks
Lenovo, the Lenovo logo, and ThinkServer are trademarks of Lenovo in the United States, other countries, or
both.
Java and all Java-based trademarks are trademarks of Sun Microsystems, Inc. in the United States, other
countries, or both.
Internet Explorer, Microsoft and Windows are trademarks of the Microsoft group of companies.
Intel is the trademark of Intel Corporation in the United States, other countries, or both.
Linux is a trademark of Linus Torvalds in the United States, other countries, or both.
Other company, product, or service names may be trademarks or service marks of others.
24
ThinkServer TD230 Remote Management User Guide