1
Getting Ready
OmniSource® Li-Ion
Universal Charger for Li-Ion Camcorder &
Digital Camera Batteries
PLEASE READ THE INFORMATION AND FOLLOW ALL
INSTRUCTIONS THOROUGHLY BEFORE USING THIS
PRODUCT.
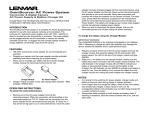
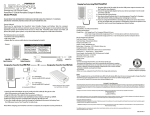
Choose the adapter plate for the type of battery you will be charging.
Each of the adapter plates is labeled as to the batteries it can work
with. If the charger base does not already have the adapter plate you
want attached, you will need to remove the adapter plate first by
pushing down on the plate and sliding it to the rear of the charger
base (away from the LED indicators). Then, attach the selected
adapter plate to the charger unit by aligning the arrows on the sides
of the adapter plates and the charger base as shown. While pressing
down lightly on the adapter plate, slide the plate toward the front of
the charger base until it locks.
Operation:
Plug-in, either the AC 110V or the DC Cigarette Lighter power
adapter, depending on where you are going to use your OmniSource
Li-Ion charger unit. Connect the other end of the power adapter cable
to the power input socket on the charger unit. While the unit is
receiving power, the red Power Indicator LED on the far right, will
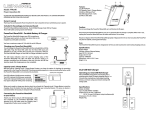
be on. (See diag.-1).
Diag.-1
Introduction
Connect the battery to the adapter plate on the charger unit, and the
red Charge Indicator LED in the center will turn on to indicate that
the unit is fast charging your battery.
The OmniSource Lithium-Ion (Li-Ion) is a fully automatic
camcorder battery charger which is compatible with virtually all 3.6
volt and 7.4 volt Li-Ion batteries for 8mm, VHS-C, digital
camcorders and digital cameras from Nikon, Kodak, Fuji, Sharp,
Sony, Canon, JVC, Panasonic, RCA and other manufacturers. In
addition to the other adapter plates for other Li-Ion battery models.
Diag.-2
This charger uses an advanced charging circuit, which provides a
safe, full charge every time. “Charging” and “Full Charge” status of
the battery is shown on the built-in LED indicators.
Flexible power input allows you to use the OmniSource Li-Ion from
home with its AC Power Supply or on the road using the DC
Cigarette Lighter Adapter included. Avoid prolonged use in an
automobile when the engine is not running as it may drain the battery
in the vehicle.
Plug-in, either the AC Adapter or the DC Cigarette Lighter power
adapter, and connect the other end of the power adapter cable to the
power input jack on the rear of the charger unit.
Status LED’s
Together, the three LED’s on the front of the OmniSource Li-Ion
will indicate the status of the battery and the charger. See the
descriptions and diagrams included in the following sections
regarding the various indications and their meaning.
When the red Charge LED turns off, and the green Charge Complete
LED, turns on, the charger has switched to “trickle” charge mode
and the battery is around 90% charged at this time. The battery will
reach 100% charge within 1-2 hours (depending on the capacity of
the battery) after the green LED has turned on. Be sure to remove the
battery from the charger within a few hours after the green LED has
turned on.
Diag.-3
Note: It is normal for the charger or the battery to become warm
during recharging.
Note: Batteries will self discharge when not in use whether they are
installed in a camcorder, digital camera or not. Batteries can be kept
fresh if you recharge them every 2-3 months, when not being used
regularly.
Cautions:
•
•
•
•
Trouble Shooting Tips:
•
•
•
•
The right hand Power Indicator LED will glow red as long as
power is connected. If not, the unit is not receiving power. Recheck the power connections to the charger (when using the car
adapter, be aware that some cars turn off power to the cigarette
lighter when the key is off).
If the green charge indicator LED turns on immediately when
the battery is attached, the battery may nearly charged already.
Leave the battery on the unit for 1-2 hours to be sure the
battery has been fully charged.
If, after you have attached the battery to be charged, neither the
red or green Charge Indicator LED’s turn on, the battery or
adapter plate may not be properly of fully connected. Unplug
the unit and check all connections of the battery to the adapter
plate and the adapter plate to the charger base. Also, ,make sure
the adapter plate is the proper one for your battery.
Use a clean dry cloth when necessary to keep the metal
contacts of both charger and battery clean.
•
•
•
•
•
Limited 1 Year Warranty
For use with Lithium-Ion batteries ONLY! Use with other type
batteries voids warranty, may cause damage to the charger /
battery and possibly cause injury to the user.
Recharge Li-Ion batteries after use and before being put away.
Do not leave the battery connected to camcorder or camera
when not to being used.
Do not leave the battery connected to the charger for prolonged
periods.
Remove the battery after charge is complete.
Unplug the charger when not in use.
Do not use, place or store the charger where it may come into
contact with water or moisture.
Always replace frayed or damaged wire and broken plugs
immediately.
Use this charger with the power adapters included in the
package only.
It is not necessary or recommended to discharged a Li-Ion prior
to charge.
Note: Batteries will self discharge when not in use whether they are
installed in a camcorder, digital camera or not. Batteries can be kept
fresh if you recharge them every 2-3 months. NiCD batteries should
be stored uncharged.
This limited warranty starts from the date of original purchase and
expires 1 year thereafter. If, during this period, any part, because of
manufacturing defects or workmanship fails to function properly
under normal use will be repaired at no charge for parts and labor or,
at our option, the product will be replaced. The following is
excluded: damages from delay or loss of use of equipment, or
damaged batteries, malfunctions resulting from misuse, tampering,
unauthorized repairs, modifications, or accident.
Package the unit and its accessories carefully using ample padding
material to prevent damage in transit and ship it prepaid and insured
to:
Lenmar Enterprises, Inc.
4035 Via Pescador
Camarillo, CA 93012
When sending in product for service, your package should include
evidence of date and place of purchase. Enclose $10.00 for shipping
and handling for addresses in the U.S. For outside the U.S. and
Canada, freight will vary depending upon ship to address.
For additional questions, comments or to explore other Lenmar
battery solutions, visit our web site at: www.Lenmar.com
Specifications:
•
•
Power Input:
Charge Method:
12-18 VDC @ 500mA
Constant Voltage
Rapid Charge, Switching to
“Trickle Charge” when full.
202-164