1
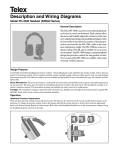
http://koss.com/koss/kossweb.nsf/pmbyunid/E7D4135ED2903AFF86257...
Print
Close This Window
Components
The JR170 RF wireless stereophone includes the following components:
1. Transmitter
2. Headphone
3. Headphone Power LED
4. Power On/Off
5. Battery Door
6. Volume Control
7. Channel Selector
8. Channel Indicator LED
9. Transmitter Power LED
10. Transmitter Power On/Off & Channel Selector
Insert Batteries
1. Locate the battery door on the left earcup.
2. To open the battery door, press the area at the top of the door (about an inch above the Koss Logo), and
push and slide
the door down from the headband.
3. Insert 2 "AA" batteries.
4. Slide battery door back into place.
Turn on wireless operation
1. Locate the power on/off switch on the left earcup.
2. Slide switch to "on".
3. The LED will be red when the unit is powered on.
4. The green Channel Indicator LED will light, when a signal is received.
Set Volume Control
1. Locate the volume control on the bottom of the right earcup.
2. Adjust the volume to a comfortable setting.
Trouble Shooting Guide
No sound from the stereophone
Check that the unit is "on" / Check that the stereophone batteries are fresh and inserted in the correct
direction /
Adjust volume control
Distortion, background noise
Verify you are on the correct channel / Check batteries
Hookup & Operation
Transmitter Hookup
1. Connect AC Adapter to the transmitter and wall outlet (Also required-2 "AA" batteries in the headset).
2. Connect Transmitter to Audio source.
a. Connect one end of the Dual RCA Cable to your audio source's left and right audio output jacks. Note: If
there are no
fixed-level audio outputs on the audio source, connect the cable to to variable-level (Hi-Fi) audio outputs, or
1 of 3
9/29/2011 10:43 AM
http://koss.com/koss/kossweb.nsf/pmbyunid/E7D4135ED2903AFF86257...
refer to Line 3
for 'Y' adapter connection instructions.
b. Connect the other end of the Dual RCA Cable to the Left/Right Audio Input Jacks on the transmitter.
WARNING: DO NOT connect the Dual RCA Cable to the speaker terminals of the TV or Audio Source. This
may damage
your transmitter and/or your audio source.
3. If no Audio Output Jacks are available - Connect to headphone Jack using 'Y' Adapter Cable and Dual
RCA patch cord
(both included)
a. Connect the color coded, left (white) and right (red) ends of the Dual RCA Cable to the 'Y' Adapter Cable.
b. Connect the 1/8" headphone plug on the 'Y' Adapter Cable to the headphone input jack located on your
audio source. If
your audio source requires a 1/4" headphone plug, you will require a Headphone Jack Adapter Plug (not
included) then
insert into your source's headphone output jack.
c. Connect the other end of the Dual RCA Cable to the Left/Right Audio Input Jacks on the rear of the
transmitter.
Operation
1. Transmitter Operation and Adjustment
a. Turn on power to your audio source (TV, Portable Device, etc.) to which the transmitter is connected.
NOTE: If transmitter
is connected to the audio variable level outputs, adjust the volume of the source (TV, etc.) to desired listening
level. If
transmitter is connected to fixed-level outputs, no volume adjustment is needed.
b. Adjust the Power On/Off Switch to channel 1 or 2 (choose the same channel as the channel selected on the
headphones).
2. Headphone Operation and Adjustment
a. Insure that you have inserted 2 "AA" batteries in the headphone battery compartment.
b. Turn On/Off Switch to the 'On' position. Power indicator on headphones should light up.
c. Adjust Channel Selector to match channel selected on the transmitter. Stand 10-15 feet away from the
transmitter.
d. Place headphones over your ears and adjust volume to your desired listening level. NOTE: If signal
interference occurs,
adjust the channel selection on both the headphone and transmitter.
3. To preserve your batteries and electricity, when not in use turn the Power Switch to the 'Off' position on the
headphones
and transmitter.
FCC Compliance Statement
This device complies with Part 15 of the FCC Rules.
Operation is subject to the following two conditions:
1. This device may not cause harmful interference, and
2. This device must accept any interference received, including interference that may cause undesired
operation.
Warning (Part 15.21)
Changes or modifications not expressly approved by the party responsible for the compliance could void the
user's
authority to operate the equipment.
2 of 3
9/29/2011 10:43 AM
http://koss.com/koss/kossweb.nsf/pmbyunid/E7D4135ED2903AFF86257...
Industry Canada
The term "IC" before the certification/registration number only signifies that the Industry Canada technical
specifications
were met.
JR170_Side1_English.pdf
3 of 3
9/29/2011 10:43 AM