1
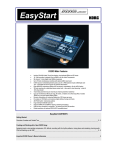
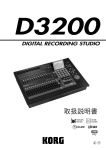
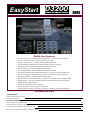
EasyStart
D3200 Main Features
•
32 track recorder plus a dedicated stereo master track - a total of 272 virtual tracks!
•
Up to 12 track simultaneous recording in both 16 and 24bit
•
Record / playback @ 44.1 or 48kHz, with No Audio Compression
•
New Knob Matrix and ClickPoint™ interface for fast and easy navigation!
•
44 channel, 12 buss automated digital mixer (69bit processing)
•
8-XLR inputs w/ individually switchable phantom power
•
12- 1⁄4 TRS balanced inputs w/26dB pads and 48dB trim knobs
•
4-band fully parametric EQ (2-band shelving EQ on CH.25-32) plus 4 band master EQ
•
Up to 11 simultaneous effects per song: 8 inserts, 2 masters and a final song effect.
•
High quality REMS mic, amp and cabinet effects (56bit)
•
Dynamic Fader and Scene Automation; 100 Scenes per song and extensive digital editing
•
Session Drums™ - 756 drum patterns with tons of real-time control and easy operation
•
Dedicated guitar input and tuner
•
Internal 40 GB IDE hard disk for recording.
•
Internal CD-RW for ripping, mastering and backup
•
Hi-speed USB 2.0 for easy connection to computers – backup; import/export WAV files
EasyStart CONTENTS
Getting Started:
D3200 Connections and Navigation
Modes and Features Tour
2
3-5
Creating and Working with a New D3200 Song:
Assigning Inputs; Using EQ and Effects
Recording with Session Drums; Mixing Down and Mastering
Burning Audio CDs and Backing up Your Data via USB
Shortcut Keys; Important D3200 Owner’s Manual References
5-6
7
8-9
9
D3200 EasyStart
Getting Started - Connections:
1.
First, connect the AC power cable > Make sure that the MONITOR LEVEL knob and PHONES LEVEL knob are
turned down first, and then connect audio cables from the MONITOR OUT L/R jacks on the top of the D3200 to
your stereo powered monitor system (or connect headphones to the PHONES jack).
2.
Press the POWER ON key on the rear panel, and then press the ON key on the top panel.
Getting Around on the D3200
In this section, you’ll become familiar with navigating the D3200, while getting an overview of the D3200’s
most-powerful features. In the second section, you’ll create a groovy drum track utilizing the Session
Drums™, learn the basics of recording, mixing and burning a CD of your song. Complete this first section
now, so that you can become familiar with the main modes and navigation.
A few words on ClickPoint…
The D3200 uses a number of new elements to create a fast and flexible navigation system that allows you
to quickly select any parameter. These elements include:
•
ClickPoint system
•
Cursor “Compass” keys
•
ENTER key
•
Tab Page>/YES key
•
<Tab Page /No key
•
VALUE WHEEL and +/- keys
•
The Knob Matrix
ClickPoint is basically a fingertip trackball that allows any displayed parameter to be selected by simply
moving the on-screen cursor over the parameter and pressing down. Using ClickPoint is not the only way
to move the cursor around the screen…
Four cursor “Compass” keys representing UP, DOWN, LEFT and RIGHT surround ClickPoint. These keys can
also be used to select any displayed parameter.
Finally, the <Tab Page/No and Tab Page>/Yes keys allow you to change Tab Pages within the display, or
answer YES/NO in an open dialog box without using any cursor action at all. Once selected, the parameter
will appear with a dark “box” outline. Parameters can be adjusted using the VALUE WHEEL as well as the +
and – keys for precise incremental control.
The Knob Matrix
The D3200’s Knob Matrix provides 16 real-time control knobs, arranged in four rows and four columns.
This arrangement mirrors the onscreen presentation of many parameters – four bands of EQ with four
knobs per, etc. - providing a truly intuitive design. The Knob Matrix can be assigned to any of a number of
parameters – EQ, FX, Pan, Send Levels, etc. The Knob Matrix knobs can work in either a “Jump” or “Match”
mode – allowing you to optimize the controllers for a custom feel…
2
D3200 EasyStart
!
The default setting is MATCH. Holding down the JUMP/MATCH key while adjusting a knob or fader temporarily
switches to JUMP operation.
Settings for the ClickPoint cursor speed and Knob/fader “Jump/Match” settings can be made in the SYSTEM
menu. Press the SYSTEM MIDI key to the right of the display, click the “Control” tab in the display then make
your selections.
The D3200’s Transport controls are shown as follows:
[
] = RECORD [] = PLAY [] = STOP [] = REWIND [] = FAST FORWARD
Modes and Features Tour
1.
First, load the demo song: Press the SONG key, and then click the “” popup button in the display, next to
the current song name > Select “001: I’d Be A Fool”, and then click “OK”.
2.
Click “Copy” in the display then click “Yes” and “OK” when completed.
3.
Now to un-protect the copied demo song: Click “Protect” > Click “OFF”, and then click “OK”. Note that the
rest of the song edit functions are now visible and accessible in the display.
4.
Press the [] key to start playback of the demo song. Slowly raise the MONITOR or PHONES level knob to a
comfortable listening position.
The [METER] key
The Meter Track View displays regions of audio, levels for playback tracks, effects, output levels as well as
the currently selected virtual tracks, track names and locate points.
As the song continues to play…
1.
Press the METER key located to the left of the top row of Matrix Knobs.
2.
You can change this view to display CH-Input, Pre or Post Fader meter levels, and also select your choice of
Track or Fader views. Try it: Click the “” popup button in the upper left corner of the display > under Select
View: click “FaderView”, and then click “OK”. Now you’re viewing meter levels in addition to the Fader and
Pan settings for the song! To view tracks 17-32, press the 17-32 channel selection key (above channel 13
fader).
The [CH VIEW] Key
This screen displays the settings and status of a single channel. Level, pan, effects, EQ, etc. are all
accessible on one page!
1.
Press the [] key to stop song playback.
2.
Press the CH VIEW key (located to the left of the Knob Matrix) > Select different channels by pressings the
channel keys above the faders (the selected channel key lights yellow), or click the “CH” in the upper left
corner of the display and use the DIAL or + and - keys to change channels. The Knob Matrix is active here for
control of the selected channel’s Effect send levels and EQ. Try it.!
3.
Press the TAB PAGE>/YES key to view the “Ch Routing” tab. Here you can view the signal flow for the
selected channel.
3
D3200 EasyStart
The [TRACK] & [SCRUB] keys
1.
Press the TRACK key, located to the right of the display, and then select the “Vtrk1-32” tab in the display.
This screen displays the currently selected virtual track for each channel. You can name your tracks by clicking
the “Rename” button in the display. There is also a handy time-saving preset name list available! Click the
“Rename” button, and then press the “”popup next to the name. Here you can scroll through the list and
select one of the preset names > Click “Cancel”.
2.
Next, select the “MasterTrk” tab. There are eight virtual stereo master tracks available to mix (bounce) down
3.
Now select the “EditTrk” tab, then click the “” popup button in the upper left corner of the display next to
to. These are used to bounce tracks and mixdown finished songs for CD burning.
“CopyTrk”, to view the list of editing functions > Leave “CopyTrk” selected and press “OK”.
4.
Press the SCRUB key located to the left of the DIAL. Here you can view a track’s waveform and use the DIAL
to “scrub” or control the playback of the selected track. Use the “ZOOM” cursors in the display to change the
waveform view. Click the “”popup next to Trk # located in the upper left of the display and select TRACK 1
(the lead vocal), click “OK” then use the DIAL to scrub the vocal.
D3200 Automation
The D3200 has two types of automation – Scene and Event (Dynamic) Automation.
SCENE AUTOMATION [The SCENE key]
With Scene automation, 100 “snapshots” of track fader, EQ, pan and effect on/off settings can be stored in
every song, and recalled during playback at registered locations.
1.
Press the MIXER key, located next to the METER key > Click the “FADER/PAN AUTOMATION” button in the
2.
Press the LOC 1/IN key to return to the beginning of the song.
3.
Press the STORE key then press the SCENE key to store the present settings to the first scene.
4.
Press PLAY to forward into the song a few seconds then STOP and change some of the fader and pan settings.
5.
Press the STORE key then press the SCENE key to store the new settings as the second scene.
6.
Press the LOC1/IN key to return to the beginning of the song and press PLAY. Watch the Mixer View, to
display, and then select the “Mixer View” tab.
monitor the first stored Scene’s Pan and Fader settings as they change to the second stored Scene’s Pan and
Fader settings.
EVENT AUTOMATION
Event automation allows real time recording and playback of fader and pan settings, as well as channel
on/off, effect/aux send on/off, master fader and expression (using the optional EXP2 expression pedal).
Recording Automation on a track:
1.
2.
Select the “Automation” tab, and then press the LOC 1/IN key to return to the beginning of the song.
Record-enable Master Fader automation by clicking on the “”(play) button next to the “Master Fader” in the
display > Set it to “
3.
”(Rec), and then click the Automation “ON [PLAY]” button to switch it to “ON [Rec]”
Press the [] PLAY key on the transport to start playback of the song, move the MASTER fader all the way up
and down several times, and then press the [] STOP key.
4.
Press the LOC 1/IN key to return to the beginning of the song, and then playback the song to hear the result
> Select the “Mixer View” tab to view the mixer. It’s that easy!
See the D3200 Owner’s Manual pages 52-53 for more on Scene and Event automation
4
D3200 EasyStart
[EFFECT] & [EQ] Keys
The D3200 has a multitude of high quality (56bit) effects to choose from. There are three effect sections
(Insert, Master and Final). Up to 11 effects can be used simultaneously in a song! There are 52 effect
algorithms and plenty of programs – 128 Preset, 128 User, and 32 that can be stored with each song.
The D3200 also provides a 4-band fully parametric EQ on channels 1-24, 2-band shelving EQ on channels
25-32 and a 4-band fully parametric Master EQ. There are 50 EQ presets, plus 50 user locations.
1.
Press the EFFECT key (located to the left of the Knob Matrix), and then select the “EFFRouting” tab. Here you
can view the effects that are being used in this song > Insert effects can be used as input effects recorded with
the incoming signal (indicated by “IN” at the far left) or as playback track effects (indicated by “TR”). To
change this status, select the “IN” or “TR” and rotate the DIAL > To the right of this parameter is the channel
in which each insert effect is applied. This can be changed in the same way.
2.
Select the “MstrEFF1” tab in the display. It’s easy to make edits to the effects using the Knob Matrix. Here you
can make custom settings, rename and save your own custom effect presets.
3.
Press the EQ key located to the left of the Knob Matrix. Here you can view and make changes to a selected
channel’s EQ, using the Knob Matrix. Select the “EQ Library” tab to view the EQ presets. This is a great time
saver!
See the D3200 Owner’s Manual pages 54-57 for more information on editing and using effects
The [MIXER] Key
1.
Press the MIXER key, located to the left of the Knob Matrix. Here you will find access to input/output
assignment, pairing faders, scene automation, mixer setups, EQ, effect sends etc.
The [Session Drums™] Key
Session Drums make it fast and easy to create a realistic drum track in real-time, without any tedious
programming! There are 756 drum (and metronome) patterns including fills and endings. Even better, you
have control over the mix and tuning of the drums, and parameters such as shuffle and humanize can be
controlled in real-time, using the Knob Matrix. And of course, you can always go in an edit the track after
the fact. You can even trigger the D3200s drum sounds via MIDI input, to create your own drum tracks
using an external MIDI keyboard or sequencer! You’ll work with Session Drums in the following section…
Creating and Working with a New D3200 Song
In this section, you’ll learn the basics on creating a new song. You’ll understand how to assign inputs,
apply effects and EQ to your input source, use Session Drums, as well as mix down, burn a CD and back up
your song to a computer.
You will need a guitar or microphone and a blank CD-R for this section. Oh, and maybe have a
refreshing beverage of your choice nearby ☺
5
D3200 EasyStart
Create a new song:
1.
Press the SONG key and click “New” in the display > For “New Song Type”, choose “44.1 kHz/ 16bit”, and
then select “OK”.
2.
Rename the song by clicking “Rename” in the display > Click “ClearAll”, name the song “QUICKTOUR”, and
then select “OK’.
Assign an input:
1.
Make sure that the PAD key, located above the TRIM knob for INPUT 1 is in the up position, and that the
TRIM knob is set all the way left to -12dB.
2.
!
Connect a guitar to the GUITAR IN jack on the top panel.
If you are using a microphone, make sure that the PHANTOM power switch for INPUT 1 is set to OFF,
unless you’re using a condenser mic that requires phantom power. Connect your mic to INPUT 1 on the top
panel.
3.
Press the MIXER key, and then click “CH INPUT/SubMixer” in the display. Here, you can select which track
each input will be recorded onto, by clicking the icon that looks like a phone jack and using the DIAL to set the
input > Select “1” for “SOURCE” on CHANNEL 1 (This is the default setting).
4.
Press the REC/PLAY key (above channel 14) > Set CHANNEL 1 record status to record by pressing the
CHANNEL 1 key to switch it’s status from PLAY (green) to REC (red).
5.
Press the METER key > Click the “” popup button in the upper left corner of the display > Under Select
6.
Gradually raise CHANNEL FADER 1 to -0- and as you play or sing, adjust the channel TRIM knob so that your
Level Meter Position, click “PreFader”, and under Select View, click “TrackView” > Click “OK”.
loudest playing doesn’t cause the TRIM LED to light RED (indicates clipping).
!
If you are using a keyboard or a guitar with active pickups, press the PAD key (-26dB), and turn the TRIM
knob up to set the appropriate input level.
See the D3200 Owner’s Manual pages 42-44 /page 100-101 for more on inputting audio
Assign effects and EQ to the input:
1.
Press the EFFECT key, and then select the “EFFRouting” tab > In the upper left corner of the display, make
2.
Click “InsEFF1 P000:NO EFFECT”, and then click the “Select” button in the display.
these settings for INSERT EFFECT 1: “IN” “CH: 1”.
-
If you are recording a guitar, select “Multi” then select the preset of your choice and click “OK”.
-
If you are using a microphone, select “SFX&etc” from the Mono effect category, and then select
“P109: Studio Mic&Pre” and press “OK”.
3.
Select the “MstrEFF1” tab > click the “” popup button to choose a master effect > Select “Reverb&Delay”
4.
Press the CH VIEW key > Rotate the Matrix knob #1 to adjust the reverb amount.
> Select “P002: Smooth Hall”, and then click “OK”.
5.
To apply EQ to the input press the MIXER key, click “EQ/ATT/PHASE”, and then select the “EQ/ATT” tab.
Use the Knob Matrix to adjust EQ, or select the “EQ Library” tab and select an EQ preset.
Ok, you’re almost ready to record. But first, let’s add a drum track so you can get your groove on...
6
D3200 EasyStart
Build a drum track with Session Drums:
1.
Press the SESSION DRUMS key, and then press the RUN key to its right (LOC 4/END key) Use the Knob
Matrix knob #1 to select a GROUP, Matrix knob #2 to select a SESSION (a pattern within the group), knob
#3 for a VARIATION and knob #4 to adjust the tempo. Adjust the DRUMS fader next to the MASTER fader to
adjust the volume. Find a GROUP and SESSION you want to use.
2.
Click the “KIT” button in the display. Here, you can make adjustments to the individual drum sounds using the
Knob Matrix.
3.
Click the “KIT CHANGE” button, and check out some different drum kits! If you find a kit you want to use,
click “OK”. To use the originally assigned drum kit, click “Cancel”. If you made changes to the kit or mix,
check the “Hold” check box - any changes you made will be used, otherwise the preset settings will be used.
When you’re finished, Click “Exit”.
4.
Select the “DrmsMixer” tab in the display, and then click the “Monitor” button under Assign. On this page
you can route the drums through effects and make EQ adjustments as well > Use Matrix knob #5 to add some
reverb to the drums.
5.
Select the “SessionDr” tab > Press the SessionDrums [
] REC key (LOC 2/OUT), and then press the
SessionDrums [] STOP/PLAY key to start recording.
6.
Use Matrix knob #3 to change to different VARIATIONS, and press the FILL key to add fills when desired.
Click the “Ending” button in the display to add an ending > Press [] to stop recording after the desired
number of measures.
7.
Press the DRUMS key above the DRUMS fader so that it lights green. This will allow you to monitor the
drums, while recording a track.
Record your input while monitoring the drums:
8.
Press the METER key > Press the [
] button (it will blink red), and then press the [] button to start
recording > when finished recording, press [], and then press LOC 1 IN key to return to the beginning of the
song.
9.
Set channel 1 to playback by pressing the CHANNEL 1 key so that it changes to green, and then press the
[] button to playback the track.
See the D3200 Owner’s Manual pages 58-64 for more in-depth coverage of the Session Drums
features.
Mixdown and master your song:
The D3200 has a dedicated Stereo Master Track for bouncing and mixing. The Master Track contains
eight virtual tracks, allowing you to record up to eight different mixes, and then choose your favorite for
burning to CD. Before final mastering, each song also provides access to a Master EQ and Final
(mastering) effect.
1.
Press the MIXER key and select “EQ/ATT/PHASE” > Select the “MasterEQ” tab. Here you can make fine
adjustments to the mix of a song. Make some adjustments using the Knob Matrix knobs, while playing back
the song.
2.
Press the EFFECT key > Select the “FinalEFF” tab > Press the “” popup button next to “P000: NO EFFECT”
and select the “Dynamics&Filter” category > select “P041: Mastering Comp” and click “OK”. Make desired
adjustments using the Knob Matrix knobs.
3.
Press the METER key > Press the MASTER key (above the MASTER fader) to record-enable the MASTER
TRACK for mixdown (it will light red).
7
D3200 EasyStart
4.
Playback the song, and make sure the MASTER fader level is not clipping (watch the MST L.R at the far right
5.
When you are ready to record, press the LOC 1 IN key to return to the beginning of the song > Press the [
of the display), and then press [].
]
key (it will blink red), and then press the [] key to begin recording.
6.
Press [] when completed > Press the MASTER key so it turns green (play), and then press the [] key to
playback the mix.
See the D3200 Owner’s Manual pages 28-34 and 67-68 for more on Mixdown and Mastering.
Create an audio CD of your song:
1.
Insert a blank CD-R in the D3200’s CD-RW drive > Press the CD key, and then select “Album CD” in the
display.
2.
Click the “Add” button in the display > Select the song “QUICKTOUR” > Click “OK”, and then click “Yes”.
3.
Click the “Write to CD” button in the display, and then click “Yes”. The display will indicate “Making Image
4.
To listen to the CD on the D3200, press the CD key > Select “CD PLAYER”, and then press the play “”
File”, followed by “Writing CD” > When prompted “Write Another CD?”, click “No”.
button in the display.
5.
Now you can eject the CD from the drive, and listen to your first D3200-recorded CD on your stereo, while
sipping your favorite beverage. Enjoy!
See the D3200 Owner’s Manual Pages 79-82 for more on CD burning and the CD modes.
Backup your data to computer using USB:
The D3200 has a 4GB partition dedicated for file transfers to/from the computer via a USB connection.
Partition size can be set to 2, 4 or 8GB, depending on your needs. First, the data must be copied to the
4GB partition, and then that partition can be mounted on your computer desktop. Individual tracks can by
transferred as WAV files, or entire songs can be backed up.
Now to backup your “QUICKTOUR” song…
1.
Connect a USB cable from the D3200 to your computer.
2.
Press the SYSTEM/MIDI key > Select the “Backup” tab in the display.
3.
Click the “Exec.” button in the display to backup the currenlty selected song, “QUICKTOUR” > Click Yes to
confirm, and then click “OK” when completed.
4.
Select the “PC File” tab, and then click “USB Mode” in the display.
5.
The 4GB partition will mount on the desktop, and will show up as a drive named “KORG D3200”. On a PC, this
can be found by opening My Computer; on a Mac it will mount directly on the desktop. Double click this icon to
open it > Open the “KORG” folder > Open the “BACKUP” folder > Drag the file “QUICKT01.DBK” to your
computer HD, to place a copy on the hard disk.
6.
On a PC, perform the “Unplug or eject hardware” command; on a Mac, drag the “KORG D3200” icon to the
trash, and then click “Exit” in the D3200 display to exit USB Mode.
See the D3200 Owner’s Manual Page 93 for more on backing up and restoring data.
8
D3200 EasyStart
D3200 SHORTCUT KEYS
The D3200’s Shortcut keys provide instant access to the most commonly used functions in a recording and
mixing session, such as meter view, channel input track assign, track editing, undo / redo, mixer
automation and other repeatedly-used functions. To use a “Shortcut”, press and hold a specific key, then
select or scroll through options with another key.
Here are a few Shortcut keys to check out…
Meter source options:
Press and hold the METER key, and then scroll through the options available with the L/ R
cursor keys.
Display Meter/Track:
Change the track/fader view of the display. Press and hold the METER key then use the UP /
DOWN cursor keys.
Track editing options:
Press and hold the TRACK key, and then 1) scroll through options with the +/- increment
keys, or 2) press the channel keys above faders 1-15.
Automation options:
Press and hold the MIXER key, and then press the SCENE key.
CH Input page:
Press and hold the MIXER key, and then press the REC/PLAY key (above channel 14).
DrmsMixer page:
Press and hold the MIXER key, and then press the CH VIEW key to instantly access your
drum mixer.
Master EQ:
Press and hold the MIXER key, and then press the Master EQ key.
Important D3200 Owner’s Manual References
MIDI Sync / MIDI Machine Control (MMC)
94 / 124
Using MIDI to control Scenes / MIDI
94 / 124
Working with WAV files and the Import/Export function
Initializing/formatting and checking the internal hard drive
Backing up and restoring data via CD-R or USB
86-88 / 136
90 / 121
82 / 92
Updating system software
96
Troubleshooting
164
Shortcut Keys
178
For more information, see the D3200 Owner’s Manual, and visit www.korg.com for
more support, tips and tricks!
9