1
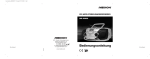
KH2264_LB4_UK
17.11.2003
14:13 Uhr
Seite 1
KH2264
t
Operating and safety instructions
IDNr. E 45-201003-2264 · www.kompernass.com
UK
KH2264_LB4_UK
17.11.2003
14:13 Uhr
Seite 2
FUNCTION
DISPLAY
BASS BOOST
VOLUME
BAND
ST./MONO
REPEAT
M-UP
PLAY
PAUSE
MEMORY
STOP ■
TUNING ▼
SKIP I<<
TUNING ▲
SKIP >>I
2
KH2264_LB4_UK
17.11.2003
14:13 Uhr
Seite 3
KH2264_LB4_UK
17.11.2003
14:13 Uhr
Seite 4
Contents
1. Intended use ......................................................................................................................4
2. Technical data ....................................................................................................................4
Safety information ..............................................................................................................4
3. Connection ........................................................................................................................5
3.1 Inserting the batteries ..................................................................................................5
A few useful tips regarding batteries ..........................................................................5
3.2 Connecting the power cable........................................................................................5
3.3 Connecting the antenna ..............................................................................................5
3.4 Connecting the headphones........................................................................................5
4. Operation ..........................................................................................................................6
4.1 Switching the device on / off ......................................................................................6
4.2 Adjusting the volume ..................................................................................................6
4.3 Bass-booster function ................................................................................................6
5. Radio mode........................................................................................................................6
5.1 Channel search ............................................................................................................6
5.2 Mono/Stereo ................................................................................................................6
5.3 Storing a channel ........................................................................................................6
5.4 Recalling stored channels ............................................................................................7
6. CD mode ............................................................................................................................7
6.1 Inserting / extracting a CD ..........................................................................................7
6.2 Play / Pause ................................................................................................................7
6.3 Track selection / fast forward ......................................................................................7
6.4 Stop..............................................................................................................................7
6.5 Programming a track list ..............................................................................................8
6.6 Playing a track list ........................................................................................................8
6.7 Repeat function............................................................................................................8
7. Tape mode ........................................................................................................................8
7.1 Inserting / extracting a tape ........................................................................................8
7.2 Using the tape unit ......................................................................................................9
7.3 Recording from the radio ............................................................................................9
7.4 Recording from CD ......................................................................................................9
8. Cleaning and maintenance ................................................................................................9
8.1 External cleaning..........................................................................................................9
8.2 Cleaning the cassette unit ........................................................................................10
8.3 Cleaning the CD unit ..................................................................................................10
9. Trouble-shooting ..............................................................................................................10
10. Disposal ..........................................................................................................................10
3
KH2264_LB4_UK
17.11.2003
14:13 Uhr
Seite 5
t
CD Stereo Radiorecorder
e-bench KH 2264
1.
Intended use
2.
This appliance is designed for casual
home-use. It is not designed for continual
use or for use in a commercial or industrial
context.
Technical data
Voltage:................................... 230 V / 50 Hz
Power consumption (rating):..................12W
Laser class:................................................1
Important safety information!
To avoid fatal danger through electric
shocks:
• Make sure that the power cable does not
get wet or damp during operation. Install
the cable so that it cannot be crushed
between two objects, or damaged in any
other way. Should the power cable be
damaged, please let our customer service replace it before using the appliance
again.
• Disconnect the power cable from the
power supply after using the appliance.
Switching the device off is not sufficient
as voltage remains in the device for as
long as it is connected to the mains
power supply.
• Make sure that no fluids or small objects penetrate the interior of the device.
• Only use the device in dry surroundings
To avoid fire hazard and the danger of
injuries:
• Install the device in a position where there is no danger of heat build up - detached and well ventilated. Never cover the
ventilation slits!
• Avoid additional heat through direct
sun, heating systems, other electrical
appliances etc.
• Never let children and frail people
handle the device without supervision,
as these people may not always judge
potential dangers appropriately.
• The CD unit has a "class 1" laser unit.
There is no immediate danger for your
eyes unless the housing is incomplete
or damaged - if this is the case, then the
appliance must not be used at any
time!
Please keep this manual in case of future queries –
and pass it on when transcribing the device to another person!
4
KH2264_LB4_UK
17.11.2003
14:13 Uhr
Seite 6
t
3.
Connection
3.2 Connecting the power cable
Insert the power cable in the power
socket on the device, and then insert the
mains power plug in the mains socket.
Before you start using the device, please
check that the device is in good order and
condition, and make sure that all packaging material has been removed.
3.3 Connecting the antenna
3.1 Inserting the batteries
The device is equipped with an internal
antenna for medium wave (AM) reception.
A telescopic antenna provides FM reception.
Open the battery compartment on the
back of the device and insert 8 UM-2
"C" batteries.
• Please make sure that the batteries are
inserted in the correct position, i.e. the
"+" end of the battery is inserted to
match the "+" symbol on the device
(polarity).
3.4 Connecting the headphones
Headphones should have an internal resistance (impedance) of 32 ohm and be
equipped with a 3.5mm stereo jack.
• Close the battery compartment after
batteries have been inserted.
Warning: Never connect the headphones to
the device when you are already wearing
them. You can severely damage your ears if
the volume is set at a high level.
Always ensure that the volume control is
turned to quiet - then ...
insert the connection plug into the
socket provided for the headphones.
A few useful tips regarding batteries:
• Only use high quality batteries.
• Always insert new and matching batteries only, in order to avoid the batteries
self-discharging.
• Renew the batteries as soon as the performance in battery mode fades, however, not later than one year after insertion.
Batteries sometimes begin to corrode
after this time.
• Batteries must not be disposed of in the
normal rubbish bin. Always return used
batteries to the retail outlet or other
collection points for disposal.
The internal loudspeakers are disabled as
soon as the headphone connection plug is
placed in the socket.
When the headphone plug is removed the
speakers will be reactivated - which can
lead to an unexpected volume level if the
volume was turned to high when using the
headphones.
For this reason the volume level should
be lowered before the headphone plug is
removed from the socket.
5
KH2264_LB4_UK
17.11.2003
14:13 Uhr
Seite 7
t
4.
Operation
To search the bandwidth press the button ...
TUNING , to search forwards or
TUNING , to search backwards over
the entire reception range.
This section applies when the device has
been connected as described in chapter 3:
4.1 Switching the device on/off
The device is equipped with a
FUNCTION sliding switch for all three
modes:
If you apply pressure to the buttons for longer than a second the device will start an
automatic channel search. As soon as a
channel with sufficient reception quality has
been found, the automatic search stops
immediately.
The device is switched on and is consuming electricity when the switch is switched
to …
• "Radio" for radio mode
• "CD" for CD mode.
The device is switched off when the switch
is switched to …
position ...
• "TAPE/POWER OFF". This also the
position for tape mode. In this position,
the device consumes near to no electricity, as long as none of the tape operating
keys are pressed.
Tip: When in VHF reception (FM) mode, you
will achieve better reception quality by putting the antenna at an angle. Then turn the
antenna until the best reception is found.
For medium wave (AM) reception, the device uses the internal antenna. Turn the entire
appliance until you achieve the best reception result.
5.2 Mono/Stereo
When a program is broadcast on the VHF
range in stereo, ST" is displayed on the device, while MONO". appears for Mono broadcasts. Should the stereo reception crackle
due to bad reception …
press the ST/MONO button to switch
between the two modes.
4.2 Adjusting the volume
Turn the volume control clockwise (louder) - or anti clockwise (quieter).
4.3 Bass-booster function
Use the BASS BOOST switch to activate or deactivate the Bass booster function.
5.
5.3 Storing a channel
You can store a total of 15 channels. When
you have found a channel you would like to
store ...
press MEMORY . The display shows the
number of the first memory position, and
the "MEMORY" indicator flashes.
You can now browse through the
memory positions by pressing the
M-UP button.
Radio mode
Select "Radio" on the FUNCTION sliding
switch.
5.1 Channel search
Chose a reception bandwidth. By pressing the button BAND you can switch
between ...
• "FM" for VHF reception or
• "MW(AM)" for med. wave reception.
6
KH2264_LB4_UK
17.11.2003
14:13 Uhr
Seite 8
t
When the desired memory number appears
on the display ...
hold the MEMORY button depressed
until the "MEMORY" indicator stops flashing. The channel is now stored.
The CD is not ready for playing as long as
the word "disc" is displayed. If this continues for some time, then the CD cannot be
read correctly - check that the CD has been
inserted the right way round and it is in
good condition.
Already occupied memory positions can be
renewed at will.
6.2 Play / Pause
If you press PLAY / PAUSE ...
• For a short time, the CD will start. The
display shows the track number and
track length of the track being played.
• Press again while a track is being played
to pause playback immediately, press
again to continue playing the track from
the position was paused.
5.4 Stored channels
Call up
When in the normal reception mode you
can browse through the 15 stored channels
by ...
pressing the M-UP button. The channels
are activated one after the other.
Note: The channels are saved for a few
minutes in the event of a power cut, or
when changing the batteries. If the device
goes without power for a longer time period, then the memory positions will be lost.
6.
6.3 Track selection / fast forward
If you press SKIP >>|
or SKIP |<< ...
• briefly, you jump one track up or
down.
• hold the button pressed to scan
through the track forwards or backwards (fast forward/backwards).
CD mode
When this function is selected, you can
listen to normal Audio CDs, as well as CDR/RW recorded in audio format.
Select the "CD" FUNCTION switch.
6.4 Stop
If you press STOP ■ ...
• Once, the CD stops playing the current
track.
• Twice, the programmed track list is eleted as described in chapter 6.5.
6.1 Inserting / extracting a CD
Keep the CD drive closed unless you are
inserting or removing a CD to prevent dust
from penetrating the device.
Apply gentle pressure to the CD drive
until you can hear it unlock and it opens
automatically.
• You can now insert the CD with the prin
ted side facing upwards.
The CD is ready for playing when the display shows the number of tracks on the CD,
and the total playing time.
7
KH2264_LB4_UK
17.11.2003
14:13 Uhr
Seite 9
t
6.5 Programming a track list
6.6 Playing a track list
You can program a track list with up to 16
tracks. To do this the CD has to be stopped.
When a CD is inserted:
Press MEMORY.
If you have programmed a playlist, play as
described in 6.5.
Press PLAY/PAUSE to start the programmed playlist.
The display now shows "Pr.01" indicating
the first memory position of the track list followed by the number of the track already
allocated to this position.
Note: The programming information all 16
track positions is deleted as soon as the CD
tray is opened or the CD is stopped and ....
STOP ■ is pressed!
Use SKIP >>| or ...
the SKIP |<< button, you can now select
the track to be played first.
Now press MEMORY again to save the
selected track in position 1 of the programmed track list.
6.7 Repeat function
If, during playback of a track or track list …
you press REPEAT …
• Once, the current track is repeated.
"REPEAT" flashes on the display.
• Twice, the entire CD or track list is
repeated. "REPEAT" is displayed continuously during playback.
• Three times, the repeat function is
deactivated. "REPEAT" is no longer displayed.
Call the next program position
by pressing …
SKIP >>| or
SKIP <<| .
The display now shows the number of the
next memory position.
7.
Tape mode
You can play all standard tapes, as well as
record from the radio and from CDs.
Select "TAPE" on the FUNCTION
switch.
Now select the track from the CD that you
want to program in this track position o
using ...
SKIP >>| or
SKIP |<< .
7.1 Inserting / extracting a tape
Keep the tape deck closed unless you are
inserting or removing a tape to prevent dust
from penetrating the device
Press the STOP/EJ button until you
can hear the tape door unlocking and it
opens automatically.
• Now insert the tape with the mechanism
facing down:
Now press …
MEMORY to save this track in the position previously selected.
You can check your program track list by
pressing MEMORY to scan through all
occupied track positions.
• Then close the tape deck again.
8
KH2264_LB4_UK
17.11.2003
14:13 Uhr
Seite 10
t
7.2 Using the tape unit
7.4 Recording from CD
Warning: Always press the STOP / EJ button first and let the tape stop before you
switch modes. This will prevent damage and
the device wearing out prematurely.
Select the "CD" FUNCTION switch.
● Press RECORD and simultaneously ...
❙❙ the PAUSE key . The device is now rea
dy to record.
Press PAUSE (deactivate) again as soon
as the CD is started.
Press PAUSE again to interrupt recor
ding.
■ Press STOP/EJ to stop recording.
The button symbols mean the following
for tape mode:
PLAY = play a tape
❙❙ PAUSE = stop/start pause
>> FFWD = fast forward
<< REW = rewind
● RECORD = record
■ STOP/EJ = stop and eject tape
Note: The recording volume is controlled
automatically and is not determined by the
volume control switch.
8.
The tape stops automatically at the end of
the tape. Remove the tape, turn it over, and
replace to play or record on the other side!
Cleaning and maintenance
Never open the device housing. There are
no operating elements inside. An opened
device housing could cause potential life
endangerment through electric shock.
Before cleaning the outside of the device,
…
• First remove the mains connector from
the mains socket.
7.3 Recording from the radio
Select "RADIO" on the FUNCTION
switch .
When you find a radio station you want to
record from:
● Press RECORD to start recording.
❙❙ Press PAUSE to pause the recording.
■ Press STOP/EJ to stop recording.
Select the "TAPE" FUNCTION to order
to switch the device off.
• If batteries are installed, remove them.
This may cause some or all preset radio
stations to be lost!
• Close all openings, i.e. the battery compartment, tape and CD trays.
Note: The recording volume is controlled
automatically and is not determined by the
volume control switch.
8.1 External cleaning
• Clean all outside surfaces with a moist
but not wet cloth.
• Do not use any sort of aggressive cleaning fluids. These could damage the
external plastic housing.
9
KH2264_LB4_UK
17.11.2003
14:13 Uhr
Seite 11
t
8.2 Cleaning the cassette unit
Wait a few minutes before restarting the
device. If the situation has not been resolved by this measure, the device may be
faulty.
• In this case, please return the device to
our customer service center.
This could be necessary if you notice the
tape sound becoming slightly muffled after
several weeks use. If you are sure the tape
is not the cause of this problem, ...
• Clean the tape heads and mechanism
with special tape cleaning materials from
specialist retailers - never use any sort of
tools. This could damage the device.
10. Disposal
Before you dispose of the device, remove
batteries as described in chapter 3.1. Old
batteries cannot be disposed of in the
general house rubbish bin.
• Always return used batteries to the retail
outlet or other collection points for disposal.
8.3 Cleaning the CD unit
The CD player should not become dirty
from normal use! Cleaning may be necessary if exceptionally dirty CDs are used, or
the CD tray is not closed and dust enters
the system.
Avoid dirt contamination by wiping dusty
CDs with a soft, dry cloth, wiping from the
inside to the outside of the CD.
Other than the batteries, the device does
not include any materials that are subject to
a special disposal law (as of Sept. 2003) at
the time this manual was published.
• Please contact your local government
office about any recent changes regarding disposal laws.
If a CD cannot be played or sounds faulty
although it is in good condition …
•
Clean the lense and mechanism with a
cleaning CD from a specialist retailer never use any other sort of tool. This
could damage the device.
9. Trouble-shooting
If a thorough cleaning of the CD or tape unit
does not resolve the problem, it may not be
caused by dirt contamination, but could a
problem with the device.
• In this case, please return the device to
our customer service center.
If confusing symbols appear on the display,
it is possible that the device's internal operating system has "crashed".
• Disconnect the power cable and ...
• Remove the batteries from the battery
compartment. This may cause some or
all preset radio stations to be lost!
10
KH2264_LB4_UK
17.11.2003
14:13 Uhr
Seite 12
t
11
KH2264_LB4_UK
17.11.2003
14:13 Uhr
Seite 13
IDNr. E 45-201003-2264 · www.kompernass.com