1
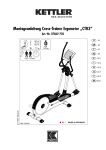
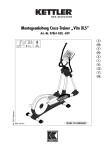
Montageanleitung Cross-Trainer Ergometer „EXT 7”
Art.-Nr. 07863-000, -090
C
A
A
138
B
B
58
cm
C
155
D
80
kg
150 kg
max.
GB
USA
F
NL
E
I
Auf 100% Altpapier!
PL
Abb. ähnlich
D
Wichtige Hinweise
■ Ein eventuell auftretendes leises, bauartbedingtes Geräusch
beim Auslauf der Schwungmasse hat keine Auswirkung auf die
Funktion des Gerätes. Eventuell auftretende Geräusche beim
Rückwärtstreten der Pedalarme sind technisch bedingt und
ebenfalls absolut unbedenklich.
■ Das Gerät verfügt über ein magnetisches Bremssystem.
Montagehinweise
■ Bitte prüfen Sie, ob alle zum Lieferumfang gehörenden Teile
vorhanden sind (s. Checkliste) und ob Transportschäden vorliegen. Sollte es Anlaß für Beanstandungen geben, wenden Sie
sich bitte an Ihren Fachhändler.
■ Sehen Sie sich die Zeichnungen in Ruhe an, und montieren Sie
wachsenen Person vorgenommen werden. Nehmen Sie im
Zweifelsfall die Hilfe einer weiteren, technisch begabten Person
in Anspruch.
■ Das für einen Montageschritt notwendige Verschraubungsma-
das Gerät entsprechend der Bilderfolge. Innerhalb der einzelnen Abbildungen ist der Montageablauf durch Großbuchstaben vorgegeben.
terial ist in der dazugehörigen Bildleiste dargestellt. Setzen Sie
das Verschraubungsmaterial exakt entsprechend der Abbildungen ein. Alles erforderliche Werkzeug finden Sie im Kleinteilebeutel.
■ Beachten Sie, dass bei jeder Benutzung von Werkzeug und bei
■ Bitte verschrauben Sie zunächst alle Teile lose und kontrollieren
handwerklichen Tätigkeiten immer eine mögliche Verletzungsgefahr besteht. Gehen Sie daher sorgfältig und umsichtig bei
der Montage des Gerätes vor!
z. B. kein Werkzeug umherliegen. Deponieren Sie z. B. Verpackungsmaterial so, dass keine Gefahren davon ausgehen
können. Bei Folien/Kunststofftüten für Kinder Erstickungsgefahr!
Sie deren richtigen Sitz. Drehen Sie die selbstsichernden Muttern bis zum spürbaren Widerstand zuerst mit der Hand auf,
anschließend ziehen Sie sie gegen den Widerstand (Klemmsicherung) mit einem Schraubenschlüssel richtig fest. Kontrollieren Sie alle Schraubverbindungen nach dem Montageschritt
auf festen Sitz. Achtung: wieder gelöste Sicherheitsmuttern werden unbrauchbar (Zerstörung der Klemmsicherung) und sind
durch Neue zu ersetzen.
■ Die Montage des Gerätes muß sorgfältig und von einer er-
■ Aus fertigungstechnischen Gründen behalten wir uns die Vor-
■ Sorgen Sie für eine gefahrenfreie Arbeitsumgebung, lassen Sie
montage von Bauteilen (z.B. Rohrstopfen) vor.
Ersatzteilbestellung Seite 23-27
Geben Sie bei Ersatzteilbestellungen bitte die vollständige Artikelnummer, die Ersatzteilnummer, die benötigte Stückzahl und die
Seriennummer des Gerätes (siehe Handhabung) an.
Bestellbeispiel: Art.-Nr. 07863-000 / Ersatzteil-Nr. 70121517 /
1Stück / Serien-Nr.: .................... Bewahren Sie die Originalverpackung des Gerätes gut auf, damit sie später u. U. als Transportverpackung verwendet werden kann.
Entsorgungshinweis
KETTLER-Produkte sind recyclebar. Führen Sie das
Gerät am Ende der Nutzungsdauer einer sachgerechten Entsorgung zu (ortliche Sammelstelle).
DE 60229750
D
Warenretouren sind nur nach Absprache und mit transportsicherer (Innen-) Verpackung, möglichst im Originalkarton vorzunehmen.
Wichtig
ist
eine
bung/Schadensmeldung!
detaillierte
Fehlerbeschrei-
Wichtig: Zu verschraubende Ersatzteile werden grundsätzlich
ohne Verschraubungsmaterial berechnet und geliefert. Falls Bedarf an entsprechendem Verschraubungsmaterial besteht, ist dieses durch den Zusatz „mit Verschraubungsmaterial“ bei der Ersatzteilbestellung anzugeben.
GB
A
HEINZ KETTLER GmbH
SERVICECENTER
Henry-Everling-Str. 2
D-59174 Kamen
www.kettler.de
& Co.KG
Tel.:
Fax:
Mail:
02307 / 974-111
02307 / 974-295
[email protected]
KETTLER Austria GmbH
Ginzkeyplatz 10 · A - 5020 Salzburg
Trisport AG
Im Bösch 67 · CH - 6331 Hünenberg
http://www.kettler.de
CH
USA Important Instructions
Please read these instructions carefully prior to carrying out assembly and using for the first time. They contain information which is important for your safety as well as for the use and maintenance of the appliance. Keep these instructions in a safe place for reference purposes, maintenance work and to assist you when ordering spare parts.
For Your Safety
■ The crosstrainer should be used only for its intended purpose,
i.e. for physical exercise by adult people.
■ Any other use of the equipment is prohibited and may be dan-
gerous. The manufacturer cannot be held liable for damage or
3
GB
USA Important Instructions
injury caused by improper use of the equipment.
■ Before use, always check all screws and plug-in connections as
well as respective safety devices fit correctly.
■ The crosstrainer has been designed in accordance with the la-
test standards of safety. Any features which may have been a
possible cause of injury have been avoided or made as safe as
possible.
■ The crosstrainer complies with the DIN EN 957 -1/-9, class
HA. It is therefore unsuitable for therapeutic use.
■ Incorrect repairs and structural modifications (e.g. removal or
replacement of original parts) may endanger the safety of the
user.
■ Damaged components may endanger your safety or reduce the
lifetime of the equipment. For this reason, worn or damaged
parts should be replaced immediately and the equipment taken
out of use until this has been done. Use only original KETTLER
spare parts.
■ In case of enquiry, please contact your KETTLER dealer.
■ If the equipment is in regular use, check all its components
thoroughly every 1–2 months. Pay particular attention to the
tightness of bolts and nuts. This is particularly true for the
attachment of grip strap, running plate and fastening of the
handlebar and front tube.
■ Instruct people using the equipment (in particular children) on
possible sources of danger during exercising.
■ Before beginning your program of exercise, consult your doc-
tor to ensure that you are fit enough to use the equipment. Base
your program of exercise on the advice given by your doctor.
Incorrect or excessive exercise may damage your health!
■ Any interference with parts of the product that are not descri-
bed within the manual may cause damage, or endanger the
person using this machine. Extensive repairs must only be carried out by KETTLER service staff or qualified personnel trained
by KETTLER.
■ To ensure that the safety level is kept to the highest possible
standard, determined by its construction, this product should be
serviced regulary (once a year) by specialist retailers.
!
Caution: While assembly of the product keep off children’s
reach (Choking hazard - contains small parts).
■ Before beginning your first training session, familiarize yourself
thoroughly with all the functions and settings of the unit.
■ Always wear suitable shoes when using.
■ Before beginning your program of training, study the instruc-
tions for training carefully.
■ Our products are subject to a constant innovative quality assu-
rance. We reserve the right to perform technical modifications.
■ In choosing the location of the apparatus, ensure a sufficient sa-
fety distance from any obstacles. The apparatus must not be
mounted in the immediate vicinity of main passageways (paths,
doorways, corridors).
■ All electric appliances emit electromagnetic radiation when in
operation. Please do not leave especially radiation-intensive
appliances (e.g. mobile telephones) directly next to the cockpit
or the electronic controlsystem as otherwise values displayed
might be distorted (e.g. pulse measurement.
■ The device requires a supply voltage of 230V, 50 Hz.
Connect the power cord with a grounded protective contact
socket.
■ Important: Do not under any circumstances carry out electrical
repairs or alterations yourself. Always ensure that such work is
done by a properly qualified electrician.
■ Important: disconnect the apparatus from the mains before
doing repair, maintenance or cleaning work.
■ Do not use a multiple power socket for the running belt. If an
extension cable is being used, ensure that it complies with the
VDE regulations.
■ Unplug the power cord of the device from the socket if not used
for a longer period.
■ Ensure that the power cable is not pinched and that no-one can
trip over it.
Handling the equipment
■ Before using the equipment for exercise, check carefully to en-
sure that it has been correctly assembled.
■ It is not recommended to use or store the apparatus in a damp
pliance maintenance set (Article no. 07921-000) specifically licensed for KETTLER Sports apparatus and available from the
Sport specialized trade.
room as this may cause it to rust. Please ensure that no part of
the machine comes in contact with liquids (drinks, perspiration
etc.). This may cause corrosion.
■ Please ensure that liquids or perspiration never enter the ma-
■ The machine is designed for use by adults and children should
■ A slight production of noise at the bearing of the centrifugal
not be allowed to play with it. Children at play behave unpredictably and dangerous situations may occur for which the manufacturer cannot be held liable. If, in spite of this, children are
allowed to use the equipment, ensure that they are instructed in
its proper use and supervised accordingly.
chine or the electronics.
■ The equipment is dependent of revolutions per minute.
mass is due to the construction and has no negative effect upon
operation. Possibly occurring noise during reverse pedalling result from engineering and are absolutely safe.
■ The crosstrainer has a magnetic brake system.
■ Use for your regular cleaning, maintenance and care our ap-
Instructions for Assembly
■ Ensure that you have received all the parts required (see check
list) and that they are undamaged. Should you have any cause
for complaint, please contact your KETTLER dealer.
■ Before assembling the equipment, study the drawings carefully
and carry out the operations in the order shown by the diagrams. The correct sequence is given in capital letters.
■ Please note that there is always a danger of injury when wor4
king with tools or doing manual work. Therefore please be careful when assembling this machine.
■ Ensure that your working area is free of possible sources of
danger, for example don’t leave any tools lying around. Always dispose packaging material in such a way that it may not
cause any danger. There is always a risk of suffocation if children play with plastic bags!
GB
USA Important Instructions
■ The equipment must be assembled with due care by an adult
wn in the diagram inset. Use the fastening material exactly as
instructed. The required tools are supplied with the equipment.
until resistance is felt, then use spanner to finally tighten nuts
completely against resistance (locking device). Then check that
all screw connections have been tightened firmly. Attention:
once locknuts have been unscrewed they no longer function
correctly (the locking device is destroyed), and must be replaced.
■ Bolt all the parts together loosely at first, and check that they
■ For technical reasons, we reserve the right to carry out preli-
person. If in doubt call upon the help of a second person, if
possible technically talented.
■ The fastening material required for each assembly step is sho-
have been assembled correctly. Tighten the locknuts by hand
minary assembly work (e.g. addition of tubing plugs).
List of spare parts page 23-27
When ordering spare parts, always state the full article number,
spare-partnumber, the quantity required and the S/N of the product (see handling).
fastening material“.
Waste Disposal
KETTLER products are recyclable. At the end of its
useful life please dispose of this article correctly and
safely (local refuse sites).
Example order: Art. no. 07863-000 / spare-part no. 70121517
/ 2 pieces / S/N ....................
Please keep original packaging of this article, so that it may be
used for transport at a later date, if necessary.
Goods may only be returned after prior arrangement and in (internal) packaging, which is safe for transportation, in the original
box if possible.
It is important to provide a detailed defect description / damage
report!
Important: spare part prices do not include fastening material; if
fastening material (bolts, nuts, washers etc.) is required, this
should be clearly stated on the order by adding the words „with
F
KETTLER (GB) Ltd.
Merse Road · North Moons Moat · Redditch, Worcestershire B98 9HL · Great Britain
http://www.kettler.co.uk
GB
KETTLER International Inc.
1355 London Bridge Road · VA 23453 Virginia Beach
USA
http://www.kettlerusa.com
USA
Instructions de montage
Veuillez lire attentivement cette instruction avant de procéder au montage et avant le premier emploi. Elle vous fournit
de précieux conseils pour votre sécurité et l’emploi ainsi que la maintenance de l’appareil. Conservez cette instruction
pour votre information et pour les travaux de maintenance ou vos commandes de pièces de rechange.
Pour votre sécurité
■ La bicyclette pour la mise en forme, ne doit être utilisée que
■ On cas de doute, on est prié de s'adresser à son conces-
pour les fins auxquelles elle est destinée, c'est-à-dire pour
l'entraînement des adultes.
■ En cas d'entraînement régulier et intensif, il y a lieu de con-
■ Tout autre emploi est interdit, voire dangereux. Le fabricant ne
pourra être rendu responsable de dommages causés par
l'emploi inadéquat de l'appareil.
■ Vous vous entraînez avec un appareil dont la technique et la
sionnaire KETTLER.
trôler, tous les mois ou tous les 2 mois, toutes les pièces de
l'appareil et en particulier les vis et les écrous. Cela vaut particulièrement pour la fixation des poignées et du marchepied et
des tubes.
sécurité correspondent aux exigences modernes. Les sources
possibles de danger qui pourraient entraîner des blessures ont
été soit supprimées, soit sécurisées.
■ Attirer l'attention des personnes présentes, surtout des enfants,
■ La bicyclette d’appartement correspond à la norme DIN EN
s'assurer que l'entraînement avec l'appareil n'est pas nuisible
à la santé. Son diagnostic devrait servir de base pour la composition de son programme de travail. Un entraînement
exagéré ou mal organisé peut être nuisible à la santé.
957 -1/-9, HA et convient donc pour soins thérapeutiques
■ Les réparations inadéquates et les modifications apportées à la
construction de l'appareil (démontage des pièces d'origine,
montage de pièces non autorisées, etc.) peuvent entraîner des
risques imprévus pour l'utilisateur.
■ Les composants endommagés peuvent affecter votre sécurité et
la durée de vie de l'appareil. On remplacera donc sans tarder
les composants usés ou endommagés et on interdira l'emploi
de l'appareil aussi longtemps qu'ils n'auront pas été remplacés. N'utiliser que des pièces de rechange KETTLER
d'origine.
sur les dangers qu'ils courent pendant les exercices.
■ Avant de commencer, consulter son médecin traitant pour
■ Touts manipulation/modification á l’appareil peut provoquer
des dommage ou représenter un danger de la personne. Des
modifications ne peuvent être apportées que par du personnel
qualifié formé par la Ste. KETTLER.
■ Afin de garantir de sécurité indiqué par le construction à long
terme, l’appareil devrait être contrôlé et révisé réulièrement
(une fois par ans) par un spécialiste (revendeur spécialisé).
■ Avant chaque utilisation, vérifier toujour les vis et les parties
5
Checkliste (Packungsinhalt)
GB
E
Checklist (contents of packaging)
F
Liste de vérification (contenu de l’emballage)
NL
Checklijst (verpakkingsinhoud)
Lista de control (contenido del paquete)
I
Lista di controllo (contenuto del pacco)
PL
Lista kontrolna (zawartość opakowania)
1
1
1/1
1
1
1/1
1/1
15
Checkliste (Packungsinhalt)
2/2
2/2
2/2
1
2/2
1/1
2
1
1
1/1
1/1
16
Checkliste
Actual Size
Schraubenbeutel 1/2
94318050
M10x20
4
M6x20
4
4x35
3,9x9,5
M5x12
ø22,2x20
M10x1,25
Schraubenbeutel 2/2
94317852
M10x105
2
M8x16
2
3,9x13
4
ø6x9,5
1
ø10
4
ø12,5x6,4
4
M10
2
7
4
4
2
2
4
2
SW10/13
ø31,5x16,3
6
D
GB
F
ø25x8,4x3
ø18x11,3x2
2
1
Die Schraubenbeutel immer zusammen bestellen.
Always order both screw bags.
L’ensemble des vis est à commander en une seule.
NL
De zakjes met schroeven altijd samen bestellen.
E
Pida siempre la bolsa de tornillos.
I
Ordinare sempre assieme le buste con le viti.
PL
Worki ze śrubami zawsze zamawiać razem.
4
17
A
"KLICK"
A
B
1
A
B
B
4x
18
M6x20 ø12
2
D
ACHTUNG!
Die beiden Schrauben D müssen aus technischen Gründen zuerst angezogen
werden. Erst dann die Schrauben E anziehen.
GB
IMPORTANT!
Due to technical reasons the screws D have to be tightend first. Tighten the screws E last.
F
ATTENTION!
Pour des raisons techniques il faut d’abord serrer les deux vis D. Serrez ensuite
seulement les vis E.
NL
LET OP!
Om technische redenen moeten de beide schroeven D eerst vastgedraaid worden. Pas daarna de schroeven E vastdraaien.
E
¡ATENCIÒN!
Por razones técnicas, los dos tornillos D deben apretarse primero. A continuación apretar los tornillos ).
I
ATTENZIONE!
Per motivi tecnici è necessario serrare dapprima le due D. Soltanto dopo questa
operazione si possono serrare anche le viti E.
PL
UWAGA!
Obie śruby z podkładką D muszą być z przyczyn technicznych dokręcane najpierw. Dopiero potem dokręcić śruby z podkładką E.
C
F
D
A
E
B
E
!
D
GB
F
NL
E
I
PL
Schraubverbindung regelmäßig kontrollieren.
The screwed connections must be controled at regular intervals.
Resserrer le raccord à vis à intervalles réguliers.
Schroefverbinding moet regelmatig opnieuw vastgedraaid worden.
La atornilladura debe ser apretada con regularidad.
Il collegamento a vite va riserrato ad intervalli regolari.
Połączenie śrubowe musi być regularnie dokręcane.
4x
M10x20 ø10
19
3
!
2x
M8x16 ø25x8,4
4
D
ACHTUNG!
Achten Sie auf die Ausrichtung der Pedalarme!
E
¡ATENCIÒN!
¡Preste atención a la alineación de los brazos de pedal!
GB
IMPORTANT!
Pay attention to the direction of the pedal
arms!
I
ATTENZIONE!
Si prega di badare all'allineamento della
pedivella!
F
ATTENTION!
Veillez à l'alignement des bras de pédale !
PL
NL
LET OP!
Let op de juiste stand van de pedaalarmen!
UWAGA!
Proszę uważać na wyregulowanie ramion
pedałów!
!
20
!
4x
M5x12
5
!
FALSCH
!
WRONG
!
FAUX
!
VERKEERD
!
FALSO
!
FALSO
!
żle
!
FALSCH
!
WRONG
!
FAUX
!
VERKEERD
!
FALSO
!
FALSO
!
żle
!
()(
2x
ø22,2x20 ø31,5x16,3
6
B
C
C
4x
A
A
2x
B
2x
M10x105
M10x1,25
ø18x11.3
M10
21
7
a
b
c
B
C
A
A
1x
ø6x9,5
B
3x
4x35
C
1x
8
A
C
B
C
22
A
4x
3,9x9,5
B
4x
3,9x13
C
4x
4x35
GB
For products with power supply: Attention! Only use with
original power unit as supplied, or with original KETTLER
spare part (see spare part list). Otherwis this may result in
damage.
F
Pour les appareils avec bloc secteur: Attention! Exploiter
uniquement l’appareil avec son bloc secteur original qui fait
partie de la fourniture ou une pièce de rechange originale
de KETTLER (voir liste des pièces de rechange). Sinon risque
de détérioration.
NL
Bij apparaten met transformator: Let op! Gebruik alleen toegestaan met de bijgeleverde orginele transformator of orgineel KETTLER-onderdeel (zie onderdelenlijst). Anders gevaar voor beschadiging.
E
En aparatos con fuente de alimentación: ¡Atención! Funcionamiento solamente autorizado con la fuente de alimentación original suministrada o con pieza de recambio original de KETTLER (ver lista de piezas de recambio). De lo contrario podría ocasionar daños.
I
Apparecchi con alimentatore: Attenzione! L’utilizzo è consentito soltanto con l’alimentatore originale fornito in dotazione oppure con parte di ricambio originale della KETTLER
(vedasi lista delle parti di ricambio). Altrimenti sussiste il rischio di danneggiamenti.
PL
Dotyczy urządzeń z zasilaczem: Uwaga! Eksploatacja urządzenia jest możliwa tylko z dostarczonym oryginalnym
zasilaczem lub z oryginalnym urządzeniem zastępczym
marki KETTLER (patrz ? Lista części zamiennych). W przeciwnym razie istnieje ryzyko uszkodzenia.
I
0
9
D
Bei Geräten mit Netzteil: Achtung! Betrieb nur mit mitgeliefertem Original-Netzteil der Original-KETTLER-Ersatzteil (siehe Ersatzteilliste) zulässig. Ansonsten Gefahr der Beschädigung.
Batteriewechsel
23
Batteriewechsel
Weicht Uhrzeit und/oder Datumsanzeige trotz erneuter Einstellung bald erheblich ab, wird ein Batteriewechsel erforderlich. Der
Computer ist mit einer Batterie ausgestattet. Nehmen Sie den Batteriewechsel wie folgt vor:
onderstaande manier verwisselen:
■ Schrauben Sie das Cockpit-Hinterteil ab und ersetzen Sie die
■ Let op dat u de + en - zijde goed plaatst.
Batterie durch eine neue vom Typ 3V Lithium CR2032.
■ Achten Sie auf die korrekte Polarität.
■ Schroef het plaatje aan de achterzijde van de computer los en
vervang de batterij door een nieuwe van het type 3V lithium
CR2032.
■ Komen er na verwisseling nog foutieve functies voor, haalt u
dan de batterijen nog eens uit het vak en duw ze weer terug.
■ Sollte es nach dem Wiedereinschalten zu Fehlfunktionen
kommen, klemmen Sie die Batterien noch einmal kurz ab und
wieder an.
Belangrijk: batterijen vallen niet onder de garantie.
Lege energiecellen mogen niet met het huisvuil mee.
Lever uw bijdrage aan het milieu en lever gebruikte batterijen apart in bij de daarvoor aangewezen depots,
zodat de ingezamelde batterijen daarna naar behoren
vernietigd en milieuvriendelijk gerecycled kunnen worden.
Wichtig: Aufgebrauchte Batterien fallen nicht unter die Garantiebestimmungen.
Verbrauchte Energiezellen dürfen nicht mehr in den
Hausmüll.
Bitte leisten Sie Ihren Beitrag zum Umweltschutz und geben Sie verbrauchte Batterie beim Handel oder bei den
Rücknahmestellen der Kommunen ab, damit die gesammelten Batterien anschließend ordnungsgemäß beseitigt
oder umweltverträglich recycelt werden können.
GB
E
■ destornille la parte trasera de la cabina de pilotaje y cambie
Battery change
If time and/or date deviate considerably although they were reset recently the battery should be changed. The computer has a
battery. Please proceed as follows:
■ Unscrew the back of the cockpit and replace the battery with
the correct type: 3VLithium CR2032.
la batería por una nueva de tipo 3V Lithium CR2032.
■ Preste atención a la polaridad correcta.
■ Si después de ser puesto de nuevo en funcionamiento se pro-
dujeran errores, desconecte brevemente las pilas y vuelva a
conectarlas.
Importante: Las pilas gastadas no est·n incluidas en la garantÌa.
■ Ensure correct polarity.
No se deben echar las baterÌas energeticas gastadas
en la basura domestica. Por favor contribuya usted por
su parte a la protecciun del medio ambiente y deposite
las pilas gastadas en los comercios especializados o en
los puntos de recogida de su localidad, para que se puedan posteriormente eliminar y reciclar debidamente.
■ Should there be any misoperation after switching on the com-
puter again, shortly disconnect the batteries once again and reinsert them.
IImportant: The guarantee does not cover worn-out batteries.
You should no longer put used batteries in domestic waste. Please do your bit for the environment and return
your batteries to the trade or to the local authority pickup point so that the collected batteries can be properly
disposed of or recycled in an environment-friendly way
F
Changement de piles
En cas d’indication incorrecte de la date / heure, le changement
de piles est nécessaire. L’ordinateur est équipé d’une pile. Suivez
la procédure suivante :
■ Dévissez l’envers du cockpit et changez la pile.
Utilisez tou-
jours des piles du type 3V Lithium CR 2032.
■ Faites attention à la polarité.
■ En cas de dysfonctionnement après la remise en marche, enle-
vez brièvement les piles et remettez-les ensuite.
I
■ Svitate la parte posteriore del cockpit e sostituire la batteria
con una nuova tipo 3V Lithium CR2032.
■ Fate attenzione alla corretta polarità.
■ Se dopo l'inserimento ci dovessero essere funzioni sbagliate,
staccate di nuovo le batterie per poco e attaccatele di nuovo.
Importante: Le batterie usate non rientrano nelle condizioni di garanzia.
Le batterie usate non devono essere gettate nella spazzatura.
Vi preghiamo di contribuire alla salvaguardia
dell‘ambiente e di consegnare le batterie usate ai punti
pubblici di raccolta, che provvederanno al loro smaltimento o a riciclarle
senza provocare danni
all‘ambiente.
Il est interdit de mettre les piles usées aux ordures ménagères. Merci de contribuer à la protection de
l'environnement et de rendre les piles usées soit au magasin soit aux localités de reprise de la commune dans
le but d'éliminer les piles collectées ou de les recycler de
manière non polluante.
PL
Omwesseln van de Batterijen
Als de tijd en/of datumweergave ondanks opnieuw instellen snel
weer afwijken, is het noodzakelijk de batterijen te verwisselen.
De computer is met batterijen uitgerust. De batterijen kunt u op de
24
Cambio delle batteria
Se l'indicazione dell'ora e/o della data differisce nuovamente
e sensibilmente nonostante la regolazione, è necessario sostituire la batteria. Il computer è infatti dotato di batteria. Procedere alla sostituzione della batteria nel modo seguente:
Important: Les piles usées sont exclues des dispositions de garantie.
NL
Cambio de la pilas
Si el indicador de la hora y/o de la fecha difiere pronto a pesar
de haber reajustado, tendrá que cambiar la batería. El ordenador viene con una batería. Cambie la batería como sigue:
Wymiana baterii
Odbiegają znacznie wskazania czasu albo daty pomimo ponownego ustawienia, będzie wymagana wymiana baterii. Komputer jest wyposażony w baterię. Wymianę batterii dokonujemy w
następujący sposób:
■ Odkręcić tylny kokpit i wymienić baterię na nową o typie 3 V
Batteriewechsel
nie włożyć.
Lithium CR2032.
■ Zwrócić uwagę na właściwą biegunowość.
Uwaga: Zużyte baterie nie podlegają pod warunki gwarancyjne.
■ Jeżeli po ponownym włączeniu stwierdzi się niewłaściwe
Zużytych baterii nie wyrzucać do domowych śmieci.
Mając na uwadze ochronę środowiska naturalnego należy baterie oddać w sklepie lub w lokalnym punkcie
zbiórki zużytych baterii. W ten sposób baterie zostaną
prawidłowo usunięte i poddane ekologicznemu
recyclingowi.
działanie, to baterie należy na chwilę wyjąć i potem ponow-
Handhabungshinweise
GB
Handling
F
Utilisation
NL
Handleiding
E
Aplicación
I
Utilizzo
PL
Zastosowanie
A
!
!
B
25
Ersatzteilbestellung
GB
E
Spare parts order
Pedido de recambios
D
Pos.Nr.
1
2
3
4
5
6
7
8
9
10
11
12
13
14
15
16
17a
17b
18
19
20
21
22
23
24
25
26
27
28
29
30
31
26
F
I
Commande de pièces de rechange
Ordine di pezzi di ricambio
Geben Sie bei Ersatzteilbestellungen bitte die vollständige
Artikelnummer, die Ersatzteilnummer, die benötigte Stückzahl und die Seriennummer des Gerätes an.
NL
PL
Bestelling van reserveonderdelen
Zamówiene części zamiennych
GB
When ordering spare parts, always state the full article
number, spare-partnumber, the quantity required and the
S/N of the product.
F
En cas de commande de pièces de rechange, nous vous prions de mentionner la référence article, le numéro de pièce
de rechange, la quantité demandée et le numéro de série
de l’appareil.
NL
Vermeld bij de onderdelenbestellingen a.u.b. het volledige
artikelnummer, het onderdeelnummer, het benodigde aantal en het serienummer van het apparaat.
E
Indicar con los pedidos de piezas de repuesto el número
completo del artículo, el número de la pieza de repuesto,
las unidades solicitadas y el número de serie del aparato.
I
Per l’ordinazione di parti di ricambio indicate il completo
numero di articolo, della parte di ricambio, il numero di
unit necessario nonchè il numero di serie dell’apparecchio.
PL
Przy zamawianiu części zamiennych proszę podawać kompletny numer artykułu, numer części zamiennej i numer serii urządzenia.
Crosstrainer
EXT 7
USA
Bezeichnung
Description
Grundrahmen
Base Frame
Führungsbuchse (4001)
Mast Sleeve (4001)
Kassettenblechaufsatz (3322)
Adaptor Ring (3322)
Kugellager 6004-ZZ
Bearing 6004-ZZ
Welle ø20x135
Drive Axle ø20x135
Seegerring A 20
C Clip 20mm
Tellerfeder ø40x20,4x1 mm
Spring Washer ø40x20.4x1 mm
Distanzring ø25x2x10 mm
Spacer ø25x2x10 mm
Sicherungsring I 42
C Clip 42mm
Bodenrohr
Frame Crossbar
Halteblech BD 1456
Metal Plate
Folienpapier für Crosstrainer
Paper Gasket
Geschwindigkeitsaufnehmer 375 mm
Magnetic Pick Up Wire
Kontakthalteblech Bd795
Bracket for Magnetic Pick Up Wire
Aufnahmeblech kpl. mont. m. Kugellager 6300-ZZ für Crosstrainer Idler Pulley with Bearings 6300-ZZ
Zugfeder Umlenkrolle
Spring for Belt Tension
Spule gewickelt
Electromagnet
Spulenbleche (BD 1305B
Verbindungsplatine
Circuit Board
Halteblech für Trafo
Bracket for Power Supply
MPG-Netzteil 230V intern montiert
Power Supply 110V
Netzleitung Version Europa
Extension Cord (USA)
Netzkabel 900mm (intern)
Cable Wire 900mm
Stromkabel unten 900 mm (10polig)
Lower Computer Wire 900mm
Schwungrad (kpl. mont. m. Lagerwelle + Kugellager 6005-ZZ + 6203-ZZ)Flywheel
Poly-V-Riemen 1651 PJ6
Drive Belt
Laufrad
Drive Disc (right)
Riemenscheibe
Drive Disc (left)
Pedalachse 22x155,75 (3-5407)
Discshaft 22x155,75 (3-5407)
Seitenverkleidung re (4351)
Lower Main Shroud (right) (4351)
Seitenverkleidung li (4352)
Lower Main Shroud (left) (4352)
Aufnahme Netzteil (4197)
Plug Cover (4205)
qty.
Stück
1
1
1
2
1
2
3
1
1
2
2
2
1
1
1
1
1
11
1
1
1
1
1
1
1
1
1
1
2
1
1
1
07863-000 07863-090
Europa
USA
Bestell-Nr. spare parts no.
94317608 94317608
70128698 70128698
70128492 70128492
33100040 33100040
11300122 11300122
10709003 10709003
10600002 10600002
97201496 97201496
10709029 10709029
91111951 91111951
97200256 97200256
34010120 34010120
67000690 67000690
97200127 97200127
94317610 94317610
25635052 25635052
94313937 94313937
1701305B 1701305B
42860116 42860116
94317153 94317153
42860100 42860101
42861110 42861114
42860118 42860118
67000833 67000833
91140443 91140443
67005127 67005127
94317611 94317611
94317613 94317613
11300116 11300116
70128906 70128906
70128907 70128907
70128804 70128805
Ersatzteilbestellung
53
64
33
48
51
50
52
54
32
77
30
29
49
78
82
47
46
81
45
44
55
34
81
10
12
31
67
60
69
65
11
62
63
66
68
56 61
73
59
43
58
23
24
57
2
1
28
72
35
27
7
25
8
6
4
5
13
9
74
20
42
70
36
38
16
14
15
3
17b
17a
22
71
41
26
18
19
21
40
28
39
35
37 75
7
80
79
27
Ersatzteilbestellung
Pos.Nr.
32
33
34
35
36
37
38
39
40
41
42
43
44
45
46
47
48
49
50
51
52
53
54
55
56
57
58
59
60
61
62
63
64
65
66
67
68
69
70
71
72
73
74
75
76
77
78
79
80
81
82
83
84
28
Crosstrainer
EXT 7
Bezeichnung
Seitenverkleidung re (3999) oben
Seitenverkleidung li (4000) oben
Abdeckung (4621) Fußrohr
Rondenabdeckung (4780)
Pedalarm
Pendelkugellager 2203 RS2
Führungsrohr ø20x557 mm
Schubstange vormontiert
Bolzen SW17x59 (14-08418)
Laufwagen
Laufrolle (4313) montiert
Vorderrohr
Stützbügel
Soft-Grip 650 mm SW
Handpulsaufnehmer WP 1007-5C
Stromkabel oben 2100 mm (10polig)
Cockpit Oberteil (4277)
Cockpit Unterteil (4544)
Schraubterminal (Flachstecker)
Erdungskabel
Schnittstelle USB, 300 mm
Computer SG1
Ohrclip
Armhebel li. (kpl. mit Pos. 57, 58, 59, 60-SW, 61, 62, 63)
Armhebel re. (kpl. mit Pos. 57, 58, 59, 60-SW, 61, 62, 63)
Kugellager 6200-ZZ für Crosstrainer
Distanzrohr ø16x2x59 mm
Zentrierhülse (4511)
Soft-Grip 880 mm SW
Kugellager 6203-ZZ für Crosstrainer
Zentrierhülse (3781)
Distanzrohr ø22,2x2x48 mm
Lenkerrohrabdeckung (3089)
Lenkerendabdeckung Oberteil (4007)
Aufkleber K-Zeichen
Lenkerendabdeckung Unterteil (4008)
Drehpunktverkleidung Teil 1 (3165)
Drehpunktverkleidung Teil 2 (3166)
Gelenkverkleidung re. (4532)
Gelenkverkleidung li. (4533)
Fußtritt re. (4609)
Fußtritt li. (4610)
Drehpunktverkleidung Oberteil (4535)
Drehpunktverkleidung Unterteil (4536)
Schraubenbeutel o. Abb.
Rohrendkappe Teil 1 (4011)
Rohrendkappe Teil 2 (4013)
Abdeckkappe (4553)
Pedalarmabdeckung
Bodenschoner-Set
POLAR Brustgurt T34 ohne Plug
Schraubenbeutel 1-2
Schraubenbeutel 2-2
USA
Description
Upper Main Shroud (right) (3999)
Lower Main Shroud (left) (4000)
PVC Caps for Guide Rods (4621)
Hubcap for Drive Disc (4780)
Ski
Bearing 2203 RS2
Guide Rods
Bolt, SW17x59 (14-08418)
Foot Frame
Foot Frame Rollers (4313)
Mast
Center Handlebar
Grip for Center Handlebar SW
Hand Pulse Pickup Sensors
Top Lead Wire 2100 mm
Front Computer Housing (4277)
Rear Computer Housing (4544)
Screw Terminal
Ground Wire
USB Interface
Computer SG1
Earclip
Ski Pole (left)
Ski Pole (right)
Bearing 6200-ZZ
Spacer Sleeve ø16x2x59 mm
Bushing White PVC (4511)
Grip for Ski Pole SW
Bearing 6203-ZZ
Bushing White PVC (3781)
Spacer Sleeve 22.2x2x48
Mast Cover (3089)
Upper Front Mast Cover (4007)
Sticker
Upper Rear Mast Cover (4008)
Ski Pole Pivot Front Cover (3165)
Ski Pole Pivot Rear Cover (3166)
Ski Cover Front Right (4532)
Ski Cover Front Left (4533)
Foot Plate Right (4609)
Foot Plate Left (4610)
Rear Ski Cover Upper (4535)
Rear Ski Cover Lower (4536)
Hardware Bag
Ski Pole Top Cap Part 1
Ski Pole Top Cap Part 2
Endcap (4553)
Crank Arm Cover
Foot-Set
Polar Chestbelt T34
Hardware Bag
Hardware Bag
qty.
Stück
1
1
4
2
1
2
2
2
4
2
12
1
1
2
1
1
1
1
1
1
1
1
1
1
1
4
2
2
2
4
2
2
1
1
1
1
2
2
2
2
1
1
2
2
1
2
2
4
2
1
1
1
1
07863-000 07863-090
Europa
USA
Bestell-Nr. spare parts no.
70129006 70129006
70129007 70129007
70128357 70128357
94317615 94317615
94317261 94317261
33100047 33100047
97100565 97100565
94318049 94318049
10900103 10900103
94317265 94317265
94317389 94317389
94317270 94317270
94317274 94317274
10118131 10118131
67000658 67000658
67000834 67000834
70128830 70128830
70129010 70129009
67000699 67000699
67000805 67000805
67000818 67000818
94317048 94317048
67000421 67000421
94317130 94317130
94317132 94317132
33100036 33100036
97201482 97201482
70128296 70128296
10118130 10118130
33100038 33100038
70128347 70128347
97201462 97201462
70128569 70128569
70128728 70128728
33907043 33907043
70128729 70128729
70128411 70128411
70128412 70128412
70129011 70129011
70129012 70129012
70129045 70129045
70129046 70129046
70129013 70129013
70129014 70129014
94318051 94318051
70121517 70121517
70121518 70121518
70129015 70129015
33003005 33003005
94317278 94317278
67002000 67002000
94318050 94318050
94317852 94317852
Ersatzteilbestellung
53
64
33
48
51
50
52
54
32
77
30
29
49
78
82
47
46
81
45
44
55
34
81
10
12
31
67
60
69
65
11
62
63
66
68
56 61
73
59
43
58
23
24
57
2
1
28
72
35
27
7
25
8
6
4
5
13
9
74
20
42
70
36
38
16
14
15
3
17b
17a
22
71
41
26
18
19
21
40
28
39
35
37 75
7
80
79
29
docu 1708g/02.08
HEINZ KETTLER GmbH & Co. KG · Postfach 1020 · D-59463 Ense-Parsit
www.kettler.de
30