1
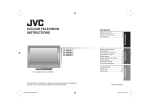
COLOR VIDEO MONITOR
TM-21A2U
INSTRUCTIONS
Contents
Important Safety Precautions ........ 2
Buttons and basic functions
—Remote control ....................... 5
Buttons and basic functions
—Main unit .................................. 6
How to operate menus .................... 7
Basic setting for picture ................. 8
Customized setting ......................... 9
Troubleshooting ............................. 10
Specifications ................................ 11
LCT2089-001A-H
Cover_TM-21A2U-f.p65
1
06.3.6, 9:53 AM
Important Safety Precautions
CAUTION
RISK OF ELECTRICAL SHOCK
DO NOT OPEN
CAUTION: To reduce the risk of electric shock. Do not remove cover
(or back). No user serviceable parts inside. Refer servicing
to qualified service personnel.
The lightning flash with arrowhead symbol, within
an equilateral triangle is intended to alert the user
to the presence of uninsulated “dangerous voltage”
within the product’s enclosure that may be of
sufficient magnitude to constitute a risk of electric
shock to persons.
The exclamation point within an equilateral triangle
is intended to alert the user to the presence of
important operating and maintenance (servicing)
instructions in the literature accompanying the
appliance.
WARNING: TO PREVENT FIRE OR SHOCK HAZARDS, DO NOT EXPOSE THIS MONITOR TO
RAIN OR MOISTURE.
CAUTION: TO INSURE PERSONAL SAFETY, OBSERVE THE FOLLOWING RULES REGARDING
THE USE OF THIS UNIT.
1. Operate only from the power source specified on the unit.
2. Avoid damaging the AC plug and power cord.
3. Avoid Improper installation and never position the unit where good ventilation is
unattainable.
4. Do not allow objects or liquid into the cabinet openings.
5. In the event of trouble, unplug the unit and call a service technician. Do not attempt to
repair it yourself or remove the rear cover.
Changes or modifications not approved by JVC could void the warranty.
• When you don’t use this monitor for a long period of time, be sure to disconnect the power
plug from the AC outlet for your safety.
• To prevent electric shock do not use this polarized plug with an extension cord, receptacle
or other outlet unless the blades can be fully inserted to prevent blade exposure.
IMPORTANT RECYCLING INFORMATION
This product utilizes both a Cathode Ray Tube (CRT) and other components
that contain lead. Disposal of these materials may be regulated in your
community due to environmental considerations. For disposal or recycling
information, please contact your local authorities, or the Electronic Industries
Alliance: http://www.eiae.org
2
02-04_TM-21A2U-f.p65
2
06.3.6, 9:54 AM
IMPORTANT SAFETY INSTRUCTIONS
1) Read these instructions.
2) Keep these instructions.
3) Heed all warnings.
4) Follow all instructions.
5) Do not use this apparatus near water.
6) Clean only with dry cloth.
7) Do not block any ventilation openings. Install in accordance with the manufacturer’s instructions.
8) Do not install near any heat sources such as radiators, heat registers, stoves, or other apparatus
(including amplifiers) that produce heat.
9) Do not defeat the safety purpose of the polarized or grounding-type plug. A polarized plug has two
blades with one wider than the other. A grounding type plug has two blades and a third grounding
prong. The wide blade or the third prong are provided for your safety. If the provided plug does not fit
into your outlet, consult an electrician for replacement of the obsolete outlet.
10) Protect the power cord from being walked on or pinched particularly at plugs, convenience receptacles,
and the point where they exit from the apparatus.
11) Only use attachments/accessories specified by the manufacturer.
12) Use only with a cart, stand, tripod, bracket, or table specified by the manufacturer, or sold with the
apparatus. When a cart is used, use caution when moving the cart/apparatus combination to avoid
injury from tip-over.
13) Unplug this apparatus during lightning storms or when unused for long periods of time.
14) Refer all servicing to qualified service personnel. Servicing is required when the apparatus has been
damaged in any way, such as power-supply cord or plug is damaged, liquid has been spilled or objects
have fallen into the apparatus, the apparatus has been exposed to rain or moisture, does not operate
normally, or has been dropped.
15) Apparatus shall not be exposed to dripping or splashing and no objects filled with liquids, such as
vases, shall be placed on the apparatus.
3
02-04_TM-21A2U-f.p65
3
06.3.6, 9:54 AM
16) Avoid improper installation and never position the unit where good ventilation is impossible. When
installing this monitor, distance recommendations must be maintained between this monitor and the
wall, as well as inside a tightly enclosed area or piece of furniture. Keep to the minimum distance
guidelines shown for safe operation.
200 mm
150 mm
200 mm
150 mm
50 mm
17) Cautions for installation
— Do not tilt this monitor towards the left or right, or towards the back.
— Install this monitor in a corner on the floor so as to keep cords out of the way.
— This monitor will generate a slight amount of heat during operation. Ensure that sufficient space is
available around this monitor to allow satisfactory cooling.
18) The main power supply for this monitor is controlled by the I (main power) button on the front panel.
Pressing the I button turns the power on, and pressing it again shuts the power off completely.
FCC Notice:
Note: This equipment has been tested and found to comply with the limits for a Class B digital
device, pursuant to Part 15 of the FCC Rules. These limits are designed to provide reasonable
protection against harmful interference in a residential installation. This equipment generates, uses
and can radiate radio frequency energy and, if not installed and used in accordance with the
instructions, may cause harmful interference to radio communications. However, there is no
guarantee that interference will not occur in a particular installation. If this equipment does cause
harmful interference to radio or television reception, which can be determined by turning the
equipment off and on, the user is encouraged to try to correct the interference by one or more of
the following measures:
– Reorient or relocate the receiving antenna.
– Increase the separation between the equipment and receiver.
– Connect the equipment into an outlet on a circuit different from that to which the receiver is
connected.
– Consult the dealer or an experienced radio/TV technician for help.
4
02-04_TM-21A2U-f.p65
4
06.3.6, 9:54 AM
Buttons and basic functions—Remote control
No. Press
1
INPUT SELECT
5
1
2
3
4
6
7
8
2
3
4
PICTURE MODE
OFF TIMER
DISPLAY/BACK
5
POWER
6
0–9
7
MENU/OK
8
9
5/∞/2/3
RESET/MUTING
0
VOLUME +/–
9
0
To
Select the input.
• Pressing this button turns on the monitor
from standby mode. (You cannot turn off
the monitor with this button.)
Select the picture mode (see page 8).
Set the off-timer (see page 9).
Displays the current input name.
While operating the menu, you can use this
button to return to the previous menu.
Turn on or off the monitor from standby
mode.
These buttons are only for maintenance or
repair by the service technician.
Display menu and confirm selected
function.
Select and adjust menu function.
Reset the picture setting while the
PICTURE SETTING menu is displayed (see
page 8).
In other cases, pressing this button turns off
the volume. Press this button again to
resume the volume.
Adjust the volume level.
Inserting batteries into the remote control
Insert two batteries by matching the ª and · polarities and
inserting the · end first.
CAUTION:
Follow the cautions printed on the batteries.
Notes:
• Use AA/R6/UM-3 dry cell batteries.
• If the remote control does not work properly, fit new batteries.
The supplied batteries are for testing, not regular use.
5
05-12_TM-21A2U-f.p65
5
06.3.6, 9:53 AM
Buttons and basic functions—Main unit
Front Panel
1
2
3
4
5
6
7
8
(in the door)
Rear Panel
VIDEO-1
INPUT
OUTPUT
VIDEO
AUDIO
9 0
No.
1
2
3
4
5
6
7
8
9
0
Button/terminal
Description
Headphone jack.
IN (VIDEO-2)
Video and audio input jacks for VIDEO-2 mode.
MENU / OK
Press to display menu and confirm selected function.
INPUT
Press either button to select the desired input.
Press either button to turn on the monitor from standby mode. (You cannot
turn off the monitor with these buttons.)
∞5
Press to select the desired menu item during menu operations.
VOLUME +/–
Press to adjust the volume level.
23
Press to adjust the selected item during menu operations.
Remote control sensor
Power lamp
Indicates whether the monitor is turned on or off.
No color : monitor’s main power is turned off.
Red : monitor’s main power is turned on.
I (main power)
Press to turn on or turn off the monitor’s main power.
VIDEO-1 INPUT
Video and audio input jacks for VIDEO-1 mode.
OUTPUT
Video and audio output jacks.
6
05-12_TM-21A2U-f.p65
6
06.3.6, 10:16 AM
How to operate menus
To display the MENU, press the MENU/OK button.
To select an item, press the 5/∞ buttons.
To adjust the selected item, press the 2/3 buttons.
MENU Screens
The available operation buttons on the remote
control are shown on each menu screen. You can
use the front control buttons with the same or
similar name.
MENU
COLOR SYSTEM
COLOR SYSTEM
PICTURE
FEATURES
EXIT
BACK
AUTO
BACK
OK
OK
PICTURE
*2
PICTURE MODE
PICTURE SETTING
WHITE BALANCE
VNR
BACK
*1
PICTURE SETTING
USER
NORMAL
OK
CONTRAST
BRIGHT
SHARP
COLOR
TINT
BACK
OK
RESET
FEATURES
*2
OFF TIMER
CONTROL LOCK
OFF TIMER
OFF
*3
0
120
10
BACK
OK
BACK
OK
Exits from the MENU.
• Pressing the DISPLAY/BACK button also exits from
the MENU.
*1 If you want to adjust PICTURE SETTING menu, set PICTURE MODE to USER.
*2 To go back to MENU:
– Select another item, then press the MENU/OK button.
– Press the DISPLAY/BACK button on the remote control.
*3 When CONTROL LOCK is set to ON, you cannot use the front control buttons. Use the remote control for
further operations.
7
05-12_TM-21A2U-f.p65
7
06.3.6, 10:48 AM
Basic setting for picture
COLOR SYSTEM
Adjusting the picture—USER
You can select the appropriate color system
when the picture is not clear or no color appears.
Select COLOR SYSTEM, then choose the
desired setting.
❇ MENU
AUTO
PAL
SECAM
NTSC 3.58
NTSC 4.43
Color system changes automatically
according to the current input.
For PAL system.
For SECAM system.
For NTSC 3.58 MHz system.
For NTSC 4.43 MHz system.
Softens contrast and sharpness.
Heightens contrast and sharpness.
Standard picture setting.
You can change this picture setting
as you like.
Select USER and adjust items in the
PICTURE SETTING menu (see the
right column).
To operate this function with a menu:
PICTURE
Select USER in PICTURE MODE under
PICTURE menu.
❇ MENU
You can choose the desired picture setting with
one-touch.
Press the PICTURE MODE button to select a
setting.
❇ MENU
1
COLOR SYSTEM
PICTURE MODE
SOFT
BRIGHT
STANDARD
USER
You can adjust the desired picture setting when
selecting USER in PICTURE MODE.
PICTURE MODE
PICTURE
PICTURE MODE
USER
2
Select PICTURE SETTING in the
PICTURE menu, then adjust the
setting.
❇ MENU
CONTRAST
BRIGHT
SHARP
COLOR
TINT*
PICTURE
PICTURE SETTING
2: Lower contrast
2: Darker
2: Softer
2: Lighter
2: Reddish
3: Higher contrast
3: Brighter
3: Higher
3: Deeper
3: Greenish
* TINT can only be adjusted in NTSC system.
To return the USER setting to the default, press
the RESET/MUTING button when the
PICTURE SETTING menu appears.
WHITE BALANCE
You can change the white balance of the picture
to better match the type of video being viewed.
Select WHITE BALANCE in the PICTURE
menu, then choose the desired setting.
❇ MENU
NORMAL
COOL
WARM
PICTURE
WHITE BALANCE
Normal white balance.
Bluish white.
Reddish white.
❇ For the basic operations of the menu, please
see “How to operate menus” on page 7.
8
05-12_TM-21A2U-f.p65
8
06.3.6, 9:53 AM
Customized setting
VNR
CONTROL LOCK
You can reduce the noise.
Select VNR in the PICTURE menu, then choose
a desired setting.
❇ MENU
PICTURE
VNR
You can disable the front control buttons of the
monitor except the I (main power) button.
Select CONTROL LOCK in the FEATURES
menu, then choose ON or OFF.
❇ MENU
OFF
AUTO
VNR is turned off.
Effect of VNR is automatically
controlled.
Effect of VNR becomes minimum
level.
Effect of VNR becomes maximum
level.
MIN
MAX
FEATURES
CONTROL LOCK
❇ For the basic operations of the menu, please
see “How to operate menus” on page 7.
If you select MAX, the picture becomes softer
even if the original picture is sharp.
OFF TIMER
You can set the monitor to turn off automatically
to standby mode after a set time.
Press the OFF TIMER button to select a desired
period of time.
OFF TIMER
0
120
10
BACK
OK
You can set the period of time to a maximum of
120 minutes in 10 minute steps.
To operate this function with a menu:
❇ MENU
FEATURES
OFF TIMER
One minute before the monitor turns off,
“GOOD NIGHT!” appears on the screen.
You can display the OFF TIMER menu again to
confirm or change the remaining time.
9
05-12_TM-21A2U-f.p65
9
06.3.6, 9:53 AM
Troubleshooting
Solutions to common problems related to your monitor are described here. If none of the solutions
presented here solve the problem, unplug the monitor and consult a JVC-authorized dealer or service
center for assistance.
No picture
• Connect the signal cable firmly.
• Turn on the power of the connected component and set the
output correctly.
Stripes appear on the picture
• Interference occurs caused by other devices such as an
amplifier, personal computer, or a hair drier.
Move such devices away from your monitor.
Poor picture quality
• Choose the appropriate color system. Refer to “COLOR
SYSTEM” on page 8.
• Adjust the COLOR or BRIGHT setting. Refer to “Adjusting the
picture—USER” on page 8.
White and bright still images look as if
they were colored
• Inevitable phenomenon due to the nature of the picture tube.
This is not a malfunction.
Top of the image from software
products or video tape is distorted
• This is due to the condition of the video signal whereby the
image was not recorded properly.
This is not a malfunction.
Cannot operate the remote control
• The batteries may be exhausted. Replace with new batteries
(see page 5).
• Ensure that you are operating the remote less than seven
meters from the front of your monitor.
Cannot turn on the monitor by using
the button on the front panel
• The CONTROL LOCK function is turned on (see page 9).
Turn on the monitor by using the remote control, then
deactivate the CONTROL LOCK function.
Cannot operate the front control
buttons
• Deactivate the CONTROL LOCK function if it is turned on
(see page 9).
Color patches appear at the corner of
the screen
• This may be due to a magnetized device such as a speaker
near your monitor. Keep the device away from your monitor.
Alternately, you can also use a magnetically-shielded
speaker.
Image takes a short period to be
displayed
• It takes time for the image to be displayed stably.
This is not a malfunction.
Monitor emits crackling sound
• This is due to a sudden change in temperature and it is not a
malfunction. If the crackling sound is too frequent, request
your service technician for inspection.
Feel a slight electric shock when
touching the monitor screen
• This is due to the static electricity of the picture tube and it
will not harm the human body. This is not a malfunction.
10
05-12_TM-21A2U-f.p65
10
06.3.6, 9:53 AM
Specifications
Model
Type
Picture Tube
Effective Screen Size
Scanning Frequency
Input/Output Terminals
Sound Output
Speaker
Compliant Video Signal
Environmental
Conditions
Power Requirements
Power Consumption
Dimensions
Weight
TM-21A2U
Color Video Monitor
21" measured diagonally
Width:
404 mm (15 7/8")
Height:
303 mm (11 7/8")
Diagonal: 505 mm (19 7/8")
H: 15 kHz
V: 50 Hz/60 Hz
Composite signal input terminals
VIDEO-1/VIDEO-2: 2 lines, RCA connector x 2 (1 Vp-p, 75 Ω)
Composite signal output terminal
OUTPUT: 1 line, RCA connector x 1
Analog audio input terminals
VIDEO-1/VIDEO-2: 2 lines, RCA connector x 2
Analog audio output terminal
OUTPUT: 1 line, RCA connector x 1
Headphone jack: stereo mini jack (3.5 mm (1/4") diameter, monaural)
3W
50 mm x 90 mm (2" x 3 5/8") x 1
PAL, SECAM, NTSC 3.58 MHz, NTSC 4.43 MHz
Operating temperature: 0°C – 40°C (32°F – 104°F)
Operating humidity:
20% – 80% (non-condensing)
120 V AC, 50 Hz/60 Hz
1.1 A/76 W (120 V AC)
Width:
502 mm (19 7/8")
Height:
479.7 mm (19")
Depth:
471.6 mm (18 5/8")
22 kg (48.4 lbs)
*Illustrations and pictures used in this manual have been exaggerated, abbreviated or compounded for
explanatory purposes only. The appearance of the actual product may differ slightly.
*Dimensions and weight are approximate.
*E. & O.E. Design and specifications subject to change without notice.
11
05-12_TM-21A2U-f.p65
11
06.3.6, 9:53 AM
Dimensions Unit : mm (inch)
Side View
502 (19 7/8")
479.7 (19")
315
(12 1/2")*
416 (16 1/2")*
471.6 (18 5/8")
TM-21A2U COLOR VIDEO MONITOR
Front View
Asterisks (*) are used to indicate front panel dimensions.
© 2006 Victor Company of Japan, Limited
05-12_TM-21A2U-f.p65
12
0306STH-MW-MT
06.3.6, 9:53 AM