1
РУCCKИЙ ENGLISH
CD RECEIVER
РЕСИВЕР С ПРОИГРЫВАТЕЛЕМ КОМПАКТ-ДИСКОВ
KD-G417/KD-G317
For installation and connections, refer to the separate manual.
Указания по установке и выполнению соединений приводятся в отдельной инструкции.
В соответствии с Законом Российской Федерации “О защите прав потребителей” срок службы
(годности) данного товара “по истечении которого он может представлять опасность для жизни,
здоровья потребителя, причинять вред его имуществу или окружающей среде” составляет семь (7)
лет со дня производства. Этот срок является временем, в течение которого потребитель данного
товара может безопасно им пользоваться при условии соблюдения инструкции по эксплуатации
данного товара, проводя необходимое обслуживание, включающее замену расходных материалов
и/или соответствующее ремонтное обеспечение в специализированном сервисном центре.
Дополнительные косметические материалы к данному товару, поставляемые вместе с ним, могут
храниться в течение двух (2) лет со дня его производства.
Срок службы (годности), кроме срока хранения дополнительных косметических материалов,
упомянутых в предыдущих двух пунктах, не затрагивает никаких других прав потребителя, в
частности, гарантийного свидетельства JVC, которое он может получить в соответствии с законом о
правах потребителя или других законов, связанных с ним.
For canceling the display demonstration, see page 7.
Информацию об отмене демонстрации функций дисплея см. на стр. 7.
INSTRUCTIONS
ИНСТРУКЦИИ ПО ЭКСПЛУАТАЦИИ
GET0261-001B
[EE]
Cover_KD-G417_G317[EE]f.indd 2
3/18/05 11:29:58 AM
ENGLISH
Thank you for purchasing a JVC product.
Please read all instructions carefully before operation, to ensure your complete understanding and to
obtain the best possible performance from the unit.
IMPORTANT FOR LASER PRODUCTS
1. CLASS 1 LASER PRODUCT
2. CAUTION: Do not open the top cover. There are no user serviceable parts inside the unit; leave
all servicing to qualified service personnel.
3. CAUTION: Visible and invisible laser radiation when open and interlock failed or defeated.
Avoid direct exposure to beam.
4. REPRODUCTION OF LABEL: CAUTION LABEL, PLACED OUTSIDE THE UNIT.
Warning:
If you need to operate the receiver while
driving, be sure to look ahead carefully or
you may be involved in a traffic accident.
How to forcibly eject a disc
If a disc cannot be recognized by the
receiver or cannot be ejected, ejects the disc
as follows.
How to reset your unit
• This will reset the microcomputer. Your
preset adjustments will also be erased.
• If a disc is loaded, it will eject. Be careful
not to drop the disc.
• If this does not work, reset your receiver.
• Be careful not to drop the disc when it
ejects.
2
EN02-05KD-G417_G317[EE]f.indd 2
3/18/05 11:30:24 AM
2
2
4
4
Sound adjustments ................ 18
Selecting preset sound modes
(C-EQ: custom equalizer) .................. 18
Control panel
— KD-G417/KD-G317 ............... 5
General settings — PSM ......... 20
How to reset your unit ...........................
How to forcibly eject a disc ...................
How to read this manual ........................
How to use the MODE button ...............
Parts identification .................................
Basic procedure ..................................... 20
5
Getting started ....................... 6
Basic operations .................................. 6
Canceling the display demonstrations ...
Setting the clock ....................................
Adjusting the sound ............................... 19
ENGLISH
Contents
7
7
Detaching the control
panel .................................. 22
Using the remote controller
— RM-RK60 ............................ 23
Main elements and features ................... 23
Radio operations ................... 8
Listening to the radio........................... 8
Maintenance .......................... 24
Storing stations in memory .................... 9
Listening to a preset station ................... 10
More about this receiver ........ 25
FM RDS operations ................. 11
Searching for your favorite FM RDS
programme ....................................... 11
Troubleshooting ..................... 27
Specifications ......................... 29
Storing your favorite programmes ......... 12
Using the standby receptions ................. 12
Tracking the same programme
—Network-Tracking Reception ........ 13
Disc operations ...................... 14
Playing a disc ..................................... 14
Changing the display information ......... 16
Selecting the playback modes................ 17
For safety....
Temperature inside the car....
• Do not raise the volume level too much, as
this will block outside sounds, making driving
dangerous.
• Stop the car before performing any
complicated operations.
If you have parked the car for a long time in
hot or cold weather, wait until the temperature
in the car becomes normal before operating the
unit.
3
EN02-05KD-G417_G317[EE]f.indd 3
3/18/05 11:30:25 AM
ENGLISH
How to read this manual
The following methods are used to make the
explanations simple and easy-to-understand:
• Some related tips and notes are explained in
“More about this receiver” (see page 25).
• Only for KD-G417: This receiver can
show the Russian fonts, if a CD Text or an
MP3/WMA files containing Russian text
information is inserted.
(See “Available characters on the display” on
page 24.)
• The control panel illustrations used for
explanation in this manual is KD-G317.
• Button operations are mainly explained with
the illustrations as follows:
How to use the MODE button
If you press MODE, the receiver goes into
functions mode, then the number buttons and
¢/4
buttons work as different
function buttons.
Ex.: When number button 2 works as
MO (monaural) button.
Press briefly.
Press repeatedly.
Press either one.
Time countdown indicator
To use these buttons for original functions
again after pressing MODE, wait for
5 seconds without pressing any of these buttons
until the functions mode is cleared.
• Pressing MODE again also clears the
functions mode.
Press and hold until
your desired response
begins.
Press and hold both
buttons at the same
time.
4
EN02-05KD-G417_G317[EE]f.indd 4
3/18/05 11:30:25 AM
KD-G417/KD-G317
ENGLISH
Control panel —
Parts identification
Display window
1
2
3
4
5
6
7
8
9
p
q
w
e
r
t
y
u
i
+/– buttons
DISP (display) button
Loading slot
Display window
MODE button
0 (eject) button
¢/4
buttons
(standby/on/attenuator) button
SEL (select) button
Remote sensor
• You can control this receiver with an
optionally purchased remote controller.
• DO NOT expose the remote sensor to
strong light (direct sunlight or artificial
lighting).
EQ (equalizer) button
MO (monaural) button
SSM (Strong-station Sequential Memory)
button
CD button
FM/AM button
RPT (repeat) button
RND (random) button
T/P (traffic programme/programme type)
button
o
(control panel release) button
; Number buttons
Display window
a Tuner reception indicators—MO (monaural),
ST (stereo)
s WMA indicator
d RDS indicators—TP, PTY, AF, REG
f MP3 indicator
g CD indicator
h Playback mode / item indicators—
RND (random),
(disc),
(folder),
RPT (repeat)
j LOUD (loudness) indicator
k EQ (equalizer) indicator
l Sound mode (C-EQ: custom equalizer)
indicators—ROCK, CLASSIC, POPS,
HIP HOP, JAZZ, USER
•
also works as the time countdown
indicator.
/ Disc information indicators—TAG (ID3
Tag),
(folder), (track/file)
z Main display
x Source display / Volume level indicator
c Tr (track) indicator
5
EN02-05KD-G417_G317[EE]f.indd 5
3/18/05 11:30:25 AM
ENGLISH
Getting started
Basic operations
To drop the volume in a moment (ATT)
~
To restore the sound, press it
again.
Ÿ
To turn off the power
You cannot select “CD” as the playback
source if there is no disc in the loading
slot.
Caution on volume setting:
!
Discs produce very little noise compared
with other sources. Lower the volume
before playing a disc to avoid damaging
the speakers by the sudden increase of the
output level.
Volume level appears.
Volume level indicator
⁄
Adjust the sound as you want.
(See pages 18 and 19.)
6
EN06-11KD-G417_G317[EE]f.indd 6
3/18/05 11:30:41 AM
ENGLISH
Canceling the display
demonstrations
Setting the clock
1
If no operations are done for about 20 seconds,
display demonstration starts.
[Initial: DEMO ON]—see page 20.
1
2
2 Set the hour and minute.
1 Select “CLOCK H” (hour), then
adjust the hour.
2 Select “CLOCK M” (minute),
then adjust the minute.
3 Finish the procedure.
3
To check the current clock time when the
power is turned off
4 Finish the procedure.
To activate the display demonstration
In step 3 above...
7
EN06-11KD-G417_G317[EE]f.indd 7
3/18/05 11:30:42 AM
ENGLISH
Radio operations
Listening to the radio
To tune in to a station manually
~
In step Ÿ on the left...
1
Lights up when receiving an FM stereo
broadcast with sufficient signal strength.
Selected band appears.
Ÿ
Start searching for a station.
2 Select the desired station frequencies.
When a station is received, searching
stops.
To stop searching, press the same
button again.
Note:
FM1 and FM2: 87.5 MHz – 108.0 MHz
FM3: 65.00 MHz – 74.00 MHz
8
EN06-11KD-G417_G317[EE]f.indd 8
3/18/05 11:30:42 AM
1
Storing stations in memory
You can preset six stations for each band.
ENGLISH
When an FM stereo broadcast is hard to
receive
FM station automatic presetting—
SSM (Strong-station Sequential
Memory)
2
1 Select the FM band (FM1 – FM3)
you want to store into.
Lights up when monaural mode is activated.
2
Reception improves, but stereo effect will
be lost.
To restore the stereo effect, repeat the same
procedure so that the MO indicator goes off.
3
“SSM” flashes, then disappears when
automatic presetting is over.
Local FM stations with the strongest signals are
searched and stored automatically in the FM
band.
9
EN06-11KD-G417_G317[EE]f.indd 9
3/18/05 11:30:42 AM
ENGLISH
Manual presetting
Ex.: Storing FM station of 92.5 MHz into the
preset number 4 of the FM1 band.
Listening to a preset station
1
1
2 Select the preset station (1 – 6) you
want.
2
To check the current clock time while
listening to an FM (non-RDS) or AM station
3
• For FM RDS stations, see page 13.
Preset number flashes for a while.
10
EN06-11KD-G417_G317[EE]f.indd 10
3/18/05 11:30:43 AM
ENGLISH
FM RDS operations
Searching for your favorite FM RDS programme
You can tune in to a station broadcasting your
favorite programme by searching for a PTY code.
!
Start searching for your favorite
programme.
~
The last selected PTY code appears.
Ÿ
Select one of your favorite
programme type.
If there is a station broadcasting a
programme of the same PTY code as
you have selected, that station is tuned
in.
PTY codes
or
Select one of the twenty-nine PTY
codes.
NEWS, AFFAIRS, INFO, SPORT,
EDUCATE, DRAMA, CULTURE,
SCIENCE, VARIED, POP M (music),
ROCK M (music), EASY M (music),
LIGHT M (music), CLASSICS,
OTHER M (music), WEATHER,
FINANCE, CHILDREN, SOCIAL,
RELIGION, PHONE IN, TRAVEL,
LEISURE, JAZZ, COUNTRY,
NATION M (music), OLDIES,
FOLK M (music), DOCUMENT
Ex.: When “ROCK M” is selected
11
EN06-11KD-G417_G317[EE]f.indd 11
3/18/05 11:30:43 AM
ENGLISH
What you can do with RDS
RDS (Radio Data System) allows FM
stations to send an additional signal along
with their regular programme signals.
By receiving the RDS data, this receiver can
do the following:
• Programme Type (PTY) Search (see page 11)
• Standby Reception of Traffic
Announcement—TA (see the following) or
your favorite programme (PTY) (see pages
13 and 21)
• Tracing the same programme automatically
—Network-Tracking Reception (see page 13)
• Programme Search (see page 21)
Storing your favorite programmes
You can store six favorite programme types.
Preset programme types in the number buttons
(1 to 6)
1 Select a PTY code (see page 11).
2 Select the preset number (1 – 6) you
want to store into.
3 Repeat steps 1 and 2 to store
other PTY codes into other preset
numbers.
4 Finish the procedure.
Using the standby receptions
TA Standby Reception
TA Standby Reception allows the receiver to
switch temporarily to Traffic Announcement
(TA) from any source other than AM.
The volume changes to the preset TA volume
level (see page 21).
To activate TA Standby Reception
The TP indicator either
lights up or flashes.
• If the TP indicator lights up, TA Standby
Reception is activated.
• If the TP indicator flashes, TA Standby
Reception is not yet activated. (This occurs
when you are listening to an FM station
without the RDS signals required for TA
Standby Reception.)
To activate TA Standby Reception, tune in to
another station providing these signals. The
TP indicator will stop flashing and remain lit.
To deactivate the TA Standby Reception
The TP indicator goes off.
Ex.: When “ROCK M” is selected
12
EN12-17KD-G417_G317[EE]f.indd 12
3/18/05 11:31:00 AM
PTY Standby Reception allows the receiver
to switch temporarily to your favorite PTY
programme from any source other than AM.
To activate and select your favorite PTY
code for PTY Standby Reception, see page
21.
The PTY indicator either lights up or flashes.
• If the PTY indicator lights up, PTY Standby
Reception is activated.
• If the PTY indicator flashes, PTY Standby
Reception is not yet activated.
To activate PTY Standby Reception, tune in
to another station providing these signals. The
PTY indicator will stop flashing and remain
lit.
Tracking the same programme—
Network-Tracking Reception
When driving in an area where FM reception
is not sufficient enough, this receiver
automatically tunes in to another FM RDS
station of the same network, possibly
broadcasting the same programme with stronger
signals (see the illustration below).
When shipped from the factory, NetworkTracking Reception is activated.
To change the Network-Tracking Reception
setting, see page 21.
ENGLISH
PTY Standby Reception
Programme A broadcasting on different
frequency areas (01 – 05)
To deactivate the PTY Standby Reception,
select “OFF” for the PTY code (see page 21).
The PTY indicator goes off.
To check the current clock time while
listening to an FM RDS station
13
EN12-17KD-G417_G317[EE]f.indd 13
3/18/05 11:31:01 AM
ENGLISH
Disc operations
Playing a disc
All tracks will be played
repeatedly until you change
the source or eject the disc.
About MP3 and WMA discs
• When inserting an audio CD or a CD Text
disc:
MP3 and WMA (Windows Media® Audio)
“tracks” (words “file” and “track” are used
interchangeably) are recorded in “folders.”
• When inserting an MP3 or a WMA disc:
Total playing time of Total track number
the inserted disc
of the inserted disc
CD Text: Disc title/performer =
Track title appears automatically
(see page 16).
Total folder
number
Total file
number
Disc information appears
automatically (see page 16).
Elapsed playing
time
Current track
number
To stop play and eject the disc
Selected folder number
Elapsed
playing time
Current track
number
* Either the MP3 or WMA indicator lights up
depending on the detected file.
14
EN12-17KD-G417_G317[EE]f.indd 14
3/18/05 11:31:02 AM
Fast-forwards.
To locate a particular track (for CD) or
folder (for MP3 or WMA discs) directly
To select a number from 01 – 06:
ENGLISH
To fast-forward or reverse the track
Reverses.
To select a number from 07 – 12:
To go to the next or previous tracks
To the following tracks.
To the beginning of the current track, then
the previous tracks.
To go to the next or previous folders
(only for MP3 or WMA discs)
• To use folder search on MP3/WMA discs, it
is required that folders are assigned with
2-digits number at the beginning of their
folder names—01, 02, 03, and so on.
• To select a particular track in a folder
(for MP3 or WMA disc) after selecting a
folder:
1
Prohibiting disc ejection
You can lock a disc in the loading slot.
2
To next folders.
To previous folders.
To cancel the prohibition, repeat the same
procedure.
15
EN12-17KD-G417_G317[EE]f.indd 15
3/18/05 11:31:02 AM
ENGLISH
Changing the display information
While playing an audio CD or a CD Text
*1 If the current disc is an audio CD, “NO NAME” appears.
While playing an MP3 or WMA disc
• When “TAG DISP” is set to “TAG ON” (see page 21)
*2 If an MP3/WMA file does not have ID3 tags, folder name and file name appear. In this
case, the TAG indicator will not light up.
• When “TAG DISP” is set to “TAG OFF”
16
EN12-17KD-G417_G317[EE]f.indd 16
3/18/05 11:31:02 AM
ENGLISH
Selecting the playback modes
You can use only one of the following playback modes at a time.
1
2 Select your desired playback mode.
Repeat play
Mode
Plays repeatedly
TRK RPT:
The current track.
• RPT lights up.
FLDR RPT*: All tracks of the current folder.
•
and RPT light up.
RPT OFF:
Cancels.
Ex.: When “TRK RPT” is selected while
playing an MP3 disc
Random play
Mode
Plays at random
FLDR RND*: All tracks of the current folder,
then tracks of the next folder
and so on.
• RND and
light up.
DISC RND: All tracks of the current disc.
• RND and
light up.
RND OFF:
Cancels.
Ex.: When “DISC RND” is selected while
playing an MP3 disc
* Only while playing an MP3 or WMA disc.
17
EN12-17KD-G417_G317[EE]f.indd 17
3/18/05 11:31:03 AM
ENGLISH
Sound adjustments
Selecting preset sound modes (C-EQ: custom equalizer)
You can select a preset sound mode suitable to
the music genre.
~
Ÿ
Indication
For:
Preset values
BAS*1 TRE*2 LOUD*3
USER
(Flat sound)
00
00
OFF
ROCK
Rock or
disco music
+03
+01
ON
CLASSIC
Classical
music
+01
–02
OFF
POPS
Light music
+04
+01
OFF
HIP HOP
Funk or rap
music
+02
00
ON
JAZZ
Jazz music
+02
+03
OFF
*1 BAS: Bass
*2 TRE: Treble
*3 LOUD: Loudness
Ex.: When “ROCK” is selected
Indication pattern for each sound mode:
18
EN18-23KD-G417_G317[EE]f.indd 18
3/18/05 11:31:21 AM
You can adjust the sound characteristics to your
preference.
1
Ex.: When “TRE” is selected
Indication
BAS*1
To do:
Range
Adjust the bass.
–06 (min.)
to
+06 (max.)
TRE*1
(treble)
Adjust the treble.
–06 (min.)
to
+06 (max.)
FAD*2
(fader)
Adjust the front
and rear speaker
balance.
R06 (Rear
only)
to
F06 (Front
only)
BAL
(balance)
Adjust the left
and right speaker
balance.
L06 (Left
only)
to
R06 (Right
only)
LOUD*1
(loudness)
Boost low and
high frequencies
to produce a wellbalanced sound at
low volume level.
LOUD ON
J
LOUD OFF
VOL*3
(volume)
Adjust the volume. 00 (min.) to
30 or 50
(max.)*4
(bass)
2
Indication pattern changes as
you adjust the level.
ENGLISH
Adjusting the sound
*1 When you adjust the bass, treble, or
loudness, the adjustment you have made is
stored for the currently selected sound mode
(C-EQ) including “USER.”
*2 If you are using a two-speaker system, set
the fader level to “00.”
*3 Normally the +/– buttons work as the volume
control. So you do not have to select “VOL”
to adjust the volume level.
*4 Depending on the amplifier gain control
setting. (See page 21 for details.)
19
EN18-23KD-G417_G317[EE]f.indd 19
3/18/05 11:31:22 AM
ENGLISH
General settings — PSM
3 Adjust the PSM item selected.
Basic procedure
You can change PSM (Preferred Setting Mode)
items listed in the table that follows.
1
4 Repeat steps 2 and 3 to adjust the
other PSM items if necessary.
5 Finish the procedure.
2 Select a PSM item.
Ex.: When you select “DIMMER”
Indications
Selectable settings, [reference page]
DEMO
Display demonstration
DEMO ON:
CLOCK H
Hour adjustment
0 – 23, [7]
[Initial: 0 (0:00)]
CLOCK M
Minute adjustment
00 – 59, [7]
[Initial: 00 (0:00)]
CLK ADJ
Clock adjustment
AUTO:
[Initial]; Display demonstration will be activated
automatically if no operation is done for about
20 seconds, [7].
DEMO OFF: Cancels.
OFF:
[Initial]; The built-in clock is automatically adjusted
using the CT (clock time) data in the RDS signal.
Cancels.
20
EN18-23KD-G417_G317[EE]f.indd 20
3/18/05 11:31:22 AM
Selectable settings, [reference page]
AF-REG
Alternative frequency/
regionalization reception
When the received signals from the current station become weak...
AF:
[Initial]; Switches to another station (the programme
may differ from the one currently received), [13].
• The AF indicator lights up.
AF REG: Switches to another station broadcasting the same
programme.
• The AF and REG indicators light up.
OFF:
Cancels.
PTY-STBY
PTY standby
Activates PTY Standby Reception with one of the 29 PTY codes,
[13].
OFF [Initial] = 29 PTY codes, [11] = (back to the beginning)
TA VOL
Traffic announcement
volume
[Initial: VOL 20]; VOL 00 – VOL 30 or 50*, [12]
* Depends on the amplifier gain control.
P-SEARCH
Programme search
ON:
OFF:
Using the AF data, the receiver tunes in to another
frequency broadcasting the same programme as the
original preset RDS station is if the preset station
signals are not sufficient.
[Initial]; Cancels.
DIMMER
Dimmer
ON:
OFF:
Activates dimmer.
[Initial]; Cancels.
TEL
Telephone muting
MUTING 1/MUTING 2: Select either one which mutes the
sounds while using the cellular phone.
OFF:
[Initial]; Cancels.
SCROLL*
Scroll
ONCE: [Initial]; Scrolls the disc information once.
AUTO: Repeats scrolling (5-second intervals in between).
OFF:
Cancels.
• Pressing DISP for more than one second can scroll the display
regardless of the setting.
TAG DISP
Tag display
TAG ON:
TAG OFF:
AMP GAIN
Amplifier gain control
ENGLISH
Indications
[Initial]; Shows the ID3 tag while playing
MP3/WMA tracks, [16].
Cancels.
You can change the maximum volume level of this receiver.
LOW PWR: VOL 00 – VOL 30 (Select this if the maximum
power of the speaker is less than 50 W to prevent
them from damaging the speaker.)
HIGH PWR: [Initial]; VOL 00 – VOL 50
* Some characters or symbols will not be shown (and will be blanked) on the display.
(Ex. “AБBЁ б ! ” ]“AБBE Б ”.)
21
EN18-23KD-G417_G317[EE]f.indd 21
3/18/05 11:31:23 AM
ENGLISH
Detaching the control panel
When detaching or attaching the control panel,
be careful not to damage the connectors on
the back of the control panel and on the panel
holder.
Attaching the control panel
Detaching the control panel
Before detaching the control panel, be sure to
turn off the power.
22
EN18-23KD-G417_G317[EE]f.indd 22
3/18/05 11:31:23 AM
This receiver can be remotely controlled as
instructed here (with an optionally purchased
remote controller). We recommend that you use
remote controller RM-RK60 with your receiver.
• When operating, aim the remote controller
directly at the remote sensor on the
receiver. Make sure there is no obstacle in
between.
RM-RK60
Main elements and features
ENGLISH
Using the remote controller —
Installing the lithium coin battery
(CR2025)
1
Warning:
• Do not install any battery other than
CR2025 or its equivalent; otherwise, it
may explode.
• Store the battery in a place where children
cannot reach to avoid risk of accident.
• To prevent the battery from over-heating,
cracking, or starting a fire:
– Do not recharge, short, disassemble, or
heat the battery or dispose of it in a fire.
– Do not leave the battery with other
metallic materials.
– Do not poke the battery with tweezers or
similar tools.
– Wrap the battery with tape and insulate
when throwing away or saving it.
2
3
4
5
6
(standby/on attenuator) button
• Turns on and off the power and also
attenuates the sound.
SRC (source) button
• Selects the source.
R (reverse) / F (forward) buttons
• Searches for stations if pressed briefly.
• Fast-forwards or reverses the track if
pressed and held.
• Changes the tracks of the disc.
SOUND button
• Selects the sound mode (C-EQ: custom
equalizer).
U (up) / D (down) buttons
• U (up): Changes the FM/AM bands.
• D (down): Changes the preset stations.
• Changes the folder of the MP3/WMA
discs.
VOLUME +/– buttons
• Adjusts the volume level.
Caution:
23
EN18-23KD-G417_G317[EE]f.indd 23
3/22/05 6:02:24 PM
ENGLISH
Maintenance
How to clean the connectors
Frequent detachment will deteriorate the
connectors.
To minimize this possibility, periodically wipe
the connectors with a cotton swab or cloth
moistened with alcohol, being careful not to
damage the connectors.
To keep discs clean
A dirty disc may not play correctly.
If a disc does become dirty, wipe
it with a soft cloth in a straight line
from center to edge.
• Do not use any solvent (for example,
conventional record cleaner, spray, thinner,
benzine, etc.) to clean discs.
To play new discs
New discs may have some rough
spots around the inner and outer
edges. If such a disc is used, this
receiver may reject the disc.
To remove these rough spots, rub the edges
with a pencil or ball-point pen, etc.
Connector
Moisture condensation
Moisture may condense on the lens inside the
CD player in the following cases:
• After starting the heater in the car.
• If it becomes very humid inside the car.
Should this occur, the CD player may
malfunction. In this case, eject the disc and
leave the receiver turned on for a few hours
until the moisture evaporates.
Available characters on the display
Only for KD-G417
Available characters
Display indications
How to handle discs
When removing a disc from Center holder
its case, press down the center
holder of the case and lift the
disc out, holding it by the
edges.
• Always hold the disc by the edges. Do not
touch its recording surface.
When storing a disc into its case, gently insert
the disc around the center holder (with the
printed surface facing up).
• Make sure to store discs into the cases after
use.
Do not use the following discs:
Warped
disc
Sticker
Sticker
residue
Disc
Stick-on
label
24
EN24-29KD-G417_G317[EE]f.indd 24
3/18/05 11:45:15 AM
Basic operations
Turning on the power
• By pressing CD or FM/AM on the receiver,
you can also turn on the power.
Turning off the power
• If you turn off the power while listening to a
disc, disc play will start from where playback
has been stopped previously, next time you
turn on the power.
Tuner operations
Storing stations in memory
• During SSM search...
– All previously stored stations are erased and
stations are stored newly.
– Received stations are preset in No. 1 (lowest
frequency) to No. 6 (highest frequency).
– When SSM is over, the station stored in
No. 1 will be automatically tuned in.
• When storing a station manually, a previously
preset station is erased when a new station is
stored in the same preset number.
FM RDS operations
• Network-Tracking Reception requires two
types of RDS signals—PI (Programme
Identification) and AF (Alternative
Frequency) to work correctly. Without
receiving these data correctly, NetworkTracking Reception will not operate.
• If a Traffic Announcement is received, the
volume level (TA Volume) automatically
changes to the preset level.
Disc operations
Caution for DualDisc playback
• The Non-DVD side of a “DualDisc” does
not comply with the “Compact Disc Digital
Audio” standard. Therefore, the use of NonDVD side of a DualDisc on this product may
not be recommended.
General
• When a disc has been loaded, selecting “CD”
for the playback source starts disc play.
Inserting a disc
• When a disc is inserted upside down, the disc
automatically ejects.
• Do not insert 8 cm discs (single CD) and
unusual shape discs (heart, flower, etc.) into
the loading slot.
ENGLISH
More about this receiver
Playing a disc
• While fast-forwarding or reversing on an MP3
or WMA disc, you can only hear intermittent
sounds.
Playing a CD-R or CD-RW
• Use only “finalized” CD-Rs or CD-RWs.
• This receiver can play back only the files of
the same type which is first detected if a disc
includes both audio CD (CD-DA) files and
MP3/WMA files.
• This receiver can play back multi-session
discs; however, unclosed sessions will be
skipped while playing.
• Some CD-Rs or CD-RWs may not play
back on this receiver because of their disc
characteristics, and for the following causes:
– Discs are dirty or scratched.
– Moisture condensation occurs on the lens
inside the receiver.
– The pickup lens inside the receiver is dirty.
– CD-R/CD-RW on which the files are
written with “Packet Write” method.
– There are improper recording conditions
(missing data, etc.) or media conditions
(stain, scratch, warp, etc.).
• CD-RWs may require a longer readout time
since the reflectance of CD-RWs is lower
than that of regular CDs.
• Do not use the following CD-Rs or CD-RWs:
– Discs with stickers, labels, or protective seal
stuck to the surface.
– Discs on which labels can be directly
printed by an ink jet printer.
Using these discs under high temperatures or
high humidities may cause malfunctions or
damages to discs.
• This receiver has been designed to reproduce
CDs/CD Texts, and CD-Rs (Recordable)/
CD-RWs (Rewritable) in audio CD (CD-DA),
MP3 and WMA format.
25
EN24-29KD-G417_G317[EE]f.indd 25
3/18/05 11:31:39 AM
ENGLISH
Playing an MP3/WMA disc
• This receiver can play back MP3/WMA files
with the extension code <.mp3> or <.wma>
(regardless of the letter case—upper/lower).
• This receiver can show the names of albums,
artists (performer), and ID3 Tag (Version 1.0,
1.1, 2.2, 2.3, or 2.4) for MP3 files and for
WMA files.
• This receiver can handle only one-byte
characters. No other characters can be
correctly displayed.
• This receiver can play back MP3/WMA files
meeting the conditions below:
– Bit rate: 8 kbps — 320 kbps
– Sampling frequency:
48 kHz, 44.1 kHz, 32 kHz (for MPEG-1)
24 kHz, 22.05 kHz, 16 kHz (for MPEG-2)
– Disc format: ISO 9660 Level 1/ Level 2,
Romeo, Joliet, Windows long file name
• The maximum number of characters for file/
folder names vary among the disc format used
(includes 4 extension characters—<.mp3> or
<.wma>).
– ISO 9660 Level 1: up to 12 characters
– ISO 9660 Level 2: up to 31 characters
– Romeo*: up to 128 (72) characters
– Joliet*: up to 64 (36) characters
– Windows long file name*: up to 128 (72)
characters
* The parenthetic figure is the maximum
number of characters for file/folder names
in case the total number of files and folders
is 313 or more.
• This receiver can recognize the total of 512
files, of 200 folders, and of 8 hierarchies.
• This receiver can play back the files recorded
in VBR (variable bit rate).
The files recorded in VBR have a discrepancy
in elapsed time display, and do not show
the actual elapsed time. Especially, after
performing the search function, this difference
becomes noticeable.
• This receiver cannot play back the following
files:
– MP3 files encoded with MP3i and MP3
PRO format.
– MP3 files encoded in an unappropriated
format.
– MP3 files encoded with Layer 1/2.
– WMA files encoded with lossless,
professional, and voice format.
– WMA files which are not based upon
Windows Media® Audio.
– WMA formatted files copy-protected with
DRM.
– Files which have the data such as WAVE,
ATRAC3, etc.
• The search function works but search speed is
not constant.
Changing the source
• If you change the source, playback also stops
(without ejecting the disc).
Next time you select “CD” for the playback
source, disc play starts from where it has been
stopped previously.
Ejecting a disc
• If the ejected disc is not removed within
15 seconds, the disc is automatically inserted
again into the loading slot to prevent it from
dust. (Disc will not play this time.)
General settings—PSM
• If you change the “AMP GAIN” setting from
“HIGH PWR” to “LOW PWR” while the
volume level is set higher than “VOL 30,” the
receiver automatically changes the volume
level to “VOL 30.”
26
EN24-29KD-G417_G317[EE]f.indd 26
3/18/05 11:31:40 AM
What appears to be trouble is not always serious. Check the following points before calling a service
center.
Symptoms
Adjust it to the optimum
level.
Connections are incorrect.
Check the cords and
connections.
• The receiver does not
work at all.
The built-in microcomputer
may have functioned
incorrectly due to noise, etc.
Reset the receiver (see page
2).
• SSM automatic presetting
does not work.
Signals are too weak.
Store stations manually.
• Static noise while listening
to the radio.
The aerial is not connected
firmly.
Connect the aerial firmly.
• Disc automatically ejects.
Disc is inserted upside
down.
Insert the disc correctly.
• CD-R/CD-RW cannot be
played back.
• Tracks on the CD-R/
CD-RW cannot be
skipped.
CD-R/CD-RW is not
finalized.
• Insert a finalized CD-R/
CD-RW.
• Finalize the CD-R/
CD-RW with the
component which you
used for recording.
• Disc can be neither played
back nor ejected.
Disc is locked.
Unlock the disc (see page
15).
The CD player may have
functioned incorrectly.
Eject the disc forcibly (see
page 2).
You are driving on rough
roads.
Stop playback while driving
on rough roads.
Disc is scratched.
Change the disc.
Connections are incorrect.
Check the cords and
connections.
General
FM/AM
Remedies
The volume level is set to
the minimum level.
• Sound cannot be heard
from the speakers.
Disc playback
Causes
• Disc sound is sometimes
interrupted.
• “NO DISC” appears on the No disc is in the loading
display.
slot.
Disc is inserted incorrectly.
ENGLISH
Troubleshooting
Insert a disc into the loading
slot.
Insert the disc correctly.
27
EN24-29KD-G417_G317[EE]f.indd 27
3/18/05 11:31:40 AM
ENGLISH
Symptoms
Remedies
No MP3/WMA tracks are
recorded on the disc.
Change the disc.
MP3/WMA tracks do not
have the extension code
<.mp3> or <.wma> in their
file names.
Add the extension code
<.mp3> or <.wma> to their
file names.
MP3/WMA tracks are not
recorded in the format
compliant with ISO 9660
Level 1, Level 2, Romeo, or
Joliet.
Change the disc.
(Record MP3/WMA
tracks using a compliant
application.)
• Noise is generated.
The track played back
is not an MP3/WMA
track (although it has the
extension code <.mp3> or
<.wma>).
Skip to another track or
change the disc. (Do not add
the extension code <.mp3>
or <.wma> to non-MP3 or
WMA tracks.)
• A longer readout time is
required (“CHECK” keeps
flashing on the display).
Readout time varies due to
the complexity of the folder/
file configuration.
Do not use too many
hierarchies and folders.
• Tracks cannot be played
back as you have intended
them to play.
Playback order is determined
when the files are recorded.
• Disc cannot be played
back.
MP3/WMA playback
Causes
• Elapsed playing time is not This sometimes occurs
during play. This is caused
correct.
by how the tracks are
recorded on the disc.
• “NO FILES” appears on
the display.
The current disc does not
contain any MP3/WMA
tracks.
Insert a disc that contains
MP3/WMA tracks.
• Correct characters are not
This receiver can display
displayed (ex. album name). Roman alphabets (A – Z),
Cyrillic alphabets, numbers,
and a limited number of
symbols (see page 24).
28
EN24-29KD-G417_G317[EE]f.indd 28
3/18/05 11:31:40 AM
AUDIO AMPLIFIER SECTION
Maximum Power Output:
Front: 50 W per channel
Rear: 50 W per channel
Continuous Power Output (RMS):
Front: 19 W per channel into 4 Ω, 40 Hz
to 20 000 Hz at no more than 0.8%
total harmonic distortion.
Rear: 19 W per channel into 4 Ω, 40 Hz
to 20 000 Hz at no more than 0.8%
total harmonic distortion.
Load Impedance: 4 Ω (4 Ω to 8 Ω allowance)
Tone Control Range:
Bass: ±10 dB at 100 Hz
Treble: ±10 dB at 10 kHz
Frequency Response: 40 Hz to 20 000 Hz
Signal-to-Noise Ratio: 70 dB
Line-Out Level/Impedance:
2.5 V/20 kΩ load (full scale)
Output Impedance: 1 kΩ
TUNER SECTION
Frequency Range:
FM1/FM2: 87.5 MHz to 108.0 MHz
FM3:
65.00 MHz to 74.00 MHz
AM:
(MW) 522 kHz to 1 620 kHz
(LW) 144 kHz to 279 kHz
[FM Tuner]
Usable Sensitivity: 11.3 dBf (1.0 µV/75 Ω)
50 dB Quieting Sensitivity:
16.3 dBf (1.8 µV/75 Ω)
Alternate Channel Selectivity (400 kHz): 65 dB
Frequency Response: 40 Hz to 15 000 Hz
Stereo Separation: 30 dB
Capture Ratio: 1.5 dB
CD PLAYER SECTION
Type: Compact disc player
Signal Detection System: Non-contact optical
pickup (semiconductor laser)
Number of Channels: 2 channels (stereo)
Frequency Response: 5 Hz to 20 000 Hz
Dynamic Range:
96 dB
Signal-to-Noise Ratio: 98 dB
Wow and Flutter: Less than measurable limit
MP3 Decoding Format:
MPEG1/2 Audio Layer 3
Max. Bit Rate: 320 kbps
WMA (Windows Media® Audio) Decoding
Format:
Max. Bit Rate: 192 kbps
ENGLISH
Specifications
GENERAL
Power Requirement:
Operating Voltage:
DC 14.4 V (11 V to 16 V allowance)
Grounding System: Negative ground
Allowable Operating Temperature:
0°C to +40°C
Dimensions (W × H × D):
Installation Size (approx.):
182 mm × 52 mm × 150 mm
Panel Size (approx.):
188 mm × 58 mm × 11 mm
Mass (approx.):
1.3 kg (excluding accessories)
Design and specifications are subject to change
without notice.
[MW Tuner]
Sensitivity: 20 µV
Selectivity: 35 dB
[LW Tuner]
Sensitivity: 50 µV
• Microsoft and Windows Media are either registered trademarks or trademarks of Microsoft
Corporation in the United States and/or other countries.
29
EN24-29KD-G417_G317[EE]f.indd 29
3/18/05 11:31:40 AM
Having TROUBLE with operation?
Please reset your unit
Refer to page of How to reset your unit
Затруднения при эксплуатации?
Пожалуйста, перезагрузите Ваше устройство
Для получения информации о перезагрузке Вашего
устройства обратитесь на соответствующую страницу
EN, RU
© 2005 Victor Company of Japan, Limited
Rear_KD-G417_G317[EE]f.indd 2
0405DTSMDTJEIN
3/18/05 11:31:51 AM
KD-G417/KD-G317
Installation/Connection Manual
Руководство по установке/подключению
GET0261-002B
0405DTSMDTJEIN
[EE]
EN, RU
ENGLISH
РУССКИЙ
Это устройство разработано для эксплуатации на 12 В постоянного напряжения с
минусом на массе. Если Ваш автомобиль не имеет этой системы, требуется инвертор
напряжения, который может быть приобретен у дилера автомобилнего специалиста JVC.
This receiver is designed to operate on 12 V DC, NEGATIVE ground electrical systems. If
your vehicle does not have this system, a voltage inverter is required, which can be purchased
at JVC IN-CAR ENTERTAINMENT dealers.
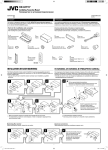
Parts list for installation and connection
Список деталей для установки и подключения
The following parts are provided for this receiver.
After checking them, please set them correctly.
Следующие детали поставлены в комплекте с устройством.
После проверки комплектации, пожалуйста, установите их правильно.
C
Sleeve
Муфта
A/B
Hard case/Control panel
Жесткий футляр/
панель управления
F
Washer (ø5)
Шайба (њ5)
G
Lock nut (M5)
Фиксирующая гайка (M5)
E
Power cord
Кабель питания
D
Trim plate
Декоративную панель
H
Mounting bolt (M5 x 20 mm)
Крепежный болт (M5 x 20 мм)
I
Rubber cushion
Резиновый чехол
J
Handles
Рычаги
INSTALLATION (IN-DASH MOUNTING)
УСТАНОВКА (УСТАНОВКА В ПРИБОРНУЮ ПАНЕЛЬ)
The following illustration shows a typical installation. If you have any questions or require
information regarding installation kits, consult your JVC IN-CAR ENTERTAINMENT dealer or a
company supplying kits.
• If you are not sure how to install this receiver correctly, have it installed by a qualified technician.
На следующих иллюстрациях показана типовая установка. Если у Вас есть какие-либо
вопросы, касающиеся установки, обратитесь к Вашему дилеру автомобилнего
специалиста JVC или в компанию, поставляющую соответствующие принадлежности.
• Если Вы не знаете точно, как следует устанавливать это устройство, обратитесь к
квалифицированному специалисту.
Do the required electrical connections.
Выполните необходимые
подключения контактов, как
показано на оборотной стороне
этой инструкции.
*1 When you stand the receiver, be
careful not to damage the fuse on
the rear.
*1 Устанавливайте устройство таким
образом, чтобы не повредить
предохранитель, расположенный
сзади.
Removing the receiver / Удаление устройства
Before removing the receiver, release the rear section.
Перед удалением устройства освободите заднюю часть.
Bend the appropriate tabs to hold
the sleeve firmly in place.
Отогните соответствующие
фиксаторы, предназначенные
для прочной установки корпуса.
When using the optional stay / При
использовании дополнительной
стойки
When installing the receiver without using the sleeve /
При установке устройства без использования муфты
In a Toyota for example, first remove the car radio and install the receiver in
Stay (option)
its place.
Стойка
В автомобилях “Toyota”, например, сначала удалите автомобильную
(дополнительно) магнитолу, затем установите на ее место это устройство.
Fire wall
Стена
Dashboard
Приборная
панель
Insert the two handles, then
pull them as illustrated so
that the receiver can be
removed.
Вставьте два рычажка,
затем потяните их, как
показано на рисунке,
чтобы вынуть устройство.
Flat type screws
(M5 x 8 mm)*
Крепежные винты
(M5 x 8 мм)*
Bracket*
Кронштейн*
Screw (option)
Винт
(дополнительно)
Pocket
Карман
Bracket*
Кронштейн*
Flat type screws
(M5 x 8 mm)*
Крепежные винты
(M5 x 8 мм)*
Note
: When installing the receiver on the mounting bracket,
make sure to use the 8 mm-long screws. If longer screws
are used, they could damage the receiver.
Install the receiver at an
Примечание
:
При
установке устройства на крепежный кронштейн,
angle of less than 30˚.
используйте только винты длиной 8 мм. При
Установите устройство
использовании более длинных винтов можно
под углом менее 30°.
повредить устройство.
TROUBLESHOOTING
•
*
•
*
•
*
•
*
*
•
*
•
*
*
•
*
* Not included for this receiver.
* Не входят в комплект.
BЫЯВЛЕНИЕ НЕИСПРАВНОСТЕЙ
• Сработал предохранитель.
* Правильно ли подключены черный и красный провода?
The fuse blows.
Are the red and black leads connected correctly?
Power cannot be turned on.
Is the yellow lead connected?
No sound from the speakers.
Is the speaker output lead short-circuited?
Sound is distorted.
Is the speaker output lead grounded?
Are the “–” terminals of L and R speakers grounded in common?
Noise interfere with sounds.
Is the rear ground terminal connected to the car’s chassis using shorter and thicker cords?
Receiver becomes hot.
Is the speaker output lead grounded?
Are the “–” terminals of L and R speakers grounded in common?
This receiver does not work at all.
Have you reset your receiver?
• Питание не включается.
* Подключен ли желтый провод?
• Звук не выводится через громкоговорители.
* Нет ли короткого замыкания на кабеле выхода громкоговорителей?
• Звук искажен.
* Заземлен ли провод выхода громкоговорителей?
* Заземлены ли разъемы “–” правого (R) и левого (L) громкоговорителей?
• Шум мешает звучанию.
* Соединен ли находящийся сзади зажим заземления с шасси автомобиля с помощью
более короткого и тонкого шнуров?
• Устройство нагревается.
* Заземлен ли провод выхода громкоговорителей?
* Заземлены ли разъемы “–” правого (R) и левого (L) громкоговорителей?
• Приемник не работает.
* Выполнена ли перенастройка приемника?
1
Instal1-2_G417_G317[EE]f.indd 1
3/18/05 11:32:35 AM
ENGLISH
РУССКИЙ
ELECTRICAL CONNECTIONS
ЭЛЕКТРИЧЕСКИЕ ПОДКЛЮЧЕНИЯ
To prevent short circuits, we recommend that you disconnect the battery’s negative terminal and
make all electrical connections before installing the receiver.
• Be sure to ground this receiver to the car’s chassis again after installation.
Для предотвращения коротких замыканий мы рекомендуем Вам отсоединить
отрицательный разъем аккумулятора и осуществить все подключения перед установкой
устройства.
• После установки обязательно заземлите данное устройство на шасси
автомобиля.
Notes:
• Replace the fuse with one of the specified rating. If the fuse blows frequently, consult your JVC
Примечания:
IN-CAR ENTERTAINMENT dealer.
• Заменяйте предохранитель другим предохранителем указанного класса. Если
• It is recommended to connect to the speakers with maximum power of more than 50 W (both
предохранитель сгорает слишком часто, обратитесь к дилеру автомобилнего
at the rear and at the front, with an impedance of 4 Ω to 8 Ω). If the maximum power is less
специалиста JVC.
than 50 W, change “AMP GAIN” setting to prevent the speakers from being damaged (see
• Рекомендуется подключать динамики с максимальной мощностью более 50 Вт (к
page 21 of the INSTRUCTIONS).
задней и передней панели устройства, с полным сопротивлением от 4 Ω до 8 Ω). Если
• To prevent short-circuit, cover the terminals of the UNUSED leads with insulating tape.
максимальная мощность динамиков менее 50 Вт, перейдите в режим “AMP GAIN”,
• The heat sink becomes very hot after use. Be careful not to touch it when removing this
чтобы предотвратить их повреждение (см. ИНСТРУКЦИИ ПО ЭКСПЛУАТАЦИИ на
receiver.
стр. 21).
• Для предотвращения короткого замыкания заклейте НЕИСПОЛЬЗУЕМЫЕ концы
изолирующей лентой.
Heat sink
• Радиатор во время использования сильно нагревается. Старайтесь его не трогать во
Радиатор
время удаления устройства.
A
Typical connections / Типичные подключения
Before connecting: Check the wiring in the vehicle carefully. Incorrect connection may cause
serious damage to this receiver.
The leads of the power cord and those of the connector from the car body may be different in
color.
Перед началом подключений: Тщательно проверьте проводку в автомобиле.
Неправильное подключение может привести к серьезному повреждению устройства.
Жилы силового кабеля и жилы соединителя от кузова автомобиля могут быть разного
цвета.
1
2
3
1
2
3
Connect the colored leads of the power cord in the order specified in the illustration below.
Connect the aerial cord.
Подсоедините цветные провода шнура питания в указанном ниже порядке.
Подключите кабель антенны.
В последнюю очередь подключите электропроводку к устройству.
Примечание: Если в Вашем автомобиле никакого вспомогательного разъема
не имеется, переставьте предохранитель из положения 1 предохранителя
(первоначальное положение) в положение 2 предохранителя и подключите красный
провод (А7) к положительному (+) полюсу аккумулятора.
• Желтый провод (А4) в этом случае не используется.
Finally connect the wiring harness to the receiver.
Note: If your vehicle does not have any accessory terminal, move the fuse from the fuse
position 1 (initial position) to fuse position 2, and connect the red lead (A7) to the positive (+)
battery terminal.
• The yellow lead (A4) is not used in this case.
Fuse position 2 / Положение 2 предохранителя
Rear ground
terminal
Задний разъем
заземления
Fuse position 1 / Положение 1 предохранителя
15 A fuse
Предохранитель 15 A
Line out (see diagram )
К выходу (см. схему )
Aerial terminal
Разъем антенны
Black
Черный
To a live terminal in the fuse block connecting to the car battery
(bypassing the ignition switch) (constant 12 V)
К разъему фазы в блоке предохранителя (минуя блок зажигания)
(постоянный 12 В)
Red
Красный
White with black stripe
Белый с черной
полосой
White
Белый
To an accessory terminal in the fuse block
К вспомогательному разъему в блоке предохранителя
Blue with white stripe
Синий с белой полосой
Fuse block
Блок
предохранителя
To the remote lead of other equipment or power aerial if any (200 mA max.)
К удаленному проводу другого оборудования или антенны (макс. 200 мА)
Brown
Коричневый
Gray with black stripe
Серый с черной
полосой
Gray
Серый
Left speaker (front)
Левый громкоговоритель
(передний)
B
Ignition switch
Переключатель зажигания
To metallic body or chassis of the car
К металлическому корпусу или шасси автомобиля
Yellow*2
Желтый*2
*2 Before checking the operation of this
receiver prior to installation, this lead must be
connected, otherwise power cannot be turned
on.
*2 Перед проверкой работы устройства
подключите этот провод, иначе питание не
включится.
*1 Not included for this receiver
*1 Не входит в комплект
To cellular phone system
К системе сотового телефона
Green with black stripe
Зеленый с черной
полосо
Right speaker (front)
Правый громкоговоритель
(передний)
Green
Зеленый
Purple with black stripe
Пурпурный с черной
полосой
Left speaker (rear)
Левый громкоговоритель
(задний)
Purple
Пурпурный
Right speaker (rear)
Правый
громкоговоритель
(задний)
Connecting the external amplifier / Подключение внешнего усилителя
Можно подключить усилитель для обновления автомобильной стереосистемы.
• Подсоедините провод внешнего устройства (синий с белой полосой) к проводу
внешнего устройства другого оборудования так, чтобы им можно было управлять с
этого устройства.
• Отсоедините громкоговорители от данного устройства, подключите их
к усилителю. Оставьте провода громкоговорителей данного устройства
неиспользованными.
You can connect an amplifier to upgrade your car stereo system.
• Connect the remote lead (blue with white stripe) to the remote lead of the other equipment so
that it can be controlled through this receiver.
• Disconnect the speakers from this receiver, connect them to the amplifier. Leave the
speaker leads of this receiver unused.
Rear speakers
Задние громкоговорители
*3 Firmly attach the ground wire to the metallic
body or to the chassis of the car—to the place
not coated with paint (if coated with paint,
remove the paint before attaching the wire).
Failure to do so may cause damage to the
Remote lead (Blue with white stripe)
receiver.
Провод внешнего устройства (Синий с белой полосой)
*3 Плотно прикрепите заземляющий провод
к металлическому кузову или шасси
автомобиля—в месте, не покрытом краской
To the remote lead of other equipment or power aerial if any
(если оно покрыто краской, удалите
К удаленному проводу другого оборудования или антенны
краску перед тем, как прикреплять
провод). Невыполнение этого требования
может привести к повреждению данного
Front speakers
устройства.
Передние громкоговорители
Remote lead
Провод внешнего устройства
JVC Amplifier
JVC-усилитель
Signal cord (not supplied for this receiver)
Кабель сигнала (не входит в комплект)
Y-connector (not supplied for this receiver)
Разъем Y (не входит в комплект)
PRECAUTIONS on power supply and speaker
connections:
ПРЕДОСТЕРЕЖЕНИЯ по питанию и подключению
громкоговорителей:
• DO NOT connect the speaker leads of the power cord to
the car battery; otherwise, the receiver will be seriously
damaged.
• BEFORE connecting the speaker leads of the power cord to the
speakers, check the speaker wiring in your car.
• НЕ подключайте провода громкоговорителей к
аккумулятору автомобиля, иначе устройство будет
повреждено.
• ПЕРЕД подключением проводов громкоговорителей
к кабелю питания громкоговорителя проверьте схему
соединений громкоговорителей в Вашем автомобиле.
2
Instal1-2_G417_G317[EE]f.indd 2
3/18/05 11:32:37 AM