1
KS-FX440/FX240
RECEPTOR-REPRODUCTOR DE
CASSETTE
KS-FX440/FX240
ESPAÑOL
RADIOCASSETTE
KS-FX440/FX240
FRANÇAIS
ENGLISH
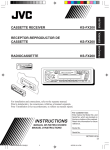
CASSETTE RECEIVER
ATT
BAND
PROG
DISC
FUNC
DISC
PRESET
/I
ATT
40WX4
Multi
Music
Scan
CD CHANGER CONTROL
KS-FX440
SOUND
SEL
MO/RND
SSM
7
8
9
10
11
RPT
12
DISP
SCAN
LOUD
KS-FX440
/I
ATT
40WX4
Multi
Music
Scan
CD CHANGER CONTROL
KS-FX240
SOUND
SEL
MO/RND
SSM
7
8
9
10
11
RPT
12
DISP
SCAN
LOUD
KS-FX240
For installation and connections, refer to the separate manual.
Para la instalación y las conexiones, refiérase al manual separado.
Pour l’installation et les raccordements, se référer au manuel séparé.
INSTRUCTIONS
MANUAL DE INSTRUCCIONES
MANUEL D’INSTRUCTIONS
For customer Use:
Enter below the Model No. and
Serial No. which are located on
the top or bottom of the cabinet.
Retain this information for future
reference.
Model No.
Serial No.
FSUN3058-631
[J]
Thank you for purchasing a JVC product. Please read all instructions carefully before operation, to
ensure your complete understanding and to obtain the best possible performance from the unit.
CONTENTS
BASIC OPERATIONS .................................................... 3
RADIO OPERATIONS ................................................... 4
Listening to the radio ..................................................................... 4
Storing stations in memory ............................................................ 5
FM station automatic preset: SSM .............................................. 5
Manual preset .............................................................................. 6
Tuning into a preset station ........................................................... 7
Other convenient tuner functions ................................................. 8
Scanning broadcast stations ....................................................... 8
Selecting FM reception sound ..................................................... 8
Changing the AM/FM channel intervals ....................................... 8
TAPE OPERATIONS ..................................................... 9
Listening to a tape .......................................................................... 9
Finding the beginning of a tune ................................................... 10
Other convenient tape functions ................................................. 11
Prohibiting tape ejection ............................................................ 11
SOUND ADJUSTMENTS ............................................. 12
Turning on/off the loudness function .......................................... 12
Selecting preset sound modes ...................................................... 12
Adjusting the sound ...................................................................... 13
Storing your own sound adjustments ......................................... 14
OTHER MAIN FUNCTIONS ......................................... 15
Setting the clock ............................................................................ 15
Selecting the level display ............................................................ 16
Detaching the control panel ......................................................... 17
REMOTE OPERATIONS .............................................. 18
(ONLY FOR KS-FX440)
Installing the batteries .................................................................. 18
Using the remote controller ......................................................... 18
CD CHANGER OPERATIONS ...................................... 19
Playing CDs ................................................................................... 19
Selecting CD playback modes ..................................................... 21
MAINTENANCE ........................................................ 22
To extend the lifetime of the unit ................................................. 22
TROUBLESHOOTING ................................................. 23
SPECIFICATIONS ....................................................... 24
2
BEFORE USE
* For safety....
• Do not raise the volume level too much, as this
will block outside sounds, making driving
dangerous.
• Stop the car before performing any complicated
operations.
* Temperature inside the car....
If you have parked the car for a long time in hot
or cold weather, wait until the temperature in the
car becomes normal before operating the unit.
ENGLISH
BASIC OPERATIONS
1
3
1
2
/I
ATT
Note:
When you use this unit for the
first time, set the built-in
clock correctly, see page 15.
Turn on the power.
Note on One-Touch Operation:
When you select a source in step 2 below, the power automatically comes on.
You do not have to press this button to turn on the power.
2
Select the source.
To operate the tuner, see pages 4 – 8.
To operate the tape deck, see pages 9 – 11.
To operate the CD changer, see pages 18 – 20.
3
Adjust the volume.
Volume level appears.
4
Adjust the sound as you want (see pages 12 – 14).
To drop the volume in a moment
Press
ATT briefly while listening to any source. “ATT” starts flashing on the display, and
the volume level will drop in a moment.
To resume the previous volume level, press the button briefly again.
To turn off the power
Press
ATT for more than 1 second.
3
RADIO OPERATIONS
Listening to the radio
1
2
1
Select the band (FM1, FM2, FM3 or AM).
You can select any one of FM1, FM2, and FM3 to listen to an
FM station.
FM1
FM2
2
SSM
FM3
AM
Audio level indicator
To search stations of
Start searching a station.
lower frequencies.
When a station is received, searching stops.
To search stations of
higher frequencies.
To stop searching before a station is received, press the same button you have pressed
for searching.
To tune in a particular frequency manually:
1 Press FM/AM to select the band.
or
¢ until “M” starts flashing on the display.
2 Press and hold 4
Now you can manually change the frequency while “M” is flashing.
or
¢ repeatedly until the frequency you want is reached.
3 Press 4
• If you hold down the button, the frequency keeps changing until you release the button.
4
ENGLISH
Storing stations in memory
You can use one of the following two methods to store broadcasting stations in memory.
• Automatic preset of FM stations: SSM (Strong-station Sequential Memory)
• Manual preset of both FM and AM stations
FM station automatic preset: SSM
You can preset 6 local FM stations in each FM band (FM1, FM2, and FM3).
1
2
1
FM1
FM2
FM3
AM
Select the FM band number (FM1, FM2 or
FM3) you want to store FM stations into.
2
SSM
Press and hold the both buttons for more than
2 seconds.
“SSM” appears, then disappears when automatic
preset is over.
Local FM stations with the strongest signals are searched and stored automatically in the
band number you have selected (FM1, FM2 or FM3). These stations are preset in the number
buttons — No. 1 (lowest frequency) to No. 6 (highest frequency).
When automatic preset is over, the station stored in number button 1 will be automatically
tuned in.
5
Manual preset
You can preset up to 6 stations in each band (FM1, FM2, FM3 and AM) manually.
EXAMPLE: Storing an FM station of 88.3 MHz into the preset number 1 of the FM1 band
1
2 3
1
Select the FM1 band.
2
SSM
Tune into a station of 88.3 MHz.
See page 4 to tune into a station.
3
1
Press and hold the button for more than 2
seconds.
Preset number “P1” starts flashing for a while.
4
Repeat the above procedure to store other station into other
preset numbers.
Notes:
• A previously preset station is erased when a new station is stored in the same preset number.
• Preset stations are erased when the power supply to the memory circuit is interrupted (for example,
during battery replacement). If this occurs, preset the stations again.
6
ENGLISH
Tuning into a preset station
You can easily tune into a preset station.
Remember that you must store stations first. If you have not stored them yet, see pages 5
and 6.
1
2
1
Select the band (FM1, FM2, FM3 or AM) you
want.
FM1
FM2
FM3
AM
2
1
Select the number (1 – 6) for the preset station
you want.
7
Other convenient tuner functions
SEL
MO/RND/h (for KS-FX440)
MO/RND (for KS-FX240)
+/–
SCAN/RPT
Scanning broadcast stations
When you press SCAN/RPT while listening to the radio, station scanning starts. Each time a
broadcast is tuned in, scanning stops for about 5 seconds (tuned frequency number flashes
on the display), and you can check what program is now being broadcasted.
If you want to listen to that program, press the same button again to stop scanning.
Selecting FM reception sound
When an FM stereo broadcast is hard to receive:
Press MO/RND/h (mono/random/Dolby NR: for KS-FX440) or MO/RND (mono/random: for
KS-FX240) while listening to an FM stereo broadcast. The sound you hear becomes monaural
but reception will be improved.
Lights up when receiving an
FM broadcast in stereo.
To restore the stereo effect, press the same button again.
Changing the AM/FM channel intervals
When using this unit in an area other than North or South America:
When this unit is shipped from the factory, the channel intervals are set to 10 kHz for AM and
200 kHz for FM. You can change the channel intervals by following the procedure below.
1 Press SEL (select) for more than 2 seconds.
“LEVEL”, “CLOCK H”, “CLOCK M” or “AREA” appears on the display.
or
¢ until it appears.
2 If “AREA” does not appears, press 4
3 Press +.
“AREA EU” appears and the channel intervals are set to 9 kHz for AM and 50 kHz (for
manual tuning) / 100 kHz (for searching) for FM.
To reset to the factory setting, follow the above step 1 and 2, then press – in step 3 (“AREA
US” appears on the display.)
AREA EU: Select this when used in an area other than North and South America.
AREA US: Select this when used in North or South America.
8
TAPE OPERATIONS
3 (Only for KS-FX440)
1
ENGLISH
Listening to a tape
2
1
Insert a cassette.
The unit turns on and tape play starts automatically.
When one side of the tape reaches its end during play, the
other side of the tape automatically starts playing. (Auto
Reverse)
Note on One-Touch Operation:
When a cassette is already in the cassette compartment, pressing TAPE xc turns on the
unit and starts tape play automatically.
2
Select the tape direction.
Each time you press the button, the tape direction changes
alternatively – forward (
) and reverse (
).
3
Turn on or off the Dolby B NR* as needed.
Each time you press the button, the Dolby B NR turns on
and off. (Only for KS-FX440)
This indicator lights up when
the Dolby B NR is turned on.
To stop play and eject the cassette
Press 0.
Tape play stops and the cassette automatically ejects from the cassette compartment.
If you change the source to AM/FM or CD changer, the tape play also stops (without ejecting
the cassette this time).
• You can also eject the tape with the unit turned off.
* Dolby Noise reduction manufactured under license from Dolby Laboratories Licensing
Corporation. “DOLBY” and the double-D symbol h are trademarks of Dolby Laboratories
Licensing Corporation.
9
To fast-forward and rewind a tape
• Press
¢ for more than 1 second to fast-forward the
tape.
When the tape reaches its end, the tape is reversed and
playback starts from the beginning of the other side.
• Press 4
for more than 1 second to rewind the tape.
When the tape reaches its end, playback of the same side
starts.
Tape direction
To stop fast-forward and rewind at any position on the tape, press TAPE xc.
Tape play starts from that position on the tape.
Finding the beginning of a tune
Multi Music Scan allows you to automatically start playback from the beginning of a specified
tune. You can specify up to 9 tunes ahead or before the current tune.
During playback
SSM
To locate a tune
before the current
tune on the tape
Specify how many tunes ahead or
before the current tune the tune you
want is located.
To locate a tune
ahead of the current
tune on the tape
Each time you set the tune, the number changes
up to ±9.
When the beginning of the specified tune is located, playback starts automatically.
Notes:
• While locating a specified tune:
– If the tape is rewound to its beginning, playback starts from the beginning of that side.
– If the tape is fast forwarded to the end, it is reversed and played from the beginning of the other
side.
• In the following cases, the Multi Music Scan function may not operate correctly.
– Tapes with tunes having long pianissimo passages (very quiet parts) or non-recorded portions
during tunes.
– Tapes with short non-recorded sections.
– Tapes with high level noise or humming between tunes.
10
z
ENGLISH
Other convenient tape functions
TAPE
Prohibiting tape ejection
You can prohibit the tape ejection and can “lock” a tape in the cassette compartment.
Press and hold TAPE xc and 0 for more than 2 seconds. “EJECT” flashes on the display
for about 5 seconds, and the tape is “locked.”
To cancel the prohibition and “unlock” the tape, press and hold TAPE xc and 0 for
more than 2 seconds again. “EJECT” flashes again for about 5 seconds, and this time the
tape is “unlock.”
11
SOUND ADJUSTMENTS
Turning on/off the loudness function
The human ear is less sensitive to low and high frequencies at low volumes.
The loudness function can boost these frequencies to produce a well-balanced sound at low
volume level.
Each time you press LOUD, the loudness function turns on/off alternatively.
Selecting preset sound modes
You can select a preset sound adjustment suitable to the music genre.
Each time you press SOUND, the sound mode changes as follows.
Indication
For:
Preset values
Bass
Treble
Loudness
SCM OFF
(Flat sound)
00
00
On
BEAT
Rock or disco music
+2
00
On
SOFT
Quiet background music
+1
–3
Off
POP
Light music
+4
+1
Off
Notes:
• You can adjust the preset sound mode as you like, and store in memory.
If you want to adjust and store your original sound mode, see “Storing your own sound adjustments”
on page 14.
• To adjust only the bass and treble reinforcement levels as you like, see “Adjusting the sound” on
page 13.
12
ENGLISH
Adjusting the sound
You can adjust the treble/bass sounds and the speaker balance.
2
1
1
Select the item you want to adjust.
Indication
To do:
Range
BAS
(bass)
Adjust the bass
–6 (min.) — +6 (max.)
TRE
(treble)
Adjust the treble
–6 (min.) — +6 (max.)
FAD
(Fader)*
Adjust the front and rear speaker
balance
R6 (rear only) — F6 (front only)
BAL
(Balance)
Adjust the left and right speaker
balance
L6 (left only) — R6 (right only)
VOL
(Volume)
Adjust the volume
00 (min.) — 50 (max.)
Note:
* If you are using a two-speaker system, set the fader level to “00” (center).
2
Adjust the level.
Note:
Normally the + and – buttons work as the volume control buttons.
So you do not have to select “VOL” to adjust the volume level.
13
Storing your own sound adjustments
You can adjust the sound modes (BEAT, SOFT, POP: see page 12) as you like and store your
own adjustments in memory.
3
1
2 1, 4
2
Call up the sound mode you want to adjust.
See page 12 for details.
2
Within
5 seconds
To adjust the bass or treble sound level
Select “BAS” or “TRE.”
To turn on or off the loudness function
Each time you press LOUD, the loudness function turns on
and off alternatively. (= go to step 4)
3
Within
5 seconds
Adjust the bass or treble level.
See page 13 for details.
4
Within
5 seconds
Press and hold SOUND until the sound mode
you have selected in step 1 flashes on the
display.
Your setting is stored in memory.
5
Repeat the same procedure to store other settings.
To reset to the factory settings
14
Repeat the same procedure and reassign the preset values listed in the table on page 12.
OTHER MAIN FUNCTIONS
ENGLISH
Setting the clock
1
4
2, 3
1
Press and hold the button for more than 2
seconds.
“CLOCK H,” “CLOCK M”, “LEVEL” or “AREA” appears on the
display.
2
1.
SSM
2.
Set the hour.
1. Select “CLOCK H” if not shown on the
display.
2. Adjust the hour.
3
1.
SSM
2.
Set the minute.
1. Select “CLOCK M.”
2. Adjust the minute.
4
Start the clock.
To check the current clock time (changing the display mode)
Press DISP repeatedly. Each time you press the button, the display mode changes as follows.
During tuner operation:
Frequency
Clock
During tape operation:
Play mode
Clock
During CD operation:
Elapsed
playing time
Clock
• If the unit is not in use when you press DISP, the power turns on, the clock time is shown for
5 seconds, then the power turns off.
15
Selecting the level display
You can select the level display according to your preference. When shipped from the factory,
the level indicator on the display shows the audio level setting.
AUDIO: Audio level indicator
OFF : Volume level indicator
3
1
1
2
Press and hold SEL for more than 2 seconds.
“CLOCK H,” “CLOCK M,” “LEVEL” or “AREA” appears on
the display.
2
3
16
SSM
Select “LEVEL” if not shown on the display.
Select the desired mode with the button.
You can detach the control panel when leaving the car.
When detaching or attaching the control panel, be careful not to damage the connectors on
the back of the control panel and on the panel holder.
How to detach the control
panel
Before detaching the control panel, be sure
to turn off the power.
1
2
3
How to attach the control
panel
1
Unlock the control panel.
Lift and pull the control panel
out of the unit.
Put the detached control
panel into the provided case.
ENGLISH
Detaching the control panel
2
Insert the left side of the
control panel into the groove
on the panel holder.
Press the right side of the
control panel to fix it to the
panel holder.
Note on cleaning the connectors:
If you frequently detach the control panel, the
connectors will deteriorate.
To minimize this possibility, periodically wipe
the connectors with a cotton swab or cloth
moistened with alcohol, being careful not to
damage the connectors.
Connectors
17
REMOTE OPERATIONS
This section is only for KS-FX440
Remote sensor
Before using the remote controller:
• Aim the remote controller directly at the remote
sensor on the main unit. Make sure there is no
obstacle in between.
• Do not expose the remote sensor to strong light
(direct sunlight or artificial lighting).
Installing the batteries
R03(UM-4)/AAA(24F)
Insert the ·
ends first.
When the controllable
range or effectiveness of
the remote controller
decreases, replace the
batteries – R03(UM-4)/
AAA(24F).
Using the remote controller
1 Functions the same as the
ATT button on the main unit.
2 Selects the source.
Each time you press FUNC (function), the source changes.
1
4
3* Functions as the +/– buttons on the main unit.
5 4 • Functions as the BAND button while listening to the radio.
2
Each time you press the button, the band changes.
•
Functions as the DISC + button while listening to the CD
6
3
changer.
Each time you press the button, the disc number increases,
and selected disc starts playing.
• Functions as the PROG button while listening to the tape.
Each time you press the button, the tape direction changes.
5 • Functions as the PRESET button while listening to the radio.
Each time you press the button, the preset station number
increases, and selected station is tuned in.
• Functions as the DISC – button while listening to the CD
changer.
Each time you press the button, the disc number decreases,
and selected disc starts playing.
6* • Functions as the station search buttons while listening to
Note:
* These buttons cannot be used
the radio.
for the clock (CLOCK H/M),
• Functions as the fast-forward/rewind buttons or the Multi
and FM/AM channel intervals
Music Scan buttons while listening to the tape.
(AREA) adjustments (see
• Functions as the fast-forward/reverse buttons or track
pages 15, 8).
selecting buttons while listening to the CD changer.
18
ATT
BAND
PROG
DISC
FUNC
DISC
PRESET
Read this section only when you used with a JVC CD automatic changer (separately
purchased).
We recommend that you use one of the CH-X series with your unit.
If you have another CD automatic changer, consult your JVC car audio dealer for connections.
• For example, if your CD automatic changer is one of the KD-MK series, you need a cord (KSU15K) for connecting it to this unit.
ENGLISH
CD CHANGER OPERATIONS
Before operating your CD automatic changer:
• Refer also to the Instructions supplied with your CD changer.
• If no discs are in the magazine of the CD changer or the discs are inserted upside
down, “NO CD” or “NO MAG” will appear on the display. If this happens, remove the
magazine and set the discs correctly.
• If “RESET 1 - RESET 8” appears on the display, something is wrong with the connection
between this unit and the CD changer. If this happens, check the connection, connect
the connecting cord(s) firmly if necessary, then press the reset button of the CD changer.
Playing CDs
Number buttons
1
1
Select the CD automatic changer.
Play back starts from the first track of the first disc.
All tracks of all discs are played back.
Disc number
Track number
Elapsed playing time
(The clock time is shown if you have pressed
DISP to see the clock time. See page 15.)
Note on One-Touch Operation:
When you press CD-CH, the power automatically comes on. You do not have to press
ATT to turn on the power.
19
To fast forward or reverse the track
Press and hold 4
, while playing a CD, to reverse the track.
SSM
Press and hold
¢ , while playing a CD, to fast forward the track.
To go to the next track or the previous track
SSM
Press 4
briefly, while playing a CD, to go back to the beginning
of the current track. Each time you press the button consecutively,
the beginning of the previous track is located and played back.
¢ briefly, while playing a CD, to go ahead to the beginning
Press
of the next track. Each time you press the button consecutively, the
beginning of the next track is located and played back.
To go to a particular disc directly
Press the number button corresponding to the disc number to start its
playback.
• To select a disc number from 1 – 6:
Press 1 (7) – 6 (12) briefly.
• To select a disc number from 7 – 12:
Press and hold 1 (7) – 6 (12) for more than 1 second.
Ex. When disc number 3 is selected
Disc number
Track number
20
MO/RND/h (for KS-FX440)
MO/RND (for KS-FX240)
ENGLISH
Selecting CD playback modes
SCAN/RPT
To play back tracks at random (Random Play)
Each time you press MO/RND/h (mono/random/Dolby NR: for KS-FX440)
or MO/RND (mono/random: for KS-FX240) while playing a CD, CD random
play mode changes as follows:
Mode
RND1
RND2
(Random1)
(Random2)
RND Indicator
Canceled
Plays at random
RND1
Lights
All tracks of the current disc, then the tracks of the
next disc, and so on.
RND2
Flashes
All tracks of all discs inserted in the magazine.
To play back tracks repeatedly (Repeat Play)
Each time you press SCAN/RPT (Scan/Repeat) while playing a CD, CD
repeat play mode changes as follows:
Mode
RPT1
RPT2
(Repeat1)
(Repeat2)
RPT Indicator
Canceled
Plays repeatedly
RPT1
Lights
The current track (or specified track).
RPT2
Flashes
All tracks of the current disc (or specified disc).
21
MAINTENANCE
To extend the lifetime of the unit
This unit requires very little attention, but you will be able to extend the life of the unit if you
follow the instructions below.
To clean the heads
• Clean the heads after every 10 hours of use
using a wet-type head cleaning tape (available
at an audio store).
When the head becomes dirty, you may realize
the following symptoms:
– Sound quality is reduced.
– Sound level decreases.
– Sound drops out.
• Do not play dirty or dusty tapes.
• Do not touch the highly-polished head with any
metallic or magnetic tools.
To keep the tape clean
• Always store the tapes to their storage cases
after use.
• Do not store tapes in the following places:
– Subject to direct sunlight
– With high humidity
– At extremely hot temperatures
CAUTIONS:
• Do not play the tapes with peeling labels; otherwise, they can damage the unit.
• Tighten tapes to remove slack since loose tape may become entangled with the mechanism.
• Do not leave a cassette in the cassette compartment after use, as the tape may become slack.
The function below is also provided to ensure the longer life of this unit.
Ignition key-off Release/Ignition key-on play
• When you turn off the ignition key with a cassette in the compartment, the unit automatically
releases the tape from its head.
• When you turn on the ignition key with a cassette in the compartment, playback automatically
starts.
22
What appears to be trouble is not always serious. Check the following points before calling a
service center.
Symptoms
Causes
Remedies
Insert the cassette with the
• A cassette tape cannot be
inserted.
You have tried to insert a
cassette in the wrong way.
• Cassette tapes become hot.
This is not a malfunction.
• Tape sound is at very low
level and sound quality is
degraded.
The tape head is dirty.
Clean it with a head cleaning
tape.
• Sound is sometimes
interrupted.
Connections are not good.
Check the cords and
connections.
• Sound cannot be heard from
the speakers.
The volume control is turned
to the minimum level.
Adjust it to the optimum level.
Connections are incorrect.
Check the cords and
connections.
• SSM (Strong-station
Sequential Memory)
automatic preset does not
work.
Signals are too weak.
Store stations manually.
• Static noise while listening
to the radio.
The antenna is not connected
firmly.
Connect the antenna firmly.
• “NO CD” or “NO MAG”
appears on the display.
No CD is in the magazine.
Insert CDs into the magazine.
CDs are inserted incorrectly.
Insert them correctly.
This unit is not connected to a
CD changer correctly.
Connect this unit and the CD
changer correctly and press
the reset button of the CD
changer.
• “RESET 8” appears on the
display.
• “RESET 1-RESET 7”
appears on the display.
• The unit does not work at
all.
ENGLISH
TROUBLESHOOTING
exposed tape facing right.
Press the reset button of the
CD changer.
The built-in microcomputer
may function incorrectly due
to noise, etc.
ATT and SEL at
Press
the same time for more than 2
seconds to reset the unit. (The
clock setting and preset
stations stored in memory are
erased.)
23
SPECIFICATIONS
AUDIO AMPLIFIER SECTION
CASSETTE DECK SECTION
Maximum Power Output:
Front: 40 watts per channel
Rear: 40 watts per channel
Continuous Power Output (RMS):
Front: 16 watts per channel into 4 Ω, 40
to 20,000 Hz at no more than 0.8%
total harmonic distortion.
Rear: 16 watts per channel into 4 Ω, 40
to 20,000 Hz at no more than 0.8%
total harmonic distortion.
Load Impedance: 4 Ω (4 to 8 Ω allowance)
Tone Control Range
Bass: ±10 dB at 100 Hz
Treble:±10 dB at 10 kHz
Frequency Response: 40 to 20,000 Hz
Signal-to-Noise Ratio: 70 dB
Line-Out Level/Impedance: 1.0 V/20 kΩ load
(250 nWb/m)
Wow & Flutter: 0.11% (WRMS)
Fast-Wind Time: 100 sec. (C-60)
Frequency Response:
50 to 16,000 Hz (± 3 dB)
Signal-to-Noise Ratio: (Normal tape)
(Dolby B NR-ON):
64 dB (For KS-FX440 only)
(Dolby B NR-OFF): 56 dB
Stereo Separation: 40 dB
TUNER SECTION
Frequency Range
FM: 87.5 to 107.9 MHz
(with channel interval set to 200 kHz)
87.5 to 108.0 MHz
(with channel interval set to 50 kHz)
AM: 530 to 1,710 kHz
(with channel interval set to 10 kHz)
531 to 1,602 kHz
(with channel interval set to 9 kHz)
[FM Tuner]
Usable Sensitivity: 11.3 dBf (1.0 µV/75 Ω)
50 dB Quieting Sensitivity:
16.3 dBf (1.8 µV/75 Ω)
Alternate Channel Selectivity (400 kHz):
65 dB
Frequency Response: 40 to 15,000 Hz
Stereo Separation: 35 dB
Capture Ratio: 1.5 dB
[AM Tuner]
Sensitivity: 20 µV
Selectivity: 35 dB
24
GENERAL
Power Requirement
Operating Voltage: DC 14.4 volts (11 to 16
volts allowance)
Grounding System: Negative ground
Dimensions (W x H x D)
Installation Size:
182 x 52 x 150 mm
(7-3/16" x 2-1/16" x 5-15/16")
Panel Size: 188 x 58 x 14 mm
(7-7/16" x 2-5/16" x 5/8")
Mass: 1.4 kg (3.1 lbs) (excluding accessories)
Design and specifications subject to change
without notice.
If a kit is necessary for your car, consult
your telephone directory for the nearest
car audio speciality shop.
VICTOR COMPANY OF JAPAN, LIMITED
EN, SP, FR
V
J
C
1098HISFLEJES