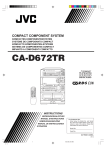
1
COMPACT COMPONENT SYSTEM
KOMPAKT-KOMPONENTEN-SYSTEM
SYSTEME DE COMPOSANTS COMPACT
KOMPACTO KOMPONENTEN-SYSTEEM
SISTEMAS DE COMPONENTES COMPACTOS
IMPIANTO A COMPONENTI COMPATTO
CA-D432TR/CA-D452TR
COMPACT
DIGITAL AUDIO
PROGRAM
/RANDOM
PROGRAM
/RANDOM
DISC
DISC
REPEAT
REPEAT
DISC
DISC
EDIT
EDIT
DISC
RDS
CONTROL
DISC
RDS
CONTROL
AM
FM
PTY/EON
AM
FM
PTY/EON
SLEEP
DISPLAY MODE SOUND
MODE
–
–
S.A.BASS
REPEAT
TAPE A
TAPE B
DIRECTION
DISC 1
DISC 2
DISC 3
CD CONTROL
AUX
MODE
SELECT +
FM MODE
SLEEP
DISPLAY MODE SOUND
TAPE CONTROL
S.A.BASS
REPEAT
TAPE B
DIRECTION
DISC 1
DISC 2
DISC 3
AUX
TAPE CONTROL
REC PAUSE
+
+
VOLUME
VOLUME
–
–
RM-SED452TRU REMOTE CONTROL
FM MODE
TAPE A
CD CONTROL
REC PAUSE
SELECT +
RM-SED452TRU REMOTE CONTROL
CA-D432TR
INSTRUCTIONS
BEDIENUNGSANLEITUNG
MANUEL D'INSTRUCTIONS
GEBRUIKSAANWIJZING
MANUAL DE INSTRUCCIONES
ISTRUZIONI
CA-D452TR
For Customer Use:
Enter below the Model No. and Serial
No. which are located either on the rear,
bottom or side of the cabinet. Retain this
information for future reference.
Model No.
Serial No.
GVT0003-006A
[E]
D432T/452TR[E]/Cover
1
3/25/98, 8:53 PM
Warnings, Cautions and Others / Warnung, Achtung und sonstige Hinweise /Mises en garde, précautions
et indications diverses /Waarschuwingen, voorzorgen en andere mededelingen/Avisos, precauciones y
otras notas / Avvertenze e precauzioni da osservare
IMPORTANT for the U.K.
DO NOT cut off the mains plug from this equipment. If the plug
fitted is not suitable for the power points in your home or the
cable is too short to reach a power point, then obtain an appropriate safety approved extension lead or consult your dealer.
BE SURE to replace the fuse only with an identical approved
type, as originally fitted.
If nontheless the mains plug is cut off ensure to remove the fuse
and dispose of the plug immediately, to avoid a possible shock
hazard by inadvertent connection to the mains supply.
If this product is not supplied fitted with a mains plug then follow
the instructions given below:
IMPORTANT:
DO NOT make any connection to the terminal which is marked
with the letter E or by the safety earth symbol or coloured green
or green-and-yellow.
The wires in the mains lead on this product are coloured in
accordance with the following code:
Blue :
Neutral
Brown : Live
As these colours may not correspond with the coloured markings
identifying the terminals in your plug proceed as follows:
The wire which is coloured blue must be connected to the
terminal which is marked with the letter N or coloured black.
The wire which is coloured brown must be connected to the
terminal which is marked with the letter L or coloured red.
IF IN DOUBT - CONSULT A COMPETENT ELECTRICIAN.
Caution ––
switch!
Disconnect the mains plug to shut the power off completely. The
switch in any position does not disconnect the mains line. The power can
be remote controlled.
Achtung ––
-Schalter!
Den Netzstecker aus der Steckdose ziehen, um die Stromversorgung
vollkommen zu unterbrechen. Der Schalter
unterbrichet in keiner
Stellung die Stromversorgung vollkommen. Die Stromversorgung kann
mit der Fernbedienung ein- und ausgeschaltet werden.
Attention –– Commutateur
!
Déconnecter la fiche de secteur pour couper complètement le courant.
Le commutateur
ne coupe jamais complètement la ligne de secteur,
quelle que soit sa position. Le courant peut être télécommandé.
Voorzichtig ––
schakelaar!
Om de stroomtoevoer geheel uit te schakelen, trekt u de stekker uit het
stopkontakt. Anders zal er altijd een geringe hoeveelheid stroom naar
het apparaat lopen, ongeacht de stand van de
schakelaar. U kunt
het apparaat ook met de afstandsbediening aan- en uitschakelen.
Precaución –– Interruptor
!
Desconectar el cable de alimentación para desactivar la alimentación
totalmente. Cualquier que sea la posición de ajuste del interruptor
,
la alimentación no es cortada completamente. La alimentación puede
ser controlada remotamente.
Attenzione –– L’interruttore
!
Disinserire la spina del cavo di alimentazione dalla presa della rete
elettrica per staccare completamente l’alimentazione. L’interruttore
in nessuna posizione stacca la linea di alimentazione elettrica principale.
È possibile il controllo remoto dell’alimentazione.
Per l'Italia:
"Si dichiara che il questo prodotto di marca JVC è conforme alle
prescrizioni del Decreto Ministeriale n.548 del 28/08/95 pubblicato
sulla Gazzetta Ufficiale della Repubblica Italiana n.301 del 28/12/
95."
CAUTION
To reduce the risk of electrical shocks, fire, etc.:
1. Do not remove screws, covers or cabinet.
2. Do not expose this appliance to rain or moisture.
VOORZICHTIG
Ter vermindering van gevaar voor brand, elektrische schokken, enz.:
1. Verwijder geen schroeven, panelen of de behuizing.
2. Stel het toestel niet bloot aan regen of vocht.
ACHTUNG
Zur Verhinderung von elektrischen Schlägen, Brandgefahr, usw:
1. Keine Schrauben lösen oder Abdeckungen enlfernen und das
Gehäuse nicht öffnen.
2. Dieses Gerät weder Regen noch Feuchtigkeit aussetzen.
PRECAUCIÓN
Para reducir riesgos de choques eléctricos, incendio, etc.:
1. No extraiga los tornillos, los cubiertas ni la caja.
2. No exponga este aparato a la lluvia o a la humedad.
ATTENTION
Afin d'éviter tout risque d'électrocution, d'incendie, etc.:
1. Ne pas enlever les vis ni les panneaux et ne pas ouvrir le
coffret de l'appareil.
2. Ne pas exposer l'appareil à la pluie ni à l'humidité.
ATTENZIONE
Per ridurre il rischio di shock elettrici, incendi, ecc...
1. Non togliete viti, coperchi o la scatola.
2. Non esponete l'apparecchio alla piogggia e all'umidità.
G-1
D432T/452TR[E]/Cover
2
3/25/98, 8:53 PM
Caution: Proper Ventilation
Voorzichtig: Goede ventilatie vereist
To avoid risk of electric shock and fire, and to prevent damage, locate
the apparatus as follows:
1 Front:
No obstructions and open spacing.
2 Sides/ Top/ Back:
No obstructions should be placed in the areas shown by the
dimensions below.
3 Bottom:
Place on the level surface. Maintain an adequate air path for
ventilation by placing on a stand with a height of 10 cm or more.
Om brand, elektrische schokken en beschadiging te voorkomen, moet
u het toestel als volgt opstellen:
1 Voorkant:
Geen belemmeringen en voldoende ruimte.
2 Zijkanten/boven-/onderkant:
Geen belemmeringen plaatsen in de hieronder aangegeven zones.
3 Onderkant:
Op vlakke ondergrond plaatsen. Voldoende ventilatieruimte voorzien
door het toestel op een onderstel met een hoogte van 10 cm of
meer te plaatsen.
Achtung: Ausreichende Belüftung
Precaución: ventilación correcta
Zur Vermeidung von elektrischen Schlägen, Feuer und sonstigen Schäden
sollte das Gerät unter folgenden Bedingungen aufgestellt werden:
1 Vorderseite:
Hindernisfrei und gut zugänglich.
2 Seiten- und Rückwände:
Hindernisfrei in allen gegebenen Abständen (s. Abbildung).
3 Unterseite:
Die Stellfläche muß absolut eben sein. Sorgen Sie für ausreichende
Luftzufuhr durch Aufstellung auf einem Stand mit mindestens 10 cm
Höhe.
Para evitar el riesgo de descargas eléctricas e incendio y prevenir
posibles daños, instale el equipo en un lugar que cumpla los siguientes
requisitos:
1 Parte frontal:
Sin obstrucciones, espacio abierto.
2 Lados/parte superior/parte posterior:
No debe haber ninguna obstrucción en las áreas mostradas por las
dimensiones de la siguiente figura.
3 Parte inferior:
Sitúe el equipo sobre una superficie nivelada. Mantenga un espacio
adecuado para permitir el paso del aire y una correcta ventilación,
situando el equipo sobre un soporte de 10 o más cm de allura.
Attention: Aération correcte
Attenzione: Per una corretta ventilazione
Pour prévenir tout risque de décharge électrique ou d’incendie et éviter
toute détérioration, installez l’appareil de la manière suivante:
1 Avant:
Bien dégagé de tout objet.
2 Côtés/dessus/dessous:
Assurez-vous que rien ne bloque les espaces indiqués sur le
schéma ci-dessous.
3 Dessous:
Posez l’appareil sur une surface plane et horizontale. Veillez à ce
que sa ventilation correcte puisse se faire en le plaçant sur un support d’au moins dix centimètres de hauteur.
Per prevenire il rischio di scosse elettriche e di incendio ed evitare
possibili danni, collocare le apparecchiature nel modo seguente:
1 Parte anteriore:
Nessun ostacolo e spazio libero.
2 Lati/Parte superiore/Retro:
Lasciare libere le zone indicate dalle dimensioni di seguito.
3 Base:
Collocare su una superficie piana. Consentire un’adeguata
ventilazione dell’impianto appoggiandolo su un tavolinetto alto almeno
10 cm.
Front view
Vorderansicht
Face
Vooraanzicht
Vista frontal
Vista frontale
Side view
Seitenansicht
Côté
Zijaanzicht
Vista lateral
Vista laterale
15 cm
1 cm
15 cm
1 cm
15 cm
15 cm
15 cm
CA-D432TR/
CA-D3S
CA-D452TR
CA-D432TR/
CA-D3S
CA-D452TR
10 cm
G-2
D432T/452TR[E]/Cover
3
3/25/98, 8:53 PM
IMPORTANT FOR LASER PRODUCTS/ WICHTIGER HINWEIS FÜR LASER-PRODUKTE / IMPORTANT POUR LES PRODUITS LASER /
BELANGRIJKE INFORMATIE VOOR LASERPRODUKTEN / IMPORTANTE PARA LOS PRODUCTOS LÁSER / IMPORTANTE PER I
PRODOTTI LASER
REPRODUCTION OF LABELS/ANBRINGUNGSORTE FÜR LASER-PRODUKTE/REPRODUCTION DES ETIQUETTES/VERKLARING VAN
DE LABELS/REPRODUCCIÓN DE ETIQUETAS/RIPRODUZIONE DELLE ETICHETTE
1 CLASSIFICATION LABEL, PLACED ON REAR ENCLOSURE
2 WARNING LABEL, PLACED INSIDE THE UNIT
1 KLASSIFIKATIONSETIKETTE AN DER RÜCKSEITE
2 WARNETIKETTE IM GERÄTEINNEREN
1 ETIQUETTE DE CLASSIFICATION, PLACÉE A L'ARRIÈRE DU
COFFRET
2 ETIQUETTE D'AVERTISSEMENT PLACÉE À L'INTERIEUR DE
L'APPAREIL
1 KLASSIFIKATIELABEL, OP DE ACHTERZIJDE VAN HET
APPARAAT
2 WAARSCHUWINGSLABEL, IN HET APPARAAT
1 ETIQUETA DE CLASIFICACIÓN, PEGADA EN LA PARTE
POSTERIOR DE LA CAJA
2 ETIQUETA DE ADVERTENCIA, PEGADA EN EL INTERIOR DE
LA UNIDAD
1 ETICHETTA DI CLASSIFICAZIONE, SITUATA SUL
RIVESTIMENTO POSTERIORE
2 ETICHETTA DI AVVERTENZA, SITUATA ALL'INTERNO
DELL'APPARECCHIO
CLASS
LASER
1
PRODUCT
DANGER: Invisible laser
radiation when open and
interlock failed or defeated.
AVOID DIRECT EXPOSURE
TO BEAM.
(e)
VARNING: Osynlig laserstrålning när denna del är
öppnad och spärren är
urkopplad. Betrakta ej
strålen.
(s)
ADVARSEL: Usynlig laserstråling ved åbning, når
sikkerhedsafbrydere er ude
af funktion. Undgå udsættelse for stråling
(d)
VARO: Avattaessa ja suojalukitus ohitettaessa olet
alttiina näkymättömälle
lasersäteilylle. Älä katso
säteeseen.
(f)
1. CLASS 1 LASER PRODUCT
2. DANGER: Invisible laser radiation when open and interlock failed
or defeated. Avoid direct exposure to beam.
3. CAUTION: Do not open the top cover. There are no user serviceable parts inside the Unit; leave all servicing to qualified service
personnel.
1. KLAS 1 LASERPRODUKT
2. GEVAARLIJK: Onzichtbare laserstraling wanneer open en de
beveiliging faalt of uitgeschakeld is. Voorkom het direkt blootstaan
aan de straal.
3. VOORZICHTIG: De bovenkap niet openen. Binnenin het toestel
bevinden zich geen door de gebruiker te repareren onderdelen:
laat onderhoud over aan bekwaam vakpersoneel.
1. LASER-PRODUKT DER KLASSE 1
2. GEFAHR: Unsichtbare Laserstrahlung bei Öffnung und
fehlerhafter oder beschädigter Spre. Direkten Kontakt mit dem
Strahl vermeiden!
3. ACHTUNG: Das Gehäuse nicht öffnen. Das Gerät enthält
keinerlei Teile, die vom Benutzer gewartet werden können.
Überlassen Sie Wartungsarbeiten bitte qualifizierten
Kundendienst-Fachleuten.
1. PRODUCTO LASER CLASE 1
2. PELIGRO: En el interior hay radiación láser invisible. Evite el
contacto directo con el haz.
3. PRECAUCIÓN: No abra la tapa superior. En el interior de la
unidad no existen piezas reparables por el usuario; deje todo
servicio técnico en manos de personal calificado.
1. PRODUIT LASER CLASSE 1
2. ATTENTION: Radiation laser invisible quand l'appareil est ouvert
ou que le verrouillage est en panne ou désactivé. Eviter une
exposition directe au rayon.
3. ATTENTION: Ne pas ouvrir le couvercle du dessus. Il n'y a
aucune pièce utilisable à l'intérieur. Laisser à un personnel
qualifié le soin de réparer votre appareil.
1. PRODOTTO LASER CLASSE 1
2. PERICOLO: Radiazione laser invisibile quando
l'apparecchio è
aperto ed il dispositivo di sicurezza è guasto o disattivato. Evitare
l'esposizione diretta ai raggi.
3. ATTENZIONE: Non aprire il coperchio superiore. Non vi sono parti
adoperabili dall'utente all'interno di questo apparecchio; lasciare tutti i
controlli a personale qualificato.
G-3
D432T/452TR[E]/Cover
4
3/25/98, 8:53 PM
English
Thank you for purchasing the JVC Compact Component System.
We hope it will be a valued addition to your home, giving you years of enjoyment.
Be sure to read this instruction manual carefully before operating your new stereo system.
Here you will find all the information you need to set up and use the system.
For questions that are not be answered in the manual, contact your dealer.
Features
Here are some of the things that make your System powerful and easy to use.
The controls and operations have been designed to make them very easy to use, so you can spend
your time listening to music.
• With the One Touch Operation feature of JVC’s COMPU PLAY you can turn on the System and
start the radio, the Cassette Deck, or the CD Player with a single touch.
To get such great sound from such a compact package the System has:
• Programmed sound mode includes live surround effects D. CLUB, HALL, and STADIUM. It
also includes S.E.A. (Sound Effect Amplifier) effects ROCK, POP, and CLASSIC. You can also
register up to three customized settings (MANUAL 1 to 3).
The System is compatible with RDS (Radio Data System) broadcasting.
• The EON data enables you to standby for desired information.
• The PTY Search function searches for programmes in the category you wish.
In addition, Radio Text can be displayed using data sent by station.
CD changer function can operate 3 discs.
• Discs can be changed during play using the TRIPLE TRAY.
• Continuous, random or program play of 3 discs.
The three timers, Daily Timer, Recording Timer, and Sleep Timer are extremely easy to set.
Easy operation
Great sound
Triple Tray
Three timers
How This Manual Is Organized
In this manual we have incorporated some special features:
• Basic information that is the same for many different functions is grouped in one place, and not
repeated in each procedure. For instance, in the section on playing a CD, we do not repeat the
information about setting the volume and the sound conditions, which are discussed in the Common
Operations section.
• Name of buttons and controls are written in all capital letters like this: SOUND MODE.
The manual has a table of contents to help you quickly look up what you want to know.
We’ve enjoyed making this manual for you, and hope you will use it to enjoy the sound and many
features built into your System.
IMPORTANT CAUTIONS
1. Installation of the Unit
•
•
•
Select a place which is level, dry and neither too hot nor too cold. (Between 5°C and 35°C or
41°F and 95°F.)
Leave sufficient distance between the Unit and a TV.
Do not use the Unit in a place subject to vibrations.
2. Power cord
•
•
•
Do not handle the power cord with wet hands!
Some power (10 watts) is always consumed as long as the power cord is connected to the wall
outlet.
When unplugging the Unit from the wall outlet, always pull the plug, not the power cord.
3. Malfunctions, etc.
•
•
There are no user-serviceable parts inside. If anything goes wrong, unplug the power cord and
consult your dealer.
Do not insert any metallic object into the Unit.
1
EN.CA-D432/452TR[E]/f
1
98.3.26, 10:55 PM
English
Table of Contents
Features ...................................................................... 1
How This Manual Is Organized ................................. 1
IMPORTANT CAUTIONS ....................................... 1
Getting Started ................................................ 3
Accessories ................................................................ 3
How to Put Batteries in the Remote Control ............. 3
Using the Remote Control ......................................... 3
Connecting the FM Antenna ...................................... 4
Connecting the AM (MW/LW) Antenna ................... 4
Connecting the Speakers ........................................... 5
Connecting Auxiliary Equipment .............................. 5
COMPU PLAY .......................................................... 6
Common Operations ....................................... 7
Demo Mode ............................................................... 7
Setting the Clock ....................................................... 8
Turning the Power On and Off .................................. 8
Turning the System On ......................................... 8
Turning the System Off ........................................ 8
Adjusting the Volume ................................................ 8
Reinforcing the Bass Sound ...................................... 9
Sound Modes ............................................................. 9
Customizing a Sound Mode ............................... 10
Changing the Display .............................................. 10
Listening to Auxiliary Equipment ........................... 11
Using the Tuner ............................................. 12
Tuning in a Station .................................................. 12
Switching between Frequency Bands ................. 12
Three Ways to Select a Station ........................... 13
Presetting Stations ................................................... 13
Changing the FM Reception Mode ......................... 13
Receiving FM Stations with RDS ........................... 14
What Information RDS can Provide .................. 14
Changing the Display ......................................... 14
Searching for Programmes by PTY codes .......... 15
EON Function ..................................................... 15
ALARM function ............................................... 16
Programming the Playing Order of the Tracks ........ 20
Checking the Program ........................................ 21
Changing the Program ........................................ 21
Random Play ........................................................... 21
Repeating a Track or the Discs ................................ 22
Tray Lock Function ................................................. 22
Locking the Trays ............................................... 22
Unlocking the Trays ........................................... 22
Using the Cassette Deck (Playing) .............. 23
Regular Play ............................................................ 24
Fast Left and Fast Right ..................................... 24
Music Scan .............................................................. 24
Finding the Beginning of the Current Selection .... 24
Finding the Beginning of the Next Selection ..... 24
Reverse Mode .......................................................... 25
Using the Cassette Deck (Recording) ......... 26
Things to Know before You Start Recording ..... 26
Standard Recording ................................................. 27
Recording AM Station to Tape .......................... 28
CD Direct Recording ............................................... 28
Auto Edit Recording ................................................ 28
Tape to Tape Recording (Dubbing) ......................... 29
How to Use DUBBING ...................................... 29
Using the Timer ............................................. 30
Setting the Daily Timer ........................................... 31
Turning the Daily Timer On and Off .................. 32
Setting the Recording Timer .................................... 33
Turning the Recording Timer On and Off .......... 34
Setting the Sleep Timer ........................................... 34
Timer Priority .......................................................... 35
Care and Maintenance .................................. 36
Troubleshooting ............................................ 37
Specifications ................................................ 38
Using the CD Player ...................................... 17
Loading CDs ............................................................ 18
Basics of Using the CD Player —
Continuous Play ................................................. 18
Playing a CD ...................................................... 18
Selecting a Track ................................................ 19
Locating a Track with the Remote Control
Directly ........................................................... 19
Fast Forward / Reverse ....................................... 19
Changing Discs While Playing ........................... 19
2
EN.CA-D432/452TR[E]/f
2
98.3.26, 10:55 PM
English
Getting Started
Accessories
Check that you have all of the following items, which are supplied with the System.
AM (MW/LW) Loop Antenna (1)
Remote Control (1)
Batteries (2)
FM Wire Antenna (1)
If any of these items is missing, contact your dealer immediately.
How to Put Batteries in the Remote
Control
Match the polarity (+ and –) on the batteries with the + and – markings in the battery compartment.
R6P (SUM-3)/AA (15F)
CAUTION: Handle batteries properly.
To avoid battery leakage or explosion:
• Remove batteries when the Remote Control will not be used for a long time.
• When you need to replace the batteries, replace both batteries at the same time with new ones.
• Do not use an old battery with a new one.
• Do not use different types of batteries together.
Using the Remote Control
The Remote Control makes it easy to use many of the functions of the System from a distance of up to 7m
(23 feet) away.
You need to point the Remote Control at the remote sensor on the System’s front panel.
PROGRAM
/RANDOM
DISC
REPEAT
DISC
EDIT
DISC
Remote sensor
3
EN.CA-D432/452TR[E]/f
3
98.3.26, 10:55 PM
English
CAUTION: Make all connections before plugging the Unit into an AC power outlet.
Connecting the FM Antenna
A. Using the Supplied Wire Antenna
ANTEN
The FM Wire Antenna provided can be connected to a FM 75-ohm
COAXIAL as temporary measure.
Extend the supplied wire antenna horizontally.
NA
A
GND
AM L
OO
AM E P
XT
B. Using the Standard Type Connector
(Not Supplied)
FM
COA75
XIAL
A standard type connector (IEC or DIN 45325) should be connected to
the FM 75-ohm COAXIAL terminal.
ANTEN
NA
B
GND
AM L
OO
AM E P
XT
FM
COA75
XIAL
ANTENNA
FM Wire Antenna
GND
AM LOOP
AM EXT
FM 75
COAXIAL
If reception is poor,
connect the outside
antenna.
Before attaching a 75-ohm coaxial lead (the
kind with a round wire going to an outside
antenna), disconnect the supplied FM Wire
Antenna.
Outside FM Antenna Wire
CAUTION: To avoid noise, keep antennas away from metallic parts of the System, connecting
cord and the AC power cord.
Connecting the AM (MW/LW) Antenna
AM Antenna Wire (not supplied)
If reception is poor, connect the outside antenna.
ANTENNA
Note: Even when connecting an outside AM antenna,
keep the indoor AM loop
connected.
GND
AM LOOP
AM EXT
FM 75
COAXIAL
AM Loop Antenna
1
2
3
Turn the loop until you
have the best reception.
4
EN.CA-D432/452TR[E]/f
4
98.3.26, 10:55 PM
Snap the tabs on the
loop into the slots of
the base to attach the
AM Loop.
English
CAUTION: Make all connections before plugging the Unit into an AC power outlet.
Connecting the Speakers
Please refer to instructions for speakers as well when you connect speakers.
For each speaker, connect one end of the speaker wire to the speaker terminals on the back of the System.
1. Open each of the terminals and insert the speaker wires firmly, then close the terminals.
2. Connect the red (+) and black (–) terminals of the right side speaker to the red (+) and black (–)
terminals marked RIGHT on the System.
Connect the red (+) and black (–) terminals of the left side speaker to the red (+) and black (–)
terminals marked LEFT on the System.
SPEAKERS
RIGHT
LEFT
+
+
–
–
Left Speaker
Right Speaker
IMPORTANT: Use speakers with the correct impedance only.
The correct impedance is indicated on the back panel.
CAUTION: If a TV is installed near the speakers, the TV may display
irregular colours. In this case, set the speakers away from the TV.
Connecting Auxiliary Equipment
VCR or other equipment
To listen to this source, press AUX.
AUX
RIGHT
LEFT
Now you can plug the AC power cord into the wall outlet, and your System is
at your command!
5
EN.CA-D432/452TR[E]/f
5
98.3.26, 10:55 PM
English
COMPU PLAY
COMPU PLAY is JVC’s feature that lets you control the most frequently used functions of the System
with a single touch.
One Touch Operation starts playing a CD, turns on the radio, plays a tape, etc. with a single press of the
play button for that function. What One Touch Operation does for you is to turn the power on, then start
the function you have specified. If the Unit is not ready, such as no CD or tape in place, the Unit still
powers on so you can insert a CD or tape.
How One Touch Operation works in each case is explained in the section dealing with that function.
The COMPU PLAY buttons are:
On the Unit
CD Player DISC 1 to DISC 3 buttons
CD Player Open/Close (0) buttons
CD £/8 button
TAPE ™ £ button
FM/AM button
AUX button
PROGRAM
/RANDOM
DISC
REPEAT
DISC
EDIT
DISC
COMPU PLAY
buttons
On the Remote Control
FM button
AM button
DISC 1 to DISC 3 buttons
AUX button
RDS
CONTROL
AM
FM
PTY/EON
SLEEP
DISPLAY MODE SOUND
MODE
–
SELECT +
FM MODE
S.A.BASS
TAPE A
TAPE B
DIRECTION
REPEAT
DISC 1
DISC 2
DISC 3
CD CONTROL
AUX
TAPE CONTROL
REC PAUSE
+
VOLUME
–
RM-SED452TRU REMOTE CONTROL
6
EN.CA-D432/452TR[E]/f
6
98.3.26, 10:56 PM
COMPU PLAY
buttons
English
Common Operations
PROGRAM
/RANDOM
SET
DISC
REPEAT
MULTI CONTROL
DISC
EDIT
DISC
STANDBY indicator
SOUND MODE
TIMER/CLOCK
PHONES
SEA CONTROL
CANCEL/DEMO
DISPLAY
S.A. BASS
VOLUME
AUX
RDS
CONTROL
Display
AM
FM
PTY/EON
MODE
–
FM MODE
S.A.BASS
TAPE B
DIRECTION
REPEAT
DISC 1
DISC 2
DISC 3
S.A. BASS
TAPE CONTROL
AUX
VOLUME
+, –
SOUND MODE
SELECT +
TAPE A
CD CONTROL
AUX
SOUND MODE indicator
SLEEP
DISPLAY MODE SOUND
REC PAUSE
+
VOLUME
Source, Sound Mode Volume level etc.
–
RM-SED452TRU REMOTE CONTROL
When the System is being used, the display shows other items as well.
However, we have only shown the items described in this section.
Demo Mode
When the System is connected to an AC power outlet, a Demo automatically starts showing some of the
system’s features.
The Demo display cycles through the following items repeatedly.
• Scrolling display of “DEMO MODE START”.
• Demo of Sound Modes.
• Demo of S.A. BASS
• Demo of continuous play from DISC 1 to DISC 3.
To turn the Demo off, press any of the operation buttons. “DEMO OFF” appears on the display and
the Demo automatically stops.
To turn the Demo on, press CANCEL/DEMO for more than 2 seconds.
7
EN.CA-D432/452TR[E]/f
7
98.3.26, 10:56 PM
English
Setting the Clock
Before operating the unit, set the correct time.
You can set the clock whether the Unit is on or off.
1
1. Press TIMER/CLOCK.
The hour digits begin flashing.
Flashing
2. Press 4 P. DOWN or ¢ P. UP on
the MULTI CONTROL to set the hours.
2, 4
Press ¢ P. UP to increase the hour. Press 4 P. DOWN
to decrease the hour. Holding down continuously changes
the hour setting more rapidly.
3. Press SET.
The minute digits begin flashing.
4. Press 4 P. DOWN or ¢ P. UP on
the MULTI CONTROL to set the minutes.
3, 5
Flashing
Press ¢ P. UP to increase the minutes. Press 4 P. DOWN
to decrease the minutes. Holding down continuously changes
the minute setting more rapidly.
5. Press SET.
“CLOCK OK” appears on the display.
The clock stops flashing, and the clock timer starts from 0 second.
If the clock is not set, “0:00” will flash instead of the clock indication.
When the time has been set, TIMER/CLOCK can be used to operate the Daily Timer and Recording
Timer.
To adjust the time once the clock has been set, press TIMER/CLOCK 5 times and follow the procedure above.
CAUTION: If there is a power failure, the clock loses its setting.
The display shows “0:00”, and the clock must be reset.
Turning the Power On and Off
Turning the System On ——————————————————
Press
.
“WELCOME” appears on the display and the STANDBY indicator
goes out.
The System comes on ready to continue in the mode it was in when the power was last turned off.
If the last thing you were doing was listening to a tape in Deck B, you are now ready to listen to a
tape again in Deck B, or you can change to another source.
If you were listening to the Tuner last, the Tuner comes on playing the station it was last set to.
or
Turning the System Off ——————————————————
Press
again.
“GOOD BYE” appears on the display for a while and the STANDBY
indicator lights up. The clock time appears on the display.
Some power (10 watts) is always consumed even though the power is on standby.
To switch off the Unit completely, unplug the AC power cord from the AC outlet. When you unplug
the AC power cord, the clock will be reset to 0:00 immediately, and preset Tuner stations will be
erased in a few days.
Adjusting the Volume
+
or
VOLUME
–
Turn VOLUME clockwise to increase the volume or anticlockwise to decrease it.
Turning VOLUME quickly also adjusts the volume level quickly.
When using the Remote Control, press VOLUME + to increase the volume or press VOLUME – to
decrease it.
You can adjust the volume level between 0 and 50.
8
EN.CA-D432/452TR[E]/f
8
98.3.26, 10:56 PM
For private listening
Connect a pair of headphones to the PHONES jack. No sound comes out of the speakers.
Be sure to turn down the volume before connecting or putting on headphones.
Reinforcing the Bass Sound
S.A. (Signal Adaptive) BASS adjusts low tones at low volume to enhance their effect. When the volume
level is low, this enhances low tones that are normally difficult to hear and adjusts low tones to a fixed
level to reduce low tone distortion.
S.A.BASS
or
Press S.A. BASS.
Pressing S.A. (Signal Adaptive) BASS changes the bass setting in the following order.
= SA-BASS1 = SA-BASS2 = OFF = (back to the beginning)
The S.A. BASS indicator lights up, and “SA-BASS1” or “SA-BASS2” appears on the display for three
seconds.
SA-BASS2 enhances low tones more than SA-BASS1.
To cancel the effect, press S.A. BASS until “OFF” appears on the display. The button light goes out.
To recall the previous S.A. BASS mode, press S.A. BASS once.
When listening to recording with low volume low tones, the difference between SA-BASS1 and SABASS2 is clear. When listening to recording with louder low tones, however, the difference between
SA-BASS1 and SA-BASS2 may not be so clear.
Sound Modes
The System has some preset sound effects that give you control of the way your music sounds, so you can
tailor it for your room and for the quality of the source. We can give you some idea of how each one
affects the music, but the only way to really tell is to try them yourself.
You can also create up to three of your own customized S.E.A. (Sound Effect Amplifier) settings and
store them in the Unit’s memory (MANUAL 1, MANUAL 2, MANUAL 3).
The preset sound modes include modes using surround effects and modes using S.E.A. effects.
Sound Mode effects cannot be recorded.
SOUND
MODE
or
To get an effect, press SOUND MODE repeatedly until the Sound Mode you want appears on the display.
The Sound Mode selected will appear on the display for three seconds. When a surround effect mode is
selected, the frame around the SOUND MODE indicator will light up. When a S.E.A. effect mode is
selected, the SOUND MODE indicator will light up.
Each time you press SOUND MODE, the Sound Mode changes as follows:
= D. CLUB = HALL = STADIUM = ROCK = POP = CLASSIC = MANUAL 1 =
MANUAL 2 = MANUAL 3 = OFF = (back to the beginning)
Surround effect modes
D. CLUB (Dance Club)
HALL
STADIUM
Increases resonance and bass.
Adds depth and brilliance to the sound, like in a concert hall.
Adds clarity and spreads the sound, like in an outdoor stadium.
S.E.A. effect modes
ROCK
POP
CLASSIC
Boosts low and high frequencies.
Good for vocal music.
Set for wide and dynamic sound stereo systems.
To cancel an effect, press SOUND MODE until “OFF” appears on the display. The SOUND MODE
indicator goes out.
To recall the previous Sound Mode, press SOUND MODE once.
9
EN.CA-D432/452TR[E]/f
9
98.3.26, 10:56 PM
English
CAUTION: The Volume cannot be adjusted while the Unit is on STANDBY.
DO NOT turn on the Unit and/or start playing any source without setting
the VOLUME control to 0; otherwise, the sudden blast of sound can
damage your hearing, speakers and/or headphones.
English
Customizing a Sound Mode ————————————————
You can change an existing sound mode to suit your own preferences. These changed settings can be
stored in the Unit’s sound mode memory.
1. Select the Sound Mode you want to change.
If you select D. CLUB, HALL, or STADIUM, the surround effect remains unchanged, but you can
adjust the S.E.A. effect.
2. Press SEA CONTROL.
The low tone section of the tone equalizer flashes. Once “SEA CONT” appears, the low tone levels
will appear.
Flashing
\
Note: If no adjustments are made for 10 seconds after SEA CONTROL is pressed, Sound Mode will
appear on the display then revert to the previous display.
3. Use MULTI CONTROL to adjust to any Sound Mode desired.
Press 4 P. DOWN or ¢ P. UP on the MULTI CONTROL to select the tone range you want to
adjust. You can adjust “LOW”, “MID” or “HIGH” tone.
Flashing
Flashing
Flashing
Press TUNING DOWN 1 or ¡ TUNING UP
on the MULTI CONTROL to adjust the level.
The level can be adjusted between –3 and +3 in 7 steps.
4. Press SET.
“MANUAL 1” appears on the display.
5. Press 4 P. DOWN or ¢ P. UP on the MULTI CONTROL to select
the MANUAL number for the memory.
6. Press SET again.
“MEMORY” appears for 2 seconds.
The setting that has been created is stored in the memory.
The adjustment you have made will apply to the sound you hear.
If you store new settings to a memory number that has already been used, the new settings replace the
existing setting.
Changing the Display
The display normally indicates each source, but it can be switched to the clock time.
Press DISPLAY.
Each time you press the button, the source and the clock time are shown alternately on the display.
j
Source (example CD Player)
Clock time
The clock indication can be interchanged with the source indication using the Unit or Remote
Control.
The clock indication may change to source indication depending on the operation of the Unit.
10
EN.CA-D432/452TR[E]/f
10
98.3.26, 10:56 PM
By playing the sound from auxiliary equipment through the System, you can gain control over how the
music or program sounds. Once the connected equipment is playing through the System, you can apply
the sound effects.
First make sure that the auxiliary equipment is properly connected to the System. (See page 5).
1. Turn down the volume level to 0.
2. Press AUX.
“AUX” appears on the display. The AUX button on the Unit lights up.
or
AUX
COMPU PLAY
When AUX is pressed while the power is on standby, the power is automatically turned on.
3. Start playing the equipment.
4. Adjust the volume level to the desired listening level.
5. Select a Sound Mode, if you wish.
To cancel the setting
Change the source by starting any one of the System’s built-in sound sources, such as the Tuner or CD
Player.
11
EN.CA-D432/452TR[E]/f
11
98.3.26, 10:56 PM
English
Listening to Auxiliary Equipment
English
Using the Tuner
PROGRAM
/RANDOM
SET
DISC
REPEAT
DISC
MULTI CONTROL
EDIT
DISC
DISPLAY MODE
PTY/EON
SELECT –, +
FM/AM
When TUNER is selected as
the source, the button lights up.
FM AM
RDS
CONTROL
RDS
CONTROL
AM
FM
PTY/EON
SLEEP
DISPLAY MODE SOUND
MODE
–
FM MODE
S.A.BASS
REPEAT
TAPE B
DIRECTION
DISC 1
DISC 2
DISC 3
AUX
Display
SELECT +
TAPE A
CD CONTROL
Number keys and
RDS operation keys
FM MODE
TAPE CONTROL
REC PAUSE
+
MULTI CONTROL
VOLUME
–
RM-SED452TRU REMOTE CONTROL
Pressing FM or AM
makes the Remote
Control ready for the
Tuner operations.
When the Unit is being
operated with the Remote
Control, press FM or AM
first.
Band display, Frequency display, Preset channel
RDS, EON, TA, INFO, NEWS indicator
When the System is being used, the display shows other items as well.
However, we have only shown the items described in this section.
You can listen to both FM and AM (MW/LW) stations. Stations can be tuned in manually, automatically,
or from preset memory storage.
Before listening to the radio:
• Check that both the FM and AM antennas are firmly connected. (See page 4.)
Tuning in a Station
Press FM/AM on the Unit (or FM or AM on the Remote Control) to turn
on the radio.
The frequency of the previously selected channel appears on the display.
Switching between Frequency Bands ———————————
On the Unit
Press FM/AM.
Each time you press the button, the band alternates between FM and AM (MW/LW).
COMPU PLAY
When FM/AM is pressed while the power is on standby, the power is automatically turned on.
12
EN.CA-D432/452TR[E]/f
12
98.3.26, 10:56 PM
or
English
On the Remote Control
To tune in FM stations, press FM.
To tune in AM stations, press AM.
AM
FM
COMPU PLAY
When FM or AM is pressed while the power is on standby, the power is automatically turned on.
Three Ways to Select a Station ——————————————
Press TUNING DOWN 1 or ¡ TUNING UP on the MULTI CONTROL repeatedly to move
from frequency to frequency until you find the one you want. (Manual Tuning).
OR
Press and hold TUNING DOWN 1 or ¡ TUNING UP on the MULTI CONTROL for a few
seconds, the frequency starts changing on the display. When a station is tuned in, the frequency stops
changing. (Auto Tuning).
OR
Possible only after presetting stations.
Press once and release 4 P. DOWN or ¢ P. UP on the MULTI CONTROL to go to the next
preset station.
You can also use the Remote Control to tune in preset channels:
1. Press FM or AM so that you can receive the last station tuned in.
2. Select the station by entering the preset number in the number keys of the Remote Control.
• Example: for channel 5, press 5. For channel 15, press +10 then 5.
For channel 20, press +10, then 10. For channel 30, press +10 twice then 10.
or
or
PTY/EON
DISPLAY MODE
–
SELECT +
•
After you have selected the preset number and the number appears, the broadcast frequency of the
selected channel appears on the display.
Presetting Stations
You can preset up to 30 FM stations and up to 15 AM (MW/LW) stations for the preset numbers.
Note: In some cases, test frequencies have been already memorized for the tuner since the factory
examined the tuner preset function before shipment. This is not a malfunction. You can preset the stations
you want into memory by following the presetting method.
1
2
1. Select a band by pressing FM/AM on the Unit.
When using the Remote Control, press FM or AM.
2. Press TUNING DOWN 1 or ¡ TUNING UP on the MULTI
CONTROL to tune into a station.
or
3. Press SET.
“SET” flashes for 5 seconds.
While it is still flashing, carry out the following procedure.
3, 5
4. Press 4 P. DOWN or ¢ P. UP on the MULTI
CONTROL on the Unit to set the preset number.
5. Press SET again.
“STORED” appears for 2 seconds. The preset station is
stored in the memory.
4
6. Repeat steps 1 to 5 for each station you want to store in memory
using different preset numbers.
CAUTION: If the Unit is unplugged or if a power failure occurs, the preset
stations will be erased in a few days. If this happens, preset the station
again.
Changing the FM Reception Mode
When an FM stereo broadcast is hard to receive or noisy, press FM MODE on the Remote Control so that the
MONO indicator lights up on the display. Reception improves, but there is no stereo effect.
FM MODE
To restore the stereo effect, press FM MODE on the Remote Control so that the MONO indicator goes
out. In this stereo mode, the STEREO indicator lights up and you can hear stereo effects, when a program is
broadcast in stereo.
13
EN.CA-D432/452TR[E]/f
13
98.3.26, 10:56 PM
English
Receiving FM Stations with RDS
RDS (Radio Data System) allows the FM stations to send additional signals along with their regular
programme signals. For example, the stations send their station names and information about what type of
programme they broadcast, such as sports or music, etc.
When tuned to an FM station which provides the RDS service, the station frequency (and then the station
name if sent) is displayed.
One convenient RDS service is “Enhanced Other Networks (EON)”. This allows the Unit to automatically switch to a programme type of your choice when one starts in your broadcast area.
Not all FM stations provide RDS service, nor do all RDS stations provide the same services. If in
doubt, check with local radio stations for details on RDS services in your area.
RDS may not work correctly if the station to which you are tuned is not transmitting properly or if the
signal strength is weak.
What Information RDS can Provide ————————————
The System can use the following RDS service.
PS (Programme Service name)
Identifies each station by a name.
TA (Traffic Announcement Identification)
Identifies that a traffic announcement is being broadcast in your area.
RT (Radio Text)
Allows the RDS station to send text messages that appear on the display of the unit.
PTY (Programme Type)
Identifies the type of RDS programme. This allows you to locate a specific type of programme being
broadcast.
The programme types are as follows:
NEWS
AFFAIRS
DRAMA
CULTURE
ROCK M
M.O.R. M
WEATHER
FINANCE
PHONE IN
TRAVEL
NATIONAL
OLDIES
INFO
SCIENCE
LIGHT M
CHILDREN
LEISURE
FOLK M
SPORT
VARIED
CLASSICS
SOCIAL A
JAZZ
DOCUMENT
EDUCATE
POP M
OTHER M
RELIGION
COUNTRY
TRAFFIC
ALARM
EON (Enhanced Other Networks)
Provides information available on RDS stations other than the one which is being received.
Changing the Display ———————————————————
RDS
CONTROL
or
You can see RDS information on the display while listening to a FM station.
To view RDS information on the display, press DISPLAY MODE. (When using the Remote Control,
press 6 DISPLAY MODE after pressing RDS CONTROL).
Each time you press the button, the display changes to show the following information:
DISPLAY MODE
3
PS (Programme Service):
Station names will be displayed.
3
PTY (Programme Type):
Types of broadcast programmes will be displayed.
3
RT (Radio Text):
Text message sent by stations will be displayed.
3
Station Frequency:
Station frequencies.
While RDS information is being received from a station, “PS”, “PTY”, or “RT” may appear on the
display.
14
EN.CA-D432/452TR[E]/f
14
98.3.26, 10:56 PM
————————
One of the advantages of the RDS service is that you can locate a particular kind of programme by
specifying the PTY codes.
The PTY Search function is applicable to preset stations only.
RDS
CONTROL
To search for a programme using the PTY codes, follow this procedure:
1. Press PTY/EON once.
or
• When using the Remote Control, press 3 PTY/EON after pressing RDS CONTROL.
“PTY” and “SELECT” appear alternately on the display.
PTY/EON
Note: If no adjustments are made for 10 seconds in PTY Select mode, the display reverts to the
previous display. Perform the next step while “PTY” and “SELECT” are being displayed.
2. Press SELECT + or SELECT – to select a PTY.
or
•
–
SELECT +
When using the Remote Control, press 8 SELECT – or 9 SELECT +.
Each time you press the button, PTY codes change as follows:
SELECT + =
Ô NEWS Ô AFFAIRS Ô INFO Ô SPORT Ô EDUCATE Ô DRAMA Ô
CULTURE Ô SCIENCE Ô VARIED Ô POP M Ô ROCK M Ô M.O.R. M Ô
LIGHT M Ô CLASSICS Ô OTHER M Ô WEATHER Ô FINANCE Ô
CHILDREN Ô SOCIAL A Ô RELIGION Ô PHONE IN Ô TRAVEL Ô
LEISURE Ô JAZZ Ô COUNTRY Ô NATIONAL Ô OLDIES Ô FOLK M Ô
DOCUMENT Ô TRAFFIC Ô
+ SELECT –
3. Press PTY/EON again.
•
or
When using the Remote Control, press 3 PTY/EON.
PTY/EON
While the search function is running, the selected programme type and “SEARCH” alternate on the
display.
Once the station which is broadcasting the selected PTY (Programme Type) is located, searching will
stop. Then the station name (if PS code is being sent) will be indicated and the broadcast will commence.
The indication will stay flashing for 10 seconds from the end of the searching function. If you press
PTY/EON again during this period, search for the same PTY (Programme Type) will restart.
If a station broadcasting a selected PTY( Program Type) cannot be found, “NOTFOUND” appears on
the display after the Unit has searched through the preset numbers. The Unit will return to the station
to which it was tuned prior to the start of the PTY Search.
To cancel a PTY Search operation, press PTY/EON . (When using the Remote Control, press
3 PTY/EON.)
EON Function ———————————————————————
With the EON (Enhanced Other Networks) code, the Unit can perform a standby reception which will
enable you to obtain desired information which is available from other stations.
“EON” will be shown while receiving stations with an EON code.
EON Standby reception is applicable for preset stations only.
You can set EON Standby reception regardless of types of receiving bands.
RDS
CONTROL
Setting EON Standby reception
1. Press PTY/EON twice.
or
• When using the Remote Control, press 3 PTY/EON after pressing RDS CONTROL.
The last EON information type selected appears.
PTY/EON
15
EN.CA-D432/452TR[E]/f
15
98.3.26, 10:56 PM
English
Searching for Programmes by PTY codes
English
2. Select information you want by pressing SELECT + or SELECT –.
or
–
SELECT +
• When using the Remote Control, press the 9 SELECT + or 8 SELECT – button.
TA:
Identifies that a traffic announcement is being broadcast in your area.
NEWS: News
INFO:
Programmes on medical service, weather forecast, etc.
• Each time you press the button, EON codes change as follows:
SELECT + =
Ô TAÔ NEWS Ô INFO Ô OFF Ô
+ SELECT –
3. Press PTY/EON.
or
PTY/EON
•
When using the Remote Control, press 3 PTY/EON.
As soon as your selection is entered, the Unit will go into EON Standby reception mode.
To cancel the EON function, select “OFF” by following the steps above.
When this Unit carries out EON Standby reception, the indication will
change as follows:
1. Waiting for EON Standby reception.
2. Preset stations are being searched for and while preparing to change the station, sound will be muted.
Light up
3. The station will be changed and the Station name being received will appear on the display.
(Station name)
Flashing
•
To view the other RDS information on the display, press DISPLAY MODE. (When using the
Remote Control, press 6 DISPLAY MODE after pressing RDS CONTROL).
Notes:
• EON broadcasts of some stations may not be compatible with this Unit. In the case of an incompatible
EON broadcast, “EON” will not appear on the display.
• If the reception is unsatisfactory for a station among the preset stations, the station is searched for
again. If after searching through the channels, the broadcasting station cannot be found,
“NOTFOUND” appears on the display. The Unit will return to the station to which it was previously
tuned.
When broadcasting of the desired information has been completed, the Unit will automatically go back to
the station which had previously been tuned to.
While receiving information on EON Standby reception, the station will not change to other stations
even if the same information is available from them.
If the information you are waiting for is available from the current station, the indicator will flash.
ALARM function ——————————————————————
If an ALARM (Emergency) signal is received while receiving an EON code from a station, the Unit
automatically switches to the station broadcasting the ALARM signal.
16
EN.CA-D432/452TR[E]/f
16
98.3.26, 10:56 PM
PROGRAM/RANDOM
REPEAT
Disc Trays
RDS
CONTROL
English
Using the CD Player
0
AM
FM
PROGRAM
/RANDOM
DISC
PTY/EON
REPEAT
SLEEP
Number keys
DISPLAY MODE SOUND
MODE
DISC
EDIT
DISC buttons
DISC
–
SELECT +
FM MODE
S.A.BASS
TAPE A
TAPE B
DIRECTION
REPEAT
DISC 1
DISC 2
DISC 3
CD CONTROL
SET
CD Player
control buttons
TAPE CONTROL
AUX
MULTI
CONTROL
REC PAUSE
CD £/8
When CD is selected as
the source, the button
lights up.
+
MULTI CONTROL
VOLUME
–
Pressing CD CONTROL
or DISC (1 to 3) makes
the Remote Control ready
for the CD operations.
RM-SED452TRU REMOTE CONTROL
7 STOP
Display
Repeat indicator
Play mode indicator
Disc indicator
Flashes while a CD is playing.
Is lit when a CD has stopped or is paused.
CD indicator
Indicates the number of the disc selected.
Track number, Playing time, step number
CD indicator
Disc indicator
When the System is being used, the display shows other items as well.
However, we have only shown the items described in this section.
The System’s CD Player has an Automatic Changer with 3 disc trays. You can use Continuous, Random,
Program or Repeat Play for the discs in DISC 1, DISC 2 and DISC 3. Repeat Play can repeat all the tracks
on all the CD’s or one track on one CD. There is also the Tray Lock function, which safely keeps discs in
the trays.
Here are the basic things you need to know to play a CD and locate the different selections on it. Each
selection is called a track, so when we are talking about locating a track, we are also talking about how
you find a certain song or performance.
Entering CD Operation Mode with the Remote Control
CD CONTROL
DISC 1
DISC 2
Pressing CD CONTROL or DISC (1 to 3) makes the Remote Control ready for the CD operations.
Operate the CD player with 3, 7, MULTI CONTROL and number keys.
The explanation provided in this section assumes that the Remote Control has been put into CD operation
mode. When you use the Remote Control, press CD CONTROL first.
DISC 3
17
EN.CA-D432/452TR[E]/f
17
98.3.26, 10:56 PM
English
Loading CDs
1. Press 0 on the CD Player you want to insert the disc onto.
“OPEN” appears on the display and the disc tray slides out.
COMPU PLAY
When 0 is pressed while the power is on standby, the power is automatically turned on.
2. Place a CD, with its label side up, onto the tray.
ATTENTION: To avoid malfunctions
when you play a CD, set the CD in
the right place at the centre of the tray.
CD
Tray
3. Press 0 to close the tray.
CORRECT
INCORRECT
“CLOSE” appears on the display.
4. Repeat steps 1 to 3 to insert other discs onto the other trays.
•
To continue putting discs onto other trays, even if a tray is open, by pressing the 0 button of
another disc tray, the open tray will close automatically, and the new disc tray will slide out.
When you place a CD onto the currently selected tray, whose disc number shown on the CD indicator,
reading of the CD starts. The total number of tracks and total playing time appear after the reading is
completed, then the playing time of the first track appears.
\
Reading now (flashing)
\
Total number of tracks
and playing time
Playing time of the 1st
track
To put an 8 cm CD onto a tray, insert it so that it is aligned with the groove in the tray’s centre.
If a tray is open when the System switches to the standby mode, the tray will close automatically.
Basics of Using the CD Player —
Continuous Play
Playing a CD ————————————————————————
Prepare the CDs.
On the Unit
Press CD £/8.
The source is set to CD and play starts from the first track of the currently selected CD whose disc
number shown on the CD indicator.
Press DISC (1 to 3) of the disc you want to play.
The source is set to CD and play starts from the first track of the selected CD.
COMPU PLAY
When CD £/8 or DISC (1 to 3) is pressed while the power is on standby, the power is automatically turned on.
When you press CD £/8 or DISC (1 to 3) while the disc tray is open, the tray will automatically
close before beginning to play.
If there is no CD in the disc tray, “NO DISC” appears on the display.
Playing order of discs
When playback starts from DISC 1, the playing order is DISC 1 = DISC 2 = DISC 3.
When DISC 3 has finished, the CD Player stops.
When playback starts from DISC 2, the playing order is DISC 2 = DISC 3 = DISC 1.
When DISC 1 has finished, the CD Player stops.
When playback starts from DISC 3, the playing order is DISC 3 = DISC 1 = DISC 2.
When DISC 2 has finished, the CD Player stops.
• If any of the disc trays are empty, the CD Player skips that disc tray and continues through the
remaining disc trays in the order shown above. When the last disc has finished playing, the Unit
will stop automatically.
18
EN.CA-D432/452TR[E]/f
18
98.3.26, 10:56 PM
On the Remote Control
Press CD CONTROL then press 3.
\
DISC 1
The source is set to CD and play starts from the first track of the currently selected CD whose disc
number shown on the CD indicator.
• If the above operation is carried out while the power is on standby, the power is automatically
turned on.
DISC 2
Press DISC (1 to 3) of the disc you want to play.
DISC 3
The source is set to CD and play starts from the first track of the selected CD.
COMPU PLAY
When DISC (1 to 3) on the Remote Control is pressed while the power is on standby, the power is
automatically turned on.
To stop play the disc, press 7 STOP (or 7 on the Remote Control). The display will show the total
number of tracks and total playing time of the disc that was playing followed by the playing time of the
first track.
To stop play and remove the disc, press 0 for the disc being played.
To pause, press CD £/8 (or 8 on the Remote Control). The playing time will flash.
To cancel pause, press CD £/8 (or 3 on the Remote Control) the Unit. Play continues from the point
where it was paused.
or
or
Selecting a Track —————————————————————
Press 4 P. DOWN or ¢ P. UP on the MULTI CONTROL to select the
track.
The selected track starts playing.
Each time you press 4 P. DOWN or ¢ P. UP, the track changes by one.
Press and hold 4 P. DOWN or ¢ P. UP to continuously change tracks.
or
Locating a Track with the Remote Control Directly ———
Using the number keys on the Remote Control allows you to go directly to the beginning of any track.
DISC 1
DISC 2
DISC 3
1. Press the DISC (1 to 3) for the disc tray containing the track you
want to listen to.
•
2. Enter the number of the track you want to listen to with the
number keys.
PTY/EON
The selected track starts playing.
• Example: for track 5, press 5. For track 15, press +10 then 5. For track 20, press +10, then 10. For
track 32, press +10 three times, then 2.
DISPLAY MODE
–
Example: for the third disc, press DISC 3.
SELECT +
Fast Forward / Reverse ——————————————————
Use TUNING DOWN 1 or ¡ TUNING UP on the MULTI CONTROL.
For Fast Forward, press and hold down ¡ TUNING UP. For Reverse, press and hold down TUNING
DOWN 1. Release the button when the part you wish to listen to is reached.
or
Changing Discs While Playing ———————————————
You can replace a CD in a tray not being used, while another CD is playing.
1. Press 0 of the tray not being used.
The tray opens.
2. Replace the disc in the tray.
3. Press 0 to close the tray.
19
EN.CA-D432/452TR[E]/f
19
98.3.26, 10:57 PM
English
CD CONTROL
English
Programming the Playing Order of the
Tracks
You can change the order in which the discs and tracks play, and select only the discs and tracks you want
from among those loaded in the CD Player.
You can programme up to 32 steps in any desired order from among the discs in the CD player.
You can only make a programme when the CD Player is stopped.
On the Unit
PROGRAM
/RANDOM
1. Press PROGRAM/RANDOM.
“PROGRAM” appears on the display and
the PROGRAM indicator lights up.
If you have already created a programme, the last step of the previous programme will appear on the
display.
Each time you press the button, play mode changes as follows:
= PROGRAM = RANDOM = No Play mode indicator (Continuous Play) = (back to the
beginning)
2. Select a disc with DISC (1 to 3).
The display changes to the Programme Entry display
and the disc number and track number flash
for a few seconds.
Track number
Step number
Disc number
While the indications are flashing, perform the operations in
steps 3 to 4. When the flashing indications change to
“PROGRAM”, repeat the operations in steps 2 to 4.
3. Press 4 P. DOWN or ¢ P. UP on the MULTI CONTROL to select a
track for programming.
The disc number and track number starts flashing
on the display.
Flashing
4. Press SET.
The indications on the display stop flashing and remains lit.
The step number appears on the display.
5. Repeat steps 2 to 4 to select the other tracks for the programme.
To select another track from the same disc, repeat the procedure from step 3.
6. Press CD £/8.
The Unit plays the tracks in the order you have programmed them.
On the Remote Control
PROGRAM
/RANDOM
1. Press PROGRAM/RANDOM on the Unit.
“PROGRAM” appears on the display and
the PROGRAM indicator lights up.
If you have already created a programme, the last step of the
previous program will appear on the display unless you have erased the program.
DISC 1
DISC 2
DISC 3
Each time you press the button, play mode changes as follows:
= PROGRAM = RANDOM = No Play mode indicator (Continuous Play) = (back to the
beginning)
Track number
2. Select a disc with DISC (1 to 3).
Step number
Disc number
The display changes to the Programme Entry display
and the disc number and track number flash
for a few seconds.
While the indications are flashing, perform the operation
in step 3. When the flashing indications change to
“PROGRAM”, repeat the operations in steps 2 to 3.
20
EN.CA-D432/452TR[E]/f
20
98.3.26, 10:57 PM
The indications on the display stop flashing and remains lit.
The selected track numbers light up and the step number appears on the display.
• Example: For track 5, press 5.
For track 15, press +10 then 5.
For track 20, press +10 then 10.
For track 32, press +10 three times, then 2.
PTY/EON
DISPLAY MODE
–
English
3. Press the number keys (1 to 10 and +10) to select the tracks.
SELECT +
4. Repeat steps 2 to 3 to select the other tracks for the programme.
5. Press 3.
The Unit plays the tracks in the order you have programmed them.
If you try to programme a 33rd track, “FULL” will appear on the display to let you know that the
programme is full.
If you try to programme a disc tray that is empty, or a track number that does not exist on a disc (for
example, selecting track 14 on a disc that only has 12 tracks), the selected disc or track are skipped
when the programme is played.
You can skip to a particular programme step by pressing the MULTI CONTROL (4 P. DOWN or
¢ P. UP) or 4 or ¢ on the Remote Control during programme play.
To play the programmed tracks repeatedly, press REPEAT. For details, refer to “Repeating a Track or
the Discs” on page 22.
To stop playing, press 7 STOP (or 7 on the Remote Control) once.
To delete all the tracks in a programme, press 7 STOP (or 7 on the Remote Control) while the CD
Player is stopped. The programme is deleted and “PROGRAM” appears on the display.
To cancel programme play, press 7 STOP (or 7 on the Remote Control) while “PROGRAM” is
shown on the display.
Checking the Programme —————————————————
While the CD Player is stopped, use 4 or ¢ on the Remote Control to check the contents of the
programme.
Each time you press ¢, the programme contents are shown on the display in the programmed order.
Pressing 4 displays the previous step in the programme.
Changing the Programme —————————————————
Modify the contents of a programme while the CD Player is stopped.
Press CANCEL/DEMO on the Unit, the last step in the programme is deleted.
Each time you press the button, the last step listed in the programme is deleted from the programme.
To add a step to the programme, follow the procedure above (on either the Unit or the Remote Control).
The new steps are added to the end of the programme.
Random Play
The tracks of all loaded CDs will play at random.
1. Press PROGRAM/RANDOM while the
CD Player is stopped to change to
the Random Mode display.
PROGRAM
/RANDOM
Each time you press the button, play mode changes as follows:
= PROGRAM = RANDOM = No Play mode indicator (Continuous Play) = (back to the
beginning)
2. Press CD £/8.
The tracks of all the CDs are played in random order.
When all of the tracks have been played, the CD Player stops.
Note: Random Play cannot be activated with the DISC buttons and the number keys.
You can skip to the next track by pressing ¢ P. UP on the MULTI CONTROL (or ¢ on the Remote
Control) during Random Play. Each time you press the button, the next track is jumped to. (You cannot
skip to the previous tracks, nor to the beginning of the current track during Random Play.)
To continue with a different random track selection after the last track is played, press REPEAT to
select REPEAT ALL before or during Random Play.
To cancel Random Play, press 7 STOP (or 7 on the Remote Control) twice. When the RANDOM
indicator goes out, Continuous Play mode is resumed.
21
EN.CA-D432/452TR[E]/f
21
98.3.26, 10:57 PM
English
Repeating a Track or the Discs
You can have all the discs, the program or the individual track currently playing repeat as many times as
you like.
REPEAT
Press REPEAT on the Unit.
Each time you press the button, the Repeat Modes change as follows.
= REPEAT ALL = REPEAT 1 = No indicator = (back to the beginning)
REPEAT ALL: Repeats all the tracks on the CDs, or all the tracks in the program.
REPEAT 1: Repeats one track on one CD.
To exit Repeat Mode, press REPEAT until the Repeat Mode indicator on the display goes out.
Tray Lock Function
In order to safely keep the discs in the CD Player, the three trays can be electronically locked in a single
operation.
When the Tray Lock function is on, the trays cannot be opened even if the 0 button is pressed.
This function can only be accessed by using the buttons on the Unit itself.
Locking the Trays —————————————————————
1. Put the System’s power into STANDBY mode.
2. While pressing 7 STOP, press 0 for DISC 1 on the Unit.
“LOCKED” appears on the display to let you know that the trays have been locked.
When the CD Player trays are locked, pressing 0 displays the message “LOCKED” on the display
and the trays do not open. Also, 0 cannot be used to automatically turn on the power.
Unlocking the Trays ————————————————————
1. Put the System’s power into STANDBY mode.
2. While pressing 7 STOP, press 0 for DISC 1 on the Unit.
When the unlock operation is done, “UNLOCKED” appears on the display to show that the lock has
been taken off.
The trays can now be opened by pressing 0.
The 0 can also be used to automatically turn on the power.
22
EN.CA-D432/452TR[E]/f
22
98.3.26, 10:57 PM
English
Using the Cassette Deck
(Playing)
PROGRAM
/RANDOM
DISC
REPEAT
DISC
EDIT
DISC
RDS
CONTROL
AM
FM
PTY/EON
SLEEP
MULTI CONTROL
DISPLAY MODE SOUND
MODE
–
SELECT +
FM MODE
S.A.BASS
REPEAT
TAPE A
TAPE B
DIRECTION
DISC 1
DISC 2
DISC 3
CD CONTROL
AUX
TAPE ™ £
When TAPE is selected
as the source, the button
lights up.
Cassette Deck
control buttons
TAPE CONTROL
REC PAUSE
+
MULTI CONTROL
VOLUME
–
RM-SED452TRU REMOTE CONTROL
7 STOP
REVERSE MODE
Pressing TAPE CONTROL
makes the Remote Control
ready for the Cassette Deck
operations.
0 Eject (Deck A)
DECK A/B
0 Eject (Deck B)
Display
Tape Direction Indicator on the Display
The Tape Direction indicator tells you which direction the
selected tape deck will use for playback.
During playback, the direction indicator flashes slowly.
During fast left or fast right, the indicator flashes quickly.
During Music Scan mode, the indicator flashes slowly and
quickly alternately.
When the System is being used, the display shows other items
as well. However, we have only shown the items described in
this section.
: Reverse Mode indicator
: Tape Direction indicator
: DECK A, B indicator
The Cassette Deck allows you to play, record and dub audio tapes.
With Automatic Tape Detection, you can listen to Type I or II tapes without changing any settings.
The use of tapes longer than 120 minutes is not recommended, since characteristic deterioration may
occur and these tapes easily jam in the pinch-rollers and the capstans.
Entering the TAPE Operation Mode with the Remote Control
Pressing TAPE CONTROL makes the Remote Control ready for the Cassette Deck operations.
Operate the Cassette Deck with 3, 7 and MULTI CONTROL.
The explanation provided in “Using the Cassette Deck” section assumes that the Remote Control has been
put into Cassette Deck operation mode. When you use the Remote Control, press TAPE CONTROL first.
TAPE CONTROL
23
EN.CA-D432/452TR[E]/f
23
98.3.26, 10:57 PM
English
Regular Play
When the power is already on, you can use this basic procedure:
1. Press down 0 for the deck you want to use.
2. When the cassette holder opens, put a cassette in, with the
exposed part of the tape down, toward the base of the Unit.
•
If the cassette holder does not open, turn the power off, then back on and press down 0 again.
3. Close the holder gently.
When both Deck A and Deck B contain a tape, the last deck to have a tape inserted is selected.
To change the selected deck, press DECK A/B. When using the Remote Control, press TAPE A or
TAPE B.
4. Press TAPE ™ £ on the Unit.
COMPU PLAY
When the TAPE ™ £ is pressed while the power is on standby, the power is automatically turned on.
When using the Remote Control, first press TAPE CONTROL followed by 3.
If the power is on standby, the power will automatically be turned on.
When “TAPE” appears on the display, the tape play starts toward the direction currently selected.
To stop playing, press 7 STOP on the Unit (or 7 on the Remote Control).
To remove the tape, stop the tape, and press down 0.
To change deck while playing a tape, press TAPE ™ £ after pressing DECK A/B on the Unit or
press 3 after pressing TAPE A or TAPE B on the Remote Control.
To change the direction of a tape while it is playing, press TAPE ™ £ on the Unit or
DIRECTION on the Remote Control.
Fast Left and Fast Right ——————————————————
While the tape is stopped, press TUNING DOWN 1 on the MULTI CONTROL (or 1 on the
Remote Control) and the tape will wind rapidly to the left side of the cassette without playing.
While the tape is stopped, press ¡ TUNING UP on the MULTI CONTROL (or ¡ on the Remote
Control) and the tape will wind rapidly to the right side of the cassette without playing.
Note: Deck A and Deck B cannot be used for playback at the same time.
Music Scan
To find the beginning of a music track during play, use the Music Scan function. Music Scan searches for
blank portions that usually separate selections, then plays the next selection.
Finding the Beginning of the Current Selection
—————
Press TUNING DOWN 1 or ¡ TUNING UP on the MULTI CONTROL
(or 1 or ¡ on the Remote Control) during play.
Make sure that you press TUNING DOWN 1 or ¡ TUNING UP on the MULTI CONTROL (or
1 or ¡ on the Remote Control) in the opposite direction to that in which the tape is playing.
Searching stops at the beginning of the current selection, and the current selection starts automatically.
or
Finding the Beginning of the Next Selection ———————
Press TUNING DOWN 1 or ¡ TUNING UP on the MULTI CONTROL
(or 1 or ¡ on the Remote Control) during play.
Make sure that you press TUNING DOWN 1 or ¡ TUNING UP on the MULTI CONTROL (or
1 or ¡ on the Remote Control) in the same direction as that in which the tape is playing.
Searching stops at the beginning of the next selection, and the next selection starts automatically.
24
EN.CA-D432/452TR[E]/f
24
98.3.26, 10:57 PM
•
•
•
No blank at the beginning of a selection.
Noise (often caused by much use or poor quality dubbing) which fills the blank with noise.
Long, very soft passages or pauses in a selection. The scan will detect these as 4-second long
blanks. If this happens, just scan again until you reach the selection you want.
Reverse Mode
Use Reverse Mode to make the tape automatically reverse at the end of a side and start playing the
other side.
Each time you press REVERSE MODE, the Reverse Mode turns on and off alternately.
Reverse Mode ON
Reverse Mode OFF
Continuous Play: With the Reverse Mode indicator on, when tape playback in the reverse (2)
direction finishes, the Unit always checks to see if a tape is in the other deck. If there is, it automatically starts playing. This Continuous Play function works regardless of which deck starts first.
25
EN.CA-D432/452TR[E]/f
25
98.3.26, 10:57 PM
English
Music Scan works by detecting a 4-second long blank at the beginning
of each selection, so it will not work well if your tape has • • •
English
Using the Cassette Deck
(Recording)
PROGRAM
/RANDOM
DISC
REPEAT
DISC
EDIT
EDIT
DISC
RDS
CONTROL
AM
FM
PTY/EON
SLEEP
DISPLAY MODE SOUND
MODE
–
SELECT +
FM MODE
S.A.BASS
REPEAT
TAPE A
TAPE B
DIRECTION
DISC 1
DISC 2
DISC 3
CD CONTROL
AUX
TAPE CONTROL
REC PAUSE
REC PAUSE
+
VOLUME
–
CD REC START
REC START/STOP
DUBBING
RM-SED452TRU REMOTE CONTROL
Display
REC indicator
When the System is being used, the display shows other items as well.
However, we have only shown the items described in this section.
Things to Know before You Start Recording ———————
It may be unlawful to record or play back copyrighted material without the consent of
the copyright owner.
When you want to record onto both sides of a tape, you can set Reverse mode on to do so. However,
recording automatically stops after recording in the 2 direction in Reverse mode. Therefore, make
sure that the tape direction is 3 when recording with Reverse mode on.
The recording level, which is the volume at which the new tape is being made, is automatically set
correctly, so it is not affected by volume control. Thus, during recording you can adjust the sound you
are actually listening to without affecting the recording level.
Two small tabs on the back of the cassette tape, one for side A and one for side B, can be removed to
prevent accidental erasure or re-recording. To record on a cassette with the tabs removed, you must
cover the holes with adhesive tape first.
However, when a Type II tape is used, only cover part of the hole as shown, since the other part of the
hole is used to detect the tape type.
When recording, you can hear Sound Mode effects through the speakers or headphones. However, the
sound is recorded without Sound Mode effects.
Type I and Type II tapes can be used for recording.
Note: At the start and end of cassette tapes, there is leader tape which cannot be recorded onto. Depending on the recording source, the first part of the recording may be missing because of the leader. When
recording CDs or radio broadcasts, to get the beginning of the recording on the tape, first wind on the
leader before beginning recording.
26
EN.CA-D432/452TR[E]/f
26
98.3.26, 10:57 PM
Standard Recording
This is the basic method for recording any source. The System also has special ways for recording CD to
tape, and tape to tape, which save your time and effort, as well as give you some special effects. However,
when you need to add a selection to a tape you have made, or are combining selections from several
sources on one tape, use the method described below; just substitute the source you want into this
procedure, such as a CD or the Tuner. You can also record from auxiliary source with this procedure.
Using the Unit
1. Insert a blank or erasable tape into Deck B.
2. Press REVERSE MODE if you want to record on both sides of the
tape.
Reverse Mode comes on.
• When using Reverse Mode, insert the tape so that it will be recorded in the forward (3) direction.
3. Check the recording direction for the tape.
Check that the Tape Direction indicator is the same as that for the tape in the tape deck. If the
directions are different, press 7 STOP after pressing TAPE ™ £ to set the tape direction.
• When using the Reverse Mode to record both sides of a tape, check that the Tape Direction
indicator is in the forward (3) direction. If the direction indicator is not in the forward (3)
direction, press TAPE ™ £ then press 7 STOP.
4. Prepare the source, for example, by tuning in a radio station,
loading CDs, or turning on connected equipment.
5. Press REC START/STOP.
The REC indicator lights up and the System begins recording.
Using the Remote Control
1. Insert a blank or erasable tape into Deck B.
2. Press REVERSE MODE on the Unit if you want to record on both
sides of the tape.
Reverse Mode comes on.
• When using Reverse Mode, insert the tape so that it will be recorded in the forward (3) direction.
3. Prepare the source, for example, by tuning in a radio station,
loading CDs, or turning on connected equipment.
4. Press REC PAUSE.
REC PAUSE
The REC indicator starts flashing.
TAPE CONTROL
5. Press TAPE CONTROL then press 3.
\
Recording starts.
The REC indicator stops flashing and remains lit.
Notes for using Reverse Mode for recording
When recording with Reverse Mode on, the System automatically stops when it reaches the end of the
reverse (2) direction. To record on both sides of a tape, make sure that the recording direction for the tape
inserted into Deck B is forward (3), and that the Tape Direction indicator is also forward (3), before you
start recording.
To pause at any time during the recording process
Press REC PAUSE on the Remote Control. Then press 3 on the Remote Control or REC START/STOP
on the Unit to restart recording.
To stop at any time during the recording process
Press REC START/STOP on the Unit again, or press 7 on the Remote Control.
27
EN.CA-D432/452TR[E]/f
27
98.3.26, 10:57 PM
English
CAUTION: If recordings you have made have excessive noise or static,
the Unit may be too close to a TV which was on during recording. Either
turn off the TV or increase the distance between the TV and the System.
English
Recording AM Station to Tape ———————————————
When recording an AM broadcast, beats may be produced which are not heard when listening to the
broadcast. In this case, press PROGRAM/RANDOM on the CD Player to eliminate the beats.
1. Set to AM station and start recording.
PROGRAM
/RANDOM
2. Press PROGRAM/RANDOM repeatedly until the beats are eliminated.
Each time you press the button, the indication on the display changes as follows:
= CUT 2 = CUT 3 = CUT 4 =CUT 1 = (back to the beginning)
CD Direct Recording
Everything on the CD goes onto the tape in the order it is on the CD, or according to the order you have
set in a program.
1. Press CD £/8, then 7 STOP.
2. Prepare CDs. (See page 18.)
Check that the CD Player is not playing a CD.
3. Insert a blank or erasable cassette in Deck B.
•
When you want to record on both sides of a tape, press REVERSE MODE to turn on Reverse
Mode. Check that the recording direction for the tape and the Tape Direction indicator are correct.
(See page 27 “Notes for using Reverse Mode for recording”.)
4. Press CD REC START.
“CD REC” appears on the display, the REC indicator lights up, and the System begins recording.
If the tape reaches its end while recording a song, the last song will be re-recorded at the beginning of
the other side.
When the recording is finished, “CD REC FINISHED” scrolls by on the display. The CD Player and
Cassette Deck stop.
To stop at any time during the recording process, press 7 STOP.
Note: When making Sleep Timer settings while doing CD Direct recording, set the time so that there is
enough leeway to finish the recording before the power turns off. If the time is set to about the length of
the CD, the power may turn off before recording finishes.
For CD Direct Recording using more than one disc, use a blank tape, If you use a prerecorded tape,
prerecorded material may not be erased between newly-recorded tracks.
Auto Edit Recording
Using Auto Edit, you can record the CD tracks to fit the tape, so a selection is not cut off. Auto Edit is one
of the best ways to copy all of a CD onto a tape. Auto Edit programs the CD tracks in numerical order. To
prevent the end of the last track on the front side from being cut off, the last track on the front side is
selected to fit on the remaining tape length.
1. Press CD £/8, then 7 STOP.
EDIT
2. Prepare CDs. (See page 18.)
Check that the CD Player is not playing a CD.
3. Press EDIT on the Unit.
“DISC-” appears on the display.
4. Press DISC (1 to 3) for the disc you want to record.
After “TAPE C - -”, the optimum tape length for the disc appears on the display.
\
•
You can select a different length of tape, depending on the actual size of the tape you are using,
from eleven possibilities programmed into the Unit: 40, 46, 50, 54, 60, 64, 70, 74, 80, 84, 90.
Select the tape length that corresponds to the length of tape you are using, or the nearest length to
it, by adjusting 4 P. DOWN or ¢ P. UP on the MULTI CONTROL.
• If you select a tape length shorter than the total playing time of the CD, the last tracks on both
sides of the tape will be faded out as the tape ends.
28
EN.CA-D432/452TR[E]/f
28
98.3.26, 10:57 PM
English
5. Press SET.
The tracks to be recorded on side B appear on the display.
•
Each time you press the button, the tracks to be recorded on side A and side B appear on the
display alternately.
6. Insert a blank or erasable cassette in Deck B.
When you want to record on both sides of a tape, press REVERSE MODE to turn Reverse mode on.
7. Press CD REC START .
The Unit plays the CD and starts recording. If the tape has not been rewound, the Unit rewinds the
tape before starting to record the CD.
To stop at any time while recording, press 7 STOP or REC START/STOP on the Unit. If 7 STOP is
pressed, the Cassette Deck will create a four-second blank space after the CD Player stops. If REC
START/STOP is pressed, the CD Player and Cassette Deck will stop simultaneously. When 7 is pressed
on the Remote Control, the stop time of the CD Player and Cassette Deck vary according to their mode
(CD operation mode or Cassette Deck operation mode). If the Remote Control is in CD operation mode,
the Cassette Deck will stop four second after the CD Player stops. If the Remote Control is in Cassette
Deck operation mode, the CD Player and Cassette Deck will stop simultaneously.
To cancel Auto Edit, press PROGRAM/ RANDOM while the CD Player is stopped or press 0 for the
disc number being recorded.
Note: When making Sleep timer settings while doing Auto Edit recording, set the time so that there is
enough leeway to finish the recording before the power goes out. If the time is set to about the length of
the CD, the power may go out before recording finishes.
Tape to Tape Recording (Dubbing)
Recording from one tape to another is called dubbing.
When dubbing tapes, make sure that the playback direction of Deck A and Deck B are the same.
When you record both sides of a tape, press REVERSE MODE to turn on the Reverse Mode.
It is preferable that the type of tape (Type I or Type II) you record from be the same as the type you
record onto.
How to Use DUBBING ———————————————————
1. Press TAPE ™ £ , then 7 STOP.
2. Insert the source cassette you want to copy from into Deck A for
playback.
Insert the cassette so that it will be played in the forward (3) direction.
3. Insert the blank or erasable cassette you want to copy onto into
Deck B for recording.
Insert the cassette so that it will be recorded in the forward (3) direction.
4. Press DUBBING.
DUBBING
Deck A and Deck B start simultaneously.
To stop dubbing, press 7 STOP.
When dubbing, you can hear Sound Mode effects through the speakers or headphones. However, the
sound is dubbed without Sound Mode effects.
29
EN.CA-D432/452TR[E]/f
29
98.3.26, 10:57 PM
English
Using the Timer
PROGRAM
/RANDOM
RDS
CONTROL
DISC
AM
FM
REPEAT
DISC
EDIT
DISC
PTY/EON
SLEEP
MODE
SELECT +
FM MODE
S.A.BASS
REPEAT
TAPE A
TAPE B
DIRECTION
DISC 1
DISC 2
DISC 3
CD CONTROL
AUX
MULTI CONTROL
SLEEP
DISPLAY MODE SOUND
–
SET
TIMER/CLOCK
TAPE CONTROL
REC PAUSE
+
VOLUME
–
RM-SED452TRU REMOTE CONTROL
Display
Clock, timer-on time etc.
Timer indicator
When the System is being used, the display shows other items as well.
However, we have only shown the items described in this section.
The timers let you control recording and listening functions automatically.
Three types of timers are available:
Daily Timer — Use this timer to set wake up everyday to music from any source, instead of an
alarm clock.
Recording Timer — Unattended recording of radio broadcasts. You can set the starting time and
stopping time of the recording.
Sleep Timer — Fall asleep and have your Unit turn off automatically after a certain length of time.
Note: When operating the Daily Timer and Recording Timer, always set the clock first. If the clock is not
set, the Daily Timer and Recording Timer functions cannot be used. For details, refer to “Setting the
Clock” on page 8.
30
EN.CA-D432/452TR[E]/f
30
98.3.26, 10:57 PM
English
Setting the Daily Timer
With this timer you can wake up to music from a CD, tape, your favourite radio program.
You can set the Daily Timer whether the Unit is on or off.
Procedure For Setting the Daily Timer
1. Press TIMER/CLOCK so that “DAILY” appears on the display.
The DAILY indicator flashes on the display.
•
Each time you press the button, the timer setting indication changes as follows:
DAILY = ON TIME (flashes) = REC = ON TIME (flashes) = Clock setting = Cancelled
(current source) = (back to the beginning)
Note: If the clock has not been set, even if TIMER/CLOCK is pressed you cannot select the Daily
Timer.
2. Press TIMER/CLOCK again.
After “ON TIME” flashes for 2 seconds, it switches to the on-time setting display.
\
Flashing
3. Set the time you want the Unit to turn on.
Press 4 P. DOWN or ¢ P. UP on the MULTI CONTROL to adjust the hours and press SET .
Then press 4 P. DOWN or ¢ P. UP to adjust the minutes and press SET.
\
•
After adjusting the minutes and pressing SET, “OFF TIME” flashes for two seconds and on-time
setting is completed.
4. Set the time you want the Unit to turn off.
Press 4 P. DOWN or ¢ P. UP on the MULTI CONTROL to adjust the hours and press SET.
Then press 4 P. DOWN or ¢ P. UP to adjust the minutes and press SET.
\
•
•
When the off-time has been set, the indication on the display changes to the source selection.
To select the source to be played, press 4 P. DOWN or ¢ P. UP on the MULTI CONTROL
until your choice is shown.
5. Select the source you want to listen to.
To use a CD as the source:
1. Press 4 P. DOWN or ¢ P. UP on the MULTI CONTROL repeatedly until
“- CD - - -” flashes on the display and press SET.
2. Press 4 P. DOWN or ¢ P. UP on the MULTI CONTROL repeatedly to select the
CD disc number to be played and press SET .
If you press SET without selecting a disc, the last disc played by the Unit will be used.
3. Press 4 P. DOWN or ¢ P. UP on the MULTI CONTROL repeatedly to select the
CD track number to be played and press SET.
If you press SET without selecting a track, playback will start from the first track on the CD.
31
EN.CA-D432/452TR[E]/f
31
98.3.26, 10:57 PM
English
To use the Tuner as the source
(Possible only after presetting stations.):
1. To listen to FM, press 4 P. DOWN or ¢ P. UP on the MULTI CONTROL repeatedly
until “TUNER FM” flashes and press SET.
To listen to AM, press 4 P. DOWN or ¢ P. UP on the MULTI CONTROL repeatedly
until “TUNER AM” flashes and press SET.
or
2. Press 4 P. DOWN or ¢ P. UP on the MULTI CONTROL repeatedly to select the
station to be listened to as a preset channel and press SET.
To use a Cassette Deck as the source:
Press 4 P. DOWN or ¢ P. UP on the MULTI CONTROL repeatedly until “TAPE”
flashes on the display and press SET.
6. Setting the Volume Level.
Press 4 P. DOWN or ¢ P. UP on the MULTI CONTROL to adjust the volume.
VOL - 10: Sets the volume level to 10.
VOL - 15: Sets the volume level to 15.
VOL - 20: Sets the volume level to 20.
VOL - - -: Sets the volume to the last volume setting used.
7. Press SET.
The DAILY indicator stops flashing and remains lit. The on-time, off-time, playback source (including
the disc number and track number if a CD source is selected), and volume level appears on the display
Turn the power off if you made the timer settings with the power turned on.
A few seconds before the on-time, the Unit automatically turns on the power. When the on-time
comes, playback starts using the selected source. A few seconds before the off-time, “OFF” flashes on
the display. When the off-time comes, the power is automatically turned off.
If a button is pressed when the Daily Timer is operating, playback continues but the timer is cancelled.
Before turning off the Unit
If the source is a CD, make sure that there is a CD in the selected disc number.
If the source is a tape:
• The tape in the deck corresponding to the Deck indicator mark is played. Make sure that there is a
tape in the selected Cassette Deck.
• Check that the tape direction is correct. This is important especially when Reverse Mode is off.
• Set Reverse Mode on if you want to play both sides of the tape.
Select the Sound Mode if you want to listen using a Sound Mode effect.
To change the Daily Timer setting
To change the settings for the Daily Timer, repeat the setting procedure from the beginning.
Turning the Daily Timer On and Off ————————————
Once the Daily Timer has been set it will be activated at the same time every day until the setting is
turned off.
To turn the Daily Timer off, press TIMER/CLOCK until “DAILY” appears on the display. Press
CANCEL/DEMO. “OFF”appears on the display and the DAILY indicator goes out.
To turn the Daily Timer on again, press TIMER/CLOCK until “DAILY” appears on the display, then
press SET. The Timer on-time, off-time, payback source (including the disc number and track number if a
CD source is selected), and volume level appear on the display, and the DAILY indicator lights up.
32
EN.CA-D432/452TR[E]/f
32
98.3.26, 10:57 PM
Setting the Recording Timer
With the Recording Timer you can make a tape of a radio broadcast automatically whether or not you are
home. For the timer to work correctly, you need to make sure of the following in addition to setting the
time for the Tuner and Cassette Deck to come on:
You can set the Recording Timer whether the Unit is on or off.
The tape you want to record onto must be in Deck B.
Procedure for Setting the Recording Timer
1. Press TIMER/CLOCK repeatedly until “REC” appears on the display.
The REC indicator flashes on the display.
•
Each time you press the button, the timer setting indication changes as follows:
DAILY = ON TIME (flashes) = REC = ON TIME (flashes) = Clock setting = Cancelled
(current source) = (back to the beginning)
Note: If the clock has not been set, even if TIMER/CLOCK is pressed you cannot select the Recording
Timer.
2. Press TIMER/CLOCK again.
After “ON TIME” flashes for 2 seconds, it switches to the time setting display.
3. Set the time you want the Unit to be turned on.
Press 4 P. DOWN or ¢ P. UP on the MULTI CONTROL to adjust the hours and press SET. Then
press 4 P. DOWN or ¢ P. UP to adjust the minutes and press SET .
4. Set the time you want the Unit to be turned off.
Press 4 P. DOWN or ¢ P. UP on the MULTI CONTROL to adjust the hours and press SET. Then
press 4 P. DOWN or ¢ P. UP to adjust the minutes and press SET.
5. Select the Recording band.
Press 4 P. DOWN or ¢ P. UP on the MULTI CONTROL to select “TUNER FM” or “TUNER
AM” and press SET.
6. Select the preset channel for the station to be recorded.
Press 4 P. DOWN or ¢ P. UP on the MULTI CONTROL to select.
7. Press SET.
The REC indicator stops flashing and remains lit. The on-time, off-time, and Recording band
(“TUNER FM” or “TUNER AM”) appear on the display.
Turn the power off if you made the timer settings with the power turned on.
A few seconds before the on-time for the recording, the Unit automatically turns on the power. When
the on-time comes, recording starts using the selected source. A few seconds before the off-time,
“OFF” flashes on the display. When the off-time comes, the power is automatically turned off.
Before the timer starts
Check that tape direction is correct. This is important especially when Reverse Mode is off.
Set Reverse Mode on if you want to record on both sides of the tape.
The volume level is automatically set to 0 when Recording Timer starts.
It is very easy, and can be very disappointing, to forget to put in a
tape, or to accidentally leave a tape in Deck B you don’t want
recorded over. Although this happens to almost everyone at one time
or another, we hope it won’t happen to you!
To change the Recording Timer setting
Repeat the setting procedure from the beginning.
33
EN.CA-D432/452TR[E]/f
33
98.3.26, 10:57 PM
English
CAUTION: If the Unit is unplugged, or a power failure occurs, the timer
setting will be erased in a few days. If the settings are erased in this
way, reset the timer settings.
English
Turning the Recording Timer On and Off —————————
Once the Recording Timer has been used, the setting is maintained but the Timer is set to off.
To turn the Recording Timer off before the timer starts, press TIMER/CLOCK repeatedly until
“REC” appears on the display, then press CANCEL/DEMO. “OFF” appears on the display and the REC
indicator goes out.
To record at the same time again, press TIMER/CLOCK repeatedly until “REC” appears on the
display, then press SET. The on-time, off-time, and Recording band (“TUNER FM” or “TUNER AM”)
appear on the display, and the REC indicator lights up.
CAUTION: If the Unit is unplugged, or a power failure occurs, the timer
setting will be erased in a few days. If the settings are erased in this
way, reset the timer settings.
Setting the Sleep Timer
Use the Sleep Timer to turn the Unit off after a certain number of minutes when it is playing. By setting
this timer, you can fall asleep to music and know your Unit will turn off by itself rather than play all
night.
You can only set the Sleep Timer when the Unit is on and a source is playing.
To set the SLEEP Timer, follow this procedure:
1. With the Unit on and a source playing, press SLEEP on the Remote
Control.
SLEEP
“SLEEP” appears on the display.
2. Set the length of time you want the source to play before shutting
off.
•
Each time you press this button while the “SLEEP” indicator is flashing, it changes the number of
minutes shown on the display in this sequence:
= 10 = 20 = 30 = 60 = 90 = 120 = Cancelled = (back to the beginning)
When the number of minutes you want shows on the display, just wait 5 seconds until the indicator stops
flashing, and remains lit.
The Unit is now set to turn off after the number of minutes you set.
To change the Sleep Timer setting
Press SLEEP until the number of minutes you want appears on the display.
To cancel the Sleep Timer setting
Press SLEEP until the SLEEP indicator goes out on the display.
Turning off the Unit also cancels the Sleep Timer.
34
EN.CA-D432/452TR[E]/f
34
98.3.26, 10:57 PM
Since each timer can be set independently, you may wonder what happens if the settings overlap. Here are
the priorities for each timer:
The Recording Timer always has priority. This means that:
• If another timer is set to come on during a time when the Recording Timer is operating, the other
timer just will not come on at all, so you will always get the entire program on tape.
• If the Recording Timer is set to come on while another timer is operating, the other timer will shut
off 10 seconds before the Recording Timer is set to turn on, and the Recording Timer will then take
over.
If the Sleep Timer is set while the Daily Timer is operating, the Sleep Timer will take over.
However, if the Daily Timer is set to come while the Sleep Timer is operating, the Daily Timer will
take over.
Example 1
Setting
OFF
ON
Recording Timer
Operation
OFF
ON
OFF
Sleep Timer
22:00
22:30
22:00
23:00
22:30
The Recording Timer has priority.
Example 2
Setting
ON
Operation
OFF
ON
OFF
21:30
22:30
Recording Timer
ON
OFF
Daily Timer
21:30
22:00
22:30
23:00
The Recording Timer has priority.
35
EN.CA-D432/452TR[E]/f
35
98.3.26, 10:57 PM
English
Timer Priority
English
Care and Maintenance
Compact Discs
Cassette Tapes
Handle your compact discs, cassette tapes, and
Cassette Deck carefully, and they will last a
long time.
•
•
•
•
•
•
•
•
Remove the CD from the case by holding
it at the edges while pressing the centre
hole lightly.
Do not touch the shiny surface of the CD,
or bend the CD.
Put the CD back in its case after use to
prevent warping.
Be careful not to scratch the surface of the
CD when placing it back in the case.
Avoid exposure to direct sunlight,
temperature extremes, and moisture.
If the tape is loose in its cassette, take
up the slack by inserting a pencil in
one of the reels and rotating.
If the tape is loose, it may get
stretched, cut, or caught in the cassette.
•
Do not touch the tape surface.
•
Do not store the tape:
- In dusty places
- In direct sunlight or heat
- In moist areas
- On a TV or speaker
- Near a magnet
A dirty CD may not play correctly. If a CD
does become dirty, wipe it with a soft cloth
in a straight line from centre to edge.
CAUTION: Do not use any solvent
(for example, conventional record cleaner,
spray thinner, benzine, etc.) to clean a CD.
Cassette Deck
•
If the heads, capstans, and pinch-rollers of the Cassette Deck
become dirty, the following will occur:
- Loss of sound quality
- Discontinuous sound
- Fading
- Incomplete erasure
- Difficulty recording
•
Clean the heads, capstans, and pinch-rollers using a cotton
swab moistened with alcohol.
Moisture Condensation
Moisture may condense on the lens inside
the Unit in the following cases:
• After starting the heating in the room.
• In a damp room.
• If the Unit is brought directly from a
cold to a warm place.
Should this occur, the Unit may malfunction. In this case, leave the Unit turned on
for a few hours until the moisture evaporates, unplug the AC power cord, and then
plug it in again.
Pinch-rollers
Capstans
General Notes
In general, you will have the best performance by keeping your
tapes, CDs, and the mechanism clean.
• Store tapes and CDs in their cases, and keep them in cabinets
or on shelves.
• Keep the Cassette Deck’s tape doors and the CD trays closed
when not in use.
Heads
•
If the heads become magnetized, the Unit will produce noise
or lose high frequencies.
•
To demagnetize the heads, turn off the Unit, and use a head
demagnetizer (available at electronics and record shops).
36
EN.CA-D432/452TR[E]/f
36
98.3.26, 10:57 PM
•
•
English
Troubleshooting
If you are having a problem with your System, check this list for a possible solution before calling for service.
If you cannot solve the problem from the hints given here, or the Unit has been physically damaged, call a qualified person, such as your
dealer, for service.
Symptom
Possible Cause
Action
No sound is heard.
Connections are incorrect, or loose.
Check all connections and make corrections. (See pages 4 - 5.)
Unable to record.
Cassette record protect tabs are removed.
Cover holes on back edge of cassette with
tape.
Poor radio reception
•
•
•
•
•
The antenna is disconnected.
The AM Loop Antenna is too close to
the Unit.
The FM Wire Antenna is not properly
extended and positioned.
•
Reconnect the antenna securely.
Change the position and direction of the
AM Loop Antenna.
Extend FM Wire Antenna to the best
reception position.
The CD skips.
The CD is dirty or scratched.
Clean or replace the CD.
Unable to operate the Remote Control.
•
•
Remove the obstruction.
•
Replace the batteries.
•
The path between the Remote Control
and the sensor on the Unit is blocked.
The batteries have lost their charge.
The CD tray cannot be opened.
The main AC power cord is not plugged in.
Plug in the AC power plug.
The CD does not play.
The CD is upside down.
Put the CD in with the label side up.
Operations are disabled.
The built-in microprocessor has malfunctioned due to external electrical interference.
Unplug the Unit then plug it back in.
The cassette door cannot be opened.
During tape playing, the power cord was
unplugged.
Plug in the power cord, press
press 0 .
, and then
37
EN.CA-D432/452TR[E]/f
37
98.3.26, 10:57 PM
English
Specifications
Amplifier Section
Output Power (IEC 268-3/DIN) 47 watts per channel, min. RMS, both channels driven into 6 ohms at 1 kHz
with no more than 0.9% total harmonic distortion.
Input Sensitivity/Impedance (1 kHz)
AUX 300 mV/50 kohms
Speaker terminals 6 - 16 ohms
Cassette Deck Section
Frequency Response
Type II (CrO2) : 50 - 14,000 Hz
Type I (NORMAL) : 50 - 14,000 Hz
Wow And Flutter 0.15% (WRMS)
CD Automatic Changer Section
CD Capacity
Dynamic Range
Signal-To-Noise Ratio
Wow And Flutter
3 discs
85 dB
90 dB
Unmeasurable
Tuner Section
FM Tuner
Tuning Range 87.5 - 108.0 MHz
AM Tuner
Tuning Range
MW 522 - 1,629 kHz
LW 144 - 288 kHz
Dimensions 265 × 315 × 340 mm (W/H/D)
(10-7/16 × 12-7/16 × 13-7/16 inches)
Mass 7.8 kg (17.2 lbs)
Accessories
AM (MW/LW) Loop Antenna (1)
Remote Control (1)
Batteries R6P (SUM-3)/AA (15F) (2)
FM Wire Antenna (1)
Power Specifications
Power Requirements AC 230 V , 50 Hz
Power Consumption 125 watts
10 watts (in standby mode)
Design and specifications are subject to change without notice.
38
EN.CA-D432/452TR[E]/f
38
98.3.26, 10:57 PM
VICTOR COMPANY OF JAPAN, LIMITED
EN, GE, FR, NL, SP, IT
D432T/452TR[E]/Cover
6
V
J
3/25/98, 8:54 PM
C
0498TNMNATJEM