1
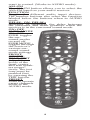
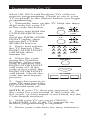
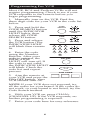
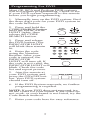
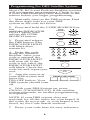
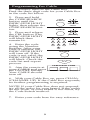
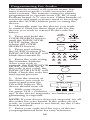
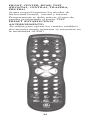
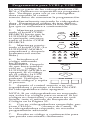
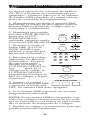
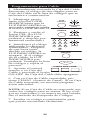
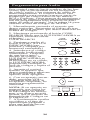
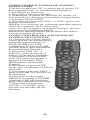
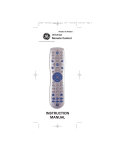
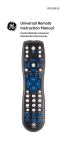
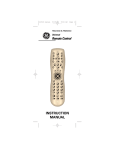
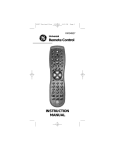
Universal
Remote Control
INSTRUCTION
MANUAL
RM24925
Thank you for purchasing the GE Universal
Remote Control. This product is designed
to provide years of service operating a wide
variety of video and audio equipment.
Please retain this guide for future reference.
Table of Contents
Install the Batteries
1
Button Description
2-4
Programming for TV
5
Programming for VCR
6
Programming For DVD
7
Programming For DBS System
8
Programming For Cable
9
Programming For Audio
10
Programming For AUX
11
Operating Audio Function
12-13
Sleep Functions
14
Menu Functions
15
Programming With Code Search
16
Identifying Codes For Your Remote
17
Trouble Shooting
18
Warranty
19
Lost Codes
19
This Universal Remote Control is already
programmed for most GE, RCA and ProScan
TVs, VCRs, DBS Systems, DVD Players, and
Audio/Video Receivers.
NOTE: For users of GE, RCA and ProScan
DBS Products, older DBS models require that
the DISPLAY Button on this remote be used
to make program selections. Use the SELECT
Button for making program selections on
newer GE, RCA and ProScan DBS models.
Battery Installation
Your Universal Remote Control requires 2 AAA
alkaline batteries.
To install the batteries:
1. Turn the remote over and push down on the
cover and slide it off.
2. . . . . . . . . . . . . . . . . . . . . . . . . . . . . . . . . . . . . . . . . . . .
Insert the batteries, matching the batteries to the (+)
mark inside the battery case.
3. Slide the battery cover back into place.
NOTE: Programmed codes will remain in memory
for a short period of time allowing for battery
replacement. If batteries have been dead for a
prolonged period of time, reprogramming may be
1
Button Description
INDICATOR LIGHT
The Indicator Light flashes to show that the
remote is working.
ON•OFF
The ON•OFF button operates the same as
your original remote.
NOTE: Some GE, RCA and ProScan models
require you to press the device button to turn
the device on and the ON•OFF button to
turn the device off.
TV, VCR, DVD, SAT, AUDIO, AUX, CBL
The TV, VCR, DVD, SAT, AUDIO-AUX, and
CBL buttons are used to select the device you
want to control.
VOL & CHAN
The VOL (Volume) and CHAN (Channel)
buttons increase or decrease the channel
numbers or volume.The CHANNEL buttons
also control the SKIP functions for DVD and
CD Player.
MUTE
Mutes volume on the TV.
PREV CHAN
The PREV CHAN button allows you to go to
the previous channel you selected. Operates
the same as Last Channel, Go Back or Recall
on your original remote.
CODE SEARCH
Used to program the remote or to search
through codes.
GUIDE
Brings up the on-screen TV program guide if
your TV has that feature.
DISP
Display Button shows the date and the time
if your TV or VCR has that feature.
NAVIGATION BUTTONS & SELECT
Used to move through on-screen menuing
and guides. With some DBS models the DISP
button should be used to select the highlighted item. Use the navigation buttons to
move the highlighted choice up, down, left
or right.
MENU•PROG
Brings up the Main Menu. If you already in
the menu system, press SELECT to select a
highlighted choice. Use the arrows buttons to
2
move through the Menu Selection.
CLEAR
Removes the on screen display to return to
normal viewing.
0-9
The number buttons operates the same as on
your original remote, and are used for entering device codes.
ENTER
The ENTER button is used to complete channel selection for some brands of TV. It is also
used to complete the code entry process.
TV/VCR
The TV/VCR button operates the TV/VCR
function of your TV.
REW, PLAY, FF, REC, STOP, PAUSE
These buttons operate the same as on your
original VCR or remote. You must press the
REC button twice to begin recording. The
REW and FF buttons also control the Reverse
and Forward functions for DVD and CD
Player.
PIP, SWAP & INPUT
PIP (Picture-in-Picture) and SWAP operate
your television’s Picture-in-Picture features.
INPUT selects the video input of your TV if
equipped with this feature.
SLEEP
The SLEEP button allows you to set a time
for you to turn off your TV automatically.
Button Description For Audio
Operation
Press AUDIO device button to enable the
AUDIO MODE Audio functions indicated by
pink descriptions
LEVEL+/LEVELSets the level of the speakers during test tone
mode.
DSP ON•OFF
Enables the receiver’s Digital Sound
Processing Mode.
DSP MODE
When the DSP mode is enabled, pressing this
button allows the user to toggle through the
various DSP modes.
CD, TAPE, TUNER, TV, VIDEO
The CD, TAPE, TUNER, TV and VIDEO buttons are used to directly select the device you
3
want to control. (Works in AUDIO mode).
AM•FM
The AM•FM button allows you to select the
AM•FM band on your audio receiver.
FUNCTION
Toggles the different audio input devices.
The number buttons also select the function
labeled below the buttons when in AUDIO
mode.
DELAY-, ON, DELAY+
Increases or decreases the delay between
the surround and main speakers when the
receiver is in the surround sound mode.
ON•OFF,
SURR. MODE
ON•OFF
SURR. toggles
the surround modes
on and off.
SURR MODE
toggles through
the receiver’s
various surround sound
mode settings.
FRONT,
CENTER,
REAR, TEST
Adjust the
levels of the
front, center,
and rear speakers respectively. The test
tone must be
enabled first
by pressing the
TEST button.
PRESET
Used to operate
preset channels
while in the
AUDIO mode.
4
Programming For TV
Most GE, RCA and ProScan TVs will not
require programming. Check to see if your
TV responds to the remote before you begin
programming.
1. Manually turn on the TV. Find the three
digit code for your TV
CODE
in the code list below.
SEARCH
2. Press and hold the
CODE SEARCH button
until the INDICATOR
LIGHT lights, then
release the CODE
SEARCH button.
3. Press and release
the TV button (The
INDICATOR LIGHT
will blink then
remain lit.
INDICATOR
LIGHT
TV
(BLINK)
1
2
3
4
5
6
7
8
9
(OFF)
0
4. Enter the code
using the Number
Buttons. After your
code is entered, the
INDICATOR LIGHT
will turn off. If the
code is not valid, the
INDICATOR LIGHT
will blink. Check the
code list and repeat
process.
ON•OFF
CHAN +
TV CODE
5. Aim the remote at
your TV and press the
ON•OFF button. Your
TV should turn off.
NOTE: If your TV does not respond, try all
the codes for your brand. If the codes do
not work, or your brand is not listed, try the
Code Search method.
6. With your TV on, press CHAN+
(CHANNEL UP). If the TV responds, no
further programming is required.
7. Enter your code here for easy reference.
5
Programming For VCR
Most GE, RCA and ProScan VCRs will not
require programming. Check to see if your
VCR responds to the remote before you
begin programming.
1. Manually turn on the VCR. Find the
three digit code for your VCR in the code list
below.
CODE
SEARCH
2. Press and hold the
CODE SEARCH button
until the INDICATOR
LIGHT lights, then
release the CODE
SEARCH button.
3. Press and release
the VCR button (The
INDICATOR LIGHT
will blink then remain
lit.
4. Enter the code
using the Number
Buttons. After your
code is entered, the
INDICATOR
LIGHT will turn off. If
the code is not valid,
the INDICATOR LIGHT
will blink. Check the
code list and repeat
process.
5. Aim the remote at
your VCR and press the
ON•OFF button. Your
VCR should turn off.
INDICATOR
LIGHT
VCR
(BLINK)
1
2
3
4
5
6
7
8
9
(OFF)
0
ON•OFF
CHAN +
VCR CODE
NOTE: If your VCR does not respond, try
all the codes for your brand. If the codes do
not work, or your brand is not listed, try the
Code Search method.
6. With your VCR on, press CHAN+
(CHANNEL UP). If the VCR responds, no
further programming is required.
7. Enter your code here for easy reference.
6
Programming For DVD
Most GE, RCA and ProScan DVD systems
will not require programming. Check to see
if your DVD system responds to the remote
before you begin programming.
1. Manually turn on the DVD system. Find
the three digit code for your DVD system in
the code list below.
2. Press and hold the
CODE SEARCH button
until the INDICATOR
LIGHT lights, then
release the CODE
SEARCH button.
3. Press and release
the DVD button (The
INDICATOR LIGHT
will blink then remain
lit.
4. Enter the code
using the Number
Buttons. After your
code is entered, the
INDICATOR
LIGHT will turn off. If
the code is not valid, the
INDICATOR LIGHT will
blink. Check the code
list and repeat process.
5. Aim the remote at
your DVD system and
press the ON•OFF button. Your DVD system
should turn off.
CODE
SEARCH
INDICATOR
LIGHT
DVD
(BLINK)
1
2
3
4
5
6
7
8
9
(OFF)
0
ON•OFF
DVD CODE
6. If the DVD System responds, no further
programming is required.
NOTE: If your DVD does not respond, try
all the codes for your brand. If the codes do
not work, or your brand is not listed, try the
Code Search method.
7. Enter your code here for easy reference.
CODE LIST
7
Programming For DBS Satellite System
Most GE, RCA and ProScan Satellite systems
will not require programming. Check to see
if your DBS Satellite system responds to the
remote before you begin programming.
1. Manually turn on the DBS system. Find
the three digit code for your DBS
system in the code list below.
2. Press and hold the CODE SEARCH button
CODE
SEARCH
until the INDICATOR
LIGHT lights, then
INDICATOR
release the CODE
LIGHT
SEARCH button.
SAT
3. Press and release
the DBS button (The
INDICATOR LIGHT
will blink then
remain lit.
(BLINK)
4. Enter the code
using the Number
Buttons. After your
code is entered, the
INDICATOR LIGHT
will turn off. If the
code is not valid, the
INDICATOR LIGHT
will blink. Check the
code list and repeat process.
5. Aim the remote at
your DBS system and
press the
ON•OFF button. Your
DBS system should turn
off.
1
2
3
4
5
6
7
8
9
(OFF)
0
ON•OFF
CHAN +
SATELLITE CODE
6. With your DBS System on, press
CHAN+ (CHANNEL UP). If the satellite
system responds, no further programming
is required.
NOTE: If your DBS system does not
respond, try all the codes for your brand. If
the codes do not work, or your brand is not
listed, try the Code Search method.
7. Enter your code here for easy reference.
8
Programming For Cable
1. Manually turn on the Cable Box.
Find the three digit code for your Cable Box
in the code list below.
2. Press and hold
the CODE SEARCH
button until the
INDICATOR LIGHT
lights, then release the
CODE SEARCH button.
3. Press and release
the CBL button (The
INDICATOR LIGHT
will blink then
remain lit.
CODE
SEARCH
INDICATOR
LIGHT
CABLE
(BLINK)
4. Enter the code
using the Number
Buttons. After your
code is entered, the
INDICATOR LIGHT
will turn off. If the
code is not valid, the
INDICATOR LIGHT
will blink. Check the
code list and repeat
process.
1
2
3
4
5
6
7
8
9
(OFF)
0
ON•OFF
CHAN +
5. Aim the remote at
your CABLE and press
the ON•OFF button.
Your CABLE should
turn off.
CABLE BOX CODE
6. With your Cable Box on, press CHAN+
(CHANNEL UP). If the Cable Box responds,
no further programming is required.
NOTE: If your Cable Box does not respond,
try all the codes for your brand. If the codes
do not work, or your brand is not listed, try
the Code Search method.
7. Enter your code here for easy reference.
9
Programming For Audio
This remote control will operate many features found in audio/video receivers and
mini-systems. The remote control is already
programmed to operate most GE, RCA and
ProScan brand A/V receivers. Other brands of
receivers and mini-systems need to be set-up
under the AUDIO button prior to using the
device.
1. Manually turn on the device you wish
to control. Find the three digit code for the
device you wish to control in the code list
below.
CODE
SEARCH
2. Press and hold the
CODE SEARCH button
until the INDICATOR
LIGHT lights, then
release the CODE
SEARCH button.
3. Press and release
the AUDIO button (The
INDICATOR LIGHT will
blink then remain lit.
4. Enter the code using
the Number Buttons.
After your code is
entered, the INDICATOR
LIGHT will turn off. If
the code is not valid, the
INDICATOR LIGHT will
blink. Check the code list
and repeat process.
5. Aim the remote at
the device you wish to
control and press the
ON•OFF button. The
device should turn off.
INDICATOR
LIGHT
AUDIO
(BLINK)
1
2
3
4
5
6
7
8
9
(OFF)
0
ON•OFF
VOL
AUDIO CODE
CD RCVR LD
6. With your device
on, press VOL+ (Volume
up). If the device responds, no further programming is required.
NOTE: If your device does not respond, try all
the codes for your brand. If the codes do not
work, or your brand is not listed, try the Code
Search method.
7. Enter your code and the type of device
youprogrammed here for easy reference.
10
Programming For Second Device
If you have not programmed the
AUDIO•AUX button for audio components,
you can assign a second TV, DVD, CD player, VCR, Satellite System, or Cable Box to it.
1. Manually turn on the device you wish
to control. Find the three digit code for the
device you wish to program in the code list.
2. Press and hold
the CODE SEARCH
button until the
INDICATOR LIGHT
lights, then release the
CODE SEARCH button.
3. Press and release
the AUX button (The
INDICATOR LIGHT
will blink then remain
lit.)
4. Enter the code
using the Number
Buttons. After your
code is entered, the
INDICATOR
LIGHT will turn off. If
the code is not valid,
the INDICATOR
LIGHT will blink.
Check the code list and
repeat process.
5. Aim the remote at
the device you wish to
control and press the
ON•OFF button. The
device should turn off.
6. With your device
on, press CHAN+
(CHANNEL UP) or
ON•OFF button. If the device responds, no
further programming is required.
NOTE: If your device does not respond, try
all the codes for your brand. If the codes do
not work, or your brand is not listed, try the
Code Search method.
7. Enter your code and the type of device
you programmed here for easy reference.
11
Operating Audio Functions
NOTE: Not all functions work for all brands.
TURNING ON THE RECEIVER OR MINISYSTEM
Point the remote control at the reciever and
press the AUDIO button. The receiver should
turn on. In some cases, it may require pressing the AUDIO button and
then the ON•OFF button
to turn the system on.
SELECTING
A DEVICE INPUT
Device inputs such as CD
Player or Tape Deck may
be selected depending
on the features of your
receiver or mini-system.
Input selection may be
made either by pressing
the labeled number button, or by pressing the
FUNCTION button to
toggle through the inputs
available on your system.
USING THE NUMBER B
UTTONS TO
CHANGE AUDIO
INPUTS
To select a device, press the
number button (1-6)
that corresponds with the
device you want to
operate (CD, TAPE,
TUNER, TV, or VIDEO).
USING THE FUNCTION
BUTTON TO
CHANGE AUDIO DEVICES
To select a device, press the FUNCTION button
until the input you want to operate appears
on your system.
OPERATING A CD PLAYER
OR TAPE DECK
Use the Play, Forward, Reverse, Record, Stop
and Pause buttons for CD players and tape
decks. In some cases, the Preset buttons
(CHAN+/CHAN-) may work in changing
tracks on CD players.
OPERATING THE AM/FM TUNER
12
1. Press the AUDIO button.
2. Press the TUNER (3) button.
3. Press the AM/FM button to toggle
between AM and FM.
4. Use the Preset (CHAN+/CHAN-) buttons
to move up and down channel presets.
OPERATING A HOME THEATER
SURROUND SOUND SYSTEM
With GE receivers, a second press of the TV
button should turn the receiver on.
1. Turn the TV on.
2. Press the AUDIO button
3. Select the audio input either by using the
labeled number buttons or the
FUNCTION button.
4. Press the VOL+ or VOL- buttons to control
volume.
NOTE: The Volume buttons may operate both
TV and receiver volume at the same time.
If this presents a problem, it may be resolved
by disabling the TV speakers by going into the
TV menu.
CONTROLLING THE SURROUND SOUND
FEATURE
The Surround Sound feature may be turned
ON/OFF by pressing the SURR ON•OFF button.
1. Press the SURR MODE button until the
desired mode is found.
2. Press DELAY+ or DELAY- to achieve the
desired delay effect.
3. Press the DSP ON•OFF button to turn DSP
(Digital Sound Processor) ON or OFF.
4. Press the DSP Button until the desired effect
is achieved.
5. Press the TEST button to listen to speaker
levels.
6. Press FRONT, CENTER, or REAR buttons to
select speakers.
7. Press the LEVEL+ or LEVEL- buttons to
adjust speaker levels.
13
Sleep Function
The Sleep Function will turn off your TV
automatically after the user programs the
time interval from one (1) to ninety-nine (99)
minutes.
1. Press and hold
the SLEEP button. The
INDICATOR LIGHT
will stay lit. Release the
SLEEP button.
2. Enter time in
minutes using the
numerical keypad.
INDICATOR LIGHT
will go off. (Min.: 1
minute/keypad entry
0-1)
(Max.: 99 minutes/keypad entry 9-9)
3. Leave remote
aimed at television.
IMPORTANT: Sleep
Feature will not work
unless remote is left
aimed at television.
To Turn Off SLEEP Timer:
1. Sleep timer program will be cancelled
and reset to zero by either of the following:
Press and hold SLEEP button until
INDICATOR
LIGHT blinks or press ON•OFF button,
turning
TV off.
14
Menu Function
The Menu Function is used to make changes
in the selected settings such as setting color,
channels, timer, etc. The MENU button
invokes TV, and SAT modes. Each menu will
vary from brand to brand.
Entering the Menu Mode:
1. Push the device button
on the remote for the desired
menu screen.
2. Push the MENU button.
This allows you to view
the menu of the device
chosen. The menu should
now be visible on your
television.
3. While in Menu Mode,
these buttons will function as
follows:
Navigation LEFT/RIGHT
buttons will operate as cursor
left or right. Navigation UP/
DOWN buttons will operate
as cursor up or down.
MENU button applies to the
highlighted menu items.
Not all functions in competitive models and
brands of
televisions may be fully supported.
EXITING THE MENU MODE
To exit the Menu Mode and clear the screen,
push the device button you have chosen on
the remote.
NOTE: The remote will automatically exit
the Menu Mode after ten (10) seconds of
inactivity with no buttons being pushed.
15
Programming With Code Search
If your TV, VCR, DBS Satellite System, Cable
Box or Audio System does not respond after
you have tried all the codes for your brand,
or if your brand is not listed, try searching
your code by following the steps below:
1. Manually turn on the device you wish to
program.
2. Press and hold the
CODE SEARCH until
the INDICATOR LIGHT
lights, then release CODE
SEARCH.
3. Press and release
the device button for
the device you are
programming. The
INDICATOR LIGHT will
blink
once, then remain lit.
NOTE: For AUX programming (when not an audio
code) press AUX followed
by the device button.
4. Press and release
ON•OFF until your device
turns off.
5. When your device turns off, press
ENTER, the INDICATOR LIGHT will turn
off.
16
Identifying Codes From Your Universal
Remote
If you need to find the three-digit code for
your TV, VCR, DBS System, Cable Box or
Audio System after your device is set-up,
use this procedure.
1. Press and hold
CODE SEARCH until
the INDICATOR
LIGHT lights,
then release
CODE SEARCH.
2. Press and release
the device button
for the code you
are retrieving. The
INDICATOR LIGHT
will blink once.
NOTE: For AUX
retrieving, press AUX
button followed
by the device button.
3. Press and release
CODE SEARCH.
The INDICATOR
LIGHT will turn off.
4. Starting with 0 on the keypad, press
the number buttons in order (0-9) until the
INDICATOR LIGHT blinks.
5. The number which causes the
INDICATOR LIGHT to blink is the first
digit of your code.
6. Repeat Step 4 until you have retrieved
all three
17
Trouble Shooting
PROBLEM
SOLUTION
A) Replace the batterRed light not blinking ies with 2 new AAA
when you press any alkaline batteries.
B) Check if batteries
key.
are properly installed.
The remote does not
operate your video
devices.
A) Try all the codes
listed for your brand.
B) Try the Code
Search method.
Start Code Search
over again to locate
properlythe proper
Not performing com- code for full compatibility
mands properly
Problems programming a TV/VCR
Combo Unit
VCR not responding
Problems changing
channels
Try the VCR code for
your brand. Some
combo units, however, may require both a
TV and VCR code for
full operation.
As a safety feature on
your remote, you
must press the REC
button twice.
If your original
remote required
ENTER after a channel, press ENTER
after you select a
channel.
A) Make sure you
have new batteries
and you are aiming
your remote at your
device.
B) Check that batteries are properly
installed.
18
No response after
pressing a key
SOLUTION
Try using the
DISPLAY button to
make the selection
while in the Program
Guide.
Trouble Shooting Invalid Code for the
device. Check the
Code list and reprogram the Remote
90 Day Limited Warranty
Jasco Products Company warrants this
product to be free from manufacturing
defects for a period of ninety days from
the original date of consumer purchase.
This warranty is limited to the repair or
replacement of this product only and does
not extend to consequential or incidental
damage to other products that may be used
with this unit. This warranty is in lieu of
all other warranties express or implied.
Some states do not allow limitations on how
long an implied warranty lasts or permit
the exclusion or limitation of incidental or
consequential damages, so the above limitations may not apply to you. This warranty
gives you specific rights, and you may also
have other rights which vary from state to
state. If unit should prove defective within
the warranty period, return prepaid with
dated proof of purchase to:
Jasco Products Company
311 N.W. 122nd
Oklahoma City, OK 73114
LOST YOUR CODES?
Enclosed with this remote is a sticker on
which you should write the codes for each
device you programmed. Apply the sticker
to the back of the remote or somewhere convenient for future reference.
Also on the sticker is our website address
which, should you lose your codes or programming instructions, you can find available on our website:
www.jascoproducts.com
19
Gracias por comprar el Control Remoto
Universal GE. Este producto está diseñado
para proveerle años de servicio operando
una amplia variedad de equipo de video
y audio. Por favor guarde esta guía para
obtener referencias en el futuro.
Indice
Instale las Baterías . . . . . . . . . . . . . . . . . . . . . . . . . 20
Descripción de los Botones
. . . . . . . . . . . . 21-24
Programación para el televisor . . . . . . . . . . . . . . 25
Programación para la Videograbadora
. . . . . 26
Programación para el DVD
. . . . . . . . . . . . . . . 27
Programación para el Sistema de Satélite DBS . 28
Programación para Cable
. . . . . . . . . . . . . . . . 29
Programación para el Audio
. . . . . . . . . . . . . 30
Programación para el Botón AUX . . . . . . . . . . . 31
Como usar la Función de Audio . . . . . . . . . 32-33
Función de Apagado Automatico . . . . . . . . . . . 34
Función del Menu
. . . . . . . . . . . . . . . . . . . . . . 34
Programando con Busqueda de Códigos . . . . 35
Identificando Códigos para su Control Remoto
Universal . . . . . . . . . . . . . . . . . . . . . . . . . . . . . . . . 36
Guía de Problemas y Soluciones . . . . . . . . . 37-38
Codigo Listas . . . . . . . . . . . . . . . . . . . . . . . . . . 39-43
Este Control Remoto Universal ya se
encuentra programado para la mayoría de
los televisores, = videograbadoras, sistemas
DBS, sistemas DVD, y receptores de video o
audio de las marcas GE, RCA y ProScan.
NOTA: Para los usuarios de productos DBS
GE, RCA, o ProScan, los modelos antiguos
de DBS requieren que el Botón DISPLAY
en este control remoto se utilice para hacer
selecciones de programas. Utilice el Botón
SELECT para hacer selecciones de programas en los modelos nuevos de DBS de GE,
RCA y ProScan.
Instale las BaterÌas
Su Control Remoto Universal requiere 2
baterías alcalinas AAA. Para instalar las
baterías:
1. Voltee el control remoto y empuje hacia
abajo la cubierta y deslícela hacia afuera.
2. Inserte las baterías, igualando la marca (+)
de las baterías con la que se encuentra dentro del compartimento para las baterías.
3. Deslice la cubierta en su lugar.
NOTA: Puede ser necesario volver a programar el control remoto después de
remover las baterías.
20
Descripción de Botones
LUZ INDICADORA
La luz indicadora parpadea para mostrar
que el control remoto está trabajando.
ON-OFF (ENCENDIDO-APAGADO)
El botón ON-OFF opera de la misma manera que su control remoto original. NOTA:
Algunos modelos GE, RCA y ProScan requieren que usted presione el botón
del aparato para encender el aparato y el
botón ON-OFF para apagarlo.
TELEVISOR, VIDEOGRABADORA,
DVD, SAT, AUDIO-AUX, CABLE
Los botones TV, VCR, DVD, SAT, AUDIOAUX y CBL se usan para seleccionar el
aparato que desee controlar.
VOL / CHAN (VOLUMEN / CANAL)
Los botones VOL (Volumen) y CHAN
(Canal) aumentan o disminuyen el numero
del canal o el volumen.
MUTE (SILENCIO)
Silencia el volumen del televisor.
PREV CHAN (CANAL PREVIO)
El botón PREV CHAN le permite ir al canal
que seleccion ó previamente. Opera igual
que el botón Last Chanel (ultimo canal), Go
Back (regresar) o Recall
(revocar) de su control remoto original.
CODE SEARCH (BUSQUEDA DE
CÓDIGOS)
Se utiliza para programar el control remoto
o para buscar los códigos.
GUIDE (GUÍA)
Si su televisor tiene esta función, muestra
en la pantalla la guía para programar el
televisor.
DISP (MOSTRAR)
Si su televisor tiene esta función, el botón
DISP muestra la fecha y la hora.
BOTONES DE NAVEGACIÓN Y SELECT
(SELECCIONAR)
Se utilizan para moverse en el menu y guías
que se muestran en la pantalla. Con algunos
modelos DBS, se debe utilizar el botón DISP
para seleccionar la
opción resaltada. Utilice los botones de
navegación para mover la opción resaltada
hacia arriba, hacia abajo, hacia la derecha o
hacia la izquierda.
21
MENU-PROG (MENU/PROGRAMAR)
Muestra en la pantalla el Menu Principal.
Si usted ya se encuentra en el sistema del
menu, presione SELECT para seleccionar la
opción resaltada. Utilice los botones con flechas para moverse dentro del Menu.
CLEAR (DESPEJAR)
Remueve lo que está mostrado en la pantalla
para volver a la pantalla normal.
0-9
Los botones enumerados operan igual que
en su control remoto original y son utilizados para introducir los códigos de los
aparatos.
ENTER (INGRESAR)
El botón ENTER se utiliza para completar la
selección de canales para algunas marcas de
televisores. También se utiliza para completar el proceso de
introducción de códigos.
TV/VCR (TELEVISOR/VIDEO
GRABADORA)
El botón TV/VCR opera la función de televisor/videograbadora de su televisor.
REW, PLAY, FF, REC, STOP, PAUSE
(REGRESAR, REPRODUCIR,
ADELANTAR, GRABAR, PARAR, PAUSA)
Estos botones operan de la misma manera
que en su control remoto o video grabadora
original. Debe de presionar dos veces el
botón REC para comenzar a
grabar.
PIP, SWAP E INPUT
Los botones PIP (Pantalla dentro de otra
Pantalla) y SWAP operan las funciones de
pantalla dentro de otra pantalla de su televisor. El botón INPUT selecciona la señal de
video de entrada de su televisor, éste cuenta
con ésta función.
SLEEP (APAGADO AUTOMÁTICO)
El botón SLEEP le permite establecer cierto
tiempo para que su televisor se apague
automáticamente.
22
Descripción de Botones par la Operación de
Audio
Presione el botón AUDIO para habilitar las
funciones de la Modalidad AUDIO indicadas por las descripciones escritas en rosa
LEVEL+ / LEVEL- (NIVEL+ / NIVEL-)
Establece el nivel de las bocinas durante la
modalidad de prueba de tono.
DSP ON-OFF
Activa la Modalidad de Procesamiento de
Sonido Digital del receptor.
DSP MODE (MODALIDAD DSP)
Cuando se encuentra activada la modalidad
DSP, si presiona este botón, le permite al
usuario cambiar de modalidades DSP.
CD, TAPE, TUNER, TV, VIDEO
(DISCO COMPACTO, CASSETTE,
SINTONIZADOR, TELEVISOR, VIDEO)
Los botones CD, TAPE, TUNER, TV y
VIDEO se utilizan para seleccionar directamente el aparato que desea con trolar.
(Trabajan en la modalidad AUDIO),
AM-FM
El botón AM-FM le permite seleccionar la
banda AM o FM en su receptor de audio.
FUNCTION (FUNCIÓN)
Cambia la selección de los diferentes
aparatos con entrada auditiva. Los botones
numerados también
seleccionan la función etiquetada debajo
de los botones cuando se encuentra en la
modalidad AUDIO.
DELAY-, ON, DELAY+
Incrementa o disminuye la demora entre las
bocinas de sonido envolvente y las principales cuando el receptor se encuentra en la
modalidad de sonido envolvente.
ON-OFF, SURR. MODE (ENCENDIDOAPAGADO, MODALIDAD DE SONIDO
ENVOLVENTE)
Los botones ON-OFF SURR. Apaga o enciende las modalidades de sonido envolvente.
El botón SURR MODE cambia la selección
de las diversas selecciones de la modalidad
de sonido envolvente.
23
FRONT, CENTER, REAR, TEST
(FRONTAL, CENTRAL, TRASERA,
PRUEBA)
Ajusta respectivamente los niveles de
las bocinas frontal, central y trasera.
Primeramente se debe activar el tono de
prueba presionando el botón TEST.
PRESET (ESTABLECIDOS
ANTERIORMENTE)
Se utiliza para operar los canales establecidos anterior mente mientras se encuentra en
la modalidad AUDIO.
24
Programación para el televisor
La mayor parte de los televisores GE, RCA
y ProScan no requerir n ser programados.
Verifique para ver si su televisor responde
al control remoto antes de comenzar la programación.
1.
Manualmente encienda el televisor. Encuentre el código de tres dígitos para
su televisor en la lista de códigos que se
encuentra a continuación.
2.
Mantenga presionado el botón CODE
SEARCH hasta que la
LUZ INDICADORA
se encienda, entonces
suelte el botón CODE
SEARCH.
3.
Presione y
suelte el botón TV. (La
LUZ INDICADORA
parpadeará y después
permanecerá
encendida.)
4.
Introduzca
el código utilizando los Botones
Numerados. Después
de que haya introducido su código, la
LUZ INDICADORA se
apagará Si el código
no es válido, la LUZ
INDICADORA parpadeará. Verifique la
lista de códigos y repita
el proceso.
CODE
SEARCH
INDICATOR
LIGHT
TV
(BLINK)
1
2
3
4
5
6
7
8
9
(OFF)
0
ON•OFF
CHAN +
TV CODE
5.
Apunte el control remoto a su televisor y presione el botón ON-OFF. Su televisor debe apagarse.
NOTA: Si su televisor no responde, use
todos los códigos para su marca. Si los códigos no funcionan, o su marca no está listada,
trate el método de Busqueda de Códigos.
6. Con su televisor encendido, presione
CHAN+ (Avance de Canal). Si el televisor
responde, no necesita programación
adicional.
7. Escriba su código a continuación para que
25
Programación para VCR1 y VCR2
La mayor parte de las videograbadoras GE,
RCA y ProScan no requerirán ser programadas. Verifique para ver si su videograbadora responde al control
remoto antes de comenzar la programación.
1.
Manualmente encienda la videograbadora. Encuentre el código de tres dígitos
para su videograbadora en la lista de códigos que se encuentra a continuación.
2.
Mantenga presionado el botón CODE
SEARCH hasta que la
LUZ INDICADORA
se encienda, entonces
suelte el botón CODE
SEARCH.
3.
Mantenga presionado el botón VCR. (La
LUZ INDICADORA
parpadeará y después
permanecerá encendida.)
4.
Introduzca el
código utilizando
los Botones
Numerados. Después
de que haya introducido su código, la
LUZ INDICADORA se
apagará. Si el código
no es válido, la LUZ
INDICADORA parpadeará. Verifique la
lista de códigos y repita
el proceso.
CODE
SEARCH
INDICATOR
LIGHT
VCR
(BLINK)
1
2
3
4
5
6
7
8
9
(OFF)
0
ON•OFF
CHAN +
VCR CODE
5.
Apunte el control remoto a su videograbadora y presione el botón ON-OFF.
Su videograbadora debe apagarse.
NOTA: Si su videograbadora no responde,
usa todos los códigos para su marca. Si los
códigos no funcionan, o su marca no está
listada, trate el método de Busqueda de
Códigos en la Página 35.
6.
Con su videograbadora encendida, presione CHAN+
(Avance de Canal). Si
la videograbadora responde, no necesita
programación adicional.
7.
Escriba su código a continuación para
que pueda encontrarlo fácilmente.
Programación para el sistema DVD
La mayor parte de los sistemas DVD GE,
RCA y ProScan no requerirán ser programados. Verifique para ver si su sistema DVD
responde al control remoto antes de comenzar la programación.
1. Manualmente encienda el sistema DVD.
Encuentre el código de tres dígitos para su
sistema DVD en la lista de códigos que se
encuentra a continuación.
2. Mantenga presionado el botón CODE
SEARCH hasta que la
LUZ INDICADORA
se encienda, entonces
suelte el botón CODE
SEARCH.
CODE
SEARCH
INDICATOR
LIGHT
3. Presione y suelte el
botón DVD. (La LUZ
INDICADORA parpadeará y después permanecerá encendida.)
DVD
4. Introduzca el código 1
utilizando los Botones
Numerados. Después
4
de que haya intro7
ducido su código, la
LUZ INDICADORA se
apagará. Si el código
no es válido, la LUZ
INDICADORA
parpadeará. Verifique
la lista de códigos y
repita el proceso.
2
3
5
6
8
9
5. Apunte el control
remoto a su sistema
DVD y presione el
botón ON-OFF. Su
sistema DVD debe
apagarse.
(BLINK)
(OFF)
0
ON•OFF
DVD CODE
6. Si el sistema DVD
responde, no necesita
programación adicional.
NOTA: Si su sistema DVD no responde, use
todos los códigos para su marca. Si los códigos no funcionan, o su marca no está listada,
use el método de Busqueda de Códigos.
7. Escriba su código a continuación para
que pueda encontrarlo fácilmente.
27
Programación para el Sistema de Satélite
DBS
La mayor parte de los sistemas de Satélite
GE, RCA y ProScan no requerirán ser programados. Verifique para ver si su sistema
de Satélite DBS responde al control remoto
antes de comenzar la programación.
1. Manualmente encienda el sistema DBS.
Encuentre el código de tres dígitos para su
sistema DBS en la lista de códigos que se
encuentra a continuación.
2. Mantenga presionado
el botón CODE SEARCH
hasta que la LUZ
INDICADORA se
encienda, entonces suelte
el botón CODE SEARCH.
3. Presione y suelte el
botón DBS. (La LUZ
INDICADORA parpadeará y después permanecerá encendida.)
4. Introduzca el código
utilizando los Botones
Numerados. Después
de que haya introducido su código, la
LUZ INDICADORA se
apa
gará. Si el
código no es válido, la
LUZ INDICADORA
parpadeará.Verifique la
lista de códigos y repita
el proceso.
CODE
SEARCH
INDICATOR
LIGHT
SAT
(BLINK)
1
2
3
4
5
6
7
8
9
(OFF)
0
ON•OFF
CHAN +
SATELLITE CODE
5. Apunte el control
remoto a su sistema DBS
y presione el botón ONOFF. Su sistema DBS debe apagarse.
6. Si el sistema DBS responde, no necesita
programación adicional.
NOTA: Si su sistema DBS no responde, use
todos los códigos para su marca. Si los códigos no funcionan, o su marca no está listada,
use el método de Busqueda de Códigos.
7. Escriba su código a continuación para que
pueda encontrarlo fácilmente.
28
Programación para Cable
1. Manualmente encienda la Caja del Cable.
Encuentre el código de tres dígitos para su
Caja del Cable en la lista de códigos que se
encuentra a continuación.
2. Mantenga presionado el botón CODE
SEARCH hasta que la
LUZ INDICADORA se
encienda, entonces suelte
el botón CODE SEARCH.
3. Presione y suelte el
botón CBL. (La LUZ
INDICADORA parpadeará y después permanecerá encendida.)
4. Introduzca el código
utilizando los Botones
Numerados. Después
de que haya introducido su código, la
LUZ INDICADORA se
apagará. Si el código
no es válido, la LUZ
INDICADORA parpadeará. Verifique la lista
de códigos y repita el
proceso.
CODE
SEARCH
INDICATOR
LIGHT
CABLE
(BLINK)
1
2
3
4
5
6
7
8
9
(OFF)
0
ON•OFF
CHAN +
CABLE BOX CODE
5. Apunte el control
remoto a su Caja del
Cable y presione el botón
ON-OFF. Su Caja del Cable debe apagarse.
6. Con su Caja de Cable encendida, presione CHAN+ (Avance de Canal). Si su Caja
de Cable responde, no necesita programación adicional.
NOTA: Si su Caja de Cable no responde, use
todos los códigos para su marca. Si los códigos no funcionan, o su marca no está listada,
use el método de Busqueda de Códigos.
7. Escriba su código a continuación para
que pueda encontrarlo fácilmente.
Lista de Códigos para la Caja de Cable
29
Programación para Audio
Este control remoto haciá muchas de las funciones que se encuentran en los receptores
de video/audio y los sistemas de audio de
minicomponentes. El control remoto está
programado para operar la mayor parte de
receptores de video/audio de las marcas
RCA y ProScan. Otros marcas de receptores y
sistemas de audio e minicomponentes necesitan ser programados bajo el botón AUDIO
antes de usar el aparato. Vea la páina 14 para
obtener la lista de códigos de AUDIO.
1. Manualmente encienda el aparato que
desea controlar. Encuentre el código de tres
dígitos para el aparato que desea controlar en
la lista de códigos.
2. Mantenga presionado el botón CODE
SEARCH hasta que la LUZ INDICADORA se
encienda, entonces suelte
el botón
CODE
CODE SEARCH.
SEARCH
3. Presione y suelte el
botón AUDIO. (La LUZ
INDICADORA parpadeará y después permanecerá encendida.)
4. Introduzca el código
utilizando los Botones
Numerados. Después
de que haya introducido su código, la
LUZ INDICADORA se
apagará.
Si el código no es válido,
la LUZ INDICADORA
parpadeará.Verifique la
lista de códigos y repita el
proceso.
5. Apunte el control
remoto al aparato que
desea controlar y presione
el botón ON-OFF. Su
aparato debe apagarse.
6. Con su aparato encendido, presione VOL+
(Volumen más alto). Si
su aparato responde, no
necesita programación
adicional.
NOTA: Si su aparato no
responde, use todos los
códigos para su marca.
Si los códigos no funcionan, o su marca no está
listada, use el método de
Busqueda de Códigos en
la Página 35.
7. A continuación escriba
su código y el tipo de
aparato que program ó
para que pueda encontrarlo fácilmente.
30
INDICATOR
LIGHT
AUDIO
(BLINK)
1
2
3
4
5
6
7
8
9
(OFF)
0
ON•OFF
VOL
AUDIO CODE
CD RCVR LD
ProgramaciÛn para el Botón AUX
Puede asignar una TV, VCR o sistema de
sátelite segunda o caje de cable a la botón
"AUX".
1. Manualmente encienda el aparato que desea
controlar. Encuentre el
código de tres dígitos
para el aparato que desea
programar en la lista de
códigos.
2. Mantenga presionado el botón CODE
SEARCH hasta que la
LUZ INDICADORA se
encienda, entonces suelte
el botón CODE SEARCH.
3. Presione y suelte el
botón AUX. (La LUZ INDI
CADORA parpadeará
y después permanecerá
encendida.) Después presione el botón del aparato
que desea programar (televisor, video grabadora,
DBS-SAT, DVD) (Presione
DBS-SAT para agregar
otra Caja de Cable y presione DVD para un disco
compacto).
4. Introduzca el código
utilizando los Botones
Numerados. Después de
que haya introducido
su
código, la LUZ
INDICADORA se apagará.
Si el código no es válido, la LUZ INDICADORA
parpadeará. Verifique la lista de códigos y
repita el proceso.
5. Apunte el control remoto al aparato que
desea controlar y presione el botón ON-OFF.
Su aparato debe apagarse.
6. Con su Caja de Cable encendida, presione
CHAN+ (Avance de Canal). Si su Caja de Cable
responde, no necesita programación adicional.
NOTA: Si su aparato no responde, use todos los
códigos para su marca. Si los códigos no funcionan, o su marca no está listada, use el método
de Busqueda de Códigos.
7. A continuación escriba su código y el tipo de
aparato que program ó para que pueda encon-
31
Como usar la Función de Audio
NOTA: No todas las funciones sirven para
todas las marcas.
COMO ENCENDER EL RECEPTOR
O SISTEMA DE AUDIO DE
MINICOMPONENTES
Apunte el control remoto al receptor y presione
el botón AUDIO. El receptor debe encenderse.
En algunos casos, puede requerir que se presione el botón AUDIO y después el botón ONOFF para encender el sistema.
COMO SELECCIONAR LA SEÑAL DE
ENTRADA DE UN APARATO
Se pueden seleccionar las señales de entrada
de aparatos como el tocadiscos compacto o
reproductor doble de cassettes dependiendo
de las funciones de su receptor o su sistema de
audio de minicomponentes. La selección de
entrada se puede hacer ya sea presionando el
botón numerado etiquetado o presionando el
botón FUNCTION para cambiar las entradas
disponibles en su sistema.
COMO UTILIZAR LOS BOTONES
NUMERICOS PARA CAMBIAR LAS
ENTRADAS DE AUDIO
Para seleccionar un aparato, presione el botón
numerado (1-6) que corresponde con el aparato
que quiere operar (CD, TAPE, TUNER, TV, o
VIDEO).
COMO UTILIZAR EL BOTÓN FUNCTION
PARA CAMBIAR LOS APARATOS DE
AUDIO
Para seleccionar un aparato, presione el botón
FUNCTION hasta que la entrada que desea
operar aparezca en su sistema.
COMO USAR EL TOCADISCOS
COMPACTO
O REPRODUCTOR DOBLE DE CASSETTES
Utilice los botones PLAY, FF, REV, REC, STOP
y PAUSE para tocadiscos compactos y
reproductores dobles de casetes. En algunos
casos, los botones programados previamente
(CHAN+/CHAN-) pueden funcionar al cambiar las canciones en los tocadiscos compactos.
COMO USAR LAS BANDAS AM/FM
1. Presione el botón AUDIO.
2. Presione el botón TUNER (3).
3. Presione el botón AM/FM para alternar
entre la banda AM y FM.
4. Utilice los botones programados anteriormente (CHAN+/CHAN-) para avanzar y
retroceder por los canales programados anteriormente.
32
COMO USAR UN SITEMA DE SONIDO
ENVOLVENTE
Con los receptores GE, si presiona el botón TV
por segunda vez, se encenderáel receptor.
1. Encienda el televisor.
2. Presione el botón AUDIO.
3. Seleccione la señal de entrada de audio ya
sea usando los botones numerados etiquetados
o el botón FUNCTION.
4. Presione los botones VOL+ o VOL- para controlar el volumen.
NOTA: Los botones de volumen pueden operar
tanto el volumen de la televisión
como los del receptor al mismo tiempo. Si esto
presenta un problema, puede
resolverse desactivando las bocinas del televisor en el menu de éste.
COMO CONTROLAR LA FUNCION DE
SONIDO ENVOLVENTE
La función de sonido envolvente puede ser encendida o
apagada presionando el
botón SURR ON-OFF.
1. Presione el botón SURR
MODE hasta que encuentre
la modalidad deseada.
2. Presione DELAY+ o
DELAY- para alcanzar el
efecto de demora deseado.
3. Presione el botón DSP
ON-OFF para encender o
apagar el sistema DSP
(Procesador de Sonido
Digital).
4. Presione el botón DSP
hasta que se alcance el efecto
deseado.
5. Presione el botón TEST
para escuchar los niveles de
las bocinas.
6. Presione los botones
FRONT, (frontal) CENTER
(central) o REAR (trasera)
para seleccionar las bocinas.
7. Presione los botones
LEVEL+ o LEVEL- para
ajustar los niveles de las
bocinas.
33
Función de apagado automático
La función de apagado automático apagará
su televisor automáticamente después de
que el usuario programe un intervalo de
tiempo entre uno (1) y noventa y nueve (99)
minutos.
1. Mantenga presionado el botón SLEEP.
La LUZ INDICADORA
permanecerá encendida. Suelte el botón
SLEEP.
2. Introduzca el tiempo
en minutos utilizando
el teclado de numeros.
La LUZ INDICADORA
se apagará. (Mínimo:
1 minuto / introduzca los numeros 0-1)
(Máximo: 99 minutos /intro duzca los
numeros 9-9)
3. Deje el control remoto apuntando hacia la
televisión.
IMPORTANTE: La
función de apagado
automático no funcionará a menos que el
control remoto se deje apuntando hacia el
televisor.
Como apagar el reloj de apagado automático: Cuando se hace cualquiera de las
siguientes dos cosas, el reloj de apagado
automático será cancelado y programado
a cero: Presione y sostenga el botón SLEEP
hasta que la LUZ INDICADORA parpadee
o presione el botón ON-OFF, apagando la
televisión.
Función del Menu
La Función del Menu se utiliza para hacer
cambios en las programaciones seleccionadas tales como color, canales, reloj, etc. El
botón MENU activa las modalidades del
televisor y SAT. Cada menu variará de
marca en marca.
Como seleccionar la
Modalidad del Menu:
1. Presione en el control
remoto el botón del aparato
del menu deseado.
2. Presione el botón MENU.
Esto le permite ver el menu
del aparato escogido. El
menu debe ser visible ahora
34
en su TV.
3. Mientras se encuentre
en la modalidad del menu,
estos botones funcionarán
de la siguiente manera: Los
botones de navegación
IZQUIERDA / DERECHA
operarán moviendo el cursor a la izquierda o derecha.
Los botones de navegación
ARRIBA / ABAJO operarán
moviendo el cursor hacia
arriba o abajo. El botón
MENU aplica a los artÌculos
resaltados.
No todas las funciones son aplicables a los
modelos y marcas de televisores principales.
COMO CANCELAR LA MODALIDAD DEL
MENU.
Para cancelar la Modalidad del Menu y
despejar la pantalla, presione el botón del
aparato que haya seleccionado en el control
remoto.
NOTA: El control remoto cancelará la
Modalidad del Menu automáticamente
después de estar inactivo por diez (10)
Programación con B˙squeda de Códigos
1. Manualmente encienda el aparato que
desee programar.
2. Mantenga presionado el
botón CODE SEARCH hasta
que la LUZ INDICADORA
se encienda,
entonces suelte el botón CODE
SEARCH.
3. Presione y suelte el botón
del aparato para el aparato
que usted está programando.
La LUZ INDICADORA
parpa-deará una vez y
después permanecerá encendida.
NOTA: Para la programación
de AUX (cuando no sea un
código de audio) presione
primero AUX y después el botón del aparato. Utilice el botón SAT para programar el
Cable.
4. Presione y suelte el botón ON-OFF
hasta que su aparato se apague.
35
5.
Cuando su aparato se apague, presione
ENTER, la LUZ
INDICADORA se
apagará
Como identificar los códigos para su
Control Remoto Universal
Si usted necesita encontrar el código de tres
dígitos para su televisión, videograbadora,
sistema DBS, Caja del Cable o sistema de
audio después de que se ha programado su
aparato, utilice este procedimiento:
1. Mantenga presionado el botón CODE
SEARCH hasta que la
LUZ INDICADORA
se encienda, entonces
suelte el botón CODE
SEARCH.
2. Presione y suelte el
botón del aparato para
el aparato que usted esté
programando. La LUZ
INDICADORA parpadeará una vez.
NOTE: Para seleccionar
el auxiliar, presione
primero el botón AUX
y después el botón del
aparato.
3. Presione y suelte el
botón CODE SEARCH.
La LUZ INDICADORA se apagará.
4. Comenzando con el numero 0, presione
los botones numéricos en orden (0-9) hasta
que la LUZ INDICADORA parpadee.
5. El numero que cause que la LUZ
INDICADORA parpadee, es el primer dígito
en su código.
6. Repita el paso 4 hasta que haya obtenido
los tres numeros en el código.
36