1
17453 v2
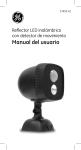
Wireless Motion Sensing
LED Spotlight
User’s Manual
Thank you on your
purchase of the GE
LED Spotlight!
Included items:
Spotlight
2 - 25 mm screws and screw anchors
1 - 44 mm screw
NOTE: The LED Spotlight will stay on as long as there is
motion detected. Spotlight will turn off after 45 seconds if
no motion is detected. The LED Spotlight only turns on in the
dark to conserve battery life.
Battery-Operation:
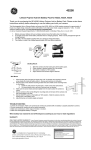
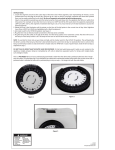
Removing the front cover Remove the front cover by
rotating counter-clockwise. (A)
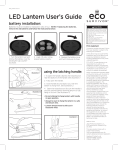
Inserting batteries - Open the
battery compartment and install
3D batteries, matching the
polarity markings. Replace the
battery compartment, making
sure it snaps back into place. (B)
Replace battery compartment put back in the spotlight
compartment. Screw on till the
arrows match. (A)
A
B
Mounting the LED Spotlight:
Determine which mounting method you need
1. Permanent mounting - Large screw mounting
a. Remove base by removing screw in the side of the base.
(See photo C next page)
b. Pull fixture from base by pulling out the neck of the base.
c. Position the base in the chosen location and drive the
44 mm screw through the top of the base (D)
d. Replace the light fixture by pressing the neck back
in to the base and replace the screw snuggly in to
the side of the base. DO NOT OVER TIGHTEN.
C
D
Hanging Keyhole Type Mounting
FOR BEST PERFORMANCE, SPOTLIGHT SHOULD BE POSITIONED
SO MOTION SENSOR IS ON TOP AND LIGHT IS ON BOTTOM.
First, use included template to mark the area where the
screws will be inserted.
NOTE: Spotlight can be rotated
360°, so screws can be mounted
in any position. We recommend
mounting the screws parallel to
the ground if mounting on a
vertical surface. Make sure the
screws are precise distance from
each other (2-1/8” apart). (E)
E
If using anchors:
Use 3/16” drill bit to drill holes
and insert anchors. Drive 25 mm
screws into anchors so that
screw head protrudes 1/8” from
surface (the height of the screw
head). (F)
F
If using screws only:
1/8”
Use 1/8” drill bit to drill holes
and insert 25 mm screws so
that screw head protrudes
1/8” from surface( the height
of the screw head).
Hang the mounting base on
the inserted screws and slide mounting base down so
that the track is securely held by the screws.
Reassembling The Unit:
Once the base is secure, insert the neck and fixture back
in to the large hole in the middle of the base. Tighten the
screw on the base so that the neck and fixture assembly
are secured snuggly within. DO NOT OVER TIGHTEN.
Positioning The Fixture:
The LED Spotlight can be
rotated 360 degrees, up or
down. To adjust the light up or
down; turn winged screw
(see photo) counter clockwise,
move light to desired position
and tighten winged screw by
turning clockwise (G). DO NOT
OVER TIGHTEN.
G
To adjust the angle; firmly hold main light area and twist
to desired position.
NOTE: The neck and light will rotate and click when
moving to a different position.
7.
Mounting Template
X
2-1/8 in.
7.
Center
X
17453-2
9/1/11
is a trademark of the General Electric
Company and is under license to Jasco
Products Company LLC, 10 E. Memorial Road,
Oklahoma City, OK 73114.
This Jasco product comes with a 1 year limited
warranty. Visit www.jascoproducts.com for details.