1
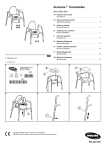
All-In-One Commode Assembly, Installation and Operating Instructions Model No. 9630E SAFETY SUMMARY The following recommendations are made for the safe installation of the Commodes: Snap Button WARNING FIGURE 1 - LEG HEIGHT ADJUSTMENT DO NOT install this equipment without first reading and understanding this instruction sheet. If you are unable to understand these instructions, contact a healthcare professional, dealer or technical personnel if applicable before attempting to install this equipment - otherwise, injury or damage may occur. INSTALLING AND REMOVING THE COMMODE SEAT AND LID (FIGURE 2) CAUTION Check all parts for shipping damage. In case of shipping damage, DO NOT use. Contact Dealer/Carrier for further instruction. Before removing/installingseat and lid, allow seat/ring to reach room temperature if exposed to cold. This will help prevent the seat clamps from breaking when being removed/installed onto commode back frame rail. Snap buttons MUST be fully engaged and aligned in the proper height adjustment hole of each leg before use. This ensures that the legs are securely locked and an even height adjustment is achieved. 1. Align the seat clamps of the toilet seat onto the back frame rail. (Each clamp should sit outside the pail holders). Push down on seat until it clamps firmly into place. Make certain ALL screws, nuts and/or bolts are tight at all times. 2. Repeat the same process for the lid. Inspect rubber tips on the leg extensions for rips, wear or if they are missing. Replace them immediately if any of these conditions exist. 3. When removing the seat or lid, remove the lid first and then the seat. To remove, grasp the back corner of the lid and/or seat and lift up firmly. CARE: Use a damp cloth and soap to clean. Leg extensions with rubber tips MUST be in contact with the floor at all times. NOTE: To make raising or lowering the seat/lid easier, you may lubricate the commode back frame rail with a very small amount of petroleum jelly or furniture polish. Users with limited physical capabilities should be supervised or assisted when using the commode. The Commode Model No. 9630E has a weight limitation of 135 kg. WARNING Toilet seat MUST be DOWN before sitting on the commode. Pail holders are NOT constructed to support the weight of an individual, ONLY the pail and its contents. LEG HEIGHT ADJUSTMENT (FIGURE 1) 1. Select the desired height for the commode by aligning the snap button of each leg extension with the appropriate adjustment hole in the leg frame. CAUTION Back Tube Models -9630E; wing nuts must be inspected regularly for proper tightness. (Refer to Item No. 6 in Parts List). 2. Make certain that the snap buttons are fully engaged into the adjustment hole of each leg frame and are at the same height before using. 1 Commode Seat 8 Seat Clamp Pail Holder 5 12 6 Pail Back Frame Rail 13 4 4 7 7 FIGURE 2 - INSTALLING AND REMOVING THE COMMODE SEAT AND LID 14 3 2 10 REPLACING THE COMMODE ARMRESTS (FIGURE 3) 1 1. Remove the Phillips Tap Screws, two (2) each from the underside of the arm tube(s). 11 2. Lift armrest(s) from the arm tube(s). 3. Install/reinstall the armrest(s). PARTS LIST ITEM 1. 2. 3. 4. 5. 6. 7. 8. 10. 11. 12. 13. 14. Armrest Phillips Tap Screws FIGURE 3 - REPLACINGTHE COMMODE ARMRESTS 2 DESCRIPTION Rubber Tip Leg Extension Anti-Rattle Screw Back Tube Assembly Wing Nut Nylock Nut Toilet Seat with Lid Pail with Lid Splash Shield 2-piece Desk Length Armrest Snap Button Release Spring QTY. 4 4 4 4 1 2 4 1 1 1 2 4 4 Toilettenstuhl Ref Zusammenbau, Montage und Gebrauchsanweisung 9630E Sicherheitsvorschriften EINSTELLEN DER VERSTELLBAREN FUSSELEMENTE (ABBILDUNG 1) Hinsichtlich einer korrekten Benutzung des Toilettenstuhls empfehlen wir die Beachtung nachstehender Vorgaben: 1. Gewünschte Stuhlhöhe einstellen: Hierzu die Druckknöpfe jeden Fußteils auf die geeignete Höhenbohrung der Rahmenfüße ausrichten. ACHTUNG: Vor dem Aufstellen dieses Produktes zuvor die Gebrauchsanleitung aufmerksam zur Kenntnis nehmen. Bei Verständnisproblemen vorliegender Anleitung setzen Sie sich bitte mit mit Ihrem Arzt oder Therapeuten in Verbindung, und zwar bevor Sie das Produkt installieren, um Verletzungen oder Schäden zu vermeiden. Überprüfen Sie bitte alle zugehörigen Teile. Bei transportbedingten Schäden dürfen diese UNTER KEINEN UMSTÄNDEN VERWENDET WERDEN. Beraten Sie sich in einem solchen Fall mit dem entsprechenden Fachhändler. Vergewissern Sie sich, daß die Einstellknöpfe korrekt einrasten und die erforderlichen Überstände aufweisen. Auf identische Einstellung aller Fußelemente achten. Dadurch wird sichergestellt, daß die Fußelemente korrekt verriegelt sind und die richtige Höhe mit der erforderlichen Stabilität, vor Benutzung, eingestellt ist. Unter allen Umständen gewährleisten, daß alle Schraubenteile u. Muttern ausreichend angezogen sind. Sicherstellen, daß die Gummikappen vollzählig sind und keine Risse aufweisen. Bei Beschädigung sind diese vor einer Benutzung des Stuhls zu ersetzen. Die Gummikappen müssen immer Bodenkontakt aufweisen. Behinderten Personen ist beim Benutzen des Toilettenstuhl Hilfe zu leisten. Dieser Toilettenstuhl ist maximal bis zu 135 kg belastbar. 2. Vor einer Benutzung sicherstellen, daß die Druckknöpfe vollständig in den hierzu vorgesehenen Bohrungen sitzen und jedes Fußteil die gleiche Höheneinstelluung besitzt. Druckknopf ABBILDUNG1-EINSTELLENDERVERSTELLBARENFUSSELEMENTE INSTALLATION UND BENUTZUNG DER SITZFLÄCHE SOWIE DES DECKELS (ABBILDUNG 2) ACHTUNG: Vor jeder Installation muß solange abgewartet werden, bis die einzelnen Teile Raumtemperatur aufweisen. Dadurch wird ein Bruch der Halteclips beim Montieren auf dem rückwärtigen Rahmen vermieden. 1. Die Montageclips des Toilettensitzes auf dem hinteren Rahmenrohr ausrichten. (jeder Halteclip muß auf jeder Seite der Eimerhalteschienen einrasten.) Die Sitzfläche aufdrücken, bis beide Clips einrasten. 2. Auf dem Klappdeckel gleiche Maßnahmen wiederholen. 3. Zum Verschieben der Sitzfläche bzw. des Klappdeckels, letzteren zuerst und dann die Sitzfläche verschieben. Zum Verschieben die hintere Ecke des Klappdeckels bzw. der Sitzfläche packen und fest hochziehen. PFLEGE: Mit feuchtem Lappen und Seife reinigen. 3 ANMERKUNG: Die Sitzfläche und der Klappdeckel lassen sich leichter hochnehmen und absenken, wenn die hinteren Rahmenelemente z.B. mit Silikonfett oder einem Gleitmittel geschmiert werden. 8 5 12 ACHTUNG: Sitzfläche vor jeder Benutzung des Toilettenstuhls absenken. Die Eimerhalteführungen sind nicht dazu bestimmt das Gewicht des Benutzers aufzunehmen, sondern dienen lediglich dem Halten des Eimers u. Inhaltes. 6 13 4 4 7 7 14 3 2 EMPFEHLUNGEN: 10 1 Die Flügelmuttern zur Befestigung des hinteren Rohres sind regelmäßig auf festen Anzug zu prüfen. 11 Sitzfläche TEILELISTE Clips POS. BENENNUNG Eimerhalterung Eimer 1 2 3 4 5 6 7 8 Hinteres Rohr ABBILDUNG2-INSTALLATIONDER SITZFLÄCHEUNDDESKLAPPDECKELS 10 11 12 13 14 AUSWECHSELN DER ARMLEHNEN (ABBILDUNG 3) 1. Kreuzschlitzschrauben herausdrehen. Jede Armlehne ist mit zwei Schrauben unterhalb des Rohres befestigt. 2. Armlehnen abnehmen 3. Armlehne/n wechseln bzw. Originalteil/e wieder aufsetzen. Armlehne Schraube ABBILDUNG3-AUSWECHSELNDER ARMLEHNEN 4 Gummikappe Stellfuß Silentring Schraube Hinteres Rohr Flügelmutter Nylstop-Mutter Sitzfläche u. Klappdeckel Eimer u. Deckel Spritzschutzsystem Armlehne Kreuzschlitzschraube Feder, Druckknopf MENGE 4 4 4 4 1 2 4 1 1 1 2 4 4 Manual Del Usuario Montaje, Instalción e Instrucciones de Funcionamiento 9630E PAUTAS DE SEGURIDAD INSTALACIÓN Y USO DEL ASIENTO Y LA TAPA (FIGURA 2) Para una correcta utilización de la silla W.C. siga las instrucciones que se detallan a continuación. ADVERTENCIA Antes de utilizar la silla procure que la misma haya alcanzado la temperatura de la habitación. ADVERTENCIAS No instale la silla sin haber leído y comprendido las instrucciones. Si tiene algún problema póngase en contacto con su médico o terapeuta antes de intentar montar la silla, de esta manera evitará cualquier posible accidente. 1. Alinee los clips de montaje del asiento sobre el tubo trasero del chasis (cada clip se deberá fijar a ambos lados del soporte de la cubeta). Presione el asiento hasta anclar los dos clips. Compruebe que las diferentes piezas están en buen estado, si no es así NO UTILICE la silla y póngase en contacto con su distribuidor. 2. Repita la misma operación para la tapa. 3. Para desplazar el asiento o la tapa, desplace primero la tapa y después al asiento. Para desplazarla sujete el extremo trasero de la tapa o el asiento y levántela. Compruebe que los anclajes de las patas están correctamente fijados y graduados a la misma altura. De esta manera la silla podrá utilizarse de forma segura. Mantenimiento: Utilice un trapo húmedo y jabón para su limpieza. Compruebe que la tornillería está correctamente fijada. NOTA: Para levantar y bajar la tapa más fácilmente puede aplicar un poco de aceite en las partes traseras del chasis. Las conteras de las patas deben estar en perfecto estado. Si no es así reemplácelas antes de utilizar la silla. ADVERTENCIA El asiento deberá estar bajado antes de ser utilizado como silla de W.C. Las guías de fijación de la cubeta no han sido pensadas para soportar el peso del usuario, solamente la cubeta y su contenido. Las 4 conteras de caucho deben permanecer en contacto con el suelo. Aquellos usuarios que tengan limitaciones físicas deben requerir la ayuda de una tercera persona. RECOMENDACIONES El peso máximo para el usuario de esta silla es de 135Kg. Debe comprobar periódicamente que las palomillas del respaldo están correctamente apretadas. AJUSTE DE LAS PATAS (FIGURA 1) Asiento 1. Ajuste las patas a la altura deseada alineando los anclajes de cada pata a la misma altura. 2. Compruebe que los anclajes sobresalen completamente y que todas las patas están a la misma altura. Suporte de Cebeta Clips del asiento Cubeta Tubo Trasero FIGURA2-INSTALACIÓNDELASIENTOY LATAPA Anclaje FIGURA 1 - AJUSTEDELASPATAS 5 SUSTITUCIÓN DE LAS GOMAS DE REPOSA BRAZO 8 1. Desmonte los tornillos, 2 debajo de cada tubo de reposa brazos. 5 12 2. Desmonte las gomas de reposa brazo 6 3. Coloque las gomas nuevas y atorníllelas a los tubos. 13 4 4 7 7 14 Reposa Brazo 3 2 10 1 11 Tornillo LISTA DE PIEZAS REF DESCRIPCIÓN FIGURA3-SUSTITUCIÓNDELASGOMAS DEREPOSABRAZO 1 2 3 4 5 6 7 8 10 11 12 13 14 6 Contera caucho Pie ajustable Tope anti ruido Tornillo Tubo trasero Palomilla Tuerca Nylstop Asiento y tapa Cubeta y tapa Sistema anti-salpicaduras Reposa brazo Tornillo Resorte CANT: 4 4 4 4 1 2 4 1 1 1 2 4 4 Guide Dutilisation Installation et Fonctionnement 9630E 2. S’assurer que les boutons pressions soient complétement engagés dans les trous prévus à cet effet et que chaque pied possède le même réglage en hauteur avant utilisation. CONSIGNES DE SÉCURITÉ Les recommandations ci-dessous vous permettront d’installer et d’utiliser la chaise-toilette en toute sécurité: AVERTISSEMENTS Ne pas installer cet équipement sans avoir lu et compris les instructions. Si vous ne pouvez pas comprendre ces instructions, contactez un professionnel de la santé (médecin ou thérapeute) avant d’essayer d’installer cet équipement afin d’éviter dommage et blessures. Bouton Pression SCHEMA1-REGLAGEDESPIEDS REGLABLES INSTALLATION ET UTILISATION DE L’ASSISE ET DE L’ABATTANT (SCHEMA 2) Controlez toutes les parties, en cas de dommage lié au transport ,NE PAS UTILISER, contactez votre distributeur pour informations complémentaires. AVERTISSEMENT Assurez -vous que les boutons de réglage soient correctement engagés et saillants suivant le même réglage pour chaque pied. Cette opération assure que les pieds sont correctement verrouillés et que la hauteur est correctement positionnée et stable avant utilisation. Avant toute installation attendre que les éléments atteignent la température de la pièce. Ceci previendra la rupture des clips lors du montage sur le cadre arrière. 1. Aligner les clips de montage du siège sur le tube arrière du cadre (chaque clip devra être enclenché de chaque côté des rails de support du seau). Poussez sur l’assise jusqu’au verrouillage des 2 clips. S ’assurer que les écrous et vis soient suffisamment serrés en toutes circonstances. Vérifiez que les embouts caoutchouc ne soient pas manquants ou déchirés. 2. Répétez les mêmes opérations pour l’abattant. Dans ce cas les remplacer avant utilisation de la chaise. 3. Pour déplacer l’assise ou l’abattant, déplacer l’abattant en premier puis l ’assise. Pour le déplacement , saisir le coin arrière de l’abattant ou de l’assise et lever fermement. Les embouts caoutchouc doivent toujours être en contact avec le sol. Entretien: Utiliser un chiffon humide et du savon pour assurer le nettoyage. Les utilisateurs ayant des capacités physiques restreintes devront être assistés pendant l’utilisation de la chaise -toilette. NOTE: Pour faciliter le soulévement et l’abaissement de l’assise et de l’abattant , vous pouvez lubrifier les parties arrières du cadre avec de la graisse silicone par exemple. Le poids limite de l’utilisateur pour cette chaise est de 135Kg. AVER TISSEMENTS REGLAGE DES PIEDS REGLABLES (SCHEMA 1) L’assise devra être abaissée avant l’utilisation de la chaise toilette. Les guides de fixation du seau ne sont pas prévus pour supporter le poids de l’utilisateur; seulement le seau et son contenu. 1. Regler la hauteur désirée de la chaise en allignant les boutons pression de chaque pied avec les trous appropriés des jambes du cadre. 7 RECOMMENDATIONS 8 Les écrous papillons utilisés pour fixer le tube arrière devront faire l ’objet d’une vérification régulière afin de s’assurer de leur serrage. 5 12 6 Assise 13 4 4 7 7 14 Clips 3 Support de Seau 2 10 1 Seau Tube Arriere SCHEMA 2 - INSTALLATION DE LASSISE ET DELABATTANT REMPLACEMENT DES ACCOUDOIRS (SCHEMA 3) 11 LISTE DES PIECES 1. Déposer les vis cruciformes, 2 sous chaque tube supportant les accoudoirs. 2. Déposer les accoudoirs 3. Installer/Réinstaller le(s) accoudoir(s). Accoudoir Vis REP DESIGNATION QTÉ: 1 2 3 4 5 6 7 8 10 11 12 13 14 4 4 4 4 1 2 4 1 1 1 2 4 4 embout caoutchouc Pied réglable Bague anti-bruit Vis Tube arrière Ecrou Papillon Ecrou Nylstop Assise et abattant Seau et couvercle Système anti-projection Accoudoir Vis cruciforme Ressort, bouton SCHEMA 3 - REMPLACEMENT DES ACCOUDOIRS Invacare Corporation USA One Invacare Way Elyria, Ohio USA 44036-2125 800-333-6900 www.invacare.com Poirier Groupe Invacare Les Roches 37230 Fondettes France 37930 47-62-64-66 Invacare and "Yes, you can" are trademarks of Invacare Corporation. © 2000 Invacare Corporation Form No. 98-130 Part No. 1079023 Rev A (1) 3/00