1
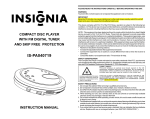
PLEASE READ THE INSTRUCTIONS CAREFULLY BEFORE OPERATING THIS UNIT.
WARNING
To prevent fire or shock hazard, do not expose this appliance to rain or moisture.
IMPORTANT
Since the CD circuitry may cause interference to other radio tuners nearby, switch this unit off when not
in use or move it away from the affected radio tuner.
This device complies with Part 15 of the FCC Rules, operation is subject to the following two conditions:
(1) This device may not cause harmful interference, and (2) this device must accept any interference
received, including interference that may cause undesirable operation.
Compact Disc Player
with Ultimate Skip Protection
and MP3 Playback
IS-PA040718
NOTE: This equipment has been tested and found to comply within the limits for a class B digital device,
pursuant to Part 15 of the FCC Rules. These limits are designed to provide reasonable protection against
harmful interference in a residential installation. This equipment generates, uses and can radiate radio
frequency energy and, if not installed and used in accordance with the instructions, may cause harmful
interference to radio communications. However, there is no guarantee that interference will not occur in
a particular installation. If this equipment does cause harmful interference to radio or television reception,
which can be determined by turning the equipment off and on, the user is encouraged to try to correct the
interference by one or more of the following measures:
Reorient or relocate the receiving antenna.
Increase the separation between the equipment and receiver.
Connect the equipment into an outlet on a circuit different from that to which the receiver is connected.
Consult the dealer or an experienced radio / TV technician for help.
.
.
.
.
SAFETY CERTIFICATION
This Compact Disc Player is made and tested to meet safety standards of the FCC, requirements and
compliance with safety performance of the U.S. Department of Health and Human Services, and also with
FDA Radiation Performance Standards 21 CFR Subchapter J.
LASER SAFETY
This unit employs an optical laser beam system in the CD mechanism,
designed with built-in safeguards. Do not attempt to disassemble;
refer to qualified service personnel. Exposure to this invisible laser
light beam may be harmful to the human eye.
INVISIBLE LASER RADIATION WHEN
OPEN AND INTERLOCK FAILED OR
DEFEATED. AVOID DIRECT EXPOSURE TO LASER BEAM.
THIS IS A CLASS-1 LASER PRODUCT. USE OF CONTROLS, OR
ADJUSTMENTS OR PROCEDURES OTHER THAN THOSE SPECIFIED HEREIN, MAY RESULT IN HAZARDOUS LASER LIGHT BEAM
EXPOSURE.
SAFETY PRECAUTIONS
1. Do not open the cabinet. Refer servicing to qualified personnel only.
2. Do not expose to excessive heat, direct sunlight, dust, moisture, vibration or shock.
3. Use ONLY the AC adaptor required; others may damage your unit. Disconnect from the wall outlet
when the set is not to be used for an extended period of time.
4. When cleaning your unit, use a soft dry cloth, do not use solvents or commercially available cleaners
as they may damage or discolor the finish.
5. Do not wear headphones while operating a motor vehicle, this could create a traffic hazard and is
illegal in many areas.
6. The headphones supplied with your unit provide superior stereo listening while allowing you to hear
outside sounds when listening at normally low volume levels. Listening at extremely high volume levels
minimizes the intrusion of outside noise/sounds.
7. If you notice that the sound has become weak or distorted, this is an indication that your batteries are
low. Replace with new or recharged batteries. (see “BATTERY OPERATION ” )
INSTRUCTION MANUAL
1
LOCATION OF CONTROL
POWER SOURCES: NORMAL BATTERIES / AC ADAPTER (NOT
INCLUDED)
Battery Operation
1. Open the battery compartment cover and
insert two “AA”alkaline batteries inside the
battery compartment. Follow the polarity
as indicated in the battery compartment.
2. Close the battery compartment cover.
+
1.
2.
3.
4.
5.
6.
7.
8.
9.
Play/Pause/Power On Button
Stop/Power Off Button
Album +/ESP Button
Album - Button
Program Button
Mode Button
Skip Backward Button
Skip Forward Button
Battery Charge Indicator
10. LCD Display
11. Charge On/Off Switch
12. Battery Door
13. Phones Jack
14. Volume Control
15. CD Door Open Switch
16. Bass Boost Switch
17. Hold Switch
18. DC Input Jack
Wire Remote Control
1. Volume Control
2. Skip - Button
3. Skip + Button
4. Stop/Power Off Button
5. Play/Pause/Power On Button
Note:
- Use only the supplied remote control unit with the player.
- You can also set the volume control of main unit to the proper sound level to the
earphone.
- You can turn on the player by pressing and hold the PLAY/PAUSE/POWER ON
button of remote control over 1 second.
- Operation is same as main unit.
2
Average Playing Time
(Continuous Play)
Battery
Type
Normal
CD
AntiShock
MP3
Alkaline
“AA”
Approx.
9 hrs.
Approx.
8 hrs.
Approx.
8 hrs.
Ni-CAD
Rechargeable
(min
specification
recommended
1.2V - 650mA)
Approx.
4 hrs.
Approx.
3 hrs.
Approx.
2.5 hrs.
Note: Zinc/Carbon, or Zinc/Chloride type batteries are not recommended for this unit.
-
AC Operation (AC adapter not included)
1. Insert the DC plug, at the end of the AC
adapter cord into the DC input jack.
2. Plug the AC adapter into AC power outlet
socket. Use only with the recommended
6V AC adapter and make sure the local
voltage corresponds to the adapters required AC input voltage.
Note:
1. While using power from AC adapter, normal batteries must be taken out of battery compartment.
2. If the AC plug of this unit does not fit in your AC outlet, a plug adapter should
be used. Consult your local dealer on the type of plug adapter required.
LOW BATTERY ALERT
When the battery indicator starts flashing in the LCD
panel, this means that the batteries are losing their
charge. In this case the CD player will not function
properly and the batteries must be replaced.
If you are using Ni-CD rechargeable batteries, follow the intructions on how to
recharge the batteries detailed in the owners manual.
3
CHARGING AND USE OF RECHARGEABLE BATTERIES
CAR KIT
Rechargeable Battery Operation
This unit can fully recharge the specified rechargeable battery in approximately
15 hours. The rechargeable batteries (NOT supplied) should be recharged
before they are used for the first time, if they are low in power or they have not
been used for a long period (over 60 days).
DC CAR ADAPTER/CORD
1. Open the battery compartment cover and
insert two of the recommended rechargeable batteries, matching polarity. (1.2V
650mA)
B O T H B AT T E R I E S M U S T B E
RECHARGEABLE BATTERIES.
2. Plug in the AC adaptor (not included). Set
the Fuction Switch to CD mode and the
Charge Switch to the ON position to start
charging.
USE ONLY THE AC ADAPTOR (NOT
INLCUDED) RECOMMENDED WITH THE
UNIT FOR CHARGING.
Note: Charge indicator will illuminate.
+
The supplied DC car adapter/cord is designed for
use with vehicles equipped with a 12 volt negative ground electrical system only. The equipment is compatible if the negative (-) terminal of
the battery is connected to the vehicle’s metal
body/chassis. If unsure, contact the vehicles’s
dealer.
Plug the small end of the car adapter into the DC
6V jack and then plug the other end into the
cigarette lighter socket. The indicator light will
illuminate red when powered on.
TO DC 6V JACK
PRECAUTIONS
!
!
!
3. After 15 hours, unplug the AC adaptor (not
included) and switch the Charge Switch to
the OFF position.
DO NOT CHARGE CONTINUOUSLY FOR
24 HOURS OR MORE. DOING SO CAN
CAUSE THE PERFORMANCE OF THE
R E C H A R G E A B L E B AT T E R Y T O
DETERIORATE.
4. If the operating time decreases drastically even when the rechargeable nickelcadmium batteries are properly recharged, purchase a new set of rechargeable
nickel-cadmium batteries. Dispose of nickel cadmium according to local environmental laws.
5. When charging new batteries or if the batteries have not been charged for a
long time, playing time may be reduced. In this case, charge and discharge the
batteries several times.
NOTE:
Do not attempt to recharge, short-circuit, disassemble, heat or expose to
fire.
Do not mix battery types. (e.g. alkaline with zinc carbonate).
When inserting new batteries, replace all at the same time. Do not mix old
and new batteries.
Weak batteries can leak and severely damage the unit.
4
!
USE ONLY THE SUPPLIED DC CAR ADAPTER/CORD. OTHER ADAPTERS COULD DAMAGE THE PLAYER.
IF THE INSIDE OF THE VEHICLE’S CIGARETTE LIGHTER SOCKET IS
DIRTY, THE PLUG MAY BECOME HOT AS A RESULT OF POOR ELECTRICAL CONTACT. BE SURE IT IS CLEAN BEFORE USE.
AFTER USE, DISCONNECT THE CORD’S PLUGS FROM THE PLAYER
AND THE CIGARETTE LIGHTER.
SHOULD THE PLAYER CAUSE INTERFERENCE TO NEARBY RADIO,
INCREASE THE DISTANCE BETWEEN PLAYER AND RECEIVER.
FUSE REPLACEMENT
Should the player fail to operate with the DC car
adapter/cord, check the fuse (1-Amp). If blown,
check all connections and inspect the cord for
any damage. Always replace the fuse with same
type and rating.
If the fuse blows again after replacement, this
indicates a potential problem. DO NOT replace
the fuse with a higher rating. Doing so may cause
damage to the player.
5
Indicator
fuse
CHANGING THE CORD ORIENTATION (Optional Type 1 or 2)
LISTENING WITH EARPHONES
(Type 1)
1. Remove the two large flathead slotted screws with a coin.
2. Gently remove plastic plate to expose the cord.
3. Gently lift the cord and reroute to
rear edge. Be sure to insert cord in
the appropriate restraining channel.
4. Reattach the plastic plate, reinsert
the two screws, and retighten screws.
Connect the plug of the stereo earphones into
the PHONES (GREEN) socket.
Caution: Avoid excessive volume level and listening to sound for a long period of time when
using earphones.
"Adjust volume to the desired level.
HANDLING COMPACT DISCS
OR
(Type 2)
1. Gently pull out the plug that was originally plugged into the corner of
cassette.
2. Insert the plug into the jack perpendicular to the jack which the plug was
removed.
3. If it is difficult to insert the plug into
the jack rotate the plug until it fits the
cassette corner properly.
This unit is designed to play only compact discs
bearing the identification logo below.
Other discs may not conform to the CD standard and may not play properly.
!
!
!
!
LISTENING IN THE CAR
!
1. Plug the cord into the HEADPHONES jack.
2. Insert the cassette adapter into
the deck’s cassette slot.
Type 1
Type 2
6
Dirty, scratched or warped discs may cause
skipping or noise.
Handle the disc only by the edges. To keep
clean, do not touch its surface.
Discs should be stored in their cases after use
to avoid serious scratches.
Do not expose disc to direct sunlight, high
humidity, high temperature, dust, etc. Prolonged exposure to extreme temperatures can
warp the disc.
Do not stick or write anything on either side of
disc. Sharp writing instruments or the inks used
in some felt tip pens may damage its surface.
Remove the disc
Hold the edge and gently press the center pivot
as illustrated to pick up the disc.
CAUTION:
Wait for the disc to stop rotating before pressing the
OPEN button.
Note: This unit can play 3” (8cm) single CDs
without an adapter. Do not use a CD single
adapter for these discs.
7
INSERT WITH
THE LABEL
FACING UP.
PRESS THE CLAWS
AT THE CENTER OF
THE DISC CASE.
PRESS THE
DISC GENTLY
TO INSERT IT.
LIFT OUT WITHOUT
TOUCHING THE
RECORDED SURFACE
INCORRECT
CORRECT
FROM THE CENTER TO THE EDGE
INCORRECT
CLEANING DISCS
!
Fingerprints should be carefully wiped from
the surface of disc with a soft cloth. Unlike
conventional records, compact discs have
no grooves to collect dust and microscopic
debris, so gently wiping them with a soft
cloth should remove most particles. Wipe
in a straight motion from the center to the
edge.
!
Never use thinner, benzine, record cleaner or anti-static spray on a compact
disc. Such chemicals can damage its plastic surface.
FEATURE LIST
ITEM
AUTO POWER
ON/OFF
ANTI
SKIP
BASIC DISC PLAY
1. Connect the earphones to the PHONES (GREEN) socket.
2. Slide the OPEN switch to open the CD compartment lid.
3. Adjust the VOLUME to desired sound level.
4. Insert the disc with the label side facing up.
5. Close the lid securely until a click is heard.
6. Press the PLAY/PAUSE button to start playing.
PLAY MODE
STOP
To Emphasize the Bass Sound
Set the BASS BOOST switch to the ON position.
Note: The bass boost performance will be dependant on
the VOLUME control setting.
HOLD Switch
This switch prevents accidental selection of an unwanted
function during Playback or Stop mode. In the HOLD
“ON” position, no function button on the unit can operate
(except OPEN). Moving the switch to the “OFF” position
will allow the unit to return to normal operation.
PLAY/PAUSE
F.SKIP
K
E
Y
B.SKIP
MODE
Turning Power On and Off
This unit has no ON/OFF switch. To turn on and off, press the following buttons.
To turn on: Press >II PLAY/ PAUSE (playback starts).
To turn off: Press"STOP button once to standby mode.
Press"STOP button twice to turn off the power.
NORMAL
PROGRAM
ESP/ALBUM
Auto Power-Off function
When the unit is stopped (standby mode) for approximately 30 sec, the power will
automatically turn off.
ALBUM DOWN
L
C
D
8
CD
CD-MP3
DESCRIPTION
Power on by pressing PLAY button
Power off by pressing STOP button
Auto power off at 30 sec after last operation during standby mode.
45 seconds
120 seconds
[ NORMAL ]
ONE REPEAT PLAY
: Plays one track repeatedly
ALBUM REPEAT PLAY : CD-MP3 album repeatedly (CDMP3 only)
ALL REPEAT PLAY
: Plays all tracks repeatedly
INTRO PLAY
: Plays 10 sec of every track
RANDOM PLAY
: Plays every track in random order
[ PROGRAM ]
PROGRAM PLAY
: Maximum 60 Tracks for CD and 60
tracks for MP3 are programable
ONE REPEAT PLAY
: Plays one track repeatedly
ALL REPEAT PLAY
: Plays all tracks repeatedly
Stops playing
Turns off the power during standby mode.
Turns on the power and starts playing
Pause on/off
Count-up of track number on normal play
Count-up of program number on programmed play
Count-up of registered track number on programmed play
Fast-forward operation during play (when button is pressed for 0.5
sec or longer).
Count-down of track number on normal play
Count-down of program number on programmed play
Count-down of registered track number on programmed play
Fast-rewind operation during play (when button is pressed for 0.5
sec or longer).
Change play mode cyclically
HOLD
BATTERY ALARM
BATTERY EMPTY
ONE REPEAT
ALL REPEAT
INTRO
RANDOM
[ PROGRAM ]
[ NORMAL ]
* ALBUM REPEAT, REPEAT ALL ( CDMP3 ONLY )
Program play to 60 tracks in CD mode and 60 tracks in MP3 mode,
Program check and change.
Anti-Skip Function in CD mode and Album up Function in MP3
mode.
CD-MP3 Album up
CD-MP3 Album down in MP3 mode
Indicates that hold switch is on.
Indicates battery change needed
Auto display is turned off.
9
LCD DISPLAY INFORMATION
TO PAUSE
Press the PLAY/PAUSE button to
turn the pause function on. The time
display digits will begin flashing.
Press the PLAY/PAUSE button agian
to turn the pause function off.
WHEN POWER IS ON
!
If a disc is in, auto adjustment starts.
During adjustment, display shows - - .
!
If no disc, no disc is displayed.
Put the disc in and close the lid.
Auto adjustment starts.
CD
MP3
SKIP AND SEARCH FUNCTION
Locating a Particular track
!
If the lid is opened, display shows OPEN.
Closing the lid starts auto adjustment.
!
If unable to read TOC then Er is displayed.
Note: TOC means Table Of Contents.
CD
MP3
!
When TOC data has been
read, display shows TOC
for 1 second.
!
Starts play from track No. 1 automatically, ESP shows on displays.
CD
Supports 40 directories and 399 files for MP3-CD format disc.
Press << lightly and repeatedly.
To go to the beginning of following tracks
Press >> lightly and repeatedly.
Locating a Particular Point in a track
To search backwards at high speed
Keep << depressed
To search forward at high speed
Keep >> depressed
For CD format discs, the low level audio will be heard during the search process to
assist in locating the correct point in the track.
TO PLAY (Normal play) FROM STOP CONDITION
!
Press PLAY/PAUSE button, the display changes
to 1 00:00 and starts play.
TO STOP
Press the STOP key. This will
stop play and datas will be
displayed.
To go back to the beginning of the current or a previous track
REPEAT PLAY
MP3
For CD mode
!
Press MODE button once and
1 is displayed. CD
player plays current track repeatedly.
!
Press MODE button twice and
ALL is displayed.
CD player plays all tracks repeatedly.
For MP3 mode
Press MODE button once and
1 is displayed. CD player plays current track
repeatedly.
!
Press MODE button two times and
is displayed. CD player plays all tracks
of current played disc repeatedly.
!
Press MODE button three times and
ALL is displayed. CD player plays all
tracks repeatedly.
!
10
11
PROGRAM PLAY
This allows selected tracks on the disc to be played in any desired order.
To set the program play
!
CD
a. In the stop mode, press the PROGRAM button and
0P-01 is displayed. PGM and 0 start flashing.
To clear programming
!
Open the door, or
!
Power off, or
!
In program mode, press STOP button.
CD
1. Press MODE button three times
(for CD) / four times (for MP3),
then INT is displayed.
b. Press F.SKIP or B.SKIP button to select the track
number.
c. When desired track is displayed, press PROGRAM button to register. Then PGM and 0P-02 display .
2. Press the PLAY/PAUSE button.
Starts INTRO play from track
number 01.
d. Repeat steps (b) and (c) (up to 60 tracks). After registering all tracks, display shows the first registered track.
3. The first 10 seconds of each
track of the disc will be played.
e. Registered track can be checked by pressing PROGRAM button.
4. Press the PLAY/PAUSE button
again to return to normal
playback.
!
MP3
a. In the stop mode, press the PROGRAM button and
0P-01 is displayed. Tracks number and album number
start flasing.
RANDOM PLAY
Enables all the tracks on a disc to be played in a Random (Shuffle) sequence.
1. Press MODE button four times
CD
MP3
(for CD) / five times (for MP3),
and RDM is displayed.
b. Press ALBUM UP and ALBUM DOWN button to select
the album number.
2. Press PLAY/PAUSE button to
start RANDOM play.
c. When desired album number is displayed,press F.SKIP
or B.SKIP button to select track number.
3. Select RANDOM mode during
play, RDM play start.
!
After finished playing the current track or if F. SKIP or B.
SKIP button is pressed, RANDOM play starts.
d. Press PROGRAM button to store, 0P-02 will appear on
display. Repeat (b) and (c) up to 60 tracks.
e. Registered tracks can be checked by pressing PROGRAM
button.
To complete programming and start play
Press PLAY/PAUSE button, the PGM
stops flashing and play will begin.
12
CD
MP3
INTRO PLAY
MP3
13
LOW BATTERY DETECTION
!
starts flashing when battery voltage level is too low.
The player will auto stop and power off when the voltage
level is too low.
MAINTENANCE
Cleaning the Cabinet
Wipe with a soft cloth. If the cabinet is very dirty, dampen the cloth with a weak
solution of neutral detergent and water, and then wipe clean.
Cleaning the lens
A dirty lens will cause the sound to skip. If the lens is very dirty, the CD may not
work. Open the disc cover and clean the lens as instructed below.
!
Dust or Dry Particles
Using a camera lens brush/blower, blow
on the lens a couple times, then wipe it
lightly with the brush to remove dust. Then
blow on the lens again.
!
Fingerprints
If the lens cannot be cleaned by using a
brush/blower, use a dry cotton swab, starting from the middle and moving to the
outside edge.
TROUBLESHOOTING GUIDE
Check the following guide for problem resolution
SYMPTOM
CAUSE
CD/MP3 Player will
Dead or weak batteries
SOLUTION
not turn on
AC adapter not con- Check AC adapter
nected properly
connection
Disc will not play
Defective compact disc Reinsert the disc with disc label facing up, or try another
Replace batteries
compact disc
CD compartment not Close lid securely
closed
Moisture has formed
Remove the disc, and leave
the compartment door open for
about one hour to dry the mois-
Display freeze or will
ture condensation.
Electro static discharge. Take out and re-insert the bat-
not play
No sound from ear-
tery to reset the unit.
Earphone plug not in- Reinsert earphone cord into
phones
serted properly
phones jack
Volume control set to Increase the volume
minimum
Weak batteries
Replace with fresh batteries or
use AC power
Defective compact disc Try another compact disc
Sound is skipping
The compact disc or Clean or replace the compact
pickup lens is dirty
disc or clean the pickup lens
Strong vibrations
Place the CD/MP3 Player on a
level surface that is stable (no
vibrations)
REMARKS:
1. This unit can support MP3 bit rate at 320, 192,128, 96, 64, 32, 16KBPS.
2. It supports CDDA, CD-R and CD-RW Discs.
3. It can support only 40 directory, 399 files in MP3.
4. It plays the MP3 songs with . mp3 file format.
5. Burning Speed: Normal 4X / Max 8X.
14
15
PRODUCT SPECIFICATIONS
PICK UP
System
Properties
Supported Disc Type
Compact disc digital audio system
Wavelength: λ=780nm
CD Audio, CD-R, CD-RW, MP3
AUDIO
D/A conversion
Frequency response
Wow and filter
No. of channels
Output level
Bass boost effect (100Hz)
DAC four times oversampling
20-20,000Hz
Below measurable limits
2 Channel (stereo)
Earphones: 15mW (32Ω)
> 6dB
DISPLAY
Segment LCD
GENERAL
Power requirements
Power consumption
Dimension
Weight
- 2 X LR6 “AA” alkaline battery
-DC in 6V jack accepts AC power adapter (center
positive with 4.0mm external dia. plug, regulated
6V DC, 600mA) (not included)
0.8W (DC 3V) under normal condition
Approx. 140 (W) x 28.5 (H) x 144 (D) mm
Approx. 230g not including battery
DESIGN AND SPECIFICATION ARE SUBJECT TO CHANGE WITHOUT NOTICE.
16
0211-11814-00B