1
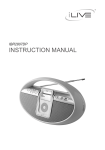
IBCD2817DP
INSTRUCTION MANUAL
Warnings and Precautions
TO PREVENT FIRE OR SHOCK HAZARDS, DO NOT EXPOSE THIS UNIT TO
RAIN OR MOISTURE.
This symbol, located on back or bottom of the unit, is
intended to alert the user to the presence of uninsulated
“dangerous voltage” within the product’s enclosure that
may be of sufficient magnitude to constitute a risk of
electric shock to persons.
This symbol, located on back or bottom of the unit, is
intended to alert the user to the presence of important
operating and maintenance (servicing) instructions in
the literature accompanying the appliance.
This product utilizes a Class 1 laser to read Compact
Discs. This laser Compact Disc Player is equipped with
safety switches to avoid exposure when the CD door
is open and the safety interlocks are defeated. Invisible
laser radiation is present when the CD Player’s lid
is open and the system’s interlock has failed or been
defeated. It is very important that you avoid direct
exposure to the laser beam at all times. Please do not
attempt to defeat or bypass the safety switches.
CAUTION: TO PREVENT ELECTRIC SHOCK,
MATCH WIDE BLADE OF PLUG TO WIDE SLOT,
FULLY INSERT.
To reduce the risk of electric shock, do not remove
cover (or back). There are no user-serviceable parts
inside. Please refer any servicing to qualified service
personnel.
WARNING: Changes or modifications to this unit
not expressly approved by the party responsible for
compliance could void the user’s authority to operate
the equipment.
CLASS 1
LASER PRODUCT
The symbol for
Class II (Double
Insulation)
WARNING: Danger of explosion if the remote
control’s batteries are incorrectly installed. Replace
only with the same or equivalent battery.
WARNING: The remote control’s button cell battery
contains mercury. Do not put in the trash, instead
recycle or dispose of as hazardous waste
WARNING: Use of this unit near fluorescent lighting
may cause interference regarding use of the remote. If
the unit is displaying erratic behavior move away from
any fluorescent lighting, as it may be the cause.
NOTE: This equipment has been tested and found to
comply with the limits for a Class B digital device,
pursuant to Part 15 of the FCC Rules. These limits
are designed to provide reasonable protection against
harmful interference in a residential installation. This
equipment generates, uses, and can radiate radio
frequency energy and, if not installed and used in
accordance with the instructions, may cause harmful
interference to radio communications. However, there
is no guarantee that interference will not occur in a
particular installation. If this equipment does cause
harmful interference to radio or television reception,
which can be determined by turning the equipment
off and on, the user is encouraged to try to correct the
interference by one or more of the following measures:
• Reorient or relocate the receiving antenna.
• Increase the separation between the equipment and
receiver.
• Connect the equipment into an outlet on a circuit
different from that to which the receiver is
connected.
• Consult the dealer or an experienced radio/TV
technician for help.
Important Safety Instructions
1. Read these instructions. All the safety
and operating instruction should be read
before the product is operated.
2. Keep these instructions. The safety and
operating instruction should be retained for
future reference.
3. Heed all warnings. All warning on the
product and in the operating instructions
should be adhered to.
4. Follow all instructions. All operating
and use instructions should be followed.
product. Use only with a cart, stand, tripod,
bracket, or table recommended by the
manufacturer, or sold with the product. Any
mounting of the product should follow the
manufacturer’s instructions, and should use
a mounting accessory recommended by the
manufacturer.
12. A product and cart combination should
be moved with care. Use only with the cart,
stand, tripod, bracket, or table specified by
the manufacturer, or sold with the apparatus.
When a cart is used, use caution when moving the cart/apparatus combination to avoid
injury from tip-over.
5. Water and Moisture: Do not use this
product near water - for example, near
a bath tub, wash bowl, kitchen sink, or
laundry tub; in a wet basement, or near a
swimming pool, and the like. The apparatus
shall not be exposed to dripping or splashing
and that no objects filled with liquids, such
as vases, shall be placed on apparatus.
6. Cleaning: Clean only with a dry cloth.
Unplug this product from the wall outlet
before cleaning. Do not use liquid cleaners
or aerosol cleaners.
7. Do not block any ventilation openings.
Install in accordance with the manufacturer’s instructions. Slots and openings in the
cabinet are provided for ventilation and to
ensure reliable operation of the product and
to protect it from overheating, and these
openings must not be blocked or covered.
The openings should never be blocked by
placing the product on a bed, sofa, rug, or
other similar surface.
8. Heat: Do not install near any heat
sources such as radiators, heat registers,
stoves, or other apparatus (including amplifiers) that produce heat.
9. Grounding or Polarization: Do not
defeat the safety purpose of the polarized or
grounding-type plug. A polarized plug has
two blades with one wider than the other.
A grounding type plug has two blades and
a third grounding prong. The wide blade or
the third prong are provided for your safety.
If the provided plug does not fit into your
outlet, consult an electrician for replacement
of the obsolete outlet.
10. Power-Cord Protection: Protect
the power cord from being walked on or
pinched particularly at plugs, convenience
receptacles, and the point where they exit
from the apparatus.
11. Accessories: Only use attachments/accessories specified by the manufacturer.
Do not place this product on an unstable
cart, stand tripod, bracket, or table. The
product may fall, causing serious injury to
a child or adult, and serious damage to the
13. Lightning: Unplug this apparatus and
disconnect the antenna or cable system
during lightning storms or when unused
for long periods of time. This will prevent
damage to the product due to lightning and
power-line surges.
14. Servicing: Do not attempt to service
this product yourself as opening or removing covers may expose you to dangerous
voltage or other hazards . Refer all servicing
to qualified service personnel.
15. Power Sources: Only connect to
the type of house-hold power supply as
indicated in the operating instructions and
rating label. If you are not sure of the type
of power supply to your home, consult your
product dealer or local power company. For
products intended to operate from battery
power, or other sources, refer to the operating instruction.
16. Overloading: Do not overload wall
outlets or extension cords as this can result
in a risk of fire or electric shock.
17. Object and Liquid Entry: Never push
objects of any kind or spill liquid into this
product through openings as this could result
in a risk of fire or electric shock.
18. Replacement Parts and Safety Check:
When replacement parts are required, be
sure the service technician has used replacement parts specified by the manufacturer.
Ask the service technician to perform
safety checks to ensure proper operation to
avoid possible fire, electric shock, or other
hazards.
system is grounded so as to provide some
protection against voltage surges and builtup static charges. Article 810 of the National
Electrical Code, ANSI/NFPA 70, provides
information with regard to proper grounding of the mast and supporting structure,
grounding of the lead-in wire to an antenna
connection to grounding electrodes, and
requirements for the grounding electrode.
20. Wall or Ceiling Mounting: The product should be mounted to a wall or ceiling
only as recommended by the manufacturer.
21. Where the AC plug or an appliance
coupler is used as the disconnect device,
the disconnect device shall remain readily
operable.
22. Ventilation: Slots and openings in the
cabinet are provided for ventilation and to
ensure reliable operation of the product and
to protect it from overheating, and these
openings must not be blocked or covered.
The openings should never be blocked by
placing the product on a bed, sofa, rug, or
other similar surface. This product should
not be placed in a built-in installation
such as a bookcase or rack unless proper
ventilation is provided or the manufacturer’s
instructions have been adhered to.
23. Protective Attachment Plug: The
product is equipped with an attachment plug
having overload protection. This is a safety
feature. See Instruction Manual for replacement or resetting of protective device. If
replacement of the plug is required, be sure
the service technician has used a replacement plug specified by the manufacturer
that has the same overload protection as the
original plug.
24. Power Lines: An outside antenna system should not be located in the vicinity of
overhead power lines or other electric light
or power circuits, or where it can fall into
such power lines or circuits. When installing
an outside antenna system, extreme care
should be taken to keep from touching such
power lines or circuits as contact with them
might be fatal.
19. Outdoor Antenna Grounding: If an
outside antenna or cable system is connected
to the product, be sure the antenna or cable
Video Out Connection Guide
From Unit
Connect to the video output
connection.
To Television
YELLOW
Connect to the video input
connection.
• Be sure to select the appropriate Video Input on the Television set.
Viewing Video or Photos from your iPod on an External Device
a. Using a video cable, connect an external device such as a TV to the Video Out port on the player.
b. Insert your iPod with video or photo capabilities into the iPod Docking Station with the appropriate
insert.
c. After your iPod Video is seated properly in the docking station, you will now be able to control your iPod
from the player’s control panel. Using the PLAY/PAUSE, NEXT/SEARCH/MIN., and PREV/SEARCH/
HR. buttons you can move from one video or photograph to the next, play, and pause.
Audio In Connection Guide
From Unit
To an External
Audio Player
Connect to the Aux In or
Line In jack.
Connect to the headphone
jack.
• The unit must be set to AUX in order for the external audio device to play through the unit’s speakers.
Connecting Other Digital Audio Devices
a. Use a line-in cord to connect an iPod shuffle or other audio device to the line-in port.
b. Toggle the AM-FM-CD-iPOD/AUX switch to iPOD/AUX to activate the line-in.
c. The iPod shuffle or other audio device will now play through the speakers of the player.
Features Defined
1
11
2
12
3
13
4
5
14
15
6
16
17
18
19
20
21
7
8
22
9
10
23
Features Defined
1
DBBS Press the DBBS button to activate the Dynamic Bass Boost System.
2
DBBS Indicator Indicates when the DBBS is activated.
3
VOLUME Press the up arrow to increase the volume, and the down arrow to decrease volume.
4
POWER Press the POWER button to turn the player on.
5
LCD Display View the Time, AM Indicator, PM Indicator, iPod Indicator, Radio Frequency, and CD
Indicator (“--”) through this Liquid Crystal Display.
6
iPod Docking Station Connect your iPod, iPod mini, or iPod nano.
7 Line-In Use the line-in jack to connect an iPod shuffle, or other audio device to the player.
8 Line-Out Use the Line-Out jack to connect the player to external speakers.
9
Video Out (Composite) Use the Video Output connection to send a composite video signal from the
unit to a TV. (Requires a RCA Cable, not included)
10 Battery Compartment (Requires 8 C-Size Batteries, not included)
11 CLK SET Press the CLK SET button to activate the clock adjust. Use this button in conjunction with
the PREV/SEARCH/HR. and NEXT/SEARCH/MIN. buttons to set the clock.
12 PREV/SEARCH/HR. Press the PREV/SEARCH/HR. button to adjust the hour when setting the clock,
skip to the previous track on a CD or iPod. Press and hold the PREV/SEARCH/MIN. button to search
backwards through a track on a CD or iPod.
13 NEXT/SEARCH/MIN. Press the NEXT/SEARCH/MIN. button to adjust the minute when setting
the clock, skip to the next track on a CD or iPod. Press and hold the NEXT/SEARCH/MIN. button to
search forwards through a track on a CD or iPod.
14 PROG Press the PROG button, select a track, then press the PROG button again to program CD tracks
in a specified order.
15 PLAY/PAUSE Press the PLAY/PAUSE button to play or pause an iPod.
16 TUNING Turn the TUNING dial to adjust the frequency of the AM and FM radio.
17 STOP Press the STOP button to stop a CD track during play.
18 REPEAT Press the REPEAT button to activate REP ( repeat one song), or REP ALL (repeat all songs).
19 AM/FM ST/CD/IPOD-AUX Toggle the AM/FM/CD/iPOD-AUX switch to cycle between AM, FM,
CD, and iPOD-AUX modes.
20 CD OPEN Toggle the CD OPEN switch to open the CD Door.
21 FM Antenna The FM extendable antenna provides flexibility and range when adjusting the FM reception. An AM Antenna is built into the player.
22 CD Door Open using the CD OPEN switch.
23 AC Cord (120V / 60 Hz) The detachable AC (Alternating Current) Cord provides power to the player.
Peripherals
24
25
28
26
29
27
iPod Inserts
Bracket #
1
iPod Model/Capacity
iPod nano (first generation)
2
iPod nano (second generation)
3
iPod mini 4GB & 6GB
4
iPod with video 30GB (fifth generation)
5
iPod (fourth generation), iPod photo 20GB & 30GB, and
iPod : U2 Special Edition 20GB
6
iPod with video 60GB & 80GB (fifth generation), and iPod
40GB (fourth generation)
Without Bracket
iPod photo, and iPod with color display 40GB & 60GB.
Peripherals Defined
24 MENU/PROG Press the MENU/PROG button to enter the menu on an iPod.
25 SHUFFLE Press the SHUFFLE button to randomly play songs on an iPod.
26 CHAPTER Press up on the CHAPTER button to increase the chapter number, or press down on the
CHAPTER button to decrease the chapter number.
27 ALBUM Press up on the ALBUM button to increase the album number, or press down on the ALBUM
button to decrease the album number.
28 Navigation Controls/SELECT Use the Navigation Controls to move through an iPod menu system.
Press the SELECT button to select a song, photo, or video on your iPod.
29 PLAYLIST Press up on the PLAYLIST button to cycle up through the playlists on an iPod, or press
down on the PLAYLIST button to cycle down through the playlists on an iPod.
Operations
Setting the Clock
a. Press and hold the CLK SET button.
b. While holding the CLK SET button, press the PREV/SEARCH/HR. button to cycle up through the hours.
Press the NEXT/SEARCH/MIN. button to cycle up through the minutes
c. Release the CLK SET button to set the specified time.
Listening to the Radio
a. Toggle the AM / FM ST / CD / IPOD (AUX) switch to AM or FM ST.
b. Use the TUNING dial to adjust the AM or FM radio frequency.
• The Radio Frequency will display on the LCD Display.
• Extend the FM Antenna for better FM reception. To improve the AM reception, adjust the position of
the entire unit, as an AM antenna is built into the unit.
Listening to a CD
a. Toggle the AM / FM ST / CD / IPOD (AUX) switch to CD.
b. Use CD OPEN switch to open the CD Door. Insert a CD here, label-side facing out, then close the CD
Door.
c. Press the PLAY button to begin playing the loaded CD.
Programming a CD
• When in Program Mode, “PROG” will blink continuously on the LCD Display.
a. Toggle the AM / FM ST / CD / IPOD (AUX) switch to CD.
b. Use CD Open switch to open the CD Door. Insert a CD here, label-side facing out.
c. Press the PROGRAM button.
• A number will begin blinking on the LCD Display. This indicates the order of the tracks to be
played. For instance, if a 01 is blinking, then the track you select will be the first to be played.
d. Press the PREV/SEARCH and NEXT/SEARCH buttons to search the CD tracks. Press PROGRAM
once the desired track is found.
• Once you press the PREV/SEARCH or NEXT/SEARCH buttons, the blinking number will change to a
number that is not blinking. This number indicates the CD track.
• Repeat this step to program up to 20 CD tracks.
e. Once the desired tracks are programmed, press the PLAY button to begin playing the programmed tracks.
Operations
Viewing Video or Photos from your iPod on an External Device
a. Using a video cable, connect an external device such as a TV to the Video Out port on the player.
b. Insert your iPod with video or photo capabilities into the iPod Docking Station with the appropriate
insert.
c. After your iPod Video is seated properly in the docking station, you will now be able to control your iPod
from the player’s control panel. Using the PLAY/PAUSE, NEXT/SEARCH/MIN., and PREV/SEARCH/
HR. buttons you can move from one video or photograph to the next, play, and pause.
Connecting Other Digital Audio Devices
a. Use a line-in cord to connect an iPod shuffle or other audio device to the line-in port.
b. Toggle the AM-FM-CD-iPOD/AUX switch to iPOD/AUX to activate the line-in.
c. The iPod shuffle or other audio device will now play through the speakers of the player.
Service Information
Address
Phone Fax
Email Website
2116 Carr Street, St. Louis MO, 63106
1-314-621-2881
1-314-588-1805
[email protected]
www.ilive.net
To download this Instruction Manual in English, Spanish, or French
visit the Support section at
www.ilive.net.
Para descargar este manual de
instrucción en inglés, español, o
francés visite la sección de la ayuda en www.ilive.net.
Pour télécharger ce manuel
d’instruction en anglais, espagnol,
ou le Français visitez la section de
soutien à www.ilive.net.
iPod not included. iPod is a trademark of Apple Inc., registered in the U.S. and other countries. TruBass, SRS and the SRS logo are trademarks
of SRS Labs, Inc. All other trademarks appearing herein are the property of their respective owners. © 2007 DPI, Inc.