1
ND 4894-1 62-140 TraceTone Ins.
4/6/04
7:35 AM
Page 1
#62-140
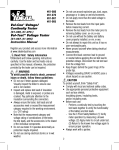
TRACETone™
Tone Generator and Amplifier Probe
Operating Instructions
Conductive probe tip
WARNING!
Do not attach to AC power. The TRACETone™
may be damaged and become a safety hazard
for the user.
CAUTION!
Improperly crimped, damaged or un-crimped plugs
can damage the jack on the TRACETone™. Inspect
plugs for proper termination and crimping before
inserting into the tester. Contacts should always
be recessed into the plastic grooves of the plug.
Adjustable volume
Trace
on/off
button
Tone indication
light
Amplified
speaker
Features
• Tone Generator stores in bottom of Amplified
Three-position
Probe to make carrying easier
on/off tone
• Two selectable tone styles with easy to read LED
switch
power-on indicator
• Built-in volume control to meet personal preference
• Turn-on the Amplified Probe by contact and automatic power off mode when
Tone Generator is in the stowed mode—no dead battery
• Accessories to isolate tracing – RJ11 Patchcord and Alligator Clip
RJ-11
Jack
Package Content
• TRACETone™ Tone Generator and Amplified Probe test set
• Alligator Clip with RJ11 interface
• Satin RJ11 patchcord
Instructions for Use
To Trace a Tone
1) Connect the Tone Generator to the RJ11 Alligator Clip, then place the Alligator Clip on the cable
to be traced
2) Select one of the tones of choice, the green LED will indicate the power-on mode
3) Press and hold the black button on the Amplified Probe to turn on the probe.
4) Adjust volume control to a comfortable level. If the signal is very loud when near the cable, the
volume may need to be reduced to keep from overloading the TRACETone™. When overloaded,
small increases or decreases in the signal at the tip cannot be heard.
5) Hold the tip of the TRACETone™ near cable to be identified. The signal will be loudest on the
wire or cable the generator is attached to. Separating the wires or cables may help in isolating
the correct cable.
ND 4894-1 62-140 TraceTone Ins.
4/6/04
7:35 AM
Page 2
Battery Replacement
1) Remove the screw at the back of the Tone Generator or the Amplified Probe with a #1 Phillipshead screwdriver and remove battery door.
2) Remove old cell batteries, rapping case against the palm of the hand will dislodge batteries.
3) Install 4 new LR44 cells being careful to orient plus end of battery with plus symbol on case.
4) Replace battery door and reinsert the screw. Do not over tighten.
Product specification
Power Requirements:
Battery life:
Externally applied
voltage w/o damage:
Tone frequencies (+/-5%):
Tone voltage:
Tone power:
4 x LR44 button cells (6 volts)
Generator: 100hrs, Amplified probe: 12hrs
250 volts peak DC or 175 volts RMS AC
995Hz and 845Hz alternating tones
12 volts p-p no load, new battery
8dbm into 600 ohms, new battery
Warranty
IDEAL guarantees to the end-user purchaser that its products will be free of all defects in material
and/or workmanship. This warranty extends for a period of 12 months for the test instrument and 3
months for the cables from the date of manufacture or proof-of-purchase. The obligation of IDEAL
under this warranty is limited to the repair or replacement (at our option) during the warranty period of
any part that proves to be defective in material or workmanship under normal use, installation and
service, provided the product is returned to IDEAL freight prepaid. Products returned to us must be
accompanied by a copy of the purchase receipt. In the absence of such a receipt, the warranty period
will cease 12 months from the date of manufacture. This warranty does not extend to products that
have been subjected to neglect, accidental or improper use, or to units which have been altered,
repaired, or inspected by anyone other than IDEAL authorized personnel. In no event will IDEAL be
liable for any incidental or consequential damages
Shipping
1. Before returning any product to IDEAL, you must first request a Returned Materials Authorization
(RMA) number by contacting our Customer Service Dept. at 800-435-0705.
No shipments will be accepted without this number, which must be clearly marked on the
shipping label.
2. Ship the equipment with a copy of the sales receipt, if available.
3. Attach a description of the operational problem.
4. Include a contact name, address, phone number, and e-mail address (if possible).
5. Pack securely to prevent damage during shipping.
6. Ship prepaid to: IDEAL INDUSTRIES, INC.; Becker Place; Sycamore, IL 60178
Product Registration
Please visit www.idealindustries.com
IDEAL INDUSTRIES, INC.
Sycamore, IL 60178, U.S.A.
800-435-0705 Customer Assistance
www.idealindustries.com
ND 4894-1