Transcript
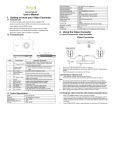
1. Getting Started Load rechargeable Li-ion battery/ SD card Insert the battery according to the correct polarity marks (+ or -)/SD card (Optional). Close the battery/SD card cover firmly. Recommended memory capacity of SD card (Optional) - 1GB above. Follow the arrow A direction and slide to eject the battery cover. Lift the battery from Location B. Insert the SD card (Optional) into the right position. To remove an SD card, press it down and take it out. Li-ion battery Charge your battery You must use the supplied AC charger or USB cable. Camera must be turned OFF; blinking light confirms charging, but light is constant when charging has been completed. For more details about the camera operation and troubleshooting, please read the User Manual located on the CDROM disc included with your camera or visit http://www.hp.com/support and download it for the camera support page.For more details about the camera operation and troubleshooting, please read the User Manual located on the CDROM disc included with your camera or visit http://www.hp.com/support and download it for the camera support page. 2. Record & Play 3. Plug & Share Install the bundled application software, ArcSoft MediaImpression, to view the movies correctly on PC. 1 Flip to power on Flip out the LCD panel or hold [Power ] Button for one second. If no operation is made in 3 minutes, the 2 camera will turn itself off automatically to conserve battery power. 3 press 6 3 To capture picture press 4 To zoom in or out 5 press 5 To review movies/pictures press , and press Movies and pictures can be found on your computer at “My Computer\Removable Disk\DCIM\100HPDVC.” Under this folder, you can view, delete, move, or copy the recorded movies and pictures you want. You can share the recorded movies and pictures to your friends via the bundled application software, ArcSoft MediaImpression. 2 To start or stop recording 4 Connect the computer and camera with the supplied mini USB2.0 cable as shown. to play movies. Uploading Video Files to YouTube You can also share the recorded movies on YouTube website via the built-in YouTube Direct application which offers you an easy way to upload your video clips to YouTube instantly. (For more detailed operational instructions, please refer to User’s Manual-Section 9 on the supplied CD.) 6 To operate more advanced options press OK Button to access option menu. 1 For more detail operational instructions, please refer to User’s Manual-Section 3 & 4 on the supplied CD. Tour of Your Camera Install bundled ArcSoft Software 1. Insert the supplied CD into your computer’s CD-ROM drive. 2. The autorun screen appears. Then click Install Application Software. Follow the on-screen instructions to complete the installation. ArcSoft MediaImpression is a user-friendly application that helps you managing your media, burning your video into DVD, and uploading your videos to YouTube easily. Tour of Your Camera Front Rear Speaker LCD Panel SD card Cover Macro Switch Switch between Macro Mode and Normal Mode [Movie Shutter] Button Start /Stop to record movies. During playback: Play and pause movie [Tele(Up)] Button During playback: Push to increase volume. [Wide(Down)] Button During playback: Push to reduce volume. Lens Light Microphone [Left] Button Digital Light On/ Light On/ Light OFF. During playback: Go to the previous movie/picture. Pressing for movie play fast rewind. TV Port Mini USB 2.0 Port [Picture Shutter] Button Start to take Picture. [OK] Button Menu ON or Validate the setting. In Picture Navigation Mode, press to exit to Picture Magnification Mode. [Right] Button HD(1080p) / WVGA mode switch During playback: Go to the next movie/picture. Pressing for movie play fast rewind. [Record/Play] Button Switch between Record and Playback Mode. Return to the previous page. HDMI Port Battery Cover Power Button Troubleshooting If the LCD image is not clear when shooting, how can the focus be adjusted? Try to switch between Macro and Normal Mode.(Macro Mode: For object in distance about 0.67 feet. Normal Mode: For object in distance beyond 6.7 feet) The files on the memory card do not display smoothly when the LCD shows the “!” marking. The” !” means the SD card is low speed or has wrong content inside. The way to solve this condition is to format SD card by camera instead of PC. (Please read the detail Format instruction in User’s Manual- Section 5). Why do some of my indoor pictures look blurry and dark? Camera extends pictures exposure time under low light/ indoor condition. Keep camera (and photographed subject) steady for several seconds when taking pictures. Shutter will sound when picture has been taken. How do I charge battery? You must use the supplied AC charger or USB cable. Camera must be turned OFF; blinking light confirms charging, but light is constant when charging has been completed. Strap Hook