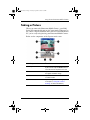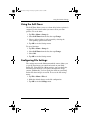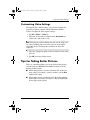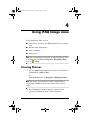
1
350444-001.book Page i Tuesday, September 9, 2003 4:07 PM
User’s Guide
hp Photosmart Mobile Camera
Document Part Number: 350444-001
September 2003
350444-001.book Page ii Tuesday, September 9, 2003 4:07 PM
© 2003 Hewlett-Packard Development Company, L.P.
Microsoft and Windows are trademarks of Microsoft Corporation in the
U.S. and/or other countries. Intel is a trademark of Intel Corporation in
the U.S. and/or other countries. SD Logo is a trademark.
The information contained herein is subject to change without notice. The
only warranties for HP products and services are set forth in the express
warranty statements accompanying such products and services. Nothing
herein should be construed as constituting an additional warranty. HP shall
not be liable for technical or editorial errors or omissions contained herein.
User’s Guide
hp Photosmart Mobile Camera
First Edition September 2003
Document Part Number: 350444-001
350444-001.book Page iii Tuesday, September 9, 2003 4:07 PM
Contents
1 Welcome
What’s In the Box . . . . . . . . . . . . . . . . . . . . . . . . . . . . . . 1–2
2 Using the HP Photosmart Mobile Camera
Getting Acquainted . . . . . . . . . . . . . . . . . . . . . . . . . . . . . 2–1
Getting Started . . . . . . . . . . . . . . . . . . . . . . . . . . . . . . . . . 2–2
Installing the Software and Drivers . . . . . . . . . . . . . . 2–2
Connecting the Photosmart Mobile Camera to Your iPAQ
Pocket PC . . . . . . . . . . . . . . . . . . . . . . . . . . . . . . . . . 2–2
Taking a Picture . . . . . . . . . . . . . . . . . . . . . . . . . . . . . . . . 2–3
Using Digital Zoom . . . . . . . . . . . . . . . . . . . . . . . . . . 2–5
Recording a Video Clip . . . . . . . . . . . . . . . . . . . . . . . 2–5
Viewing Pictures and Video Clips. . . . . . . . . . . . . . . 2–5
Ending Your Photo Session . . . . . . . . . . . . . . . . . . . . . . . 2–6
Exiting the Photosmart Mobile Camera Software. . . 2–6
Disconnecting the Photosmart Mobile Camera . . . . . 2–6
3 Using the Camera Settings
Customizing the Camera Settings . . . . . . . . . . . . . . . . . .
White Balance . . . . . . . . . . . . . . . . . . . . . . . . . . . . . .
Color Settings . . . . . . . . . . . . . . . . . . . . . . . . . . . . . .
Compression . . . . . . . . . . . . . . . . . . . . . . . . . . . . . . .
Resolution . . . . . . . . . . . . . . . . . . . . . . . . . . . . . . . . .
Auto-Exposure Metering . . . . . . . . . . . . . . . . . . . . . .
Setting Up Other Features . . . . . . . . . . . . . . . . . . . . . . . .
Configuring Instant Review. . . . . . . . . . . . . . . . . . . .
User’s Guide
3–1
3–2
3–2
3–2
3–3
3–3
3–3
3–3
iii
350444-001.book Page iv Tuesday, September 9, 2003 4:07 PM
Contents
Using the Self-Timer . . . . . . . . . . . . . . . . . . . . . . . . .
Configuring File Settings. . . . . . . . . . . . . . . . . . . . . .
Customizing Video Settings . . . . . . . . . . . . . . . . . . .
Tips for Taking Better Pictures . . . . . . . . . . . . . . . . . . . .
3–4
3–4
3–5
3–5
4 Using iPAQ Image Zone
Viewing Pictures . . . . . . . . . . . . . . . . . . . . . . . . . . . . . . .
Viewing a Picture Full-Screen . . . . . . . . . . . . . . . . . . . . .
Recording Sound With a Picture . . . . . . . . . . . . . . . . . . .
Viewing a Slideshow . . . . . . . . . . . . . . . . . . . . . . . . . . . .
Printing Pictures . . . . . . . . . . . . . . . . . . . . . . . . . . . . . . . .
4–1
4–2
4–2
4–3
4–3
A Regulatory Notices
Federal Communications Commission Notice. . . . . . . . . A–1
Modifications . . . . . . . . . . . . . . . . . . . . . . . . . . . A–2
Declaration of Conformity for products marked with the
FCC logo—United States only . . . . . . . . . . . . . . . . . A–2
Canadian Notice . . . . . . . . . . . . . . . . . . . . . . . . . . . . . . . . A–2
Avis Canadien . . . . . . . . . . . . . . . . . . . . . . . . . . . . . . A–3
Korean Notice . . . . . . . . . . . . . . . . . . . . . . . . . . . . . . . . . A–3
European Notice. . . . . . . . . . . . . . . . . . . . . . . . . . . . . . . . A–3
User’s Guide
iv
350444-001.book Page 1 Tuesday, September 9, 2003 4:07 PM
1
Welcome
Congratulations on purchasing an HP Photosmart Mobile Camera
for your HP iPAQ Pocket PC. Use this guide to find out about
setting up your Photosmart Mobile Camera and to learn how it
works.
The HP Photosmart mobile camera allows you to turn your
HP iPAQ Pocket PC into a mobile digital imaging center with
1.3 MP total resolution and 4X digital zoom. Share images
through e-mail or the web, or print from your iPAQ Pocket PC
using Bluetooth.
The software programs described below are included on your
HP Photosmart Mobile Camera software and drivers CD.
HP Photosmart Mobile
Camera Software
Function
Mobile camera capture
application
Capture images and videos and
modify settings for your HP
Photosmart Mobile Camera.
iPAQ Image Zone
Review and share images from your
iPAQ Pocket PC. Print, send, and
email images directly from your
iPAQ, or create slideshows to share
your pictures with friends and family.
User’s Guide
1–1
350444-001.book Page 2 Tuesday, September 9, 2003 4:07 PM
Welcome
HP Photo Unload Utility
Automatically transfers images from
your iPAQ Pocket PC to your
desktop computer whenever its
connected.
HP Mobile Printing for
Pocket PC
Print documents and images directly
from Pocket PC devices to many
Bluetooth, infrared, and network
printers.
HP Photo Center software
Allows you to organize, edit, share,
and print images from your
computer.
What’s In the Box
Your HP Photosmart Mobile Camera comes with the following
items:
■
HP Photosmart Mobile Camera
■
Software and Drivers CD
■
Protective carrying case
■
Worldwide Limited Warranty card
User’s Guide
1–2
350444-001.book Page 1 Tuesday, September 9, 2003 4:07 PM
2
Using the HP Photosmart
Mobile Camera
Getting Acquainted
Component
Function
1
Lens
Shows what will be seen in the photo.
2
Rotating Lens Body
Allows you to turn the lens to aim at
the subject when composing a shot.
3
SDIO interface
Interface between your iPAQ Pocket
PC and your Photosmart Mobile
Camera.
User’s Guide
2–1
350444-001.book Page 2 Tuesday, September 9, 2003 4:07 PM
Using the HP Photosmart Mobile Camera
Getting Started
Installing the Software and Drivers
Before using your HP Photosmart Mobile Camera for the first
time, you must install the software and drivers.
1. Create an ActiveSync connection between your computer and
your iPAQ Pocket PC. Refer to the Getting Started booklet
that came with your iPAQ Pocket PC for ActiveSync
instructions.
2. Insert the Software and Drivers CD that came with your
Photosmart Mobile Camera into your computer.
3. Follow the on-screen instructions to install the Photosmart
software and drivers.
Connecting the Photosmart Mobile Camera
to Your iPAQ Pocket PC
To connect the Photosmart Mobile Camera to your iPAQ
Pocket PC:
1. Locate the SD slot on your iPAQ Pocket PC and remove any
memory cards or other devices.
2. Insert the Photosmart Mobile Camera until it is firmly seated
in the expansion card slot of your Pocket PC.
3. You will hear an audible click when the Photosmart Mobile
Camera is fully connected. Now you’re ready to take a
picture.
Ä
CAUTION: When you place your iPAQ Pocket PC and Photosmart
Mobile Camera on a flat surface, be sure that the lens is not facing
down. Resting the iPAQ Pocket PC on the camera lens may place stress
on the camera joints.
Do not use excessive force when handling the Photosmart Mobile
Camera or when connecting or disconnecting it.
User’s Guide
2–2
350444-001.book Page 3 Tuesday, September 9, 2003 4:07 PM
Using the HP Photosmart Mobile Camera
Taking a Picture
When you connect the Photosmart Mobile Camera, your iPAQ
Pocket PC automatically turns on in Capture mode. When you see
the camera’s digital viewfinder on the screen of your iPAQ Pocket
PC, you’re ready to begin using your Photosmart Mobile camera.
Below are the components of the Capture mode screen.
Component
Function
1
Digital viewfinder
Displays the picture currently framed
by the camera. Tap the Zoom button to
zoom the view of the picture in or out.
2
Zoom buttons
Tap these buttons to zoom in or out on
the digital viewfinder image.
3
Command Bar
Tap the commands to enter information
or switch modes.
4
Menu button
Tap to change camera settings (refer
to Chapter 3, “Using the Camera
Settings,” for more information.)
User’s Guide
2–3
350444-001.book Page 4 Tuesday, September 9, 2003 4:07 PM
Using the HP Photosmart Mobile Camera
5
Image Zone button
Tap to go to iPAQ Image Zone where
all your captured pictures and recorded
video clips are stored.
6
Shutter button
Tap to snap a picture or start/stop
recording a video clip.
7
Camera status icons
The top number is the number of
pictures remaining, the stars indicate
the image quality, the bottom number
is the resolution, and the indicator on
the left side of the screen shows the
metering mode.
To take a picture:
1. Rotate the lens body on the Photosmart Mobile Camera to
frame the subject you want to photograph in the digital
viewfinder.
2. Make sure that both you and your subject are still to ensure a
clear image.
3. Tap the Shutter button to snap a picture.
When you snap a picture, your iPAQ Pocket PC makes an audible
shutter sound (if you have not muted the sounds). The clock runs
to indicate that the picture has been taken and your iPAQ Pocket
PC is processing the picture. It may take a few seconds to process
and store the picture, depending on its size, quality, and
complexity.
Immediately after capturing an image a preview of the picture
you just took appears so that you can decide to either discard or
keep the image.
■
To discard the image, follow the instructions on the screen
and tap the preview image while it is displayed.
■
To save an image, simply wait for the preview to disappear
from the screen and the camera application to return to the
digital viewfinder.
User’s Guide
2–4
350444-001.book Page 5 Tuesday, September 9, 2003 4:07 PM
Using the HP Photosmart Mobile Camera
Using Digital Zoom
The digital zoom feature on the Photosmart Mobile Camera
allows you to get closer to your subject without moving. To zoom
in to your subject, tap on the Zoom In icon in the digital
viewfinder window.
When you use the digital zoom feature, your iPAQ Pocket PC will
make an audible zoom sound (if you have not muted the sounds),
and the subject will appear closer in the viewfinder.
Note: Pictures you snap using the zoom feature may not be as
sharp as other pictures. Be careful to hold the camera steady
when snapping zoomed pictures. After you aim the camera, wait
a moment to steady it and to insure that automatic exposure has
taken affect.
Recording a Video Clip
Recording a video clip is similar to capturing a still image. To
capture a video clip:
1. From the Command Bar, tap Mode > Video.
2. Rotate the lens body on the Photosmart Mobile Camera to
frame the subject you want to record in the digital viewfinder.
3. Tap the Shutter button to begin recording your video.
4. Tap the Shutter button a second time to stop recording.
To return the Photosmart Mobile Camera to still image mode,
from the Command Bar, tap Mode > Still.
Viewing Pictures and Video Clips
You can use iPAQ Image Zone to browse the pictures and
videos you have taken and recorded. To switch to iPAQ Image
Zone, from the Command Bar, tap File > Play, or tap the Image
Zone button in Capture mode. For more information, refer to
Chapter 4, “Using iPAQ Image Zone.”
User’s Guide
2–5
350444-001.book Page 6 Tuesday, September 9, 2003 4:07 PM
Using the HP Photosmart Mobile Camera
Ending Your Photo Session
Exiting the Photosmart Mobile Camera
Software
To exit the Photosmart Mobile Camera software in Capture
mode or from iPAQ Image Zone, from the Command Bar, tap
File > Exit.
Disconnecting the Photosmart Mobile
Camera
To disconnect the Photosmart Mobile Camera from your iPAQ
Pocket PC:
1. Push the Photosmart Mobile Camera down into the iPAQ
Pocket PC until you hear a click.
2. Pull the Photosmart Mobile Camera out of the Pocket PC.
Note: Store your Photosmart Mobile Camera in the case that
comes with it when you are not using it.
User’s Guide
2–6
350444-001.book Page 1 Tuesday, September 9, 2003 4:07 PM
3
Using the Camera Settings
Customizing the Camera Settings
Besides simple “point-and-shoot” photography, your Photosmart
Mobile Camera includes many other features. This section
describes the features that allow you to customize your camera
settings for different photography environments. Features
include:
■
Self-timer
■
Exposure settings (white balance, color settings,
auto-exposure metering)
■
Compression settings
■
Resolution settings
■
Digital effects
To make changes to the camera settings:
1. Tap File > Menu.
2. Select the category that you would like to modify, then tap
Change.
3. Choose the best setting from the list of options.
4. Tap OK to exit the Settings menu.
Using the Camera Settings menu, you can modify many different
aspects of the capture settings. Below is a list of the possible
settings and the situations in which you would use them.
User’s Guide
3–1
350444-001.book Page 2 Tuesday, September 9, 2003 4:07 PM
Using the Camera Settings
White Balance
Adjusts the color balance in the image depending on the lighting
conditions. The possible White Balance settings are:
■
Auto (default)—Automatically selects the best white balance
for the shot.
■
Sun—Best for outdoor shots with natural lighting.
■
Tungsten—Best for indoor shots using incandescent lighting.
■
Fluorescent—Best for shots taken with fluorescent lighting.
■
None—Best for shots where one color (other than white) is
prevalent in the picture.
Color Settings
Allows you to capture images with creative effects. Possible
Color Settings are:
■
Full Color (default)—Standard color output.
■
Black & White—Grayscale image.
■
Negative—Produces a color negative of the image taken.
Compression
Choose the picture quality from three compressions for the
pictures you snap. Higher-quality pictures look better, especially
at greater magnification. Lower-quality pictures require less
storage space on your iPAQ Pocket PC, and may take less time
when sending by e-mail or infrared.
■
Good
■
Better
■
Best (default)
User’s Guide
3–2
350444-001.book Page 3 Tuesday, September 9, 2003 4:07 PM
Using the Camera Settings
Resolution
Choose from four resolutions or sizes of pictures. Larger
resolution size pictures require more storage space and may also
take longer to process and send.
■
1280 x 1024 pixels (default)
■
1280 x 960 pixels
■
640 x 480 pixels
■
320 x 240 pixels
Auto-Exposure Metering
Auto-exposure (AE) metering determines how to measure the
brightness of an image.
■
Center-weighted (default)—Measures the brightness of the
entire picture, with emphasis on the large area in center of a
scene.
■
Average—The entire scene is used to calculate exposure.
Setting Up Other Features
Configuring Instant Review
Instant Review allows you to see a preview of the image you just
captured to quickly determine whether you want to keep or
discard the image. To set the time period for Instant Review:
1. Tap File > Menu > Setup tab.
2. Select Instant Review from the list, then tap Change.
3. Select the period of time you want the Instant Review image
to remain on the screen.
4. Tap OK to exit the Settings menu.
User’s Guide
3–3
350444-001.book Page 4 Tuesday, September 9, 2003 4:07 PM
Using the Camera Settings
Using the Self-Timer
The Self-Timer allows you to set a short delay before a picture is
snapped. Use this feature when you want to be in your own
pictures. To set the timer:
1. Tap File > Menu > Setup tab.
2. Select Self-Timer from the list, then tap Change.
3. Select a delay of either 2 or10 seconds by selecting the
corresponding option on the menu.
4. Tap OK to exit the Settings menu.
To cancel the timer:
1. Tap File > Menu > Setup tab.
2. Select Self-Timer from the list, then tap Change.
3. Select Off.
4. Tap OK to exit the Settings menu.
Configuring File Settings
The settings menu on the Photosmart mobile camera allows you
to specify how images are named and stored on your iPAQ
Pocket PC. Using the File > Menu settings, you can change the
filename prefix of images you capture and adjust the image
counter. Additionally, you can specify the folder on your iPAQ
Pocket PC where images are stored. To access the file settings
menu:
1. Tap File > Menu > File tab.
2. Make the desired changes to the file configuration.
3. Tap OK to exit the Settings menu.
User’s Guide
3–4
350444-001.book Page 5 Tuesday, September 9, 2003 4:07 PM
Using the Camera Settings
Customizing Video Settings
Through the File > Menu settings, you can also customize the
properties of videos captured with the Photosmart Mobile
Camera. To adjust the video capture settings:
1. Tap File > Menu > Video tab.
2. Select the desired video resolution in the Resolution box
(either 320 x 240 or 160 x 120).
Note: Changing the video resolution not only sets the image size
for video recordings, but it also affects the size of the digital
viewfinder image. The higher the resolution, the lower the
frame size.
3. Select the appropriate option to choose whether to turn audio
off or on.
4. Tap OK to exit the Settings menu.
Tips for Taking Better Pictures
There are a number of things you can do to ensure the pictures
you take with your HP Photosmart Mobile Camera are of the
highest possible quality.
■
When taking pictures of scenes with many fine details and
many colors (for example, a farmer’s market), use the Best
compression setting.
■
When taking pictures of subjects where the background has
bright lights, try to frame the subject so that the bright lights
do not appear in the picture.
User’s Guide
3–5
350444-001.book Page 6 Tuesday, September 9, 2003 4:07 PM
Using the Camera Settings
■
User’s Guide
Change the White Balance setting to the appropriate type of
lighting, or choose None under the following conditions:
❏
Pictures taken with indoor lighting appear tinted (either
bluish or yellowish).
❏
The picture is composed of a uniform, primary color (for
example, a close-up shot of lemons or oranges).
❏
No white color is present in picture.
3–6
350444-001.book Page 1 Tuesday, September 9, 2003 4:07 PM
4
Using iPAQ Image Zone
Using iPAQ Image Zone, you can:
■
View pictures stored on your iPAQ Pocket PC or on a storage
card
■
Record sounds with pictures
■
View a slideshow
■
Print pictures
Note: You can find more information on using iPAQ Image Zone
in the Help files. Tap Start > Programs > iPAQ Image Zone,
then tap
> Help.
Viewing Pictures
1. Tap the Camera icon on the bottom of the screen. From the
Command bar, tap File > Play.
Or
From the Start menu, tap Programs > iPAQ Image Zone.
Note: The viewer opens in Browse mode by default. Browse
mode displays thumbnail view of the pictures in the current
folder.
2. Tap a thumbnail to select the picture. A preview of the
picture and information about it will be displayed.
User’s Guide
4–1
350444-001.book Page 2 Tuesday, September 9, 2003 4:07 PM
Using iPAQ Image Zone
To view images in a different folder:
1. Tap File > Change Folder.
2. Select the desired folder.
3. Tap OK.
Viewing a Picture Full-Screen
To view a picture full-screen, and to be able to zoom in or out:
1. Tap a thumbnail to select the picture.
2. Tap View > Image, or tap on the preview window.
3. Zoom in or out using the toolbar buttons. If the picture is too
large to fit on the screen, you can display other parts of the
picture by dragging the stylus on the screen, or by using the
Navigation Buttons.
4. Tap OK to return to thumbnail view.
Recording Sound With a Picture
You can record sound for each picture. When the picture is
displayed, the associated sound is played. Pictures with sound
have a speaker icon in their thumbnails.
To add sound to a picture:
1. Select the picture by tapping on its thumbnail.
2. Tap the Cassette icon on the menu bar.
3. Tap the Record button on the Recording toolbar.
4. Speak into the microphone or record the sound.
5. Tap the Stop button on the Recording toolbar.
6. Tap the Cassette icon on the Command bar to close the
Recording toolbar.
User’s Guide
4–2
350444-001.book Page 3 Tuesday, September 9, 2003 4:07 PM
Using iPAQ Image Zone
To change audio options:
1. Tap File > Options > Audio tab.
2. Select your audio options.
3. Tap OK.
Viewing a Slideshow
You can view a slideshow of the images in the current folder. To
start the slideshow, tap View > Slideshow.
During the slideshow, tap anywhere on the screen to display the
on-screen controls which you can use to move forward or
backward through the slides, or to end the slideshow. You can
also use the Navigation Buttons to move forward or backward
through the slides.
You can control display options such as:
■
Sequence
■
Delay
■
Rotation
■
Transition Effect
To change slideshow settings:
1. Tap File > Options > Slideshow tab.
2. Select the settings and effects you want to use in your
slideshow.
3. Tap OK.
Printing Pictures
You can print pictures from iPAQ Image Zone if HP Mobile
Printing has been installed on your iPAQ Pocket PC. HP Mobile
Printing software can be found on the Software and Drivers CD
that came with your HP Photosmart Mobile Camera, or you can
find it on the website at www.hp.com/go/pocketpcprint.
User’s Guide
4–3
350444-001.book Page 4 Tuesday, September 9, 2003 4:07 PM
Using iPAQ Image Zone
To print a picture:
1. Select the picture to be printed by tapping on its thumbnail.
2. Tap File > Print.
User’s Guide
4–4
350444-001.book Page 1 Tuesday, September 9, 2003 4:07 PM
A
Regulatory Notices
Federal Communications Commission
Notice
This equipment has been tested and found to comply with the
limits for a Class B digital device, pursuant to Part 15 of the FCC
Rules. These limits are designed to provide reasonable protection
against harmful interference in a residential installation. This
equipment generates, uses, and can radiate radio frequency
energy and, if not installed and used in accordance with the
instructions, may cause harmful interference to radio
communications. However, there is no guarantee that interference
will not occur in a particular installation. If this equipment does
cause harmful interference to radio or television reception, which
can be determined by turning the equipment off and on, the user
is encouraged to try to correct the interference by one or more of
the following measures:
■
Reorient or relocate the receiving antenna
■
Increase the separation between the equipment and receiver
■
Connect the equipment into an outlet on a circuit different
from that to which the receiver is connected
■
Consult the dealer or an experienced radio or television
technician for help
User’s Guide
A–1
350444-001.book Page 2 Tuesday, September 9, 2003 4:07 PM
Regulatory Notices
Modifications
The FCC requires the user to be notified that any changes or
modifications made to this device that are not expressly approved
by Hewlett-Packard Company may void the authority to operate
the equipment.
Declaration of Conformity for products
marked with the FCC logo—United
States only
This device complies with Part 15 of the FCC Rules. Operation is
subject to the following two conditions: (1) this device may not
cause harmful interference, and (2) this device must accept any
interference received, including interference that may cause
undesired operation.
For questions regarding your product, contact:
Hewlett-Packard Company
P. O. Box 692000, Mail Stop 530113
Houston, Texas 77269-2000
Or, call 1-800-652-6672
For questions regarding this FCC declaration, contact:
Hewlett-Packard Company
P. O. Box 692000, Mail Stop 510101
Houston, Texas 77269-2000
Or, call (281) 514-3333
To identify this product, refer to the Part, Series, or Model
number found on the product.
Canadian Notice
This Class B digital apparatus meets all requirements of the
Canadian Interference-Causing Equipment Regulations.
User’s Guide
A–2
350444-001.book Page 3 Tuesday, September 9, 2003 4:07 PM
Regulatory Notices
Avis Canadien
Cet appareil numérique de la classe B respecte toutes les
exigences du Règlement sur le matériel brouilleur du Canada.
Korean Notice
European Notice
Products bearing the CE marking comply with the EMC Directive
(89/336/EEC) and the Low Voltage Directive (73/23/EEC) issued
by the Commission of the European Community, and if this
product has telecommunication functionality, the R&TTE
Directive (1999/5/EC).
Compliance with these directives implies conformity to the
following European Norms (in parentheses are the equivalent
international standards and regulations):
■ EN 55022 (CISPR 22)—Electromagnetic Interference
■ EN55024 (IEC61000 - 4-2, 3, 4, 5, 6, 8,
11)—Electromagnetic Immunity
■ EN61000-3-2 (IEC61000-3-2)—Power Line Harmonics
■ EN61000-3-3 (IEC61000-3-3)—Power Line Flicker
■ EN 60950 (IEC60950)—Product Safety
User’s Guide
A–3